

Northampton OFN's project thread
- Thread starter Northampton_ofn
- Start date
You are using an out of date browser. It may not display this or other websites correctly.
You should upgrade or use an alternative browser.
You should upgrade or use an alternative browser.
Northampton_ofn
Registered User
- Joined
- Jul 21, 2015
- Messages
- 297
- Reaction score
- 106
- Points
- 43
Thanks for the comments guys. Yeah I knew the tyres were going to be too big, they're just what the wheels came with but I'll put them up for sale once they're off. Probably won't fit the genuine wheels until the summer anyway so plenty of time to get things in order.
http://www.ebay.co.uk/itm/10-x-Unde...540588?hash=item339d5e626c:g:hlAAAOSwKrhVXx6R There you go mate.Do you have a link for the under tray fixings, some of mine could do with replacing.
Ok it's had its day anyway and is a PITA to clean around. When I get a moment I will polish it off.Loose the A4 logo tooit will make the rear more tidy.

Northampton_ofn
Registered User
- Joined
- Jul 21, 2015
- Messages
- 297
- Reaction score
- 106
- Points
- 43
Right, I haven't updated this for a while mainly because I haven't done anything much since the headlights. Been really busy but with the lighter longer evenings coming in I think a few updated will follow this one.
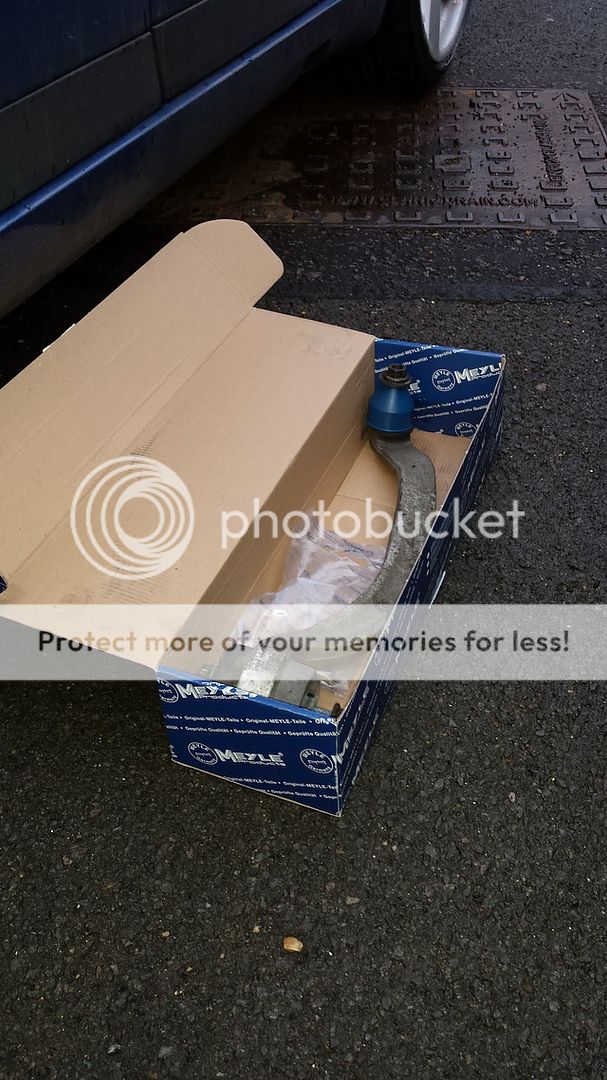
Tonight I managed to get another control arm fitted so I now have all the top arms renewed and both bottom rears. Went for the Meyle HD arms.
Forgot to take pics at first because as usual I went in the zone.
Started by putting some WD40 on the ball joint nut to start working in. Used an 18mm socket and a medium breaker bar to crack the long bolt through the subframe end with and 18mm ring spanner on the nut in the subframe cavity. Removed a bit of undertray that was in the way too and then pulled the long bolt out, twising the arm slightly to get the exit angle needed to miss the car body. Then I removed the ball joint nut and tapped it out the bottom of the hub carrier. And out:
Pushed the new arm in place.

Offered the new supplied bolt up
and pushed it through and put the nut on loosely.
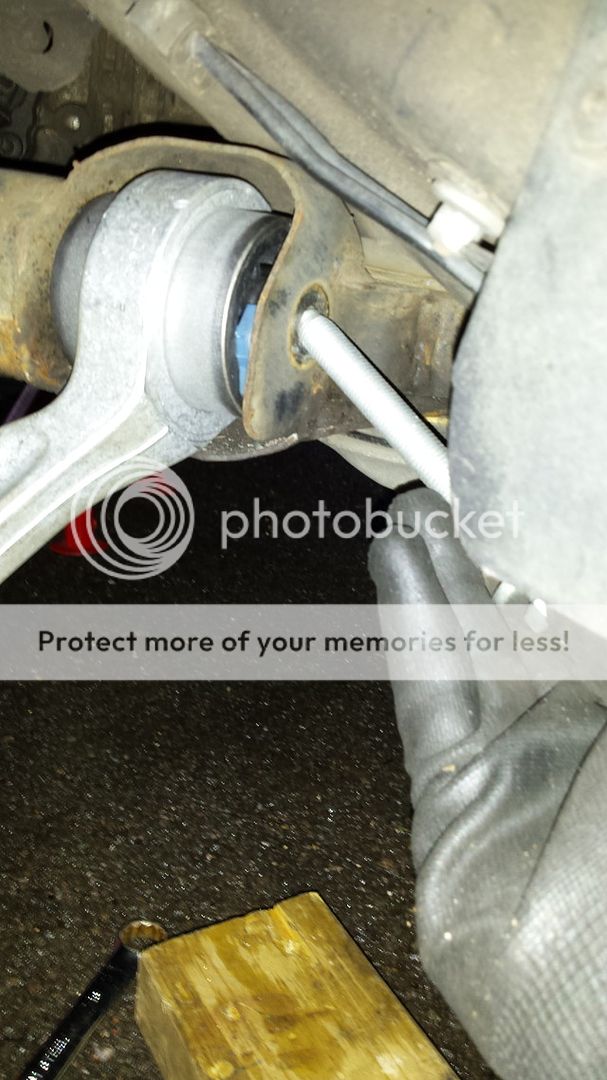
I lined the ball joint up with its hole and raised it slightly with the trolley jack.
A tap with the hammer and it dropped in and I fully tightened the nut.
All in with subframe end left loose.
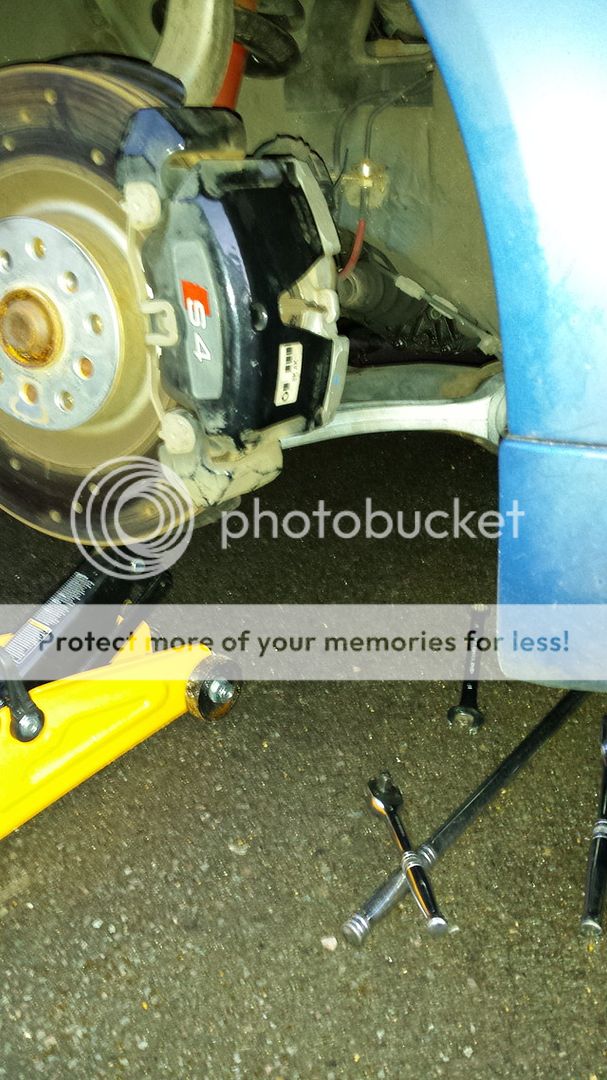
I then got the trolley jack on the bottom of the front bottom front control arm's bolt and jacked the suspension up to normal ride height (previously measured hub centre to arch)

and tightened the pinch bolt with a breaker holding the nut with the spanner.
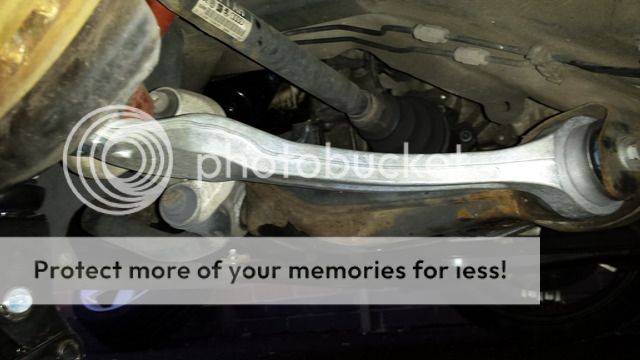
And back on its wheels.
Will probably do the last two control arms over the next month or so if I get time and then it's just track rod ends and ARB links for a fully fresh front end
Also picking up a slightly bigger turbo tomorrow
Tonight I managed to get another control arm fitted so I now have all the top arms renewed and both bottom rears. Went for the Meyle HD arms.
Forgot to take pics at first because as usual I went in the zone.
Started by putting some WD40 on the ball joint nut to start working in. Used an 18mm socket and a medium breaker bar to crack the long bolt through the subframe end with and 18mm ring spanner on the nut in the subframe cavity. Removed a bit of undertray that was in the way too and then pulled the long bolt out, twising the arm slightly to get the exit angle needed to miss the car body. Then I removed the ball joint nut and tapped it out the bottom of the hub carrier. And out:

Pushed the new arm in place.

Offered the new supplied bolt up

and pushed it through and put the nut on loosely.
I lined the ball joint up with its hole and raised it slightly with the trolley jack.

A tap with the hammer and it dropped in and I fully tightened the nut.
All in with subframe end left loose.

I then got the trolley jack on the bottom of the front bottom front control arm's bolt and jacked the suspension up to normal ride height (previously measured hub centre to arch)

and tightened the pinch bolt with a breaker holding the nut with the spanner.
And back on its wheels.

Will probably do the last two control arms over the next month or so if I get time and then it's just track rod ends and ARB links for a fully fresh front end
Also picking up a slightly bigger turbo tomorrow
Northampton_ofn
Registered User
- Joined
- Jul 21, 2015
- Messages
- 297
- Reaction score
- 106
- Points
- 43
Was meant to fetch a k04 on Friday night but the lad messaged me an hour before I was about to leave and said his house had been robbed sure.
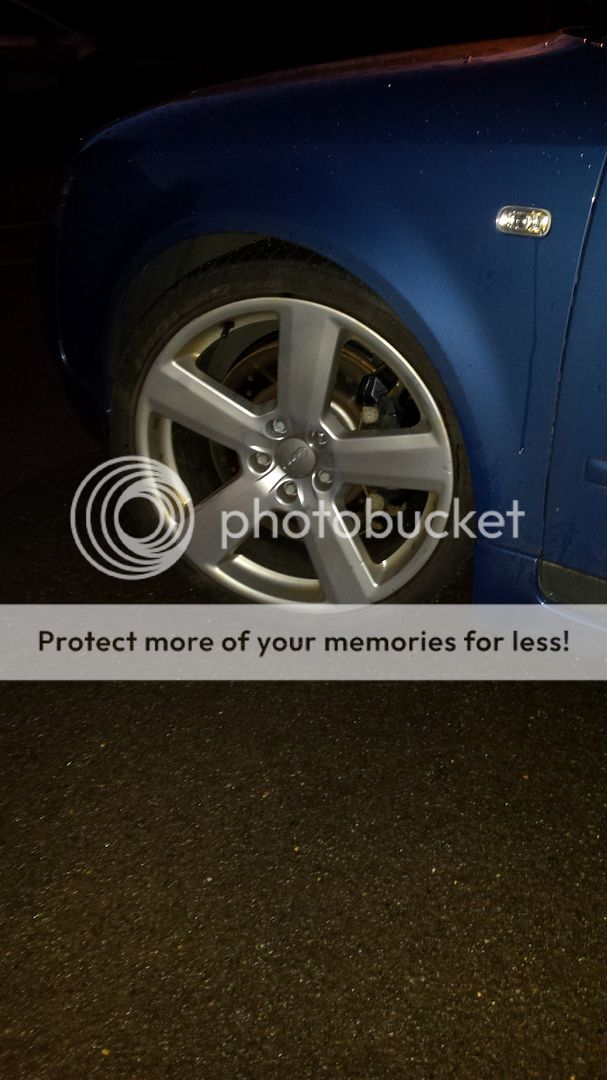
Anyway that left me some time to tinker so put an RS6 wheel with 235/35 on the front left and went out for a joyride. And I know I'm not low but surprisingly it didn't rub!
Dry this morning so I gave her a good clean and wax. Then cracked on with swapping my rears cos one is cracked and the other has weird stress marks or weathering on the top.

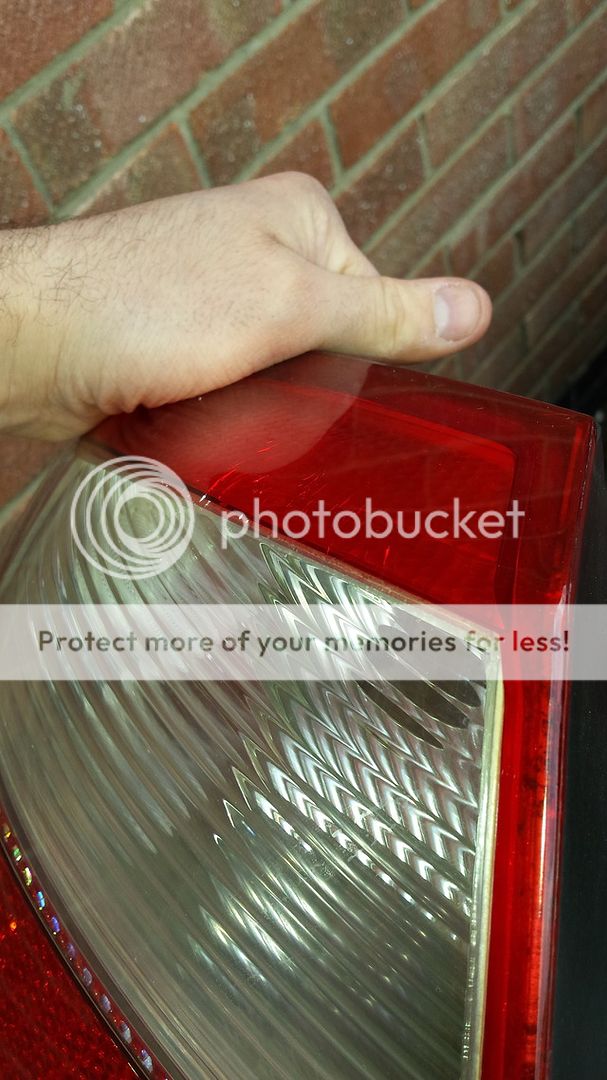
Thought I'd try Depo as GSF had 50% off
Whipped one off.

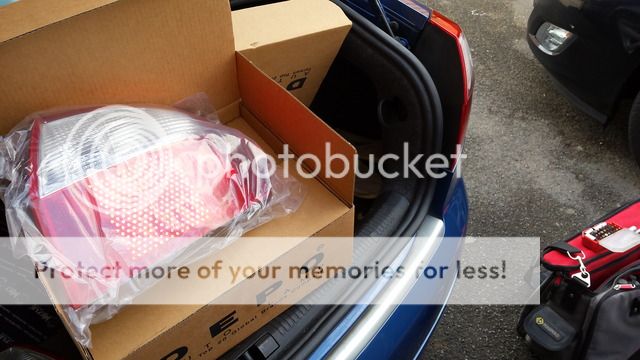
Old and New.

And all finished.
Really happy with the fit of the Depos. They're pretty much identical and had no problem sealing the bulb plates on the back.
Finally got around to fitting the other 5G ballast.
Finally got matching white instead of the blue white I've been running all winter
I actually bolted up the ballast first and it was still blue so it was just the wrong bulb after all
Anyway that left me some time to tinker so put an RS6 wheel with 235/35 on the front left and went out for a joyride. And I know I'm not low but surprisingly it didn't rub!
Dry this morning so I gave her a good clean and wax. Then cracked on with swapping my rears cos one is cracked and the other has weird stress marks or weathering on the top.


Thought I'd try Depo as GSF had 50% off

Whipped one off.

Old and New.

And all finished.
Really happy with the fit of the Depos. They're pretty much identical and had no problem sealing the bulb plates on the back.
Finally got around to fitting the other 5G ballast.

Finally got matching white instead of the blue white I've been running all winter
I actually bolted up the ballast first and it was still blue so it was just the wrong bulb after all
Northampton_ofn
Registered User
- Joined
- Jul 21, 2015
- Messages
- 297
- Reaction score
- 106
- Points
- 43
Different temperature bulbs or a bulb on its way can give off different colours mate
Yeah it's a funny one mate cos I bought 2 brand new 4700k bulbs off eBay and stuck them in but they obviously weren't the same temp. Luckily 4700k is OEM and one of the headlamps had a bulb in it when I got them so I've stuck that in haha

I was always being messed about on eBay with different coloured bulbs even tho they said they had sent the same that's why I went with Cree led you can't go wrong there the colours are perfect match mate
Sent from my iPhone using Tapatalk
Sent from my iPhone using Tapatalk
Northampton_ofn
Registered User
- Joined
- Jul 21, 2015
- Messages
- 297
- Reaction score
- 106
- Points
- 43
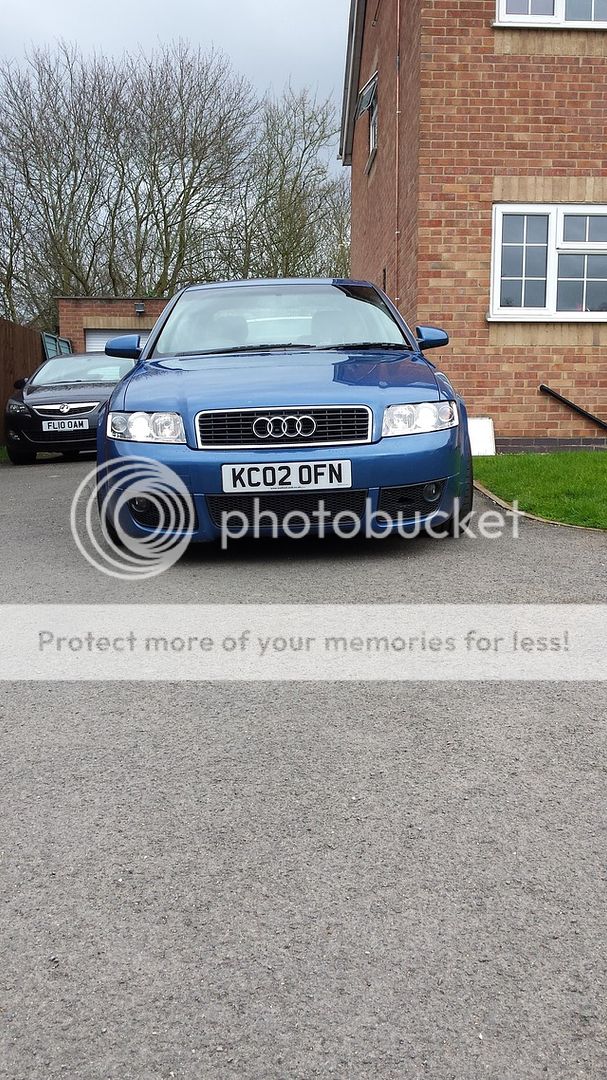
Random picture from the weekend.

Then tonight I got angry because I was trial fitting a Chinese eBay special front grille with honeycombe to match my votex but I barely pushed on it and half the clips smashed. Anyway:

Not sure whether to try and send it for refund but I got it toward the end of last summer so it might be too late.
Adamwagg
Registered User
I had two off ebay mate and on them the clips broke on them nightmare. Same happened to my mate as wellRandom picture from the weekend.
Then tonight I got angry because I was trial fitting a Chinese eBay special front grille with honeycombe to match my votex but I barely pushed on it and half the clips smashed. Anyway:
Not sure whether to try and send it for refund but I got it toward the end of last summer so it might be too late.
Northampton_ofn
Registered User
- Joined
- Jul 21, 2015
- Messages
- 297
- Reaction score
- 106
- Points
- 43
Crap aren't they Adam. Took a punt on none OEM and it hasnt paid off haha. Won't be buying anything from china again.
Yeah that would be alright as a temporary fix Mike but I don't really like having stuff fitted like that.
Is there an Audi honeycomb grill?
Yeah that would be alright as a temporary fix Mike but I don't really like having stuff fitted like that.
Is there an Audi honeycomb grill?
Northampton_ofn
Registered User
- Joined
- Jul 21, 2015
- Messages
- 297
- Reaction score
- 106
- Points
- 43
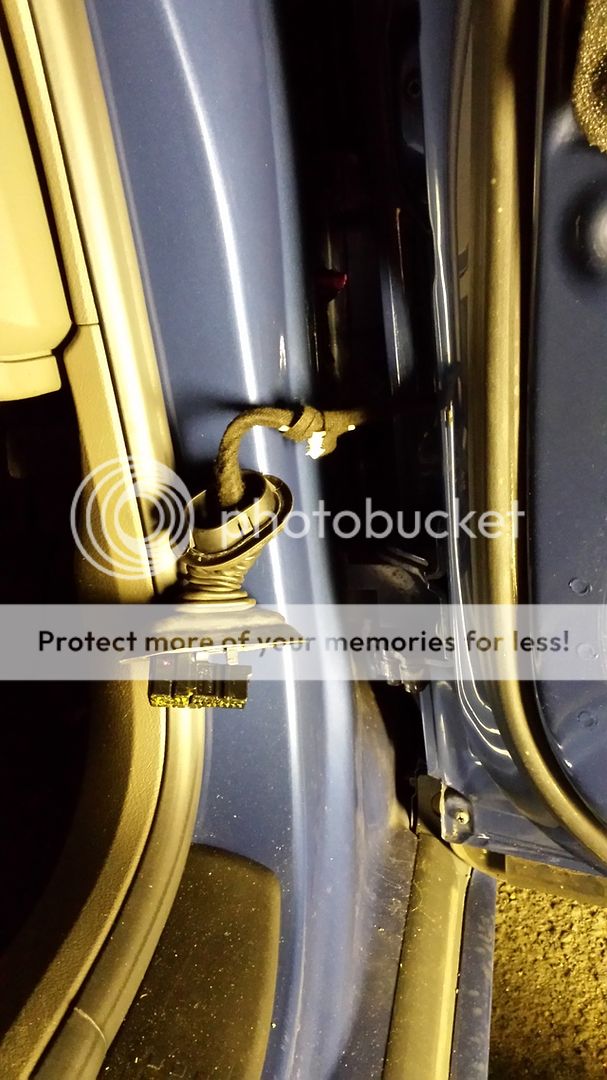
For quite a while I'd been getting crackling from the driver's door speaker and eventually I noticed the car was no longer aware whether I had the door open so the interior light would stay on all the time and the red light on the door edge stopped coming on. I read a while back about the door loom flex issue but hadn't found my issues serious enough to strip it all down, that was, until a friend said "what, a broken wire in here" whilst poking the black flex whilst I was explaining about the interior light.
Anyway, that was the last of it. I no longer had power/heated mirrors, speaker, any electric windows, the door wouldn't lock other than manually by key and still no red light or interior light going off.
So I found some time and started. First I removed the a-pillar side black flexi and attempted to remove the plug but was greeted by the arcing sound you get from electricity jumping. So I disconnected the battery and undid the plug
Easy, once you know how actually that's how I'd describe this whole job.
So door card off
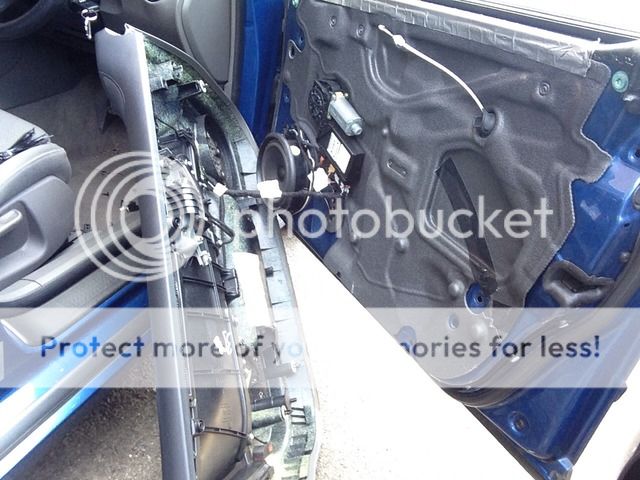
Speaker out
And loosened off all connections to pull some slack towards the car end
Anyway, that was the last of it. I no longer had power/heated mirrors, speaker, any electric windows, the door wouldn't lock other than manually by key and still no red light or interior light going off.
So I found some time and started. First I removed the a-pillar side black flexi and attempted to remove the plug but was greeted by the arcing sound you get from electricity jumping. So I disconnected the battery and undid the plug

Easy, once you know how
actually that's how I'd describe this whole job.So door card off

Speaker out

And loosened off all connections to pull some slack towards the car end

Northampton_ofn
Registered User
- Joined
- Jul 21, 2015
- Messages
- 297
- Reaction score
- 106
- Points
- 43
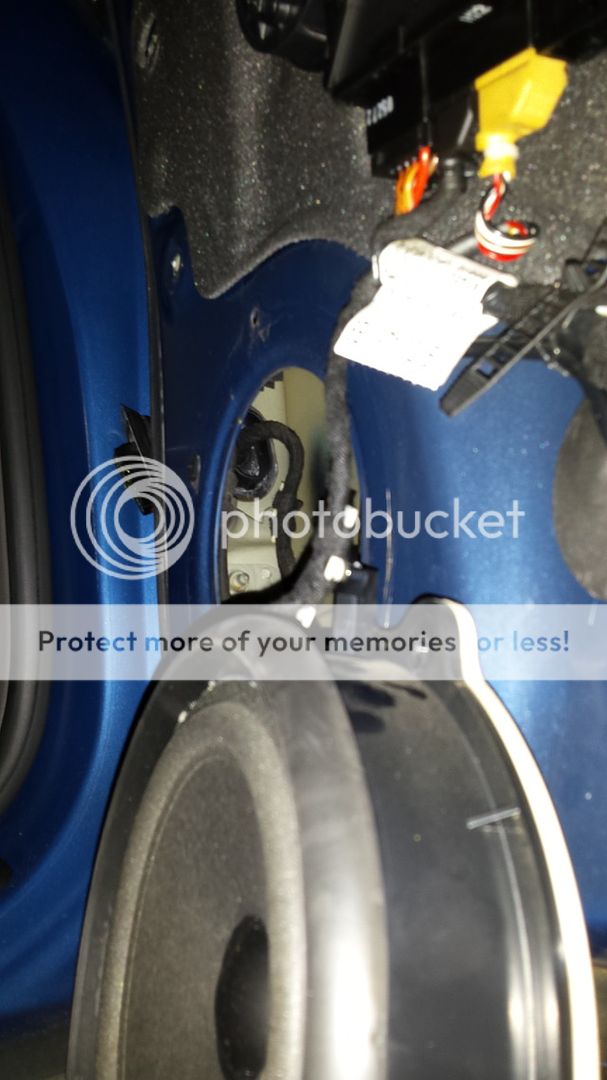
And pulled some through (annoying white clips to tackle first) 

There were 2 clearly clean sheared wires, +12v & ground. Hence the arcing.
Wanted to have a proper look so I took a bit of the black wrap off and moved the flex further along
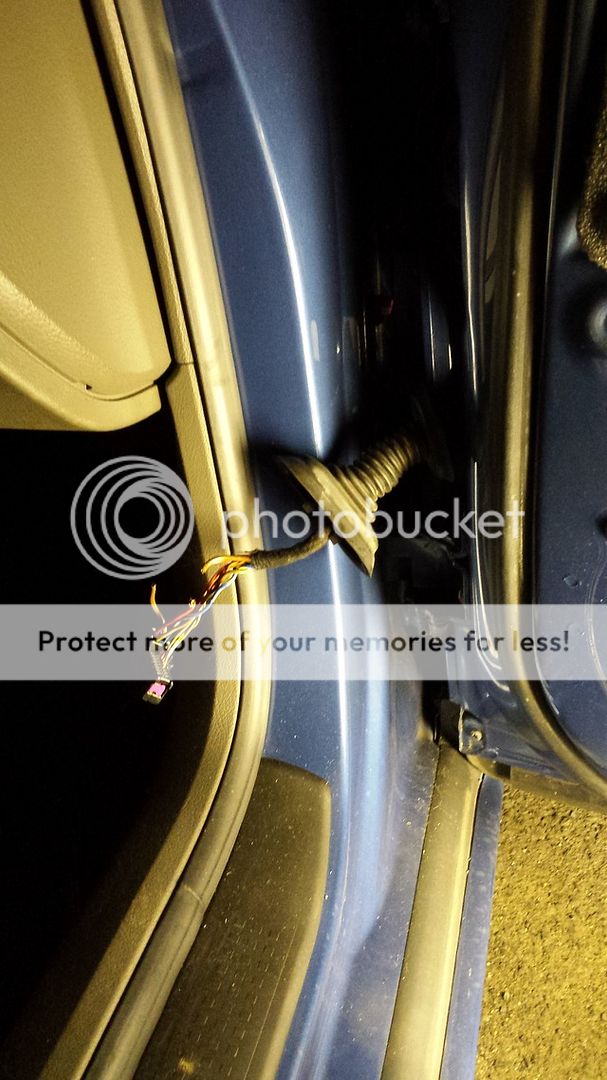
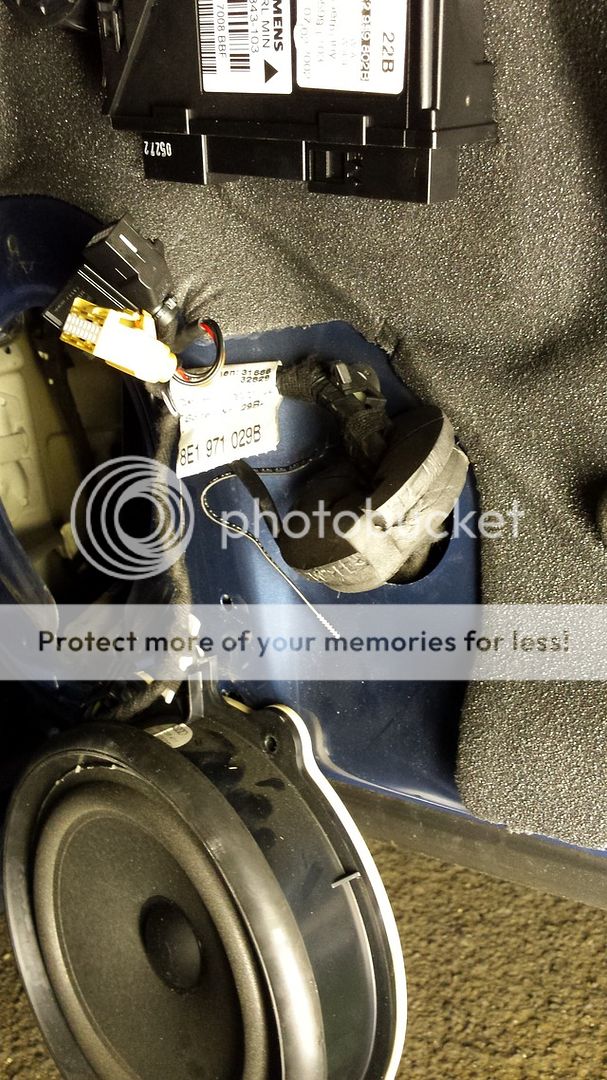
I found more damage to wires, only two didn't have any damage. The rest had tears in the insulation and a few had started to fray.
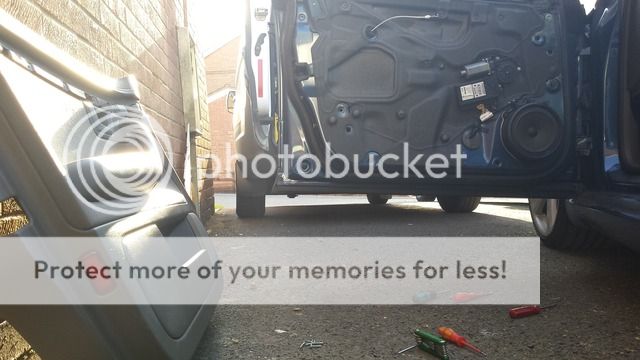
Decided it would be easier to work on with it removed so took the loom out the door through the door shut end, hardest part was releasing the ****ing connector from the door latch/lock.
Got it on the trusty work bench

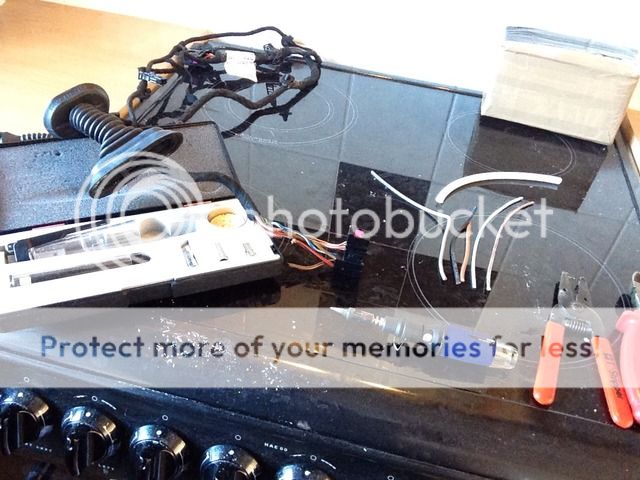
I soldered in some fresh wire for the broken wires, gave them all some shrink wrap, then insulating tape and a tiny dab of grease to help them move past each other.
And done.
Refitting was just reversal of removal. With it all back together I plugged everything back in to the loom and gave it a go. Door locked and unlocked again . Interior light and dash recognised door as open and closed, great I thought. Started her up, no windows/mirror control/total closure still.
Now I spent the next two hours on this, trawling the search, thread after thread of broken wires in the door flex. Strangely I noticed you could now open the other 3 windows locally where as you couldn't before. I checked over all connections, had the loom back off to bell out continuity with the meter. All ok. Decided it must be a faulty driver's door control module which is attached to the bottom of the window motor.


There were 2 clearly clean sheared wires, +12v & ground. Hence the arcing.
Wanted to have a proper look so I took a bit of the black wrap off and moved the flex further along

I found more damage to wires, only two didn't have any damage. The rest had tears in the insulation and a few had started to fray.
Decided it would be easier to work on with it removed so took the loom out the door through the door shut end, hardest part was releasing the ****ing connector from the door latch/lock.

Got it on the trusty work bench

I soldered in some fresh wire for the broken wires, gave them all some shrink wrap, then insulating tape and a tiny dab of grease to help them move past each other.
And done.

Refitting was just reversal of removal. With it all back together I plugged everything back in to the loom and gave it a go. Door locked and unlocked again
. Interior light and dash recognised door as open and closed, great I thought. Started her up, no windows/mirror control/total closure still. Now I spent the next two hours on this, trawling the search, thread after thread of broken wires in the door flex. Strangely I noticed you could now open the other 3 windows locally where as you couldn't before. I checked over all connections, had the loom back off to bell out continuity with the meter. All ok. Decided it must be a faulty driver's door control module which is attached to the bottom of the window motor.
Northampton_ofn
Registered User
- Joined
- Jul 21, 2015
- Messages
- 297
- Reaction score
- 106
- Points
- 43
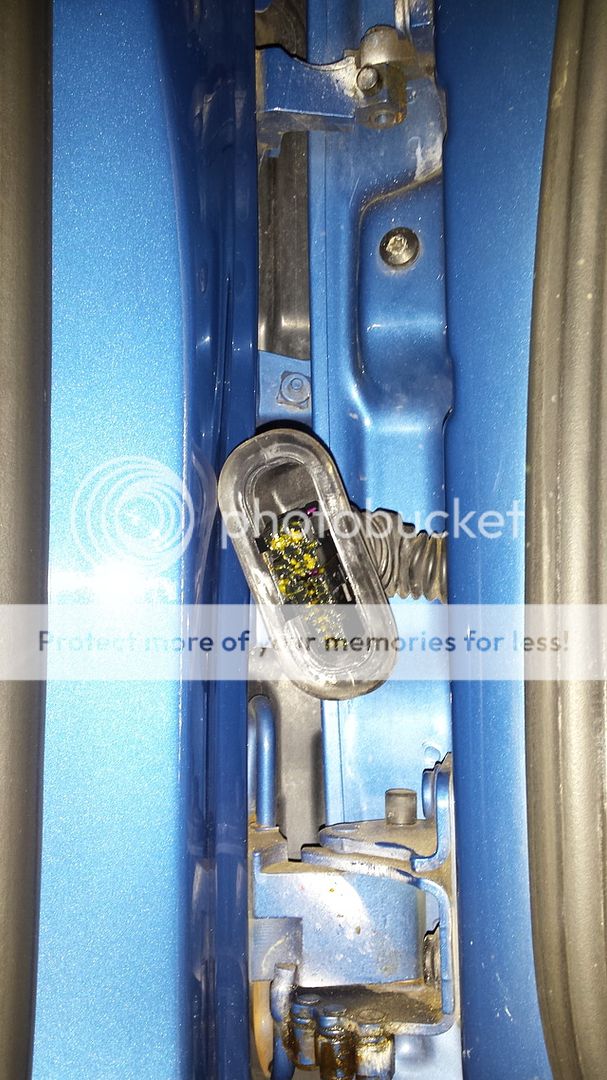
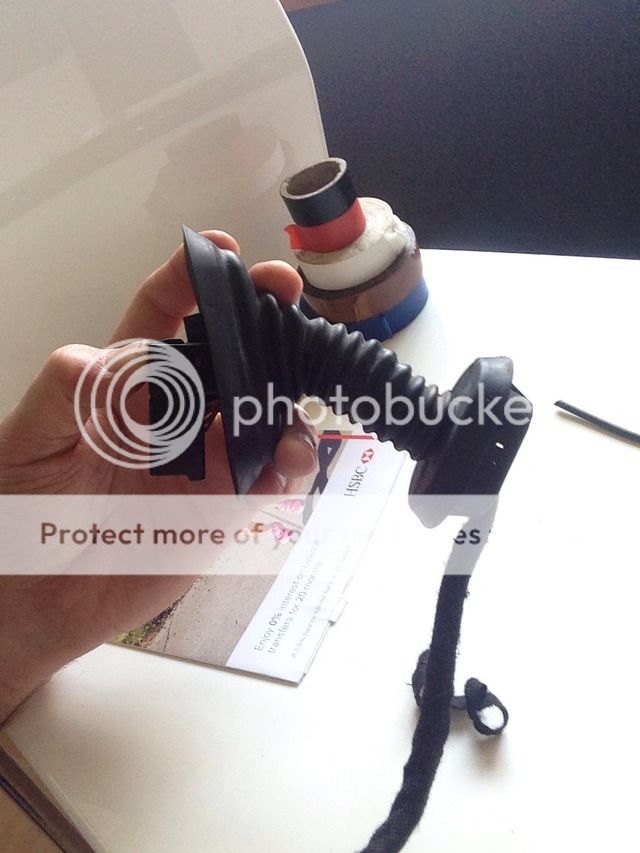
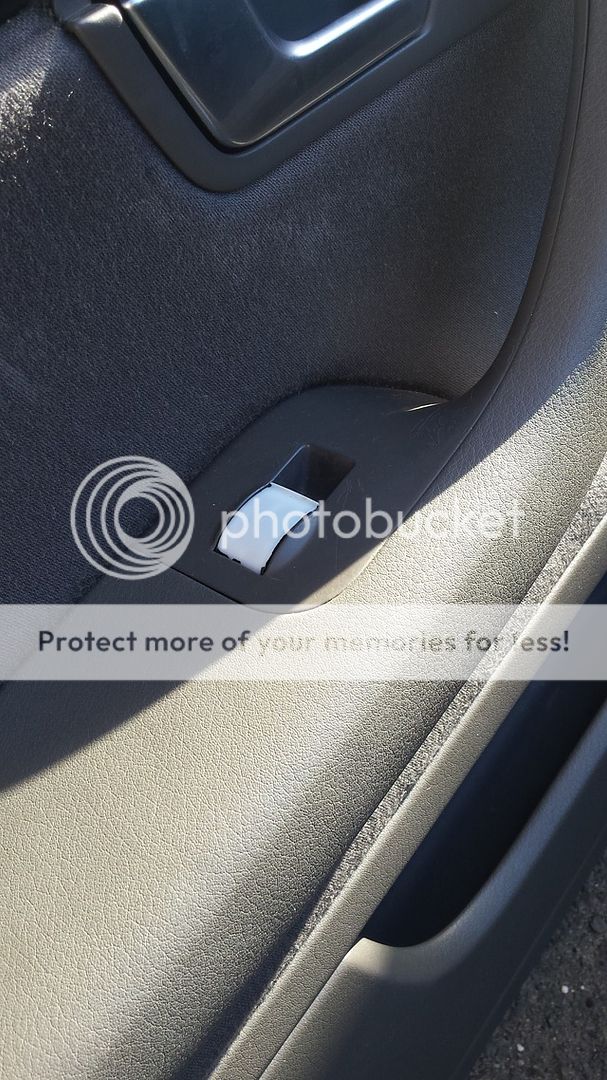
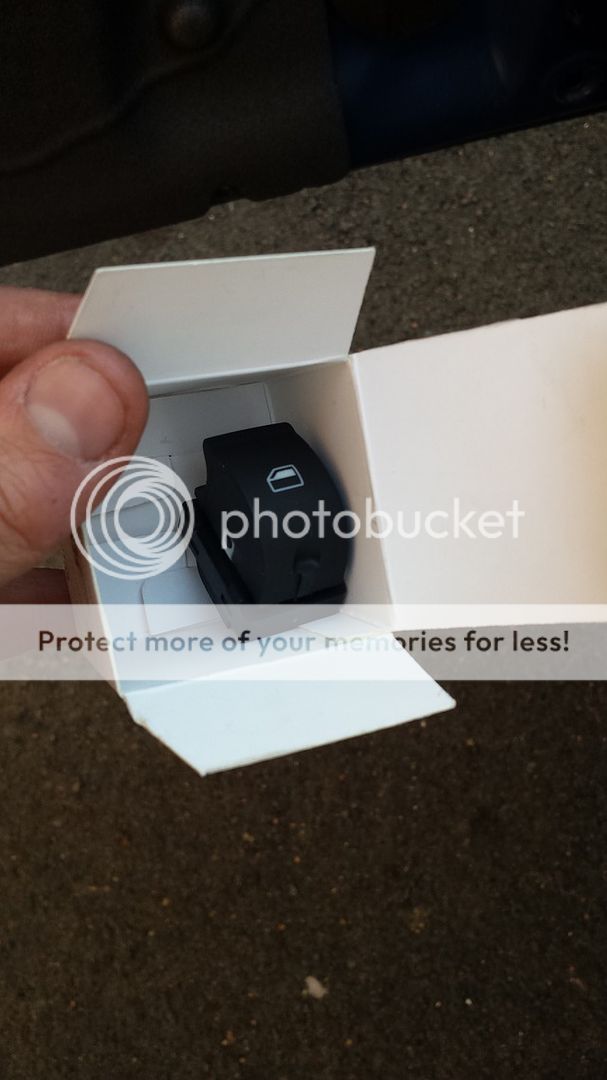
I started removing the passenger door trim as I no longer felt like a novice and I had a replacement switch to fit as the other one looked like this
Removing the connectors from the door control module it twigged! The grey connector that comes out the DCM to feed the secondary door loom (everything on the door card) was seated much deeper than I remembered the driver's door one.
So I quickly whipped the driver's door back apart and sure enough the plug felt solid, but there's a knack to make it seat correctly. It has a locking arm which goes across as it locates but if you don't have that pushed completely to the unlocked position when you insert the plug into the DCM, it locks in too early. Causing it to appear locked and ok but none of the contacts are made! Tested everything, all working! Happy with that
So only a temporary bodge until I can bring myself to spend £125 at TPS but a fully functioning door once again.


Removing the connectors from the door control module it twigged! The grey connector that comes out the DCM to feed the secondary door loom (everything on the door card) was seated much deeper than I remembered the driver's door one.
So I quickly whipped the driver's door back apart and sure enough the plug felt solid, but there's a knack to make it seat correctly. It has a locking arm which goes across as it locates but if you don't have that pushed completely to the unlocked position when you insert the plug into the DCM, it locks in too early. Causing it to appear locked and ok but none of the contacts are made! Tested everything, all working! Happy with that
So only a temporary bodge until I can bring myself to spend £125 at TPS
but a fully functioning door once again.
neil ratcliffe
coupe rebuild master
iam getting the same issue with my drivers side door speaker. looks like ill have to pull mine. and check the wire. thank you for a great write up mate..And pulled some through (annoying white clips to tackle first)
There were 2 clearly clean sheared wires, +12v & ground. Hence the arcing.
Wanted to have a proper look so I took a bit of the black wrap off and moved the flex further along
I found more damage to wires, only two didn't have any damage. The rest had tears in the insulation and a few had started to fray.
Decided it would be easier to work on with it removed so took the loom out the door through the door shut end, hardest part was releasing the ****ing connector from the door latch/lock.
Got it on the trusty work bench
I soldered in some fresh wire for the broken wires, gave them all some shrink wrap, then insulating tape and a tiny dab of grease to help them move past each other.
And done.
Refitting was just reversal of removal. With it all back together I plugged everything back in to the loom and gave it a go. Door locked and unlocked again
Now I spent the next two hours on this, trawling the search, thread after thread of broken wires in the door flex. Strangely I noticed you could now open the other 3 windows locally where as you couldn't before. I checked over all connections, had the loom back off to bell out continuity with the meter. All ok. Decided it must be a faulty driver's door control module which is attached to the bottom of the window motor.
Northampton_ofn
Registered User
- Joined
- Jul 21, 2015
- Messages
- 297
- Reaction score
- 106
- Points
- 43
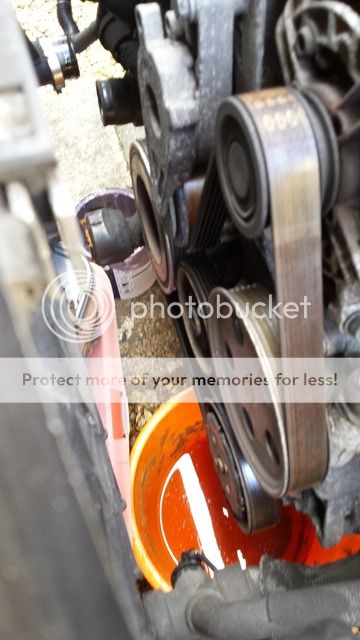
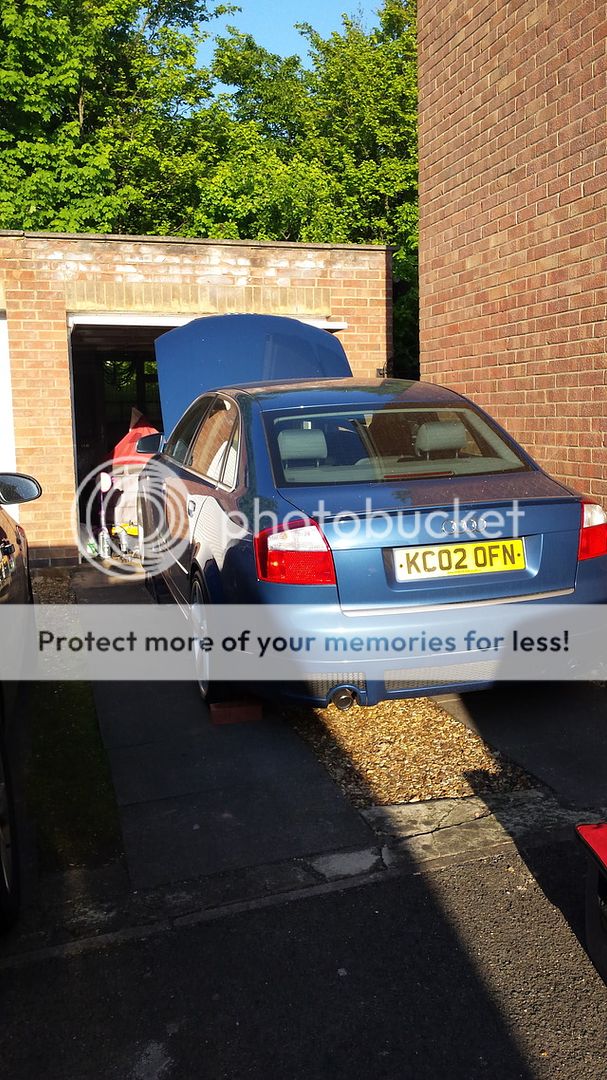
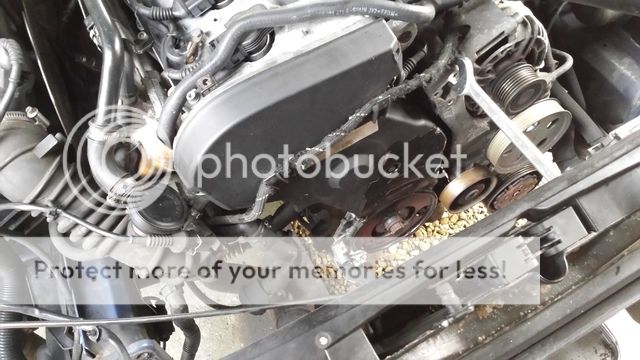
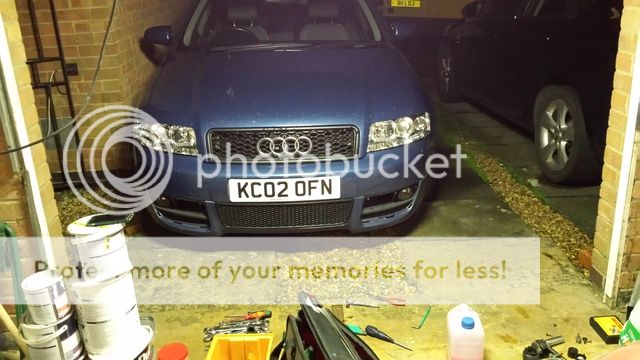
Well, cam belt time rolled around. It had actually been 7 years & 65,000 according to the paperwork so I had it in the pipeline. Best time for me to carry out any major work is when I'm on call every 8 weeks as I get a weeks full use of the work van.
So pulled the car up to the garage

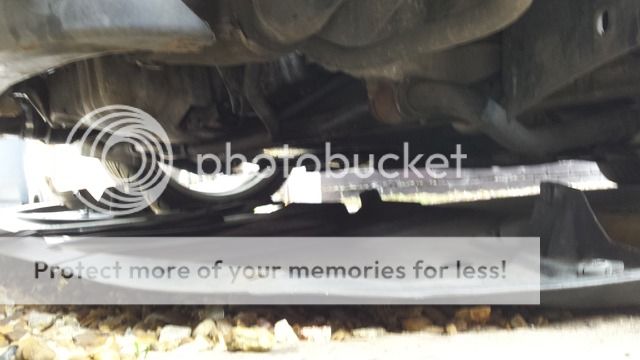
Wheels off to undo arch underpan screws

Grills out

Headlights out
Underpan down
Bumper/wing bolts 3 each side undone

Then one Allen bolt at the top of each small grill and bumper off
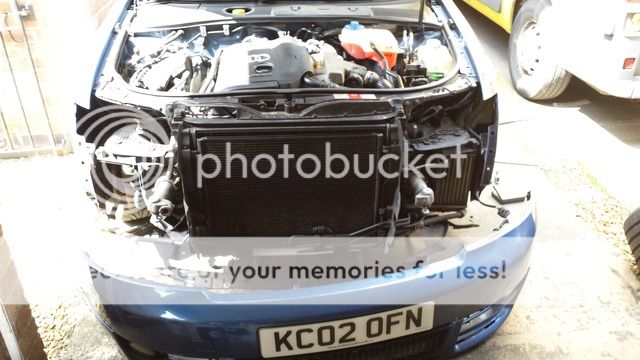
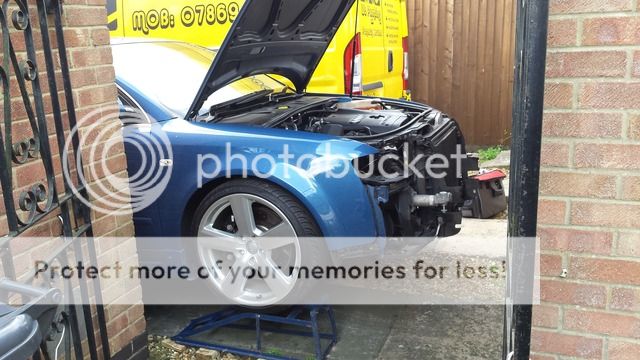
Now with the clearance of the bumper off I could actually get on ramps!!!
Doing water pump so dumped the coolant by pulling the tab on the CTS on passenger side rad hose
3 Torx bolts each side into subframe and another 3 smaller ones to the wing
Released the two jubilees to the boost hose/intercooler and the service position can be assumed
More to follow
So pulled the car up to the garage

Wheels off to undo arch underpan screws

Grills out

Headlights out

Underpan down

Bumper/wing bolts 3 each side undone

Then one Allen bolt at the top of each small grill and bumper off

Now with the clearance of the bumper off I could actually get on ramps!!!

Doing water pump so dumped the coolant by pulling the tab on the CTS on passenger side rad hose

3 Torx bolts each side into subframe and another 3 smaller ones to the wing

Released the two jubilees to the boost hose/intercooler and the service position can be assumed

More to follow
neil ratcliffe
coupe rebuild master
Northampton_ofn
Registered User
- Joined
- Jul 21, 2015
- Messages
- 297
- Reaction score
- 106
- Points
- 43
Forgot to mention I had a very competent mechanic shouting orders
More than a normal amount of oil came out the intake
But a new turbo is quite high up my priorities for the B6.
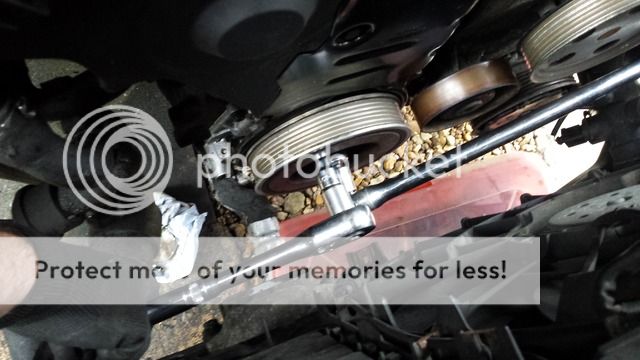
Enough room to get in and crack on now

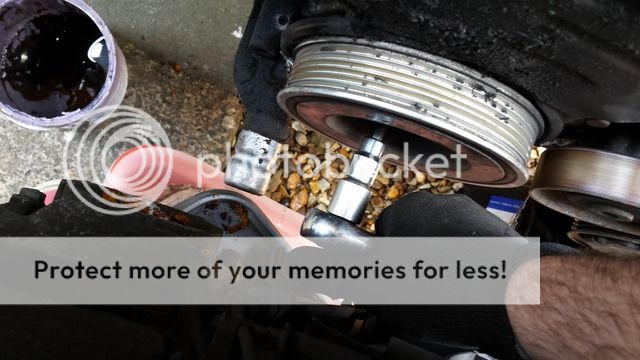
A 17mm open ended spanner fits over that tab on the aux tensioner to release the belt.
Snub mount has seen better days
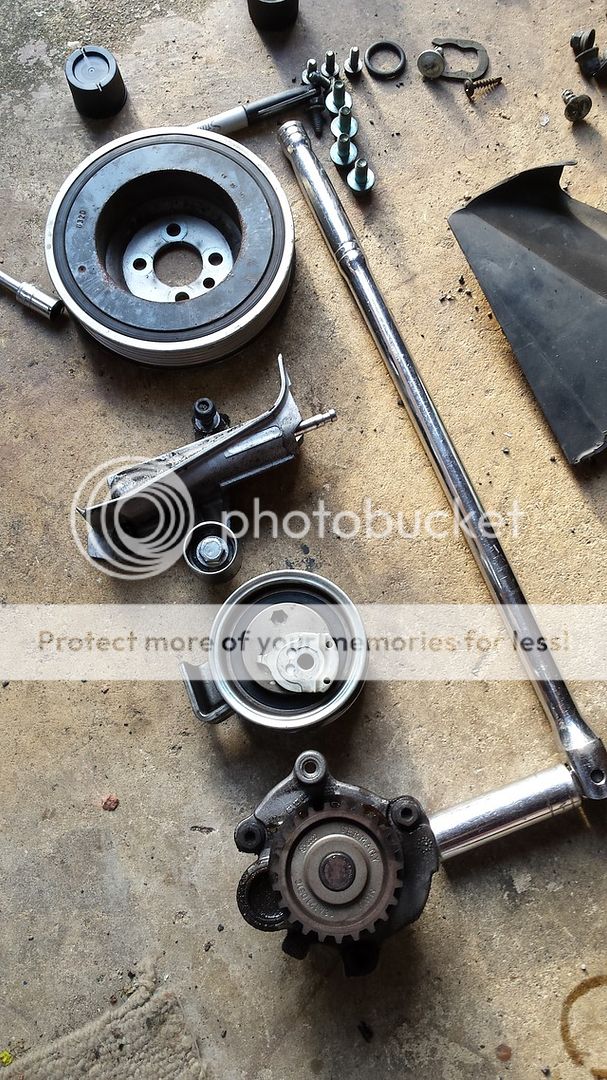
Aux belt and tensioner removed
4 Torx bolts gets the crank auxiliary drive pulley off
Then the top timing cover comes off with two clips

And more Torx for the middle and lower covers until the whole belt and the water pump are exposed
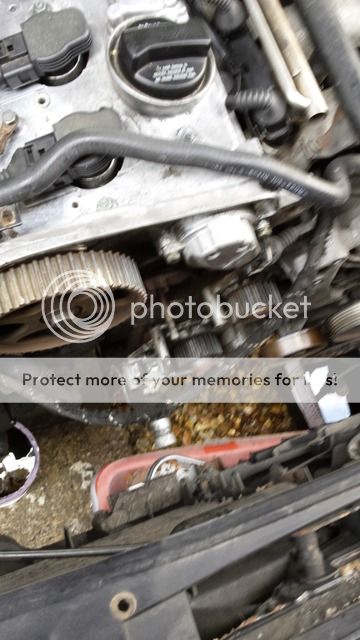
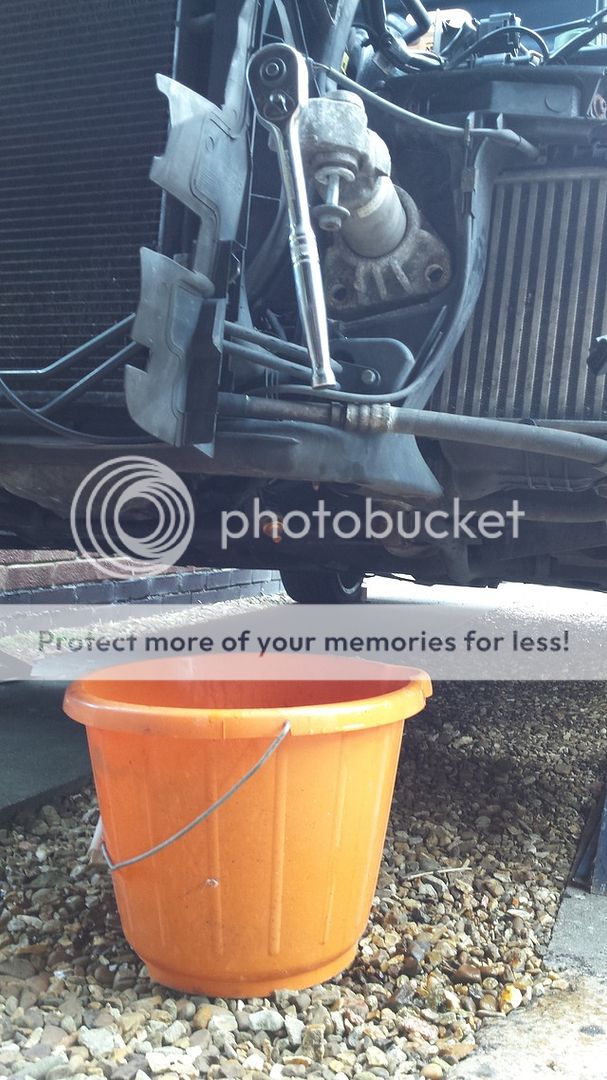
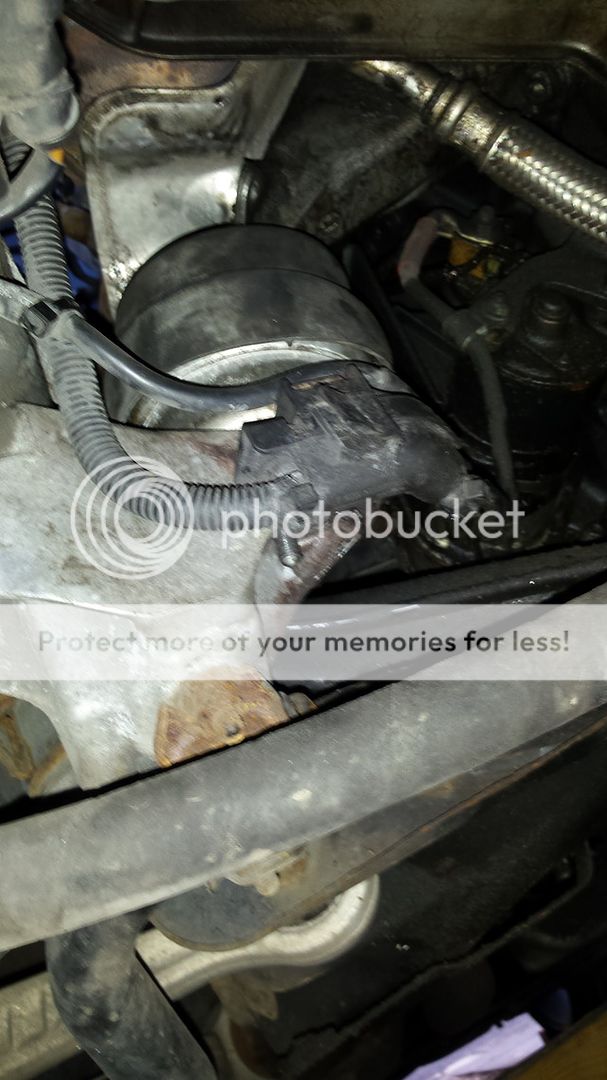
No photos here but basically I released the water pump (pulley below camshaft sensor in the pic) with a 10mm socket (3 bolts) and pulled it out the block with a catch bucket underneath to catch the onslaught.
And gathered all the parts to take down p/n's for a TPS order
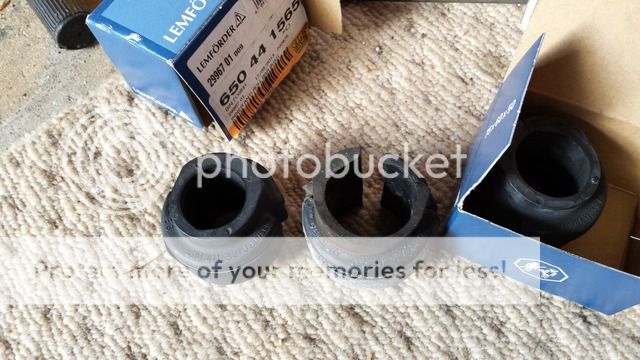
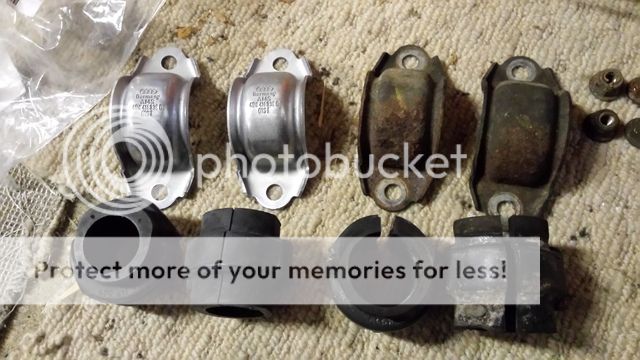
I had some new ARB bushes waiting to go on so had a look at them.
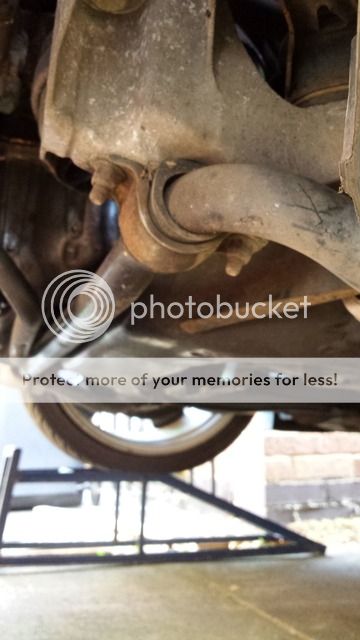

Looking a bit worn and misshaped compared to the new ones
Decided to leave these off for now as I didn't like the rusty bush holders so added them to the TPS list.
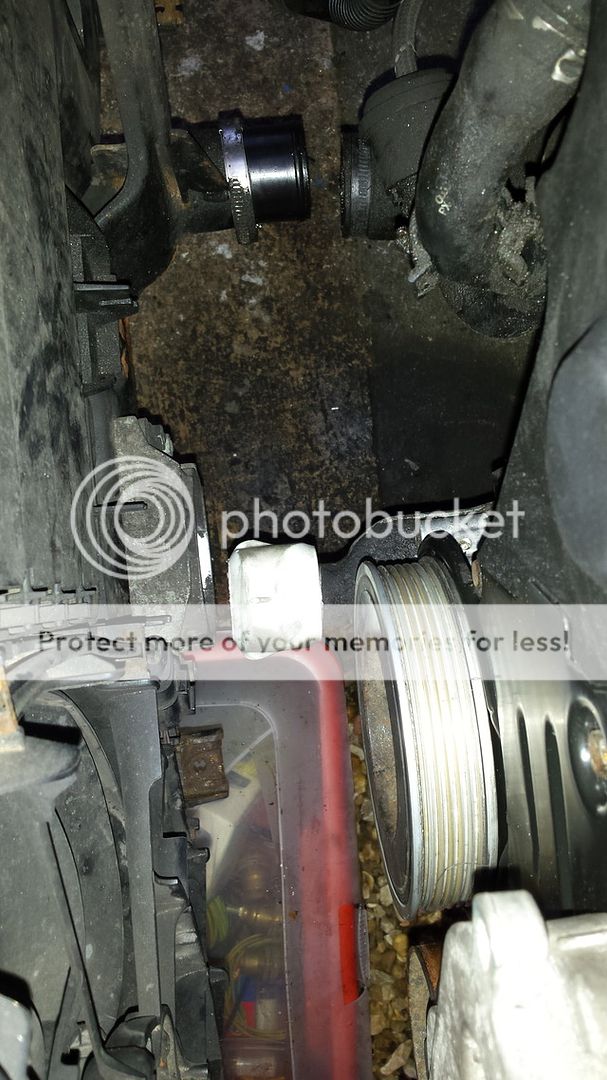
Had a spare driver's side engine mount sat there so set about removing

Set up a well dodgy rig with some bricks and scaffold boards to get the pump jack high enough to lift the engine. I jacked it from the lowest bolt holding the snub/front engine mount to the bottom end.
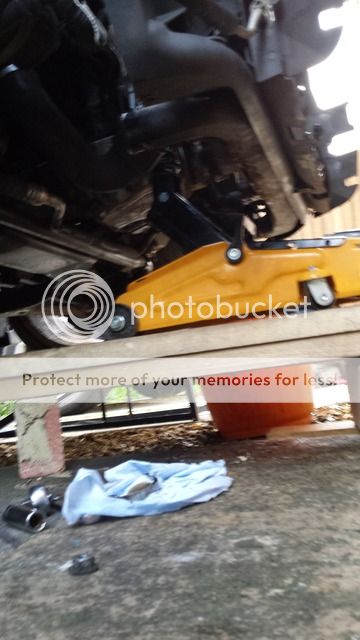
Then I managed to get a 1/4 ratchet in the gap to get the top nut off the engine mount.
And out
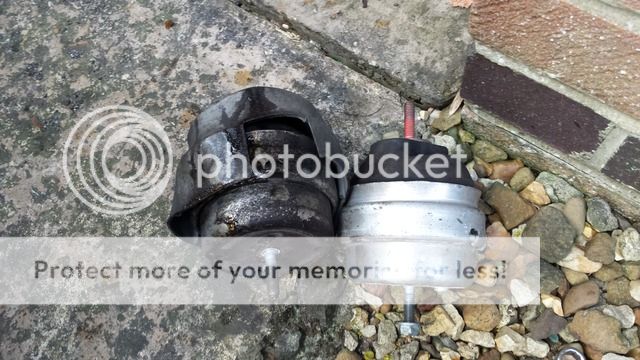
No points for guessing old and new
Put the old cover on the new mount and wriggled it in the gap. Bit of faffing and it lined up
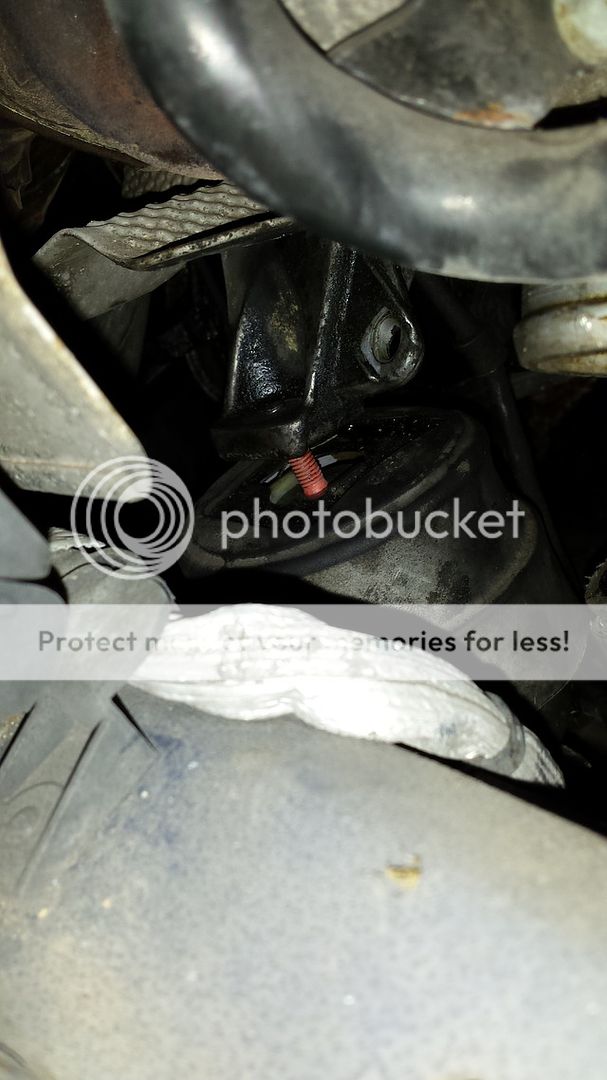
Tightened the top nut before lowering the jack and tightening the bottom.
And in
Then I called it a day.

More than a normal amount of oil came out the intake

But a new turbo is quite high up my priorities for the B6.
Enough room to get in and crack on now


A 17mm open ended spanner fits over that tab on the aux tensioner to release the belt.
Snub mount has seen better days

Aux belt and tensioner removed

4 Torx bolts gets the crank auxiliary drive pulley off

Then the top timing cover comes off with two clips

And more Torx for the middle and lower covers until the whole belt and the water pump are exposed

No photos here but basically I released the water pump (pulley below camshaft sensor in the pic) with a 10mm socket (3 bolts) and pulled it out the block with a catch bucket underneath to catch the onslaught.
And gathered all the parts to take down p/n's for a TPS order

I had some new ARB bushes waiting to go on so had a look at them.


Looking a bit worn and misshaped compared to the new ones

Decided to leave these off for now as I didn't like the rusty bush holders so added them to the TPS list.
Had a spare driver's side engine mount sat there so set about removing

Set up a well dodgy rig with some bricks and scaffold boards to get the pump jack high enough to lift the engine. I jacked it from the lowest bolt holding the snub/front engine mount to the bottom end.

Then I managed to get a 1/4 ratchet in the gap to get the top nut off the engine mount.
And out

No points for guessing old and new
Put the old cover on the new mount and wriggled it in the gap. Bit of faffing and it lined up

Tightened the top nut before lowering the jack and tightening the bottom.
And in

Then I called it a day.
Northampton_ofn
Registered User
- Joined
- Jul 21, 2015
- Messages
- 297
- Reaction score
- 106
- Points
- 43
Managed to get the TPS bits

Part numbers in case anyone needs them
AVJ Timing belt kit 06B198119C
Water pump 06A121012GX
Auxiliary belt 06B903137D
This kit superseded the old hydraulic tensioner as you can see. They now have a spring loaded tensioner within the bearing of the tensioner pulley. Maybe they had had problems with faulty hydraulic ones??

Back to work
Fitted the water pump which comes with a new o-ring

And fitted the new tensioner, the 90 degree tab sits in the large port on the side of the head:
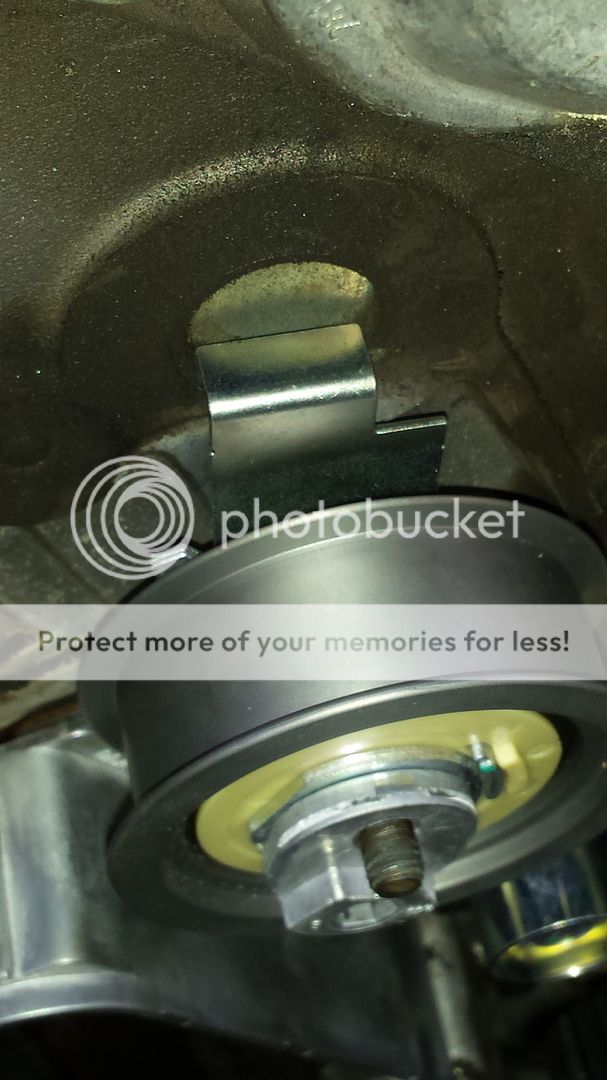
I turned the tensioner to its slackest position to fit the belt as that kept the belt tight enough not to jump off my TDC marks but I imagine if you have a partner in crime then you'd fit the belt and then add the tensioner after for ease.

Anyway, I triple checked I was on my marks and then followed this guide for tightening the new style tensioner.
http://pic.ctapps.de/media/montagetips/TN_13_035 (EN).PDF
The nut they refer to tighten to 23n/m is supplied in the cambelt kit along with a washer. Turn the engine over a couple of times and check you are still on your marks (cam sprocket aligns with cam cover notch, hopefully you have made your own mark on the crank) and check your tensioner still aligns with the mark in the guide above, then torque your tensioner nut and that's it.
My cam belt covers were quite mucky from when my cam gasket was leaking
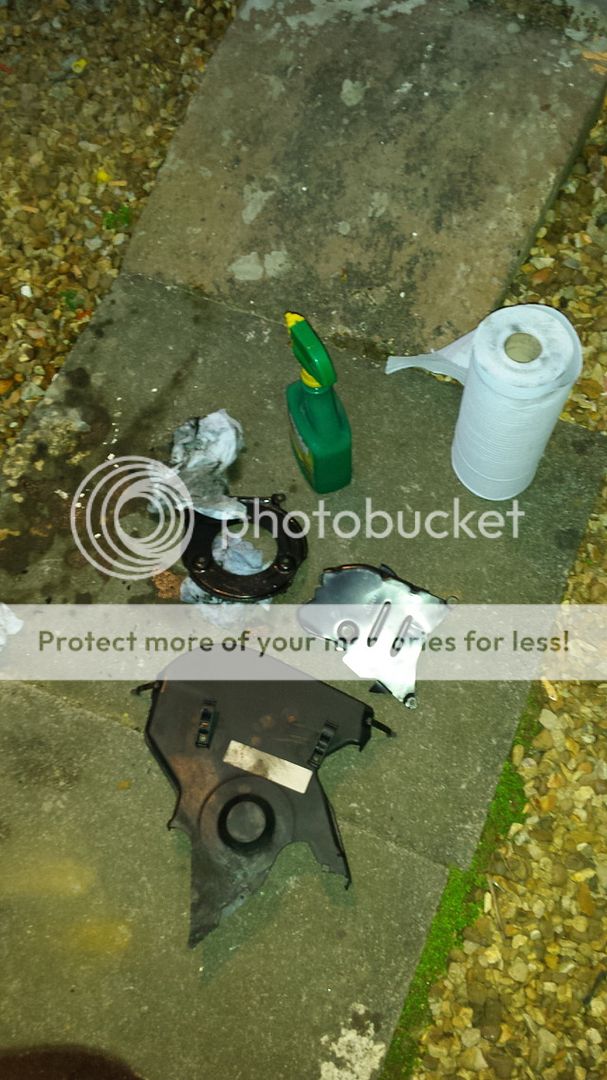
So gave them a good scrub
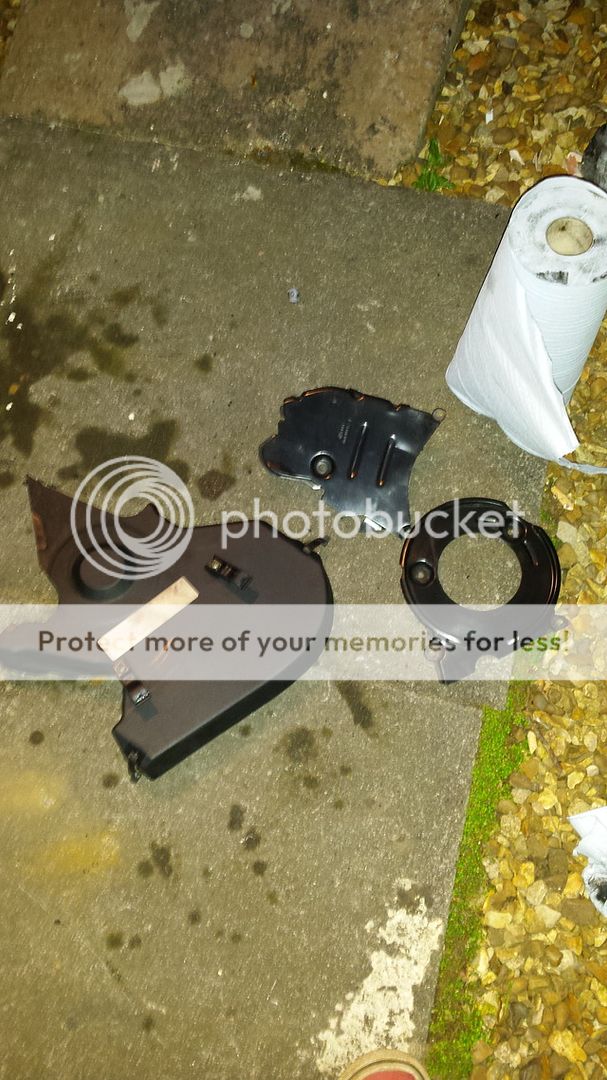
And back on
And pulley followed
I'd originally planned to replace the aux tensioner and slave pulley but during removal I tested them both and they're in very good condition so just reused them. They must have been replaced shortly before I got the car.
Belt on

New snub mount

And the radiator mount can bolt back to the chassis
I used new bolts as the old ones were corroded
Radiator housing to chassis N90967602 x6
Replaced these too

Headlight plate bolt N10535502

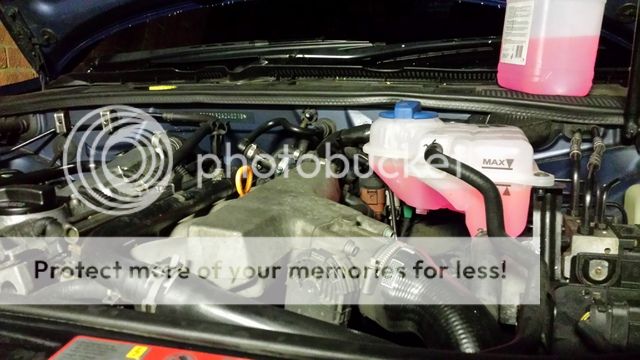
Had a new expansion tank waiting to go on
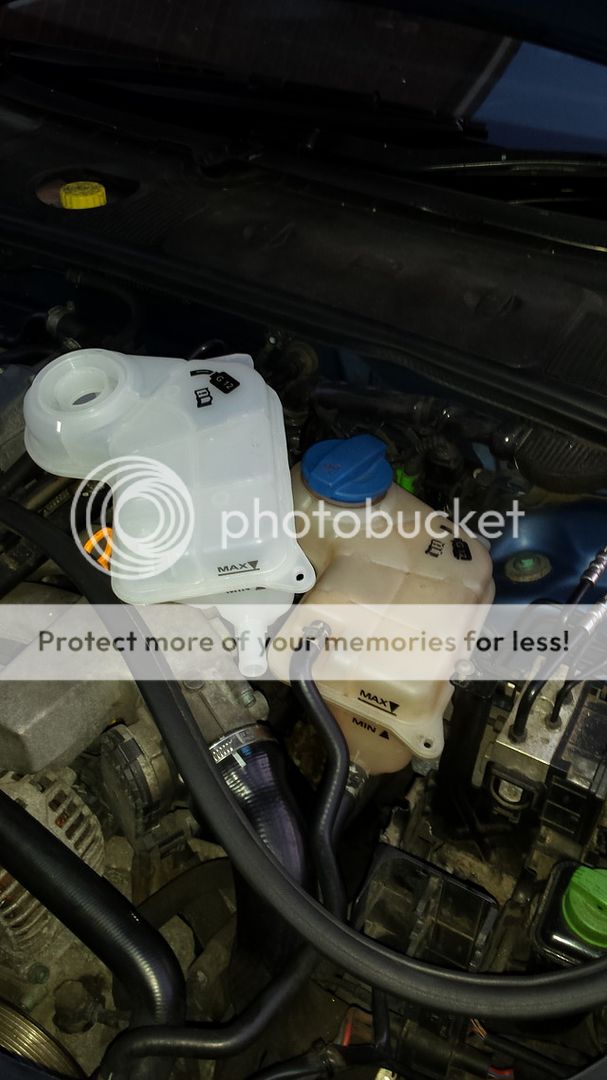
Fitted that and carried out coolant flushes until water drained clean (2 I think) and then topped up with G12.
New ARB bush carriers 4D011336G

Wanted to fit new nuts too but TPS had ordered the wrong part.
So lowered to the ground. Re-fitted bumper, and went for a little hammer up the dual carriage way followed by a top up of coolant

Part numbers in case anyone needs them
AVJ Timing belt kit 06B198119C
Water pump 06A121012GX
Auxiliary belt 06B903137D
This kit superseded the old hydraulic tensioner as you can see. They now have a spring loaded tensioner within the bearing of the tensioner pulley. Maybe they had had problems with faulty hydraulic ones??

Back to work

Fitted the water pump which comes with a new o-ring
And fitted the new tensioner, the 90 degree tab sits in the large port on the side of the head:

I turned the tensioner to its slackest position to fit the belt as that kept the belt tight enough not to jump off my TDC marks but I imagine if you have a partner in crime then you'd fit the belt and then add the tensioner after for ease.

Anyway, I triple checked I was on my marks and then followed this guide for tightening the new style tensioner.
http://pic.ctapps.de/media/montagetips/TN_13_035 (EN).PDF
The nut they refer to tighten to 23n/m is supplied in the cambelt kit along with a washer. Turn the engine over a couple of times and check you are still on your marks (cam sprocket aligns with cam cover notch, hopefully you have made your own mark on the crank) and check your tensioner still aligns with the mark in the guide above, then torque your tensioner nut and that's it.
My cam belt covers were quite mucky from when my cam gasket was leaking

So gave them a good scrub

And back on

And pulley followed

I'd originally planned to replace the aux tensioner and slave pulley but during removal I tested them both and they're in very good condition so just reused them. They must have been replaced shortly before I got the car.
Belt on

New snub mount


And the radiator mount can bolt back to the chassis

I used new bolts as the old ones were corroded

Radiator housing to chassis N90967602 x6
Replaced these too

Headlight plate bolt N10535502

Had a new expansion tank waiting to go on

Fitted that and carried out coolant flushes until water drained clean (2 I think) and then topped up with G12.

New ARB bush carriers 4D011336G


Wanted to fit new nuts too but TPS had ordered the wrong part.
So lowered to the ground. Re-fitted bumper, and went for a little hammer up the dual carriage way followed by a top up of coolant

Last edited by a moderator:
Northampton_ofn
Registered User
- Joined
- Jul 21, 2015
- Messages
- 297
- Reaction score
- 106
- Points
- 43
Great work! Love those 19's on the B6 so much.
Thanks mate, yeah they look good even when you're not slammed.
great write up so far mate i remember doing my cam belt feels like your stripping stuff out forever
Haha I know bud its mental! Almost as much hassle as writing the ****** build thread

Northampton_ofn
Registered User
- Joined
- Jul 21, 2015
- Messages
- 297
- Reaction score
- 106
- Points
- 43
Lol gotta be prepared!
Although, have you seen my rusty arch coming through? Look back through the pics and you see the paints come off that won't be sorted in time
Although, have you seen my rusty arch coming through? Look back through the pics and you see the paints come off
that won't be sorted in timeLol gotta be prepared!
Although, have you seen my rusty arch coming through? Look back through the pics and you see the paints come off
Find a good local body shop! I've seen your car west hunsbury way! I know a good one near you
Adamwagg
Registered User
Northampton_ofn
Registered User
- Joined
- Jul 21, 2015
- Messages
- 297
- Reaction score
- 106
- Points
- 43
Thanks for the comments
I live near the top shop mate, where are you? Where's the spray shop, I'd much rather go off of a recommendation than go searching blindly, you often get mugged off that way.
Find a good local body shop! I've seen your car west hunsbury way! I know a good one near you
I live near the top shop mate, where are you? Where's the spray shop, I'd much rather go off of a recommendation than go searching blindly, you often get mugged off that way.
Northampton_ofn
Registered User
- Joined
- Jul 21, 2015
- Messages
- 297
- Reaction score
- 106
- Points
- 43


Thanks for the comments
I live near the top shop mate, where are you? Where's the spray shop, I'd much rather go off of a recommendation than go searching blindly, you often get mugged off that way.
Pm sent mate
Northampton_ofn
Registered User
- Joined
- Jul 21, 2015
- Messages
- 297
- Reaction score
- 106
- Points
- 43
neil ratcliffe
coupe rebuild master
Northampton_ofn
Registered User
- Joined
- Jul 21, 2015
- Messages
- 297
- Reaction score
- 106
- Points
- 43
Right then, where to start.
The anti roll bar bush carrier nuts I ordered from TPS arrived
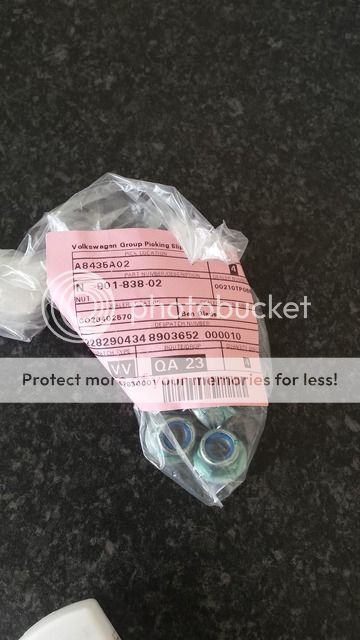
P/n: N90183802
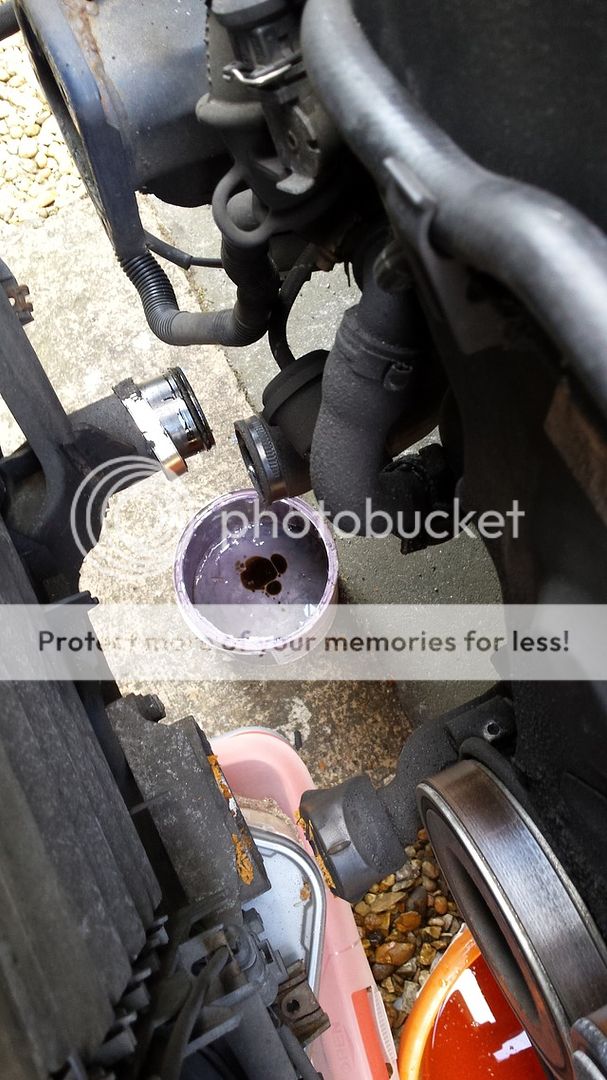
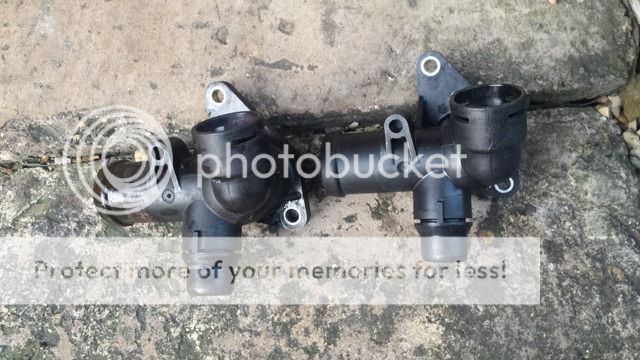
The Audi had started leaving spots on the ground whenever it was sat for a while after a run. At first i thought it was another oil leak but a bit of poke around (underpan was still off from the cambelt) and I could tell everything was caked in coolant on the turbo side of the block. A bit of searching on here and Audizine came up trumps, my rear coolant flange was leaking.
So ordered one for £13 at TPS.

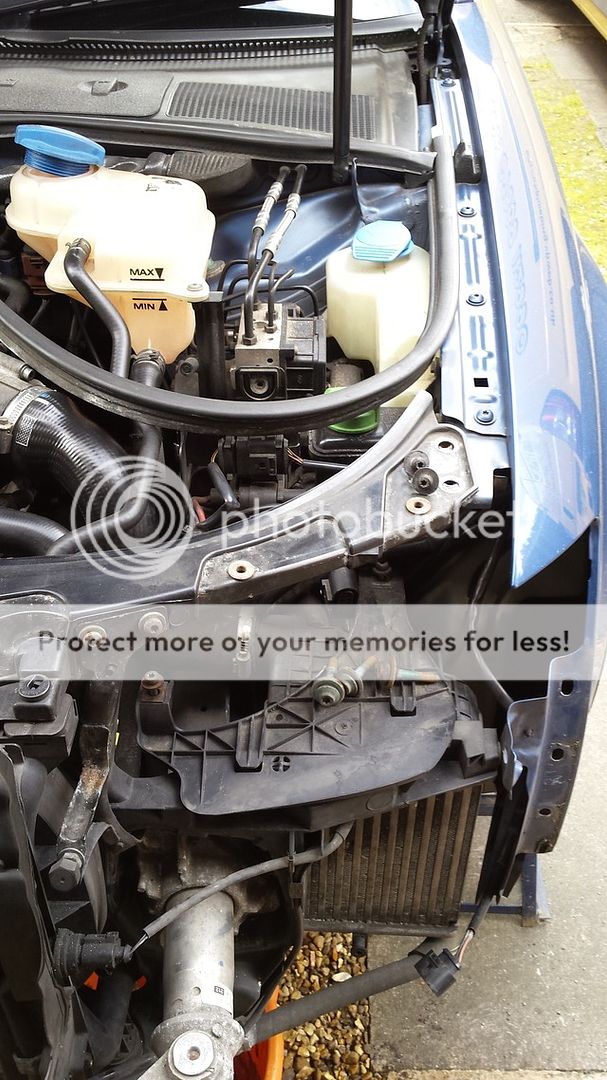
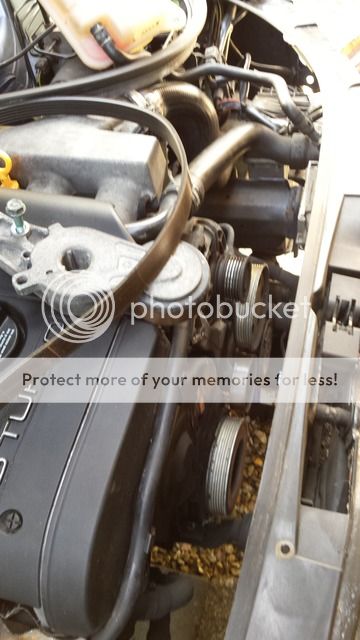
Started work in the engine bay
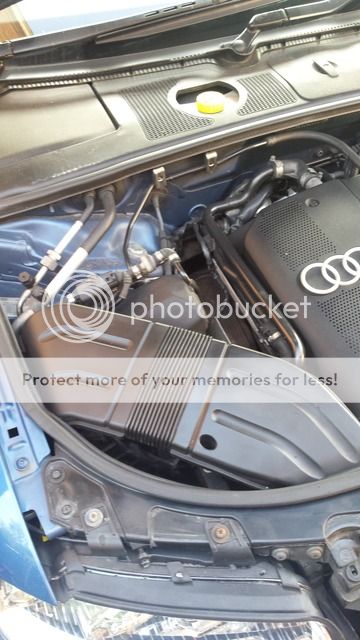
Engine cover and cold air duct off
Secondary air injection feed & return pipes and coil loom moved
Heatshield removed
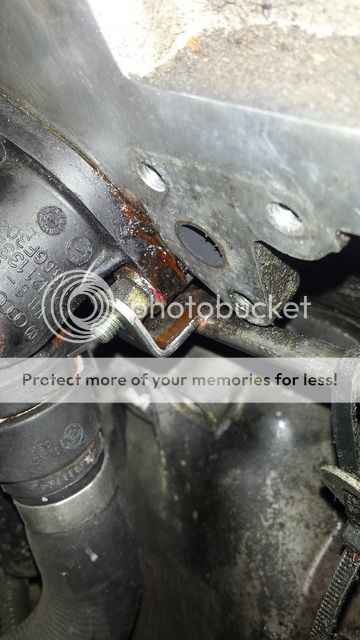
Just enough room to get an Allen key in (although don't think I would of before the engine mount renewal)

3 Allen bolts later

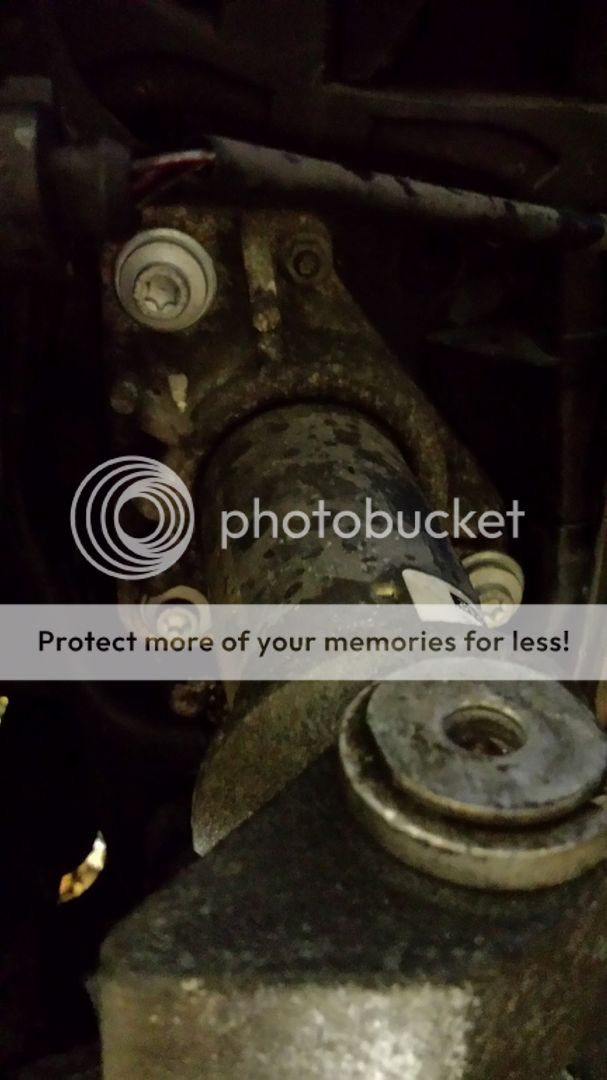
Leaving a good view and access to the offending article
The anti roll bar bush carrier nuts I ordered from TPS arrived

P/n: N90183802


The Audi had started leaving spots on the ground whenever it was sat for a while after a run. At first i thought it was another oil leak but a bit of poke around (underpan was still off from the cambelt) and I could tell everything was caked in coolant on the turbo side of the block. A bit of searching on here and Audizine came up trumps, my rear coolant flange was leaking.
So ordered one for £13 at TPS.

Started work in the engine bay

Engine cover and cold air duct off

Secondary air injection feed & return pipes and coil loom moved

Heatshield removed

Just enough room to get an Allen key in (although don't think I would of before the engine mount renewal)

3 Allen bolts later

Leaving a good view and access to the offending article

Northampton_ofn
Registered User
- Joined
- Jul 21, 2015
- Messages
- 297
- Reaction score
- 106
- Points
- 43
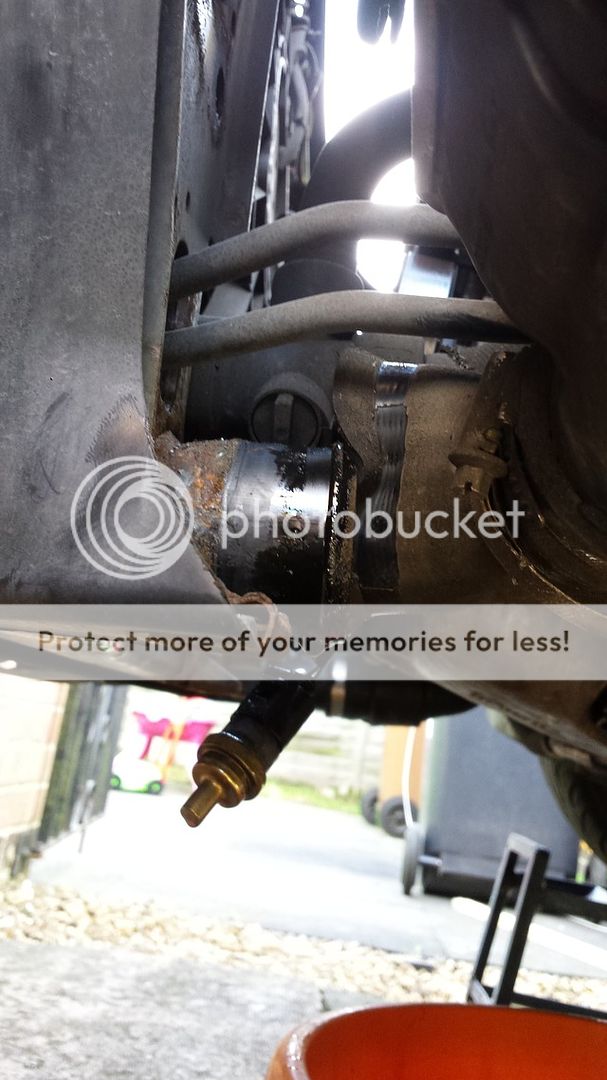
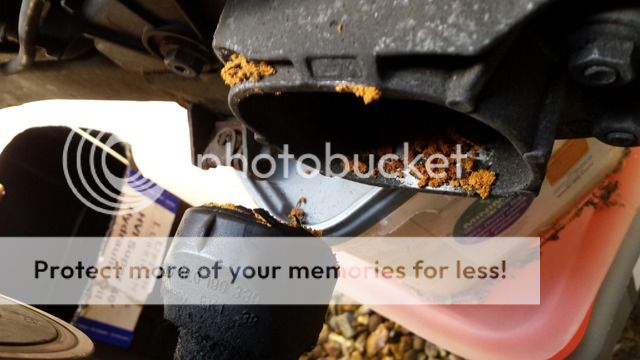
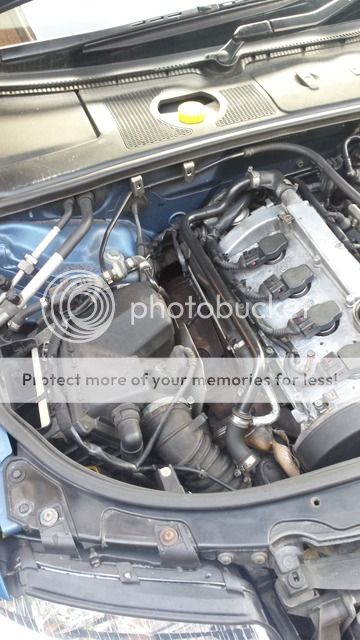
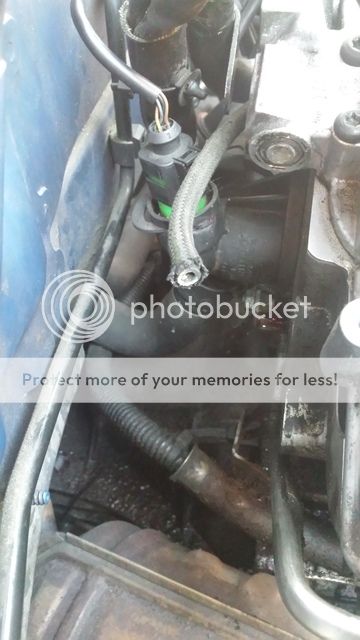
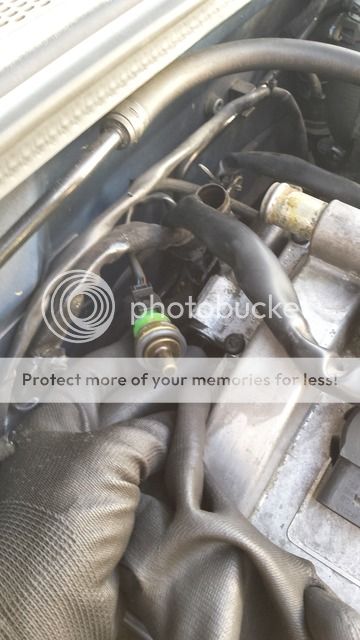
Leaking in two places
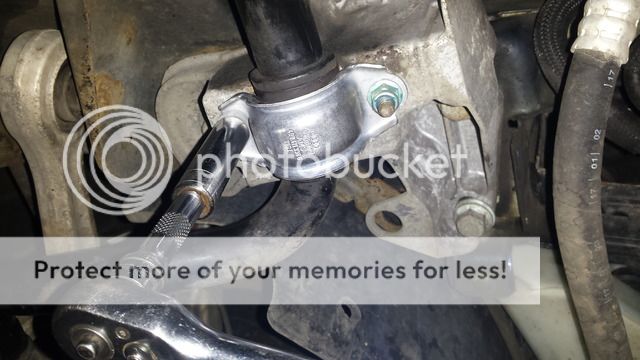
I removed the vacuum pump and adjoining vac lines for a little more access.
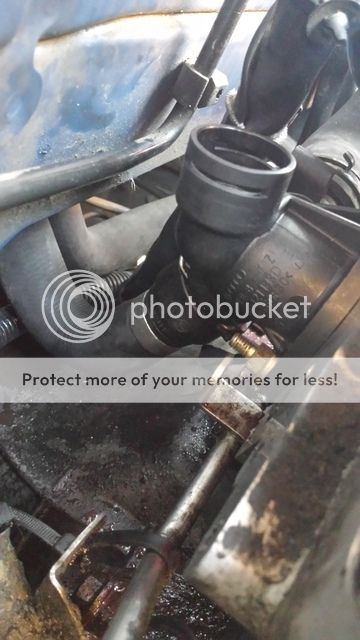
The coolant flange is held to the head by a stud and a bolt. The stud is at the bottom and has a nut securing the turbo oil feed line which you must undo first. A 10mm spanner will remove the two
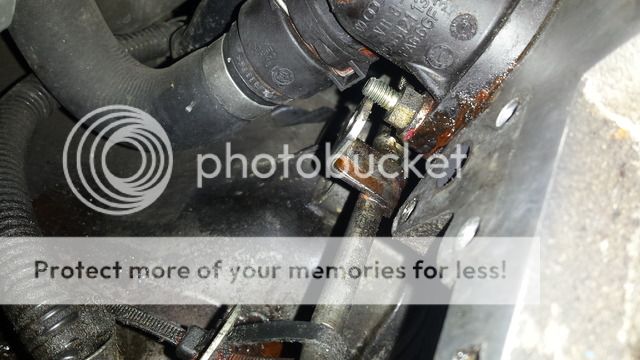

Remove the plastic tab to release the coolant sensor

Northampton_ofn
Registered User
- Joined
- Jul 21, 2015
- Messages
- 297
- Reaction score
- 106
- Points
- 43
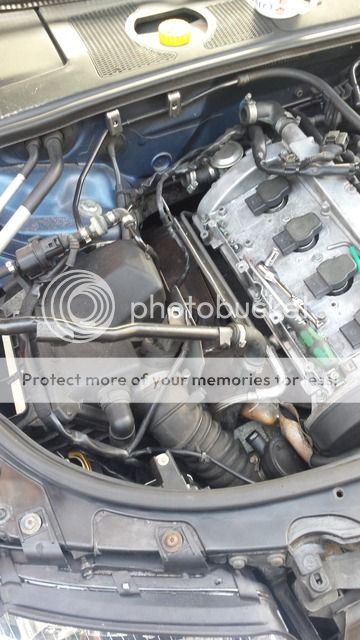
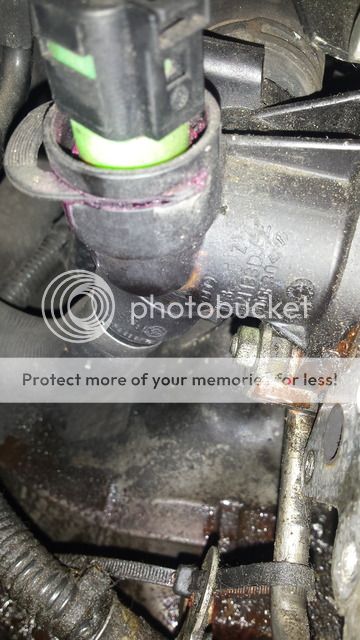
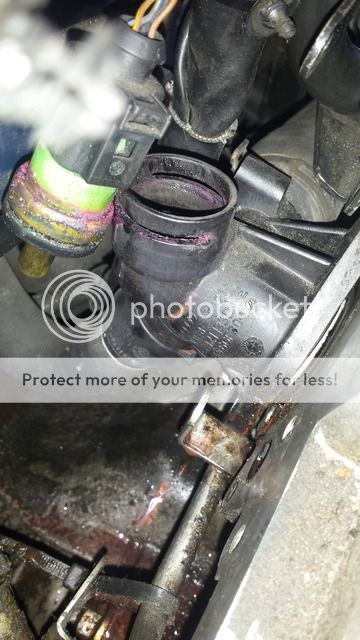
I managed to get a long flatty down the gap in the picture to release the metal clip on the heater matrix hose quick release
Rather than struggle behind the head I found it easier to remove the host clamp at the other end where it joins the black metal pipe on the inlet side and then pivot the coolant flange up
I ordered a new secondary injection valve gasket and a new o-ring for the temp sensor as you could see it leaking in previous pics

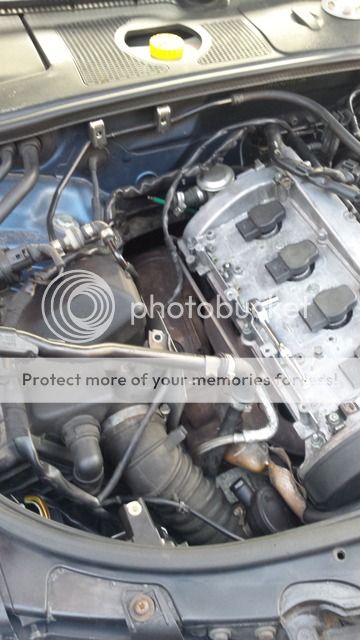
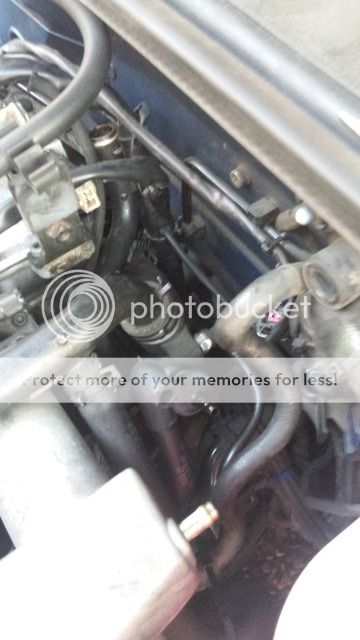
Fitted the o-ring
Gave the check valve a good clean up and fitted the gasket

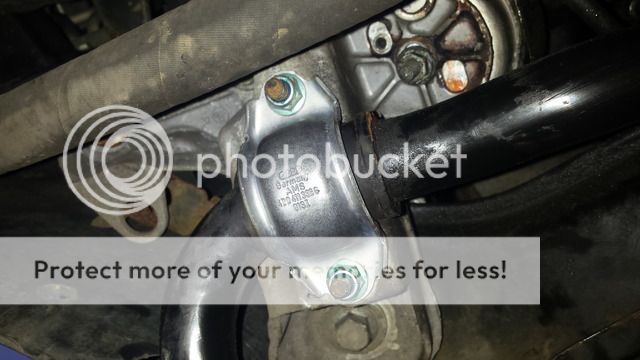
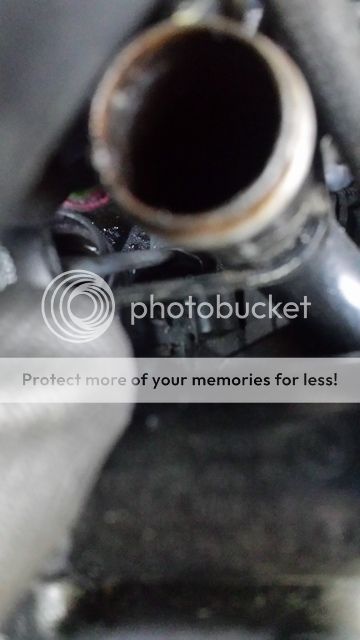
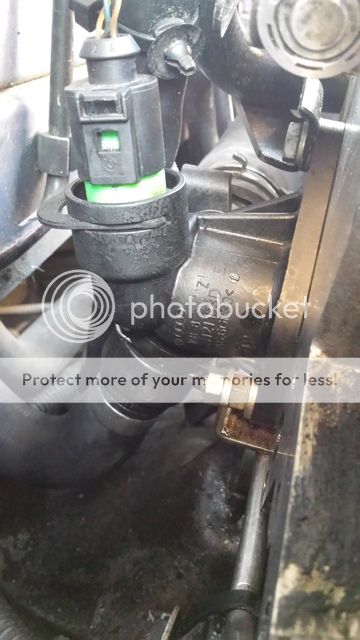
Fitted the new coolant flange to the hose from the pipe and pivoted back in to place

Fitted the quick release hose and the bolt and stud
Then the coolant sensor

Rather than struggle behind the head I found it easier to remove the host clamp at the other end where it joins the black metal pipe on the inlet side and then pivot the coolant flange up


I ordered a new secondary injection valve gasket and a new o-ring for the temp sensor as you could see it leaking in previous pics

Fitted the o-ring

Gave the check valve a good clean up and fitted the gasket

Fitted the new coolant flange to the hose from the pipe and pivoted back in to place

Fitted the quick release hose and the bolt and stud

Then the coolant sensor
