Since I've had the car in Easter this year, the drivers seat has never moved forward when lifting the lever, and although it has been a minor annoyance, I rarely have 3 or more people in the car so I've lived with it, but this weekend we decided to take a look.
The following is not a full guide, just a bit of direction for anyone with the same problem and a spare hour on their hands to fix it.
We started by disconnecting the battery as Airbags can be dangerous, so we decided not to risk it.
Then the seat was pushed as far forward as it would go to access the Torx head bolts (one on each side) on the seat rail.
The seat was then pushed all the way back, and the 2 Torx bolts were released from the front of the seat rail.
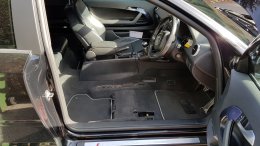
Next we tilted the seat back very carefully to reveal all the electrical wires leading to a plastic panel on the floor, which popped off easily. This revealed 3 electrical plugs which we disconnected and allowed the seat to be carefully removed from the front of the car.
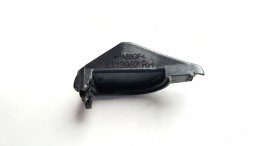
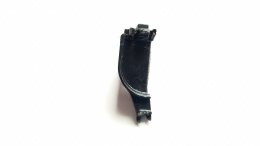
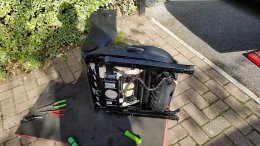
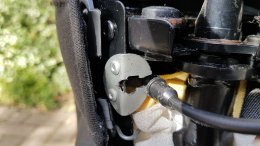
Carefully placing the seat on a protective mat, we had a look at the underside and discovered a plastic clip had broken. The clip is designed to hold the cable in place so it releases the lever at the bottom front of the seat allowing it to move forward and backwards. Knowing I was unlikely to get it from anywhere local, and seeing how badly designed it was, we thought of a way to replace it with a better and stronger method from whatever we could find in the workshop.
After a bit of head scratching we decided on a washer. We placed the washer into a vice and knocked it into a 90 degree bend before carefully cutting a section out for the cable to slide into.
We tested the cable connection would fit and decided it had room to fall out if pulled on too often, so we filed out a slightly bigger hole in the centre so the clip could be rotated 90 degrees. This allowed it to sit in the hole perfectly, but not slide back up the groove we had cut due to it being to wide.
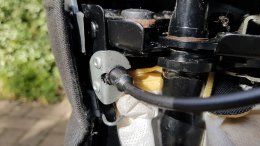
Happy with our test fit, we drilled 2 small holes through a bit of metal on the seat and riveted it in place.
We now have a working front seat and it is far stronger than it was from the factory, and probably cheaper than buying a replacement clip. We also found £1.20 under the seat, which probably covered the cost of materials and electric for the tools.
One last job was to use electrical tape to cover some of the electrical wiring which had been rubbed over the years and could have caused some issues if they had made contact with each other.
The following is not a full guide, just a bit of direction for anyone with the same problem and a spare hour on their hands to fix it.
We started by disconnecting the battery as Airbags can be dangerous, so we decided not to risk it.
Then the seat was pushed as far forward as it would go to access the Torx head bolts (one on each side) on the seat rail.
The seat was then pushed all the way back, and the 2 Torx bolts were released from the front of the seat rail.
Next we tilted the seat back very carefully to reveal all the electrical wires leading to a plastic panel on the floor, which popped off easily. This revealed 3 electrical plugs which we disconnected and allowed the seat to be carefully removed from the front of the car.
Carefully placing the seat on a protective mat, we had a look at the underside and discovered a plastic clip had broken. The clip is designed to hold the cable in place so it releases the lever at the bottom front of the seat allowing it to move forward and backwards. Knowing I was unlikely to get it from anywhere local, and seeing how badly designed it was, we thought of a way to replace it with a better and stronger method from whatever we could find in the workshop.
After a bit of head scratching we decided on a washer. We placed the washer into a vice and knocked it into a 90 degree bend before carefully cutting a section out for the cable to slide into.
We tested the cable connection would fit and decided it had room to fall out if pulled on too often, so we filed out a slightly bigger hole in the centre so the clip could be rotated 90 degrees. This allowed it to sit in the hole perfectly, but not slide back up the groove we had cut due to it being to wide.
Happy with our test fit, we drilled 2 small holes through a bit of metal on the seat and riveted it in place.
We now have a working front seat and it is far stronger than it was from the factory, and probably cheaper than buying a replacement clip. We also found £1.20 under the seat, which probably covered the cost of materials and electric for the tools.
One last job was to use electrical tape to cover some of the electrical wiring which had been rubbed over the years and could have caused some issues if they had made contact with each other.