

So I noticed a couple of cracks in oem engine cover and the front snorkel... wasn't gonna bother replacing with oem as it's a waste of time as the design in my eyes is rubbish...
I had a AS Performance one on my last S3 and thinking about it just can't justify £350 for another one . ITG , REVO and evoms are all around that price tag . Far to much for what they are tbh.
So I found a one by RAMAIR it boasted a 90mm pipe work like the AS one. Looking at it online looked like there was a few more joints than AS but other than that was exactly what I wanted . So I phoned RAMAIR up direct and spoke to Ryan Davies. What a fountain of knowledge he is when it comes to intakes. I also got a bit of flexi pipe for a little idea . Price wise it was £189 that's almost £200 cheaper than the big brands .
It arrived the next day via courier and soon as I got it opened it up straight away. First impressions where good everything looked well made and sturdy.
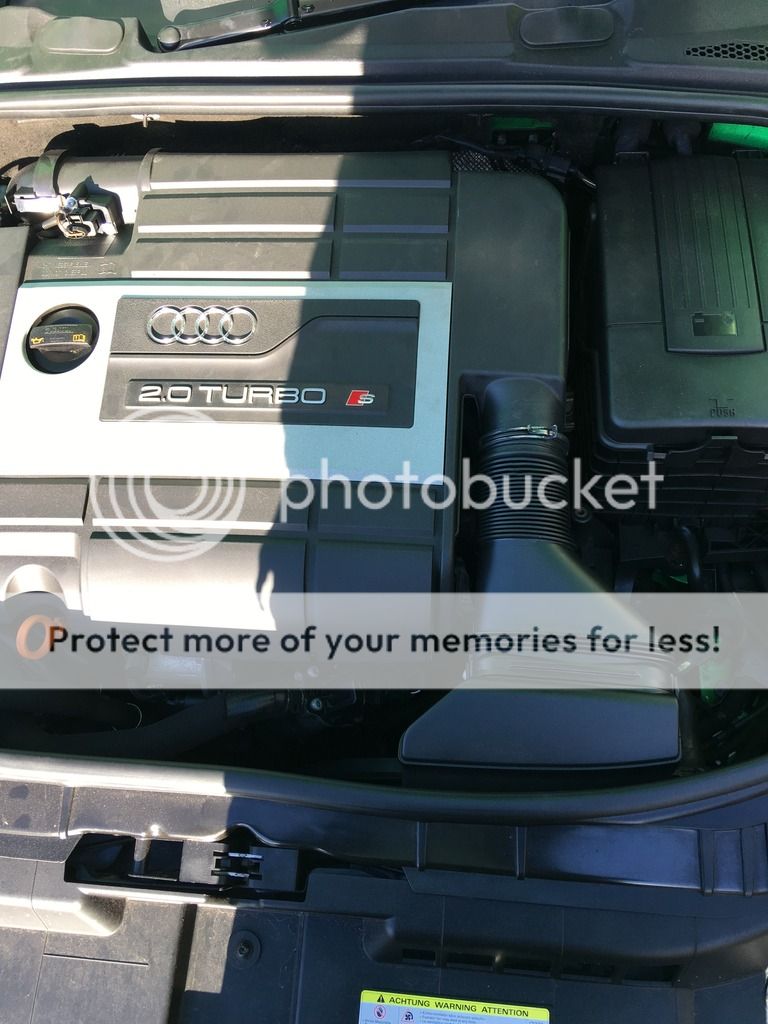
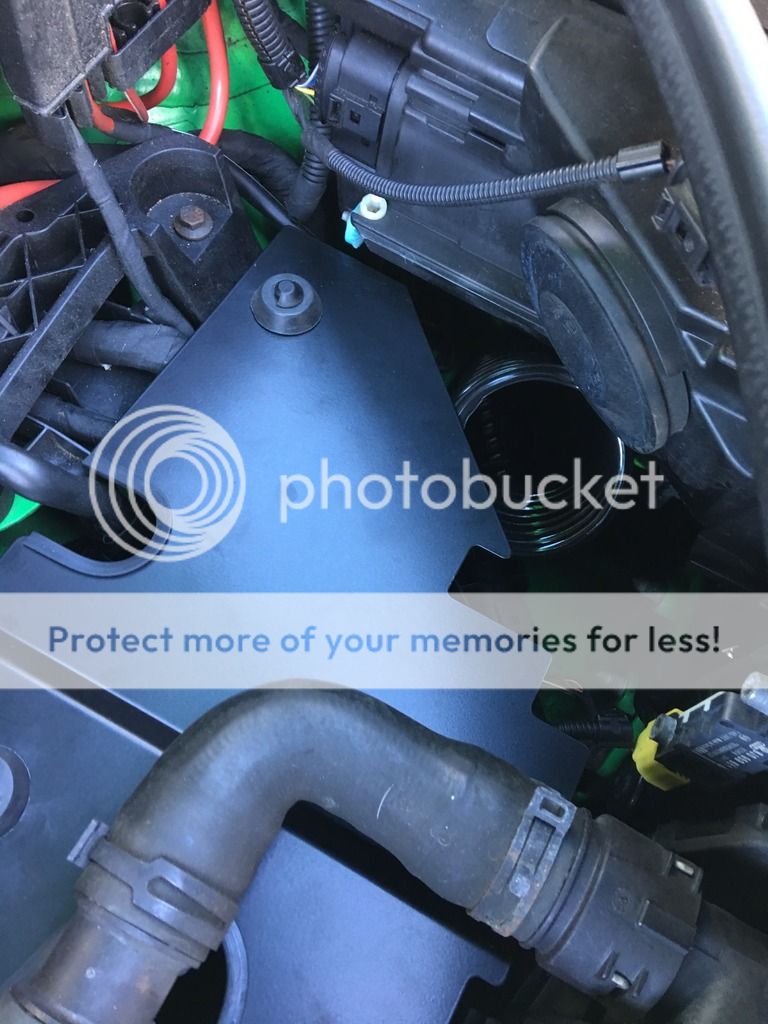
First off was to remove the standard air intake and cover which is easy as had previously done one.
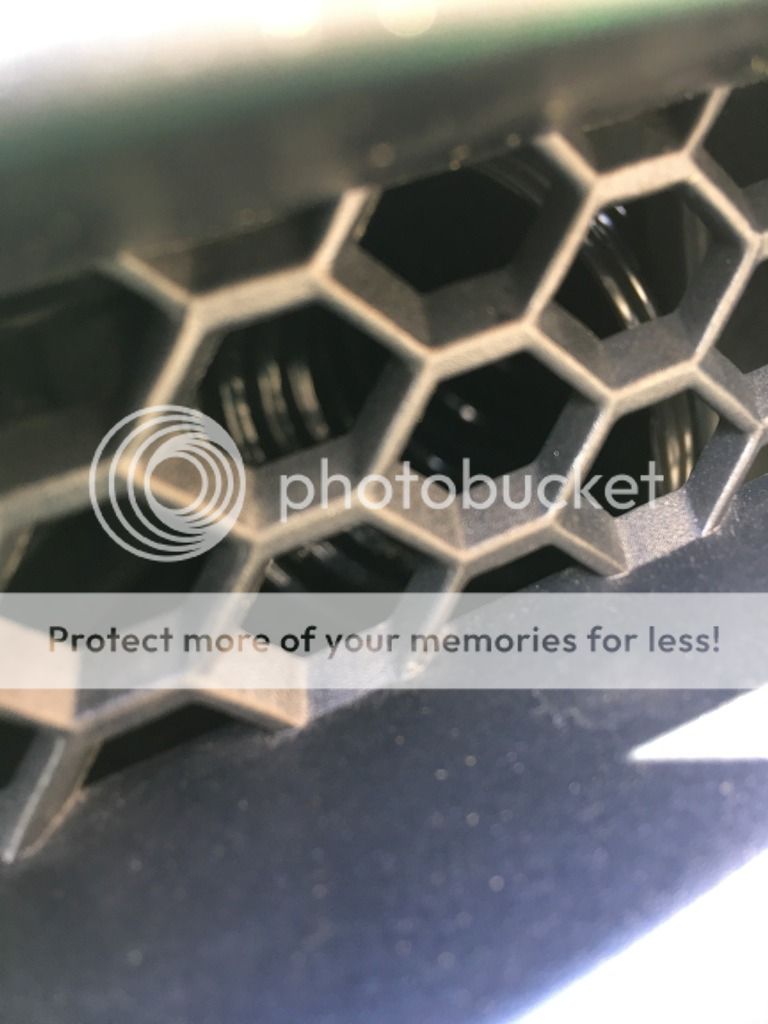
Standard oem intake
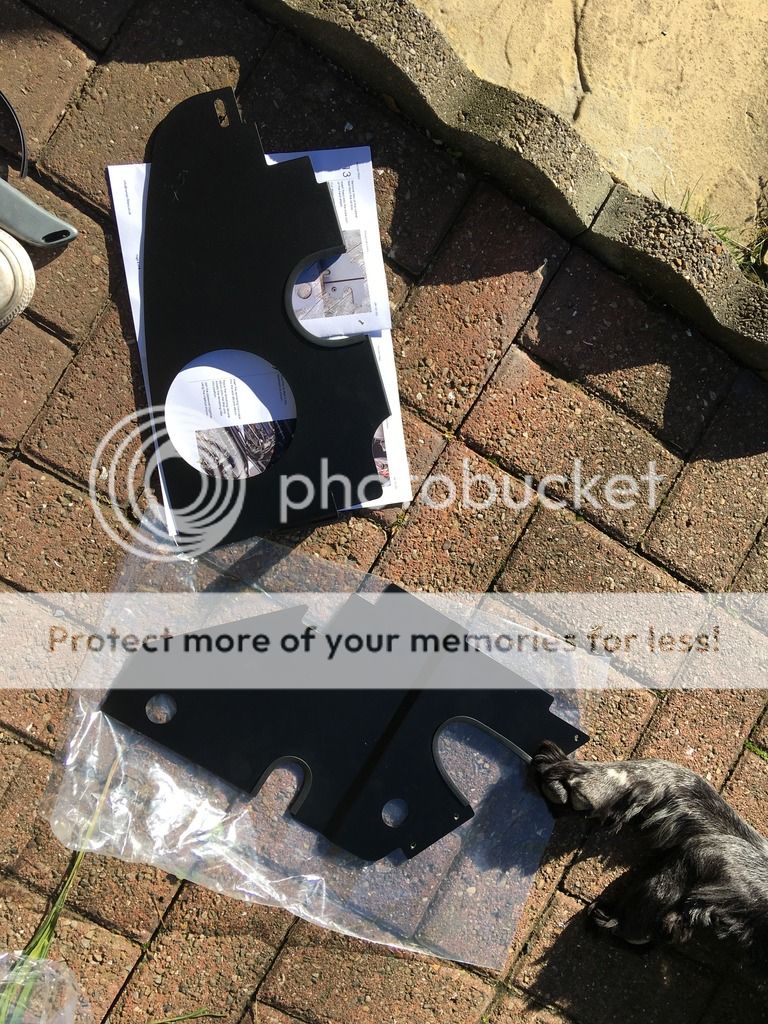
With the new intake the first job was to fit some protective edging to the heat sheilds. I have put it on the bottom one to show what's it like it has to go on top sheild aswell.
After that the rear heat shield went in. It uses the rear factory mounting points for the oem heatsheild. The cut and precision of this heatsheild is top draw .
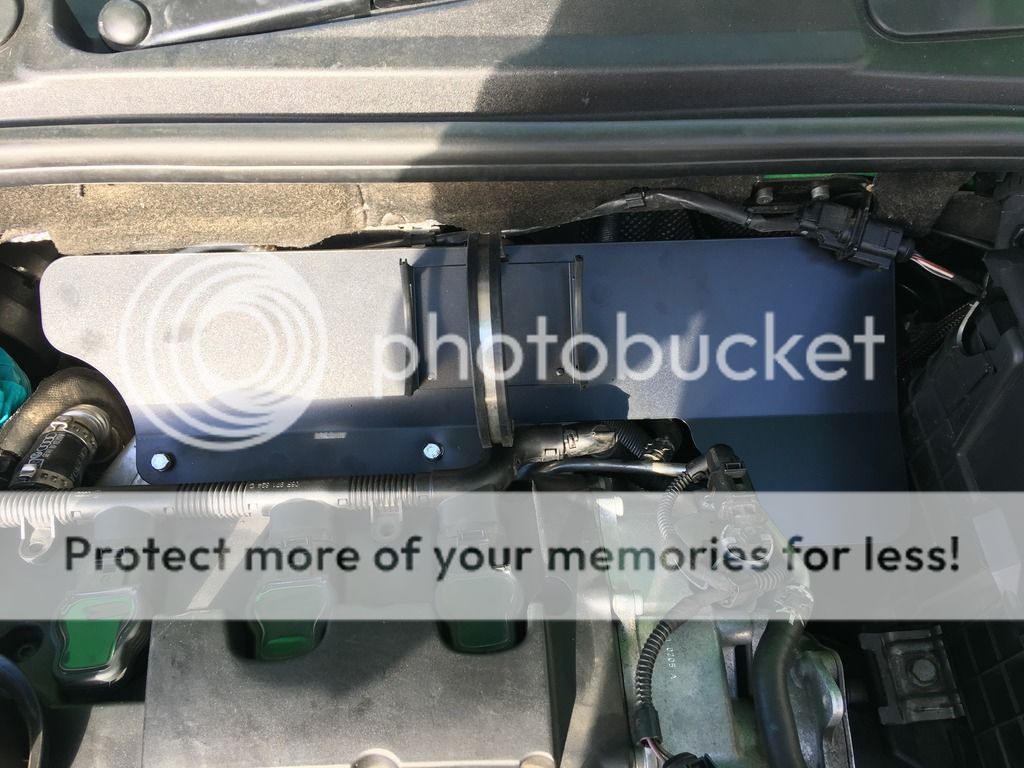
After this it was the silicone reducer onto the turbo and the first metal pipe with maf housing along with second reducer and second metal pipe. All the jubilee clips are just say nipped up and can rotate if needed. There is a steel band with a rubber protector to clamp the second metal pipe tight .

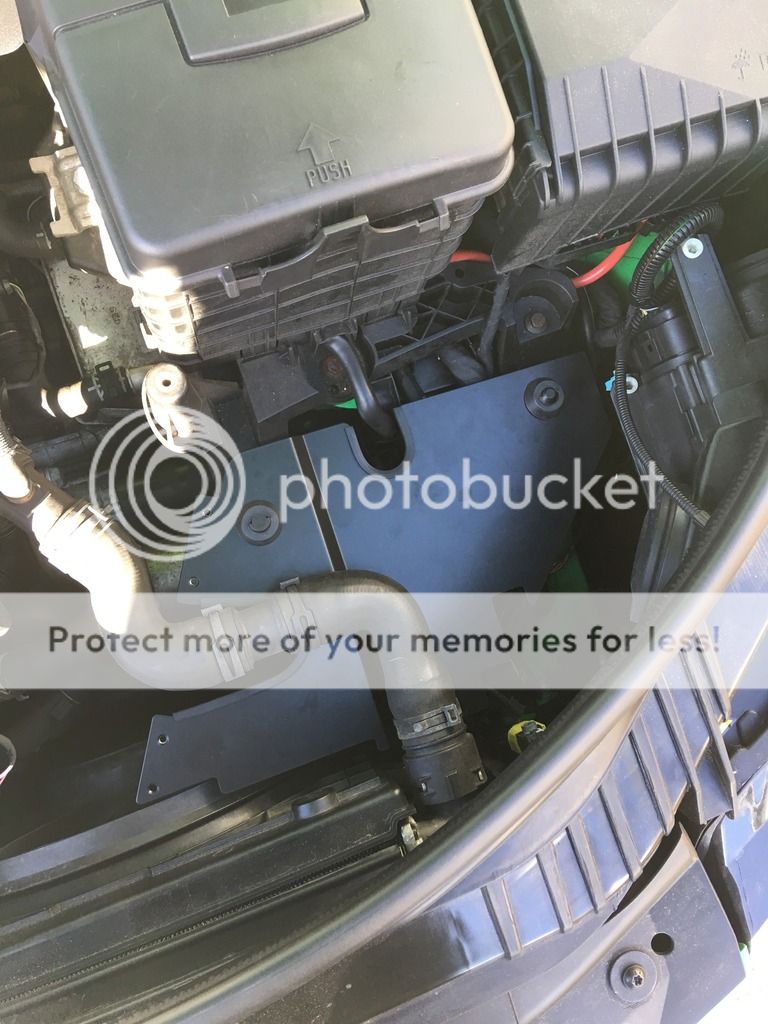
Next was the front heat shield, this is in two parts . The lower ones uses the rubber bungs from the oem engine cover to secure it on pegs infront if the battery as shown below .
Again fit if heat shield is excellent and there is even a little gap for what I was planning on doing with the flexi pipe. I just wanted more cold air hitting the filter so I came up with this...
Flexi pipe has been slided down to front lower grill and I used a cable tie around the fog light bracket to secure it .
Looks like this from the top...
Top of pipe is not fixed but is a snug fit anyways .
Next step was to fix other part of the heat shield . This uses 4 nuts and bolts with serrated washers for fixing both heat sheilds together . A bolt into the oem battery mount and a torx screw into where the oem intake was behind the front grill.

Next was to put the top elbow third metal pipe and the bottom elbow on as well as the filter . I made sure everything was facing the correct way to get at the jubilee clips.
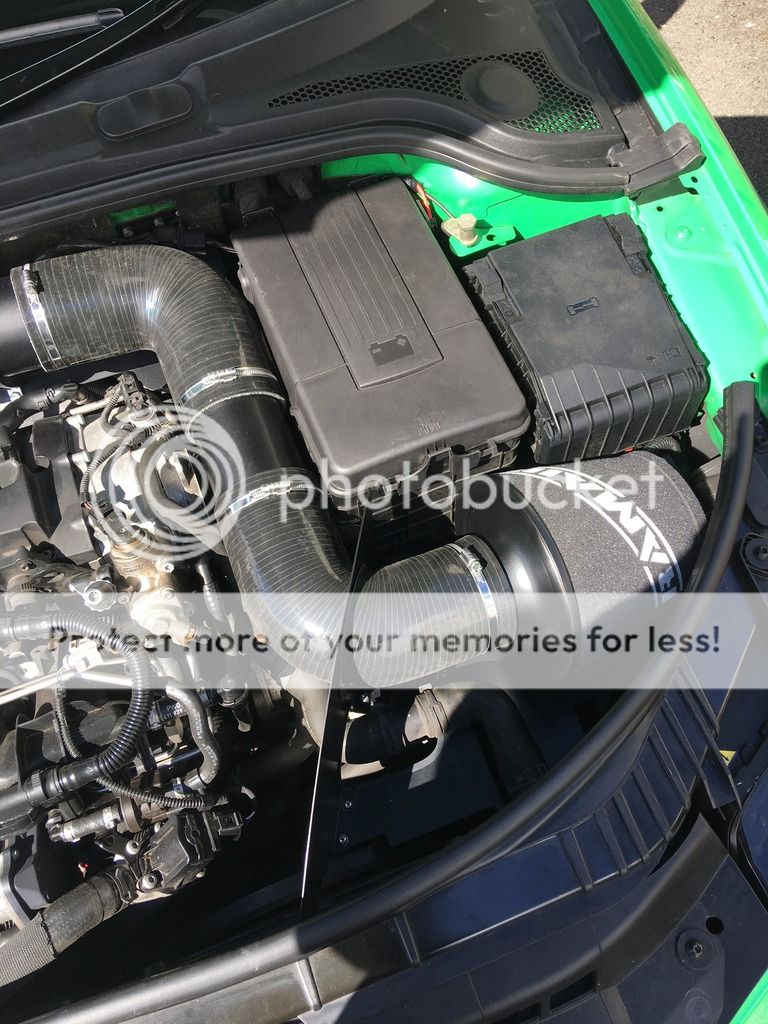
Once it was all together and rotated the way I wanted I nipped all the jubilee clips up so everything was secure .
Really happy with the fit and personally I think this is on the same level if not better than the kits that are £200 more .
Normal differences with fitting a intake . Throttle response is better and seems to spool up and pick up quicker .
All comments welcome
I had a AS Performance one on my last S3 and thinking about it just can't justify £350 for another one . ITG , REVO and evoms are all around that price tag . Far to much for what they are tbh.
So I found a one by RAMAIR it boasted a 90mm pipe work like the AS one. Looking at it online looked like there was a few more joints than AS but other than that was exactly what I wanted . So I phoned RAMAIR up direct and spoke to Ryan Davies. What a fountain of knowledge he is when it comes to intakes. I also got a bit of flexi pipe for a little idea . Price wise it was £189 that's almost £200 cheaper than the big brands .
It arrived the next day via courier and soon as I got it opened it up straight away. First impressions where good everything looked well made and sturdy.
First off was to remove the standard air intake and cover which is easy as had previously done one.
Standard oem intake
With the new intake the first job was to fit some protective edging to the heat sheilds. I have put it on the bottom one to show what's it like it has to go on top sheild aswell.
After that the rear heat shield went in. It uses the rear factory mounting points for the oem heatsheild. The cut and precision of this heatsheild is top draw .
After this it was the silicone reducer onto the turbo and the first metal pipe with maf housing along with second reducer and second metal pipe. All the jubilee clips are just say nipped up and can rotate if needed. There is a steel band with a rubber protector to clamp the second metal pipe tight .
Next was the front heat shield, this is in two parts . The lower ones uses the rubber bungs from the oem engine cover to secure it on pegs infront if the battery as shown below .
Again fit if heat shield is excellent and there is even a little gap for what I was planning on doing with the flexi pipe. I just wanted more cold air hitting the filter so I came up with this...
Flexi pipe has been slided down to front lower grill and I used a cable tie around the fog light bracket to secure it .
Looks like this from the top...
Top of pipe is not fixed but is a snug fit anyways .
Next step was to fix other part of the heat shield . This uses 4 nuts and bolts with serrated washers for fixing both heat sheilds together . A bolt into the oem battery mount and a torx screw into where the oem intake was behind the front grill.
Next was to put the top elbow third metal pipe and the bottom elbow on as well as the filter . I made sure everything was facing the correct way to get at the jubilee clips.
Once it was all together and rotated the way I wanted I nipped all the jubilee clips up so everything was secure .
Really happy with the fit and personally I think this is on the same level if not better than the kits that are £200 more .
Normal differences with fitting a intake . Throttle response is better and seems to spool up and pick up quicker .
All comments welcome

