Cam tensioner gasket problem

only real difference is VVT vs non VVT... both fit the same and functionally work the same (other than the VVT part of course)...

<tuffty/>
 
  • Like
Reactions: MPH
only real difference is VVT vs non VVT... both fit the same and functionally work the same (other than the VVT part of course)...

<tuffty/>
Hi @<tuffty/> still having probs removing cam adjuster unit, all lined up TDC wound tool down chain still tight again don't wont to take off exhaust cam if I can help it due to timing! any advice on this would be good as I am struggling to resolve this cam adjuster swap thanks as always Mark
 
Tensioner tool needs to be undone to do cam to cam properly... set top/bottom TDC, ex cam should line up... then with the the top tensioner pad extended to its highest position (you should be able to do this with the inlet cam winding back to lift it) you should then have 16 rollers between cam point and both cam indicators aligned with the marls on the cap

As long as top/bottom cam timing is fine there is no need to take the exhaust cam out... you are just trying to get cam to cam right and you only need to mess with the inlet at that point

<tuffty/>
 
  • Like
Reactions: MPH
Tensioner tool needs to be undone to do cam to cam properly... set top/bottom TDC, ex cam should line up... then with the the top tensioner pad extended to its highest position (you should be able to do this with the inlet cam winding back to lift it) you should then have 16 rollers between cam point and both cam indicators aligned with the marls on the cap

As long as top/bottom cam timing is fine there is no need to take the exhaust cam out... you are just trying to get cam to cam right and you only need to mess with the inlet at that point

<tuffty/>
My big question is is the chain tensioner supposed to be tight at tdc I have alined the cams without the tensioner tool for correct timing sorry if I'm being a pain but it's my first time at doing this.

Sent from my SM-G930F using Tapatalk
 
Ok so... assuming top/bottom timing is fine and inlet cam is out... make sure ex cam is aligned to timing mark as this will be "TDC" for cams and crank...

Using the image below as a guide, count off the 16 rollers marking 1 and 16 using something suitable like a paint pen or tipex...
Screenshot 2020 07 12 at 182820

Slot the inlet cam into the chain aligning the timing mark with the 16th roller you marked previously...

Place the inlet cam into the head, I normally do this with the tensioner 'out' (not bolted in) as its easier...

Fit two of the cam caps (I normally fit the ones marked 4 and 2)... torque bolts to spec (7/8nm from memory) and don't forget to wind the caps in a bit at a time to ensure the cam fits in straight

Check the ex cam timing mark is still aligned then undo the tensioner tool to release it...

Now wind the inlet cam back (turn towards the car from the front) to allow the tensioner and chain to rise to highest point...

If you have timed it correctly both the ex cam and inlet cam timing marks should align as well as the 16 roller marks you did previously

If they do you can fit the rest of the cam caps... don't forget the cam caps are marked 5,4,3,2 and 5 fits at the belt end of the head with 2 at the gearbox end

<tuffty/>
 
  • Like
Reactions: MPH
Sorry for my ignorance I have not removed the inlet cam due to the chain begin so taught at TDC that is where I am at! I am aware of the cam cap removal/replacement order and the 16 links etc.
 
Moving the inlet cam back should slacken the chain off

<tuffty/>
 
  • Like
Reactions: MPH
Can't recall if standard cams have flats on them to crank round so yeah... best bet is to turn anti clockwise to line inlet cam mark up then clockwise to get ex cam to line up... this should let the top section of chain go slack

Don't be tempted to turn the assembly using the cam pulley bolt... it will snap off...

<tuffty/>
 
  • Like
Reactions: danny_dj3 and MPH
Can't recall if standard cams have flats on them to crank round so yeah... best bet is to turn anti clockwise to line inlet cam mark up then clockwise to get ex cam to line up... this should let the top section of chain go slack

Don't be tempted to turn the assembly using the cam pulley bolt... it will snap off...

<tuffty/>
Many thanks that must be where I was going wrong but I will not touch the cam Bolt

Sent from my SM-G930F using Tapatalk
 
:icon thumright:BIG SHOUT OUT :thumbs up: to @<tuffty/> and @danny_dj3 Gentlemen you have both helped me through this process a :chuncky: BIG THANKS :chuncky: to you both Tuffty for your patience and knowledge and Danny for the donation of the part and the telephone assistance that you gave the switch is complete :whistle2::whistle2: could not have done without you both not forgetting Dave my extra set of hands thank you all for your support chaps.
 
  • Like
Reactions: s3mad_dude, danny_dj3, Asim1 and 1 other person
it can be a bit tricky to be fair and if you are not sure what the 'norm' is its also a little daunting but I would say its more fiddly than difficult...

Good work though... got there in the end :)

<tuffty/>
 
  • Like
Reactions: Asim1 and MPH
yeah, its a git of a job especially if the exhaust cam is still in. you've done well to get that sorted mate!
 
  • Like
Reactions: MPH
it can be a bit tricky to be fair and if you are not sure what the 'norm' is its also a little daunting but I would say its more fiddly than difficult...

Good work though... got there in the end :)

<tuffty/>
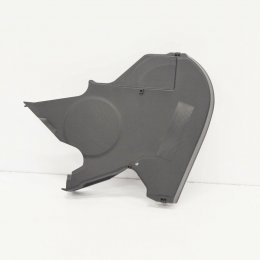
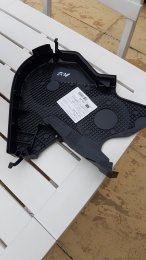
Good evening your tufftyness any tips for reinstalling 06A109108K upper toothed belt guard engine cover on any advice would be nice thanks in advance as it was a bit of a wiggle to get off Mark.
 

Attachments

  • s-l1600.jpg
    s-l1600.jpg
    113.6 KB · Views: 229
  • s-l1600 (1).jpg
    s-l1600 (1).jpg
    139.8 KB · Views: 216
Its as tight as a nats chuff so you have to wiggle it in... they normally break off a bit on removal so cleaning that up makes them easier to fit but you just have to jiggle it about

<tuffty/>
 
  • Like
Reactions: MPH
Its as tight as a nats chuff so you have to wiggle it in... they normally break off a bit on removal so cleaning that up makes them easier to fit but you just have to jiggle it about

<tuffty/>
:thumbs up:Thanks, mate just thought there may have been a method of wiggling I have given it a thorough degreasing etc already has a small crack and some scrapes from previous attempts to fit it in previous belt changes.
 
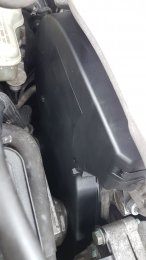
IMG 20200723 WA0000 Had to wait for a new one from @creweaudiparts as the old one had several cracks from previous people and decided to snap on reinstall but I am happy to say new one went on with difficulty and many wiggles :wtf: had the old one to you as a crash test dummy :thumbs up: just waiting for some nuts and bolts and I can finish off the engine bay.
 

Attachments

  • IMG-20200723-WA0002.jpg
    IMG-20200723-WA0002.jpg
    976.6 KB · Views: 201
  • Like
Reactions: creweaudiparts, Asim1 and danny_dj3
i think my cam tensioner has kicked the bucket, the AGN is sounding like a diesel with a heavy rattle on the chain side , what tools is required to replace it ?
 
thanks the issue with international purchases are that my aliexpress orders from January only arrived last month, there are massive delays with the postal system here. im lucky i purchased the agu earlier this year atleast i can drive that in the interim
 
  • Like
Reactions: MPH
purchased a patent part yesterday (selco brand) for a reasonable R2300 which is about 104,28 Pounds, because Audi SA wanted 680,30 pounds which is the price of a second hand S3 engine here in SA.

Hopefully the part is 100% correct, now i just need the tensioner tool

IMG 20200908 070454


IMG 20200908 070516
 
  • Like
Reactions: MPH
purchased a patent part yesterday (selco brand) for a reasonable R2300 which is about 104,28 Pounds, because Audi SA wanted 680,30 pounds which is the price of a second hand S3 engine here in SA.

Hopefully the part is 100% correct, now i just need the tensioner tool

View attachment 209120

View attachment 209121
The part appears to look connect keep me updated

Sent from Syknet Global Defence Network
 
  • Like
Reactions: Dohcwp
The part appears to look connect keep me updated

Sent from Syknet Global Defence Network
Make sure you check the chain for slack take a few pics you also need some good quality sealant and a gasket metal and rubber also you need to change the engine cover gasket you will require a torque wrench

Sent from Syknet Global Defence Network
 
Last edited:
Make sure you check the chain for slack take a few pics you also need some good quality sealant and a gasket metal and rubber also you need to change the engine cover gasket you will require a torque wrench

Sent from Syknet Global Defence Network
You also need a 12 point socket and bar to crank the engine over manually a couple of times inlet manifold gasket throttle body gasket

Sent from Syknet Global Defence Network