Evoms CAI - on and loving it!

MartayMcFly

Booooooost
VCDS Map User
Gold Supporter
Joined
Feb 17, 2009
Messages
2,774
Reaction score
376
Points
83
Location
Aberdeen
Today I finally got around to fitting my intake. I'd read that it was a half-hour job, but knew better than to expect I could match that. After reading the instructions over and over (despite them being for a MkV Golf) I was happy I knew what had to be done and I had all the tools I'd need.

Before...
640x480P8180001-1.jpg


Bits I stuck in (I know the tape could be neater, bends are hard!).
640x480P8180002-1.jpg

640x480P8180006.jpg


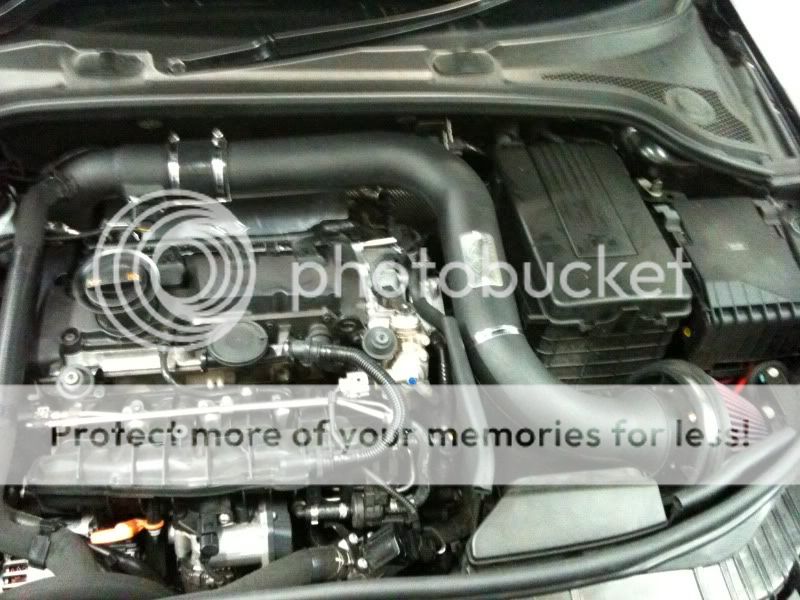
Engine bay prepped and waiting. Taking the cover off was a bit nerve-wracking, but I just wriggled it about until the first clip came out and then it was a doddle.
640x480P8180003-1.jpg


640x480P8180005-1.jpg


This was the biggest head-ache. It took forever to get the 90degree section to fit onto this little **** (eventually got a jubilee on it instead of the spring clamp that was on it originally). S3 engines apparently have a lot tighter access than Golfs.
640x480P8180004.jpg


But I got there in the end... now I need to either trim down the cover, or get my hand on a custom one. Also, didn't have the screws for fitting the heat-shield, so it'll have to wait for another day... might even leave it off until I see some heat-soak issues show their face.
640x480P8180007-1.jpg


I drove home in 2/3rd gear constantly spooling up the turbo and then lifting off for a much more pronounced, but not too loud, whoosh from under the bonnet. Very happy with the results, and eager to get the Milltek on for an aural double team!
 
Last edited:
Nice one, Martay! That looks ace, bet you can't get the grin off your face now!! :wub: x
 
Looks cracking mart!! Get a neuspeed carbon cover on there and it'll look the dogs..
 
Really happy with it, and a huge thanks to you Chris (quattro1981) and your father-in-law. Thinking about getting another standard cover and trimming it down. Like the look of the 2.0 TFSI off an A3 too, but not sure of the fit.
 
No probs mate.. Glad you've got it installed, just the exhaust now! Is the a3 cover different to the s3 one then?
 
Just re-read that cos it looks very different to mine, and it's the TSI cover, not the TFSI one, does look nice though in that pic...
Err:think: now I've confused myself..! Lol either way it looks smart!
 
Last edited:
Oh yeah... didn't read that bit. Guess it's from the newer TFSI then, so even less likely to fit. Pretty sure I'll give trimming a standard S3 cover a go, seems like the most straight forward option.
 
Am I meant to put the scoop bit back on, the bit that attaches to the front edge of the engine bay? Just noticed it says to put it back in the instructions... oops.
 
did you get a rubber bit with the kit. maybe 6 inches long? why put the scoop bit back on?
 
Last edited:
Rubber bit? Could you be more specific? Shape? Function maybe? I got it second hand, so might not have all the bits but pretty sure I do, doesn't seem to be anything missing apart from the heat shield screws (they're probably still rolling around the box it was all packed in).

I wasn't sure why you'd need it put back on either, and wasn't still referring to the guide by that point. It looks a bit rough without it though.
 
Just a question really. But was aimed at the forge heat shield really. l do suppose they are much the same. The heat sheild l fitted squeeled like hell till l found out l forgot to fit the rubber bit. Goes between the sheild and bulk head. Thinking about it, my twintake didnt come with a heat shield.
 
It's the Evoms heat shield I have, not Forge. And no, no rubber bit to stop squeaking (though I am considering using rubber washers to stop any vibration/rattle).
 
My heat shield doesn't rattle at all... i fitted the scoop because that's what the instructions said to do.. :icon_thumright:
 
Been a while coming, but finally got around to trimming my spare engine cover (thanks brough) and got it painted/fitted a couple of weeks ago. I should probably have taken some "during photos" but didn't, so tough (and sorry). The cutting took a while to do as I was just using a pair of hack-saws after realising that metal blades on a dremel just melt the plastic, and don't leave a very clean cut. Could probably have nipped round to B&Q for the right attachment, but didn't.

Anyway, I took the whole thing apart (take off the air scoop, unscrew the rear section, take out the air filter, remove the front panel and detach the 4-rings and S3 logo from it), then figured out where to make my cuts. The front right edge is pretty obvious, but where to take the rear edge in to is a bit more try-and-see, trial and error. Decided to remove the top 'bars' on the cover, and meet the left insert bit just under where the old MAF plugged in.

Once I had (very roughly) cut the back section to match, and had decided to leave one floppy mount under the CAI, I went to Halfords and picked up a can of Flexible Vinyl paint in "dark gray" to tidy up the slightly stained front panel. I used a soldering iron and a small file to remove the S3 badge and 4-rings, then put the to one side and started trying to mask the "2.0 Turbo" bit, but failed enough times to just spray over it. I might try and put a top coat of silver paint along the raised lettering if I ever get round to cleaning up the cuts, but I'm leaving it as is for now.

All of the cuts could do with a bit more time with a file to even them up, and round off the corners too, but since it's taken me about 6 months to get round to the cutting, I wouldn't hold your breath for the final product. Anyway, here's what I ended up with.

Before, for reference
P8180001640x480.jpg


The reason I needed the cover back on
P8180007640x480.jpg


The (almost) finished product
P3160179640x480.jpg


P3160181640x480.jpg


P3160180640x480.jpg


I'm not sure what part of the turbo loop that is that used to run down the left hand edge of the cover, and meet the down-turn of the intake, but it is now tucked underneath the cover. I'm pretty sure the slightly different connection to the EVOMS unit means it would have to take too sharp a turn at the back end to meet the intake if it still ran down the outside edge of the cover. Oh well.
 
  • Like
Reactions: Paullie
Hi-jacking the thread sorry but where do you get the heat wrap from ?,the cover looks a nice job by the way
 
Excellent job Martay! Looks very at home there and much better than most of the aftermarket engine cover solutions there are available. Top job, Dude. :wub: xx
 
Hi-jacking the thread sorry but where do you get the heat wrap from ?,the cover looks a nice job by the way

Another job I should have spent more time on, and I should have focused the tape on the up-turn bit, not towards the cone... live and learn.

Um... link... I'll see if I can find it.

EDIT: success - Reflect-A-Gold tape from JJC Race & Rally. I went for the 1.5", 30ft roll and it was plenty (maybe a foot spare after a couple of re-dos)

Design Engineering Reflect-A-Gold
 
Last edited:

Similar threads

Replies
7
Views
1K
Replies
12
Views
2K
Replies
2
Views
657
Replies
18
Views
1K