thought I would do a quick write up for the iabed uprated rear main crankshaft oil seal as no one seems to have done on the ea113 engine and have been asked lots to do a write up when I next did one
it is also the same to fit the standard genuine seal except not putting sealant on the face that contacts the block as it has a rubber seal -
But this is known to fall so I opted for the iabed one from AKS tuning.
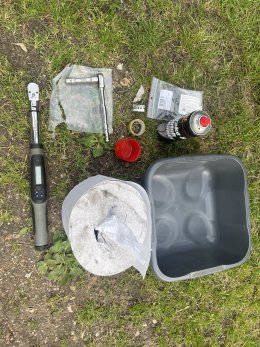
Tools needed-
genuine or iabed rear main seal,
10mm socket,
Torque wrench,
Lots of blue roll,
Brake cleaner,
Bowl for oil,
Durko or 3 bond sump gasket sealant,
Stanley blade,
Electrical tape
If uprated seal… vwag special tool- part number in pics on baggy
everything used is in pic
iabed seal from AKS tuning
On their website I have now got the owner to add the sealant and fitting tool to the bottom of the item in things you may also need so easily obtainable all from them.

So start by removing subframe, gearbox and if applicable transfer box
Remove clutch cover and flywheel which Is already on here I’m sure
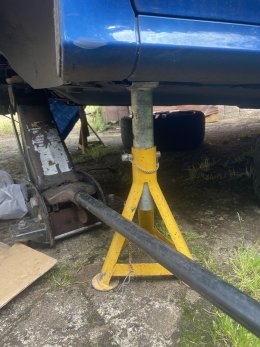
once there, raise the car one more notch on the axle stand than other side to tip excess oil away from flange
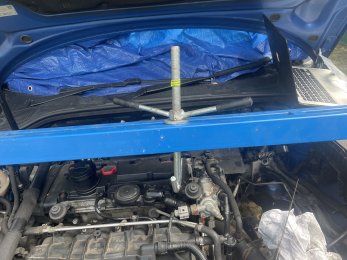
Then tape the brace bar at the position angle that the gearbox came off at and raise till engine is level

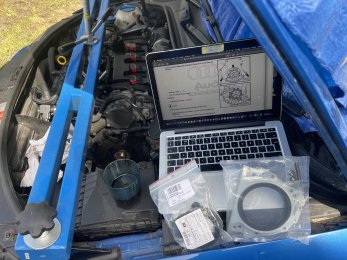
get all your bits together and manual ready to go
Remove the backing plate by just un- hooking from the left and right gearbox dowels and just slide upwards

Now get a screwdriver and gently pry the old seal off from the bottom left and right- it’s the rms dowels this time you are pulling the seal off from

Then gently pull seal away making sure that nothing gets inside the gap into the engine as this will clog the oil pick up


Once removed, use a rag to stop anything from going in the engine until at the bottom and clean properly with a blade until fully clean

also use rag round the top of crankshaft

To further stop debris… a light smearing of oil on the surface you are cleaning with blade helps it stick to blade and always curve blade away from any gaps as you work your way down

As rag has to be removed for the last part
Then clean the sump face also away from hole always

Don’t forget about the sump bolt holes

Clean rust off the back of crankshaft without damaging the remember a light oiling will hold the crud on the blade rather than sending it everywhere

Then use brake cleaner on all the faces but not directly as it will end up in the sump / oil.
I cleaned right from top to bottom so I can see any potential leaks and pin point just in case
Once cleaned, it should look like this or better


I then also cleaned up the sump pan face to see any possible leaks and pin point just in case


I then thought I would clean the backing plate both sides while there

Then spray some brake cleaner in the lid and chuck the bolts in , let them soak for a bit and a bit of a shake and tip out onto a rag and rub off excess fluid until dry and not oily anymore


The two seals side by side from the rear - as there is not one picture of the rear of the iabed seal before I purchased and it also shows on original seal where to put the sealant bead on mating face (not if using genuine seal)
The area that the horseshoe rubber seal is

Although it says not to in the genuine Audi manual, I put a very light amount of oil on the seal face that contacts the crankshaft
- not the mating faces and don’t get any on mating faces whatsoever
I then brake cleaned the mating face to block and to sump on new seal
Using the oil filler cap for oil and wipe dry again so just residual left

Then get the instillation tool and carefully slide on to seal making sure both sides are not pinched in any way


From now, only hold seal on the edge tabs so the mating faces aren’t contaminated
Stop at this point and give up… no just joking have a cup of tea/cigarette and wash hands as once sealant is applied, you have 5 mins to finish
Get torque wrench ready, get socket ready and lots of rag on hand
when ready, cut the sealant (durko) etc to 2mm squeeze a bit out on tissue to get used to perfect beading… and start by applying to the two edge faces of block to sump

then apply to base of seal a small amount to seal to sump

wiping excess away from inside edges as to not over ooze into crank case and block pickup etc
And if using iabed seal also apply a thin seal around the edges where the standard rubber horseshoe seal would be and on inside of bolt holes
Once again not too much to over ooze inside and clean off any excess also.
i cleaned up better after pic but you have to work fast so struggled to take pics at this point properly

Gently fit the seal onto crankshaft square and slowly push to contact the mating face of block locking onto locating dowels either side
sorry I had to move quick so couldn’t take many pics
Hand screw in bolts in increments on block face till nipped up to about 5nm or less
if iabed seal - wind studs into sump all the way
then slowly start on left side bolt working round to right taking to about 10nm
Then the same to 13nm
Then the same to 15nm final torque
then the sump bolts to 15nm if genuine seal
Or sump nuts to15nm if iabed seal

It should look like this when fitted

Then re fit the backing plate by hooking onto the top tab of seal and hooking onto gearbox dowels either side..
No screws or bolts

With it all finished, I would probably wait for 24hrs to cure before dropping car back level on axle stands and don’t forget to lower brace bar back down to correct angle to put gearbox back on


enjoy a cup of tea before (sighhhh) putting flywheel, clutch, gearbox, transfer box, prop, steering rack, suspension, subframe etc back on.
I chose to rebuild and replace everything while there - see my other write ups for those bits if you needed.
I will post the Audi manual for this job also in next comment
And don’t forget if using genuine seal, it should come with the instillation tool already fitted
hope it helps people as, like I said, there is no write up on these that I could find other than the diesel one with crankshaft position sensor and is off the car with sump off -
and definitely no write up for the iabed uprated one.
nb/ I am doing balance shaft delete soon so sump will be off then and pick-up will be changed as it always should when sump is off so wasn’t worried about excess sealant as I wanted no leaks.
Audi also says not to remove sump but it probably won’t be a bad idea if you have not done the pickup
also a point to note… the AKS imbed seal can be re used if cleaned up and the seal flange isn’t damaged. So for future rebuilds, to fit new bottom end bearings, crank removal etc it is a good purchase when doing a clutch
that’s all from me
it is also the same to fit the standard genuine seal except not putting sealant on the face that contacts the block as it has a rubber seal -
But this is known to fall so I opted for the iabed one from AKS tuning.
Tools needed-
genuine or iabed rear main seal,
10mm socket,
Torque wrench,
Lots of blue roll,
Brake cleaner,
Bowl for oil,
Durko or 3 bond sump gasket sealant,
Stanley blade,
Electrical tape
If uprated seal… vwag special tool- part number in pics on baggy
everything used is in pic
iabed seal from AKS tuning
On their website I have now got the owner to add the sealant and fitting tool to the bottom of the item in things you may also need so easily obtainable all from them.

So start by removing subframe, gearbox and if applicable transfer box
Remove clutch cover and flywheel which Is already on here I’m sure
once there, raise the car one more notch on the axle stand than other side to tip excess oil away from flange

Then tape the brace bar at the position angle that the gearbox came off at and raise till engine is level

get all your bits together and manual ready to go

Remove the backing plate by just un- hooking from the left and right gearbox dowels and just slide upwards
Now get a screwdriver and gently pry the old seal off from the bottom left and right- it’s the rms dowels this time you are pulling the seal off from
Then gently pull seal away making sure that nothing gets inside the gap into the engine as this will clog the oil pick up
Once removed, use a rag to stop anything from going in the engine until at the bottom and clean properly with a blade until fully clean
also use rag round the top of crankshaft
To further stop debris… a light smearing of oil on the surface you are cleaning with blade helps it stick to blade and always curve blade away from any gaps as you work your way down
As rag has to be removed for the last part
Then clean the sump face also away from hole always
Don’t forget about the sump bolt holes
Clean rust off the back of crankshaft without damaging the remember a light oiling will hold the crud on the blade rather than sending it everywhere
Then use brake cleaner on all the faces but not directly as it will end up in the sump / oil.
I cleaned right from top to bottom so I can see any potential leaks and pin point just in case
Once cleaned, it should look like this or better
I then also cleaned up the sump pan face to see any possible leaks and pin point just in case
I then thought I would clean the backing plate both sides while there
Then spray some brake cleaner in the lid and chuck the bolts in , let them soak for a bit and a bit of a shake and tip out onto a rag and rub off excess fluid until dry and not oily anymore
The two seals side by side from the rear - as there is not one picture of the rear of the iabed seal before I purchased and it also shows on original seal where to put the sealant bead on mating face (not if using genuine seal)
The area that the horseshoe rubber seal is
Although it says not to in the genuine Audi manual, I put a very light amount of oil on the seal face that contacts the crankshaft
- not the mating faces and don’t get any on mating faces whatsoever
I then brake cleaned the mating face to block and to sump on new seal
Using the oil filler cap for oil and wipe dry again so just residual left
Then get the instillation tool and carefully slide on to seal making sure both sides are not pinched in any way
From now, only hold seal on the edge tabs so the mating faces aren’t contaminated
Stop at this point and give up… no just joking have a cup of tea/cigarette and wash hands as once sealant is applied, you have 5 mins to finish
Get torque wrench ready, get socket ready and lots of rag on hand
when ready, cut the sealant (durko) etc to 2mm squeeze a bit out on tissue to get used to perfect beading… and start by applying to the two edge faces of block to sump
then apply to base of seal a small amount to seal to sump
wiping excess away from inside edges as to not over ooze into crank case and block pickup etc
And if using iabed seal also apply a thin seal around the edges where the standard rubber horseshoe seal would be and on inside of bolt holes
Once again not too much to over ooze inside and clean off any excess also.
i cleaned up better after pic but you have to work fast so struggled to take pics at this point properly
Gently fit the seal onto crankshaft square and slowly push to contact the mating face of block locking onto locating dowels either side
sorry I had to move quick so couldn’t take many pics
Hand screw in bolts in increments on block face till nipped up to about 5nm or less
if iabed seal - wind studs into sump all the way
then slowly start on left side bolt working round to right taking to about 10nm
Then the same to 13nm
Then the same to 15nm final torque
then the sump bolts to 15nm if genuine seal
Or sump nuts to15nm if iabed seal
It should look like this when fitted
Then re fit the backing plate by hooking onto the top tab of seal and hooking onto gearbox dowels either side..
No screws or bolts
With it all finished, I would probably wait for 24hrs to cure before dropping car back level on axle stands and don’t forget to lower brace bar back down to correct angle to put gearbox back on
enjoy a cup of tea before (sighhhh) putting flywheel, clutch, gearbox, transfer box, prop, steering rack, suspension, subframe etc back on.
I chose to rebuild and replace everything while there - see my other write ups for those bits if you needed.
I will post the Audi manual for this job also in next comment
And don’t forget if using genuine seal, it should come with the instillation tool already fitted
hope it helps people as, like I said, there is no write up on these that I could find other than the diesel one with crankshaft position sensor and is off the car with sump off -
and definitely no write up for the iabed uprated one.
nb/ I am doing balance shaft delete soon so sump will be off then and pick-up will be changed as it always should when sump is off so wasn’t worried about excess sealant as I wanted no leaks.
Audi also says not to remove sump but it probably won’t be a bad idea if you have not done the pickup
also a point to note… the AKS imbed seal can be re used if cleaned up and the seal flange isn’t damaged. So for future rebuilds, to fit new bottom end bearings, crank removal etc it is a good purchase when doing a clutch
that’s all from me


