Re: here you go


This is a brief guide for wiring in an ignition source for an aftermarket stereo. If you're changing your stereo then you'll need to do this in order for the stereo to turn on and off when you take the keys in and out of the ignition barrel. Most Audiâs donât have an ignition cable due to the CANBUS system.
To wire your own ignition source you will need the following:
We don't want any power running through the car during the install until testing at the end.
Step 1 â Connecting the Dual Fuse Holder to your Fusebox
Take off your fuse panel, its located inbetween the drivers door and the dash. Use a suitable tool to remove it.

There are only a few locations that turn on and off with the ignition on the fusebox, this may vary depending on what car you have, my car is a 2.0 TDI PD170. Fuse location 41 - Rear wiper, is the one I've used.

Remove the existing fuse (if there is one) and place it in the first fuse slot as shown in the picture. The second location will be for the 10amp fuse but weâll be connecting that later.


Place the fuse holder back into the fuse box as shown in the picture, you can do it either way the cover should still go back over.

Step 2 â Removing your stereo
Use your four keys in each slot; itâs easier when youâve got two people doing this, one person to do the left, the other do the right. Pull the stereo out evenly on both sides until its out, donât pull it all the way out you need to disconnect the Quadlock/ISO blocks and aerials.

For Quadlock, squeeze the two bottom sections together and youâll feel it release, lift the tab and itâll pull itself out halfway then remove it once the tab is at 90 degrees to the rest of the block.

For FAKRA aerials, push the tabs in (youâll feel/hear a small click) and pull those off, be careful with these they can break easily.

For ISO blocks depress the tabs on the side of each block and pull the blocks out.
For ISO aerials just pull it off.

Step 3 â Running your ignition cable through
Take your length of wiring cable, strip one end and crimp your male 15amp bullet to it. This end of the cable will connect to the cable coming out of the dual fuse holder.


At this point you need to remove the tray that sits underneath the dash (above the pedals), its 3x T20 Torx screws to remove it (if I remember correctly) and itâll just slot out.
With the tray removed, pass your cable through around the fusebox (whichever way you can find) and into the footwell. Run the cable along towards the centre console, be sure not to pull it all the way through, leave enough slack on the fusebox side of the cable. At this point your stereo should also be removed and out the way

There is bags of space behind here, you should be able to put one hand in the space for the stereo and reach down the back of that while passing the cable up through the footwell, once youâve got it on the stereo side then pull it through. If you struggle get a friend to help, or attach the cable to something more solid to help pass it through (stretch out coat hanger, cable tie etc)

Again, be sure not to pull it all the way through, but also do not pull it too tight as there is a load of other wiring in the drivers footwell and behind the stereo that you donât want to damage.
Use some cable ties to secure the cable so it doesnât interfere with the pedals. Once the trays back up it canât come out easily but just to be safe secure it anyway.
Once itâs secure, replace the undertray.
Step 4 â Connecting the ignition cable to your loom
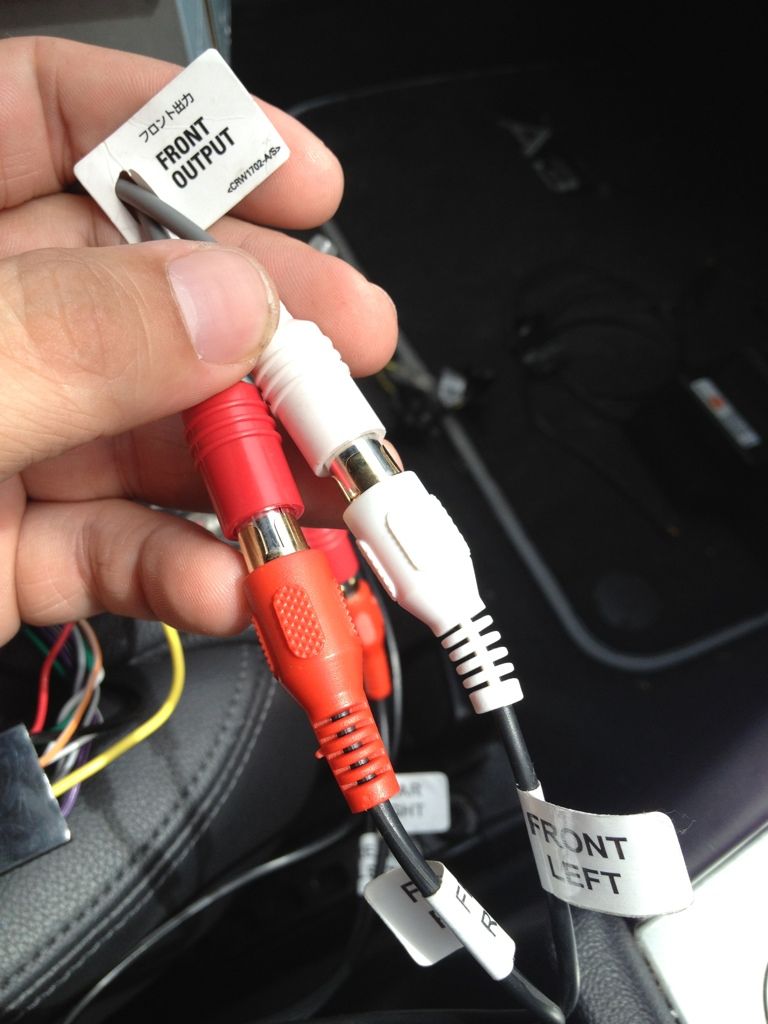
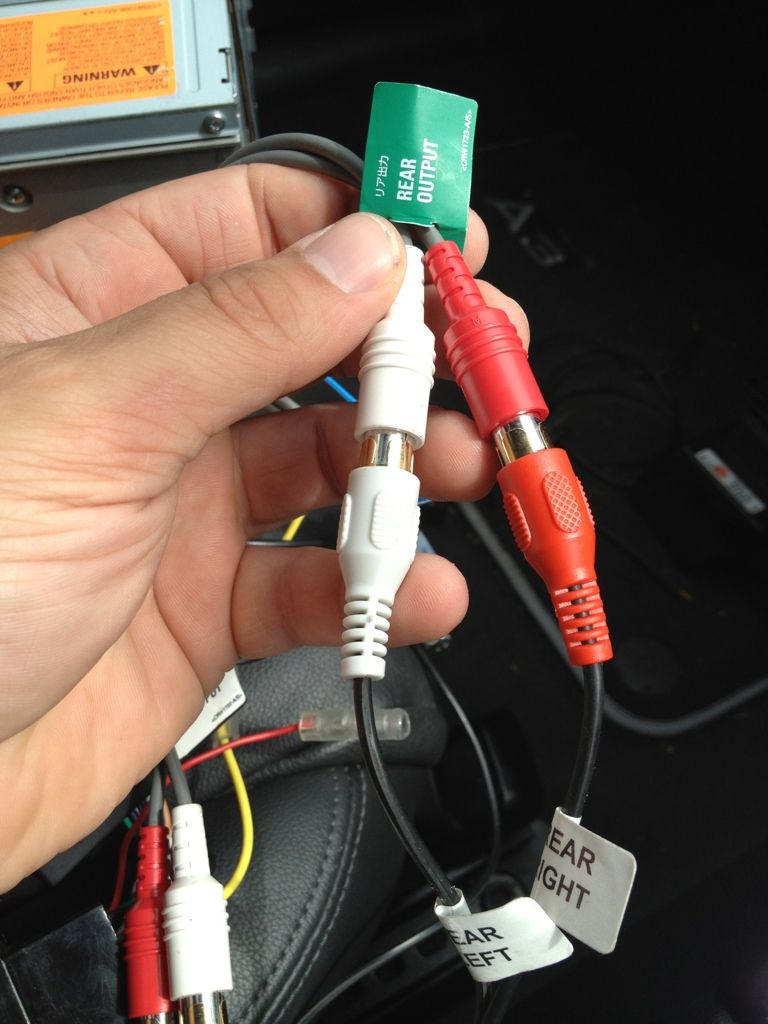
At this point you should have your harness and aerial adaptors connected to your original loom, fascia adaptor in, stereo cage in, and all the wires coming through the centre of the cage.
Most stereo looms will have use 5amp bullet connectors for the ignition cable, which is the red wiring on the loom. Split this if itâs not split already (by this I mean take the male part out of the female part). Then take the stereo side of the wiring and see whether it has a male or female end.
At this point if you want to you can cut down the wire so u donât have a load of it sitting behind the stereo, donât cut it too short though.
Once youâve established what is on the loom you need to use either your male/female 5amp bullet connector to connect to your new ignition wire. Strip the wire end, crimp your connector, and connect it to the stereo loom.
Now go back to your wire on the fusebox side, connect the bullet connectors together and place your 10amp fuse into the spare location on the dual fuse holder.

Step 5 â Testing
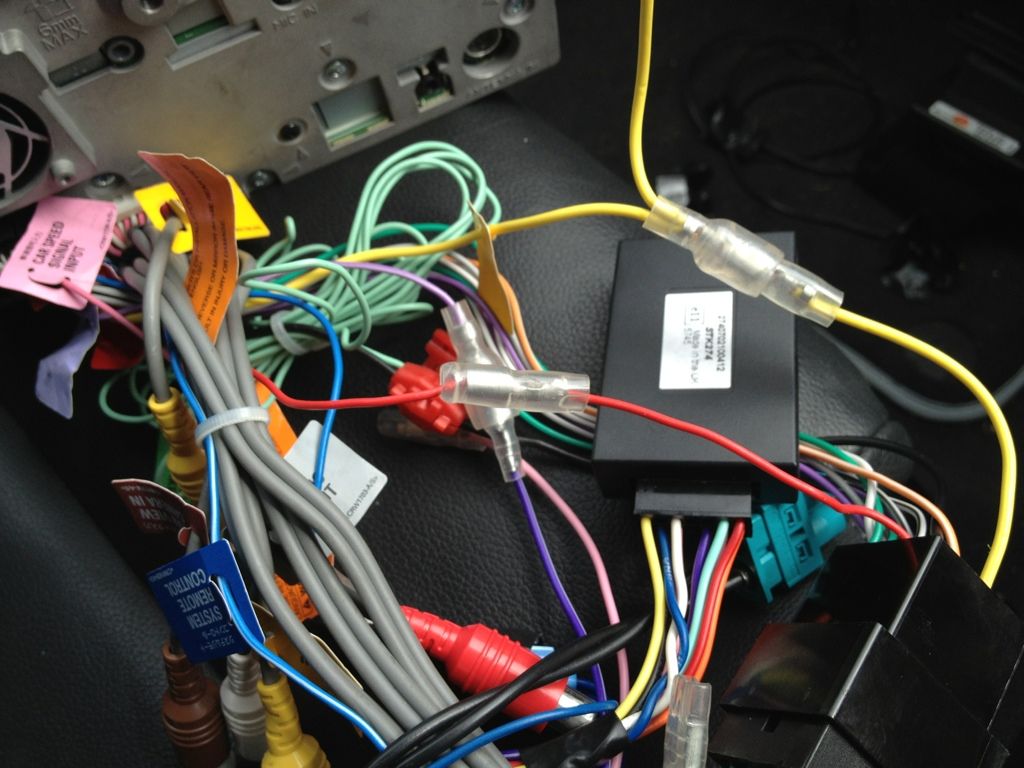
Right, now that all done, take all the wiring (there should be a fair amount of it now) and tuck it all to the left hand side at the back, there a fair amount of space in here and you should be able to get it all in. Get your stereo connected and in place, but not fully clipped in place yet. Keys in, ignition on (you donât have to have the engine running). Your stereo should now be powered up.
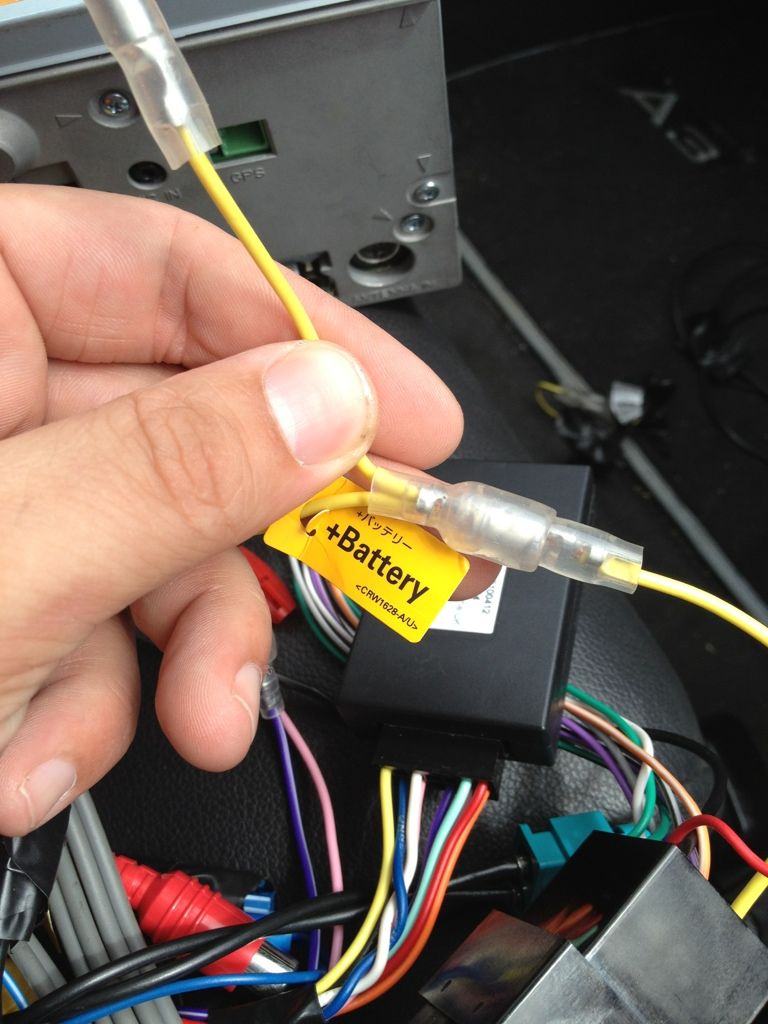
Hereâs the test, find a radio station and save it as a preset. Take the key out, wait a few seconds, key back in, ignition back on. The stereo should pick up where it left off, so back to the radio station you just saved. If this is the case then youâre all set. If not then take the keys out again and swap the ignition (red) and battery (yellow) cables around. It should be red to yellow and yellow to red. Test again, if this still doesnât work youâve probably got another issue so check over your new ignition cable first if you canât see anything wrong then PM me.
However most VAG systems are Red to Red/Yellow to Yellow. The only time Iâve ever had to swap this around is on Bluetooth hands free kits and DAB kits that work with factory head unit.
So now you should be done, tidy everything up, fuse cover back on, undertray back on if you havenât done so already. Make sure there are no wires loose anywhere. Insulate the areas where youâve crimped the cable with insulation tape just to be safe and to help them stay together. Finally put your stereo into place properly.
This is what I was installing: Parrot MKi9200

This wiring guide should work for any Audi that doesn't have an ignition source as standard, mainly any Audi running CANBUS systems.
Please note; I will not be held responsible for any damages occurred during the process of following this guide or installing anything yourself. If anything bad happens, itâs on you!
I'd also advise not using fuse locations for important electrical components such as ESP, ABS, Airbags, ECU etc. Donât be a ******.
If you have any questions feel free to PM me, I'll be more than happy to help.
To wire your own ignition source you will need the following:
- Wire strippers
- Crimps
- 1x 10amp Fuse (can also be a mini fuse)
- 10-25amp cable (preferably red, ~1metre)
- Insulation tape
- Cable ties
- 1x Dual fuse holder (Autoleads BSFDUAL) I can supply these. Please PM Me
- 1x Male 15amp bullet connector
- 1x Female 5amp bullet connector (optional)
- 1x Male 5amp bullet connector (optional)
- 4x European radio removal keys (stereo dependant, you may need 2)
We don't want any power running through the car during the install until testing at the end.
Step 1 â Connecting the Dual Fuse Holder to your Fusebox
Take off your fuse panel, its located inbetween the drivers door and the dash. Use a suitable tool to remove it.
There are only a few locations that turn on and off with the ignition on the fusebox, this may vary depending on what car you have, my car is a 2.0 TDI PD170. Fuse location 41 - Rear wiper, is the one I've used.
Remove the existing fuse (if there is one) and place it in the first fuse slot as shown in the picture. The second location will be for the 10amp fuse but weâll be connecting that later.
Place the fuse holder back into the fuse box as shown in the picture, you can do it either way the cover should still go back over.
Step 2 â Removing your stereo
Use your four keys in each slot; itâs easier when youâve got two people doing this, one person to do the left, the other do the right. Pull the stereo out evenly on both sides until its out, donât pull it all the way out you need to disconnect the Quadlock/ISO blocks and aerials.
For Quadlock, squeeze the two bottom sections together and youâll feel it release, lift the tab and itâll pull itself out halfway then remove it once the tab is at 90 degrees to the rest of the block.
For FAKRA aerials, push the tabs in (youâll feel/hear a small click) and pull those off, be careful with these they can break easily.
For ISO blocks depress the tabs on the side of each block and pull the blocks out.
For ISO aerials just pull it off.
Step 3 â Running your ignition cable through
Take your length of wiring cable, strip one end and crimp your male 15amp bullet to it. This end of the cable will connect to the cable coming out of the dual fuse holder.
At this point you need to remove the tray that sits underneath the dash (above the pedals), its 3x T20 Torx screws to remove it (if I remember correctly) and itâll just slot out.
With the tray removed, pass your cable through around the fusebox (whichever way you can find) and into the footwell. Run the cable along towards the centre console, be sure not to pull it all the way through, leave enough slack on the fusebox side of the cable. At this point your stereo should also be removed and out the way
There is bags of space behind here, you should be able to put one hand in the space for the stereo and reach down the back of that while passing the cable up through the footwell, once youâve got it on the stereo side then pull it through. If you struggle get a friend to help, or attach the cable to something more solid to help pass it through (stretch out coat hanger, cable tie etc)
Again, be sure not to pull it all the way through, but also do not pull it too tight as there is a load of other wiring in the drivers footwell and behind the stereo that you donât want to damage.
Use some cable ties to secure the cable so it doesnât interfere with the pedals. Once the trays back up it canât come out easily but just to be safe secure it anyway.
Once itâs secure, replace the undertray.
Step 4 â Connecting the ignition cable to your loom
At this point you should have your harness and aerial adaptors connected to your original loom, fascia adaptor in, stereo cage in, and all the wires coming through the centre of the cage.
Most stereo looms will have use 5amp bullet connectors for the ignition cable, which is the red wiring on the loom. Split this if itâs not split already (by this I mean take the male part out of the female part). Then take the stereo side of the wiring and see whether it has a male or female end.
At this point if you want to you can cut down the wire so u donât have a load of it sitting behind the stereo, donât cut it too short though.
Once youâve established what is on the loom you need to use either your male/female 5amp bullet connector to connect to your new ignition wire. Strip the wire end, crimp your connector, and connect it to the stereo loom.
Now go back to your wire on the fusebox side, connect the bullet connectors together and place your 10amp fuse into the spare location on the dual fuse holder.
Step 5 â Testing
Right, now that all done, take all the wiring (there should be a fair amount of it now) and tuck it all to the left hand side at the back, there a fair amount of space in here and you should be able to get it all in. Get your stereo connected and in place, but not fully clipped in place yet. Keys in, ignition on (you donât have to have the engine running). Your stereo should now be powered up.
Hereâs the test, find a radio station and save it as a preset. Take the key out, wait a few seconds, key back in, ignition back on. The stereo should pick up where it left off, so back to the radio station you just saved. If this is the case then youâre all set. If not then take the keys out again and swap the ignition (red) and battery (yellow) cables around. It should be red to yellow and yellow to red. Test again, if this still doesnât work youâve probably got another issue so check over your new ignition cable first if you canât see anything wrong then PM me.
However most VAG systems are Red to Red/Yellow to Yellow. The only time Iâve ever had to swap this around is on Bluetooth hands free kits and DAB kits that work with factory head unit.
So now you should be done, tidy everything up, fuse cover back on, undertray back on if you havenât done so already. Make sure there are no wires loose anywhere. Insulate the areas where youâve crimped the cable with insulation tape just to be safe and to help them stay together. Finally put your stereo into place properly.
This is what I was installing: Parrot MKi9200
This wiring guide should work for any Audi that doesn't have an ignition source as standard, mainly any Audi running CANBUS systems.
Please note; I will not be held responsible for any damages occurred during the process of following this guide or installing anything yourself. If anything bad happens, itâs on you!
I'd also advise not using fuse locations for important electrical components such as ESP, ABS, Airbags, ECU etc. Donât be a ******.
If you have any questions feel free to PM me, I'll be more than happy to help.
| |
Last edited by a moderator:

 Thanks again!