Rear O/S Light Cluster Issue

CountryGent

Registered User
Joined
Jul 18, 2017
Messages
49
Reaction score
11
Points
8
Ok, so I took the Quattro to have the wheel alignment done (I will update my thread on that shortly). I had the lights on auto and whilst the car was on the ramp the lights came on. Well all apart from the rear o/s light cluster with the indicator, reverse and taill lights.

No problems I thought I'll just sort out the bulbs that need replacing. Well after after looking at how to access the light cluster to take it off and change the bulbs, I decided to youtube it. I couldn't a way to access the light cluster without a lot of work, but thanks to Total Technik I found out how to remove the cluster!

My initial excitement of getting the cluster out gave way to disappointment once it was removed. I will just say that the scuffs/damage to the electrical connector and on the plastic were not me! So before I removed the cluster I had an intermittant tail light problem, now the inndicator, tail and reverse light don't work!!

Can someone tell me if this is a common fault on a B7 and also if the connector in image 1718 - which looks like the metal contacts has been broken or disintegrated is a replaceable part? I couldn't see how to disconnect it from the cabling..is it easy to do or is it a main dealer only job?

Thanks for any updates
 

Attachments

  • IMG_1717[1].JPG
    IMG_1717[1].JPG
    507.7 KB · Views: 159
  • IMG_1718[1].JPG
    IMG_1718[1].JPG
    747.6 KB · Views: 153
with all the corrosion going on it would have been the initial source of your problem , but , as you have disconnected it what little poor electrical connection was there has now been lost after the dodgy connection was agitated.
there has either been an electrical short at some time that has damaged that terminal or water ingress ( very likely ) is to blame possibly both.
you will need to either bypass that damaged terminal or get a replacement plug and clean up the lamp side of the connection.
 
  • Like
Reactions: mikep99 and CountryGent
with all the corrosion going on it would have been the initial source of your problem , but , as you have disconnected it what little poor electrical connection was there has now been lost after the dodgy connection was agitated.
there has either been an electrical short at some time that has damaged that terminal or water ingress ( very likely ) is to blame possibly both.
you will need to either bypass that damaged terminal or get a replacement plug and clean up the lamp side of the connection.

I agree with the diagnosis Dr Rob!..just didn't want to have to deal with electrics..my pet hate:sorrow:. Any way I'll toddle of to Audi just to see if the part number I found is right and a user replaceable part. Just to get the ball and maybe to have a back up I've ordered part number -
1J0973704

Need to get the car road worthy so watch this space..
 
Ok so the parts have turned up and I went to Audi to see what they suggested. I was to say the least I was a little suprised..they advised that they would remove the cable that fits in the corroded/damaged terminal and cut the loom and put a new cable in, solder it to the existing loom cable end and heat shrink the joint - hope that makes sense.

Naively I was expecting a pull of/on bullet style connector for light connectors so the whole unit would be removable..

Before I go ahead and do the Audi suggested fix, has any one done this fix? Was it easy enough to do? did it cause any errors? Any tips for the best way to do it/things not to do etc?

Thanks
 
yep that's what I suggested chap, the old plug is a bin job and will need to be cut of and a new plug attached by whatever your preferred method is, clean up the terminal on the lamp assembly and your good to go, unless of course your lamp assembly terminal is also suspect, its unlikely but allways possible, just make sure you give all the prong terminal a darn good cleanup.
 
  • Like
Reactions: CountryGent
yep that's what I suggested chap, the old plug is a bin job and will need to be cut of and a new plug attached by whatever your preferred method is, clean up the terminal on the lamp assembly and your good to go, unless of course your lamp assembly terminal is also suspect, its unlikely but allways possible, just make sure you give all the prong terminal a darn good cleanup.

Ok then...onwards to plug replacement it is. Glad I ordered the part as a just in case scenario. In prep I have already cleaned the terminals in the lamp assembly so when it stops raining long enough I'll get on with the job.

Thanks Rob
 
Another way would be to just cut off the plug, directly solder the appropriate lead to matching pin terminal on the lamp housing and insulate with heat shrink, but you would not be able to remove the housing once its soldered permantly , or another similar method would be to use a short fly lead soldered onto pins directly , then use a new two piece plug to join the fly lead to the car loom , that way you can still unplug the lamp assembly...
various ways to do it, just which ever works best for you chap.
 
Hello chaps dont know if you can help but got an A 3 sline and rear lights not working but come on when i brake any ideas
 
Hello chaps dont know if you can help but got an A 3 sline and rear lights not working but come on when i brake any ideas

Hmm..really not sure as car electrics really not my strong point. Have you taken of the light assembly and checked all the connections are good, no nicks/kinks/cuts in cables? Are all the contacts on the bulb assembly clean and not damaged? Are all the fuses and relays clean and in good condition? Outside of that is the limit of any thing I could suggest sorry..
 
Ok so after a very nice day at Longleat with the family - in my wife's car, I came back and thought that I should crack on with the replacement terminals and block. Not posted multiple images in the same thread so I have numbered them in sequence so I hope that helps..... I cleaned the bulb assembly connector pins first. Then:

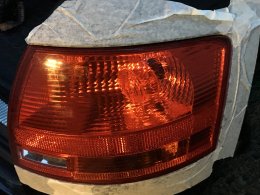
I taped up round the light housing - just so I didn't catch the paint with anything whilst get the lens out (IMG1):

Then after removing the lamp assembly I unravelled a bit of the tape around the cables and discoveredthat the blue and brown cables had nick/cuts in the casing(IMG2):

As a result I decided that I would cut all the cables at the same point (IMG3):

The next image is just the parts I ordered, the link for the part is above. There are 4 little grommets that will make an appearance in the next photos (IMG4):

Next is the cables stripped with the grommets on and then with solder on - have to say that the soldering was done by my wife as she is much better than me at it (IMG5-6):

Hope you're still with me....

Following on from this was the delicate task of crimping the terminals to the cables and then inserting them into the block. Again Caz did this...(IMG7-9):

After this was getting the damn grommets in...that took longer than all of put together so far!! Sorry image isn't great but they are there! (IMG10):

The next two are after putting in the orange rubber band and the purple plastic clip - again not great pictures (which you push through a gap in the casing) (IMG11 and 12):

After that I put the bulb assembly to test the connections....and joy of joys they all worked!! So before I need to change a bulb on the n/s light cluster I'm going to order two more of the assemblies, so I have a spare ready!!

I have to thank my wife as I probably would have damaged something if I'd soldered and broekn the new pin connectors getting them into the terminal block!

After doing this replacement I have a question about what function the orange rubber band and parple clip play as there is nothing loose or anything that needs the band to cushion the assembly?!

And relax with JD
IMG1
IMG2
IMG3
IMG4
IMG5
IMG6
IMG7
IMG8
IMG9
IMG10
IMG11
IMG12
 

Attachments

  • IMG_1763.jpg
    IMG_1763.jpg
    1.1 MB · Views: 120
  • Like
Reactions: Charlie Farley
there you go, you see , not that difficult was it.....all in an afternoons work.
the orange band is a seal what you should end up with is a water tight plug , grommets seal the individual cable entry points from the ouside and the rubber band provideds a water tight seal from the inside...., they are pretty reliable for the most part but can like most things fail , not allways 100% leak proof , anyway good job chap, and saved yourself a few £££ in the process.
 
Hmm..really not sure as car electrics really not my strong point. Have you taken of the light assembly and checked all the connections are good, no nicks/kinks/cuts in cables? Are all the contacts on the bulb assembly clean and not damaged? Are all the fuses and relays clean and in good condition? Outside of that is the limit of any thing I could suggest sorry..
Yes tried all the above but no joy thanks for your reply though guess i will have to put it in audi for 162 pounds an hour to try and find out ouch
 
Hello chaps dont know if you can help but got an A 3 sline and rear lights not working but come on when i brake any ideas
you need to do some basic diagnostic on them, if you have brake lights then part of the cluster is working.
i'd be unplugging the lamp assemblies and getting a meter on each of the circuit terminal in the plug on both sides to see what, and if any voltage is reaching them, then work from that point.
if you have a reliable 12v at the terminal of each separate circuit then check at the bulb holder for the same , it's all down to tracing the fault back to the sorce.
Thanks for your info going to try that getting my electrican to try that thank you once again