Prawn and BigAls A3 Track Car

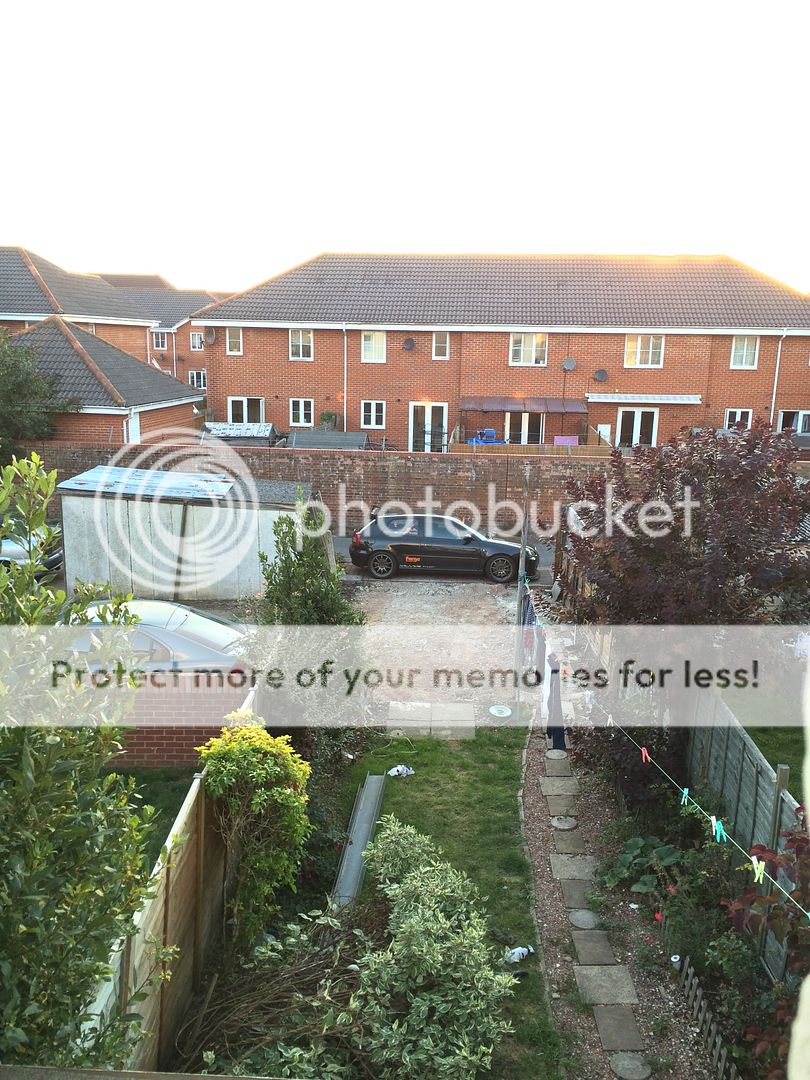
With the roof gone and disposed of, next up were the walls:


Which left me with just the uprights, and a nasty ancient steel frame holding them together:


I tied a rope around the frame, and pulled.

Not very hard as it happened, and this was the result!


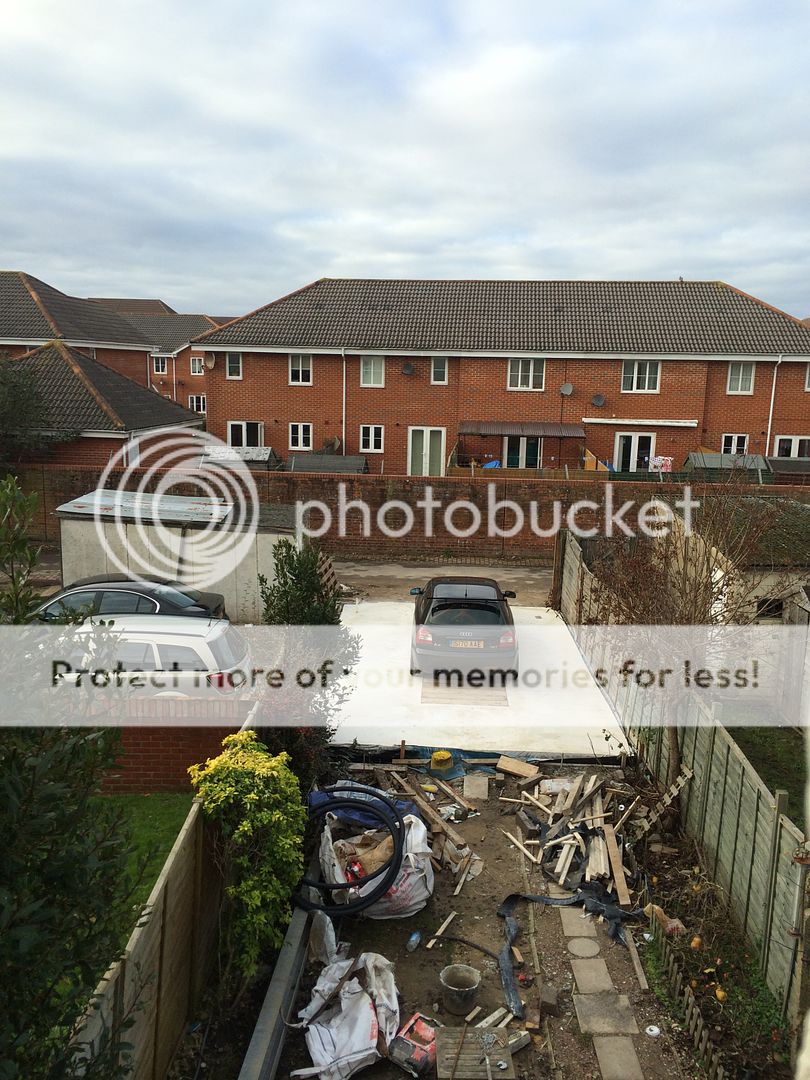
A good bit of hard with with the grinder cutting it all up, and the result was a nice clean slab to stick the car back on for another week:

 
  • Like
Reactions: Essflee
Not wanting to waste any time, I hired a concrete breaker, and got to work breaking out the old slab the old garage sat on:


It doesn't really show, but this took a LOT of work to do all by hand with a tiny electric breaker.


I borrowed a tipper truck, and cleared all the concrete I'd broken out:


And then, in timely fashion, I parked the A3 up again for another week:

 
  • Like
Reactions: Essflee and Alex C
Have you ever considered a career in civil engineering?!
 
  • Like
Reactions: bigal 1
So, fast forward a little while, a few trackdays, and Dad going on Holiday for what seemed like forever, and it was time to get stuck in.

We booked a digger with driver for a day (****** kids toy if you ask me!)


And set about making an enormous mess!


We then blocked the road behind my house with the largest grab lorry we could rent in Hampshire. 3 times.


A few hours later, and we had what sort of looked like it could possibly, one day, form the start of an inspection pit and a foundation trench:


Sadly, there are no pics from the next few days. as the world damn near ended, and quite frankly, I didn't have the time, or will to document it.

As our excavation neared completion, I nipped out in the van to collect some plywood to sure up the sides of the dig, to avoid collapse.

Nobody wants a collapse.

John finished digging the hole, loaded up his digger, and went on his way.

I loaded up my gear, and headed home, feeling good about how day 1 was going.

And then, just 200 yards from home on my way back with a load of ply and timber, Dad called me.

One side had collapsed.

oh ****.
 
  • Like
Reactions: Essflee
These pictures don't really show the full extent of what happened, but basically, one side of the excavation collapsed completely.

The nice cleanly dug pit was filled in, across it's entire area, but almost 400mm. Some 3 cubic metres, around 6 tons of material fell in.

Very, very, not, cool.

Dad and I dug a trench along on side of the collapsed hole, and dropped in some plywood shutters. We then placed plywood on the other side, and braced between the two to stop any further collapse:


We then lowered a cement mixer into the whole, and set about sorting this mess out.

To save on materials,we used 1/2 ballast, and 1/2 as dug material mixed with cement to form a lean mix to fill in behind the shutter covering the collapse.

It took us 2 solid days, but digging entirely by hand, we got the pit back to level, and the collapsed side supported and filled with a cement bound mix.

Sadly, due to the incredibly tight limitations on space, half the material we dug out had to be thrown into the foundation trenches, as from down a 6ft hole, there's really else that can be done with it!

So, a few days later, this is where we were:


here you can see just how tight we were on space. Dad looking on wisely whilst we wait for another grab wagon to take away the final arisings.

 
  • Like
Reactions: Essflee
man you guys get stuck in
its gonna be awesome!!!
what a great set up you will have
very envious!!!
 
Fast forward another couple of days, and Dad and I mixed and placed the concrete base for the pit. We placed a very thick visqueen liner in the hole, then filled the base with concrete to form the floor of the pit.

This was a bit stressfull, as we'd used lots of the ballast we had in fixing the collapse, so we were VERY tight on the quants for the base of the pit. With no way of getting more ballast into the garden to mix up more concrete.

Thankfully, it JUST came in for us, with literally the last few shovels of ballast in the mixer allowing me to pace the concrete to the correct level.

The next day, we started laying the block work for the pit.

I've never laid a block in my life before, but I'll have a go at anything, and I'm the only one that's got to look at this, as it's underground, so I thought I'd give it a try!


A big thanks to andy P at this point, who lent me some task lighting, to allow us to work on into the night.

We cracked on, with Dad sorting stuff out during the day, and me laying blocks after work each evening, knocking back a few alcohol free beers to make sure the blockwork stayed straight!


it rained like crazy one day, so up went the gazeebo so we could carry on:


Slowly but surely, a pit of sorts was appearing:

 
  • Like
Reactions: Essflee and Mrharris2
Due to space, we could only get a certain amount of blocks in the garden before we started.

we ended up around 50 blocks short of completing the pit on a saturday afternoon, so Dad and I took the cars up the builders merchants, and loaded up the a4 wagon!


Feeling quite large down there now!


2 block to go to completion:


With the block work finished, in customary fashion, I parked the A3 up at the end of the garden, and left it for another week!

 
  • Like
Reactions: Essflee, superkarl and StaceyS3
Having to dig out the pit collapse and throw the arisings into the foundation trenches was pretty demoralising. Knowing full well that when we finally finished the pit, we'd have to do the same amount of digging all over again, by hand again in order to regain the foundations.

Thankfully, what collapsed in was from a fairly low level, and was primarily decent solid fill.

I decided, rather than trying to dig out ALL the foundation trenches again, I'd spread what we'd dug out around the founds to one level, and compact it in situ with a whacker plate.

This worked pretty well, and after a solid days work I had a foundation trench that was good and solid.

Then plan had never been to dig the foundations so deep anyway. That had been forced by soft ground conditions. Thankfully the trench was now filled with some pretty good gear, and the compaction was excellent.

Around the pit Dad and I backfilled slowly with concrete, including steel reinforcement all round. we brought this up slowly in layers so as not to overload the block work at any one point. This should add massive strength to the pit, as it's wall is effectively now 12'' thick all round and reinforced. I don't imagine it'll be going anywhere!

With the concrete back fill to the pit completed, and all the soft spots and remaining poor ground dug out, we were in need of some additional fill.

I ordered 6t of Hardcore from a local supplier, expecting around 3m³ worth of gear to arrive.

When it arrived, apparently the driver was feeling 'generous'


He reckoned it was closer to 8-9t on the wagon!

This arrived on a Monday, and the bin lorries use the access road on a Tuesday morning to collect the bins.

Monday was not a fun day, but I managed to get the access road clear, and got a load of the gear into the hole as well and compacted.


  • Like
Reactions: Essflee
The following weekend Mowgli (Luke) came over to give me a hand.

I'd bought 7 brand new 3.9m scaffold boards (and carted them home thanks to Andy getting a truck!), with the intention of getting double use from them.

We measured up the pit opening, and worked out that 1 scaff board would divide exactly 3 times to cover the pit span.

We used the scaff boards to shutter up the sides of the base, being sure not to cut any of them apart from in multiples of 1.3. This worked really well, and we only cut cut a single board, leaving the rest full length.

These were secured with 900mm wooden stakes bashed roughly 5-600mm into the ground, then the scaff boards screwed to them to set the level and position finally.


To shutter the recess around the pit, we used 63x38 timbers, and long through fixings to drill down into the block work and bolt the timber down.

This had to be done in such a way that it could be knocked off 'internally' after the concrete had been poured, to avoid damaging the concrete recess we were hoping to form.

Here we have the shutter all finished, inside and out. Ready for a measure up to see how much concrete I'd need


I cubed it up, and it worked out at just under 7m³.

This was a massive pain, as almost every company I spoke to about concrete supply only used 6m wagons, and if you get a part load of concrete, you are charged on the empty space in the drum! So to get an additional 1m, you end up paying for 3.5m! No fair :(

I decided the only thing to do was to reduce the volume down to 6m or less. The slab was VERY thick at this point, at around 220mm all over and 400mm in the foundations. In reality, far thicker than it needed to be.

The solution I came up with, was to use part sand, and part RC Concrete panels removed from the old garage wall.

I blinded the whole excavation in 25mm or sand, and then screeded out sections (away from the walls) and laid the old concrete panels in to bulk it out. I made VERY sure that these were bedded solidly, with no voids to avoid any future problems with movement.


With the sand and concrete panels down, we cubed it up again.

I did my usual run over with a tape measure, and made my 'engineering guess' at 5.6m³. it looked promising.

with this volume being so crucial, and Victoria being by far the more proper and precise of the two of us, I roped her in to help with a double check.

We thoroughly dipped the entire slab on a 500mm grid, and she input all the numbers to a spreadsheet to churn out an exact volume.

5.57m³. Excellent. My guess wasn't bad at all!

Allowing for a little wastage, and some concrete loss down either end of the pit where there weere some voids, I decided to order 6m³.

All that was left was to line the exacvation, and get some reinforcement in there!
 
  • Like
Reactions: Essflee
Concrete type was a big decision.

I wanted the floor to be flat. really flat! The aim was to have it good enough that I'd be able to do all my own suspension setup from now on, and setting ride heights etc etc.

I looked at a few options, such as using a C30 concrete followed by a self levelling screed. but this worked out pretty labour intensive, and fairly espensive too.

I also the idea of using a C30 mix, then a power float to finish the surface. This tends to give a very smooth hard finish, but isn't necessarily always the most even in level throughout.

After a good long chat with Nige, he had used a very specialist self levelling, self compacting concrete, and couldn't praise it highly enough!

I did some research trying to find out what it was, but didn't get very far. Everyone I spoke to seemed useless, and nobody knew what self levelling concrete was.

I called up detective Pinder again, who did some digging, and mananged to find a video from when he poured his, from which he was able to see the company who delivered it!

La Farge - Sorted! time to make some calls.

I rang La farge, only to get the most EYE WATERING quote of over £1200 to supply 6m of self levelling concrete. This compares to around £560 for a 'normal' load of 30N concrete.

Thankfully, after a good deal more google searching and asking around, I came across Hope Construction. A recently formed company, who turned out to be made up of loads of ex La Farge employees, and run from ex La Farge batching plants!

A few calls, and I found out that Hope had adopted the special 'Agila' self levelling concrete mix for themselves, and were over 30% cheaper than La Farge for an identical product!

WoooooooHOOOOooooo!!!! and a deal was done.
 
  • Like
Reactions: Essflee and Mrharris2
pmsl @Tuffty!!!!
hahaha

just brilliant work nick
cant wait to see the finished product
gonna be awesome when its done and you will use that garage loads!!!

proper racecar!!!
 
you remind me of me so much prawny.. lol

pit digging, collapse... Been there.. still mentally scarred.. lol
got a big **** pit/pond in my garage now tho - lol

no narrow cars welcome over your pit tho.. looks purdy wide
 
  • Like
Reactions: Prawn and Mrharris2
its an inch wider than the inside measure of an a3 wheel to wheel
8l only garage!!
 
Haha, thanks Bill :)

It is reasonably wide, but bizzarely, it'll take the A3 just fine, and it'll also take the Mini!

Although the A3 is wider than the Mini, the wheels are fairly wide offset and fairly narrow, so still sail down either side of the pit just fine :)

Edit: I've just measured up my standard fiesta zetec S because I'm curious. That'll also go over with 2'' to spare :)

I wanted it as big as possible, not just for maximum work space, but also for maximum wheel and tyre storage :D
 
its an inch wider than the inside measure of an a3 wheel to wheel
8l only garage!!


It's a good bit more than that on the A3 Daz.

Also, the scaff boards that cover it will most definitely be in place whilst backing over it, then removed from inside when the car is over the pit.

Victoria has done the load calcs on the scaff boards, and at 1/4 span they'll take the full weight of a front wheel. They won't quite take a front wheel at mid span, but I'm working on a solution to that.

The scaff boards as they are will take a rear wheel at mid span though, so they're pretty strong.

That's also working on an absolute minimum bending moment requirement for the boards. Most will probably exceed it :)
 
****** hell Nick,
You should of got a two post lift in there on top of the concrete that was already down, lol.

You are thorough in you're approach!
 
This is pretty much what's going to happen when i sell my house any buy my next one. I want a decent sized garage/workshop so i can do some fabrication/welding work on the side and have plenty of room for a car to be worked on. Well aware that im going to have to end up building it myself though
 
Totally waterproof, conduits under slap for electrics into the pit, and air lines from compressor, which is stored under slab, allowance for toilet and wash basin/parts washer. Air intake and exhaust fans , bilge blower in the pit. All thought of. !!! ??? I think. +++ lots more
 
  • Like
Reactions: jimmcgee
Where is the dyno going ?
seriously impressed with the reuse of materials and the thought gone into it and the size of the pit, could do with some stairs to get in and out.
 
stairs would mean less storage space though.
plus he's fit as a fiddle he will jump in and out lol
 
Totally waterproof, conduits under slap for electrics into the pit, and air lines from compressor, which is stored under slab, allowance for toilet and wash basin/parts washer. Air intake and exhaust fans , bilge blower in the pit. All thought of. !!! ??? I think. +++ lots more

OI! :sign unfair:

Stop giving the story away! All in good time BBD, all in good time :)

Thanks for the comments so far chaps :)
 
Looking awesome Nick, It's going to make a great workspace. A truly level and smooth surface will be amazing, as will the pit!

(P.S. Glad to hear mention of extractor fans, not that I'd ever doubt you'd do it properly, but it's reassuring all the same. The thought of heavy gasses settling in them scares me a bit with pits.)
 
with the sand blinding done and a bit of 'bulk fill' to get it below the magic 6m³, it was time to add the liner:


Luke popped over that afternoon, which turned out to be a great help! To try and keep things neat, rather than just running the liner up the shutters and folding it over, we decided to use timber battens on top to 'clamp' the liner in. This way is the concrete tried to force the liner under the bottom of the shutter, the liner was evenly clamped, rather than a few nails / pins which it could easily pull through.

This had the added bonus of giving me a really clear defined line around the top of the shutter, which I wouldn't have had with a simple fold over.

It was the final weekend before the pour, so I had to crack on and work late to get it done.

Next up was the steel, by task light:


The whole area was covered in A252 mesh, set in the bottom 3rd of the slab, with an additional layer of 252 around the perimiter foundation.

I then used some surplus 16mm L bars to additionally reinforce the corners of the walls, and also the wheel loading points around the edge of the pit:


The keen eyed may spot some black ducting in the above pics too.

I've run 2x black 50mm twin wall ducts down into the pit. These enter the pit 300mm below the top ground level, and run into the corner of the garage that will be under the work bench, below where the power feed will enter from the house. I've also run 2x 50mm ducts into the slab from the garden side, to allow me to run power, ethernet and water into the garage.

We designed the pit in such a way, that our big 150L 16cfm compressor will sit nicely in one end.
The idea of the ducting down to the pit is 2 fold.

1: To power the compressor, and also have a ring of sockets and lights at high level around the pit

2. To run an airline from the compressor up to the garage surface, where I'll have a retractable air line reel to run all the air tools we've collected over the years.

I'll have a line splitter down in the pit soon after the outlet, to run air tools in the pit too, and I'll also probably mount the water seperator to one wall of the pit to keep things neat.

So with the steel in, this takes us to early December. There was only one thing left to do!
 
stairs would mean less storage space though.
plus he's fit as a fiddle he will jump in and out lol

Quite, a collapsible ladder is being used, to allow extra storage. Steps would take up enough room to store four wheels/tyres.
 
The day of reckoning arrived.

I woke up, and it was chucking it down. ARgh. not ideal.

I was outside at 7am, with our trusty bildge pump, trying to pump as much water out of the liner as I possibly could.

Due to a short hose, all I could do was pump it into the pit. So I pumped gallon after gallon of water from the concrete liner. Straight into the pit, which ended up about 9'' deep in water!

I got the majority of it out, and sponged the rest, just in time for the concrete arriving at 9am.

I'd ordered a full 6m³, not wanting to take the risk of ending up 10mm low.

The truck turned up, and my god, it was MASSIVE!

Due to the self levelling concrete being SO fluid, apparently you can't put 6m in a 6m truck, or it'll all flow out the back at the first sign of an incline!

Instead, what they sent was 6m of concrete, in an 8m wagon.

I was a little bit cross at this point, because I'd absolutely worked my **** off to get the quantity down to 6m, only to find that the 8m wagon could happily have taken 7m of the self levelling and saved me all the work!

ARGH.

The next concern, was access.

a 6m wagon sits on what we call a 6 legger chassis. 6 wheels, 3 axles. 2 at the back, and a single at the front. I know for a fact that a 6 legger can get down the rear access road, although it's a tight fit.

The 8m wagon sits on an 8 legger chassis, 4 axles. and it's ****** HUGE. it's a good 2m longer than a normal 6m wagon.

I was worried.

Thankfully, the driver was REALLY good. and got the truck down with literally inches to spare.


What this picture doesn't show, is the 12'' central heating outlet on the right hand side, and the brand new downpipe from the house on the left hand side, only just refitted after a previous delivery wagon knocked it off!

I cracked on with laying the concrete, with help from Tony the Hope Construction supervisor.

My glamorous assistant Victoria was in charge of photos from the usual view point!


The first drops!


And then some in the other side:


Getting there!

Another little bit to get the level perfect:


Tony showed me how to do it, then I had a go at Dappling the whole surface to get the perfect finish we were after:


This is how it looked when I'd finished:


All that was left was for Tony to apply the sprayed curing agent. This just helps cure the top surface and retains some heat in the slab during intial curing.


Tori then thought it'd be funny to take a picture of me, taking a picture of my slab :laugh:


And then, it was time for cat watch!

Cats LOVE cement. I have no idea why, but there's something about it that they just love.

We finished pouring at 10:30, so I grabbed a camp chair, and sat down to observe what was now mine, and protect it from cats.

This was my view for the day:


Much to my dismay, around an hour after pouring, the heavens opened and it poured down with rain!

I'd been told that rain would damage the surface finish if it rained before it had gone off. With the rain mixing with the curing agent, it was impossible to know what was occuring underneath. All I could do was sit there, looking at it, not knowing if I was looking at a fine concrete finish, or a watery mess of misery and doom a few mm below the surface!
 
I sat there, in that chair, from 10:30 until 19:30. Tori was bringing me coffee and lunch, and I sat there, just watching and waiting for cats.

A few came, I shouted at them, and they left again. And the slab was safe.

at 19:30, the surface was still rippling in the breeze due to the water laying on top. I still had NO idea if it had gone off at all, or if the finish had been ruined, and I was truly freezing right to the core.

I tried a few star jumps to keep warm, but after about 8 cups of coffee this wasn't such a great idea!

I decided I'd done all I could, and at 19:30 I closed the fences to make the site safe, and headed inside to warm up.

Just as I got inside, I heard next door open the back door.

They have a kitten. - *** ALERT *** THEY HAVE A KITTEN!

I legged it back out, and positively sprinted across the scaff board walk way, but it was too late!

The same adorable kitten that had sat down in the pit talking to me when I was building it, had come for a site inspection again, and it was determined to test the concrete for me!


It's very hard to be cross at something so cute, but I think if the fence hadn't been there to stop me getting out of the garden I'd have been giving it a stern talking to :laugh:

At the time I wasn't too impressed. But there was nothing I could do. Looking back now, it's quite comical, and I may make a feature of it. Victoria wants to fill the paw prints with a coloured resin so they're there for the rest of time!

The next morning it was still raining hard. there was a good 15mm of water over the whole slab, and I still had NO idea how it was going to look.

I was going to have to wait until the weekend to find out
 
  • Like
Reactions: Vex182
I hear Hope Construction are amalgamating with another local company called Glory.
 
Saturday morning came, and this was how it looked:


I started by stripping down the internal shutters for the pit. after the rain there was a lot of debris on the surface, so it looks much rougher in this pic than the finished article:


There was a nice clean crisp edge to the concrete. I was happy.

I got an offcut of scaff board to see how the depth of the recess had worked out. I was pretty pleased with this:


With all the pit shutters stripped, I moved onto the external shutters, and also very lightly brushed the standing water off the surface so it could start to dry out a little:


With that done, I set up a pump to start emptying the pit, into the sink out let I'd cast into the base, and got to work cleaning up and cutting the scaff boards down to cover the pit:


I ended the evening with all the boards cut, feeling really pretty pleased with how it had all turned out:


And that, gentlemen, brings us bang up to date.

If I hadn't spent the last 2 hours typing all this out, I'd probably have the garden cleared by now, and the car parked on the slab in it's new home.

Hopefully, that'll be my next installment this evening :)
 
  • Like
Reactions: StaceyS3, jimmcgee and bigal 1
you sat outside in the freezing cold:cold: , when you could have been at the back window with a nerf gun :p , and I have 3 cats, so no slug guns please :keule:
 
see if I done that to my back garden , the wife would have me sleeping in it lol, Top work by the way , if your going to do it , do it right :thumbs up::applaus:
 
If you can Nick build a extra heavy duty frame or beam over the front 1/3 of the garage, its always handy to be able to use it as an impromtu engine/gearbox hoist!
 
The walls will have peers every 2m Ant, and I've got 2 massive RSJ's to mount on the peers, and a Tiger 3 ton chain hoist that I'll mount on runners for a proper lifting setup :)
 
  • Like
Reactions: A3-Lee
Today was the day!

Poured last thursday, the slab has now had 10 days to cure. At this point it's going to be getting fairly decent strength. the concrete spec is 35N at 28 days. In reality I'd imagine it'll be well over 20N already at this point.

I did a few quick calcs and worked out that the car was likely to exert aroundf 0.2n/mm^2. I think it'll be OK!


Car - meet slab.

Slab - meet car


Welcome home A3! This is where you will live for a long time!

It was so strange being able to walk around under the car, in my own garden!


It also showed me a fair few bits of TLC that were required :laugh:

I pushed the car forward, right up to the bollard, and opened the doors, right out to where they will be able to open in the finished garage.

This is allowing for the thickness of the walls on each side, and a 400mm deep shelving unit on the passenger side of the car.


I'm still able to open both doors fully, which is amazing.

But the even better bit, is the sapce still available behind the car:


A whopping 2.3 m from the back of the car to the internal rear wall of the garage!

I've been waiting a long time to be able to take this picture :)

 
  • Like
Reactions: A19quattro, superkarl, StaceyS3 and 3 others

Similar threads

Replies
26
Views
8K
Replies
6
Views
4K
Replies
10
Views
4K
Replies
166
Views
20K
Replies
40
Views
4K