Facelift centre console

Hi NHN,

Following your post I tried the heater today.
I replaced the stock climate unit with the facelift one in May 2010, when weather was already hot here in Athens and everything worked ok since then.
Or at least I thought that way, till I used the seat heating and the heater. Seat heating works less effectively (at 6, looks like it is at 2-3 compared to the previous unit).
The heater works ok (as far as I can tell) but when I set it to low with ambient temp of 17-18, it looks like 20-21.
Not sure if there is a cure or if the internals of the 2 units can be interchanged, or if I have to go back to the old one.

thnx

aki

hi mate - i was flicking through this old thread to help out another member get his climate unit out.

i remember reading recently that apparently the sensor telling the car that the front seat was occupied (for the use of the seat belt warning and airbag in case of an accident) was being affected by high temperatures and it was postulated that the facelift cars had seat heating that was less... intense... as a result.

what did you end up doing about this? did the old unit go back in?

surprisingly i've still had no problems with my facelift climate unit. all still works as intended, 3 months after installation.

Hi mate,
I left it as it is. Everything works fine except the familiar seat heating intensity. Looks like the factory diminished the power in 2010 cars.
On coldest days I am very comfortable at setting 6, then I lower to 4.
A/C and outside air work fine too.
I suspect that outside air coming in, is slightly warmer than actual ambient (2-3C) but maybe I'm wrong. In any case, that does not bother me.
Overall, there is no concern to go back to the old unit.

cheers
 
Cheers for the guide sub, I spent about 30 mins total fitting. Most of which was time taken up getting the slightly short ESP plug into teh back of the facelift switch once on the other side and getting the card tray in with all the wiring I've got for RNS-E bluetooth and antenna's etc behind it. The guide was invaluable though pal, would've taken far longer without it.

Start

IMG-20110429-00424.jpg


Nearly there...

IMG-20110429-00428.jpg


We're done!:)

IMG-20110429-00430.jpg
 
Glad you got it done. Did you have to mod the cage for the hazard switch or did you already have the newer revision of cage?
 
Had the revision cage fortunately from when Nige did my RNS-E upgrade. Makes a surprising difference... as I turned my ignition off to get out of car and the lights came on, I really noticed it looks miles better!
 
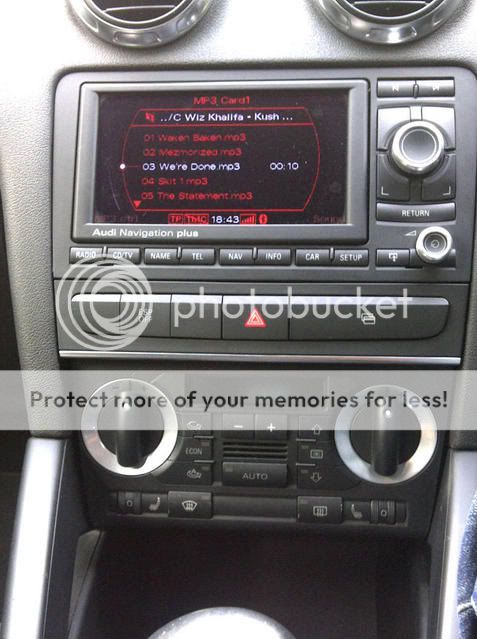
Let's revisit the facelift climate control (abbreviated "CC" from here) for a moment. I've got an older style CC as well as a facelift CC and have done quite a bit of digging in the Bentley manual as well as Vag-com to try to make this work. Some of this information has been posted already, but I'm going to reiterate to support my ideas.

We know that the early '07s and below do not work with the facelift CC because the flaps and motors in the AC system are different. According to the Bentley manual, this change started in May '07. My A3 is a Sept. '06 build, so I have the older system. Specifically, the recirculating flap motor (V113) was phased out, as well as the recirculating position sensor (G143.) These are pins 7 and 8 in the smaller black plug, and pin 6 in the red plug, on the back of the CC unit. All of the other pins are identical. The bit that's got me curious is how the pre-facelift CC units can work on both the older and newer setup. The Bentley manual states that whenever you replace the CC unit, you must perform "Basic Setting for A/C System" and check coding and adaptation in VAS5051. I'm assuming that's how the CC knows whether you have the flap motor V113 or not, and adjusts accordingly. What I'm wondering is if there is some way to make this change on the facelift unit. Since every car that the facelift CC came on has the newer blower system, it makes sense that they are all set for the newer system by default (thus not working with pre-May '07 cars.)

Now, the pins for this extra flap motor are still physically present on the facelift units, and by tracing out the circuits and comparing against the pre-facelift unit, it seems that all of the electronics for those pins are still physically present (as opposed to simply being a dead pin that's not electrically connected to anything.) I've dug through Vag-com hoping to find a way to change the setting. There are only four entries under Basic Settings, none of which are applicable. The adaptation channels are set identically to my pre-facelift CC with one exception: channel 5, which is set to '1' on the old unit, simply does not exist on the new CC. There is no identifying label on this channel, but I did try changing it to '0' on my old CC to test this theory. It made no noticeable difference, and definitely did not make it behave like the facelift CC. No idea what this channel does. The 'Coding' button for the HVAC module is greyed out in Vag-com. The other thing I found interesting is when I go into measuring block 007 for the recirculation flap motor, it says "Not Installed" in green text. This leads me to believe that the software on the facelift CC is at least aware that something is associated with that group. Normally when a channel simply does not exist, it says "ERROR: Unavailable" in red text. Seems promising to me.

So this is where I'm stuck. Does anyone have any bright ideas from here? Could this be hidden in the Security Access menu? Could it be in the non-accessible Coding menu? Can I enable long coding by generating my own label file for Vag-com? Of course, it's possible that the software on the facelift CC is hard-coded to not accept this additional flap motor, but if that's the case then why leave any reference to it at all? As last resort, I may take it to the dealer and have them run the basic setting/adaptation procedure with their VAS tool.

FYI, I have had identical results with the latest official Vag-com release (10.6.4) as well as the beta (11.3.0)

A few other tidbits I've learned the hard way that may help some others- I bought this facelift CC as part of a double DIN conversion. I tried swapping the new CC faceplate onto the old, single DIN CC electronics and backing plate- does not work. I could live with a couple of the LEDs being irregular, but on top of that half of the buttons do not work. They are either too close or too far from the circuit board and do not actually make contact properly with the switch and do not do anything when you press them. Additionally, the 'AUTO' LED does not illuminate when the faceplate is swapped (which we know,) but contrary to what was stated it is not an issue of a wire being too short. The LEDs are surface mounts on the circuit board, so there is no wire, and no good way to extend it to the proper place.

Finally, I did end up swapping the chrome knobs from the facelift CC onto my old CC, however I did it differently than shown on the German site linked above. I don't know if my way was better or not, but I thought I'd share: I did not remove the knob from the chrome ring, I pulled the knob/ring assembly out as one piece. Then from the back of the old CC, I enlarged the four holes where the tabs on the chrome ring snap in (see pic 2 on the German site,) then I ground down the raised plastic channels from the front (pic 6, outlined in red) until they were flush with the surrounding plastic. I used a Dremel with a grinding stone that has a flat top to do this, then an Xacto knife to trim the stray plastic bits leftover from grinding. At this point the knob and ring will clip in perfectly. You must reuse the white plastic spring retainer from the old CC, the new one won't work (although you can reuse either set of springs.) Unfortunately, I scarred my old CC faceplate in the process as my Dremel slipped at one point. If you're going to attempt this, tape up your faceplate first!
 
  • Like
Reactions: N8 and klik
I just read through the label file for the HVAC... not too hopeful. Apparently the coding can not be entered manually, it is set by basic setting "MVB001," which I'm guessing is the potentiometer and flap alignment (basic setting group 001.) Running this has not been any help for me thus far. Still hoping that someone has an idea though.
 
Hi mate,
I left it as it is. Everything works fine except the familiar seat heating intensity. Looks like the factory diminished the power in 2010 cars.
On coldest days I am very comfortable at setting 6, then I lower to 4.
A/C and outside air work fine too.
I suspect that outside air coming in, is slightly warmer than actual ambient (2-3C) but maybe I'm wrong. In any case, that does not bother me.
Overall, there is no concern to go back to the old unit.

cheers

sorry for digging up an old thread but it has lots of good info in it.

just reading the post that i have quoted am i right in saying that the new CC unit does work but the temp on the display is actually off by 2-3C? so if i set it to 16C it would be pumping out 18/19C?
i dont have heated seats so that does not apply to me.

i know Nigel mentioned that a second fan is not working but what does that actually mean for the Aircon/heating in the car? also on the newer CC units you have an AC button that lights up when the AC is on, where as on the older units it has a Econ button that when the light is on the AC is actually off... does this new AC button works properly?
thanks
 
Holy thread revival!!

ok so a quick update first...
for those who want to do a climate control swap over... if your car is early 07 or earlier it just wont work. I tested it in mine and found that when i pressed the Auto button no air was actually coming through the vents. The AC button does work so when its on the light comes on unlike our earlier units where the light is on the actual AC is off.

for anyone wanting to do the climate swap over here is a guide for a slightly different approach: http://www.audi-sport.net/vb/new-a3...ft-chome-climate-control-module-switches.html

now onto the facelift buttons, i am thinking about taking the plunge onto doing the newer MY11 buttons and although there is a long list of parts i need to siv through to find the right combo how have you guys fitted a card tray into the complete unit?
 
how have you guys fitted a card tray into the complete unit?

We havnt as it doesnt exist, currently, personally I wouldnt bother as it will mess up the alignment, also the unit is sealed with plastic heated rivets, not to say cant be modded in, kinda pointless & best to just have the MY09 versions which has a tray as default on most cars, achieves the same ending.
 
Ahh that sucks! I actually liked the double chrome strip on the new ones :(

Maybe I should just get the newer one and hack It up and see if I can't get a card tray in there :p
 
Hack away, but lets be honest it will end up being the identical ending as MY09, if it was an actual gain mod that no other way could achieve the same goal, I'd understand, but this one would be a complete waste of your time mate trust me, whole point of MY10 onwards is to fix the terrible alignment MY09 had, if you hack a MY10 version then alignment would suffer on the right side.

Other issue is if the buttons you need are now fixed into the right side aswell as left, then game over.
 
ahh yh fair point... i guess il just stick with the old buttons until im mad enough to figure out a way to hack apart a my11 one and get it all back together with a proper alignment. shoudnt be too hard if i can get all the tools in hand.
 
TBH you wont get alignment correct because the tray actually pushes/clips into place on the cage, where as the MY11 buttons dont clip into anything, the surround is what fixes to the dd locating lugs, hence why all buttons remain in line, so thats why alignment is better as nothing is being pulled in different directions, all you'll end up with is a MY09 look lol, pointless use of time, but thats your choice :)
 
Hi, sorry to bring back an old thread, but from looking at this I take it that everything I need to convert my car to double din with facelift buttons is:
Double din cage : 8P0 858 005 D
Bezel which holds switches left of the hazard button in place : 8P0 941 567 A
Blank left : 8P0 941 515 D
ESP Switch : 8P0 927 134 D
Passenger airbag warning light : 8P0 919 234 B
Hazard Switch : 8P0 941 509 D
Card Shelf : 8P0 941 561 J
Trim Surround for buttons : 8P0 863 321 F

Then I will just need to trim my climate control unit and fit my Pioneer double din? I just wanted to quickly double check before ordering parts.


Also this is on ebay but is there any way to check if I'd be able to just change the buttons for the ones I have parts number for and fit the storage tray or if this is the sort with buttons that cannot be swapped and I'd need a new panel with the correct button configuration?
$T2eC16Z,!)!E9s2fDPj5BRTJFVvo(g~~60_12.JPG
 
Last edited:
Does anyone have the old style ESP button for a double din for sale? Or even just the cover (it will remove carefully)

Mine has the black paint paint chipped of by a ring or something and is white during the day & shows through red at night

Thanks
 

Similar threads