How to refurb your own alloys

JimC64

Registered User
Joined
Apr 22, 2009
Messages
246
Reaction score
29
Points
28
Location
Glasgow UK
car01.jpg


The topic - How to refurb your own alloys cheaply back to as new condition.
Why? - Damn cat run out in front of me and I had to swerve clipping a kerb.....on hindsight, maybe I shoulda took it out!
Visited Kwik fit this am who took my newly acquired spare out and swapped the tyres and fitted for me leaving the damaged wheel off the tyre.

Now onto the how to -

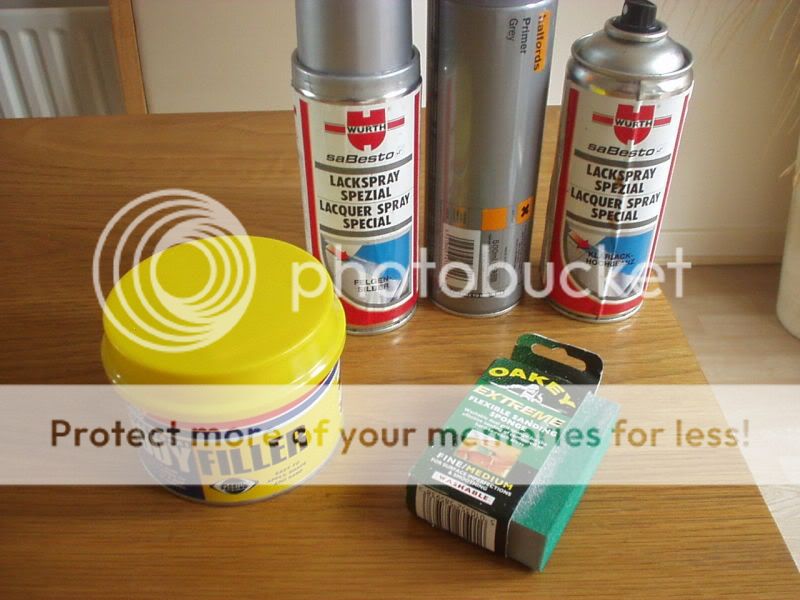
Firstly, for those of us owning Audis, Bm's or Vw's you really have to buy Wurth paint. This is what the manufacturer uses from new and is a perfect match

Products used

wol_error.gif
This image has been resized. Click this bar to view the full image. The original image is sized 800x600 and weights 92KB.
productsused-1.jpg


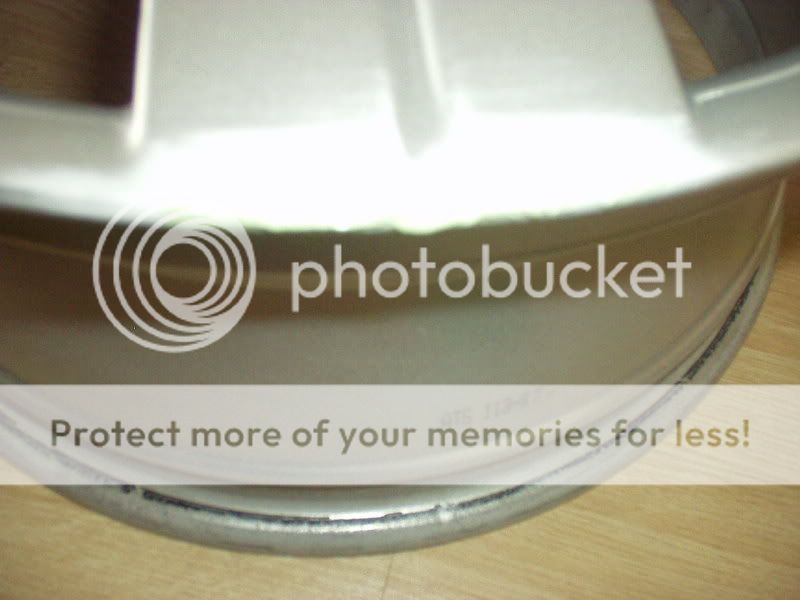
First thing is to sand down the damaged area as much as possible as shown

wol_error.gif
This image has been resized. Click this bar to view the full image. The original image is sized 800x600 and weights 72KB.
damageshownsandeddown.jpg


Once the rim has been sanded down, fill the damage with filler and allow to harden

wol_error.gif
This image has been resized. Click this bar to view the full image. The original image is sized 800x600 and weights 74KB.
damageshownwithfiller2.jpg


Sand again until a smooth level surface that matches the original is obtained and then add primer
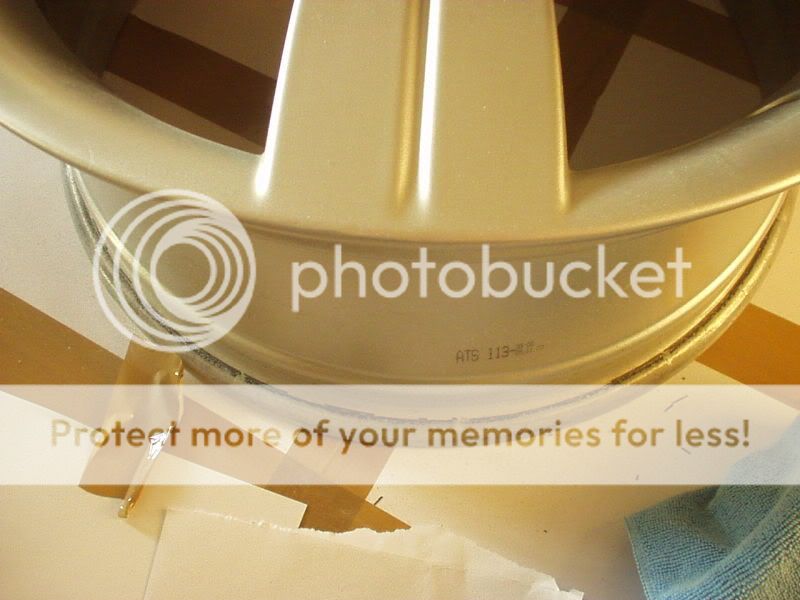
As it was a spot repair I masked off the unaffected areas

wol_error.gif
This image has been resized. Click this bar to view the full image. The original image is sized 800x600 and weights 78KB.
damageshownwithfiller.jpg

wol_error.gif
This image has been resized. Click this bar to view the full image. The original image is sized 800x600 and weights 73KB.
primer.jpg


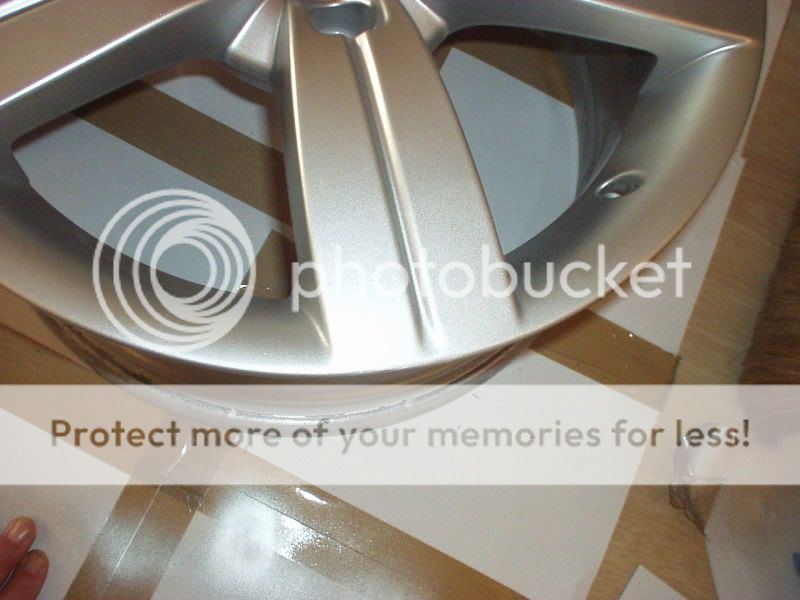
First coat of paint - good match too
wink.gif


wol_error.gif
This image has been resized. Click this bar to view the full image. The original image is sized 800x600 and weights 74KB.
firstcoatofpaint.jpg


Second coat of paint + lacquer
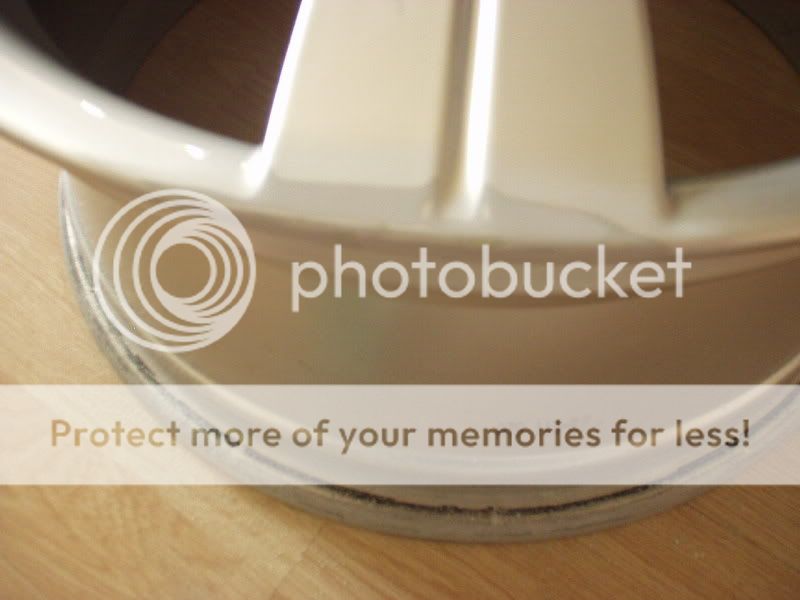
wol_error.gif
This image has been resized. Click this bar to view the full image. The original image is sized 800x600 and weights 74KB.
secondcoatofpaintlacquer.jpg


Finished rim

wol_error.gif
This image has been resized. Click this bar to view the full image. The original image is sized 800x600 and weights 71KB.
finishedrim.jpg


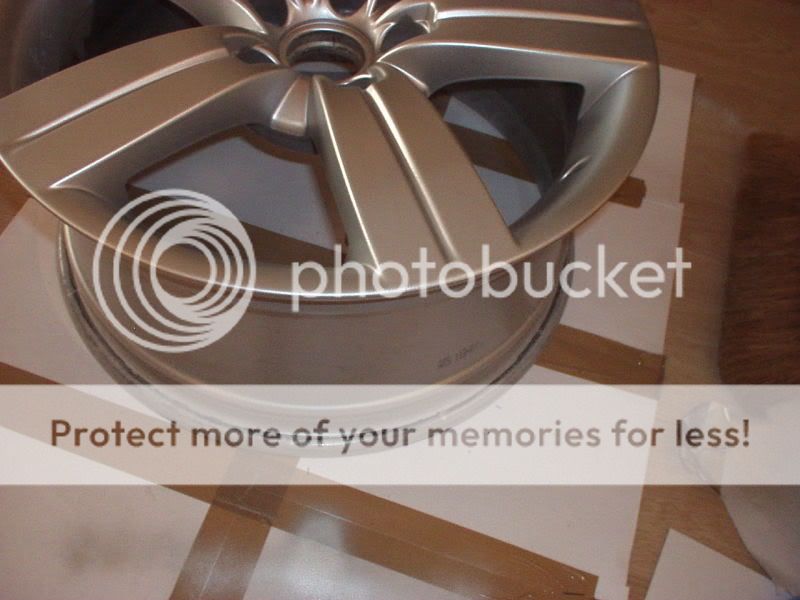
The whole process took around 3 hours from start to finish and will look even better left overnight
Blush.gif

I'm really pleased with it and it'll be going back into my boot as my spare.

Comments welcome

Thanks

Jim
 
Nice job Jim! I did my RS6's last summer - that was a full refurb - took me weeks! But I was fitting it in around work etc. It's not a hard job in all honesty especially when the tyres are off which is the only way to do it IMO.

The original colour is actually called "Avus" silver and is available in a twin pack of 150ml aerosols, one top coat and one lacquer part number LLS OM6 Z17 - about £10 from the dealer.

Sadly when my car broke down the recovery guy damaged three of the wheels so I need to do them again now :banghead:
 
Top job!

Just as a side note though, am I right in thinking you can also use something called "wheel stopper" rather then body filler? Supposed to be more hard wearing?
 
car01.jpg


Hi guys, thanks for the positive comments, much appreciated
James, you're right, its not that difficult just time consuming if you wanna do it properly.
Keeno - as for the wheel stopper, I'm not sure, you may be correct on that.
Jim
 
Looks superb. Would it be possible to do with the tyres still on?
 
car01.jpg


Hey gwildor, funny you should ask that......I did a set for my wifes Jaguar X type about a year ago and did them with the tyres still on and they turned out just as good.
I masked them off totally with lots of newspaper and masking tape and it worked very well I have to say.....my personal prefernece though is for doing them with the tyres off.

Hope this helps

Jim
 
same here did it with tyres on but well masked off with bin bags and ducktape ,i had five standard S4 wheels so i did one at a time and swaped them over as i went along
 
Hello guys.

Interesing thread! This is what I do would you believe!? Don't want to hi jack the subject just wanted to add some minor things that weren't covered to help the masses out there....

Pretty much spot on but to keep the pain on the rim, especially if your doing the whole wheel, key the paint up with 3M scotch brite or similar. It's like the green side of your washing up sponge, it's to take the shine off and give the new paint a surface to adhere to. Get all the edges as this paint tends to peel from the edge and not the middle!
When priming build up the coats gently as sometimes putting it on too heavy can cause a paint reaction! Once primer is fully cured dust some black paint over as a guide coat, you'll see why.....
Now always try and finish your repairs in as fine a grade of sand paper as possible as it will require less primer to fill the scratches. I rub the primer down with 800/1200 wet and dry paper. This is where you see why you dusted the black on. Keep flatting the primer untill the black is gone and check for imperfections, may require alittle more primer.....
Now I would always say f you can take wheels to a paint shop to be painted do it, as most of the hard work is done. You may be suprised at how little they charge!
I say this because a two pack paint, mainly the laquer is more resistant to the elimants etc!
Aerosol laquer drops it's shine after not long dependent on products but all of them are a 1k material!
If you do end up painting them just watch how the paint is laying as you apply and again, like with the primer, don't go made with the silver as this can also prompt paint reactions. Use a degreaser between processes up until your applying paint.
I know for cetain you can do a fantastic job wth aerosol as I used this method when I set up a wheel refurb business when I was 19! Also a good friend of mine did a set with zero experience and they looked wicked! Now though I paint his once prepped lol. Good luck all, I love people taking care and having a go! I have been painting cars since 16 and have seen some great ametuer jobs......some absolute crap ones too though so remember , paint work can NOT be rushed!!!!!
 

Similar threads