

What have you done to your A3 (8p) this week
- Thread starter lea323ci
- Start date
You are using an out of date browser. It may not display this or other websites correctly.
You should upgrade or use an alternative browser.
You should upgrade or use an alternative browser.

Wash wax. Tomorrow got carpet cleaner coming doing interior
Sent from my SM-G960F using Tapatalk
Sent from my SM-G960F using Tapatalk
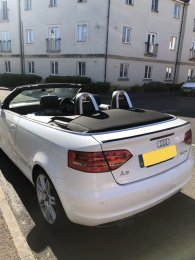
Roofspoiler fitted and gave the A3 a handwash since I dont dare to pull it through a automatic washer yet  .
.


Sent from my ONEPLUS A5010 with Tapatalk
 .
.


Sent from my ONEPLUS A5010 with Tapatalk

CHRIS SPIJKER
Registered User
- Joined
- Sep 12, 2014
- Messages
- 52
- Reaction score
- 35
- Points
- 18
Just bought a second hand bumper and got it painted budI know I shouldn’t spend one more penny on the old dog but where did you source the new front end? The PFL front end always drives me mad with the ugly bumper stripes.
Sent from my SM-G975F using Tapatalk
CHRIS SPIJKER
Registered User
- Joined
- Sep 12, 2014
- Messages
- 52
- Reaction score
- 35
- Points
- 18
Fitted a new drop link and h&r 28mm front bar

Sent from my SM-G975F using Tapatalk

Sent from my SM-G975F using Tapatalk


Spiezels
Registered User
- Joined
- Feb 17, 2015
- Messages
- 416
- Reaction score
- 90
- Points
- 28
Thank you thank you excuse the legs
All i need now is yellow seat belts
Sent from my SM-N976B using Tapatalk


How did you do it mate?
You' d laugh but its the best method get a sharpie of your colour choice and hold it in the middle of the stitch youll see it absorb itHow did you do it mate?
Sent from my SM-N976B using Tapatalk
Spiezels
Registered User
- Joined
- Feb 17, 2015
- Messages
- 416
- Reaction score
- 90
- Points
- 28
You' d laugh but its the best method get a sharpie of your colour choice and hold it in the middle of the stitch youll see it absorb it
Sent from my SM-N976B using Tapatalk
Ha! Brilliant, I was expecting something much more complex.
Will give it a go!
New top mounts all around, 10mm ride height increase and 4 wheel alignment this week. And to make it even more expensive I've got some new wheels and tyres on order 
Now to tackle the persistent knock from the front that I assumed was top mounts

Now to tackle the persistent knock from the front that I assumed was top mounts

New top mounts all around, 10mm ride height increase and 4 wheel alignment this week. And to make it even more expensive I've got some new wheels and tyres on order
Now to tackle the persistent knock from the front that I assumed was top mounts
Have you tried replacing drop links?
Have you tried replacing drop links?
Yeah, they were changed not that long ago, probably 6 months ago? The knock has been there for well over a year though. Thinking possibly ARB bushes although I don't know if doing that and taking off the drop links will knock the alignment out already?

Yeah, they were changed not that long ago, probably 6 months ago? The knock has been there for well over a year though. Thinking possibly ARB bushes although I don't know if doing that and taking off the drop links will knock the alignment out already?
Yeah arb’s a good shout, probably best to jack it up or make some little ramps and see what you can move that might be making the noise.
Don’t think it’ll necessarily knock the alignment out but is good practise to have an alignment done whenever you touch suspension I think. Even still, I can’t imagine replacing bushes would move it more than a couple degrees, probably less than a large pothole would
Funnily enough ramps are next on my list of things to do, I need low profile ones though so was thinking about making some out of some decent wood, give me something to do...
The potholes around here are just horrendous, the amount of weaving required is unreal!
When I get this done I'll report back.
Thanks for your help
")
Funnily enough ramps are next on my list of things to do, I need low profile ones though so was thinking about making some out of some decent wood, give me something to do...
The potholes around here are just horrendous, the amount of weaving required is unreal!
When I get this done I'll report back.
Thanks for your help

I’ve got 4 of them, best things I’ve ever made.
I’m on stock suspension so you’re probably have to make it more of a ramp than 2 steps, I’m going to do that eventually anyway when I can be bothered lol
No worries mate hopefully you get sorted


I’ve got 4 of them, best things I’ve ever made.
I’m on stock suspension so you’re probably have to make it more of a ramp than 2 steps, I’m going to do that eventually anyway when I can be bothered lol
No worries mate hopefully you get sorted
Like this idea. I'll be on the hunt for some wood and get this made up! Yeah I'm a bit lower than stock on coilovers so might need another level on that ramp lol.
Aaron Wiles
Registered User

- Joined
- Jun 24, 2010
- Messages
- 1,417
- Reaction score
- 241
- Points
- 63
- Location
- East Manchester In the Hills !
Full service
Dropped off at garage for MOT and Cambelt water pump change and had two wheels refurbed. Painted the dust shields as they were rusted to hell whilst I had the wheels off
Doing no more. Spent enough on it. Just need to get the small triangles in the doors changed as they have bubbles. Car is then Mint. Not bad for an 8 year old

Sent from my iPhone using Tapatalk

Since corona doesn't get me anywhere this year I will be spending my vacation money on some mods.
Browsing the net and already got some parts for my next retofit (will make it into a guide since there is 0 information about it though).
Retrofitting front PDC + PLA (Park Assist).
Browsing the net and already got some parts for my next retofit (will make it into a guide since there is 0 information about it though).
Retrofitting front PDC + PLA (Park Assist).
Since corona doesn't get me anywhere this year I will be spending my vacation money on some mods.
Browsing the net and already got some parts for my next retofit (will make it into a guide since there is 0 information about it though).
Retrofitting front PDC + PLA (Park Assist).
was waiting for the day youd do park assist!
seen a guide for a jetta, but i think yours would be better as itll be 8p focused, and more descriptive. cant wait
was waiting for the day youd do park assist!
seen a guide for a jetta, but i think yours would be better as itll be 8p focused, and more descriptive. cant wait
Saw some videos on the web about Lane Assist and Park Assist on the 8P and thought... That's what I want...
Found the PDC module and centre console buttons (PDC and PLA) at my local scrapyard. Just need to get a price from the man. Already send a mail out to Kufatec giving them the information and questions what looms I need to fix this.
Also my thesis is due somewhere next week so I'd expect this guide/retrofit done somewhere in the next month or so
. Quite excited myself too lol.Not sure if I'm gonna buy myself a new front bumper or drill the holes in it myself .. Can't find to seem a good frontbumper for a decent price. Problem is, since I want my A3 to be full-options I have jetwashers for my headlights. This is an option not much A3's have so It's hard to find a bumper in a good condition with PDC, Washer holes, is a facelift bumper and in a normal condition for a decent price lol.
(@NHN You are a retrofit king aswell, did you do this mod youself? And if so, did you buy a new frontbumper or drilled the holes for it yourself?)
Last edited:
Front parking sensor here we come !was waiting for the day youd do park assist!
seen a guide for a jetta, but i think yours would be better as itll be 8p focused, and more descriptive. cant wait

Sent from my SM-N976B using Tapatalk
Front parking sensor here we come !
Sent from my SM-N976B using Tapatalk
got a front camera, aint excited about the front sensors. but watching the wheel steer itself? sheeeeeeeeet
Wait you can get self park on the 8p?got a front camera, aint excited about the front sensors. but watching the wheel steer itself? sheeeeeeeeet
Sent from my SM-N976B using Tapatalk
Wait you can get self park on the 8p?
Sent from my SM-N976B using Tapatalk
yeah bro, thats what hes planning to do, and what im looking forward to lol
Eyyyy that lit dont even need a reverse camera tooyeah bro, thats what hes planning to do, and what im looking forward to lol
Sent from my SM-N976B using Tapatalk
Do you already have PDC to the rear? Or is it going to be a complete front and back retrofit? Can’t wait for your guide.Retrofitting front PDC + PLA (Park Assist).
Yup, its called Audi PLAWait you can get self park on the 8p?
Sent from my SM-N976B using Tapatalk
Sent from my ONEPLUS A5010 with Tapatalk
Only the front, I got the back already soDo you already have PDC to the rear? Or is it going to be a complete front and back retrofit? Can’t wait for your guide.
Sent from my ONEPLUS A5010 with Tapatalk
But before people get too hyped about it, still sourcing all the parts so it can take a while before its done
Sent from my ONEPLUS A5010 with Tapatalk
Sent from my ONEPLUS A5010 with Tapatalk
got a front camera, aint excited about the front sensors. but watching the wheel steer itself? sheeeeeeeeet
Wait you can get self park on the 8p?
Sent from my SM-N976B using Tapatalk
Do you already have PDC to the rear? Or is it going to be a complete front and back retrofit? Can’t wait for your guide.
I made a topic for everyone/information and updates.
https://www.audi-sport.net/xf/threa...distance-control-pla-park-lane-assist.417456/
Instead of raining down this topic I think it would be wise to create a central discussion point about the subject
Remove my old chrome s3 badge and replaced it with the new yellow/black s3 badge from stealthbadges, my only mistake was i forgot to use a hest gun to get the adhesive to a softer state and just using teeth floss lucky the weather was hot so naturally made it slightly softer with the help ot alcohol too
Sent from my SM-N976B
View attachment 203540


Sent from my SM-N976B
View attachment 203540


New rear inner lights fitted today
I finally managed to replace my old and faded rear inner lights.
I’ve learnt from experience to allow much more time for any jobs relating to the car, no matter how straightforward they should be. In fact it seems to be that what should be a quick and easy job never is (not for me anyway). Replacing my inner rear lights is a good example of this.
I ordered OE Magneti Marelli lights from Autodoc. Delivery took 11 days which was fine with me. I prefer to keep my cars in factory spec so only replace like with like. They came with the bulb housing and I decided to buy all new Philips bulbs at the same time.
My thanks to NHN for advising to disconnect the battery first to avoid any error codes when replacing the lights. I wasn't aware of that.
The job itself is pretty straightforward but I found it a bit fiddly.
Just when I thought everything was going fine I accidentally closed the rear tailgate. Of course, the battery was disconnected so I couldn’t open it again. I checked the car manual and it showed how to open it manually from inside the tailgate using the ignition key. Well, this took a while as I couldn’t see where the key was meant to go. Eventually I somehow got it open but not before dislocating a small piece of plastic trim inside. I then had to remove the back tailgate trim to fix it back on - ahh.
Also, when replacing one of the lights I was a little shocked to see the first signs of minor rust bubbles in one corner (see photo). It looks like where the water was collecting. The other side is perfect. Strange how that can happen. I cleaned it and touched it up with a little paint. Looks like I’ll have to revisit that over the summer and treat it properly before it spreads. Rust ruins a car for me and it always seems to return. I hate treating rust. I'm assuming the body shell is galvanised but not the tailgate and doors - is that correct?
It wasn’t until I fitted the lights that I noticed that the right hand side was missing the tip on one corner (see photo). At first I thought I accidentally damaged it but after checking the photos I took beforehand, it was definitely already damaged in the box. I left the protective plastic film on the lights until they were fitted so didn’t notice. It’s a bit annoying but they’re still vastly better than before and I couldn’t bear the thought of the hassle it would be to try and return one. The car’s not mint anyway.
After reconnecting the battery it came up with a warning light for the ESP and power steering which I imagine is to be expected. I took it for a short drive and all was fine.
It’s certainly a huge improvement and was worthwhile.

Look closely on the right hand light and you can see that the tip is flatter.

Oh dear, a few tiny rust bubbles! ahhhhhh.

The old lights were VERY faded. Cleaning and polishing didn't work so I opted to replace with new ones.

Second shock after the rust bubbles was seeing the missing light tip - ahhhh. Annoying but I can live with it.

Decided I might as well fit all new bulbs at the same time - Philips replacement fog and reversing light bulbs.

Before and after - certainly a massive improvement.
I finally managed to replace my old and faded rear inner lights.
I’ve learnt from experience to allow much more time for any jobs relating to the car, no matter how straightforward they should be. In fact it seems to be that what should be a quick and easy job never is (not for me anyway). Replacing my inner rear lights is a good example of this.
I ordered OE Magneti Marelli lights from Autodoc. Delivery took 11 days which was fine with me. I prefer to keep my cars in factory spec so only replace like with like. They came with the bulb housing and I decided to buy all new Philips bulbs at the same time.
My thanks to NHN for advising to disconnect the battery first to avoid any error codes when replacing the lights. I wasn't aware of that.
The job itself is pretty straightforward but I found it a bit fiddly.
Just when I thought everything was going fine I accidentally closed the rear tailgate. Of course, the battery was disconnected so I couldn’t open it again. I checked the car manual and it showed how to open it manually from inside the tailgate using the ignition key. Well, this took a while as I couldn’t see where the key was meant to go. Eventually I somehow got it open but not before dislocating a small piece of plastic trim inside. I then had to remove the back tailgate trim to fix it back on - ahh.
Also, when replacing one of the lights I was a little shocked to see the first signs of minor rust bubbles in one corner (see photo). It looks like where the water was collecting. The other side is perfect. Strange how that can happen. I cleaned it and touched it up with a little paint. Looks like I’ll have to revisit that over the summer and treat it properly before it spreads. Rust ruins a car for me and it always seems to return. I hate treating rust. I'm assuming the body shell is galvanised but not the tailgate and doors - is that correct?
It wasn’t until I fitted the lights that I noticed that the right hand side was missing the tip on one corner (see photo). At first I thought I accidentally damaged it but after checking the photos I took beforehand, it was definitely already damaged in the box. I left the protective plastic film on the lights until they were fitted so didn’t notice. It’s a bit annoying but they’re still vastly better than before and I couldn’t bear the thought of the hassle it would be to try and return one. The car’s not mint anyway.
After reconnecting the battery it came up with a warning light for the ESP and power steering which I imagine is to be expected. I took it for a short drive and all was fine.
It’s certainly a huge improvement and was worthwhile.
Look closely on the right hand light and you can see that the tip is flatter.
Oh dear, a few tiny rust bubbles! ahhhhhh.
The old lights were VERY faded. Cleaning and polishing didn't work so I opted to replace with new ones.
Second shock after the rust bubbles was seeing the missing light tip - ahhhh. Annoying but I can live with it.
Decided I might as well fit all new bulbs at the same time - Philips replacement fog and reversing light bulbs.
Before and after - certainly a massive improvement.
Just replaced my broken PCV and dip stick. Also replaced the funnel too. Much easier than I thought it might be...

Sent from my ONEPLUS A5010 using Tapatalk

Sent from my ONEPLUS A5010 using Tapatalk


I decided to rework my folding mirrors on remote mod. This time I wanted to make sure the door control units controlled the mirrors when ignition on, driving etc. Also desperately needed to tidy up the wiring in the doors. I think it turned out ok. I’m still waiting on one connector for the mod making it removable from vw that didn’t turn up today.
Before.

After.

The mirrors in action:
Sent from my iPhone using Tapatalk
Before.

After.

The mirrors in action:
Sent from my iPhone using Tapatalk
Since my A3 came with the Audi Chorus (2 speakers in the front and none in the back and none AMP+SUB) My doorcards also didnt had the connectors for speakers in them.
Got some looms that had the connectors on them, removed my orginal ones and replaced them.
Also wired the speakers again since I got the terminals that fit the connector now, taped them in for my personal OCD ( ) and build it back together.


Since my 8 channel PDC+PLA module came with the postage I wanted to make sure it functions. When unplugging my old PDC module I saw some corrosion. When replugged the original module couldn't be reached anymore so tomorrow will be a cleaning the connectors day.


Got some looms that had the connectors on them, removed my orginal ones and replaced them.
Also wired the speakers again since I got the terminals that fit the connector now, taped them in for my personal OCD (
) and build it back together.
Since my 8 channel PDC+PLA module came with the postage I wanted to make sure it functions. When unplugging my old PDC module I saw some corrosion. When replugged the original module couldn't be reached anymore so tomorrow will be a cleaning the connectors day
.

It's been a loooooong day..
PDC module went faulty yesterday when reconnecting. Under further investigation I found corrosion so today I needed to clean it off. Got the connector apart and cleaned the pins on the connector aswell on the module itself.


After cleaning hookup up VCDS again and unfortunatly... It still gives me a fault.
When starting the car I got a start/stop problem too, this is because the start-stop system is on the same "line/system" as parking aid. So when one of the two is at fault your dash will light up as a christmas tree.


Got the module out again and opened the puppy up.. And hard to see on this picture but there was some corrosion on the inside of the pin too. The pin that had corroded was the earthpin so makes sense for the module not to turn on if there is no electrical circruit.

After cleaning everything worked as normal.
O yeah, and I swapped my rear chrome logo for a black one today.


And yes yes yeeeeees, I will remove the A3 / TFSI badges too. It was just too hot to do them today.
Looking for the A3 badge in matt black too, and looking into a company nearby that can wrap my roofrails into matt black.
PDC module went faulty yesterday when reconnecting. Under further investigation I found corrosion so today I needed to clean it off. Got the connector apart and cleaned the pins on the connector aswell on the module itself.
After cleaning hookup up VCDS again and unfortunatly... It still gives me a fault.
When starting the car I got a start/stop problem too, this is because the start-stop system is on the same "line/system" as parking aid. So when one of the two is at fault your dash will light up as a christmas tree
.
Got the module out again and opened the puppy up.. And hard to see on this picture but there was some corrosion on the inside of the pin too. The pin that had corroded was the earthpin so makes sense for the module not to turn on if there is no electrical circruit.
After cleaning everything worked as normal
.O yeah, and I swapped my rear chrome logo for a black one today.

And yes yes yeeeeees, I will remove the A3 / TFSI badges too. It was just too hot to do them today
.Looking for the A3 badge in matt black too, and looking into a company nearby that can wrap my roofrails into matt black.
#Aliexpress £3.23 12%OFF | Black / Silver Car Styling Logo Auto Accessories For Car Rear Bumper Trunk English Alphabet Letter Emblem Stickers Badge DecalsLooking for the A3 badge in matt black too, and looking into a company nearby that can wrap my roofrails into matt black.
https://a.aliexpress.com/_d7Ecbjd
Some there, but tbh id just debadge and leave the a3 and tfsi badges off
Look gloss black actually, could coat them with a matt lacquer.