What have you done to your 8V today?

117efih.jpg

Do you have a link for these?


Sent from my iPhone using Tapatalk
 
Gave it a post holiday wash and parked it on the new drive for the first time :)

View attachment 128002

Hi mate,

What brick are those? They don't look like the normal paved brick driveways... interested because I have to get ours done soon and I'm about to be getting some quotes.

Thanks - Mark
 
Fitted some little trays that fit quite nicely into the door handles... Store your phone or keys... Can never have enough storage... Oh and fitted some air vent surrounds in red to match the outside...
 

Attachments

  • 20170610_120228.jpg
    20170610_120228.jpg
    511.9 KB · Views: 343
  • 20170610_120254.jpg
    20170610_120254.jpg
    485.3 KB · Views: 345
  • Like
Reactions: Jassyo06, christoph7r, AL_B and 2 others
Hi mate,

What brick are those? They don't look like the normal paved brick driveways... interested because I have to get ours done soon and I'm about to be getting some quotes.

Thanks - Mark
They are Cheshire cobblestones...BUT they are not real :) It's imprinted concrete ;)

I looked at the normal block paving but every single one I saw that had been down for a while had either weeds between the bricks or had sunk! This stuff just requires resealing every 4-5 years or longer depending on use, £50 to seal it again and that's them doing it. Upkeep is just jet washing it off now and again to clean it. A guy up the road had his done 4 years back in the same pattern as mine by the same people, it still looks just as good as mine which was laid two weeks back.
 
  • Like
Reactions: azibux1, Mark_86 and Rob2k68
They are Cheshire cobblestones...BUT they are not real :) It's imprinted concrete ;)

I looked at the normal block paving but every single one I saw that had been down for a while had either weeds between the bricks or had sunk! This stuff just requires resealing every 4-5 years or longer depending on use, £50 to seal it again and that's them doing it. Upkeep is just jet washing it off now and again to clean it. A guy up the road had his done 4 years back in the same pattern as mine by the same people, it still looks just as good as mine which was laid two weeks back.

Nice. I'm looking at tarmac at the moment aswell... go someone coming Tuesday to give me a quote. They're silly money driveways...
 
Gave her a bath, will post some more pics when I get on the laptop as I though the DSLR would do it more justice than the phone.

19AB410A-4E1A-4BF0-9441-CDBF993BD476.jpg
 
  • Like
Reactions: Benji34, Rob2k68, Jassyo06 and 1 other person
LoL Jassy beat me to it looks like shaving foam more than snow foam !!
 
  • Like
Reactions: Jassyo06
That's a thick coat lol

LoL Jassy beat me to it looks like shaving foam more than snow foam !!

It's a thick old foam that's for sure! Hadn't been washed for a few weeks though as it's been non stop rain pretty much! Will stick the after pics up in a bit hopefully, managed to get some decent ones as the sun was out at long last.
 
  • Like
Reactions: Rob2k68 and Jassyo06
today i got the sim card in and got google maps/street view working :)
 

Attachments

  • Screenshot_20170611-120052.png
    Screenshot_20170611-120052.png
    1.9 MB · Views: 323
  • Like
Reactions: Rob2k68, Mark_86, Tom.H and 2 others
Finally got around to install the FL sweeping LED tail lights on my PFL... As suspected, you don't need any adapter! All you need is knowing the diagram and running extra wire to the fuse box, not even coding is needed... It took me like 5 hours total to install, would it be easier with the $300 adapter? You bet, but it won't be anywhere near as satisfactory. Besides, pretty sure all the adapter is just a capacitor, pretty steep for what it is...

The hardest part of the install is getting the extra wire into the rubber grommet to the outer tail light, but if I'm to do it again, pretty sure I can do it in 2 hours or so now... I'll do a write up if anyone is interested. Total cost is about $600 for the tail lights, plus $50 for the proper connector and self made loom, then sold my original tail lights for $300, so the whole thing was done for $350 :)

 
  • Like
Reactions: Shortyian, Fiddie, Rob2k68 and 5 others
Finally got around to install the FL sweeping LED tail lights on my PFL... As suspected, you don't need any adapter! All you need is knowing the diagram and running extra wire to the fuse box, not even coding is needed... It took me like 5 hours total to install, would it be easier with the $300 adapter? You bet, but it won't be anywhere near as satisfactory. Besides, pretty sure all the adapter is just a capacitor, pretty steep for what it is...

The hardest part of the install is getting the extra wire into the rubber grommet to the outer tail light, but if I'm to do it again, pretty sure I can do it in 2 hours or so now... I'll do a write up if anyone is interested. Total cost is about $600 for the tail lights, plus $50 for the proper connector and self made loom, then sold my original tail lights for $300, so the whole thing was done for $350 :)


You've more money than sense mate l really don't see the point... What was wrong with the correct tail lights.....
 
You've more money than sense mate l really don't see the point... What was wrong with the correct tail lights.....

Bit of a wild statement to make, its his car and time and he can do what he wants. Personally if I had the expertise and knowledge I would do this to my car. The FL tail lights are desirable so kudos to you fella for doing this. Its like asking all the new FL owners, why go for that particular model when the PFL does almost everything the same....?
 
  • Like
Reactions: sjbarneS3
spray wrapped the chrome window surrounds. Did one side and then took a look and actually (cant believe these words are coming out of my mouth) prefer the chrome over the black,

gave her a wash and wax and then applied Gtechniq G3 to the rear windscreen windows (thought i had G1 in my garage) but nevermind i'll stick with G3 for now.
 
Last edited:
  • Like
Reactions: Benji34 and Rob2k68
All the pics I took
 

Attachments

  • 20170611_134118.jpg
    20170611_134118.jpg
    214.4 KB · Views: 305
  • 20170611_134104.jpg
    20170611_134104.jpg
    222.4 KB · Views: 292
  • Like
Reactions: Rob2k68
Mixed up alloy wheel cleaner and QD spray...

Safe to say that alloy wheel cleaner wasn't the best thing to use to clean the screen with (sigh)

On a plus note I'm fairly sure the screen doesn't have an iron deposits on it now :relaxed:

Didn't trust myself to wash the car after that so it'll have to stay dirty for another week! :tearsofjoy:
 
  • Like
Reactions: Benji34, Supa Koopa, Tom.H and 3 others
Bit of a wild statement to make, its his car and time and he can do what he wants. Personally if I had the expertise and knowledge I would do this to my car. The FL tail lights are desirable so kudos to you fella for doing this. Its like asking all the new FL owners, why go for that particular model when the PFL does almost everything the same....?
Yeah each to their own?
 
  • Like
Reactions: Tom.H and Rob2k68
Yeah each to their own?

If we all use our senses, how many Audi S3 would be on the road instead of Golf R? I've done countless useless mods in the past, and don't tell me you never done anything in this nature LOL I did it coz people are paying $1K for it and I could do it for less so I jumped on it, wasn't a planned mod but it came out great IMO, I'd do it again anytime too :) Besides, I still have many other useless mod around waiting to be install LOL Just give it a big laugh if you don't agree, free world :)
 
  • Like
Reactions: Jimbo10, Tom.H, Jassyo06 and 1 other person
Finally got around to install the FL sweeping LED tail lights on my PFL... As suspected, you don't need any adapter! All you need is knowing the diagram and running extra wire to the fuse box, not even coding is needed... It took me like 5 hours total to install, would it be easier with the $300 adapter? You bet, but it won't be anywhere near as satisfactory. Besides, pretty sure all the adapter is just a capacitor, pretty steep for what it is...

The hardest part of the install is getting the extra wire into the rubber grommet to the outer tail light, but if I'm to do it again, pretty sure I can do it in 2 hours or so now... I'll do a write up if anyone is interested. Total cost is about $600 for the tail lights, plus $50 for the proper connector and self made loom, then sold my original tail lights for $300, so the whole thing was done for $350 :)


Good saving without the modules !!!

So you have to pin an extra wire to each light unit ?
 
If we all use our senses, how many Audi S3 would be on the road instead of Golf R? I've done countless useless mods in the past, and don't tell me you never done anything in this nature LOL I did it coz people are paying $1K for it and I could do it for less so I jumped on it, wasn't a planned mod but it came out great IMO, I'd do it again anytime too :) Besides, I still have many other useless mod around waiting to be install LOL Just give it a big laugh if you don't agree, free world :)
All the better if you got them cheaper, l thought the new tail lights retailed around a £1000
 
Good saving without the modules !!!

So you have to pin an extra wire to each light unit ?

The pinout are different on the PFL vs FL, so I ordered the proper connectors to make an adapter and rerouted them, pretty much like the plug n play adapter but without the box. And then the PFL has 5 pins each vs the FL has 6 pins, the extra pin is for powering the sweeping module inside the tail lights. Without this pin, everything works normally, but you need this wire tap to constant power to activate the sweeping function.

@jassyo06 They're around US$600, plus the connectors for like US$50. But like I said, my original tail light were sold for US$300 so the whole project cost me US$350 only.
 
  • Like
Reactions: Rob2k68
The pinout are different on the PFL vs FL, so I ordered the proper connectors to make an adapter and rerouted them, pretty much like the plug n play adapter but without the box. And then the PFL has 5 pins each vs the FL has 6 pins, the extra pin is for powering the sweeping module inside the tail lights. Without this pin, everything works normally, but you need this wire tap to constant power to activate the sweeping function.

@jassyo06 They're around US$600, plus the connectors for like US$50. But like I said, my original tail light were sold for US$300 so the whole project cost me US$350 only.
Well l take back what l said you got a bargain
 
  • Like
Reactions: Rob2k68
Resonator delete on my PFL a few weeks ago. Amazing for the price it costs! (car was warm btw): .

Tunnel run:

Sounds amazing in low revs too!
 
  • Like
Reactions: Benji34, StevenC95 and Rob2k68
Gave her a bath, will post some more pics when I get on the laptop as I though the DSLR would do it more justice than the phone.

19AB410A-4E1A-4BF0-9441-CDBF993BD476.jpg
Never get mine that thick, what you using and how you applying it.
 
  • Like
Reactions: Rob2k68

Cheques cleared and it's going tomorrow so cleaned it out and have a box of bits waiting for a new home

Dashcam
4 x Audi beam
LED cigarette lighter torch
SD card full of music
Clearmount
Emergency Blanket
Emergency light/compressor
Can of tyrweld
Bottle of Oil in Audi bag (never opened)
First aid kit (donated to the Mrs)
Centre arm rest coin and bits and pieces holder
Various cleaning and polishing cloths
Bottle of rapid detailer
Bottle of glass cleaner
Ice scrapper
Emergency travel toothpaste and toothbrush


Never knew I had so much c***

Now got to manage 17 Audiless days!!!
 
  • Like
Reactions: Rob2k68, MattSedg and Tom.H
  • Like
Reactions: Rob2k68 and Daveotto
That's using this https://www.elitecarcare.co.uk/product/elite-hd-snow-foam-lance-with-free-litre-of-elite-snow-foam/ and the free foam it came with which was this https://www.elitecarcare.co.uk/product/valet-pro-ph-neutral-snow-foam-1-litre-2/, the Gtechniq foam was no where near as thick and didn't cling very well.

Currently using valet pro Ph neutral so might give the elite stuff when it runs out.

The valet pro stuff has been pretty good but does not grab so well now the car has a very good coating of Sonax detailer which apply after each wash and gives excellent beading
 
  • Like
Reactions: Rob2k68
Currently using valet pro Ph neutral so might give the elite stuff when it runs out.

The valet pro stuff has been pretty good but does not grab so well now the car has a very good coating of Sonax detailer which apply after each wash and gives excellent beading

It was Valet Pro that came with the lance, although the page says the lance comes with elite foam. The lance was pretty much set to give out as much foam as poss and it didn't disappoint!
 
  • Like
Reactions: Rob2k68
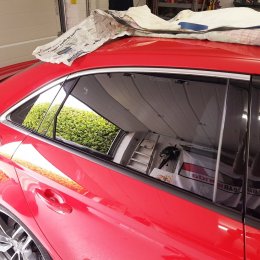
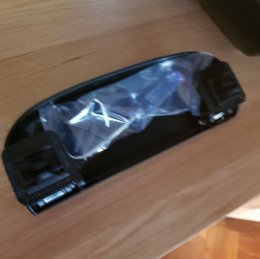
Bought some vortex generators for along the top of the rear window but unsure of them as of yet. :grimacing:
 
  • Like
Reactions: Rob2k68
My rear S3 brake calipers finally are being delivered so I'll be able to install the larger vented and slotted brakes on the car. Also the S3 rear valence for the non sline rear bumper

Sent from my SM-N910V using Tapatalk
 
  • Like
Reactions: Rob2k68
Just picking mine up from Glos Detailing following a one of Nigel's valets, he protected the car earlier in the year.

I'm in Gloucester, have a new S3 on order and have contacted Glos detailing - you have good experience with them? I've never used a detailer before but I'm keen to keep my new toy as shiny as poss
 
Got this today, it's a sun glasses holder but replaces the handle in the roof lining so fits nice against the roof... Will see how this works and might do other side as a handy storage area
 

Attachments

  • 20170614_195059.jpg
    20170614_195059.jpg
    327.4 KB · Views: 240
  • 20170614_195113.jpg
    20170614_195113.jpg
    382.7 KB · Views: 222
Last edited:
  • Like
Reactions: Mark_86, Rob2k68 and Tom.H