What did you do to your audi today

Disappointed with the bass output of the standard B&O system so substituted it with a 6" Vibe enclosure which I've had for years, pain to get to the standard wiring though.

I'm 57 so don't want ear shattering thumping that'll shake the windows in the local houses, just a more subtle more balanced sound.

IMG 20200423 134158 resized 20200423 014228139


I've run out of things to do on the S4 now, so I guess I'll have to start tidying up my sons Ex-Works rally car.
Nissan Sunny GTi F2 kitcar
Sunny Race retro
 
  • Like
Reactions: Nitro_CR
I tried to decide if I should remove the wrap covering the chrome around the windows or leave it like it came...2 hours of staring at it and still came to no conclusion
 

Attachments

  • 104151EA-CD31-4CDD-AEDD-7DBBC571152B.jpeg
    104151EA-CD31-4CDD-AEDD-7DBBC571152B.jpeg
    253.5 KB · Views: 250
  • Like
Reactions: V6_Man
Proper washed wheel arches and the wheels -
unfortunately forget to take a pic with the arch after but you can see how black is behind the wheel now.

IMG 1130

IMG 1132

IMG 1128

IMG 1129

IMG 1131

Adjustments


Sent from my iPhone using Tapatalk
 
  • Like
Reactions: ruairi83, V6_Man, S3 Rav and 1 other person
New coilovers arrived the other day! Gone for Stance+ street kit. The current Raceland ones are atrocious! They're going on this week. Cars had a service. Garage claimed they gave it a service before I bought it......they lied! I'm still struggling to settle on alloys. Can't find 18s 10j that are any good. Any help would be appreciated.
 
  • Like
Reactions: V6_Man
I fitted a new petrol filler cap as the strap on the old one had snapped due to age. Also conditioned my front seats.

Probably will need a new battery soon as I had to call out the RAC to jump start the car after only a couple of weeks of non-use. Battery is still the original from factory so it’s done well!


Sent from my iPhone using Tapatalk
 
  • Like
Reactions: V6_Man
Well, after the very 'basic' service....it doesn't register the oil! :wtf: It's fine when idle but I go a few yards up the road and it says'Stop engine, check oil level' So I check the oil level and it's fine......any ideas???
 
Hi brand new member here, had a Mercedes-Benz company car for 17 years! Due to lockdown made hasty decision not to renew scheme so needed an estate quickly and bought this from a dealer friend arrived last Wednesday!

Very keen to join you and post some pictures itching to get going!
 
Some pics of the car delivered 6/5 according to government guidlines couldnt open for 3 hours.
0b1617a81fb8313ea680eea6f1633dae.jpg
91d13ba96d0c295e81d009011c2ec64a.jpg


Sent from my SM-J600FN using Tapatalk
 
  • Like
Reactions: V6_Man
Thursday / Friday tasks clean a very dirty engine bay . Then attend to the predictable corrosion on sill edge / front wing. Looks as though previous owner had applied clear stone foils to prevent it getting too bad.
fc5c59564eef365b95cc60aee117c3cc.jpg
5607ecc098c21d1f120786161f2478b9.jpg


Sent from my SM-J600FN using Tapatalk
 
  • Like
Reactions: V6_Man and Eldeano2
Been busy! Washed, Clay bar, washed, dodo juice waxed, nano ceramic coated

Wheels off for much needed refurbs Wednesday, caliper paint on the way too!
ad312ab9f23b66519754320c2c591910.jpg
3294c83848e432c5018d56ec84eaea5c.jpg


Sent from my SM-J600FN using Tapatalk
 
  • Like
Reactions: V6_Man, Nitro_CR and RyanJonS4
While the wheels are off just had to do something with the rusty calipers, ordered a kit from E tech. As with everything its all about the prep, wire brush and cleaning all components with brake cleaner. Quite pleased with the results.

What do you think before and after pics? I know there has been many opinions on colours on here but i think this just looks clean and oem.
cadf3ebfb6e48ed9f8dd8b84e3628909.jpg
4e6b25ad11f1edab8121e0b1fe3882cc.jpg
d4a1a92ab64483570ba07b18c0e5948b.jpg
e17c3a02bcc113f789f2325c0d67383b.jpg
094c580db7a71257e7a267795535a996.jpg


Sent from my SM-J600FN using Tapatalk
 
  • Like
Reactions: V6_Man, Eldeano2 and RyanJonS4
Quite a productive day...
Swapped the rings & s-line badges for black ones and fitted silver indicator bulbs on the rear to get rid of that of that fried egg look
 

Attachments

  • F8BEA38D-4E23-4719-A978-FF6FD494F917.jpeg
    F8BEA38D-4E23-4719-A978-FF6FD494F917.jpeg
    557 KB · Views: 235
  • A1DCE61C-D055-4804-A938-2EC72CAD2E06.jpeg
    A1DCE61C-D055-4804-A938-2EC72CAD2E06.jpeg
    525.2 KB · Views: 232
  • B18EB268-5288-4469-B36D-8E53EF5547CA.jpeg
    B18EB268-5288-4469-B36D-8E53EF5547CA.jpeg
    415.3 KB · Views: 236
  • 1FEF0168-C113-46E9-A0FE-E7DD4FDC9C0E.jpeg
    1FEF0168-C113-46E9-A0FE-E7DD4FDC9C0E.jpeg
    538.2 KB · Views: 229
Last edited:
  • Like
Reactions: V6_Man, RS5 JON and ***DK***
Finally repaired my power boot!

It has been a bit intermittent to close on the first press of the button and when it finally stopped I bought a new button. Only this didn’t fix it. The only way to shut it was to pull it down a bit until the motors took over.

couldn’t find any info on the wiring for the switch so started checking continuity along the loom. Was fine in the bent between the tailgate and frame and ok there but nothing down by the bcm module. Anyway started to cut off the fabric tape only to find the wire completely broken haha. Fixed that back together and re-taped it back to look oem.
Shuts perfectly and after spraying the gas struts with ptfe spray it seems to open loads better too!
 
  • Like
Reactions: Eldeano2
Did a service on mine this weekend. Just oil service, top up fluids and inspect air filter. While in the airbox I modified the intake scoop a bit as it scooped downwards quite sharply upon entering to the box so now it's more direct. I removed the flapper a while back as well.

When I reset the service interval on VCDS I couldn't work out how to get a decent amount of miles on the display so I just compromised for the time being. Wanted to set 7500 miles for oil and maybe 15000 for inspection but ended up with 9000 oil and 3100 inspection lol.
 
Fitted the new 19" alloys and spaced the rears 15mm. I've got 2x 20mm spacers and bolts used to £30. If anybody wants them.
 

Attachments

  • 20200531_143232_copy_3456x2592_copy_1728x1296.jpg
    20200531_143232_copy_3456x2592_copy_1728x1296.jpg
    700.3 KB · Views: 195
  • 20200531_143027_copy_3456x2592_copy_1728x1296.jpg
    20200531_143027_copy_3456x2592_copy_1728x1296.jpg
    589.9 KB · Views: 183
  • 20200531_143046_copy_3456x2592.jpg
    20200531_143046_copy_3456x2592.jpg
    1.4 MB · Views: 214
  • 20200531_143137_copy_3456x2592.jpg
    20200531_143137_copy_3456x2592.jpg
    1.8 MB · Views: 196
  • Like
Reactions: V6_Man and Eldeano2
Fitted LED Number Plate Bulbs and LED Reverse Light Bulbs to my A4 this morning. I've previously had the 24 LED Ebay specials units in my number plate housings and these have given massive "beam me up Scottie" light output to the rear. Unfortunately the LED's have dwindled away to virtually nothing over time so I replaced them back with the standard Halogen bulb units. Now I've got the 2 Led in each bulb from Trups at EM Tuning, and although light output is far less than the multi Led units, they are still much brighter than the standard yellowish output halogen bulbs.
As for the T15 LED Bulbs, also supplied by Trups a
IMG 20200606 102604
IMG 20200606 102621
t EM Tuning (don't forget to put in the discount code ASN13 if purchasing) these bulbs are in a different league with their super bright white light output compared to the standard bulbs. They are also Canbus error free which is great after the disappointment of fitting some cheapie so called Canbus error free T15 LED Bulbs (less than a fiver from Ebay as a stop gap) only for both bulbs to show faults everytime I selected reverse.
Next up will be the rear indicators swapping to LED's. While I was in the boot doing the other bulbs, I took the rear light fitting out to check which type of bulb the rear indicator takes. It's a P21W standard bulb but decent Canbus error free LED replacements aren't cheap. The rear wing mounted fitting comes out very easy and also went back on easily enough. While I had it out I took the opportunity to clean around and behind it with almost 9 years of crud, algae etc built up around and behind it in the nooks and crannies. Should be a straightforward bulb replacement job if the bulbs fit back inside the fitting OK. The final piece of the jigsaw will be the front indicator bulbs, something which looks far from straightforward with the Xenon headlights having to come out to do it.
 
  • Like
Reactions: V6_Man, Deo and jdp1962
Finally got round to fitting the CWA100 charge cooling pump.
Also fitted my new supercharger with Forge Pulley and dual nozzle Meth set up.
E170B25D D57E 416A ABF5 99F8D2407E02
 
  • Like
Reactions: Deo
Plastidipped the rear diffuser from factory grey to black. Fully removed the diffuser from the bumper and removed the honeycomb section in order to achieve the finish.

WhatsApp Image 2020 06 09 at 222018


WhatsApp Image 2020 06 09 at 221820
 
  • Like
Reactions: feva, briceportier and Deo
  • Like
Reactions: Mercedes Traitor
Just need to polish those exhaust tips back to their shiny chrome finish now and it will set the rear defuser colour off nicely
Definitely need to clean and polish them...but they are black chrome!

Going for a red and black theme, next jobs are to replace the Quattro badge and boot rings.
 
  • Like
Reactions: Eldeano2
Definitely need to clean and polish them...but they are black chrome!

Going for a red and black theme, next jobs are to replace the Quattro badge and boot rings.
Sorry about that, I didn't realise they were black chrome. I clean my chrome tips inside and out on every maintenance wash but it doesn't take long for the internals and the tips to blacken up again...looks nice when it's done though :) Look forward to seeing the effect of the black rings and quattro badge makes to your motor.
 
Got that in mind as well but would prefer piano black...

Sent from my SM-G965F using Tapatalk

Would have liked piano black too...can you get that as an actual colour or would some sort of finish help achieve that?

On a related note, i have bought a roll of 3M piano black wrap for the interior...
 
Sorry about that, I didn't realise they were black chrome. I clean my chrome tips inside and out on every maintenance wash but it doesn't take long for the internals and the tips to blacken up again...looks nice when it's done though :) Look forward to seeing the effect of the black rings and quattro badge makes to your motor.

Don't mention it! just need to find some time to wash, clay, polish and wax. So just the five or so hours required for that!
 
  • Like
Reactions: Eldeano2
Got me some H&R springs. -40mm so -20 on the S Line as its already lowered from standard. Ride is much the same, just looks better in my opinion.
 

Attachments

  • 397402F8-8324-4039-92A6-5E4F50E856E5.jpeg
    397402F8-8324-4039-92A6-5E4F50E856E5.jpeg
    1.2 MB · Views: 186
  • 6D9EA5B1-B03B-43C2-8B6D-2825895EE5EF.jpeg
    6D9EA5B1-B03B-43C2-8B6D-2825895EE5EF.jpeg
    1.2 MB · Views: 174
  • CE775A58-639A-40C5-8CC8-B31CF6BE7159.jpeg
    CE775A58-639A-40C5-8CC8-B31CF6BE7159.jpeg
    1 MB · Views: 169
  • Like
Reactions: Ben1413 and Eldeano2
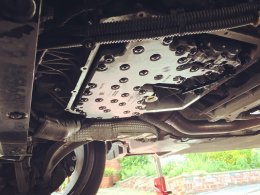
Did a full DSG oil/filter change.
Needed to remove the x brace to get to inside the pan and replace inner filter & magnets. Rather than just doing what audi do, which is replace outer filter and oil change.
5A11B4CB A464 4E21 9A55 1B5A3C51D5F8 72575000 0CE1 414F 855E 950CFCFB3140
 
  • Like
Reactions: Ben1413
Gave the car its first proper clean in my possession today. It was also my first time properly cleaning a car, never bothered with my old one! I used a combination of AutoGlym and Meguiars products in combination with the Karcher K2 pressure washer since it's my first delve into the detailing world.
y0gybk0.jpg

Xy2tjGI.jpg
 
  • Like
Reactions: V6_Man, RS5 JON and 8YARWY
Changed the front strut and the job was a b***h. Pinch bolt was seized and it took a air impact chisel to get it out.
 

Attachments

  • 20200622_165646_copy_3456x2592.jpg
    20200622_165646_copy_3456x2592.jpg
    1.7 MB · Views: 142
  • Like
Reactions: V6_Man
Screenshot 20200715 212227 Gallery
Replaced front disks and pads (pagid)

£163 from ecp with code

Caliper carrier was a nightmare 21mm spanner and a hammer got it free.
 
  • Like
Reactions: V6_Man
Well that was the easiest upgrade I've ever done (well apart from the fan washers)

Love the way my cheap Chinese one came in matching sepang blue (almost ;) )
WMtYaKAYVGtM3eehVnUBA8tXD6xuS1PXYOnwf-1HLFvV0Ef-Vzni3MapNO7S0xN2F3V3Z81cdA6UbfCtrikOTkPU4leQOdLTNM4PYKM3wQYNiu1Gfe-Qv8R_NMxX-Fz-R2cMNPALmPMCFcCjUHw3W53cuf1fZKP1C-iZ6rxLZT-DBhdStM_Z1bwwRXBvBjWhYGYLLd-oMc1ddrmNOwl2N8WxkL5tmcBrJDUJdPzR5g8vVA3OsNLan_rcz0BcdmUDfSCHejLPGpkZXtnEXRE-Ww42FrYZQYv0EkAoEjUNtwpzcDXrmYIMBwqWcBYf7TtzmRerENRXCkxHCMVMyr4zcaL8wOoLpDLkWsBAyB0Y6np0zbH_tItGyQ3nBKJoKoSR3L3himirdg_RPOlBChyYoPknfeG_xTAD894mfC7MITifblV-Ep7ua246YX_Fpqdavp3KXlMi_rIsVqQETg4u21r22P7sJEjKbxteLBQyn-7H3UhY6GLf0a5JpnK8jHEPTF3CDki1CGMftdJ6-s13h_dWtHC-3o6_AcpGgblphbR1SYzYP3OP5vCFhgdjoYu3mGCPi_g59EuDyKm-eYOvuOmpvUuTAwbYM33i0k4Y8ssIrS3cC4c1cjA-NShMLUzacMPjC-5GWXO8kjlFutpGqICql3opBo6LUCoygVBTRUEZsbE1ojjn822Dz4FZnQ=w2898-h1630-no
 
  • Like
Reactions: V6_Man