Thinkware F770 worklog/installation guide

TMB

Registered User
Joined
Sep 6, 2016
Messages
102
Reaction score
101
Points
43
Location
Norway
Thought I'd put up a few pictures of my recent dashcam installation if anyone's interested :) Hardwired this 2-channel system to my car a few days ago.

Dashcam eske


Dashcam kabel eske


Minnekort


The front and rear cameras with CPL filters from edr-auto.fr attached:

Cpl front1


Cpl front4


2016 10 29 144550


The first thing I did was to find out which fuses to use. To get parking mode working on the F770 you need two fuses; one that's always on and one that's switched by the ignition. That way the F770 knows when to enter and leave parking mode.

The fuse box (one of them) is located on the left side of the cabin. For a LHD like mine it's under the wheel, for a RHD it's behind the glovebox.
To get to it I had to remove the panel to the right of the light switch. the one that says airbag on it. You can pry this right off but I recommend first removing the larger panel to the left that's against the door to be able to access the clips for the other panel from behind and help get them out to avoid breaking anything.

2016 10 28 131424


2016 10 28 131511


Here you can see the other panel and the clips that hold it in place. You can easily squeeze these together and remove the panel that way.

2016 10 28 131730


2016 10 28 133908


2016 10 28 133914


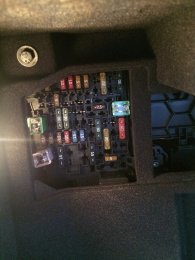
And the fuse box is revealed:

2016 10 28 132503


For the fuses I chose the 12v outlet one (bottom in picture) for switched and the one for central locking for the permanent (top in picture).

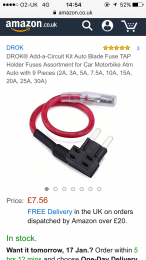
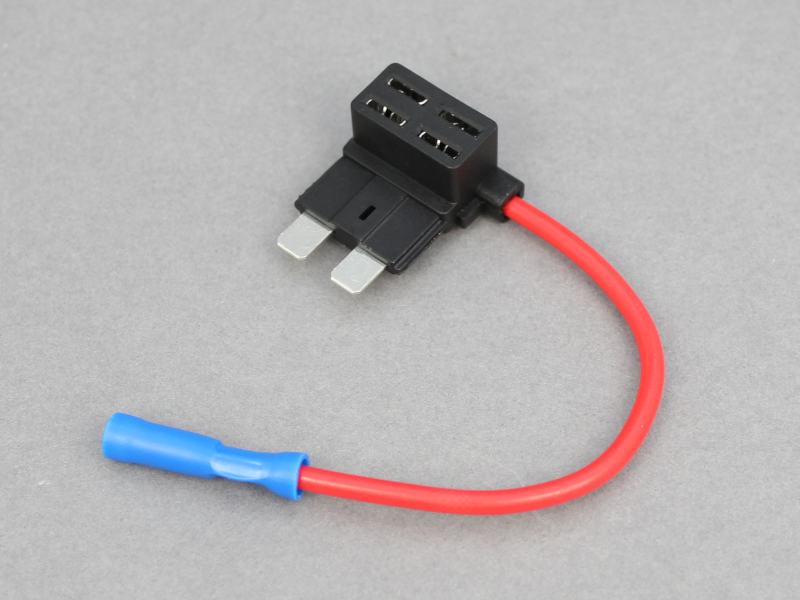
To get a "professional" installation that can easily be reversed/removed I used "fuse taps", also called "Add-a-Circuits" that plug right into the existing fuse slot and lets you create a second circuit off of that with a seperate fuse. They look like this:
post-106660-0-22650700-1477893253.jpg


You just plug it in (the right way!) where the existing fuse is located, insert the original fuse in the bottom slot and the new fuse in the top slot. I chose 5A fuses for the dashcam.

I chose to attach "cable shoe" connectors with some tape around them to the fuse taps and the hardwiring kit. I could have also soldered (best result) or used i.e. Wago connectors. I used my awesome crimping tool from Cimco to do this.

Krympetang


Before:

2016 10 28 135744


After:

2016 10 28 135904


2016 10 28 140244


Kabelsko


Together:

2016 10 28 135944


2016 10 28 161158


Installed:

2016 10 28 155802


2016 10 28 161551


Then I started with the running of the power cable from the fuse box to the front facing camera. Ran it up along the A piller and along the headline, just tucking it in as I went along. Easy.

2016 10 28 145656


2016 10 28 145929


2016 10 28 150428


2016 10 28 152558


2016 10 30 162453


2016 10 30 162527


Then I ran the cable from the front camera to the rear camera. Exactly the same way, tucking in in along the headliner on the right side of the car. No need to remove any panels until I got to the rear door.

2016 10 29 131612


2016 10 29 131751


2016 10 29 133036


2016 10 29 134111


2016 10 29 134657


2016 10 29 135407


Then came the rear door and the panels had to come off. These are fastened with clips all the way around that needs to be carefully removed to avoid breaking anything. There are also two T25 screws behind the warning triangle that has to come off first.

2016 10 29 143313


2016 10 29 142250


2016 10 29 143309


Now I just had to run the cable through the right grommet and out to where the camera would be mounted. I used a piece of network cable to feed the cable through.

2016 10 29 143700


2016 10 29 144156


2016 10 29 150151


2016 10 29 150629


The leftover cable (about 2 meters) I tucked behind this panel. It's a good idea to avoid looping too much cable near the DAB antenna to avoid interference issues. I also attached the included ferrite core in this end and have not yet experienced any DAB issues.

2016 10 29 144147


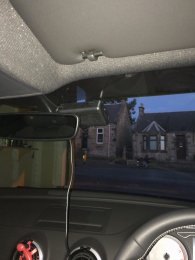
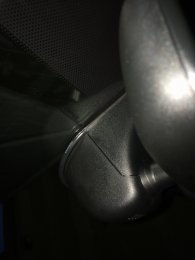
Figuring out the placement of the two cameras was simple. I just powered them up using the included cigarette jack power adapter and went into the mobile app and viewed the live image. I had to mount the front facing camera a little bit to the right but it's barely visible on the footage.

Here are some pictures of the car after installation. The cameras are almost invisible :)

2016 10 30 162548


Bak etter


2016 10 30 162610


Here is a clip from a test drive right after installing it:

 
Last edited:
  • Like
Reactions: AndrewB, ahfh1, tele2050 and 13 others
Nice write up mate ;o)

When I crimped my fuse taps to the dash cam wires (the power magic pro in my case) I used one male on one and a female on the other that way should they come loose they'll never go back on the wrong way.

Quick point about the centre hole on your tailgate where you've routed the rear cam cable through. That's actually used for a location hole there is a crucifix ribbed feature moulded on the trim to centralise it prior to pushing the clips home. The cable is either holding the trim off or you're in danger of slicing through it. I'd re-route this in a hurry if you've yet to put the trim back on!
 
  • Like
Reactions: TDI-line, S3 Turbo and pburv
Quick point about the centre hole on your tailgate where you've routed the rear cam cable through. That's actually used for a location hole there is a crucifix ribbed feature moulded on the trim to centralise it prior to pushing the clips home. The cable is either holding the trim off or you're in danger of slicing through it. I'd re-route this in a hurry if you've yet to put the trim back on!
Oh snap, didn't think of that :O

No, I haven't put it back on yet as I'm going to be installing rear view cam soon. I'll fix it asap, thanks!
 
  • Like
Reactions: TDI-line, S3 Turbo, pburv and 1 other person
We have a 770 as well as the earlier 750. The big problem with the 770 as compared to the 750 is it's near impossible to unplug the connectors once plugged in. I took a dremel to mine and removed the side cheeks. If you intend leaving it on the windscreen all the time it may not matter. I prefer to remove temptation myself. The 750 was easily removable. The 770 is a typical example of something designed by someone who has no intention of using it. Style over substance.
 
  • Like
Reactions: S3 Turbo and pburv
Oh snap, didn't think of that :O

No, I haven't put it back on yet as I'm going to be installing rear view cam soon. I'll fix it asap, thanks!

You're welcome mate. Also note my preferred cable routing so that you don't cut across the curtain airbag at the top of the A pillar :-

CAB_2.jpg
 
  • Like
Reactions: TMB, S3 Turbo and pburv
Great write up, thanks.

I am struggling to find an earth for my supply. In my previous A3 I managed on the back of the AMI unit, but it won't pull out in my new car. Where did you manage to terminate the negative?
 
  • Like
Reactions: pburv, Raul_sbd and Rob2k68
Good write up dude.

I transferred and fitted my Blackvue last weekend from my old car to the S3 - even though it was the second time i've fitted a 2 camera dash cam it took me ****** ages lol, always paranoid i'll break something.
 
  • Like
Reactions: pburv, AudiNutta, Raul_sbd and 1 other person
Good write up dude.

I transferred and fitted my Blackvue last weekend from my old car to the S3 - even though it was the second time i've fitted a 2 camera dash cam it took me ****** ages lol, always paranoid i'll break something.
How is the DAB reception on yours? my 2chanel 650w Blackvue still experiencing DAB issues.. I cannot be bothered more so just listen to FM ;)
 
Good write up dude.

I transferred and fitted my Blackvue last weekend from my old car to the S3 - even though it was the second time i've fitted a 2 camera dash cam it took me ****** ages lol, always paranoid i'll break something.

Did you hardwire this kit? If so where did you terminate the neutral please? I am having nightmares with my 2CH camera with LCD. I think Audi unplugged the camera for the test drive in mine yesterday, which is sickening. But I can't go accusing because it is playing up. I have a 64GB card in, I have gaps of 6 days between footage and some journeys where it starts recording 10 minutes in for 3 minutes, then stops. I drove from London to South Wales 6 weeks ago, I had 10 minutes of footage and nothing for the next 4 hours!!!!

The supplier is telling me that 64GB cards are temperamental and need formatting once a week on a PC, not the dashcam? :(
Mine is recording nothing of use, it is all blurry and juddery with no audio.
 
  • Like
Reactions: Rob2k68 and pburv
Great write up, thanks.

I am struggling to find an earth for my supply. In my previous A3 I managed on the back of the AMI unit, but it won't pull out in my new car. Where did you manage to terminate the negative?
I used the large bolt found behind the cover by the A pillar:

2016 10 28 145656
 
  • Like
Reactions: pburv
Great write up, thanks.

I am struggling to find an earth for my supply. In my previous A3 I managed on the back of the AMI unit, but it won't pull out in my new car. Where did you manage to terminate the negative?

I used the large bolt found behind the cover by the A pillar:

View attachment 109057

I used that very same earth point to start with but found that the camera wouldn't come on 100% of the time which defeated the point of having it !, in the end I drilled a hole and used a self tapper into the bracket at the end of the dashboard - you can see the earth I made here .......

DCAM_EARTH.jpeg
 
  • Like
Reactions: pburv
I used that very same earth point to start with but found that the camera wouldn't come on 100% of the time which defeated the point of having it !, in the end I drilled a hole and used a self tapper into the bracket at the end of the dashboard - you can see the earth I made here .......

DCAM_EARTH.jpeg

Hm, interesting. Do you find this works reliably?
 
  • Like
Reactions: pburv and Rob2k68
How is the DAB reception on yours? my 2chanel 650w Blackvue still experiencing DAB issues.. I cannot be bothered more so just listen to FM ;)

It's a weird one really. The DAB definitely does play up, but it only happens in the same places in my town. On my drive to work i'd say 20% of the time it's intermittent, the other 80% it's absolutely perfect. Not sure if the DAB signal is weaker in certain areas and so when it's weaker it's easier for the dash cam to interfere? I leave mine in DAB and just switch to my SD card music when i get back to my town after work haha. Having said the above i haven't tried those little magnetic clip things to try and reduce it yet
 
  • Like
Reactions: Rob2k68 and Raul_sbd
Did you hardwire this kit? If so where did you terminate the neutral please? I am having nightmares with my 2CH camera with LCD. I think Audi unplugged the camera for the test drive in mine yesterday, which is sickening. But I can't go accusing because it is playing up. I have a 64GB card in, I have gaps of 6 days between footage and some journeys where it starts recording 10 minutes in for 3 minutes, then stops. I drove from London to South Wales 6 weeks ago, I had 10 minutes of footage and nothing for the next 4 hours!!!!

The supplier is telling me that 64GB cards are temperamental and need formatting once a week on a PC, not the dashcam? :(
Mine is recording nothing of use, it is all blurry and juddery with no audio.

Mine's not hardwired although I am looking to do that at some point to be honest due to idiots with trollies etc.

I've been pretty fortunate and never had any problems with my DR650-2CH (touch wood), picture is really good, sound works well as do its other features. I don't use a 64GB card though, i've always used the 16GB SD card it came with as it's always on loop and i take any footage i want straight off the card to keep.

I've formatted my SD card on a PC about...2, maybe 3 times in total in almost 2 years so it sucks if they're telling you it needs doing every week - if you're anything like me the whole point of a decent dash cam is you install it and forget about it - so having to format it all the time defeats the object. Did the supplier of the dash cam also sell you the SD card? If so then they need to do something IMO.
 
Both the 750 and 770 need their sd card formatting on a very regular, i.e. weekly, basis irrespective of type. Thinkware, of course, say you should only use their own cards to reduce the problem. It matters not. The best cards to use are the Delkin as used in the GoPro but they still need regular formatting. Unless you want to leave your cam on your windscreen forever go for the 750. If you select the 770 you'll soon see why.
Having said that both cams are superior to the 650.

Unsure who you were replying to, but I was discussing a blackvue dash cam not a thinkware one, which doesn't require weekly formatting.
 
  • Like
Reactions: Rob2k68
I like his write up and will come in handy when I come to install.

Did you package come with the 64gb card?

What benefits do the filters offer?
 
I like his write up and will come in handy when I come to install.

Did you package come with the 64gb card?

What benefits do the filters offer?

I bought the 64GB card separately.

CPL filters mainly remove some of the reflection from the dash on sunny days.

Video from another camera but it's the same effect.

 
  • Like
Reactions: Rob2k68 and Gazjs
I used the large bolt found behind the cover by the A pillar:

View attachment 109057

This is where my Blackvue is grounded too. Never had any issues with it as others are reporting. I seem to remember that the ring for the ground wire on the Power Magic Pro has the anti-slip 'spikes' on it, and I did do the bolt up reasonably tightly so perhaps it has just gone through the paint and is in contact with the panel underneath.

I may look at tapping a hole into that frame for the next one though, as the trouble with tha big bolt is that you have to wedge the ground wire into the side and tighten up, it's far too big to go through the hole in the ground wire.
 
  • Like
Reactions: Rob2k68
I may look at tapping a hole into that frame for the next one though, as the trouble with tha big bolt is that you have to wedge the ground wire into the side and tighten up, it's far too big to go through the hole in the ground wire.
You can just cut the ring on the wire in the middle and bend it a little so that it fits "around" the bolt.
 
  • Like
Reactions: cemerson
You can just cut the ring on the wire in the middle and bend it a little so that it fits "around" the bolt.
Yeah, make it into a 'fork'
 
  • Like
Reactions: Rob2k68 and cemerson
Hmm thinking about it, I don't think that can be the bolt I used. I'm pretty sure I had to use a Torx bit to get the bolt I used off, but it's somewhere in a similar area.
 
  • Like
Reactions: Rob2k68
Add a circuits ..... is this the only purchase i need to make together with additional fuse? on top of the camera and hardwire kit? Would any tool(s) come in handy? I haven't done anything similar before but it look easy enough?

The add a circuit, are these full size fuses yes?

Many Thankl
 
Add-a-curcuits come in all fuse types and sizes. Depends on what type of fuse slot you're going to use for the dashcam.

Well, a multimeter is always nice to have when doing anything electrical related. Apart from that I would get a set of trim removal tools (Bojo or similar) to avoid damaging the trim with screwdrivers.

And you would need "normal" tools like different types of screwdrivers, pliers, cutters etc. Electrical tape. Etc.
 
  • Like
Reactions: Rob2k68
Many thanks for reply. I will be fitting the same camera to an Audi S3, I assume our fuse boxes will be very similar.

I will grab hold of a MultiMate and set of trim tools to confirm this.

Many Thanks once again.
 
  • Like
Reactions: TMB
No problem, just ask if you need anything :)

About the DAB issues some are experiencing; I still to this day haven't experienced any form of DAB issues installing it the way I did :)
 
Wrapping the lead that connects front and rear cameras together completely in aluminium tape also helps reduce the risk of DAB issues.
 
  • Like
Reactions: pburv
As a rule of thumb avoid clipping to or looping through any of the antenna amplifier cables (the blue wires in the image below) also careful positioning of the ferrite cores will allow you to get the camera as high up the screen as possible should you wish to :-

DASHCAM%20RR%20CABLE.JPG
 
  • Like
Reactions: pburv
this guide, and the comments in here, helped a lot with me wiring up my camera and radar detector. Thanks OP and others!
 
  • Like
Reactions: TMB and Rob2k68
Those with RHD cars, have you chosen to mount on right or left of mirror?

OP - do you find it easy enough to still access the cables and lens adjustment with it against the rear mirror housing?
 
OP - do you find it easy enough to still access the cables and lens adjustment with it against the rear mirror housing?
Yeah, not a problem. I rearely have to unplug it or adjust the lens anyway though.
 
Installed the front camera and traced the wire back to the boot. Got dark so will finish that off tomorrow. Also running off a temp power socket supply until I get around to hardware.

I decided to install on drivers side so the camera lens was more central.

To avoid any issues with removing cables or adjusting the camera lense, I have stored enough loose cable around the mirror housing so that once removed from hanger there is plenty of slack for what I need.

Very impressed with the camera and the video feed!
 

Attachments

  • IMG_4011.JPG
    IMG_4011.JPG
    757.3 KB · Views: 509
  • IMG_4013.JPG
    IMG_4013.JPG
    528.8 KB · Views: 537
  • Like
Reactions: TMB
So I got the multi meter out today. What I uncovered what a fuse box significantly different from the OP.

Together with the manual however I managed to test and prove that the same 20 fuse as highlighted by OP still controls the cig lighter, but my central locking appears to be the 40 below the larger green.

Although on removing the fuse the doors still locked? Anyway, the fuse showed a voltage of around 12.44 when the car was off.

Please can advise what add a fuse I should buy based on below picture of my fuse box and the description above?

Edited to add - will add a fuse even fit with the two fuses being so close together?

Second edit - to make space - I can use the 15 bottom left of the 20 which I first highlighted (rear wiper) this is not live when off.
 

Attachments

  • IMG_4045.JPG
    IMG_4045.JPG
    895.6 KB · Views: 531
Last edited:
Been looking at the add a fuse. Some of these say max 20A or max 30A etc. Is your 40 running off a specific add a fuse? Or is it the output that is limited to 20/30A?
 

Attachments

  • IMG_4046.PNG
    IMG_4046.PNG
    207.3 KB · Views: 566
  • IMG_4047.PNG
    IMG_4047.PNG
    83.7 KB · Views: 534
Last edited:
The camera only takes a few amps, 20 or more will be fine for the cable.
 
  • Like
Reactions: Rob2k68
So I got the multi meter out today. What I uncovered what a fuse box significantly different from the OP.
Probably because my car is LHD.

Together with the manual however I managed to test and prove that the same 20 fuse as highlighted by OP still controls the cig lighter, but my central locking appears to be the 40 below the larger green.

Although on removing the fuse the doors still locked?
I think the fuse controls the automatic unlocking/locking of the doors when using the key fob or the control panel on the driver's door. Try pressing either when the fuse it out.

Been looking at the add a fuse. Some of these say max 20A or max 30A etc. Is your 40 running off a specific add a fuse? Or is it the output that is limited to 20/30A?
Tbh I didn't really pay attention to what the "maximum amperage" of the ones I used were. This probably has to do with the gauge of the wire in relation to fire hazards etc.
 
Many thanks both.

I think too now after some thought along with your comments that the max Amp must be for the cable rather than fuse.

Yeah I thought would be. Excuse LHD, my layout dosent even reflect the manual fully but it's relatable.

Thanks again for the help.
 
  • Like
Reactions: TMB
Been looking at the fuse box again.

I removed F42 again which is a 40A and labelled central locking/windscreen washer.

Provides full power when ignition off, but dosent appear to control the central locking at all, could still lick the car inside and out and set the alarm off .

It does however remove the windscreen washer.

Appears weird that windscreen washer would be 40A and on all the time?

Anyway, the fuse taps I got were too small from Amazon so making a trip to Halfords.

Anyone any idea why F42 would be so high a current for a windscreen washer and why it would be powered all the time?