since when has an A8 been the more economical option....

Flynn89forever

Registered User
Joined
May 23, 2018
Messages
167
Reaction score
135
Points
43
Location
Norfolk
normally post over in the S5 B8 forum here but having retired the S5 from daily use i bought a new daily and having had to use the S5 as an everyday car since the company car went back the fuel costs with the mileage i'm doing has been horrendous.... and i really don't want to be putting this daily mileage onto the poor thing.....
So the hunt was on for something a lot more economical.....
So what's a petrolhead to do who has an obsession with Audi V8's???
6.jpg

Well it is technically a lot more economical than the S5.....
It is a 2007 A8, decent condition, low miles... but needs some love
3.jpg

Not a huge fan of the wheels but they are in good condition, needs spacers and lowering (has the air suspension so can do that with VCDS)
Electric everything.... and even has a full Alpine system in the rear and screens in the headrests for the children in the back....
8.jpg

Plans? clean it and make the paintwork better....
and a remap just because....
then hunt for stuff to make it OEM+
rear lights on the drivers side need replacing
clean out the drain tubes and scuttle area as it's a rain forest of crud waiting to leak.
Huge amount of car for not a lot of money
 
  • Like
Reactions: mister.c. and Bristle Hound
Nothing more frustrating than buying a new car and wanting to get stuff done and the weather being dismal... wet.... and just bleaugh
The outside of the house whilst flat, it wasn't flat enough.... what's a man to do? go use the 100,000 sqft facility he works in.
The mission this morning was to get the suspension lowered via VCDS. There are many online "how to's". The one thing none of them mention is when you need to take your actual wheel centre to arch dimension.
Once you've gone into the actual Adaption phase and the car has raised and lowered and it is the actual point of changes the dimensions, that is the point to actually measure the gap, just before you change the measurements...
I went for a 20mm lower at the front and 15mm at the rear.
IMG_2043.JPG

armed with the trusty laptop and VCDS all plugged in.....
before dropping it down
IMG_2047.JPG

IMG_2045.JPG

and after.... subtly different. I have a set of S5 wheels to go on, with spacers.... but the weather.... say no more
IMG_2046.JPG

The A8 has the TV tuner installed, my first ever Audi that has ever had this feature.... so of course it needs the speed limiter removing for VIM.
I found a great tutorial on how to remove the VIM
https://trick77.com/tools/mmi2g_vimcode.php#bottom
Just follow it to the letter and it worked perfectly.
Then got home and the weather is still..... bleaugh
IMG_2048.JPG

So, the list of things which need attention. In no particular order
drivers side rear lights need replacing
drivers side front fog lamp needs replacing
Brake hoses need changing out for a set of Hel Performance brake lines and the whole system purged and bled.
Wheel spacers and wheels swapping out, i will need to swap the tyres from these wheels to the new ones as they are 255/40-19 as fitted and the new wheels are 255/35-19
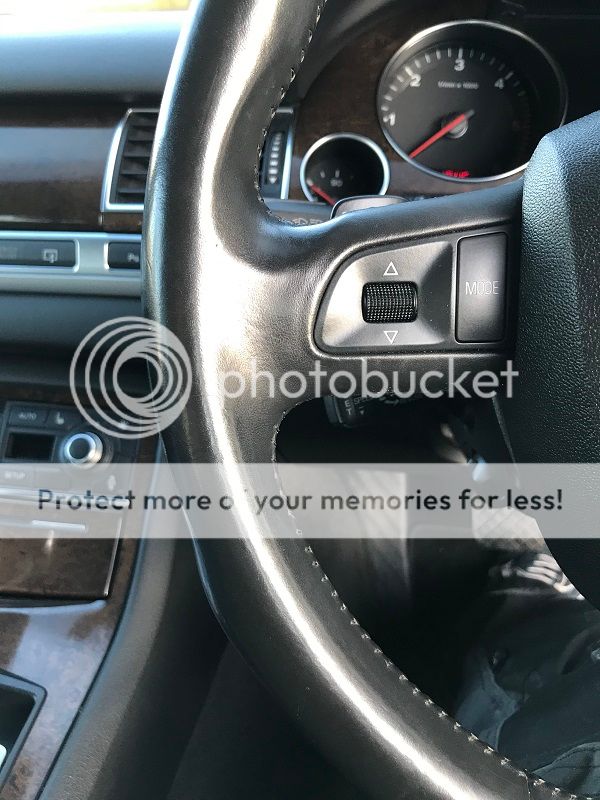
The interior needs a ****** good clean, the leather wants deep cleaning and the steering wheel is shinier than the bodywork and feels disgusting, same with the gearknob
Keys need new batteries, on my old S8 i had a new key made based on a Bentley keyfob, i'd like to look into doing that again as it was a lovely key.
Arch liners all need removing and deep cleaning behind, definitely not the weather at present.
Paintwork needs a thorough clay barring and polish.
Remap... because it has turbo's and is an easy upgrade.
Interior lights need all swapping out for LED.... will be going the tried and trusted route of using good old Trupp.
The interior window switches can be swapped out for the chrome tipped versions as fitted to the facelift A3 Sportback..... so that's on the list.
plus whatever other retrofits i can find
 
a fantastic quick break in the awful weather had this big yellow glowy thing make an appearance.....
Good time to tackle the awful steering wheel..... only a quick hit
I'll revisit and redye also when i have more time
IMG_2050.JPG

what we started with, minging and felt awful
gearkbob was no better
IMG_2051.JPG

quick rub and wipe with my normal go to cleaner
IMG_2052.JPG

30 minutes later
IMG_2053.JPG

IMG_2054.JPG

much much better... smells better in there too
 
  • Like
Reactions: Homer Simpson
With a little decent weather this weekend, i tried the S5 wheels, hated it....
I had a spare set of spacers, so stuck them on with the original wheels and gave them a thorough deep clean... they came up like new, not a kerbing in site.... i think i've decided i actually like them.... funny old world.
IMG_2138.JPG

20mm on the rear, 15mm on the front, need to drop it a little more.....
IMG_2140.JPG

IMG_2142.JPG

i was curious what the scuttle area was like.... knowing that 99% of car owners don't tend to clean the inner workings of their car....
Prepare yourself... it was grim, proper grim....
IMG_2132.JPG

Armed with TFR, a brush, a hose and a full Haz-Mat suit, i dived in
IMG_2134.JPG

can now see the paintwork colour in there lol....
The whole engine bay was TFR'd and then a thorough splashing of 303 and a wipe later
IMG_2136.JPG

All the plastics which go over the scuttle area were also cleaned and 303'd
I then Clayed the car, well a first hit..... **** me it's a big car...!!!!
 
having a bit of a hunt for what can be tweaked OEM style i saw a thread where someone had swapped out a set of chrome switches from an S5 steering wheel.... well for once i had something in stock having had a spare wheel for my S5 from ages ago....
IMG_2219.JPG

what we started with...
IMG_2220.JPG

and the switches... but ******... first issue... steering wheel was from a manual car, so no flappy paddles. hmmmmm....
So i took one switch to bits, there is a tiny torx bit on the reverse. With that undone the front unclips from the rear case. Could i just swap the fascia over?
nope, wouldn't clip in.... ******... would i be lucky enough that i could swap the inner PCB boards from the chrome, to the none chrome.....
yup...!!! woohoo
I always have the engine running so i can rotate the wheel so the screws will be at 12 o'clock
IMG_2230.JPG

Do not disconnect the airbag with the engine running, or the ignition on...!!!
to get the switches out you need to remove this trim piece, after you have removed the airbag (with ignition off).
IMG_2231.JPG

all inner gubbings swapped over and built back up and airbag back in and all now nice and chromey....
IMG_2232.JPG

chrome window switches needed from an A3 8P Sportback next....
 
normally post over in the S5 B8 forum here but having retired the S5 from daily use i bought a new daily and having had to use the S5 as an everyday car since the company car went back the fuel costs with the mileage i'm doing has been horrendous.... and i really don't want to be putting this daily mileage onto the poor thing.....
So the hunt was on for something a lot more economical.....
So what's a petrolhead to do who has an obsession with Audi V8's???
6.jpg

Well it is technically a lot more economical than the S5.....
It is a 2007 A8, decent condition, low miles... but needs some love
3.jpg

Not a huge fan of the wheels but they are in good condition, needs spacers and lowering (has the air suspension so can do that with VCDS)
Electric everything.... and even has a full Alpine system in the rear and screens in the headrests for the children in the back....
8.jpg

Plans? clean it and make the paintwork better....
and a remap just because....
then hunt for stuff to make it OEM+
rear lights on the drivers side need replacing
clean out the drain tubes and scuttle area as it's a rain forest of crud waiting to leak.
Huge amount of car for not a lot of money
Very nice car. How much did you get it for if you don't mind me asking?
 
Plenty on Autotrader to see what the market sells them at....
What I actually paid is between me and the person I bought it from
 
  • Like
Reactions: RS5 JON
as curiosity always gets the better of me, out into the garage this morning and dug through the box of parts....
AMI is definitely MOST, so is compatible...!!!
IMG_2238.JPG

Just need to find out what cable i need to connect it as OE to the A8.... any suggestions???
Having a play about with other things... the Alpine system wasn't working.... screens would illuminate and DVD's would cycle but nothing was playing... started with all the basics. All new batteries in the remote control and both headphones was all it needed....
Got to love a cheap fix
 
Jobs for the weekend..... weather is bound to stuff it up

AMI install, MOST retrofit cable ordered
Update to SW 5570, discs ordered
Aux heater pump install

Whilst the wheels, arch liners and bumper are off I plan clean.... I have some Raceglaze aluminium deox which I’ll try to bring some resurrection to the brake calipers.
However I think a full brake rebuild will be the best way forward.... the brake discs are ok, just cruddy and look bad. They function as needed... just aesthetically displeased
 
A subtle PM offered me a list of parts to undertake the pre-heater conversion....
a good conversation struck up and a decent agreement on a fair price for the new parts
and they arrived safe and sound today.... many thanks - you know who you are
IMG_2287.JPG

all that was missing were the hose clips, so with part number in hand, they were ordered from my local Audi dealer... they arrive tomorrow....
Weather permitting for Saturday
 
a late night trip out to the garage to find the hose clamps.... i'd had a stash of them left over from another project..... 4no required and found.....
and picked up the update disc today from my local Audi dealer.....
IMG_2294.JPG

at least the update disc install won't be hindered by the weather hahaha
 
nice big bus, im guessing by year its a 6 speed aisin auto box fitted ? i had a mappad casa 3.0 v6 with this box in my old my08 q7 and it went quite well for the size of it . is the 4.2 a big difference ?
anyway enjoy
 
  • Like
Reactions: Flynn89forever
nice big bus, im guessing by year its a 6 speed aisin auto box fitted ? i had a mappad casa 3.0 v6 with this box in my old my08 q7 and it went quite well for the size of it . is the 4.2 a big difference ?
anyway enjoy

it is the 6 speed....
The 4.2 is a world away from the 3.0..... at least compared to the 3.0tdi A5 I once had
 
Why is it simple jobs always escalate into bigger jobs hahaha
one of the bulbs had gone out for the rear number plate lights, quick email to Trups for a set of LED's (and also a set for the front side light whilst at it). and a pair duly arrived yesterday.
Went to unscrew the screws and all 4 heads sheared in the aluminium housing....
IMG_2307.JPG

so, total boot lid strip down to extract the handle and it's always fun with a pistol drill drilling steel screws out in aluminium... the drill has a tendency to follow the path of least resistance and wander off...
No such worries, time and patience and a steady hand....
IMG_2308.JPG

drilled and retapped to the correct M3 size
sadly i didn't have the correct Audi screws, but i did have some M3 stainless cap heads so they will do for now....
The lens need replacing so when i order a new set, i'll order the correct AUdi screws as well....
IMG_2309.JPG

all built back up....
IMG_2310.JPG

whilst in the boot i added LED's to the boot lights
IMG_2311.JPG

a comparison of LED (left) and original (right), i've used these before in other cars and it illuminates the recess's of the boot far better.... i'd had these LED's also from Trup's but from a previous project i never used them on.
front LED sidelights fitted....air filter top housings removed to gain access to the back of the lamps and swapped out...
IMG_2313.JPG

i am always amazed by how people look after their cars prior to my ownership.... on one side the air filter was a genuine Audi item, date stamp 2008, on the other side some pattern part of some unknown brand, date stamp 2017....
Then onto the software update... car came with 3340, it is a long boring ordeal....
start at disc 1, notice the time stamp
IMG_2314.JPG

disc 1 complete, onto discs 2, run disc 2 twice and then onto discs 3...
all done and updated to 5570
IMG_2318.JPG

notice the end time stamp....
tomorrow if the weather holds it's time for the pre heat pump....
 
Mission pre heat today...
IMG_2327.JPG

There are plenty of good guides online on how to do this, so i won't reinvent the wheel..... i'll just add my findings
set the suspension to lift and set it to Jack on
onto axle stands and wheels off, front part of the wheel arch liners off and undertray off...
remove the bumper....
IMG_2328.JPG

lots to clean within but that's for another day....
remove the drivers side air filter housing and the headlight
IMG_2330.JPG

it's fiddly getting the aux heater out.... when removing the exhaust on the rear of it be careful when removing it, it's aluminium onto steel.... it will break if you strain it....
IMG_2332.JPG

it does eventually come out
where the new pump mounts you need to drill out and tap, i did mine M6 as i had a nice Titanium M6 button head bolt...
Build up the new pump and connect the pipes and connect the wiring...
IMG_2333.JPG

IMG_2334.JPG

and that's it.... build it all back up and refill the coolant you lost.... about 2 litres comes out when you disconnect the pipes....
Then onto the inside to do the codings....
IMG_2335.JPG

It gives you additional settings with the HVAC setup on the MMI
and when the timer is set you get 2 little icons on the dash display....
IMG_2338.JPG

I did set the timer to come on and watch the measuring blocks to watch the pump cycle on and off when playing with the settings....
Can't wait to see it's effect tomorrow morning.... looking at the timer it appears it needs to be set for each day rather than being able to set a weekly schedule.... i'll have to investigate that.....
 
  • Like
Reactions: Simon
having used Trupp's at EM Tuning for all my LED's since forever on a lot of Audi's i was surprised to have a bulb warning chime up for the LED sidelights...
It was borderline, sometimes it would chime, other times it would stay silent... weird!!!
So a quick email to Trupp's to ask if he'd come across it, yes came the instant reply... stick a set of resistors in...
IMG_2380.JPG

I'd previously bought a set for my VW CC bought a pair of these from Trupp's....
IMG_2379.JPG

all assembled and job's a goodun' no more chimes.
Onto another niggle today, since buying the A8 the windscreen washers weren't great, there was ****** all pressure and it dribbled out...
first thoughts were the jets - nope all clear
thinking it was a dying pump, strip down to investigate
IMG_2383.JPG

normally would swap the pumps to test if a duff pump but the A8 had to have a different pump for the windscreen and headlights.... electrical connection and hose connection are both different.... ******
So, unclipped the hose and pressed go... dribble dribble...!!! ******
Took the pump out of the bottle and put it into a cup of water..... stupidly had the outlet point at my crotch... cue suddenly looking like i'd wet myself but the pump worked as it should.... hmmmm
It was then i remembered that previous Audi's had a filter where the pump sits in the bottle....
IMG_2382.JPG

That'll be the issue then.....!!!
IMG_2384.JPG

washed both the windscreen filter and the headlight filter and all built back up and now can see through a clean screen.....!!!
 
  • Like
Reactions: RS5 JON
Looks like you've been busy mate, A8 getting as much attention as your S5 does. :thumbs up:

JG
 
  • Like
Reactions: Flynn89forever
Looks like you've been busy mate, A8 getting as much attention as your S5 does. :thumbs up:

Lol, thanks... always good to be busy

A bit of holiday time during this festive season meant i was able to revisit the Aux Heater install.... whilst it had made a difference and had reduced warm up a time a bit, the more i thought about the more it wasn't making me think WOW, what a difference......
So i Googled, and read.... and read a bit more.... and then for good measure, read it all again. None of the install guides mentioned an additional coding requirement on the Auto HVAC side of things....
IMG_2541.JPG

Channel 21 on Adaptions, change your 0 to 1, press save....
What does that do, i hear you ask???
well once you have rebooted your MMI it gives you another additional setting to turn on
IMG_2540.JPG

It now gives me the engine preheat option, rather than just aux heat and aux vent.
Time will tell if it makes a further improvement...
 
  • Like
Reactions: RS5 JON
Ebay has kept me occupied over the Christmas break.....

When fitting the new spacers, 2 of the wheel bolts on one back hub didn't feel great, so peace of mind i have ordered a new hub.
Also on route....
Complete brake discs and pads front and rear, whilst in there have also ordered a set of HelPerformance brake lines to replace the aged originals
As no knowledge of when last done, i have a complete engine service kit coming. All filters including fuel filter....

A new set of Pirelli P Zero's are on route as well as this is fitted with an aged set of Vredestein's#, which are over 6 years old.

but the most fun will come with the arrival on the new ECU reprogrammer... i used to tinker back in the day and well with the advent of a new turbocharged car it would be rude not too....
Have order a V54 FGTech Galletto 2.....

The sat nav disc is the original 2007 item, so a 2020 version is also on route....

Should all keep me busy for a day or 2 when it all arrives....
 
good reading, always appreciate posts like this.
always good to have people that contribute pictures , time and effort on thier projects to show the next guy their pitfalls and success.
i will be keeping an eye on the progress.

i fitted a set of hel lines to my a7 a few weeks ago and posted my work if you fancy a 5 min read

https://www.audi-sport.net/xf/threads/a7-brake-failure.422419/#post-3637620
 
Well Mr Postman has been busy, parts have been slowly arriving...
IMG_2619.JPG

I was going to tackle the brakes yesterday, as despite the cold the sun was out and it was dry.... went to prep the brake discs as these ones were uncoated and i always like to paint the unswept areas as it makes them look better for long as i cannot stand rusty, cruddy brake discs.... Having checked earlier in the week that i had plenty of satin black paint, like a knobhead i failed to check that i had the correct zinc primers.... lockdown prevented going and getting any, so will have to wait for Mr Postman and another dry weekend... Once i'd got over the tantrum i went inside and sulked....
Whilst sulking yesterday i started to look at the ECU programmer i bought, seems i need a laptop now with Windows 7, of the 3 laptops in the house all are Windows 10, so couldn't even play with that...!!!
Today i wanted to do the service. Car into service position
IMG_2622.JPG

Under tray removed, of course it was covered in historic oil leaks, crud and just was plain manky.... I'd read on another thread how effective (and very cheap) a product called EnlbowGrease was at dissolving this type of crud. I'd attached Amazon and bought 3 squirty bottles for the amzing price of £3.00 delivered for all 3, yes that is £1 a bottle....
****** brilliant stuff.... was even better than my normal Rhino TFR.
I will keep an eye on this area to make sure i don't have an oil leak, the car doesn't use any oil but the engine should be oil tight....
Oil dropped, filter changed etc.... everything cleaned up underneath and rinsed down.
Air filters changed, so at least now i have a matched pair....
The pollen filter had a date stamp of 2007.... surely this would have been changed during at least a main dealer service????
It was certainly filthy under there and looked undisturbed...!!!
IMG_2623.JPG

now all replaced and cleaned and hit with 303 to protect the plastics.
Fuel filter replaced, again with a ****** 2007 date stamp..... *** and to bring damnation down onto me, of course i got caught in a sudden downpour
IMG_2626.JPG

Under all the covers, it was a bit dusty and no signs of any oil leak from above... i cleaned and treated all the aluminium parts and cleaned and again hit with 303 to protect.
IMG_2624.JPG

Even the sun came out to celebrate the finished results...!!!
One lot of jobs ticked off the list at least....!!!
 
Quick note on the number plate lights, the broken screws are a common issue. I had broken screws too bodged in the past which bubbled the paint. Ended up replacing the trim and the lights but I'm afraid the problem will happen again in the future. I would stick to stainless if you can rather than the Audi originals. I will be replacing my screws when I get time to check out which size I need
 
  • Like
Reactions: Flynn89forever
So, finally having sorted a Windows 7 laptop i went back to installing the software and updating the drivers and we now have the computer communicating with the Galletto and able to see the cars ecu.... and there i stopped.... a couple of thing stopped me
Snow and it being miserable outside
A battery on the laptop not being the most robust and needing the power lead on it at all times
I discovered that the battery on the A8 isn't optimal and whilst the car starts fine, if you sit with the ignition on for any short length of time it runs flat instantly, so to proceed it needs a charger connecting to maintain the electrical current.
Knowing how easy it is to brick an ecu i want to wait until the weather is better and get set up comfortably and not have any electric disruptions for fear of it dying, or spiking and bricking the ecu and immobilising the car for daily use....!!!
However i feel it has made a (small) step forward..... and the seller finally admitted that the plug they sent was incorrect so i am expecting a plug adapter so i can bench flash as well if needs be.....
 
one thing i do intend doing though prior to any map install is data logging the standard car.... for a couple of reasons

a/ to ensure MAF's are reading correctly and to see what figures they are running
b/ to ensure there are no boost leaks
c/ to ensure the wastegate control circuits are working
d/ to have a baseline for figures once the new map is on
 
another piece of the puzzle arrived safely in the post today
IMG_2697.JPG

full interior LED kit from EMTuning.... i asked Trupp's if he had anything to offer for the revers lights, knowing the bulb is unique to Audi.
"give me a couple of weeks" came the reply.....
IMG_2698.JPG

direct replacement for the standard Audi halogen lamp....
fitting report soon and i can rid the outdated yellowness of the standard interior lamps.....
 
well the hunt for a replacement inner rear light is proving fruitless..... it WAS just the lens which needed replacing until one morning a ping on the dash..... rear bulb out (where's the OMG emoji?)
IMG_2792.JPG

yup, half the LED's said goodbye and shuffled off.... ****** and ****** a bit more. The cost of a new replacement made even my eyes water. there are next to no secondhand ones on the market, and the small number which are are either nearly the new cost, or next to scrap..... so rebuild time it is...!!!
IMG_2798.JPG

a quick Google and an order later and a small bag of 50 straw hat 5mm LED's arrived....
IMG_2794.JPG

started removing.... and now on hold as ran out of time.....
once i've got the boards rebuilt i'll split the lens to rebuild that and sort out the "melted" are and clean up and reseal.
In other news a new battery arrived as the old one was not holding charge and not wanting to over work the alternator. Again a quick Goole and an order later...
IMG_2787.JPG

locate the old one
IMG_2788.JPG

remove and replace
IMG_2789.JPG

IMG_2790.JPG

of course you can't just fit them, the fact that aftermarket batteries don't come with the required BEM code etc a cheat is required..... so after going onto module 61 Battery reg, all i did was change the suffix on the part number to the next letter and the coding i increased the last number up 1.... then it's just a case of accept coding.
IMG_2791.JPG

and now a healthy 14.6V on charging, where previously it was sat at 12.2V
 
well Sunday was spent looking at the light PCB
IMG_2816.JPG

there is an issue which is still preventing it to illuminate, it will need further investigation and not currently having the time during the week and needing to have a fully functioning light array on the back of the car i took the plunge and bought another light.
It's in reasonable condition, but at least
a/ it works fully
b/ it doesn't look like it's melted internally in the reverse lens area
viewed from certain angles the plastic outer lens has some internal fracturing, so at a point in the future on a far drier day than currently i'll remove the outer lens from the original light and swap them over.....
but at least i have working lights again....
IMG_2850.JPG

interestingly, with the defunct lamp unit plugged in it registered a fault on the warning system on the dash, without it plugged in, absolute nothing..... i found that strange
 
  • Like
Reactions: Homer Simpson
waking up this morning to a bizarre strange glow in the sky, it couldn't be the sun could it....!!!

so with SWMBO shuttled out with the kids it was time to tick off a couple of jobs. I'd been waiting for a sunny day so i could get the new front and rear brake discs protected. I always prefer to do a zinc rich primer and a satin black mist coat to protect the unswept areas. It keeps the brake discs looking a lot better, for longer.....

a recent delivery of Bilt Hamber's brilliant Zinc primer arrived in the week

IMG_3002.JPG


All 4 discs were thoroughly degreased and allowed to gas off in the sun

IMG_3004.JPG


and all done, i'll leave the paint to cure overnight and weather permitting tomorrow the car is going in the air for all brakes removal, wheels off and getting the tyres changed and wheels protected etc...

IMG_3006.JPG


either my hands have really shrunk or these front discs are huge lol

IMG_3007.JPG
 
and a cheeky shot at night showing the new LED effect

IMG_3021.JPG


IMG_3022.JPG


gives a better spread of light when getting in
 
  • Like
Reactions: RS5 JON
when i originally out the spacers on the passenger side rear hub, 3 of the threads which the wheel bolts went into really didn't feel that good... it niggled and a new hub was needed.... not wanting to spend hours following the workshop manual it is possible to remove the hub without having to replace the wheel bearing.... sometimes works, sometimes doesn't.... i had nothing to lose....

it involves removing the hub bolt, and using a slide hammer to drift the hub out... sometimes it'll pull the inner race of the bearing with it..... i hit lucky....

IMG_3024.JPG


the hub drifted out lovely, leaving all of the bearing intact, which was good as i didn't have a replacement on the shelf lol...

IMG_3023.JPG


new and old n crutsy.....

and all back in... total time, 30 minutes

IMG_3026.JPG


whislt in the the arches and everything was looking yucky....

IMG_3027.JPG


a splash of TFR later and much better.... all 4 corners all done....

IMG_3034.JPG


and the day ends with all the calipers stripped off and being dismantled for cleaning etc..... i keep telling myself it's not a restoration....

jobs for future, rear ARB drop links, the bushes are not the best.....whilst removing the brake lines, some of the unions had seized in so to get them off you need to sacrifice the spring retainers... so tomorrow sees some of them being ordered for the rebuild.....,
 
  • Like
Reactions: RS5 JON
how is it small jobs just seem to escalate.....
Today i wanted to get the tyres changed over.... now most normal folk would have rocked up TyreFitters-R-Us and just had them swapped over with nare a care in the world as to the condition of the surface the weights were going to be stuck too.....
So with my OCD in full force and sadly no Fallout remover i went old school....
This is the before.... normal crud from this time of year plus embedded brake dust to contend with....

IMG_3040.JPG


The fronts being far more contaminated than the rears.....

the process involved lots of hot soapy water, a hair dryer to remove the old weights and adhesive and then to clay bar and hit with G3 to remove all the crud etc

IMG_3041.JPG


it took ****** ages... about 6 hours in total.....

Then it was a case of load up the other half's A3 Sportback, it was a damn squeeze fitting 4 19" wheels and tyres and then the replacement tyres..... There were a couple of John Cleese Branch moments as it took careful placement so i could shut the doors....
A quick trip over to my local Kwik-Fit

IMG_3042.JPG


and all finally done....

IMG_3044.JPG


because i can't help myself the brake calipers have been stripped down for repainting.... it's a damn disease i tell you..... and hopefully tomorrow the new spring retaining clips arrive for the brake lines as i had to destroy 4 getting the old flexi's off.
 
  • Like
Reactions: daytonamart
IMG_3067.JPG


it's not a restoration....

it's not a restoration....

it's not a restoration....

i keep muttering those same words over and over till it sinks in, but i can't help it....

blasted and zinc primered, again with Bilt Hamber's zinc primer....
The calipers are to the same state but rain stopped all play today....

small steps forward and all that...!!!
 
being miserable that the weather was ruining the painting, it hit me like a lightening bolt..... SWMBO is off with the children for a couple of days at the Grandparents, i had an empty house.... go old skool and do a makeshift spray booth in the dining room....

what could go wrong.....

IMG_3070.JPG


absolutely nothing..... all painted, They can cure in the dining room over night. The cold was removed with putting all the brake parts in the oven for 10 minutes at 50C, then hung up and sprayed satin black.
The trims which go on the front calipers were attacked with Audi sparkly silver (i had a can left over from my first TT way back when...)

The smell will have gone by Sunday when she returns lol....!!!
 
with a bit of a break in the weather i was able to get the fronts assembled....

because i'm a tart and love any excuse to get something Titanium (see bike build for my true disease...!!! lol) i needed Titanium nipples, as i'm sure the weight saving will make a difference.

IMG_3072.JPG


ordered and received next day from the guys at Bigg Red....

new flexi's from Hel Performance, sadly they didn't have the Titanium versions available and i didn't want to wait lol

IMG_3074.JPG


and both sides built....

IMG_3079.JPG


then it rained.....
 
  • Like
Reactions: RS5 JON
today was onto the rears.....

IMG_3091.JPG


certainly looks a hundred times better than how it all started

5(1).jpg


also so glad to have got the old tyres off, peace of mind as i have no idea of the history of them before my ownership and they should be perfectly fine but again my OCD kicks in and i prefer peace of mind that i have tyres i know the full history of and how they've been cared for.

nothing out of the ordinary, all built back up as required. what was strange the rear pistons only needed pushing in, not the normal wind in... never ever had the on an Audi before.... even the S5 with the same style EPB system wound in.... every day is a skool day lol

also strange was that during the bleeding there is zero need to cycle the ABS pump, in fact the module won't even let you get onto it without having a spaz, took a bit of careful coding to get that function back.... last thing i needed was a bricked ABS module.

there are 2 flexi lines on the back, replaced with Hel lines as per the front...

IMG_3094.JPG


the brake system was washed through with a crappy DOT 4 so it was purged of all crud.
Then 2 litres of Motul RBF660 fluid was pressure bled through

IMG_3090.JPG


again because i'm a tart and i like peace of mind i always like to sweep the master cylinder as i do the final bleed, this needs an assistant and she's not home until tomorrow.... so the final bleed will wait for her....

interestingly you have to tell the handbrake module the rear pad thickness, as it doesn't rely on wear sensors like the front. Another first for me on an Audi....
 

Similar threads

Replies
17
Views
3K
Replies
8
Views
3K
I
Replies
2
Views
2K