S5 full fat V8 content

Flynn89forever

Registered User
Joined
May 23, 2018
Messages
167
Reaction score
135
Points
43
Location
Norfolk
having grown to enjoy the merits of Audi's wonderful V8 in a few cars over the years from the original type 44 V8, to an RS6 to a lovely S8, I deviated and bought an economical A5 3.0tdi V6...
WP_20160901_15_41_40_Pro__highres_zpsmocdjdlx.jpg

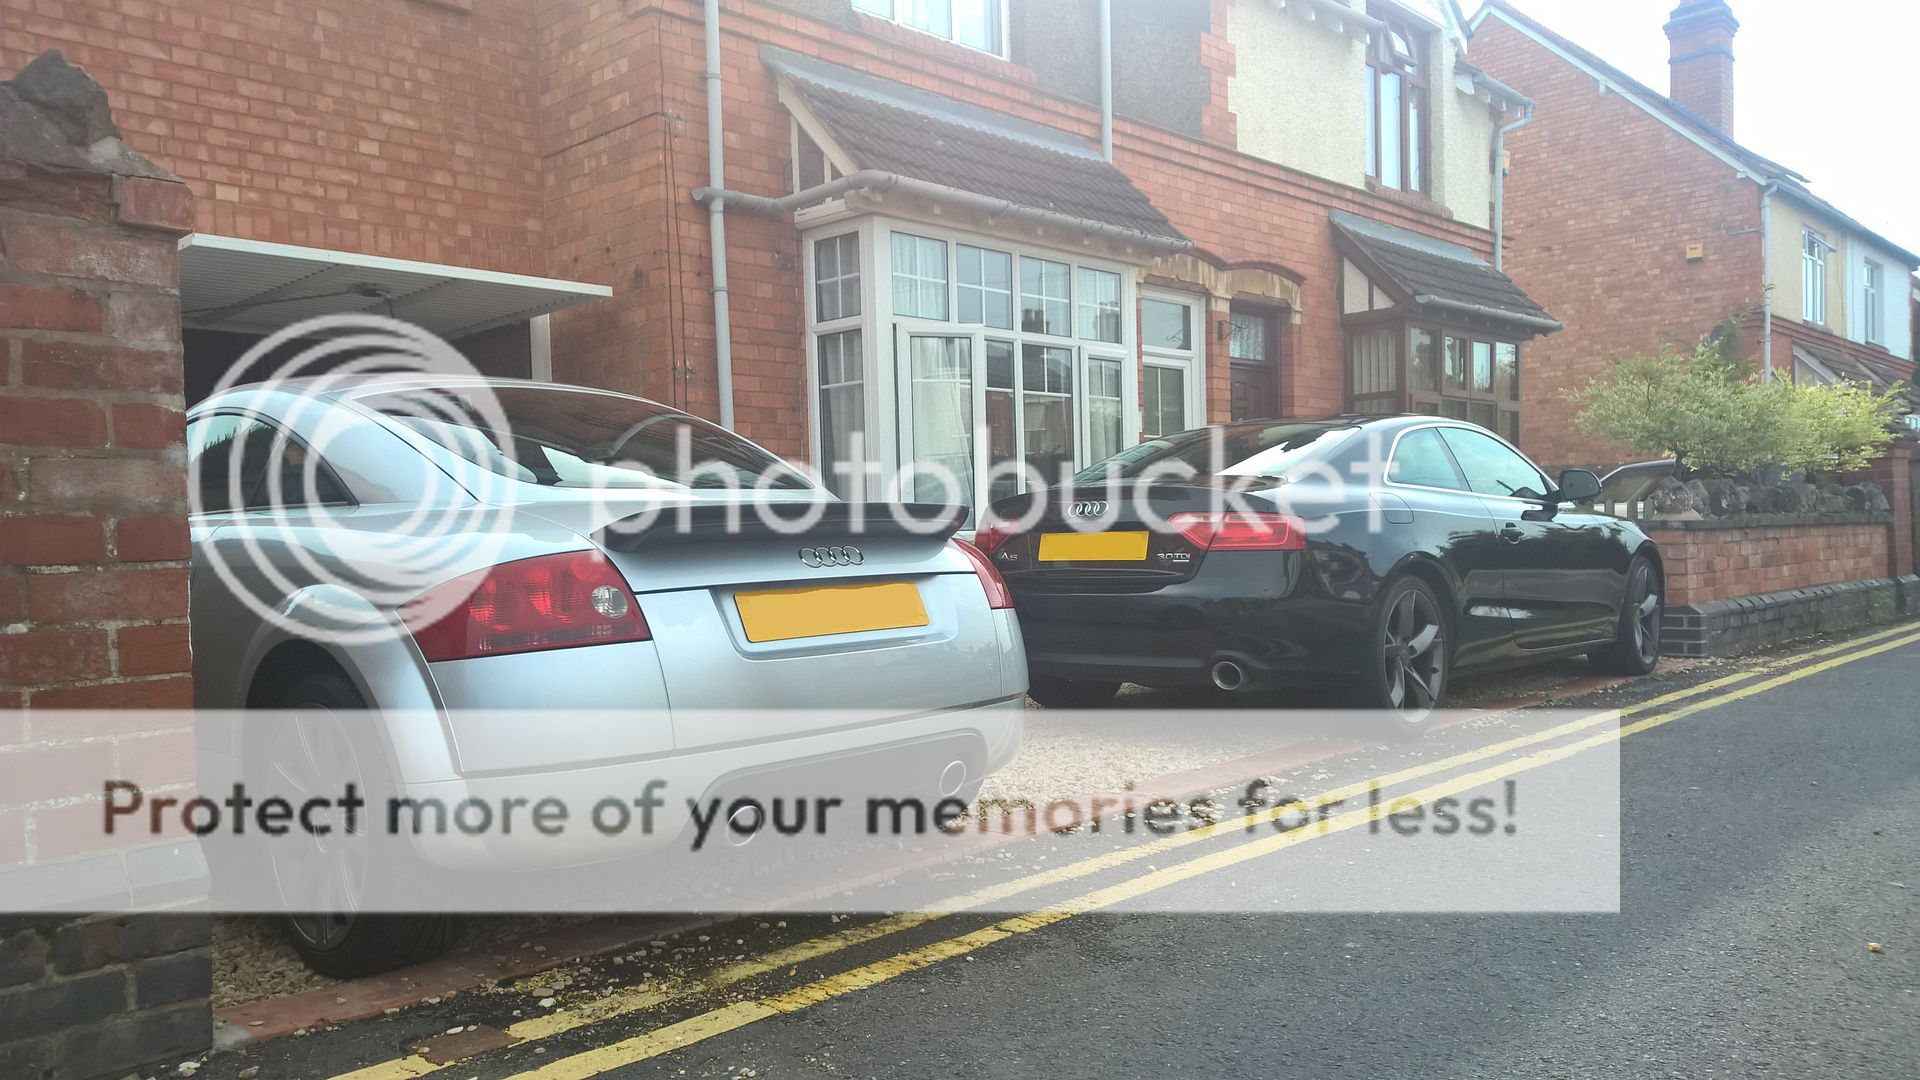
(at the time I also had a restored TT, plus many others along the way)
The A5 fared well but it was lacking something..... I missed the V8 but loved the A5 shape, as I felt it was an ageless design, so what should I do...?

Yup. go buy an S5
WP_20180414_18_34_25_Pro_zpsfyfb1dvl.jpg

(We also have an A3 as my partners daily)
WP_20180429_11_59_26_Pro_zpsv6fnmm7c.jpg

she is a 2007 with 73,000 miles on her, she was in good condition but not perfect (not that any daily driven car can ever be perfect but she was a good base to improve upon!!!

The first thing needing attention was to turn on stuff with VCDS
Where would we be without VCDS

So what has been activated
Adaptive brake lights - turned on (I doubt i'll ever see them)
Optical Rear Parking - turned on
Lap timer - turned on
Enable Horn confirmation on locking - turned on
Enable Rear Tail Lights on with DRLs - turned on
Enable Release Parking Brake without putting foot on Brake - turned on
Enable the Battery volt meter
Specific fog light on when turning - turned off (why give the impression you have a bulb out? don't get it!!!)
 
  • Like
Reactions: voorhees, Roadrunner146 and V6_Man
Another couple of jobs ticked off...
The rubber cord on the fuel cap was broken
WP_20180421_10_36_14_Pro_zpsuhzyq5dy.jpg

swapped that out for a brand new one, you can't just buy the cord though, you have to buy a whole new fuel cap, not bad at only £26 from Audi.
WP_20180421_10_36_24_Pro_zps4btzjrlt.jpg

I then wanted to get the front seats out to hoover the carpets where know one looks, 11 years of other people being in a car I always shudder.....
WP_20180421_12_00_05_Pro_zpsfigym9t5.jpg

so sill protected to prevent scratching it on lifting the seats out of the car, damn they are ****** heavy....
WP_20180421_11_59_29_Pro_zps9rzp3mli.jpg

and then each seat was scrubbed and gone over with Dr Leather's fantastic wipes...
I'll get an after pic later as only got them back in the car then it started ****** raining...
 
As i had 10 minutes to kill at lunch i thought i'd stick some of the LED's in.
WP_20180427_13_35_11_Pro_zpsv6vnzn7l.jpg

as said before and by others, very impressed with the service from Trups. All parts very well made and clearly labelled.
So i managed to get the 4no map reading lights in and the centre dome done, perfect colour.
WP_20180427_14_00_20_Pro_zps3vhslm3t.jpg

the camera does not do them justice, and the light is nicely diffused behind the lens.
 
Then it was onto nothing more exciting than ordering more parts from my local friendly neighbourhood Spide... (wrong Universe) Audi Dealer...!

I have been fitting the rest of the interior LED's, very pleased with them... i did discover the passenger puddle light housing in the base of the door was cracked, so a new one was ordered and fitted (with the bulb replaced for the LED
The rear "S5" badge had a small corner of the red flash missing, so a brand new badge ordered and fitted.

Whilst talking to the Parts guy i mentioned that my main MMI knob was peeling, he said there was a repair kit available, which i replied was for the joystick option on the later MMI. He confirmed that, which wouldn't work on mine, to which he then stated that the knob isn't available on it's own "you have to buy the complete panel, at £740".
Bit of digging through ETOS and found the version of knob i needed and duly ordered... £29 is a bit better than £740...!!!
 
I then decided to remove all the aluminium window trim and grill so as to get it into the paintshop to get it turned black.... I just couldn't bring myself to wrap it in vinyl.

What an absolute **** of a job, the WSM states one line on interior removal, there went 2 hours of the day....

Poor thing is looking sorry for itself, tape has been applied to all the window edges to seal it all back up....

Just need to make my mind up on whether satin or gloss black!!!
 
Frustrating and it's probably why I do so much myself, sadly my job means I have little time these days to get as deep into car mods as I once did. Paint being the one thing that absorbs my time so I entrust it to local specialists. I'd previously removed all the chrome trim to take it to my trusted paint bod... too busy came the reply (wasn't impressed given the amount of work we put his way), so onto the next one...
nah mate can't be painted
and the next one said the same....
***, so the only course of action was to **** work, finish early and start sanding the anodising off of the aluminium, ball ache of a laborious job (hence why wanting to pay others to do it) but persevered all afternoon and managed to get the first coat of Etch Primer onto all 6 trims.
IMG_0082_zps972sfsfe.jpg

that will need flatting back and another couple of coats of etch, then flatten again and then prime and paint.
I've decided on satin black (I say decided, I've got 6 tins on the shelf and I can't be ***** to buy more), then a satin lacquer.
 
WP_20180515_19_03_40_Pro_zpsjobgp3r4.jpg

first coat of black done... couple of nibs but they all need flatting prior to lacquering....
so far so good... not bad for rattle cans and outside...
 
  • Like
Reactions: Roadrunner146
I thought i'd best show the poor car in her current straight, window edges taped up with duct tape... tonight I deep cleaned the areas the trim normally sits and gave it a thorough seal, i'll waxoil the clips as they have surface corrosion on them.
WP_20180516_17_32_23_Pro_zps2f1aox73.jpg

the interior A and B pillars have been removed to facilitate putting the door seal back on, it would have been impossible to sit it correctly with the interior trims on.
At the 11th hour I changed my mind and have gone full gloss on the trims, I painted them satin black and wasn't loving it, so I flatted the black, gave it another coat and then high gloss lacquer.... sorry for the **** picture but I couldn't capture it that well...
WP_20180516_17_30_46_Pro_zpshcjxziql.jpg

So all 6 trims are now done, they will want a buff and wax once on the car... 24 hours to cure overnight and I may be able to start installing tomorrow night.... Watch this space!!!
 
  • Like
Reactions: Roadrunner146
WP_20180516_19_44_17_Pro_zpsvfrlxmo3.jpg


one side all on, buttoned up and interior back together.... The paint was hard enough to handle and can be buffed tomorrow evening after the other side is installed...
 
  • Like
Reactions: Roadrunner146
I seem to have invented the magical flying S5 version...
WP_20180519_15_41_32_Pro_zps4v9b28yd.jpg

today was all about the brake lines but like most things it evolved into other stuff (whilst in there). So the rear discs are being binned as they are past their best, the brake shields have been removed to go to the powdercoaters, thankfully the calipers just need a ****** good clean, the black finish on them is acceptable.
WP_20180519_15_41_57_Pro_zpsf29ki48o.jpg

WP_20180519_15_42_09_Pro_zpsxte3xw8h.jpg

but as the wheels are off and she can't move anywhere and I am going to the powdercoaters it would be rude to not take these
WP_20180519_15_42_17_Pro_zpsijvc0kue.jpg

as they definitely are not in the condition I want them to be in...
 
parts are slowly landing.... I blame my bike for my Titanium fixation..... when presented with this...
rusty, crusty nipples....
WP_20180523_17_15_19_Pro_zpscfjnhbty.jpg

yup.... 4 ordered in lovely Ti64
WP_20180523_17_15_56_Pro_zpselflukj6.jpg

much better
WP_20180523_17_19_54_Pro_zpsifpjsiwu.jpg

the condition of the black finish on the calipers (certainly the face you see) was deemed acceptable after a clean.... I'll wait till I get my hands on a set of RS5 calipers before stripping and refinishing them....
However in the meantime, the plates just wouldn't clean up on the front calipers
WP_20180523_17_23_37_Pro_zpsvlgyy5zz.jpg

what should I do?


yup.....
WP_20180523_17_23_46_Pro_zpspayr7cxx.jpg

much better
WP_20180523_17_35_14_Pro_zpskg5wrtdy.jpg

whilst I am waiting to collect my wheels I've been repainting the brake disc bells, the front discs where fairly new, so they are done...
WP_20180523_17_36_16_Pro_zpslbebktmv.jpg
 
I'm sure I said somewhere that i'm not aiming to go concours with it, but it doesn't hurt to be clean....
Good old Mr Muscle on the ally bits
WP_20180524_16_51_06_Pro_zpskycwjntg.jpg

The hub face was duly attacked with a grinder mounted wire brush to descale to ensure as flat a surface as possible, a very thin film of assembly paste on the mating surface should resist corrosion for a time and done....
WP_20180524_20_29_34_Pro_zps7yffxpd1.jpg

repeated another 3 times and all 4 corners were done.....
The new Hel lines fitted as expected, and then it was on to the flushing and bleeding...
I always flush through with a cheap DOT 4 to fill the lines and do a pre bleed, then it's on to the good stuff.
WP_20180524_19_30_09_Pro_zps2h9hu0vs.jpg

the only thing left to do was reset the EPB with the aid of VCDS and job is more done than a done thing...!!!
 
  • Like
Reactions: V6_Man
WP_20180525_17_44_07_Pro_zpswqt6fuf0.jpg

is that too much of a tease...????


oh ok then.....
WP_20180525_17_44_00_Pro_zpsbztht2cm.jpg

and then the money shot....
WP_20180525_17_43_50_Pro_zps7hdpt4bf.jpg

The wheels have been waxed and sealed with Gtechniq C2v3 Liquid Crystal, inside the barrels and front faces, will see how well that lasts....
 
  • Like
Reactions: scobie140, Roadrunner146, RS5 JON and 1 other person
That's kept me busy for the last month...!!!

more to follow

Great effort and a fantastic build mate. Looking forward to more mods - keep 'em coming.


Sent from my iPhone using Tapatalk
 
  • Like
Reactions: Flynn89forever
Awesome work. I have enjoyed the read so far. Look forward to the next instalment. :)
 
  • Like
Reactions: Flynn89forever
Car looks great, well worth the effort, keep the updates coming. :thumbs up:

JG
 
  • Like
Reactions: Flynn89forever
Great work fella, I really enjoyed the read during my lunch break. However you made me feel pretty lazy now, I must pull my finger out and do a bit of work on mine. :thumbs up:
 
Great work fella, I really enjoyed the read during my lunch break. However you made me feel pretty lazy now, I must pull my finger out and do a bit of work on mine. :thumbs up:

Thanks, sorry if I made you feel lazy lol......
She needs the front suspension arms doing as there's a subtle vibration on accelerating around 70mph which is annoying.
She needs a decent exhaust system and I am slowly building the spec I want to build.....
Engine bay needs detailing, i'd like to do the cam covers a different colour, this will probably be done when I do a carbon clean type service as i'll remove the intake manifold and go in deep.....
 
A TYPE 44 V8 tell me more!!

I had a few of them, some were breakers and gave up wings etc to convert a couple of 200 Avants..... I wish I still had at least one..... Sadly no pics as it was in a pre digital age....
 
  • Like
Reactions: RS4B5
Was the S5 logo on the brake calipers painted on? I like the look of those looks very slick. The standard logo on my s5 calipers is pretty much black / covered in dirt - not tried cleaning just yet..
 
Was the S5 logo on the brake calipers painted on? I like the look of those looks very slick. The standard logo on my s5 calipers is pretty much black / covered in dirt - not tried cleaning just yet..

They are a removable plate, takes a bit of effort to get the old ones out. They will break.

Part number for the S5 plates are 8T0 698 221, you need 2no. Roughly £30 each from your local dealer.
 
Was the S5 logo on the brake calipers painted on? I like the look of those looks very slick. The standard logo on my s5 calipers is pretty much black / covered in dirt - not tried cleaning just yet..

Give the logo's a clean, see how they come up, if satisfied, give them a couple of coats of clear nail varnish, job done. :thumbs up:

JG
 
Give the logo's a clean, see how they come up, if satisfied, give them a couple of coats of clear nail varnish, job done. :thumbs up:

JG

Will give that a try on the weekend thanks. I'm a bit wary of taking of the wheels and then not fully tightening the bolts (paranoia!)
 
  • Like
Reactions: RS5 JON
Will give that a try on the weekend thanks. I'm a bit wary of taking of the wheels and then not fully tightening the bolts (paranoia!)

I did mine with the wheels on, Genuine Rotors, just parked the car so I could get into them, simples. :whistle2:

JG
 
there are just some things you have to have, they can be like little jewels and your life isn't complete without them.....
For me I have been distracted by the inner door handles as fitted to the RS5 and Cabriolets (I think??)….. cheapest place I found them was again at my local friendly neighbourhood Audi dealership....
They were on back order from Germany, ordered Friday, arrived today...…

Simple case of whip the door cards off and swap over...

before
WP_20180606_17_52_41_Pro_zpsos5dc0f4.jpg

after
WP_20180606_18_28_27_Pro_zpsdwuozubf.jpg


one step closer....
 
  • Like
Reactions: voorhees, V6_Man and RS5 JON
Will give that a try on the weekend thanks. I'm a bit wary of taking of the wheels and then not fully tightening the bolts (paranoia!)

Get yourself a torque wrench that allows you to tighten to 110Nm, with the car in the air get them hand tight. With the car on the ground torque them up to 120Nm in a diagonal pattern and job done.
Just remember lefty losey, righty tighty ;
 
  • Like
Reactions: Kayobong and metzer_001
well sadly this morning the rear diffuser fell off...!!!
WP_20180609_12_38_33_Pro_zps08fd60ym.jpg

but luckily landed on my makeshift diffuser support V1
WP_20180609_13_07_07_Pro_zpscvtbvyxb.jpg

and then in the best here's one a did earlier type thing it turned black....
WP_20180609_14_04_02_Pro_zpsarocjmvc.jpg


just waiting for the paint to cure and then I can get it all assembled back on....
 
  • Like
Reactions: Roadrunner146
WP_20180609_14_31_46_Pro_zps7ovtegwu.jpg


and fitted....

****** ran out of black so the front grill has to wait.....
 
  • Like
Reactions: scobie140, RS5 JON and V6_Man
Full fat is the way to go, all these whippersnappers with their charged V6's do not realise the eight cylinders will dissappear and that glorious symphony will be gone forever.
 
  • Like
Reactions: CHEZ, Roadrunner146 and Flynn89forever
Full fat is the way to go, all these whippersnappers with their charged V6's do not realise the eight cylinders will dissappear and that glorious symphony will be gone forever.

It keeps it more select in my view.....
 
  • Like
Reactions: voorhees
Full fat is the way to go, all these whippersnappers with their charged V6's do not realise the eight cylinders will dissappear and that glorious symphony will be gone forever.

" whippersnapper" haven't heard that one for years, showing your age @voorhees :whistle2:

JG
 
  • Like
Reactions: voorhees and Flynn89forever
Unfortunately N/A V8's can't get to 480+hp (I've seen at least one on 550+hp with meth) like their supercharged cousins. Speed over sound every day... Having said that... lovely work on the car!
 
  • Like
Reactions: Flynn89forever
Unfortunately N/A V8's can't get to 480+hp (I've seen at least one on 550+hp with meth) like their supercharged cousins. Speed over sound every day...

that is the only downside... tuning is expensive on the V8, now once the V8 has forced induction then.... ;)

arad85 said:
Having said that... lovely work on the car!

thank you, more to come...….
 
The vibration on accelerating around 70mph is baffling, with the vehicle up in the air (so wheels at full suspension drop) there is absolutely nothing wrong. So I thought today i'd drive on some ramps and have a look underneath with the suspension under load as though it's being driven. Again, all suspension parts are tight, no obvious issues with bushes...
However what I have noticed, the drivers side driveshaft... whilst in the air, so it is extended there is no movement, when on the ground and the suspension is compressed there is significant play that would cause an oscillation when rotating... In all my years of quattro ownership I've never seen a driveshaft like this (I've had bad CV joints before). Passenger side (this being exactly the same as the drivers side driveshaft) shows absolutely zero oscillation.
So, new driveshaft ordered and will see if that eliminates the issue....
In other news, I've ordered a cruise control stalk as I miss that and the S5 needs it.....
and as it was sunny and I felt like washing the thing, I also dragged the bike out to introduce her to the S5
DSC_0028_zpsfhzt5fay.jpg

fingers crossed the driveshaft cures the vibration.....
 
  • Like
Reactions: Roadrunner146 and voorhees
well I can happily say my vibration is gone, no more.... one is a happy one...!!!!

WP_20180627_18_20_35_Pro_zpsvtnjabzy.jpg


my inner cv joint was fubar'd
this time I didn't buy it from my main dealer....
Audi's price was £478.00+VAT
I found a brand new driveshaft in Germany that was 50.24 EUROS delivered to my door. It even has a 3 year warranty.
If it only lasts me 10,000miles it's still a risk worth taking, and certainly worth the risk to see if it eliminated the problem.
Ok, it's bare metal and not painted as nice as a genuine one, do I care? nope.... as my vibration is gone.....
3 days it took to get here from Germany. Shame the cruise control stalk I ordered from a shop in the UK couldn't be as good. Excuse after excuse as to why it's not been delivered and i'm still waiting 12 days later... I'll see if opening a case on Ebay will stick a rocket up the **** wombles *** to actually deliver what I've paid for.....
 
  • Like
Reactions: scobie140, V6_Man and Roadrunner146

Similar threads

Replies
1
Views
1K
Replies
0
Views
1K
Replies
0
Views
957