Retrofit Rear View Camera to Audi A4 2017 B9

I have a factory fitted rear camera and the same thing happens with mine. It's another quirk of CarPlay.
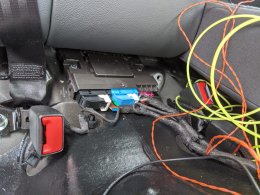
Interesting, never seen this before on factory fitted units. I retrofitted a genuine camera to a vehicle with rear sensors only the other day, copy and pasted coding without thinking, and it had the CarPlay issue. Turns out the camera was configured to front and rear sensors and after changing this, and completing an hour of testing, the issue was resolved.
 
Maybe not - the correct way is video signal (white) to pin 1 - shield/ground (black) to pin 2
 
  • Like
Reactions: Kondax
So I am in discussions with the eBay company mentioned above to buy a camera, but they've told me that you need ODIN to program the camera once it's in.
Nobody else has mentioned this and it's left me a bit perplexed and the costs have left the realm to do this. I've got OBD11, I presume nobody else here needed Odin?
 
You do not need ODIN as the camera comes pre-parameterised for your car. VCDS works fine, OBD11 should be fine as it's just long coding.
 
So I am in discussions with the eBay company mentioned above to buy a camera, but they've told me that you need ODIN to program the camera once it's in.
Nobody else has mentioned this and it's left me a bit perplexed and the costs have left the realm to do this. I've got OBD11, I presume nobody else here needed Odin?

I did mine with VCDS last weekend. The camera came pre coded for my car, but there is a bit of coding to be done in other modules.
 
You do not need ODIN as the camera comes pre-parameterised for your car.

I did mine with VCDS last weekend.

Thanks both - so I should be able to do it with OBD11 then! The company said;

"You need make the calibration with Odis after the install. we will upload the calibration file to the camera, so it will be works fine. Only you will see the " basic settings missing " erorr in the 6c module until you will not make the calibration process." Which makes it sound like I need ODIN.

Hmm worked fine for me! Maybe it's to do with the reverse lines on the display? Since they don't appear on mine.
 
Do you get the guide lines? Can I ask where you got the camera from?
I got mine from vwmodules on eBay. It came from Hungary, but it took only a couple of days.
It has the moving guidelines. I connected the Extended Can wires to the CAN Gateway under the rear seat, +12 V came from an extra fuse in the fusebox in the luggage compartement.
 
  • Like
Reactions: Kondax
Just to confirm is that vwmodul_de https://www.ebay.com/usr/vwmodul_de


The video cable then goes to the MMI, right? Is it then plugged into the back of the MMI or spliced in?
Plugged into the back with two pins. You can see them below on the right in the wiring diagram.

BB1E9489 7713 4AE1 AC23 3A15A344490B
 
Thanks all - the company have confirmed that without ODIN I would get an error message on the car when doing a OBD scan, but it doesn't actually affect the functionality of the camera at all as they will pre-configure it for me. As long as I'm happy to ignore the error message (I am) then all is good.
Will be ordering it next month when I get paid and before Brexit stops me receiving the damn thing!
 
  • Like
Reactions: Kondax
I was wanting to keep everything neat and as close to oem as possible so I installed the power into it's appropriate fuse location in the rear fuse box (require the VW fuse terminal to crimp on), and run the loom along the main wiring harness, so the only wires I ended up crimping were the PIN 12 and PIN 30 under the rear seat and for these I used so nice look dual connectors as pictured.

More questions (sorry) when using the dual connectors, did you use one (with Low and High going into it) or did you use one for each?
Can you link me to the fuse terminals you bought.
 
More questions (sorry) when using the dual connectors, did you use one (with Low and High going into it) or did you use one for each?
Can you link me to the fuse terminals you bought.
Since they're dual I used one for both connections. He's got all the links to the products on the other forum linked above somewhere. I'll look and see if I can find the link
 
Just got my camera and loom from the same eBay seller in Hungary.

However - no instructions at all with them! I think I've worked out the majority of what to do with the help of you guys, Erwin and a bit of reading, but did you guys get instructions?
I'm tempted to do the glove box first, get the cables plugged in, then wire the unit up to the CANBUS and into a fuse tap to test it all before I start actually putting wires behind panels, does that sound sensible?
Getting the MMI out seems to be the biggest challenge I don't understand so far. I'm guessing for the majority of the rest when Ive got panels off there will be other wires I can follow the route of.
 
No, the camera doesn't come with instructions. We all did it ourselves :)

I managed to get the reverse lines working the other day by the way. Work fine and nice to have.

I personally started from the back and made my way to the front. If anything wasn't to work it would be the camera, not the cables (or your coding).
 
Thanks for the reply - yet again! How did you get the lines working? Would be useful to know incase I have a similar issue.
If I remember from the top of my head - Byte 4, Bit 2 in 6C (reverse camera) enabled it. I use VCDS, but you can pretty much copy the long coding that Mark posted on the first page.
 
I like to know what I'm doing! Almost there - does anybody know if there's a guide to removing the handle, or is this easy/obvious? And removing the MMI - or is it easy/obvious or not needed once the glove box is out?
 
I like to know what I'm doing! Almost there - does anybody know if there's a guide to removing the handle, or is this easy/obvious? And removing the MMI - or is it easy/obvious or not needed once the glove box is out?
In that case the best 7 Euros you'll ever sped is on erwin.audi.com where you'll get one hours download time. You'll get great help from the PDF with wiring diagram, Communication and General body repairs, interior.
But to answer your question - it is pretty obvious how to remove the handle. To remove the MMI unit you'll need a set of radio removal hooks.
 
The documents I sent you are what you'll find on Erwin and describe how to remove the trim, handle, glovebox etc. If you follow that you should be good.
 
I'm actually planning on getting around to this in the next few days.
To people who did it, where it goes behind the side trim in the boot - where the fuse box is - did you really remove the whole of the boot floor and padding, or somehow just pass the cable through instead?
Also I've seen one guide which suggests just tucking the AV cable underneath the bottom door trim to the glove box, did you do that or did you remove it all and lay it/clip it properly?
 
Hello. @Kondax can you please send me also the instructions? Where to connect the wires? I saw the above diagram, I think I'll handle it, but it will be easier if I have some instructions with images or how and what to disassemble. My camera is on the way and I can't wait to make this retrofit. Recently I retrofit the Auto Hold Button, if someone is interested, I can help. Thank you!
 
Hello. @Kondax can you please send me also the instructions? Where to connect the wires? I saw the above diagram, I think I'll handle it, but it will be easier if I have some instructions with images or how and what to disassemble. My camera is on the way and I can't wait to make this retrofit. Recently I retrofit the Auto Hold Button, if someone is interested, I can help. Thank you!
Sorry, I no longer have the documents. You can download them from Erwin for around £7.
 
How did people work out exactly which cables go into pins 12 and 30 of the canbus, or did you just go off colour coding. I've had a look but can't tell which cables go to which pins at all.
 
Check the documents I sent to you (I believe it was you). It will tell you exactly which ones go in (based off colour). The colours in your harness should match those found in the documents.
 
Check the documents I sent to you (I believe it was you). It will tell you exactly which ones go in (based off colour). The colours in your harness should match those found in the documents.
Cheers - yeah I've got the wiring diagram and got the colours. Just wanted to know if you guys went off just the colours or also worked out the pin outs.
Although I also appear to have two plugs, but only one has enough pins.
 
Cheers - yeah I've got the wiring diagram and got the colours. Just wanted to know if you guys went off just the colours or also worked out the pin outs.
Although I also appear to have two plugs, but only one has enough pins.
Yep, just the colours.

If I'm remembering correctly, one of the cables went into an empty pin. The other cable had to be spliced with another pin already occupied.
 
Thanks, MMI pair goes into new pins. The CanBus I'm pretty sure both need to be spliced, but I was just worried about splicing the right ones. Think I'll just go based off colour and keep fingers crossed!
On another note did you remove all of the top and bottom B pillar trim, or just feed the cable under/through the bottom trim in-situ?
 
CanBus both need splicing, yeah. One of the MMI pins gets spliced into an existing pin though.

I fed it through the bottom (the trim running parallel to the floor) under the B pillar. I couldn't unclip it for some reason, so poked it through with a stick lol.
 
@GenerationGav can you share the documents you have from Kondax? I'm interested to make this retrofit also. My camera is on the way. Thank you!
 
  • Like
Reactions: Kondax
So in the loom I couldn't see the right coloured wires to splice, so carefully took the black plug apart. There's nothing going into pins 12 or 30. Not sure what to do now, whether I should try to get pins or if mine is different, as you can see I've actually got two plugs.
 

Attachments

  • IMG-20200412-WA0005.jpg
    IMG-20200412-WA0005.jpg
    313.4 KB · Views: 589
Ah, wrong place. Only the Canbus connections are under the seat, the MMI connection goes into the back of the MMI in the glovebox.
 
CanBus goes into 12 and 30 though. According to everybody that is spliced into existing wires. I don't have anything going into 12 or 30 at all, so nothing to splice into. Have confirmed that it's the black plug, blue one is for SOS. Seems most sensible at this point to get some pins, crimp them on and fit them, but need to workout where to get the pins from and want to be sure that's right...
 
Apologies, I thought you were talking about the MMI connection for some reason.

It's super bizarre that your J533 is different. Is that the only unit under the read seats for you?