ProjecTTrack

ProjecTTrack

#MOARwin
Joined
Nov 24, 2015
Messages
82
Reaction score
26
Points
18
Location
Peterborough
Hi all, new to this forum, but i like a lot of the track going build threads on here and figured it'd be a good idea to add mine and hope for help, tips and advice as it progresses further!
:sign imnew:

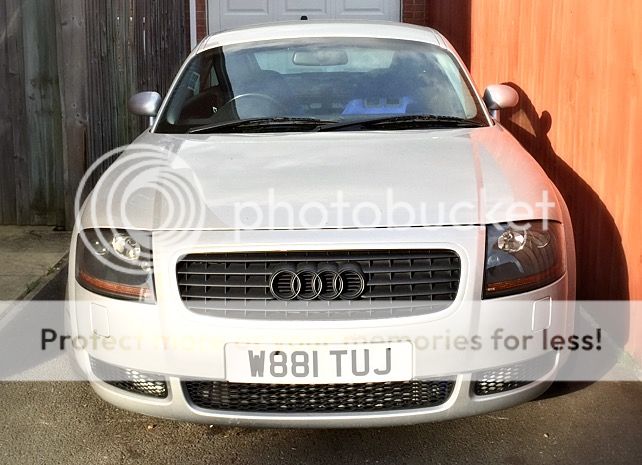
I picked the car up in September 2013, with the intention of running her for a few years as a 2nd car and slowly prepping her for the track. Three days after collection, the plan changed!


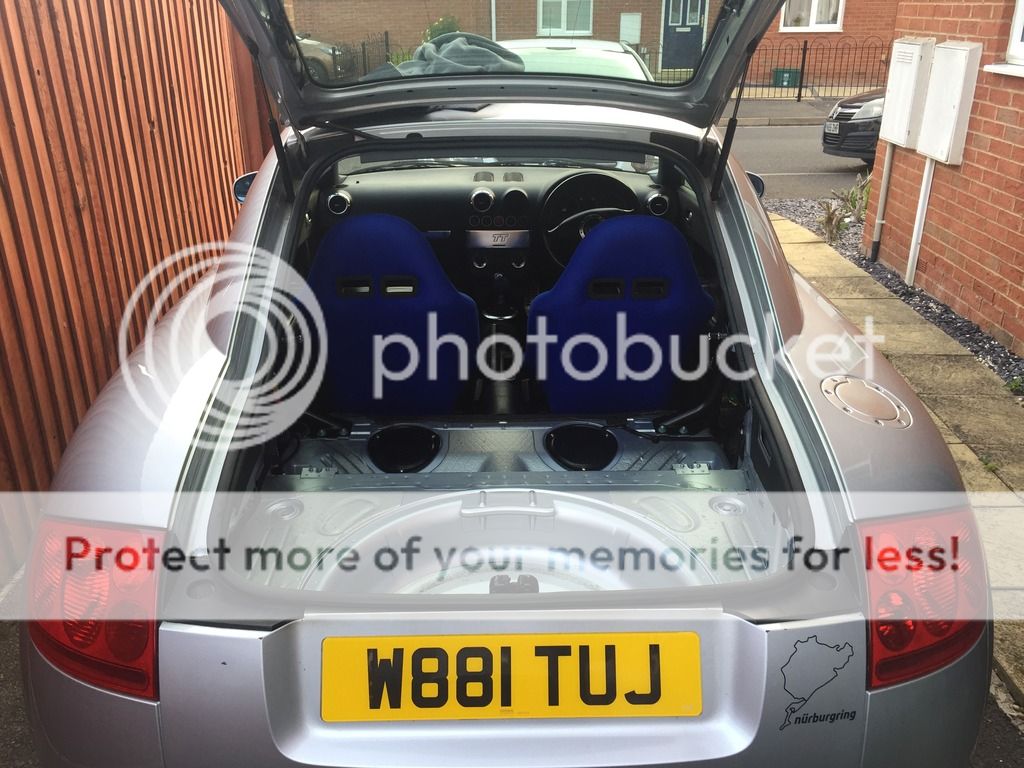
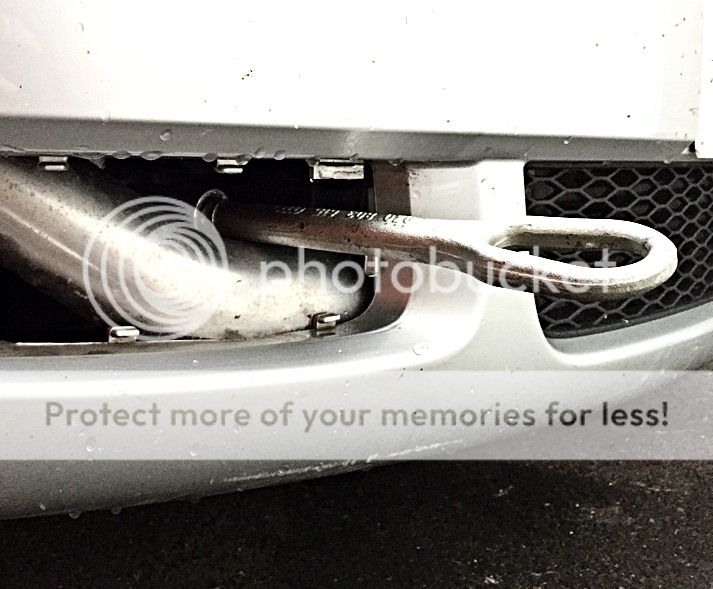
Had the car approximately 3 days and today the turbo blew up, rather spectacularly! I haven't even been able to clean her yet due to last nights rain! What a PITA!!!

Never mind, i don't like to dwell on things, so after getting her recovered back home, i've started on stripping out to remove the turbo tonight. Decided to call it a night tonight but have removed a lot so far, there's oil EVERYWHERE!

And i didn't dwell, with the help of a friend (And the lack of a garage) we quickly erected a mini safe-haven for working on the TT on the driveway...


With that setup we set about beginning the process of removing the turbo, which on a TT is no mean feat without removing the engine! We got a good deal done, with the knowledge from the TTForum and the banter and motivation provide by a few members, before finally i struck gold and was gifted the use of a garage... this is when thing got expensive!!

Once in the garage the first thing we set about doing was removing the engine entirely! This was beneficial as it was clear the poor thing had been neglected, with oil, sealant and grime everywhere, so decided to remove as much as possible, clean up and re-install!

Word of advice, these things are much more fun when undertaking with good friends.... cider also helps!!! :rock:

De-gassing the aircon WWII style...


So the engine was out and confirmation was made that the Turbo was knackered...


A shopping list was made and ordered, whilst waiting for this lot to arrive we done a hell of a lot of cleaning up in and around the engine bay.
  • K&N S2000 Cone
  • Awesome Gti Full Timing Belt Kit
  • Forge Secondry Air system blank plate
  • LUK Clutch & Flywheel
  • Forge Baffled Sump
  • Powerflex Steering Rack Mount Bush
  • Powerflex Engine Mount Dog Bone bushes
  • K04 Turbo refurbished
  • 1120 Auxiliary Belt
  • 5l Oil from Audi
  • Oil Filter from Audi
  • Oil pick-up
  • Powersteering fluid
  • Turbo Oil return pipe gasket
  • Spark Plugs
  • Sump Sealant
  • Turbo to manifold gasket
  • Turbo to downpipe gasket
  • Intake Manifold gasket
  • Rocker cover gasket
  • 3" TIP - SFS
  • Cam cover breather - SFS
  • Coolant Hoses - SFS
  • Brake servo hose - SFS
  • N75 Hose - SFS
  • Forge Intake breather pipe
  • Gearbox cover plate
  • 3l Transmission fluid
That list meant providing the working with a complete refresh short of rebuilding the engine itself (Another project in the future!) which in turn gave me confidence progressing with the project. Also deleted a number of ancillaries from the engine, such as SAI and the N249 system, to tidy stuff up, save weight and reduce weaknesses.

This again wasn't without it problems however. The rebuilt turbo i was provided was worth little more than scrap and was swiftly returned for a refund...


I may have been fussy, but for something that was going to be abused on the track, i didn't want to chance it!
So thanks to the turbo guru that is Dan at Beach Buggy Turbos, i eventually ended up with an entry level hybrid K04!!

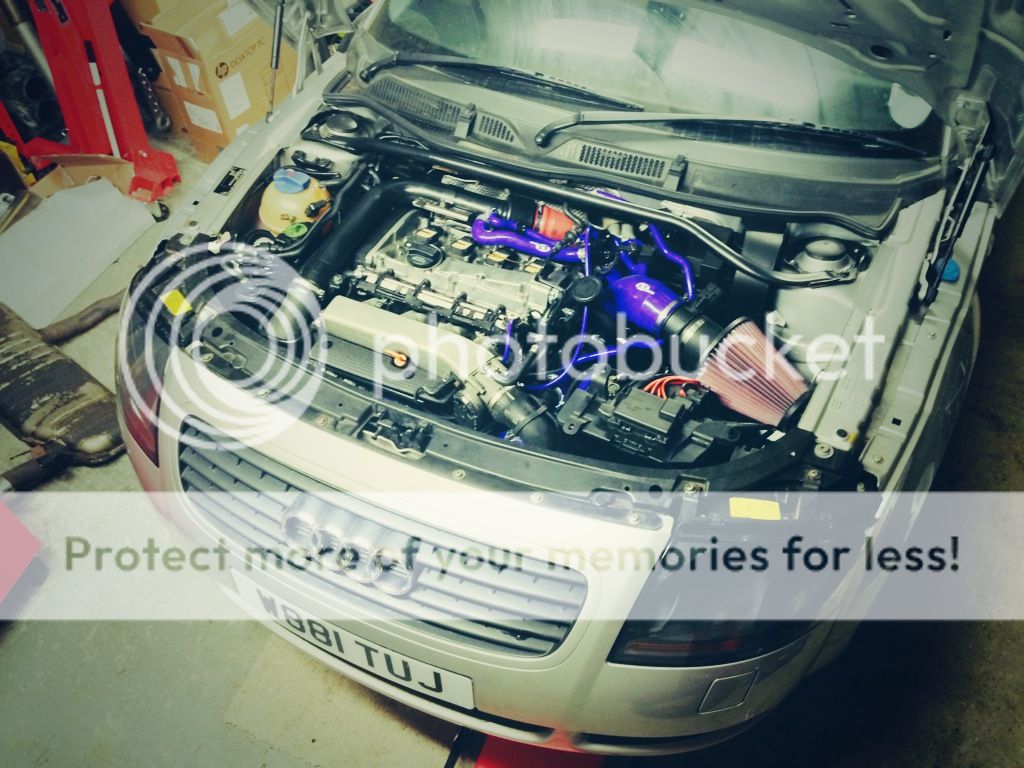
Everything went back in and finally we had this:


Excuse the poor quality! Was a very exciting moment, hence the HUGE smile on my face! :p

Also just to note the exhaust system is not connected, hence the loudness!


That's when things got expensive again!

To be continued...
 
  • Like
Reactions: Jake 61, mister.c. and xpoweruk
After installing the unplanned Hybrid turbo the car was going to need a remap... now i don't usually need an excuse for mods, so why pay out all that money to not get full potential?


Relentless 3" downpipe and decat
HG Motorpsort FMIC set-up
Bosch 630cc Injectors

Well, it would have been rude not to!!

After this the car went for a Wak Remap, after a long day we had a half decent map, unfortunately my MAF and fuel pump were both found wanting, so a new date was booked and these were both replaced for new parts!

The end result was a MAF estimated 309bhp but to this day it has still not been confirmed!!!

Next up was a boring winter, so i done a home refurb of my terribley kerbed wheels..


Then decided to install some "Bargain" 40mm lowering springs, to remove some arch gap.

Next up the car was actually put to use, on a Euro tour...

1200 miles... 6 Days...

Amsterdam
Landgraaf
Cologne
& THE NÜRBURGRING


Unfortunately due to a bad accident and a tight schedule i only got 1 lap of the ring...

The one lap...


Filmed on a Toshiba Camileo X-sports using £4.39 eBay windscreen mount!

A very slow lap by any standards, overtaken by everything and anything! But obviously i was expecting to have a few more, so was treating this as more of a sighter lap to learn a little bit and calm the nerves! Even so it was still AMAZING! Also from this one lap i discovered that coilovers are a must before i return, the big hills and troughs really show how soft my suspension is with the Amax springs, with the wheels rubbing a number of times! Also tyres that aren't ditchfinders would be nice!

The BMW at the end looked like it had had a massive impact, the front windscreen was obliterated and there was damage to the roof. I hope the guy was ok, i know the air ambulance was called out, but hopefully he had recovered fast!
 
Next up on the cars journey was a trip to...

Cheddar Gorge

I'd purchased some 20mm Hubcentric bolt-on spacers for each corner. Fitted these on the Friday night before a weekend in Bath and Cheddar Gorge!

They make a huge difference to the looks and she's now looking a lot meaner!

A few photo's from the visit to the Gorge...


Following this...

Santa Pod RWYB

This weekend me and a few pals attended a Run What Ya Brung (RWYB) day over at Santa Pod Drag Strip.

Along with the TT, in our group, we had a Subaru Impreza running 350 BHP, a Lexus LS460 V8 which runs at 381 BHP (and weighs as much as a small boat!), a Mercedes Benz C55 AMG running 362 BHP with a V8 and finally an E-plate Mercedes S500 V8 which i have no idea on power for!

The day threw up a few surprises for me, I couldn't believe how quick the TT was off the line, nor could anyone else. She beat everything, including a 10 second Evo that was there... at least up to 60 feet! :lol: (Video evidence coming soon!). The final eighth of a mile was where people began to catch, where weight isn't as important as sheer power!

Gradually improved throughout the day from a 14.99 second 1/4 mile to a 14.27on the last run. Every run except the final one I had a passenger for and unfortunately I messed up the gear shift between 3rd and 4th on that run, if I hadn't then I’m confident I could have got very close to a 13-second time.

A few pics from the day…


My pal's Subaru (Very smart, if you forget its a Subaru! :lol: )


A Lexus doing a burnout!! :lol:


The all important times...


All in all a very fun day and very happy with how she’s running!

Here's a video of my run against a 10 second Evo...


"Dude, i almost had him!"
 
After a house move the next stage then began early this year...

Suspension Refresh

After 6 months of neglect due to winter weather and moving house i have finally got a chance to crack on with the suspension refresh.

So now she has a new home and is finally garaged full time...


I'd been stockpiling parts all winter and had the following ready to go on...


  • New Oil & Filter
  • ECS Magnetic Sump Plug
  • Haldex Filter, Oil & Drain plug
  • 16mm Golf 4motion rear ARB with Superpro bushes
  • Powerflex Rear wishbone bushes
  • Powerflex Top mount bushes
  • Powerflex rear tie arms bushes
  • FK 4motion shocks all round
  • Cookbots with superpro bush
  • Cookbots adjustable rear tie bars
  • Lemforder Tie Rods and Rod Ends
  • Lemforder Rear drop links
  • Lemforder Ball Joints
  • OEM Front Discs
  • Mintex M1144 pads
  • Top mount bearings & New nuts


Everything down there had definitely seen better days, hence refreshing the majority of it.

The wishbones were stripped down and repainted and the cookbots and powerflex bushes pressed in!

0B6659C6-8049-423D-AA17-604D4E58136F_zpsfnnjuva6.jpg


Bit of an update...

Picked up a set of Nankang NS2-R's in 120 soft compound for a ridiculous price delivered from Germany, so these have been fitted.

D1BCA9E2-80C0-43F1-ABFC-EF267DF3B505_zpsbp8z9gxq.jpg


I also fitted the new passenger wing I bought from a breaker on eBay, again for an absolute steal! Yayyy, no more dent!!

Rear 16mm ARB has been fitted, not too bad a job at all and when jacking the car up now from the rear the wheels stay almost level when I'm sure they didn't before! Makes placing axel stands at lot easier!!

Both cookbots adjustable tie bars are now fitted, very good pieces of kit and I've adjust the rear to what I believe to be about 0 to -1 degree ready for alignment.

The car seems to sit a tiny bit lower on the new shocks, but this may be in my head, I'm not sure they'd make a difference to height realistically! From underneath she's now looking nice and refreshed anyway...

47946614-C210-4CFC-B22A-165DEE3622D9_zpsqwy7yjlu.jpg


New OEM Front Discs were then fitted along with Mintex 1144 pads and new racing spec brake fluid. The bedding in process is essential with these pads, so was completed off the public roads.

I then had a problem with the car coughing and spluttering under boost, it really worried me as I was thinking major problems. After some helpful advice I investigated the issue which was believed to be related to fueling. Changed the fuel filter, been meaning to do that for months anyway, but this made no difference. I then started the process of removing the injectors, when I noticed the inlet manifold to fuel pressure regulator hose wasn't connected!!! Reconnected and back to normal! I don't know what caused the pipe to come off, but I'm happy the issue is rectified!

Final part of the update, bought a solid black rear balance off a fellow member, thanks for that, looks a lot better IMO anyway!

3F4A3CAB-4D5B-4424-B98C-CF382640EA8D_zpstlymhidk.jpg
 
Next, with the assitance of a friend some airbag resistors were made;

0C3E829C-2FFE-4CBC-956F-30AFED9A655D_zpswjxklwvh.jpg


C75BCCFB-F9F5-41B4-95B6-3848A0A97678_zps7whyidw3.jpg


Two 10 ohm 0.25w resistors wired in parallel, wired and glued into an airbag plug. Plugged them in, connected the battery and then started her up. No warning light showing. Result!!

This allowed fitment of a new set of seats, again from eBay...

I'll let the pics do the talking...

9E1C93BA-036F-4C60-A193-84E07F9AABCB_zpsp4tdeneg.jpg

948E361C-16A0-4679-B53C-6B21ABB86A35_zpsuivhdcie.jpg

95367A2E-332E-4117-BD84-198359C204DB_zpsbpnolxsx.jpg

EEFE082A-4FDE-4AA6-8F62-B2015117BB20_zpsuexu3kqt.jpg

F63EAC43-6DB8-4E79-B295-6771740C861B_zpsemhhhmyb.jpg

5FB6BE72-F2C8-4E65-A186-6FB09593A8D6_zpsghrydpii.jpg


I then had nothing better to do so made the most of the weather and sprayed the front grills to bring them back to a proper black, not faded grey colour!! Also sprayed the Audi rings satin black as a bit of a change. I like them, I'm sure they're not everyone's taste however!

E454DEA9-396C-4367-AC5B-02FBC7CE0307_zpsgnhmokyv.jpg


57A0BA6D-E277-4DA9-A281-29EF1BD4BC4B_zps1msf0p0c.jpg


B3646510-4413-48C9-972F-26C9DA3DD805_zpsmwasxddz.jpg


716C7FE8-B352-4589-B65E-DA0E29D659F9_zps63uugklm.jpg
 
  • Like
Reactions: bluemoona3246
Another couple of mods with the track in mind... Gauges have now been mounted within the vents, they look awesome, but I'll let the pictures do the talking again...

561B42E9-2375-4ED9-95F5-82EA3B2B98DB_zpsye5pg6v2.jpg


566CF2A3-FC4C-455F-A5C9-2AF1D68D56BB_zpsc7lo32pn.jpg


C6F1E02F-4E35-4A43-8A3F-84EC3AFEB9C9_zpsmdtk48wq.jpg


BFF2B438-82DF-4E17-81B5-7CFBE7806FCD_zps888lle1j.jpg


Also arriving in the post this week was my new extended towing eye, able to clear the FMIC pipe work as well as sit right out the front of the bumper...

BFCCD692-2EFC-48CA-9EA9-B7DE30134A4A_zpsky3ruiod.jpg


E1CA013E-A204-49EE-93AE-9014FD77EAB9_zpsanopum3n.jpg


With a little bit of modification this should fit through the grill so that it can stay in place without looking terrible!
 
  • Like
Reactions: mister.c.
Bedford Autodrome Trackday 20/7/2015

Well at long last, she was finally put to her intended use, when i finally hit the track!!!

Along with a fantastic group of fellow forum dwellers, we attended an MSV day at Bedford Autodrome, a day thoroughly enjoyed by all!!

The car performed faultlessly all day, completing over 100 miles of track driving over the day! She didn't hiccup even once and i am extremely happy and to be honest, proud, of how she handles and how far i've brought her so far, with the help of a few friends and some fantastic advice and help from forum members, so a big thanks to all who have helped along the way!

Here are a few photos from the day, with videos to follow soon;


Fantastic write up. Car looks fantastic. Look forward to more. :) x
 
The Next Phase

On track the car performed really well and the main limitation was my driving ability!

However one big thing that became clear having looked through the photographs was the amount of body roll we were getting on the FK Shocks & AMAX springs setup... so this had to change.

We were also carrying a lot more weight then was needed, so stripping out was going to be part of the next phase...

Goodbye...


Also removed are all the airbags, wiring and ECU. There's possibly going to be a CCM delete coming very soon too, as the amount of wiring to this thing is beyond ridiculous!

And hello tedious bitumen removal...


[URL='http://s1368.photobucket.com/user/nickgough901/media/F83D4E80-7CE1-4606-98DA-2498E10873FD_zps5ixbkbgk.jpg.html][IMG]http://i1368.photobucket.com/albums/ag173/nickgough901/F83D4E80-7CE1-4606-98DA-2498E10873FD_zps5ixbkbgk.jpg[/IMG][/URL'][/URL]

[URL='http://s1368.photobucket.com/user/nickgough901/media/F83D4E80-7CE1-4606-98DA-2498E10873FD_zps5ixbkbgk.jpg.html][IMG]http://i1368.photobucket.com/albums/ag173/nickgough901/F83D4E80-7CE1-4606-98DA-2498E10873FD_zps5ixbkbgk.jpg[/IMG][/URL'][URL=http://s1368.photobucket.com/user/nickgough901/media/9DB6E4B7-81D1-45EC-9BE1-39A9DB8B51FC_zpsittxzv8b.jpg.html][/URL][/URL]


You get the idea, it's pretty relentless, but has to be done!!

Then to combat that body roll...


Gaz Golds with custom spring rates, much stiffer then your off the shelf coilovers!

With the dampening set to it's softest setting this setup is still pretty unforgiving, i can't wait to get on track and experiment with dialing this up further.

It's also worth noting that we are aiming to reduce body roll with the use of stiffer spring rates, not the forum standard "bigger ARB's" (Controversial apparently!). This allows the suspension to work independently and offer more grip... contrary to popular belief thicker ARB's generally assist to remove grip to change the feel of a car! A few other serious trackers on the TT forum actually run without a front ARB in an attempt to reduce understeer... this may be a step i take one day!

It was also noted that the seat where just not going to be good enough for the track, i couldn't use Harnesses with them for a start and they offered little in the way of protection, so these have been purchased and are waiting to be installed...


Along with a pair of 6-point TRS harness that are waiting to go in, just got to get the Harness bar fabbed up and fitted!
 
Update time... Well up-to-date time - 30th Decemeber 2015

A shopping basket full of goodies!

Not much progress has been made recently, due to the festive period stealing time and the dark nights closing in early! I have however managed to collect a few goodies, ready for next year...

New wheel, for lightweight and added grip for those sweaty hands...


A nice lightweight battery...


That should keep Gonz happy, made in U-S-A, U-S-A, U-S-A, U-S-A! :p


Hoping to relocate this to somewhere around the passenger footwell/centre console area, and install an internal and external battery isolater as is required for competition use... kill to birds with one stone so to speak! Anyway, at 7kg it's over 6kg lighter then the standard one, can't grumble at that!

I've also stolen (I use the word loosely, they were a bargain!) a set of boxster front calipers from a breaker...


These will be dismantled, blasted, re-painted and re-assembled with new seals as required!

Nice even pad wear on the existing pads, so hopefully they're in decent working order...


As we all know, it's fast approaching that time of yeat for New Years resolutions and all that crap, so i'll let the picture to the talking...

 
  • Like
Reactions: StaceyS3, CHEZ and Sandra
Fantastic thread, look forward to future updates.
 
  • Like
Reactions: ProjecTTrack
nice build dude, i'll be keeping an eye on this.
 
  • Like
Reactions: ProjecTTrack
Cheers guys, it's gone a bit quiet recently, other then collecting parts, mainly due to lack of light!

Hope to have access to a unit next year which will help massively!
 
Nice uptodate update. Looking forward to more. Added this to my watch list so I don't miss the next update. :) x
 
Love a TT track car :) will follow this build closely :)

I'm so glad you changed the cobra clubman seats, that's the one thing I didn't like as I was reading through.

Would be interested to know what Spring rates you settled on also :)

Keep up the good work!

:racer:
 
  • Like
Reactions: Sandra
Love a TT track car :) will follow this build closely :)

I'm so glad you changed the cobra clubman seats, that's the one thing I didn't like as I was reading through.

Would be interested to know what Spring rates you settled on also :)

Keep up the good work!

:racer:

Cheers, she's coming along nicely!

I know, they weren't great, but they were much lighter and more supportive then heated leather and were REALLY cheap! Not good enough though, can't wait to get the new ones in! FIA approved to, with Motorsport in mind!

With the TT having a 0.97 motion ration at the front, and 0.63 at the rear, we went for 500/800lbs for now. This will be fine for a while, may look at 800/1300lbs in the future as I've seen this used on another TT to good effect, we shall see!

I do need to try and order a set of shorter springs at the rear, as the car still sits far too high for my liking, hopefully GAZ will be able to do this!

What setup are you running dude?
 
Thanks for pointing me towards this as don't usually come out of the 8L section.

Looks like your onto a brilliant project here, will be folllowing your progress and subscribing to see your updates.

Will also be good to see how you get on with the GAZ coilovers as my H&R's are very tired, GAZ are the top of the list for my next setup being only down the road and that can specify spring rates :)
 
  • Like
Reactions: ProjecTTrack
Thanks for pointing me towards this as don't usually come out of the 8L section.

Looks like your onto a brilliant project here, will be folllowing your progress and subscribing to see your updates.

Will also be good to see how you get on with the GAZ coilovers as my H&R's are very tired, GAZ are the top of the list for my next setup being only down the road and that can specify spring rates :)

Cheers!

I have to say I'm impressed with GAZ for the service and build quality they've offered so far! I need to contact them to get smaller springs for the rear as the ride height is far to high, I know that's a problem area for off the shelf kits for TT's anyway, which will have been multiplied by my weight saving, but it shouldn't be too difficult to rectify!
 
  • Like
Reactions: StaceyS3
I love threads like this! Great read keep it up! Cadwell park is a great track if you ever fancy it! I miss my old track/daily even the harness on daily basis didn't bother me haha!
 
Thanks mate, I'm hoping 2016 will bring lots of updates!

I like the track at Cadwell, been there a few times in 2015 to watch the bikes! I don't fancy taking the car around there though, that back section is so unforgiving!!!
 
It's been a long while since an update - Mainly waiting for light and time to continue with the build (Or destruction at this stage!).

Today, i finally finished the labourious task of removing the bitumen panels from the car - A final weigh-in gives a total weight removed of 10kg... I can't grumble at that, for the sum of naff all and a bit of time!


With this job out the way i decided to perform a test fit on the Subframes and seats, which it turns out fit just about perfectly! (Mega shout out to Nem/BigBison for the idea of mounting the seats from their build thread) 8) The height's okay for now, plenty of room for me with a helmet on - this will need to be re-assessed after a cage is installed next year.


Anyway, seats in, steering wheel temporarily mounted and after a nice sit down i could confirm everything works, steering wheel is reachable and with the standard adjustable mounting point fully outstretched the wheel doesn't touch my knees. I'm not convinced about being able to reach a few buttons, but hey, that's part of the fun i guess! :lol: Now let the pics do some talking...


I've now got to just drill out a slightly larger slot in the sidemounts and i can install fully! I think i've figured out the Harness mounting points now too, one eyelet in the existing seat belt mount gives a perfect 45 degree angle, another will be mounted through the tunnel directly opposite and then i've figured out the 2 crotch straps now, i've located some thinner but longer mounts that will fit nicely up into the tunnels in the floor. Once these are in it'll be going to the guy whos going to fabricate a harness bar for me and then we'll be ready!

Also, the wiring loom needs a lot of work, this might just be tidied up temporarily, however ideally i want to remove a lot of the dead weight (Full Airbag system inc. ECU, radio system, CCM - need more info on how Max done this!). I also have the lightweight battery to relocate to the passenger footwell - Anyone have a how to guide for this? Also would like to take the opportunity to add a battery cut-off, again a how-to guide would be helpful!

In other news, i went full VT on my gearstick mounting - Cheers mate...


And i picked up a cheap set of 2nd hand unused TTRS brake ducts, for an extra bit of cooling (Wonder if they work). I'll install these at some point.
 
  • Like
Reactions: StaceyS3
Small update today, even though it took most of the Bank Holiday Friday to do!

Harness Eyebolts are now in place, i'm dead chuffed with how it all came together in the end and excited to get the seats in!


Drilled through and then riveted with my Awesome Black PPC Alumnium Rivets (Awesome because they were free from a supplier!)

The Seat Subframes have also been drilled to the right position and so i could start installing these, however i haven't just yet as i've taken on another project internally...


I've posted about the dash separately, as i would like to know what weight is hiding where and get this all done tomorrow! (As said in that post, i wish i had bought the lightweight heating matrix, but hey i'll just have to do this another day!) With the dash out it should be easier to route the cable for the battery relocation.

I've also started stripping the wiring out where i can. Would you believe the cables from the CD changer and rear passenger speaker back to the stereo weighed 0.5kg! Theres going to be plenty of kg's to lose from the wiring harness at this rate!

Tomorrow i'll hopefully also;

  • Swap my rear springs over (I had GAZ make me a set that are a bit shorter as the drop wasn't great and i couldn't get the adjusters in!)

    Remove the rear archliners and clean up (Save some weight)

    Fit the new tow strap at the rear (Thanks for the idea Max!)

Wish me luck!
 
Just testing the Instagram Embedding function, but please feel free to follow the project on there!
 
Oooo this forum is fancy! Embedded the twitter feed, another place to follow the build if you wish! :rockwoot:

 
Minor bits and and pieces done today in the crappy weather we've (It's bank holiday after all!)...

First up some of the sound deadening was removed from the dash and then the dash replaced (After removing a couple of redundant brackets). At some point I'll take it out properly however that won't be until i've bought a replacement lightweight heating matrix so i can do all this at the same time. For now the redundant wiring has been cut off and isolated at the point where each section meets the main loom - This will at least keep it tidy for now!

As my central two vents have gauges mounted without the use of my own adapters (Before i had made them), they completely block all airflow, so i've removed the pipe that goes up to them both. Now the car is a proper race vehicle as it features a blanking plate... made from duct tape!


I've also got a couple of wires that i need assistance with to understand what they are for (and if i can remove them!)...

This one was wrapped with the interior lighting to the ceiling and sunvisor lights and then terminated coming down the driver's side A-pillar... any ideas?!


The second one i have no idea - It's long enough to go to the rear somewhere, has 2 cables, both green/red but i've no idea what for! (Part of me is thinking rear drivers side speaker as i can't find another cable for that!)


Next up I removed the headlining and associated trims, a nice 3kg of weight saved, musn't grumble! Now i've just got to remove the wooly lining that's left over - Done the easy parts then got bored so moved onto the next job!


Next up then i swapped the original GAZ springs over for the Shorter ones i ordered from GAZ, they've gone from 5" to 4" and this has made a massive difference, i'm now able to get the adjuster in! I've not got it at it's lowest setting but it's still lower then the old ones - This adjuster will prove vital when the time comes to corner weight the car and hence why i was so keen to get it in one way or another!


The next job on today's list - Remove the rear archliners, easy enough to do and i even treated the body to a little degrease and scrub down... (Excuse the brake discs - please?!)


Lastly the rear bumper was removed to allow me to figure out the rear tow strap. I like Max's idea of it coming through the bumper, however some sort of bracket will need to be made in order to mount the strap in the correct orientation...


I also love how the car looks like that, just looks so mean!

Next job is to install the seats and harnesses!!!
 
The final update to the Bank Holiday weekend!

I bought a hanging basket... this allowed me more time to work on the car without hassle... Think about it! :wink:

Anyways, first job today was to get rid of all that woolly ceiling crap. This started as the job from hell, i'd removed maybe 1/4 in about an hour and wasn't best pleased about it! Then i tried another method, nail brush in the sticky stuff remover, scrub it into the mess and leave it for 10 minutes, i came back and the rest of the crap was scraped off 5 minutes later...Win!


Once that was done i finished tidying up a few cables and cable tied a few switch panels into place! (Good call 1781cc! - Would love to know what you done with the Light switch though as i've not found a method to get this secure at all!)


With that out of the way it was time for the fun part... Final installation of seats and harnesses! :twisted:


First impressions of the seat and harness combo - ****** AMAZING! no need to worry about sliding about anymore! Can't wait to get out on the track and strapped into these things!

Lastly i dropped the big battery back in and started her up - First time, no messing about and ran her up to temperature. She's a good girl really! Scanned for codes and only the airbag light to worry about (But for some reason, it's not showing on the dash :wink: ).


Next up, i need to get the steering wheel fitted then i can drive her down to the garage to get the harness bar made up! I'm aiming to have this done by 16th April to attend the day at Quattrotech, however this really depends on the harness bar and i won't be pressurizing for it as it's being done by a friend of a friend, we'll see, but fingers crossed!
 
Got to love the return of sunlight in the evenings right!? :D

Gave me a spare hour to fit this bad boy...


Feels nice, fits great and i even bought it a little present to keep it warm on those cold nights...


Chucked the gauges back in as well tonight, very nearly ready! :D :D :D
 
Harness bar and Rear tow strap

Update time!

Finally had a chance to finish up the bits on the car ready for the next trackday :p

First up the new shorter rear springs where installed, to begin with i went with a 5mm gap on the adjuster...error... the rear sat so low you couldn't get a finger between the tyre and arch! So i raised it a good chunk, up to 14mm either side and i now have a decent gap front and back, not too low but not on stilts!

Harness bar has been fabricated, thanks VT for the pics to give us the idea! :D

The plates either side where they mount to the frame were laser cut from 4mm steel and bent up, the bar was then tacked into place before being welded fully out of place. We opted for 45mm x 2.5mm CDS tube for a nice strong bar that won't be going anywhere anytime soon.


I had a bit of a result also and managed to get the thing powdercoated at very short notice (3 hour turnaround between dropping off and collection!)...score! :p Fitted using rivnuts inserted into the existing rear seat mount points on the body.


I also finally finished up the rear tow strap, KarlD fabbed me up a nice little bracket to span the existing mount points, i then dremelled a nice slot in the rear bumper to feed the strap through and voila...


I love it, in my eye's it just fits in nicely!

Finally i completed another little VT mod, the famous heated seat switch blank, looking very OEM! :p


And that's me, ready for the next trackday!
 
Blyton Park Trackday - 27.4.16


So the first trackday of the year has been and gone, i went for Blyton Park as it was cheap at only £109 for the day, had a good run off area all around the track and finally was a lot shorter than Bedford, so i managed to complete 66 laps in the day, compared to around 25 at Bedford... this allowed me to get used to the track as i only had 9 corners to learn!

I had an awesome day, the car ran perfectly all day without coughs, splutters or groans - I do have a slight boost leak (About 2 psi) but i had that before i went, i will try and track that down soon! The day was cold but dry in the morning, before the heavens opened at lunch, bringing hail followed by heavy rain (And maybe even some sleet!). Whilst the laps were clearly slower after lunch i still had a hell of a lot of fun and it allowed me to find the limitations of the cars handling at a lower speed than in the dry! I also noticed the entire Fiesta ST owners club went home an hour after lunch... i guess they didn't find FWD fun in the rain.

For a lot of my final 2 sessions i was either alone on track, or with only one or two other cars - Gotta love Quattro power in the rain!!! The senior Marshall on the day came and had a chat after i finished my last session as he was intrigued by the car, he drives one as a daily and wondered what i'd done! He also mentioned they were going to Red flag the track when it rained heavily, but as i was the only one out and seemed to be having fun, they let me continue :lol:

Anyway, a few of my favourite laps & snaps (please note: Timing was added from the Time stamps during editing NOT recorded on track!)...


And a little bit of rear end action causing some correction in the rain...


Notes from the day:


  • Rear brakes are dead - Very dead: I think this caused me issues throughout the day, as it would have put pretty much all of the pressure on the front brakes for stopping - New rear discs and pads on the way!

    The above also probably explains the back wanting to overtake the front when trail braking

    The rain also highlighted the cars tendency to understeer still: Under power in the wet its still understeering - Will the Haldex insert provide a temporary aid to this for the time being?

    Turn in was also pretty poor at the front in the wet, how can i improve this?
 

Similar threads

Replies
0
Views
415
Replies
1
Views
3K
Replies
24
Views
4K
Replies
18
Views
4K