Project RS28

Nice project mate and ill be following with interest!
How does the car sound with the stainless steel exhaust and is it a full system or what?
Looking forward to updates :)

Thanks mate. Stainless sounds excellent, v6 noise sings through and not like usual rasp some others have, actually similar to S4, need to try get a vid of it. And its a full system with de-cat.
 
Nice one, yeah i thought it might be a bit tasty sounding, thats on my list of stuff to do..
Deffo try and get a vid up of it! :)
 
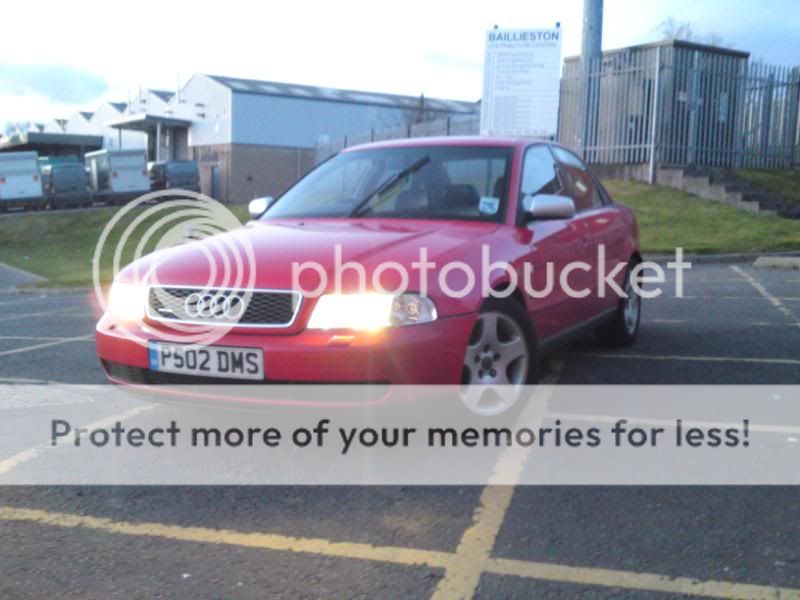
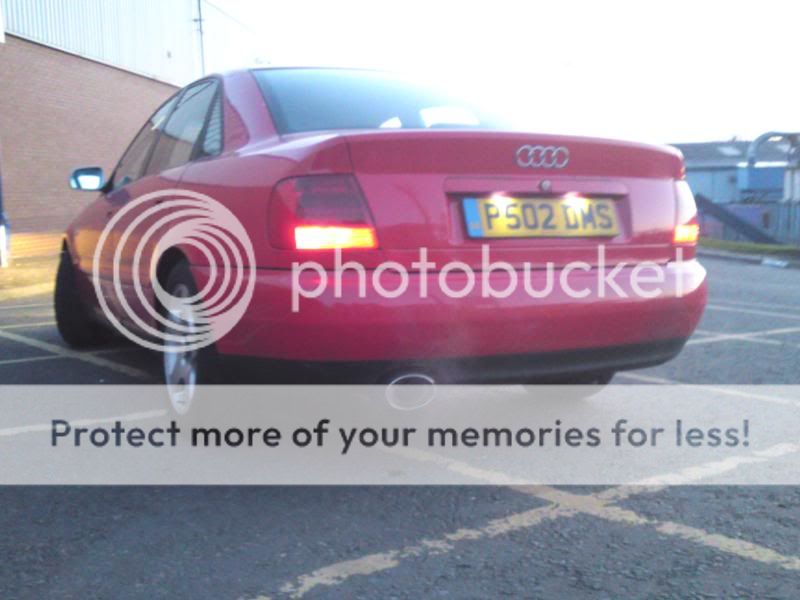
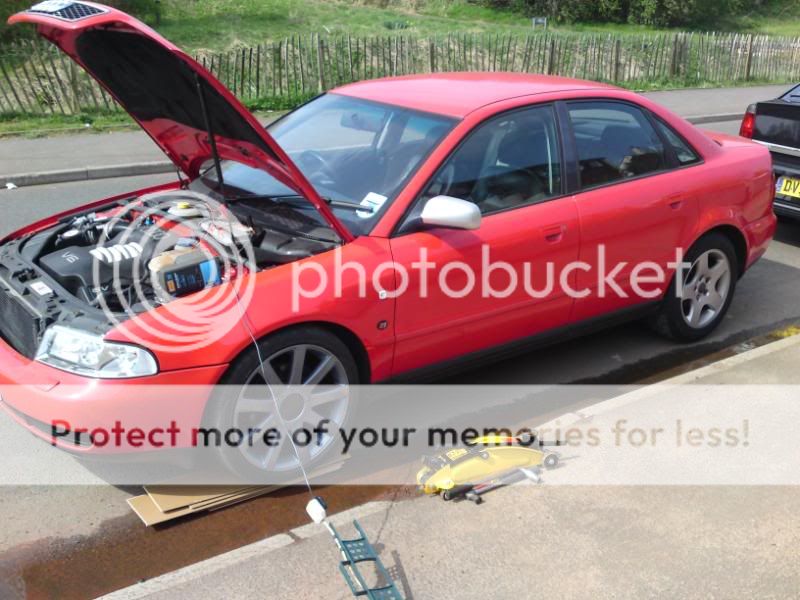
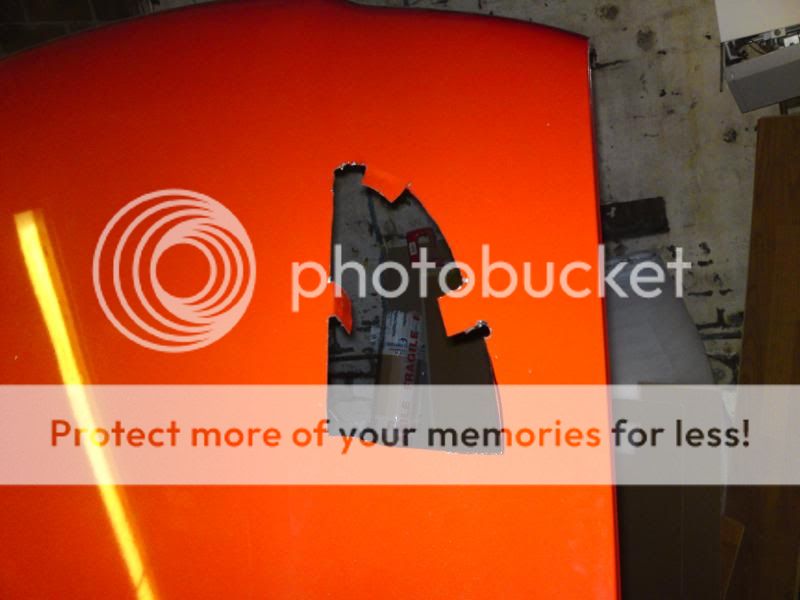
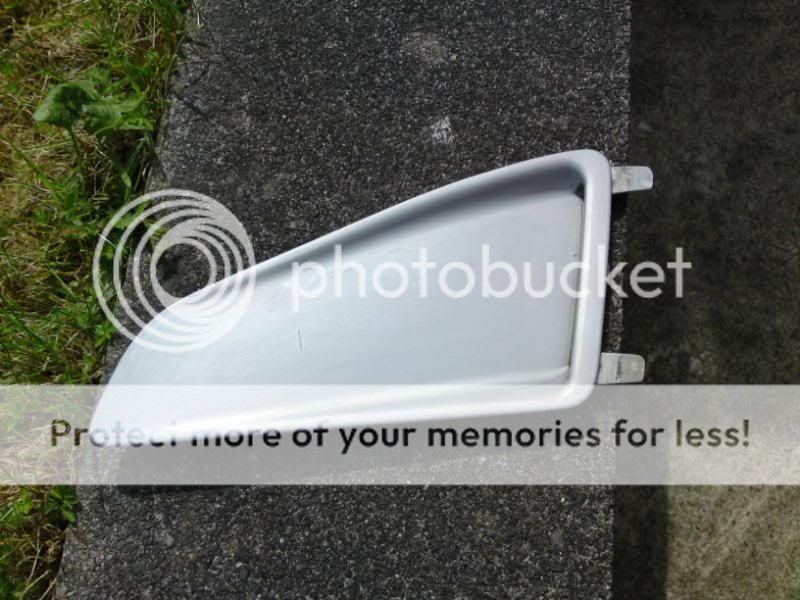
Finally got pc sorted and managed to upload some progress, pic heavy.

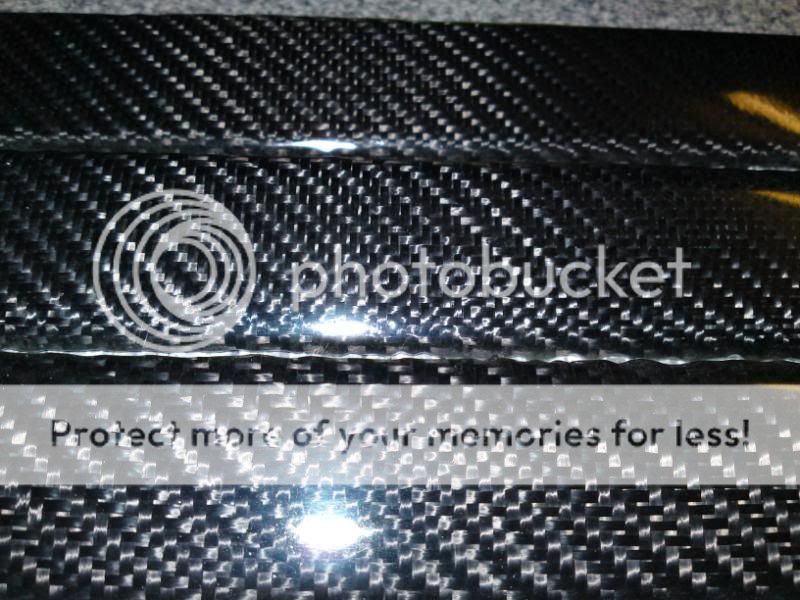
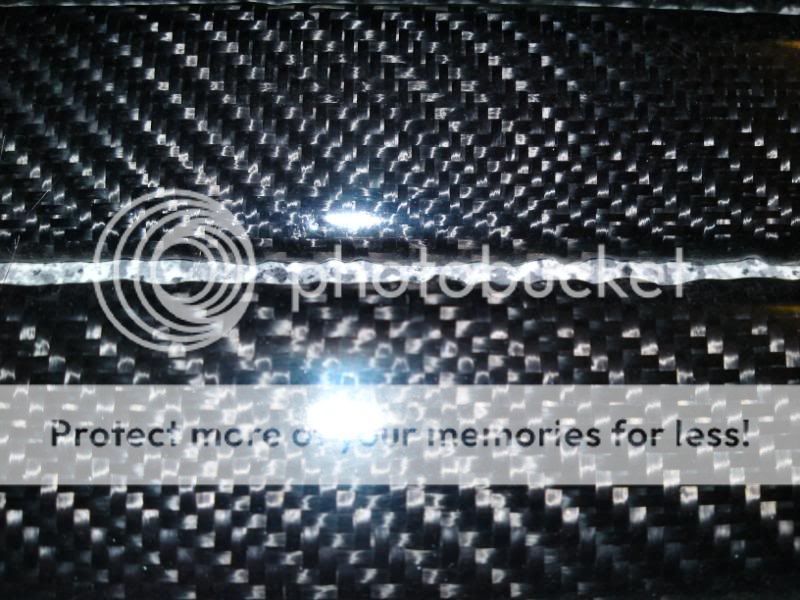
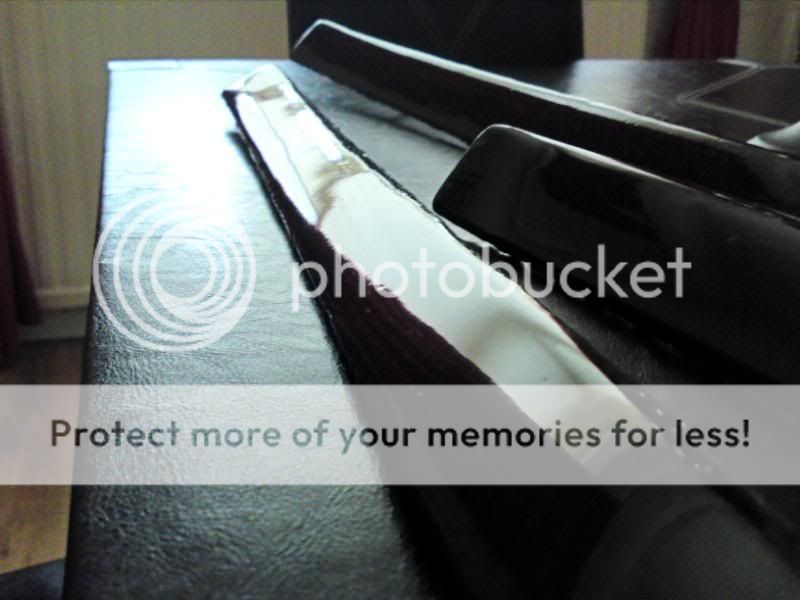
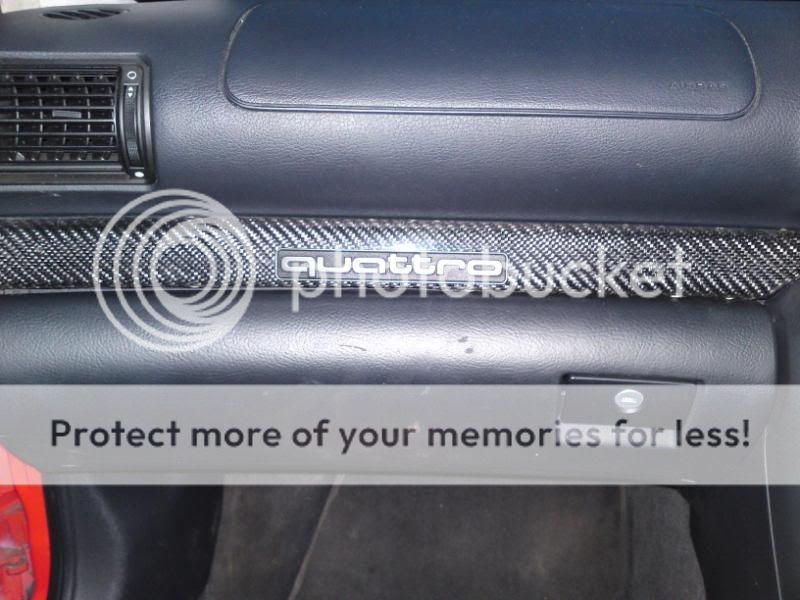
Some final pics of the finished and polished carbon
DSC00110-1.jpg

DSC00111.jpg

DSC00113.jpg

DSC00114.jpg

DSC00116.jpg

DSC00120.jpg

DSC00124.jpg


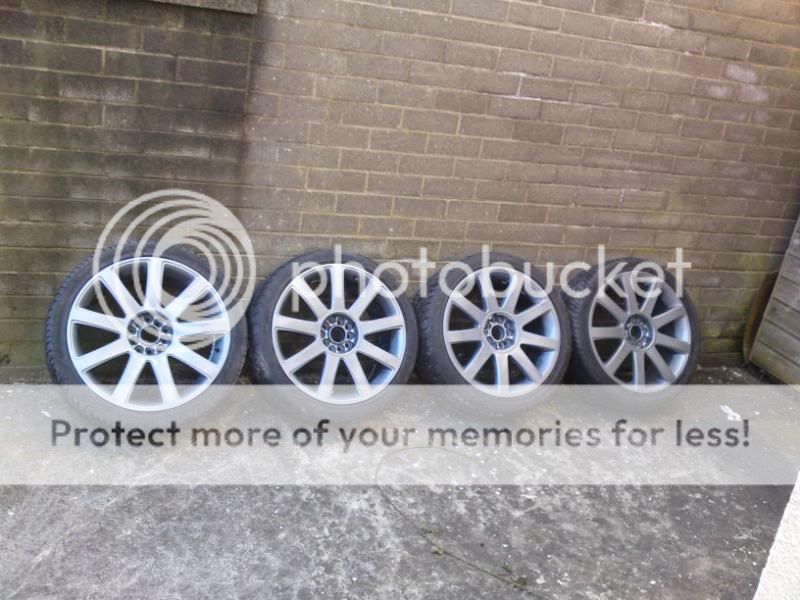
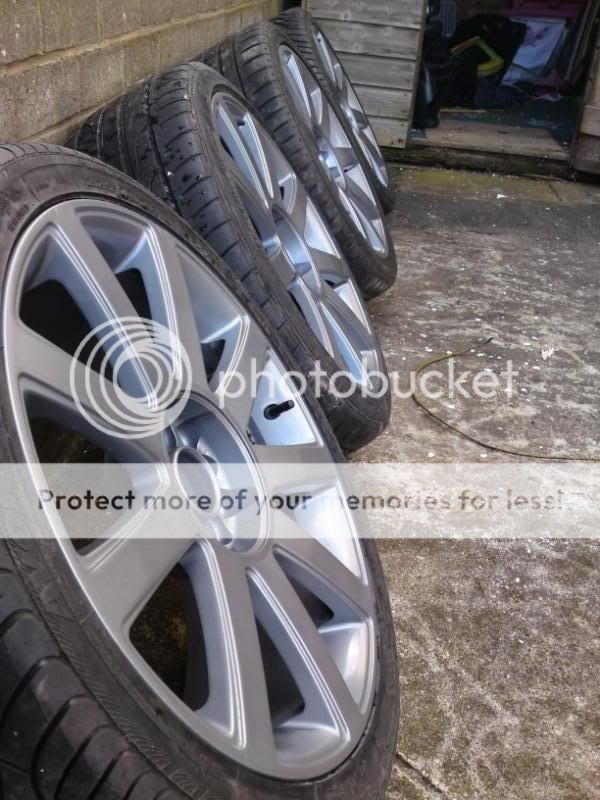
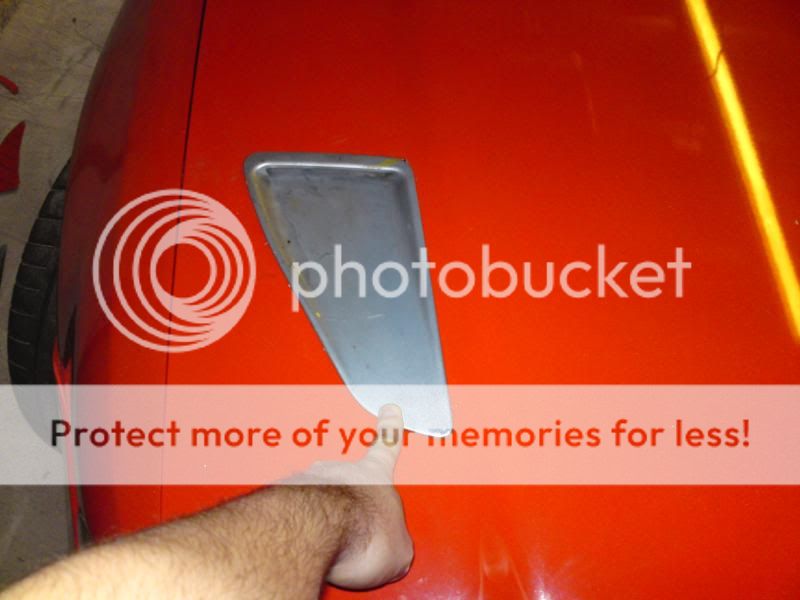
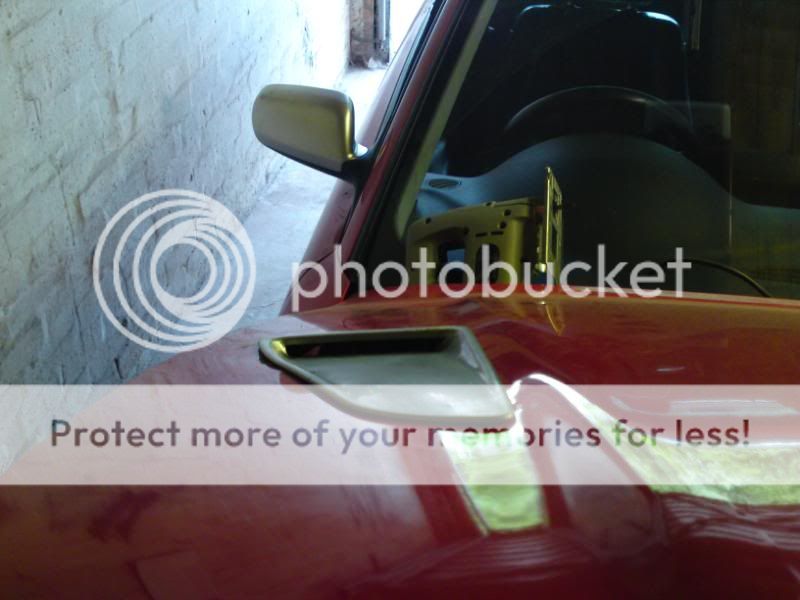
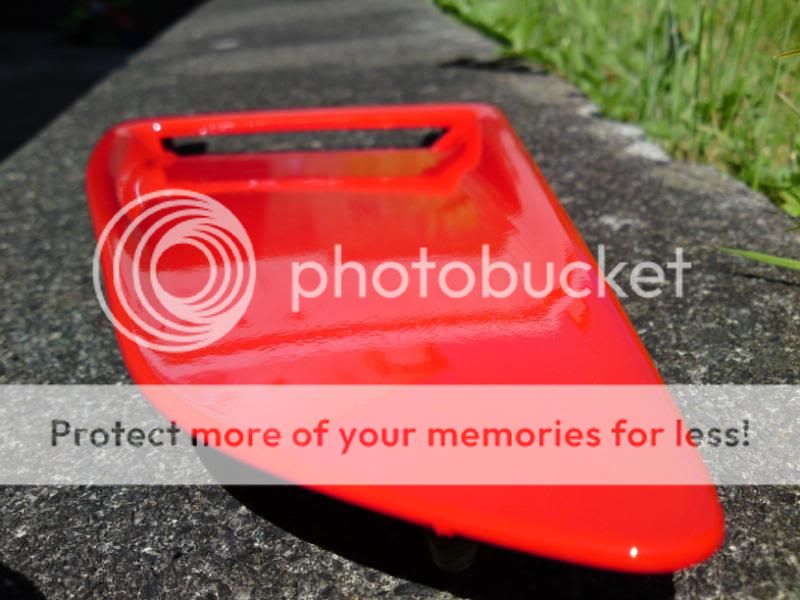
And finally got round to fitting them, no major problems and seem to sit nice and tight!
DSC00153.jpg

DSC00154.jpg

DSC00155.jpg

DSC00156.jpg

DSC00157.jpg

DSC00160.jpg

DSC00162.jpg


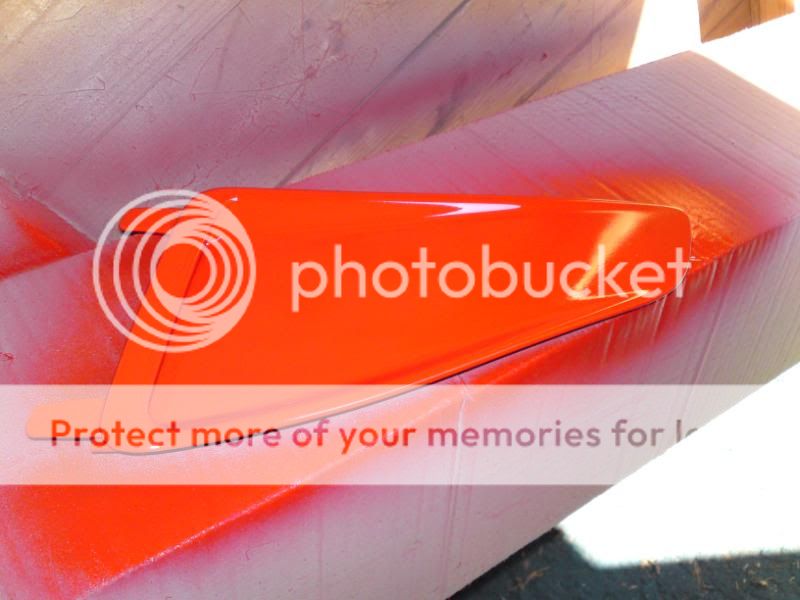
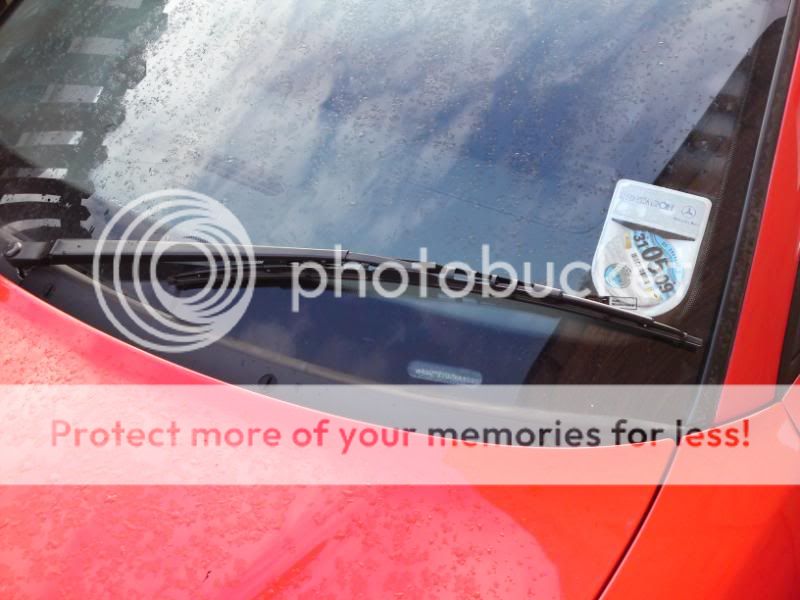
Changed my single wiper blade from standard to aero type, and fitted a slightly shorter one

Old
DSC00146.jpg


New
DSC00147.jpg


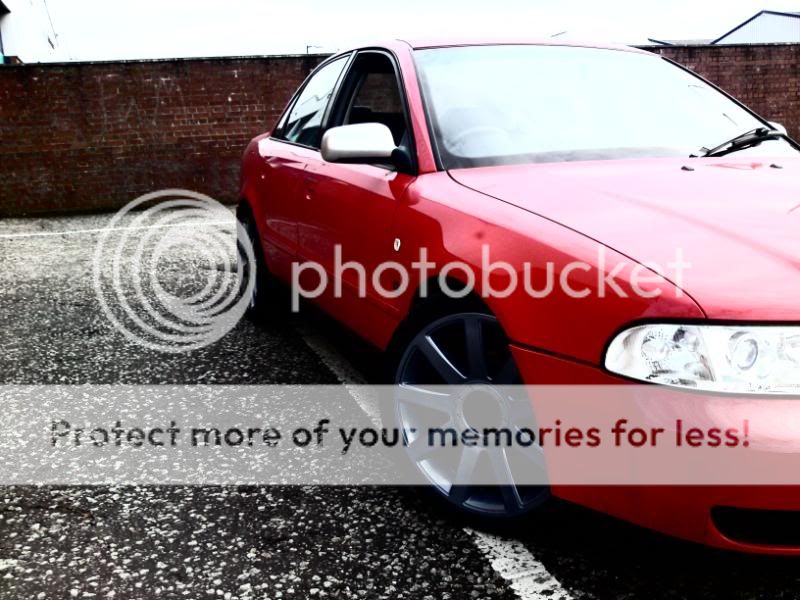
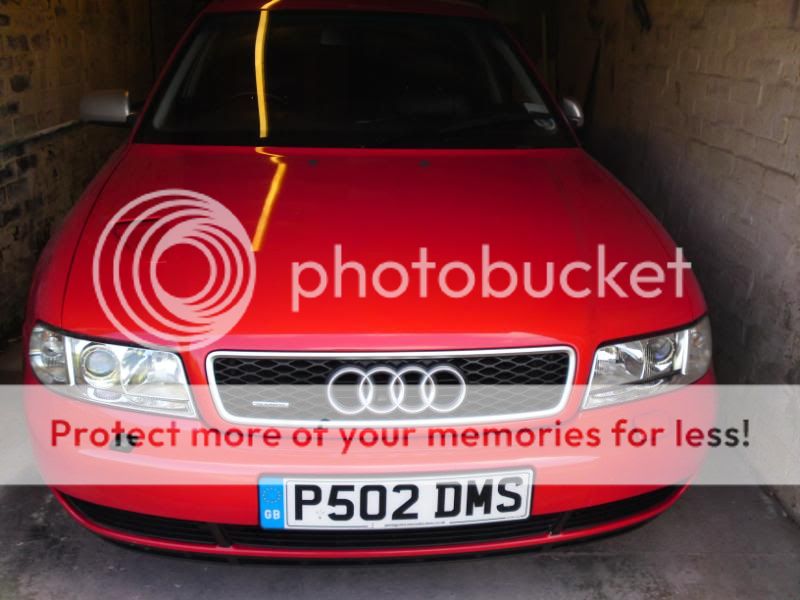
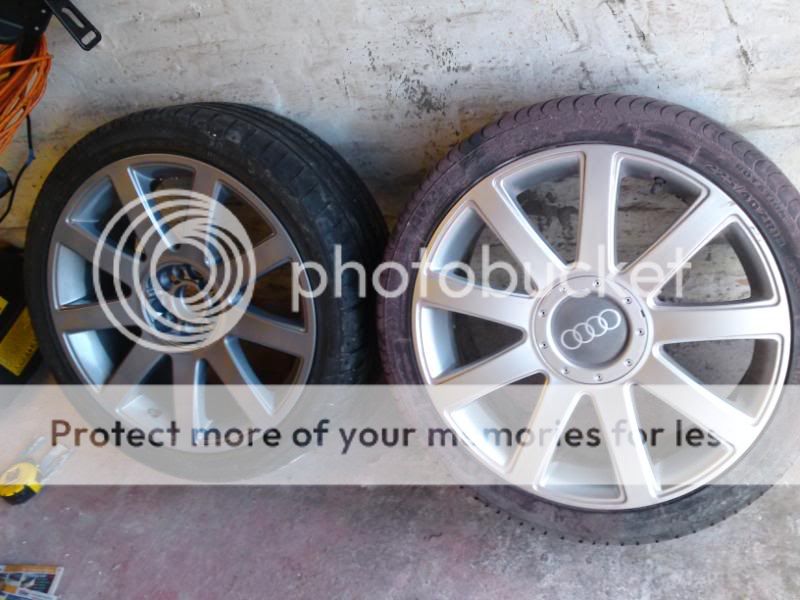
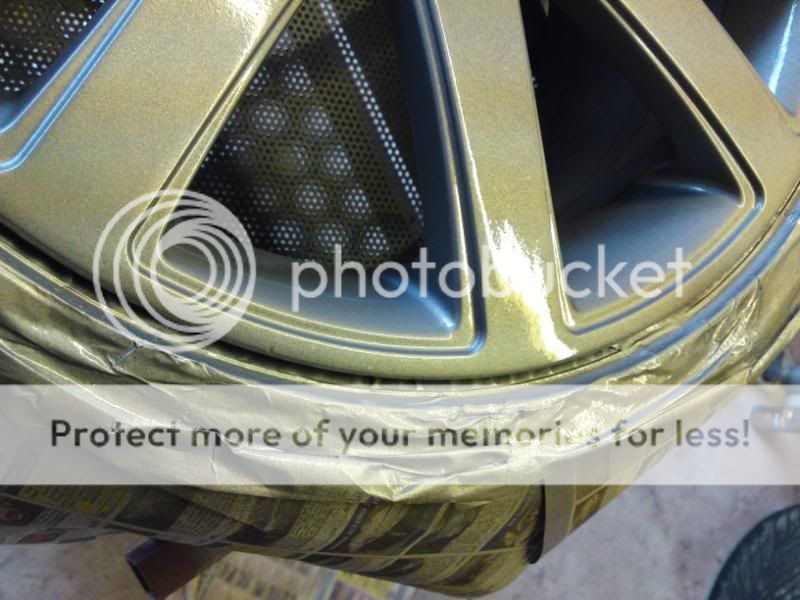
And in between all this, ive been busy doing a cheap wheel refurb on the RS alloys. One or two had some scratching and kerbing but i wanted a colour change anyway. Having previous wheels powder coated in anthracite, i decided on a less dark colour to this and also wanted to do the paint myself, so picked a colour called Stone Silver from a Daewoo range!!!

First stages of prep, with sanding and masking
DSC00127.jpg

DSC00128.jpg


2 coats of primer
DSC00129.jpg


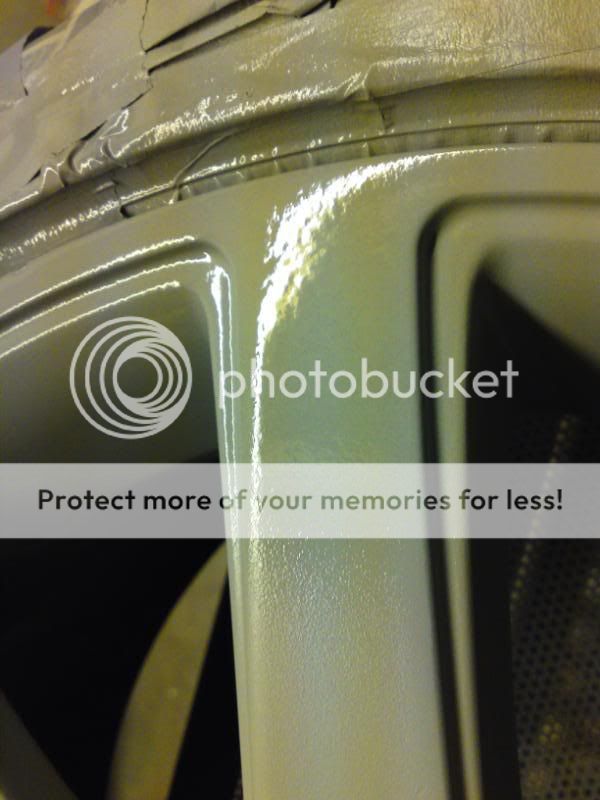
Then 2 coats of paint with 2 coats of clear
DSC00130.jpg

DSC00133.jpg


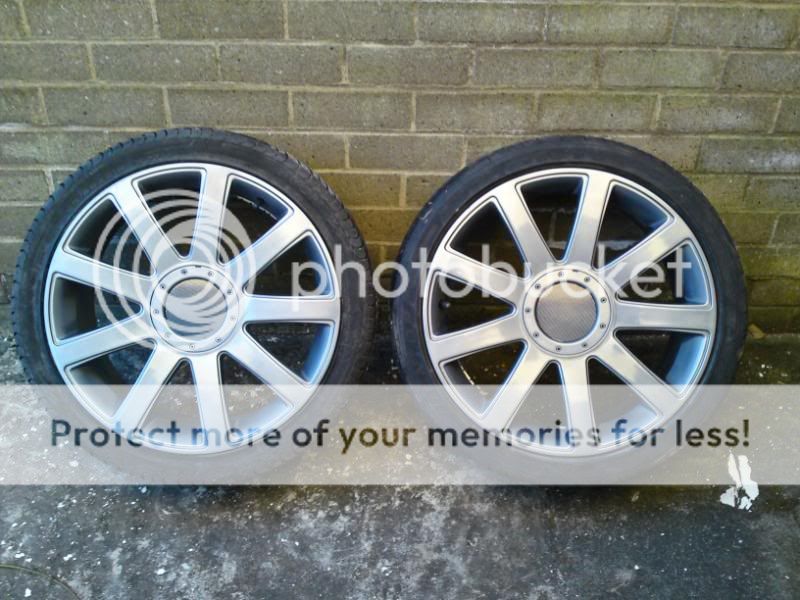
Compared with original silver
DSC00135.jpg


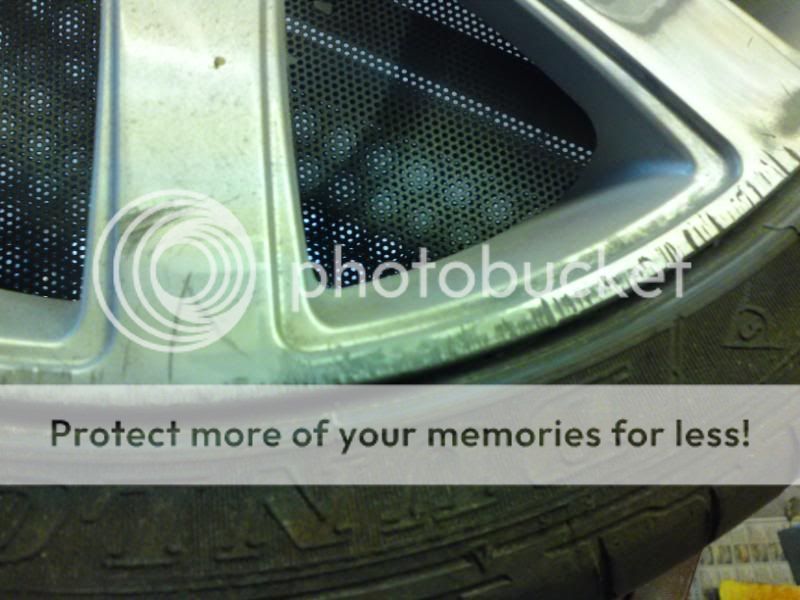
Worst of the wheels with kerbing
DSC00136.jpg


After 5mins with sanding, mostly flat again
DSC00137.jpg


Another rough section
DSC00139.jpg


With more time sanding, no need for filler
DSC00140.jpg


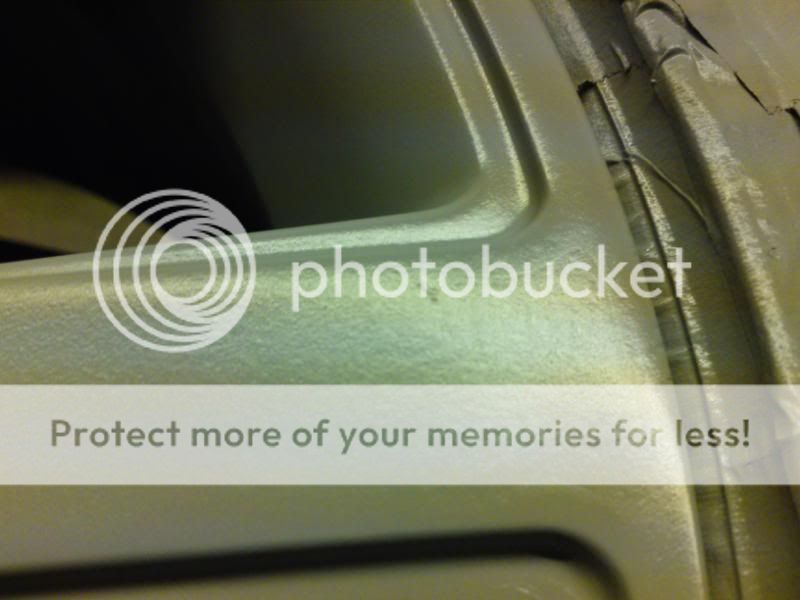
Wheel fully sanded down now ready for primer and paint. Any small chips that were missed with sanding will be filled with 2 stage primer before paint
DSC00141.jpg


First coat of primer shows some small imperfections still
DSC00142.jpg


After next stage of primer and 2 coat of paint, the imperfections are filled
DSC00143.jpg


This is the same area of the badly kerbed wheel with no filler applied, looking good!!!
DSC00145.jpg


Currently on the last wheel, still have centre caps to do and will get a pic when fitted.
 
Last edited:
Next stage, picked these vents up a while back

DSC00171-1.jpg


And like before, will be applying some of the good stuff!!!!!!!!!

DSC00172.jpg


Quick pic of it placed on bonnet, will be cutting and fitting soon. Originally was only fitting the one, but will see how it balances out with two and might go that route instead.

DSC00174.jpg
 
really impressed with the alloys bud!

im sure the vents go the other way round IMHO not keen on the vents
 
Looking good!

Vent direction depends on if you want to get cold air in... or draw hot air out.
 
Yep, vents are originally off a Mk2 Astra GTE and normally mount the other way, but as Geeman says it depends if you want cold air in or hot air out and as i plan to use the car on track its really just to flow more air to the bay, and its a bit different at the front.

Ran out of primer and paint but just picked some up so hopefully finish wheels and caps by tomorrow.

Cheers for comments guys.
 
thought they looked familiar i had a Mk2 GTE16v
 
thought they looked familiar i had a Mk2 GTE16v

Same here Ras, first performance car, absolutely loved it. Dont really see them anymore, always said i'd get another, but bet clean ones fetch decent prices now, as most had parted company with their rear arches and that was about ten years ago!!!:keule:
 
Mine was just a lowly 8 valver :redface: in black, but had a mate at work who had a 16v in bordeaux red i think it was called!

If i ever do go back for one it'll be 16 valver, and a Champion if theres any left!
 
Finished the last wheel last nite and left overnight to cure

DSC00187.jpg


DSC00190.jpg


Still got centre caps to do but wont take as much as the wheels, and order new centre badges.

Trimmed the LCR splitter down as i want a tight fit against the bumper due to car being lowered and bit of a steep incline at garage, ready to trim the ends and screw into final position.

DSC00188.jpg


DSC00189.jpg
 
Cool!

The LCR splitter is a bit fiddly to fit isn't it! Not as straight forward as I first thought... getting both sides to match up is the tricky bit...
 
Cool!

The LCR splitter is a bit fiddly to fit isn't it! Not as straight forward as I first thought... getting both sides to match up is the tricky bit...

Cheers Geeman.

Yep, splitter takes a bit of time, plus i ground down all the tabs used to attach to the Seat bumper and both centre columns to get as tight a fit as possible near to the bumper as im sure mine will catch on a lot!:rolleyes: Ive aslo set it back a bit further than ususal, wont be as noticable.
 
Very nice work mate. Looking forward to seeing more progress :icon_thumright:

My car needs a bit of a clean up aswel. Front splitter is cracked ''Again'' and needs primer and paint to sort it. Thinking of de-badgeing the back of mine aswel.

I like what you done with the Rims, my RS6s need a serious clean and respray.

Dave
 
Thanks mate, more to come shortly but also looking into starting my own business up and thats eating a lot of my time at the min, i'll get there in the end thou. You should do a wheel refurb for the hopefully decent weather starting.
 
I just read through this thread for the first time! Awesome! Some really, really nice work in here :) Looking forward to seeing more!
 
I just read through this thread for the first time! Awesome! Some really, really nice work in here :) Looking forward to seeing more!

Thanks mate, not done much lately, busy wk last, but all the positive comments keep spurring me on. I'll get my ar$e in gear this week, hoping to finish preping bumpers and skirts and doing some trial fits, pics to come.:icon_thumright:
 
Got some more done on the kit, more sanding, smoothing and priming ready now to go for paint when i get the readies

DSC00219.jpg


DSC00220.jpg


DSC00223.jpg


Quick mock up with grilles in
DSC00221.jpg


Sideskirts sanded
DSC00222.jpg


Then plastic primed
DSC00224.jpg


And S4 rear in process of keying and sanding
DSC00225.jpg
 
are those the S4 'look' skirts from eBay?
 
They are from the bay Ras, some place abroad that does kits n stuff.

Spent months looking for Genuine skirts and ended up just getting these as i intend to take the lower door trims off aswell for a smoother look so not too bothered that they would have to line up etc. Was gonna go custom for skirts but decided against it as the rest of stuff is audi origin(S, RS etc)
 
I thought so i was looking into these as well. the fiberglass put me off TBH, the finish looks ok in the pics tho
 
The finish is really good mate, surprised myself. Not bothered bout the fibreglass issue, they're out of the way when fitted, only issue will be stones from front wheels but only time will tell!

Decent price aswell, bout 70-80 quid i think.
 
looking good butty cant wait too see what it looks like when all put together well done :icon_thumright:
 
looking good butty cant wait too see what it looks like when all put together well done :icon_thumright:

Thanks Gareth, cant wait myself mate, lot of work done but its still in pieces, soon as im back at work i'll be getting the kit in for paint then fitting it!

Oh, and got the car started the other day mate, so will get the trims off prob tomorrow, wouldve done it today but had some bad news regarding family dog for 13 yrs, had to be put to sleep today. R.I.P Jodie.:bye:
 
No problem butty sorry to hear about your dog,,, 13 thats a good age though

Cheers gareth
 
Just seen/picked up on this thread. Very nice efforts and a good look with those wheels! Out of interest and going back a page or two, where did you pick up your de-cat pipes? I was thinking about de-catting mine.
 
Just seen/picked up on this thread. Very nice efforts and a good look with those wheels! Out of interest and going back a page or two, where did you pick up your de-cat pipes? I was thinking about de-catting mine.

Cheers mate, i got the car with the exhaust fitted, its a custom s/s so was made up by the exhaust place as far as i know.
 
Its a very interesting/innovative build. I very much look forward o seeing the rs4 bumper on.......A decat is my next performance mod. I might push to a PES at a later date but I have to wait until next month for the MOT to decat (afterwards obviously) then worry about it passing emissions the next time around. How did yours get on for its MOT without cats?? Also mate, does yours still have its centre box/pre silencer?
 
The mot expired in Jan and the car is kept in the garage(2nd car) till its built and ready before i'll get it done. Helps if you know a mot tester for the emissions test;)

I think there is a centre box, will be under it later so let u know for sure.

Currently researching the PES charger, might be thrown into the mix at a later date.
 
Recieved these this weekend, flush type washer jets for front bumper, will need a bit of work to fit
DSC00263-1.jpg


Then went on to attack the Audi....started cutting in the bonnet vent
DSC00264.jpg


The point of no return...........:ohmy:
DSC00265.jpg


DSC00266.jpg


DSC00267.jpg


And a rough shape cut out with tabs left for mounting the vent onto
DSC00268.jpg


Small amount of filing and cleaning up to do but the vent fits nice so far, will add pics of it fitted 2morro when i get it finished.
 
Good update keep it up especially looking forward to the flush jet caps and GTE vents
 
Filed some more around edges etc for a better fit and reshaped the tabs and drilled wot i could to sit the vent into and use the nuts to tighten it down.
DSC00269.jpg

DSC00270.jpg

DSC00273.jpg

DSC00274.jpg


Ideally id like to eventually adjust it more to have the vent sit completley flush but this is the rough idea of it.
The bonnet is a kill anyway as the jigsaw jumped at one point and the steady plate put a nice ding next to the vent! But using this to mess around with atm anyway, so will do for now and replace at a later date.
Now the hard bit, carbon fibre vent.....
 
Painted my front grille rings to get rid of the chrome look, now match the grille surround and mirrors!:)

Beside chrome to show difference
DSC00276-1.jpg


And fitted
DSC00277-1.jpg

DSC00278.jpg

DSC00280-1.jpg
 
What colour did you spray the rings mate? Whats it called? I like it!

Its called Aluminium Spray Paint from Halfrauds, pretty good stuff, same i used for my mirrors and it looks spot on for the finish. Keeps the rings bright as im not a fan of the black ones, but gets rid of the chrome and ties in with grille surround and mirrors, good times!
 
Got the vent painted and fitted now. Primer reacted on a bout 2 or 3 occasions so had to keep prepping before finally getting 2 coats of paint and a clear coat to finish it.

DSC00281.jpg


First reaction due to lacquer peel underneath
DSC00282.jpg

DSC00283.jpg


DSC00284.jpg

DSC00285.jpg

DSC00286.jpg


And fitted
DSC00289.jpg

DSC00290.jpg

DSC00291.jpg


And had spare vents in black lying about, fitted it to see roughly how it'd look in carbon against paint
DSC00287.jpg

DSC00288.jpg
 

Similar threads

Replies
1
Views
3K
Replies
24
Views
4K
Replies
18
Views
4K
Replies
8
Views
4K
Replies
2
Views
2K