

Project RS28
- Thread starter Foxmeister
- Start date
You are using an out of date browser. It may not display this or other websites correctly.
You should upgrade or use an alternative browser.
You should upgrade or use an alternative browser.
- Joined
- Nov 24, 2010
- Messages
- 15,084
- Reaction score
- 1,131
- Points
- 113
- Location
- Plymouth
- Website
- wheelsnwires.blogspot.com
Liking the centre console mate.
I keep looking at mine and thinking of doing something like that.
I'm shocked that no one made a complete replacement to save having them annoying little spacers.
The lights do look a lot better as well.
Hows the ICE coming along?
I keep looking at mine and thinking of doing something like that.
I'm shocked that no one made a complete replacement to save having them annoying little spacers.
The lights do look a lot better as well.
Hows the ICE coming along?
- Joined
- Nov 24, 2010
- Messages
- 15,084
- Reaction score
- 1,131
- Points
- 113
- Location
- Plymouth
- Website
- wheelsnwires.blogspot.com
Cool. You got me thinking now...
Does the 'wood' facia just pull off / unclip?
You got some allen/torx screws behind the HVAC unit.

Foxmeister
Fired Up!
Thanks lads.
Geeman- As Scott said, screws/torx but im sure they were behind the stereo?
Scott- Thats all the front end stuff finished now, so just to concentrate on my amp rack, then trim that and the box and install subs, 2nd amp etc. Not long now, promise! lol.
Rob- Thanks mate.
Geeman- As Scott said, screws/torx but im sure they were behind the stereo?
Scott- Thats all the front end stuff finished now, so just to concentrate on my amp rack, then trim that and the box and install subs, 2nd amp etc. Not long now, promise! lol.
Rob- Thanks mate.
- Joined
- Nov 24, 2010
- Messages
- 15,084
- Reaction score
- 1,131
- Points
- 113
- Location
- Plymouth
- Website
- wheelsnwires.blogspot.com
Geeman- As Scott said, screws/torx but im sure they were behind the stereo?
Scott- Thats all the front end stuff finished now, so just to concentrate on my amp rack, then trim that and the box and install subs, 2nd amp etc. Not long now, promise! lol.
You might be right, I knew it was one of the two.
Foxy, will it be ready for the next AITP?

Foxmeister
Fired Up!
You might be right, I knew it was one of the two.
Foxy, will it be ready for the next AITP?
As in next year Scott? Definately will have all loose ends tied up by then, hopefully even running the charger by then too!

- Joined
- Nov 24, 2010
- Messages
- 15,084
- Reaction score
- 1,131
- Points
- 113
- Location
- Plymouth
- Website
- wheelsnwires.blogspot.com
As in next year Scott? Definately will have all loose ends tied up by then, hopefully even running the charger by then too!
Next year mate.
should give you some time to get it done.
")
Chin.
P88LSH
- Joined
- Jan 17, 2011
- Messages
- 179
- Reaction score
- 3
- Points
- 16
Foxmeister
Fired Up!
Lovely looking car mate, well done
Cheers mate, hows the B7 coming along, wots next for it? :icon_thumright:
Foxmeister
Fired Up!
Quick vid of noise from inside, and rediculous mpg when used properly!
Last edited by a moderator:
- Joined
- Nov 24, 2010
- Messages
- 15,084
- Reaction score
- 1,131
- Points
- 113
- Location
- Plymouth
- Website
- wheelsnwires.blogspot.com
Foxmeister
Fired Up!

Foxmeister
Fired Up!
i see that at 5mpg
Yep, and thats without the Charger fitted yet
 ......Can you get negative values for MPG?
 Find out next year! lol
Foxmeister
Fired Up!
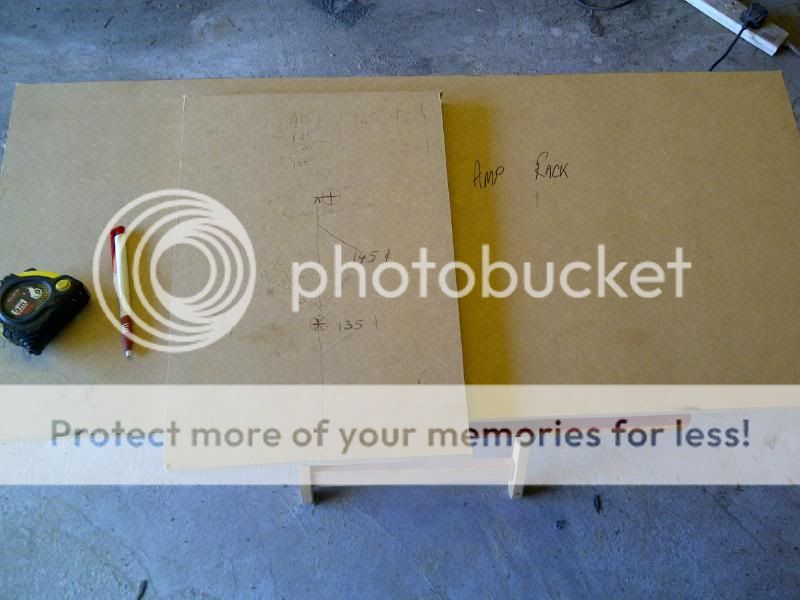
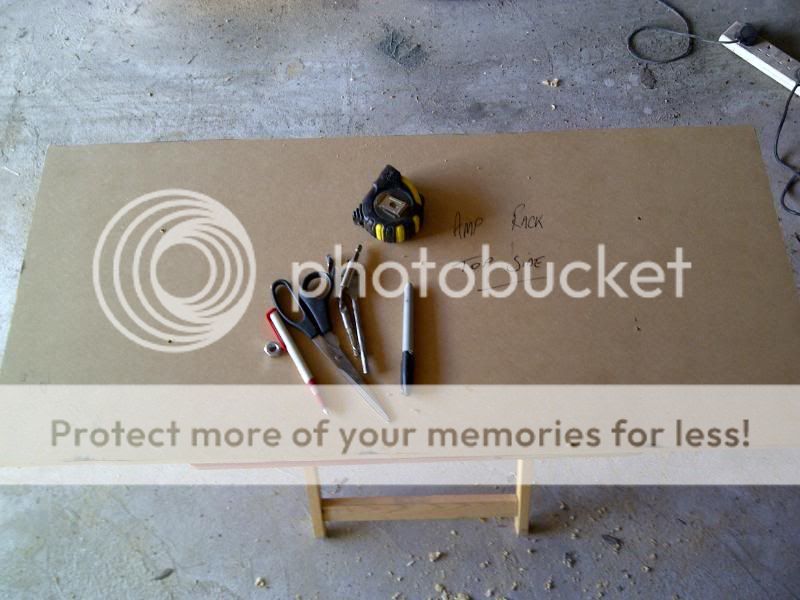
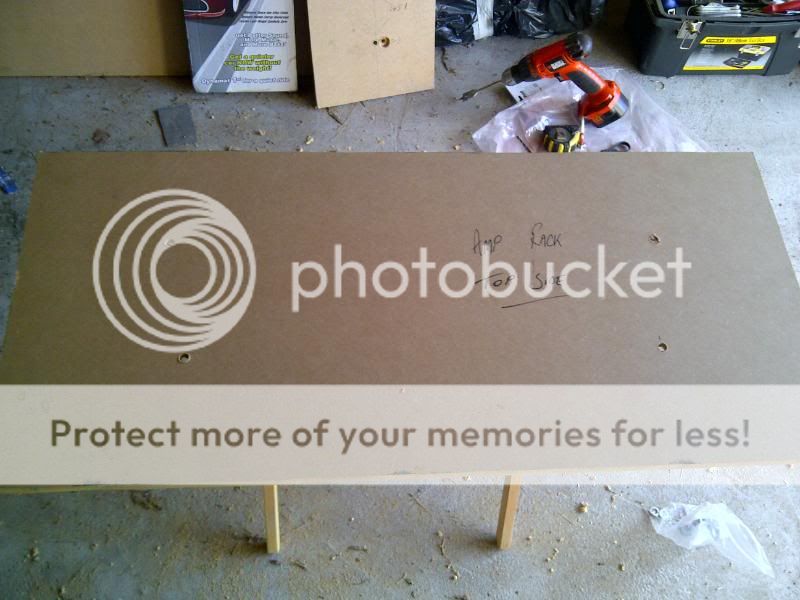
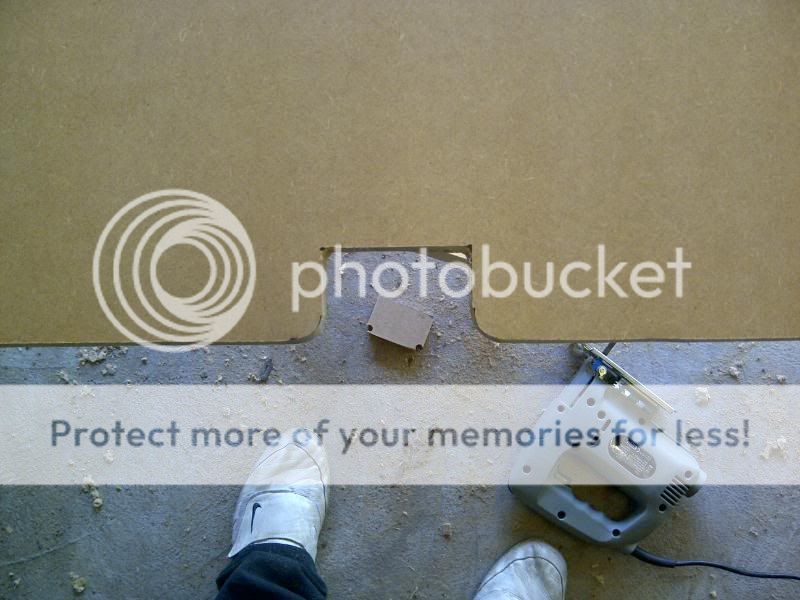
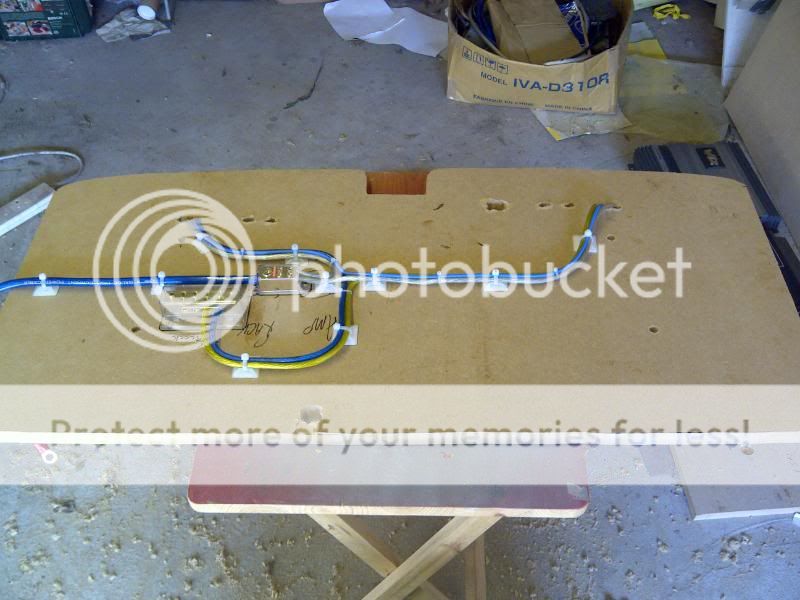
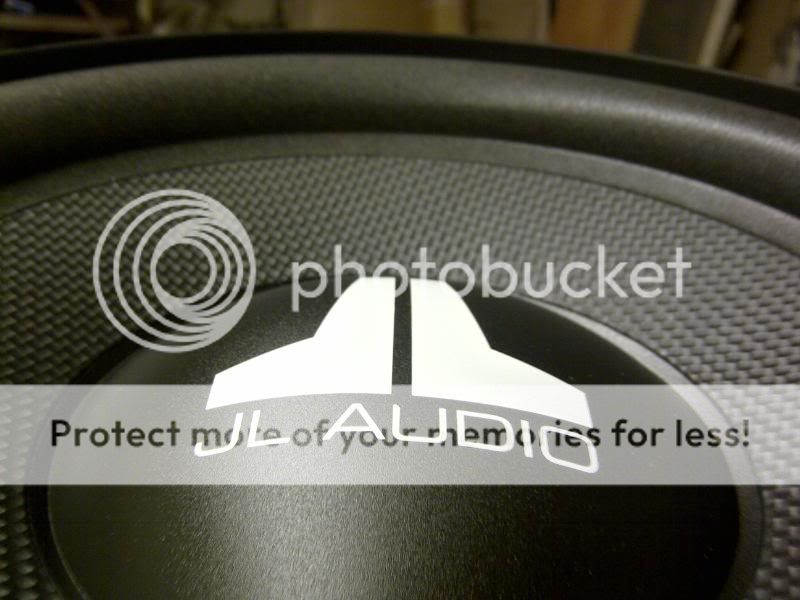
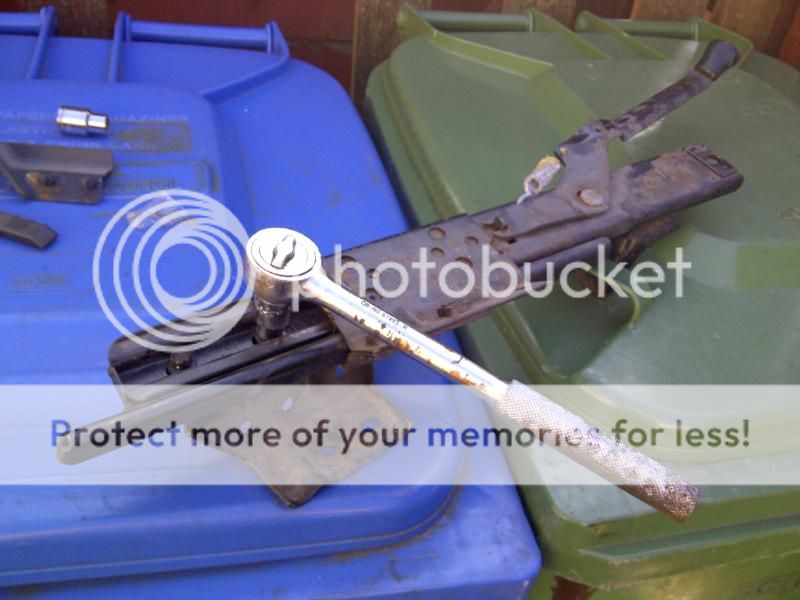
Following on with the audio install, this is for the amps, with template
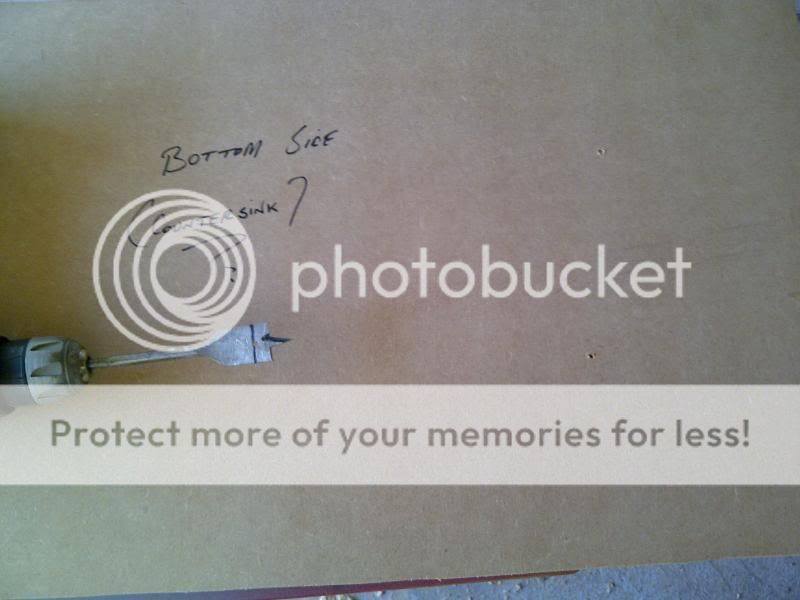
Had to countersink the mounting points
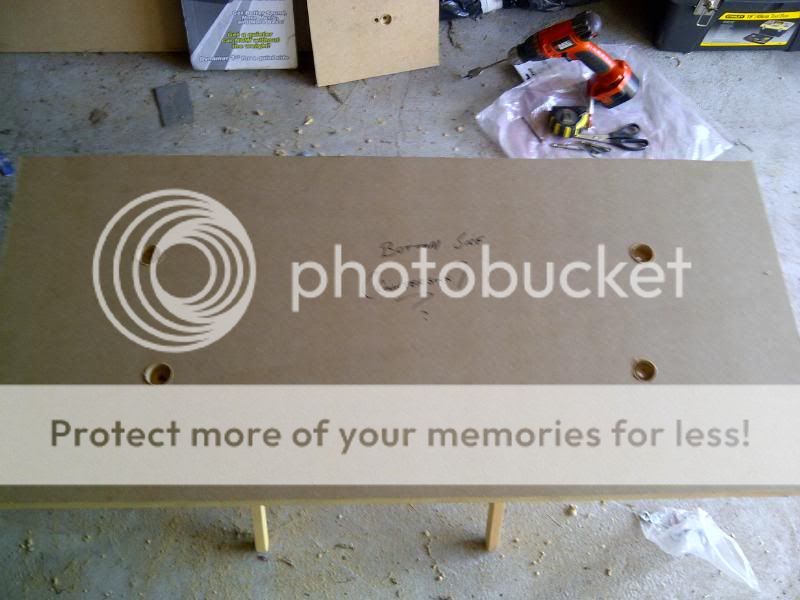
Top side drilled through with 10mm holes
Trial fit in the car....this is why the bolts were added before
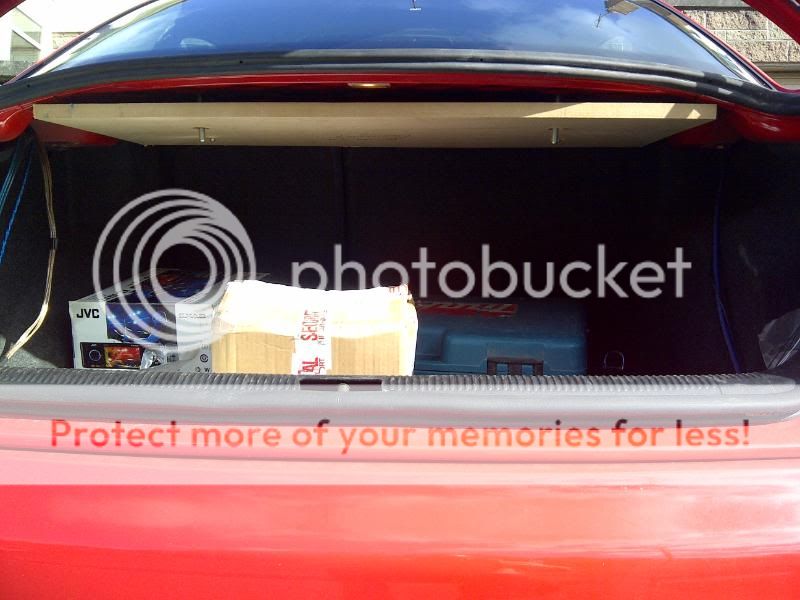
Longer bolts will be cut down, and countersinking so amps can be mounted over these fixings

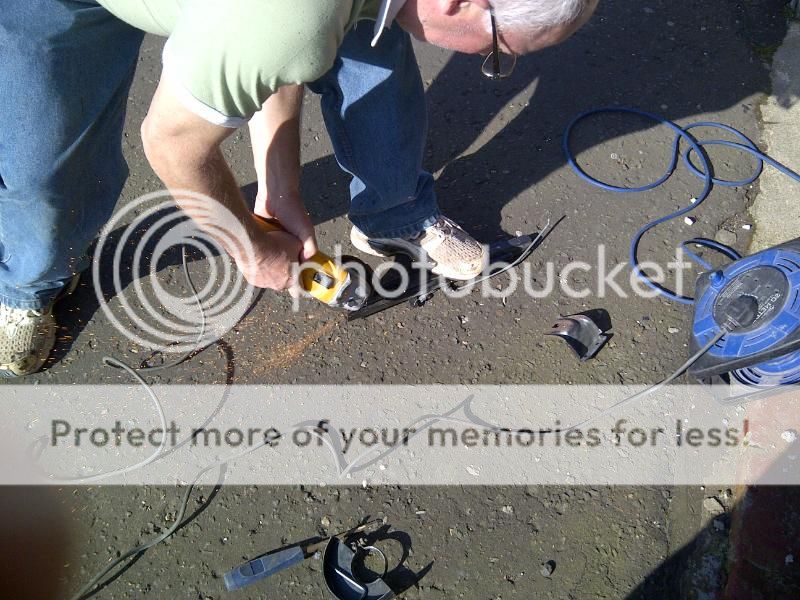
The rack obscured the boot light slightly so trimmed of a bit
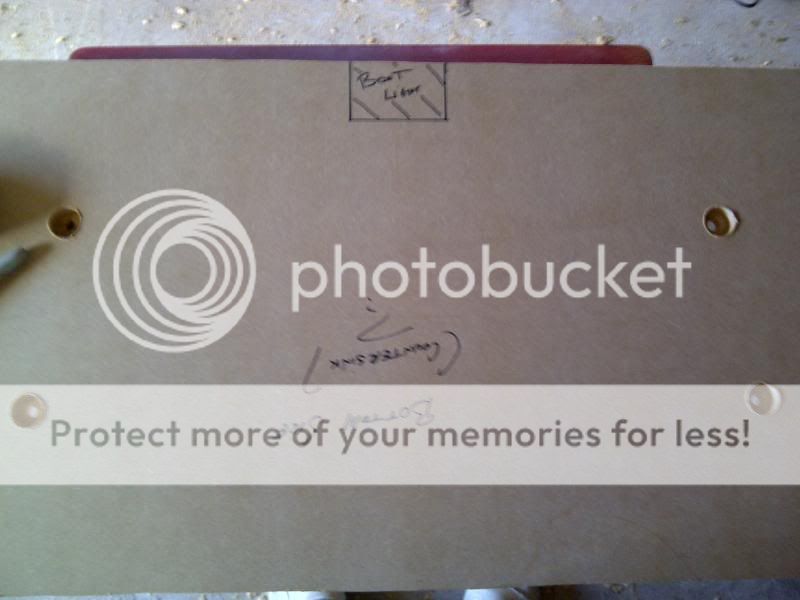
Drilled corners then jigsawed out
Made up a template to trim some edge of the rack and so it flowed better with shape of boot

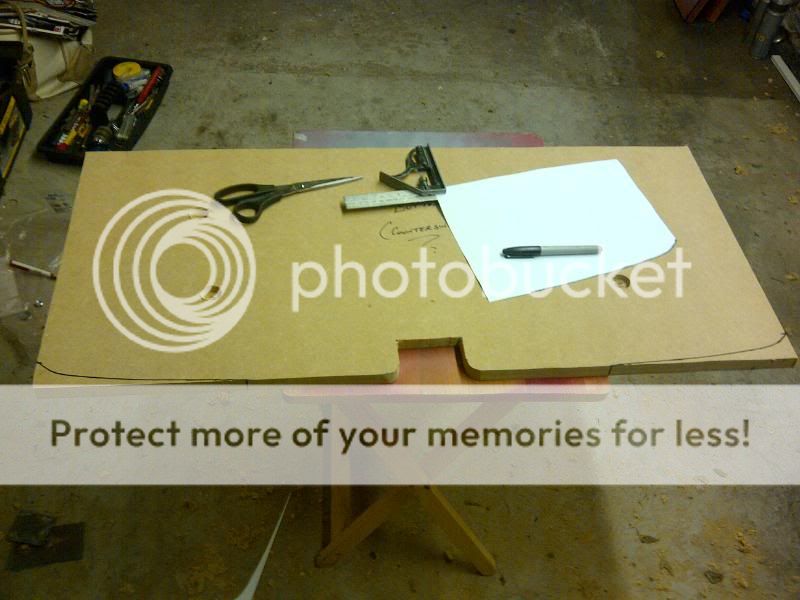
Cuts done

Back in for another trial fit, looking better now


Had to countersink the mounting points
Top side drilled through with 10mm holes
Trial fit in the car....this is why the bolts were added before
Longer bolts will be cut down, and countersinking so amps can be mounted over these fixings
The rack obscured the boot light slightly so trimmed of a bit
Drilled corners then jigsawed out
Made up a template to trim some edge of the rack and so it flowed better with shape of boot
Cuts done
Back in for another trial fit, looking better now
Foxmeister
Fired Up!
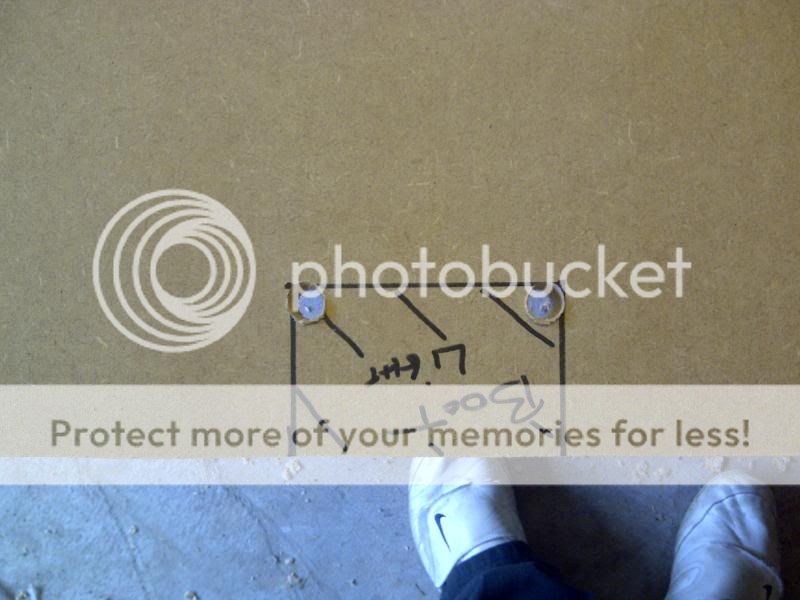
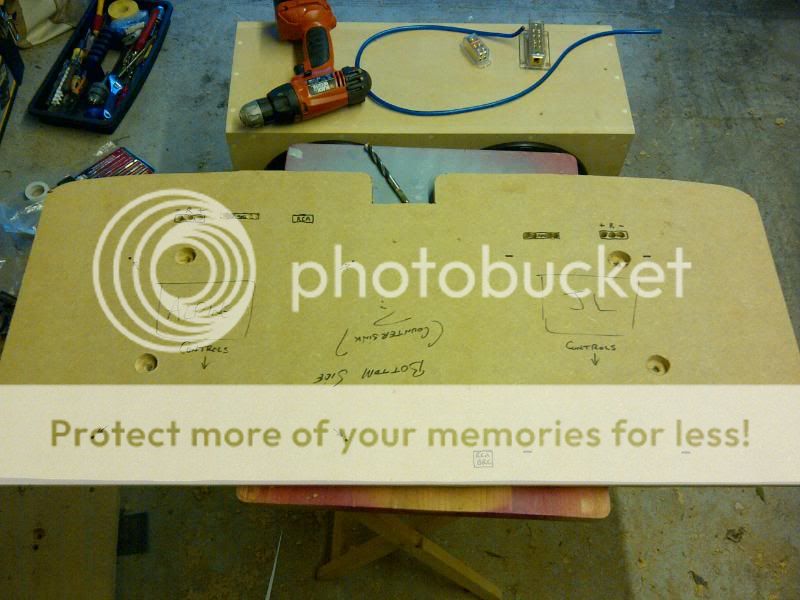
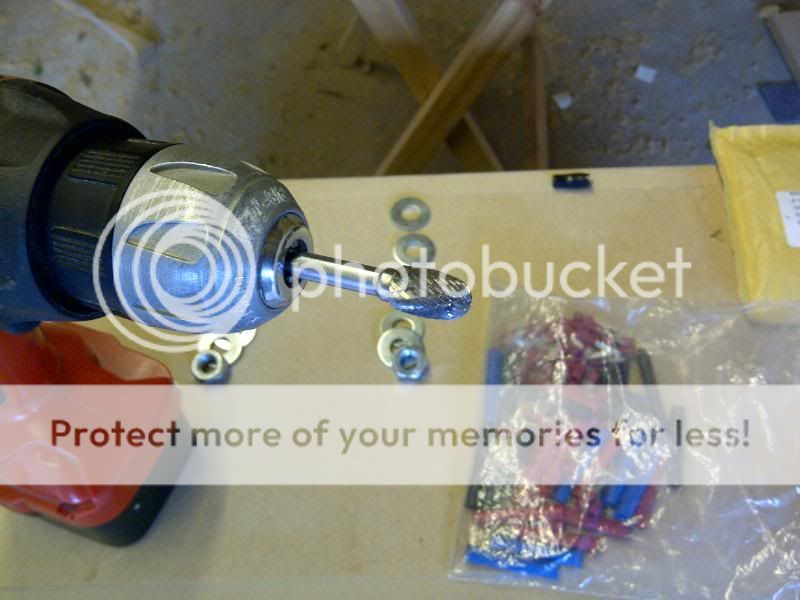
Then i had to configure the amp arrangement

Decided to space them, ready for wiring

All marked out and holes started
All fixed wiring on top side

And complete
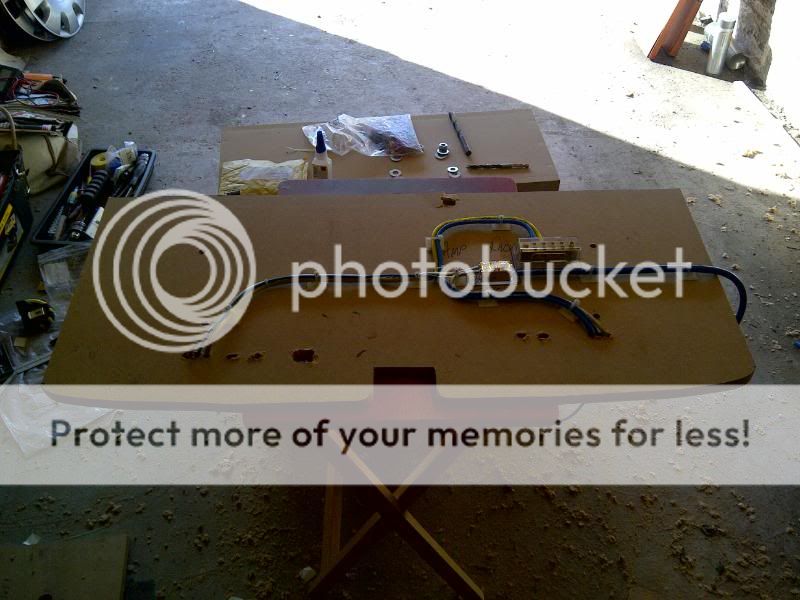

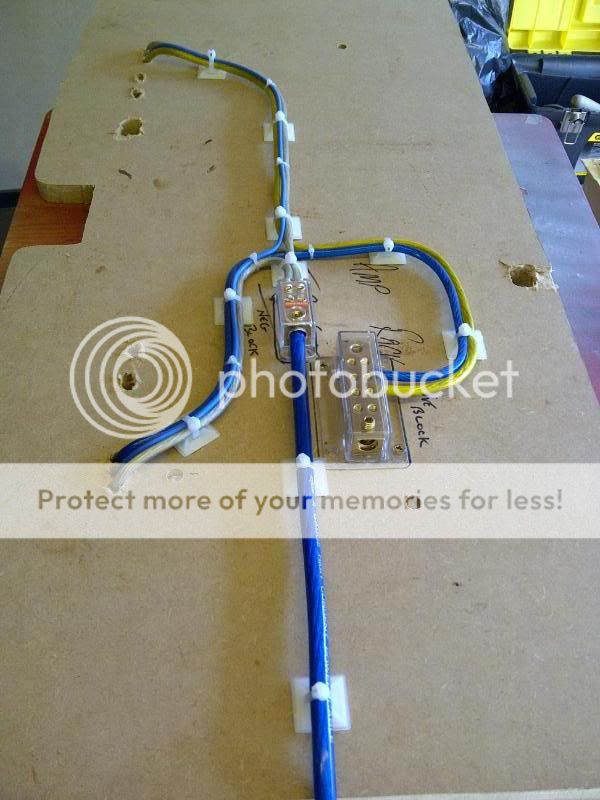
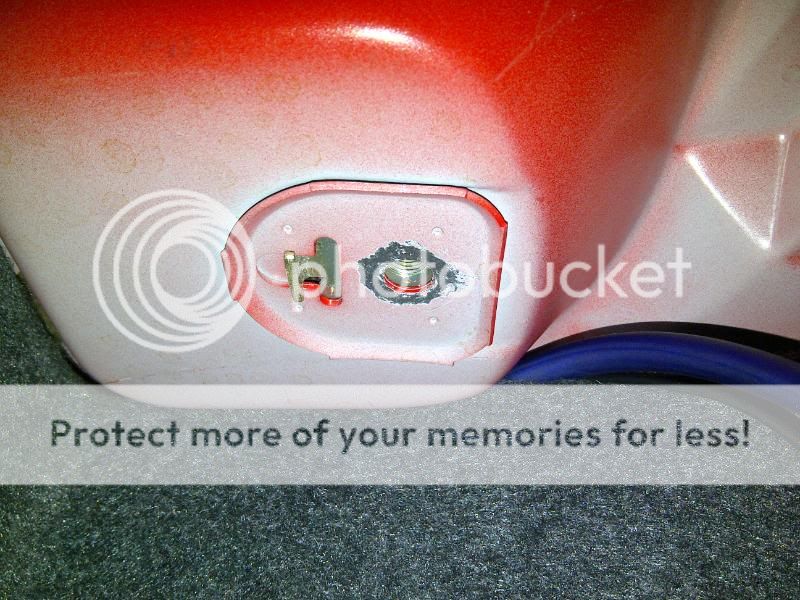
Used this to take back to metal for good earth
Rack in final position with cables all routed thru

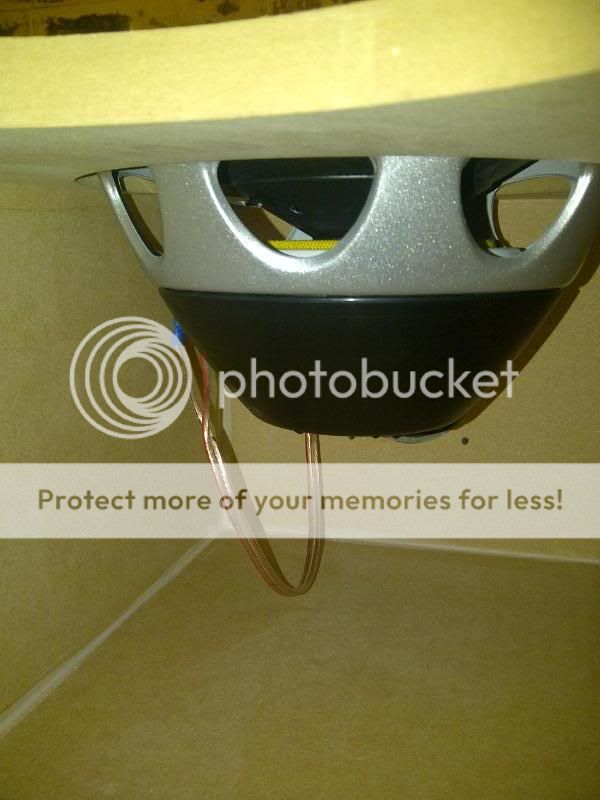
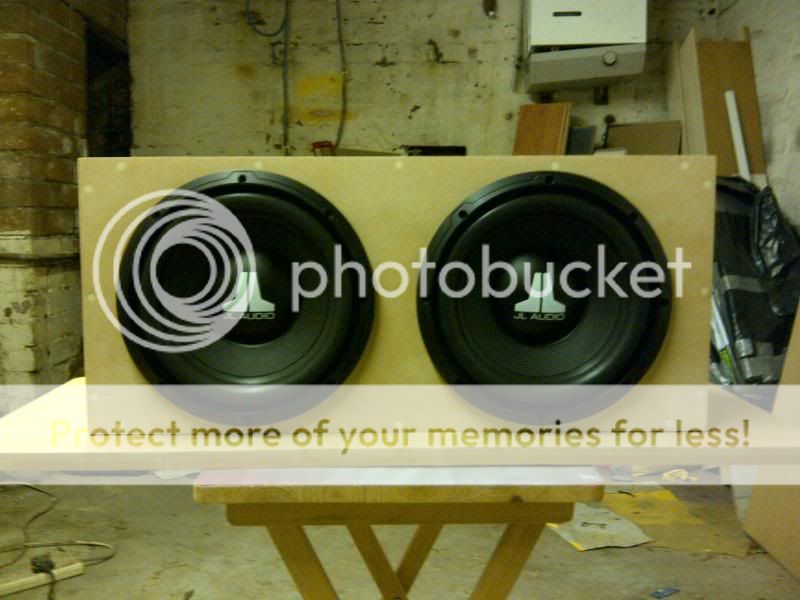
Subs ready for fitting


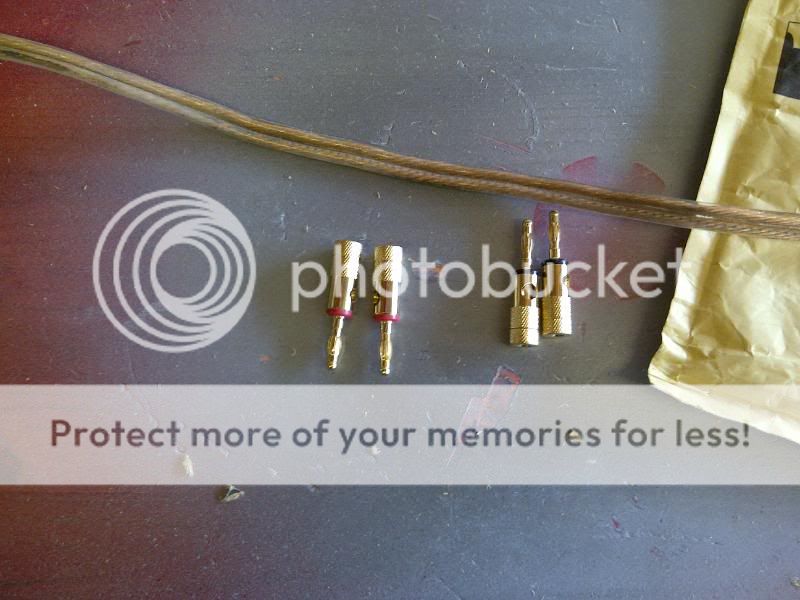
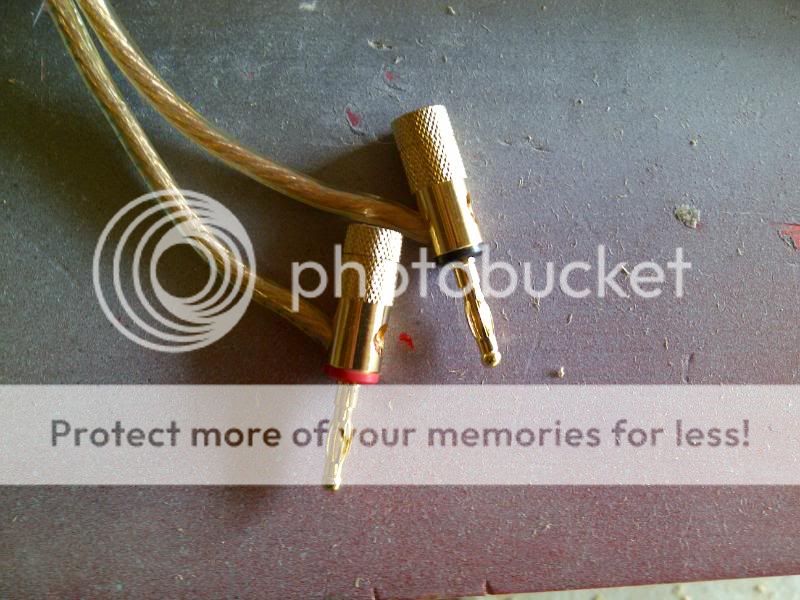
Banana plugs and cable for subs
Finally all wired and in position

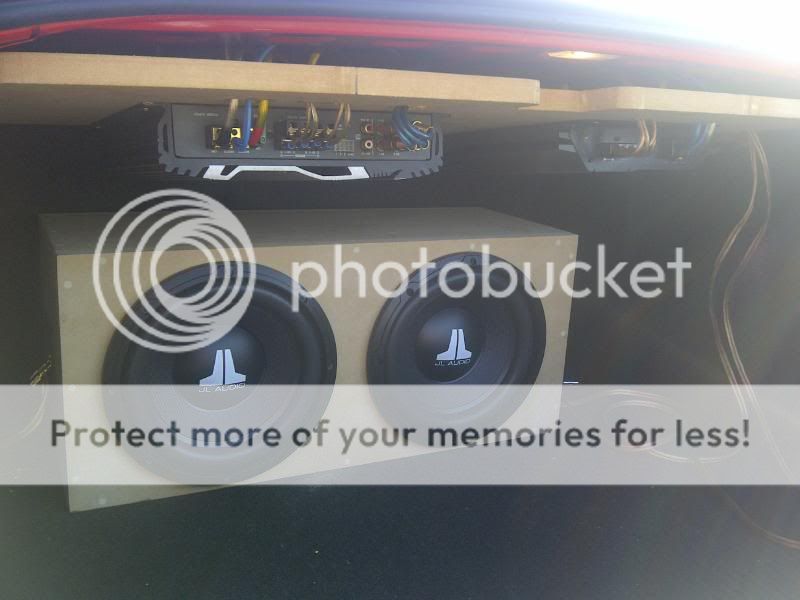
Settings all accessible from inside the car

Just some last pieces needed to cover the cable run, trim the rack and box and form some mounting design to solid mount the box, carry on with this soon, unless i decide to sell!
Decided to space them, ready for wiring
All marked out and holes started
All fixed wiring on top side
And complete
Used this to take back to metal for good earth
Rack in final position with cables all routed thru
Subs ready for fitting
Banana plugs and cable for subs
Finally all wired and in position
Settings all accessible from inside the car
Just some last pieces needed to cover the cable run, trim the rack and box and form some mounting design to solid mount the box, carry on with this soon, unless i decide to sell!
Foxmeister
Fired Up!
Brian- Thanks mate, kept me busy the last couple of yrs!
Ras- Great minds alright, Ha! Get some pics up of yours, never get to see it really, lovely car!
Ras- Great minds alright, Ha! Get some pics up of yours, never get to see it really, lovely car!
AudiAndy21
Registered User
Foxmeister
Fired Up!
Thanks mate.
The charger has been put back till next year now, but will be digging it out soon to clean and service it ready for install. Car is back off road now and next stage of work is in planning, more to come.
The charger has been put back till next year now, but will be digging it out soon to clean and service it ready for install. Car is back off road now and next stage of work is in planning, more to come.
Foxmeister
Fired Up!
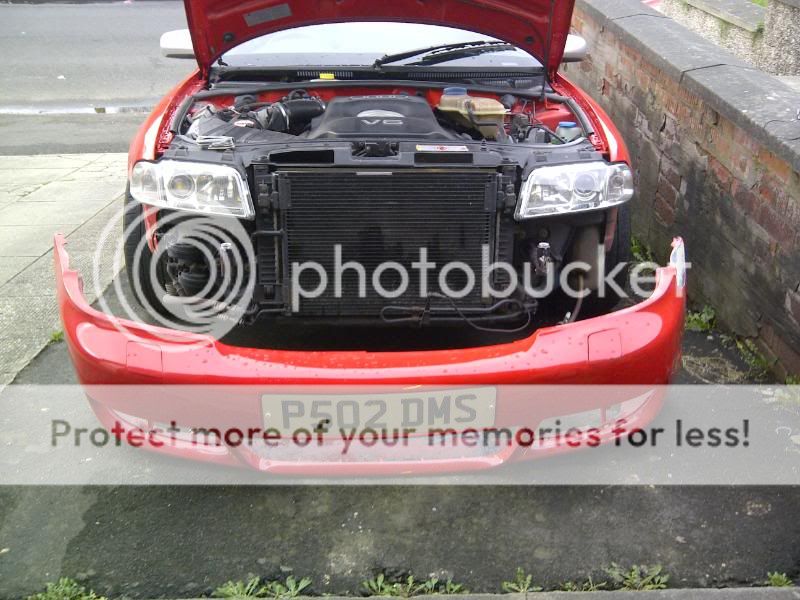
Well this is how the car was put away, front bumper had a little tussle with the driveway again the last time i moved it, left it looking like this


OUCH!!! Bumper has seen better days so decided to get it off anyway seeing as the cars back in the garage


Kinda like the look without the bumper, if only it was legal!!! lol

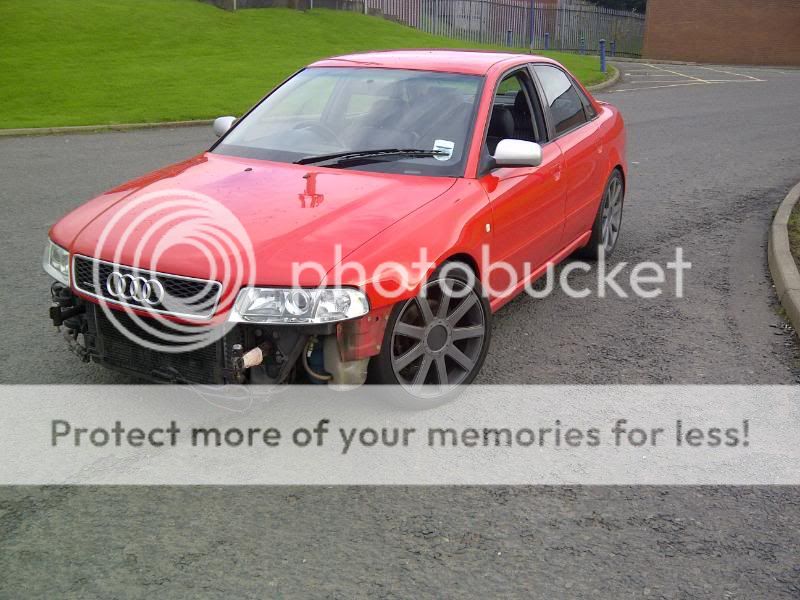

Will decide on a replacement later when its near the road again, doesnt need it for now!
OUCH!!! Bumper has seen better days so decided to get it off anyway seeing as the cars back in the garage
Kinda like the look without the bumper, if only it was legal!!! lol
Will decide on a replacement later when its near the road again, doesnt need it for now!
- Joined
- Nov 24, 2010
- Messages
- 15,084
- Reaction score
- 1,131
- Points
- 113
- Location
- Plymouth
- Website
- wheelsnwires.blogspot.com
Thats a harsh drive.
No wonder you keep catching the bumper.
Shell out for some Air ride.
What is it in the garage for now?
No wonder you keep catching the bumper.
Shell out for some Air ride.
What is it in the garage for now?
Foxmeister
Fired Up!
Thats a harsh drive.
No wonder you keep catching the bumper.
Shell out for some Air ride.
What is it in the garage for now?
Tell me bout it, plan is to move in a year or so, so will hopefully eliminate that problem soon!
I took it back off the road when i lost my job mate, cashed in the tax aswell as its too thirsty for daily duties and cant run it on my "im a ****** scumbag not trying to find a job" allowance! Will use that time wisely to upgrade some bushes etc and vacum lines for when the mighty charger gets thrown into the mix!:busted_cop:

Foxmeister
Fired Up!
Ouch kinda does look good without front bumper, lol looks like its been in a fight bottom jaw missing

 Its a rogue alrite!!!
Foxmeister
Fired Up!
Cant believe i havent seen this since Nov! Car has been locked away due to financial issues after job change, and getting ready to move home soon so no more stupid camber on the drive to ruin it anymore!!!!!!!
Ready to start a few things on it in the next few weeks to get the ball rolling for this year, and a custom front bumper to be fitted for the time being till i can source and have an RS4 bumper done again at a later date.
Ready to start a few things on it in the next few weeks to get the ball rolling for this year, and a custom front bumper to be fitted for the time being till i can source and have an RS4 bumper done again at a later date.
- Joined
- Nov 24, 2010
- Messages
- 15,084
- Reaction score
- 1,131
- Points
- 113
- Location
- Plymouth
- Website
- wheelsnwires.blogspot.com
Foxmeister
Fired Up!
Blast from the past mate.
Hurry up and get some updates.
Im trying, im trying! lol
Just been so busy with other stuff that its took a back seat, will have some updates in the next week or 2!
OllieQS
Registered User

PelicanBlue
Registered User
Ahoy!
I posted on your thread at superchargedaudi but it appears that this is where you post more frequently.. just wanted to congratulate you on the work you've done on your car and i certainly will take lessons from your experiences and DIYs.
I was just wondering whether your PES G2 install was successful?
Foxmeister
Fired Up!
Hi guys,
Thanks for kind comments.
PelicanBlue- I havent been on SC for a bit mainly due to not having done anything with the charger install yet, have mostly everything needed now including equal length DP's, uprated injectors etc, the other bits are the expensive and harder to find stuff like somebody to do a full custom map on it as i believe the PES map is pretty crap. Im currently moving home also which is taking up a lot of time and money, but as soon as i have settled and saved a bit, i intend on pushing on with it again, will update here and on SC Audi when i do to let you know.
Cheers!
- Joined
- Sep 12, 2010
- Messages
- 34,881
- Reaction score
- 15,946
- Points
- 113
Ahoy!
I posted on your thread at superchargedaudi but it appears that this is where you post more frequently.. just wanted to congratulate you on the work you've done on your car and i certainly will take lessons from your experiences and DIYs.
I was just wondering whether your PES G2 install was successful?
Welcome to ASN. Hope you enjoy the forum.
Foxmeister
Fired Up!
At last, an update, in between all the house move stuff aswell....
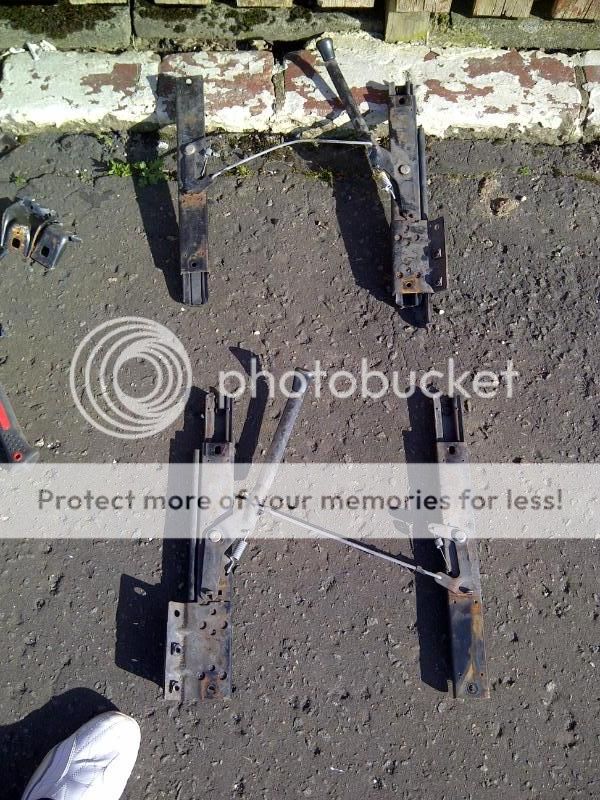
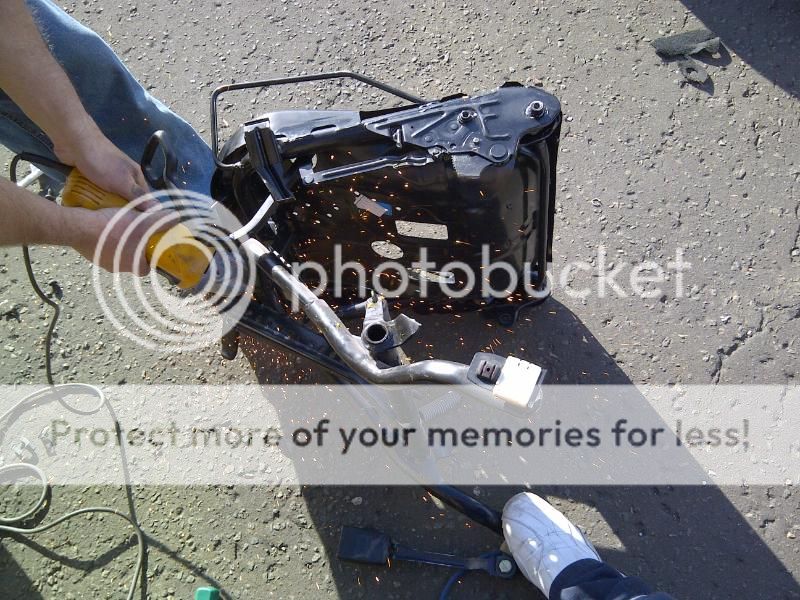
Anyway, made a start on getting the seat mounts fabricated up. Started off with the Ford RS Recaro sliders, had to remove the mounts fitted for the Escort, quite easy, bit of grinding and they were off
Got the auld man skivvying for me aswell! lol

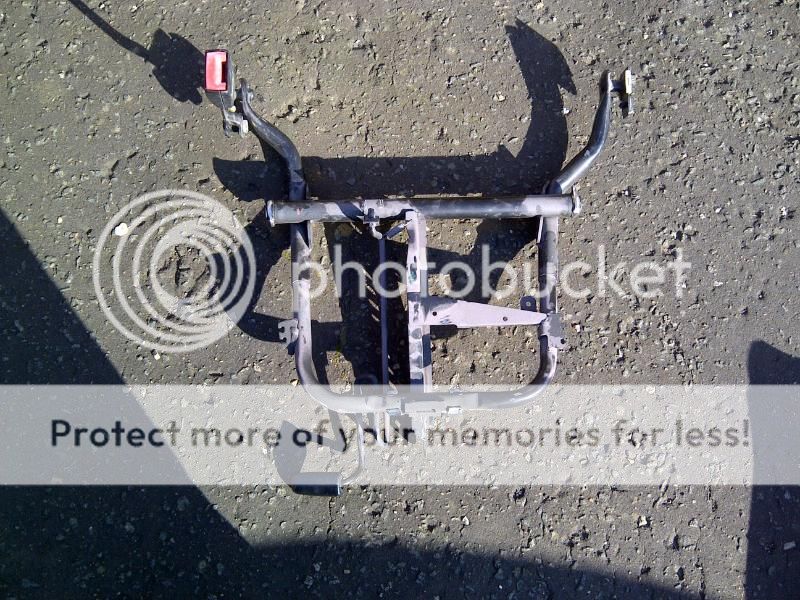
All done and smooth, ready to mate
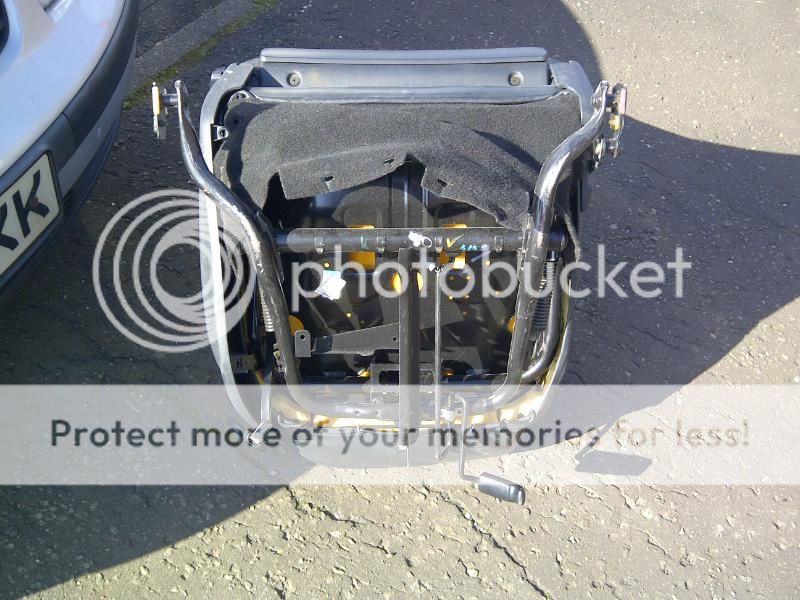
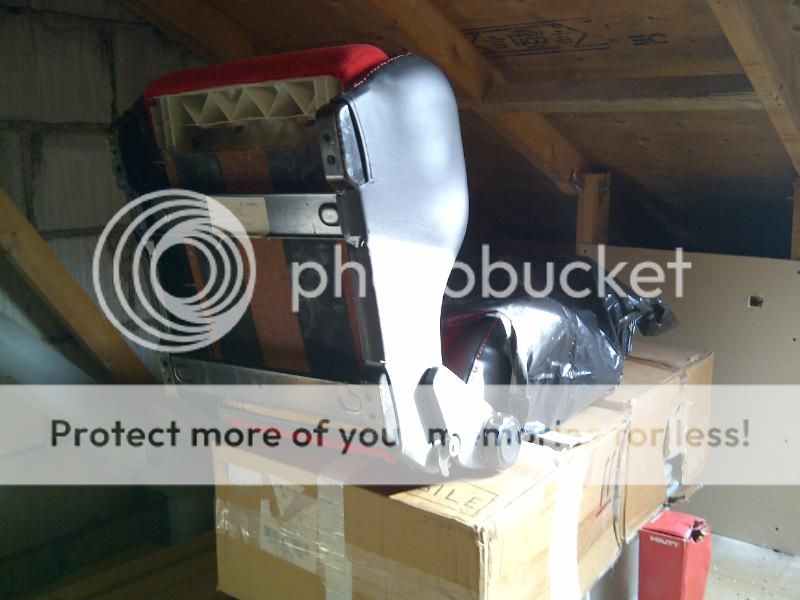
And one perfectly good Audi Sport seat....

Dismembered......
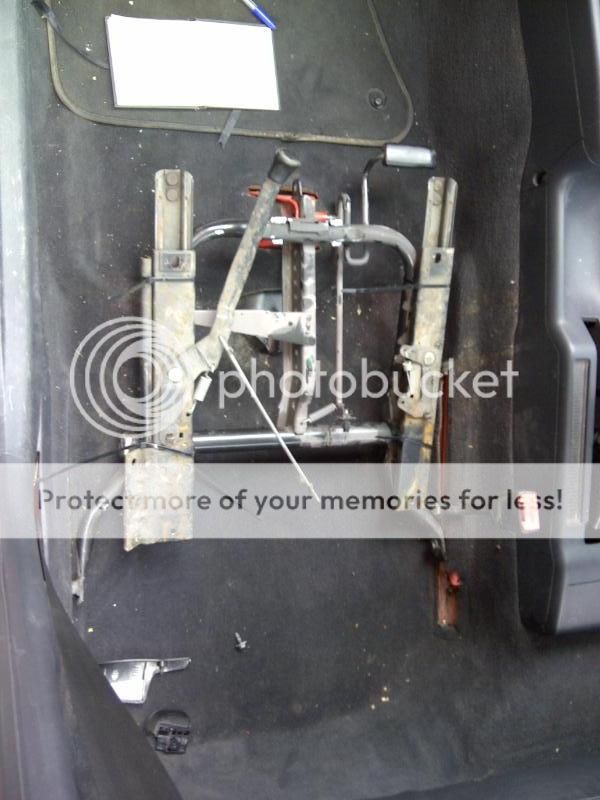
And a quick mock up of both runners
Now its a case of some measuring and get a tack weld to attach them, then a trial fit of the seat, if all is good with measurements and heights etc, the 2nd will be done, then sent in for seam welding and painting, ready to fit.
Hopefully able to trial fit one seat tomorrow seeing as the weathers holding up!
Anyway, made a start on getting the seat mounts fabricated up. Started off with the Ford RS Recaro sliders, had to remove the mounts fitted for the Escort, quite easy, bit of grinding and they were off
Got the auld man skivvying for me aswell! lol
All done and smooth, ready to mate
And one perfectly good Audi Sport seat....
Dismembered......
And a quick mock up of both runners
Now its a case of some measuring and get a tack weld to attach them, then a trial fit of the seat, if all is good with measurements and heights etc, the 2nd will be done, then sent in for seam welding and painting, ready to fit.
Hopefully able to trial fit one seat tomorrow seeing as the weathers holding up!
- Joined
- Nov 24, 2010
- Messages
- 15,084
- Reaction score
- 1,131
- Points
- 113
- Location
- Plymouth
- Website
- wheelsnwires.blogspot.com
Foxmeister
Fired Up!
Just for you Scott^^^ (now seeing as weathers good, go fit those wheels ya whorebag!)
Unfortunately i didnt make it to welders today, more "home" things had to happen first!
But i did manage a quick trial fit in the Audi to make sure all looks well
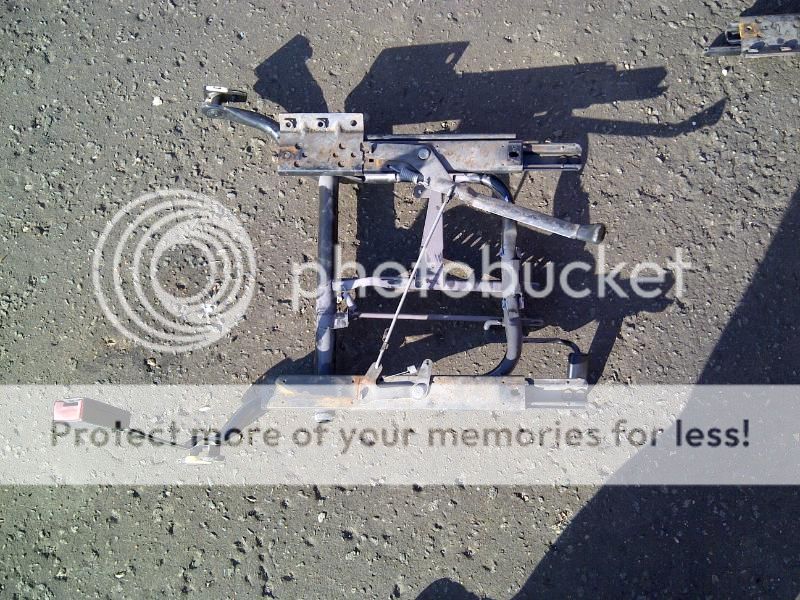
At this point there are 2 means of slide adjustment, the Audi design that is on the B5 frames and the Recaro design that is on the Ford sliders. Decision made to cut up the rest of the Ford design to obtain only 2 rails i need that bolt onto the bottom of the Recaro seats, these will now be set out and welded onto the B5 base, tac at first with a test fit of the seat to check heights, position etc with any final adjustments done, they will then be fully seam welded at every contact point possible between the rails, to obtain a proper, single piece seat mount ready to fit.
More pics from today
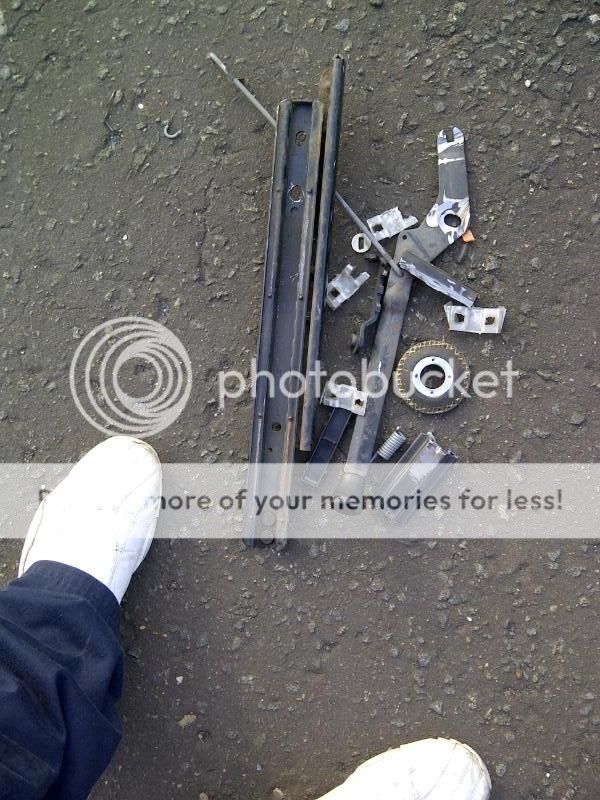
And what im now left with from the Ford rails

Some careful measuring of the seats
And my Rolf Harris engineers drawing

Looking like i might have tomorrow off maybe, so will defo get the welding started if thats the case!
Unfortunately i didnt make it to welders today, more "home" things had to happen first!
But i did manage a quick trial fit in the Audi to make sure all looks well
At this point there are 2 means of slide adjustment, the Audi design that is on the B5 frames and the Recaro design that is on the Ford sliders. Decision made to cut up the rest of the Ford design to obtain only 2 rails i need that bolt onto the bottom of the Recaro seats, these will now be set out and welded onto the B5 base, tac at first with a test fit of the seat to check heights, position etc with any final adjustments done, they will then be fully seam welded at every contact point possible between the rails, to obtain a proper, single piece seat mount ready to fit.
More pics from today
And what im now left with from the Ford rails
Some careful measuring of the seats
And my Rolf Harris engineers drawing
Looking like i might have tomorrow off maybe, so will defo get the welding started if thats the case!
- Joined
- Nov 24, 2010
- Messages
- 15,084
- Reaction score
- 1,131
- Points
- 113
- Location
- Plymouth
- Website
- wheelsnwires.blogspot.com
Faster gold fish man, if you go to slow you'll forget. :thumbsup:
Looking forward to the final bit of the puzzle mate.
Looking forward to the final bit of the puzzle mate.
Foxmeister
Fired Up!
LOL^^^ You crazy Mr Scott!!!
Well its off to the welders soon, hopefully have some fitted pics later!
Then its time to start saving for the REMAPPP!!!!!!!!!
Well its off to the welders soon, hopefully have some fitted pics later!
Then its time to start saving for the REMAPPP!!!!!!!!!