Northampton OFN's project thread

Thanks mate! Not had any problems with the Meyle arms personally but don't really do many miles.


Hi mate, at this stage I won't be porting the manifold. Looking for a reliable 250-260hp with a smooth delivery for now.. In the fuure though, who knows, maybe a tubular mani..
Thanks for the comments :smile new:

You're welcome.

Ok, that all sounds sensible and understood. Kind like what I would like to do.

Have been told by beach buggy turbos I can get up to 270bhp with their K280 turbo with all the correct stage 2 goodies.

But yes, a mate of mine has a 1.8t quattro cabby and is pretty much doing exaclty what you are. Already has tubular manifold too. Looks GOOOOOD.
 
You can buy a lead off EBay and download the freeware version called VCDS Lite this will allow you to pull codes.

In the lite vcds version are you able to activate and disable basic computer leads. I'm not talking about a remap but just to say kill the hazards that wont stop blinking on my car?


Sent from my iPhone using Tapatalk
 
Some more turbo p0rn


The other week i noticed the bonnet pop lever had become very stiff and the bonnet had stopped lifting the first inch when popped, so it had become a two man job to open. So i took the lock out the radiator cross member and serviced it with grease and oil. While removing it I'd snapped the bonnet switch for the alarm so i got one ordered up.

So I removed the four bolts that hold the lock in the rad housing


Then pulled it out. In the below pic you can see the two sprung loaded silver arms that i'd previously freed up which lift the bonnet the first inch.


The switch from TPS


And fitted


Then lock fitted back to carrier - i notched the washers to get the bonnet to sit a bit higher as i'd never liked how it sat before.


Then I dropped the underpan and took these clips off which hold the wiring around the edge of the fan


I had taped up the old one to stop the annoying symbol on the dash


Whilst it was up in the air with the belly pan off I decided to remove the SAI system


More to follow when I get time
 
I used the Audizine A4 B6 vacuum line and check valve removal thread for reference.

So cold air duct and engine cover off


I disconnected the hockey puck and removed the black solid pipes on the turbo side


Then I started on the secondary air injection (SAI) pump


To get to the top bracket mounting screws you have to remove the o/s headlight and it's base plate


The SAI pump is removed from the bottom, just the plug to undo.

I removed the air box which involves disconnecting a few small breather lines


One screw and the coolant reservoir can be moved out of the way.


And with the practice i gained when doing the coolant flange I again removed the EGR valve from the back of the block with the three allen bolts, it won't be going back this time though.


And fitted the block off plate from ebay, I discarded the shiny bolts it came with for some OEM ones that won't corrode.


Then the bracket that holds the two N-valves comes away from under the inlet mani

The N-valves will need to be plugged back in to avoid codes and the right hand one (N249 IIRC) needs a loop of vacuum line running two the two opposite ports.
Then you can remove all the leak-prone hoses from under there..


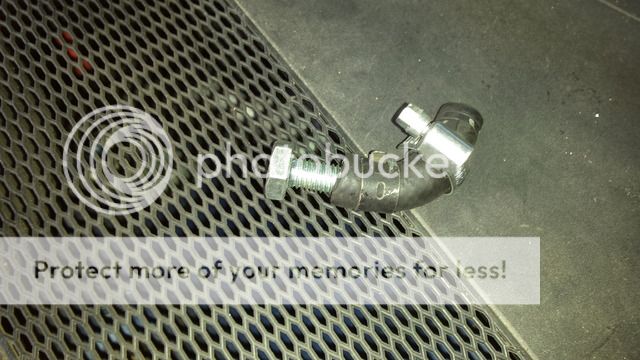
I had to make up two bungs. There are four ports on the inlet manifold. One will continue to serve vacuum to the brake servo, another provides vacuum to your diverter valve (during vacuum in the inlet manifold ie- coming off throttle). The other two are blocked.
 
Have a read at this, http://www.audizine.com/forum/showthread.php/554859-N249-delete-Why-you-should-not-do-it
I would remove the SAIP and N112 if it wasn't working properly but as long as it works it'll stay in place the reason being it will illuminate the CEL, incorrect flow http://wiki.ross-tech.com/wiki/index.php/16825/P0441/001089

The single most popular misconception on the 1.8t is the part you remove from the back of the cylinder head, the SAIP valve, it's function is to inject air into the exhaust manifold to help the cat heat up quicker.

It certainly cleans up the engine bay with all those pipes etc removed and makes valve cover gasket replacement much easier. Good post mate, those bolts that came with the blank kit look far too long, good job you used the originals.

Thanks for that QC! Made for a very interesting argument & after a little bit more research (most of that was based on an S4 breathing system) I might well consider linking the N249 back in circuit. Would be nice to find more definitive data on the 1.8t.


Ok so I rigged up a hose from the original manifold to injection pump outlet on the manifold directly on to the brake servo feed. This is temporary and I will improve this at some point.

I know what you're thinking, there's no one way to hold the vaccum in there. Well luckily Audi doubled up and there's one behind the plenum.


That was the passenger side complete, I decided that as I already had the headlight base out and the under pan off, I might as well have a go at fitting the second intercooler. So a long old while later, with plenty of swear words, oil in my eye and many different angles of attack, I finally had it mounted. Albeit one of the bungs went missing in the pandemonium - I wouldn't suggest anyone try this task without the bumper off, there's really zero room whatsoever.


I fitted a spare one-way valve I had lying about so that the valve cover cavity can't pull any atmosphere pressure in. The plan here will be to run a line down the back of the head to a catch can with a vacuum from that onto the exhaust - possibly using the secondary lambda hole once I've had it mapped out.


I bung'd up a few more holes such as on the TIP which left me with this:

I'd bolted the MAF on the end of the TIP so I shut the bonnet and fired her up.

All was well, the car idled nicely and there were no warnings on the dash so I went around the block. The only noticeable difference seemed to be the obvious whoosh when coming off the accelerator and a lot more low down torque - possibly the second intercooler doing it's job?

There was one more redundant breather on the airbox so i set about taking it off.


And back in the car


One more hole to block up is the un-filtered feed previosly down to the SAIP.

I used some plastic cement.

I drove the car hot between fitting the airbox and fitting this bung and it seemed to help no end in generally lumpi-ness of the torque curve. I've put this down to drawing in a lot of warm air straight off the turbo area.

And all back together just in time for rain.
 
Yeah it was based on the S4 but the principle remains the same, during gear change the throttle plate will be closed and the turbo will be forced to stop very quickly, then it has to build boost from zero again, it would be a shame to put your new turbo through that, anyway, I found this guide from the S3 Forum on here (engines the wrong way round) This is the part that stands out for me,

To be honest mate, performance advantages are negligible. Some people who have tried this have reported changes, but I think that to say it will increase performance isn't true.

It will crispen up your DV response time, which is nice, as there is no valve and vac chamber for it to go through. It will also eliminate the possibility of boost/vac leaks from the pipework assembly.

Anyway, with regard to the traction control, it will disable the traction control's ability to dump boost if it sees fit. I'm a bit funny like that, and don't like the idea the car can decide to do something I don't want it to....

Here is the full thread http://www.audi-sport.net/xf/threads/n249-bypass-how-to-2000-s3-but-same-for-many.84402/
 
  • Like
Reactions: Northampton_ofn
Thanks QC that's another good argument, still unsure what i'll do long term.

Found some time to treat the silver trim to a 3 stage. Still thinking about blacking this out but can't have it looking crap and cloudy in the mean time.


Only a small update (basically showing off haha) but I've got some more shiny things turning up in the post.

Here's the bung for the TIP, where the old hockey puck valve hole


And the 007P and panel filter

The forge came with all the springs so if anyone wants to jump in and tell me which colour I should use initially with the standard map, please do..

Just some p-clips left to get now for holding the new braided stainless turbo oil feed round the back of the head using the original hard line supply mounting points. Other than that i'm ready for T-day next weekend though :D
 
Awesome pal! Yellow spring will be perfect for stock map and even up to stage 2.

I have the yellow spring in mine. If you listen carefully, you will hear the smallest of whoooosh noises haha.
 
  • Like
Reactions: Northampton_ofn
Turbo Day
Right then, T-day rolled around and Uncle Nick showed up to help out. Strangely, this is the first time I can think of that I've had a second pair of hands to help with a job on the B6, and it was hugely beneficial.


So as usual I'd got my teeth well in to the job before remembering that I do this build thread and need some photos. So to catch up, up to this point we had removed the under tray, headlights and lower outer Vortex grilles in preparation for bumper removal. It's not actually a requirement to take the bumper off but we needed to fit the o/s intercooler's air duct anyway and it added better access to the work area.

So out came the nuts that hold bumper to wing

Then bumper off and also air-box fully removed


That's the offender


Then we dropped the oil out the sump and removed the turbo's brace, oil/water feeds and returns and the TIP and intercooler hose.


Then just the six exhaust nuts and bolts and it was out. Shortly followed by the cat/down pipe once the exhaust clamp bolts were snapped off under the car.


Then I fitted the new forge DV on the second intercooler.


The bolts between the cat and the down pipe were corroded beyond use and had to be angle ground off and then we fitted the de-cat with new bolts.


And fitted it back in


Then we swapped the breathers and coolant return line from old turbo on to new, which would be almost impossible in-situ.


We added the new studs I'd bought and the new gasket for the exhaust


And mounted the K04 up!


Awesome pal! Yellow spring will be perfect for stock map and even up to stage 2.

I have the yellow spring in mine. If you listen carefully, you will hear the smallest of whoooosh noises haha.

Cheers Dan I've used the yellow spring on your advice and it seems great! Not sure whether it's the hybrid/panel filter combination or what but the whooooosh is very loud haha
 
  • Like
Reactions: DrStrange and Baka
Well done mate, how's the car going and are you still using the standard airbox or a cone filter?
 
Better pictures of Turbo mounted

This one is when we thought we had used the wrong gasket between the de-cat and downpipe and pulled it back out..


Ever since changing the coolant flange I'd had a very slow leak from the area which I'd narrowed down to the top heater matrix quick release hose and ordered a new one but could never quite be bothered to change it - until now. So whilst working behind the head, to put a new p-clip on securing the supplied braided oil feed line on the bottom stud of the coolant flange, I also fitted the new hose. Not before getting coolant everywhere of course. You can also see the EGR plate in this shot.


I gave the oil return line a good clean, mainly internally with de-greaser and carb cleaner until it ran out clean.

Then added the supplied gasket and fitted to turbo.


Then we fitted the new magnetic sump plug I'd bought, fitted the bottom of the turbo oil return-to-sump back on and fitted a new oil filter.


We fitted the coolant supply and return lines; most of which had new fittings/banjos supplied along with the turbo however we had to swap the coolant supply fitting for the one off the old turbo as it was different. Then we fitted both ends of the oil feed hose and p-clipped it to the block.


We then blanked off all the necessary ports of the new TIP, added the N75 with small vacuum breathers to it and fitted it on the inlet side, with the outlet hose to the intercooler bolted up next.


Then we plugged in all the sensors, added the MAF, added oil & coolant & checked over everything we had done


Time to fire her up, we started by removing the injector harness and turning the engine over on the starter for around 30 seconds to circulate some new oil. Then plugged them back in and fired her up. She started, hunted for a few seconds and then idled perfectly.

The next few hours were spent trying to bleed the bleeding coolant system. Such a pain in the **** every time. However it got so tiresome this time I actually did some research and found out about the bleed point on the top heater matrix hose by the battery. For those who don't know, you have to release the hose clamp and pull the hose back, around an inch, until the little pin hole starts to hiss. Forgot a picture but it's similar to this off google
https://www.audiworld.com/tech/pics/int54_02.JPG

Once bled I drove her around, the most noticeable thing was the hiss of the new turbo. From around 1800-2500rpm there was a very high pitch whistle. The next most obvious is the dumping of boost. I fitted the Forge 007p in the "push" rotation as it makes sense to me, but wow is it noisy now haha. Anyway, happy with the drive I got back on the driveway to fit headlights and airbox.

Fitted the panel filter


And that was it, more drives have proven there's a fair bit more power however i'm taking it easy on the new turbo for a few hundred miles out of precaution so haven't really launched yet. I think the map gets quite confused by the data it's receiving because the car struggles to maintain a speed, it kind of pulses but I'm sure the remap will eradicate all of that. Just need to get it booked in. Unfortunately I've had an accident at work this week and can't walk/drive at the moment so the Audi isn't getting any use.

Well done mate, how's the car going and are you still using the standard airbox or a cone filter?

I went for the airbox mate. I've heard the standard set up is good for 400 odd hp anyway and I'd like to keep the engine bay looking as standard as possible. A couple of things left to decide and possibly requiring a few more hours spent searching;
1. Which injectors to run for the re-map.
2. Whether or not to run a 3" MAF (whether it's really necessary for the power I'm chasing)
 
Re bleeding the coolant system, I think adding coolant into the pipe that goes over the inlet helps, just remove the bleed bolt and use a small funnel, but I know you have it done now anyway. Funnily enough it was that joint that decided to leak on me when I was refitting the gearbox, wasn't funny at the time though.
1, depends on how much power you are aiming for
2, will your new tip fit a 3 inch maf?
 
  • Like
Reactions: Northampton_ofn
Just read that thread start to finish. I'm glad there's a lot of positiveness towards this mod. Partly because it means i don't need to undo all that work, but also because there seems to be some proven cases of these mods increasing dv response time which can only be good news for my turbo.

Now all I need to get organised is the vacuum in the valve cover. I really don't want to run a vacuum to the inlet/TIP again as this introduces so much gunk to an otherwise clean intake system. Does anyone know whether a small port on the exhaust, if measured. would record constant vacuum or pressure? My common sense tells me the exhaust would be under pressure conditions but i read otherwise elsewhere. If I could run a hose off the green one way valve at the back off the head down to the exhaust then it would burn off any vapours and an inline catch can could hold any oil.
 
Last edited:
Amazing work as per usual and thanks for sharing! Love your mods to date.

With a Map, you should get 250bhp easy and all of the said issues should be eradicated as mentioned.

So pleased for you and slightly jealous at the same time haha.
 
  • Like
Reactions: Northampton_ofn
Wondering how your getting on? As regards the n249 bypass, I tried it and it does make the car more responsive which is good, the one thing that spoils it is town driving, on/off throttle is not nice and any smoothness has gone. So in retrospect the N249 improves driveability but does detract from the responsiveness, as will all things, there's a compromise.
 
I've pulled the trigger and got an 80,000 mile B6 S4 therefore this project and most of the equipment fitted is now for sale! Gutted to see it go but I've got big plans for the V8!
 
  • Like
Reactions: DrStrange

Similar threads

Replies
2
Views
2K
Replies
58
Views
5K
Replies
16
Views
2K
Replies
8
Views
2K