N249 Bypass How To (2000 S3 - but same for many)

What does the N112 valve do on an APY engine then?

I bypassed mine whilst doing the N249 bypass. Left them both electrically connected and it runs fine without it.
 
Good and interesting thread! worth doing on a std car? (AMK engine)
 
Just ordered a 1m length (hopefully this is enough) of 4mm internal diameter pipe so think i will give this a go as it sounds a piece of cake on my BAM engine.
 
Just to say i did this today on my BAM and it was pretty easy as mentioned.

i decided to put the plate back ontop of the block so it could support the engine cover and i also put the N249 back on the bracket as it was and still connected but without all the pipework. i only used to of the original bolts to hold the plate down so its still easy to remove when changing plugs etc.

1m pipe is defo enough to do the job and also keep it neat.
 
Hi everyone. This is my first post here. I'm from Venezuela and have always had problems with my BAM S3. Everything was going ok, just had installed a cone filter, decat and that's it, everything else is stock. So, one day I was just checking some stuff in my engine bay and accidentally broke the hose that goes from the n249 to the vacuum chamber. Now I get a fluttering. It's a really nice sound but yesterday I heard a huge woshhhh on full throttle and then like the dv just released all the air, and the turbo I felt it lowered down the psi. I don't have a gauge yet so I can't tell if it really went down, but from yesterday, I feeling the car with so little power, and I can even hear the turbo whistle like I always do. Every hoses are fine, just checked them, and maybe tomorrow I'm gonna reconnect the hose from the n249 to the vacuum chamber.

Sorry for the long post, but I'm also considering on doing this bypass. I've noticed that the hose from the mani is thinner than the one that goes on the top of the dv, how can I do here? Thanks in advance. 20120925 172120
 
UPDATE--
Ok, so I reconnected the hose today, and the car is not fluttering anymore, but the turbo is inconsistent. It feels like is just a 1.8 without turbo. Thinking it could be the N75 valve?
 
Did this today on my AMK - took all of 20 minutes and cost £2.50 for the vacuum pipe from local car spares shop.
Great guide and easy to follow
 
thank god i can get rid of all that pipe work. job for the weekend thanks for the how too
 
Did mine today AUM and the mk4 Golf link is the one I followed. Not sure how but I managed to use 2.5m of 5mm hose (the only size I could find but fitted a treat).

Idle is much more steady as I've had an intermittent problem lately and seems smoother when giving it a boot. Thanks to the OP though for creating the thread, f**k knows what mangled mess I would have done without instructions. Took 2.5 hours as well thanks to the freezing cold and those ****** one-shot clips.
 
Just ordered a 1m length (hopefully this is enough) of 4mm internal diameter pipe so think i will give this a go as it sounds a piece of cake on my BAM engine.

Where did you order your pipe from mate? Last time i ordered online i ended up with some cheap crap i didnt even use.
 
yep, but some people will do this for the pro's of doing it, others will do it to make it look neater and not need to have cover, plus its one less thing to remove when doing coilpacks/plugs ;)

You wouldnt know what sort of electrical cable is best for hiding the valve would you dude? Im just looking on fleebay now. The only cable i have is speaker cable....
 
Ha, I've just had to change two myself actually. Another point to note is that I cut the N249 bracket in half, meaning you only have to bolt it on in 2 places instead of all the way across...

Good thread mate.
I done mine yesterday. Im also going to hide the valve...
Is there any other use for the bracket except to support the one single pipe.
Im thinking it would look neater without.
Thumb up
 
Did anyone else find that some connectors were 2mm on one side and 4/5mm on the other? I had to tape up the end of the pipes to fatten them out a bit so it was a snug fit.
 
Hi just have few questions what size is the vac hose from the diverter valve mine has hole near clips so going to replace it and what size t piece did you use.
 
I think its 4 mate and same for the t piece. Thats going off my memory though.......,
If you read the thread, someone has already asked i think....
Paul
 
Well I've finally done it!!! :superman:

Did mine on Thursday afternoon. Will most pictures of mine tomorrow (Monday + compare also with whereabouts I stashed my wiring loom/ N249 electrical plug thing) that we need to keep after finishing this "mod".


---

No, 4mm is ample. You need this guys...

4mm Silicone Vacuum Hose AIR VAC BLUE 2 Metre | eBay


---

I honestly thought it wouldn't fit over the top of my 007p Forge valve, but after a little persuasion, she went on. lol

Anybody have any questions, please ask me.


Believe me, It's easy.

Hardest thing I had was the plastic (cover/ guard) at the front of the engine (in front of the dipstick - with the two round screws). The nuts had rusted & wouldn't budge, so I had to snap it/ break it off to get the dipstick out the way + make some extra room by taking the metal guard off at the front underneath the dipstick holder.

It's quite hard to explain but looking at the previous pictures it's obvious what I mean. You'll see what I mean when you start as it's easier to see for yourself etc...

All that's needed then to sort this out is some, allen keys/ bits (think a 10mm for the nuts that held in the vac chamber onto the head), rest is just free'ing up the pipe work off the Audi bomb-proof clips that secure the "plug in" part of the N249. Bit of cutting/ wriggling + more swearing later & it came clear.


Results: Well, as per somebody else's comments, I have noticed a bit more zip under full load/ boost. Seems to hold boost more steadily + for longer.

Other then that... Tidy's up the bay alot. That pointless, pipework does my head in.


:beerchug:


Joe
 
Uh oh, I think I misread something then went hell for leather at it. I have the DV going to the nipple on the manifold and a T piece between them going to the SAI completely bypassing the n112 is this an issue?
 
Hi everyone,

I did this mod this afternoon but I stumbled on something I founded weird at my APY engine. There were two vacuum hoses at the manifold and both were connected to the N249 instead of one vacuum-hose from the manifold being connected to the N249 and one to the FPR. The N112 had one braided hose going to the SAI pancake thing and one to the FPR:tocktock:. I refitted everything correcly as in the guide but found it strange that the N112 was connected to FPR instead of the FPR to the manifold..

What kind of problems could the old situation give? It seemed to run pretty ok with the old situation though..
 
Sorry to drag this out the depths again but I followed your guide yesterday and have run into some problems the diverter valve is fluttering when letting off the throttle which i have read is not good please can you confirm that i have done this correctley i am pretty sure that its fine. just want the peace of mind and if i cant get it to work going to put it back to standard.

the clear pipe that is on the right hand side heading down towards the manifold is connected to the n112 valve and the other on the left is the original pipe that heads to the intake manifold. the last pipe that is housed in the clip heads up to the top if the diverter valve.

1420001_10153515926845137_1894300802_n.jpg


Any help would be appreciated
 
When i bought mine, it had that fluttering sound. The dv had gone. I actually liked that sound :( someone told me its the sound of the air going back through the turbo the wrong way :S
 
Hi I have just bought 1m of 4mm pipe do you think this will be long enough to do n249 bypass on a apy or should I wait and buy abit longer pipe before cut all the pipes on my car.
 
N249 Bypass.

Car: 2000 S3 with APY.

Time taken: Approx 1 hour 30 mins (would have been less but we were messing about, and broke something).

Attempted by: Welly & his mate Jonny.

Needed: 4mm internal diameter vac hose. Allen keys. 10 MM socket. T piece.

Difficulty: A trained chimp could complete.

OK. This isn’t a difficult task, and to anyone with even a flicker of mechanical know-how will, (once knowing what pipe is what) have this done with ease.

Pros and Cons:

Pros: It sharpens up DV response and eliminates the possibility of the ECU dumping boost mid rev (using the DV anyway).

Cons: Limits the ways that the ECU has to control overboost (although the N75 & MAP sensor will keep the ECU in the know and in control). Also, it removes one of the ways that the Traction Control uses to limit power.

The three items in question are a) the re-circ valve b) the N249 valve and c) the N112 valve (not on AMK or BAM engines)

So, let’s begin….

Engine cover off….

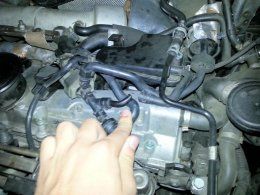
n249_1.jpg


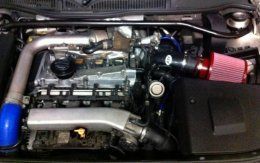
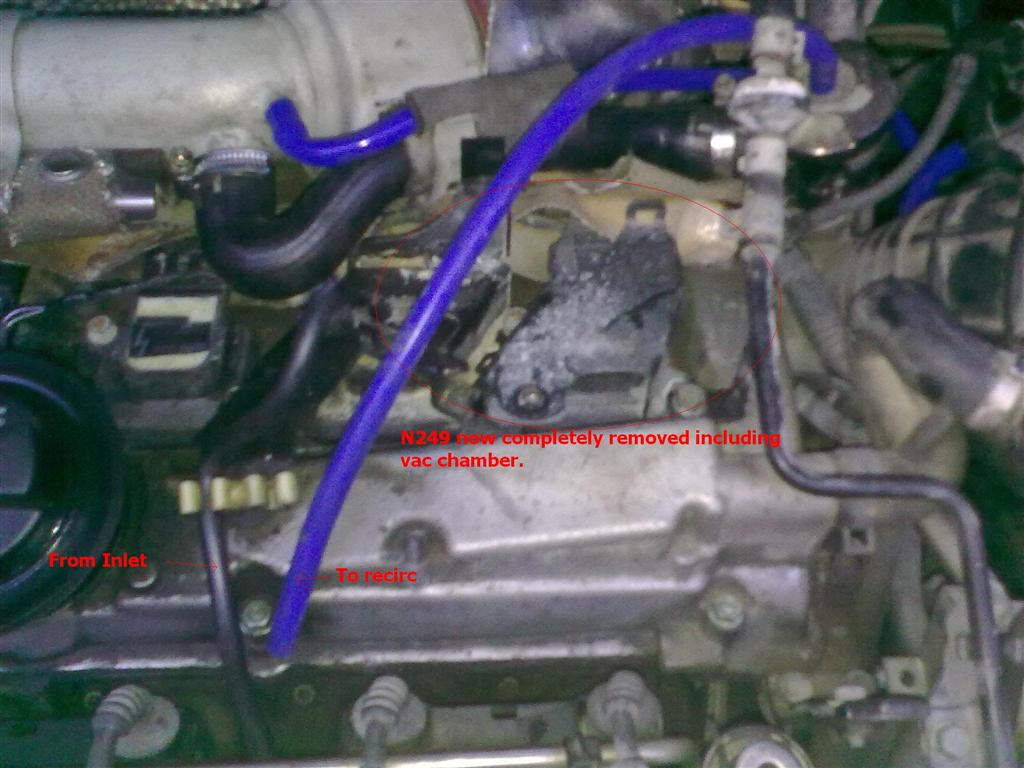
N249 is readily obvious on the APY engine as shown in image 1.

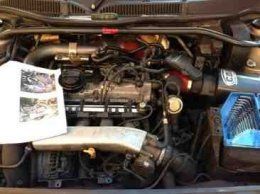
n249_2.jpg


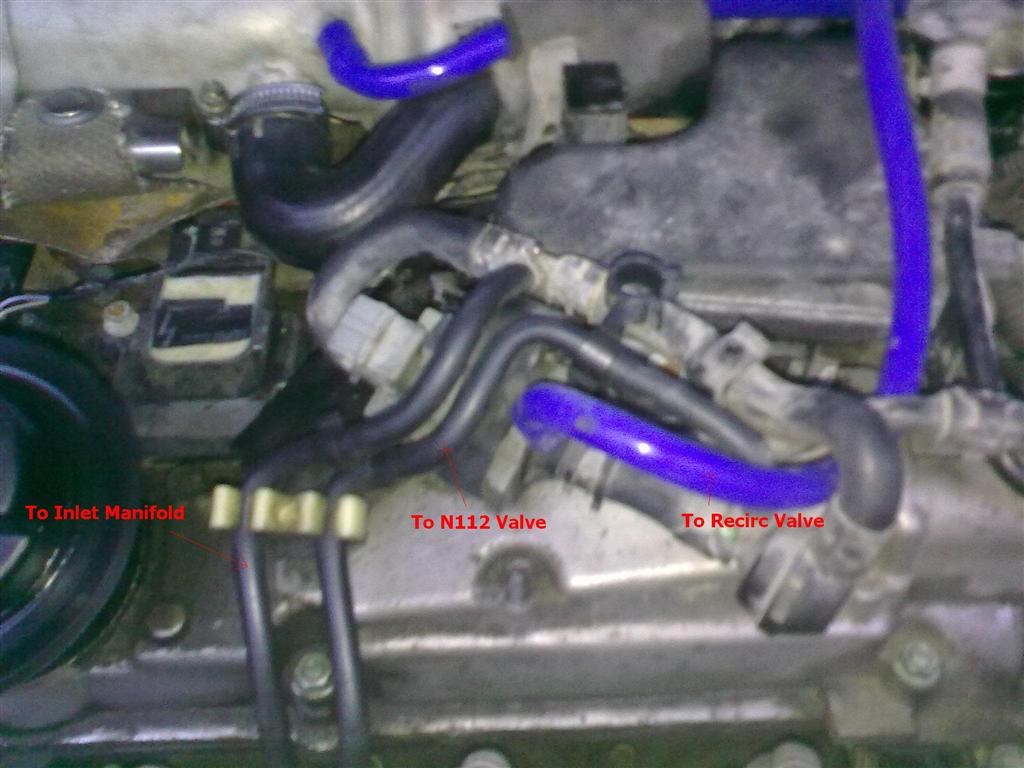
In image 2 you can see the three pipes that we need to keep on the engine.

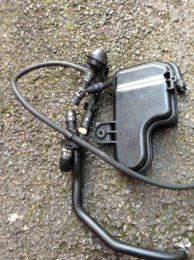
n249_3.jpg


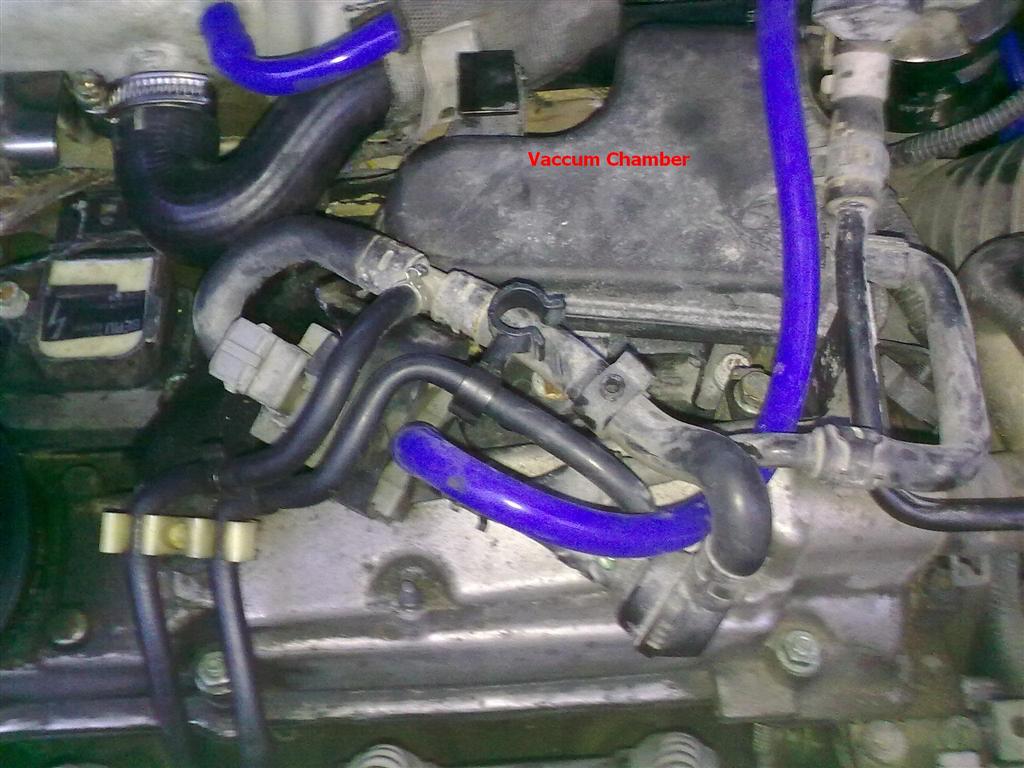
Image 3 simply shows the vac chamber that we will be getting rid of.

Removal of the metal plate attached to the inlet manifold is necessary at this point – two Allen key bolts. Forgot to note what size – sorry. Be VERY careful when removing plate as it has a lug which connects onto the dipstick shroud – this will usually be brittle and easily broken (that’s why mine isn’t there. But I broke that fitting an alternator. It’s been temporarily replaced with a wine bottle cork… Pro bodge!).

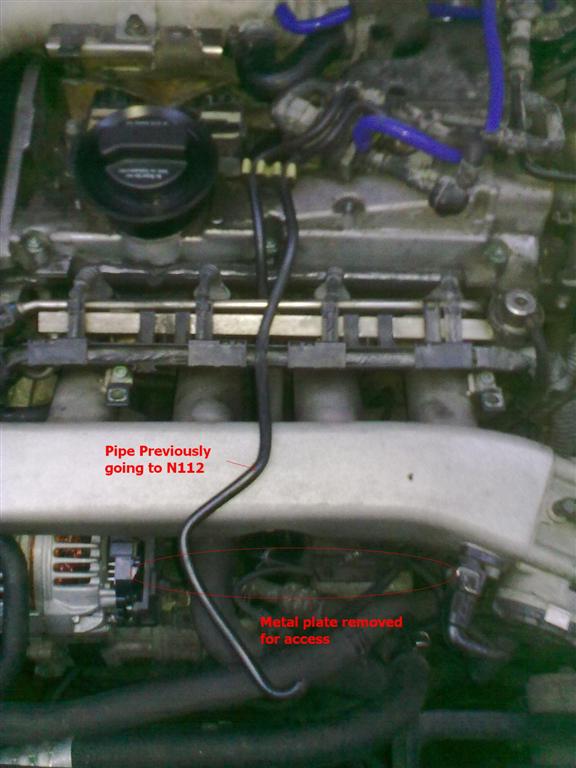
n249_4.jpg


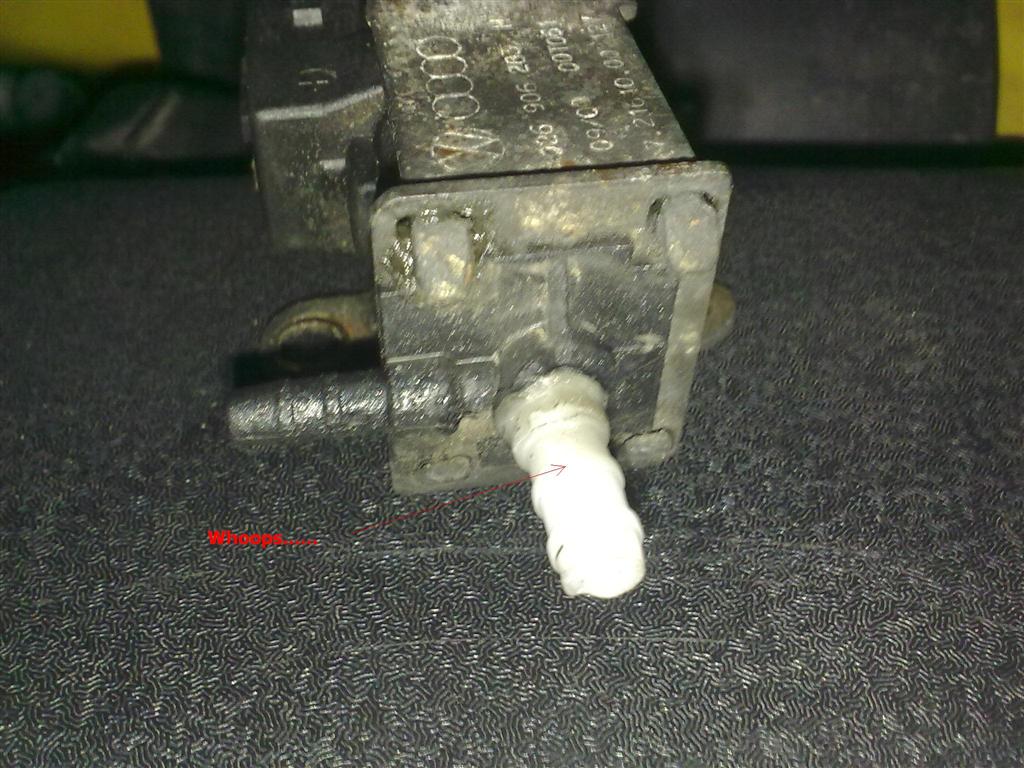
Image 4 is showing you the underside of said metal plate. N112 pipe work is readily visible. Cut pipe to N249 as close to the nipple as possible. If replacing vac line to SAI also (if you have a bit of spare hose) the cut the second vac line. If not, simply pull off (be careful not to damage valve – more on this later)

n249_5.jpg


Image 5 shows the pipe to the N249 that was cut off in the previous step. This will need to be cut back – but not yet.

n249_6.jpg


Image 6 shows cutting into the vac feed from the inlet manifold. Again, will need to be cut for a good fit, but not yet.

n249_7.jpg


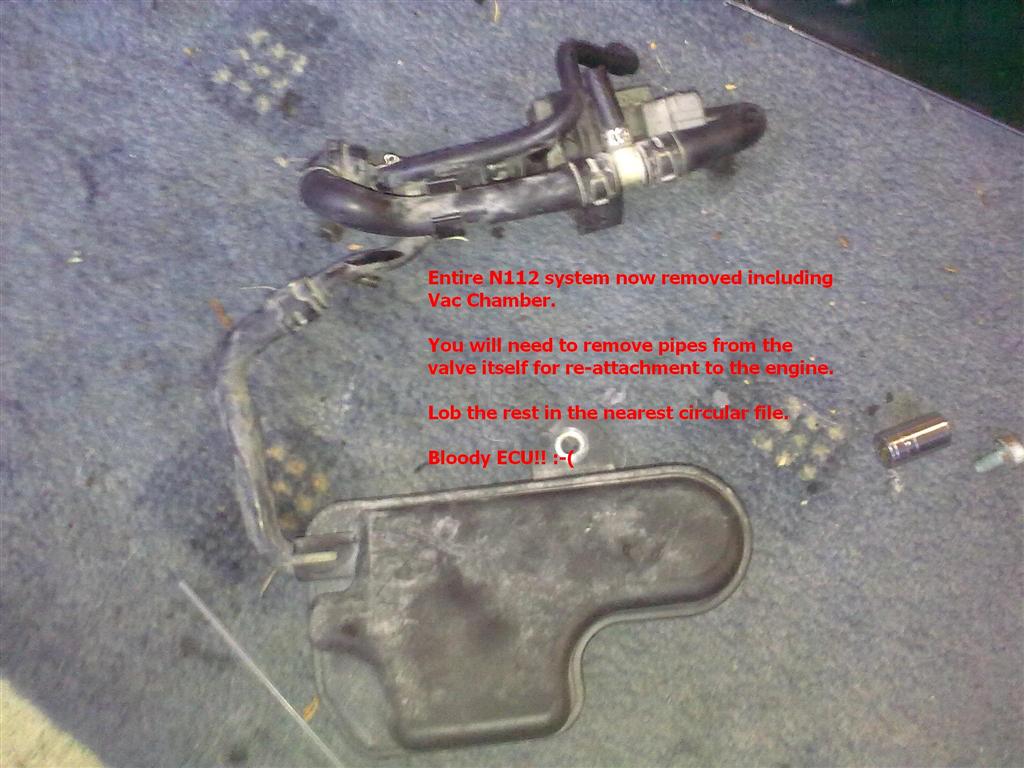
As shown in image 7, once this line is cut, you can unbolt the vac chamber (1 x 10mm bolt) and remove from the car along with the valve and pipe assembly.

n249_8.jpg


Once out of the car, remove the clips from the two pipes connected to the N249 valve and pull free. Keep somewhere handy (and clean if you have OCD).

n249_10.jpg


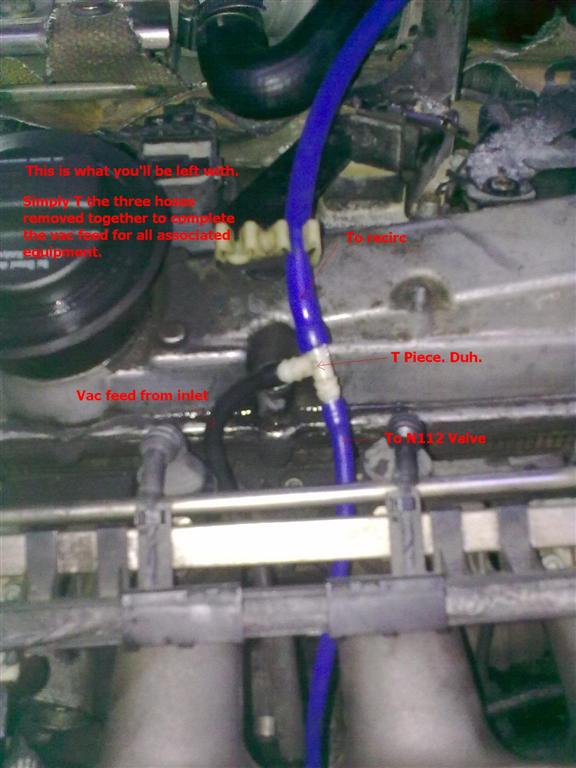
Image 10 is trying to show a few bits all at once… T piece connecting (top) Recirc vac line (left) vac feed from inlet manifold (bottom) Vac feed to N112 valve.

It is worth mentioning here that you CAN T into the FPR vac line for the N112. I didn’t however based on the fact that I don’t like putting anything into the FPR vac line – in case of leak. Ultimately meaning lean fuelling.

n249_11.jpg


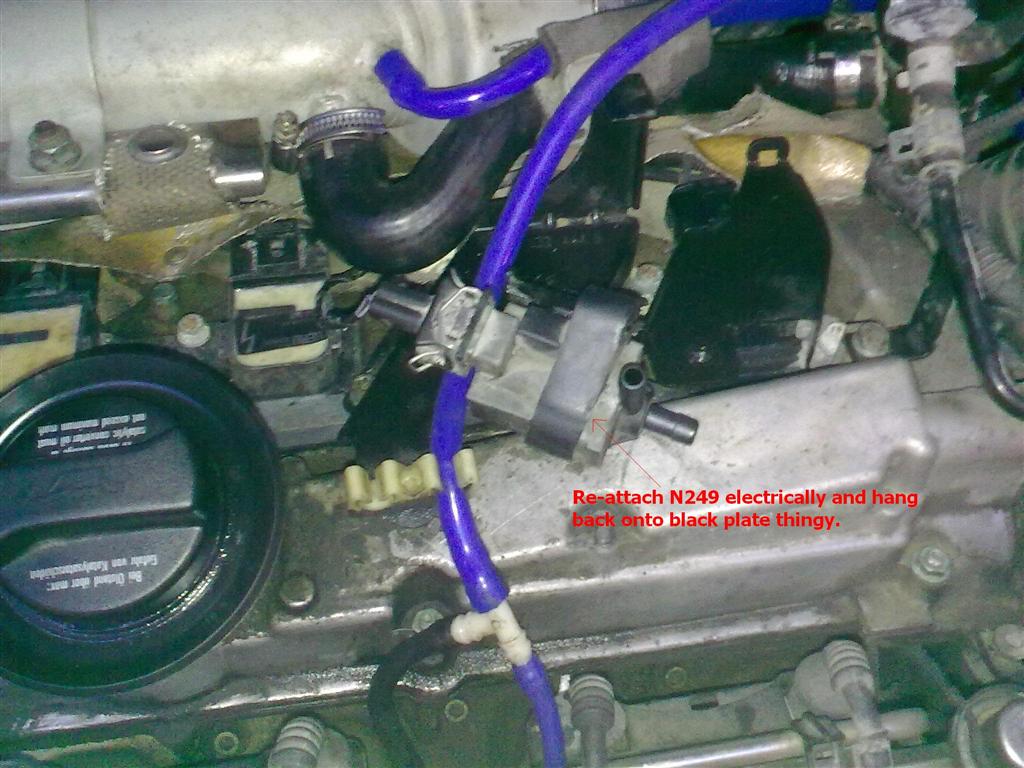
Refit N249 valve to rocker cover as shown in image 11. Make sure you reconnect wire.

n249_12.jpg


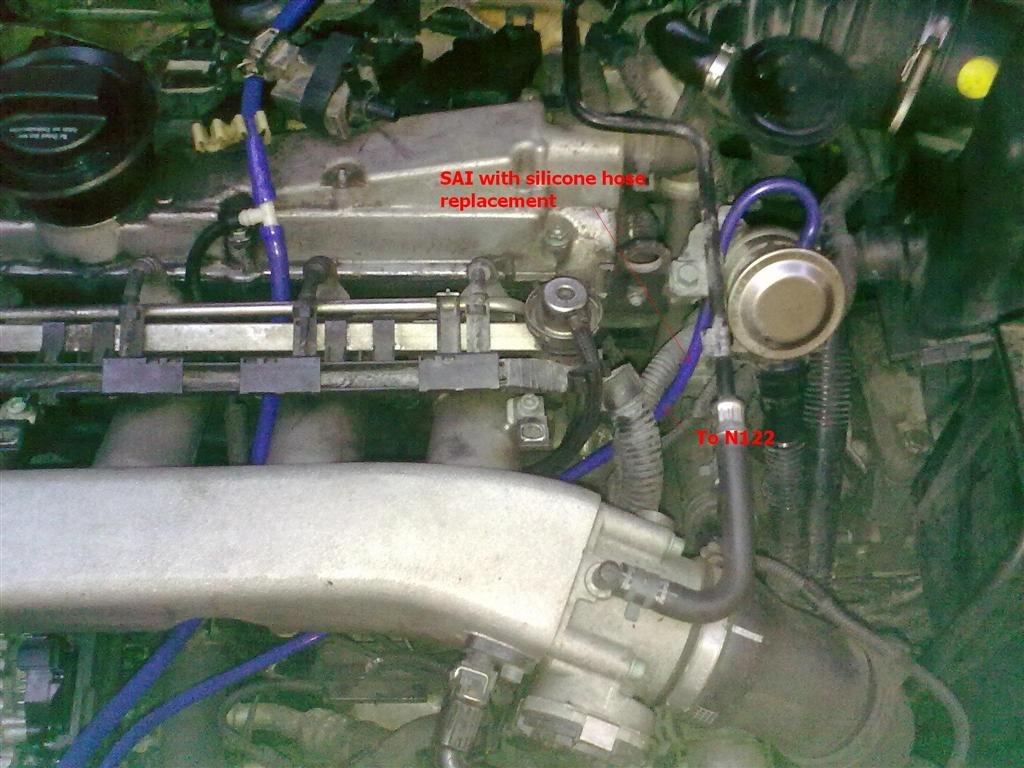
I replaced second N112 vac line to the SAI with silicone for good measure…. You don’t have to do this.

n249_13.jpg


As mentioned before, this is the repair that we had to make to my N112 valve after the nipple breaking off…. 1 x T Piece pipe cut down and plastic welded to the snapped stub.

n249_14.jpg


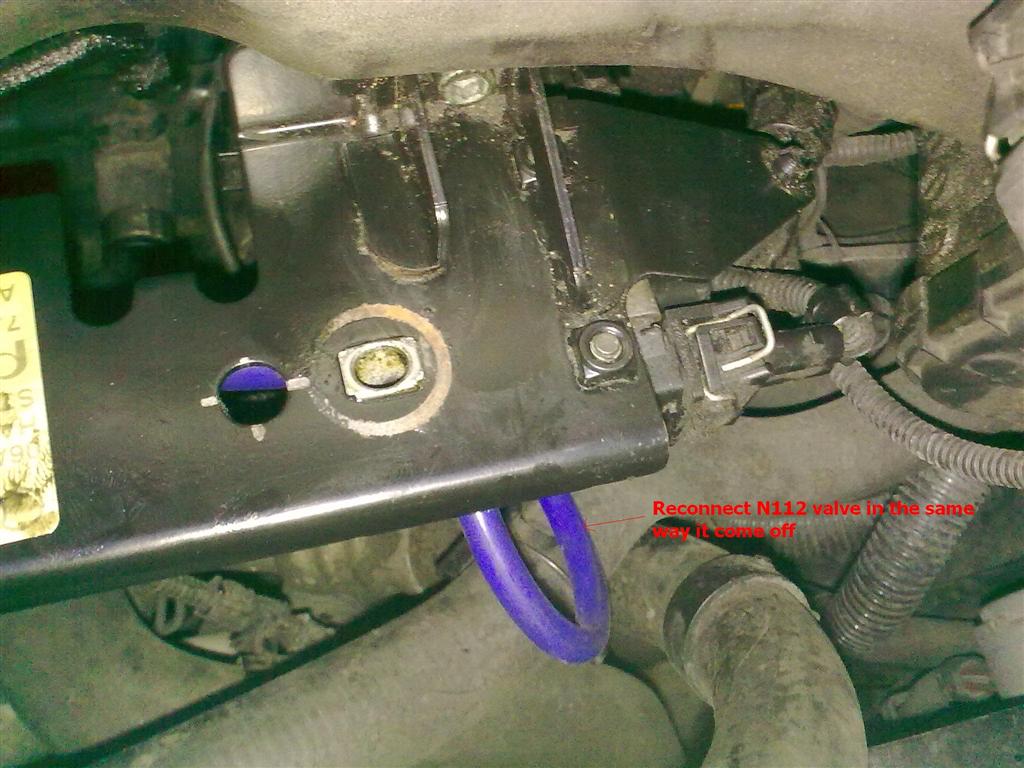
Reconnect N112 pipe work in the same way it was removed – one to the new T piece and one to the SAI. Ensure N112 electrical plug is refitted.

Remove all equipment from engine bay and start engine.

Local test.

You should notice improved DV response at gear change, as it no longer has a third party interfering. You SHOULD NOT have any warning lights etc with this bypass. If you do stop and check all plugs correctly refitted.

Job Done. :whistle2:

Please note that SOME (I'm not fully aware of what engine codes) 1.8T engines have the N249 valve on the underside of the attached plate (next to N112 valve). The basic process for those is the same, you'll just have to figure out what pipes correspond to the pictures... And count yourselves lucky that yours is hidden!!

If anyone spots anything I've missed, please add it.

(NB. I take no responsibility for any damage you do whilst attempting this mod. But you should be fine!)