

You are using an out of date browser. It may not display this or other websites correctly.
You should upgrade or use an alternative browser.
You should upgrade or use an alternative browser.
- Joined
- Jun 19, 2009
- Messages
- 3,883
- Reaction score
- 619
- Points
- 113
- Location
- Leeds
- Website
- www.aldevelopments.com
Just taken delivery of the latest bit of kit to end up in a box waiting to be fitted lol...

R32 throttle body... 75mm over the std 60mm... will be looking at a way to get this on the std inlet mani for now
<tuffty/>
You'll need something like this then


- Joined
- May 28, 2004
- Messages
- 10,217
- Reaction score
- 2,385
- Points
- 113
- Location
- nr Glos
- Website
- www.badger5.co.uk
- Joined
- Jun 19, 2009
- Messages
- 3,883
- Reaction score
- 619
- Points
- 113
- Location
- Leeds
- Website
- www.aldevelopments.com
I'm planning on this mod so when i'm in at work i'll jump on the CNC mill and machine them out
Just got to make a deal on a brand new R32 T/B, I should get it for less than £100
Just got to make a deal on a brand new R32 T/B, I should get it for less than £100
- Joined
- Sep 14, 2008
- Messages
- 24,836
- Reaction score
- 6,078
- Points
- 113
- Location
- Wibbleton
- Website
- www.tuffty.co.uk
Managed to get my car on the dyno today for a bit of a play with boost and to see if I can get a baseline figure ready to see the relative increase the next rounds of mods will make...
I learned quite a bit today, less is more and previous dyno runs have been on happy dyno's....
I first wound the MBC to its lowest setting with the stronger spring which turned out to be 1.3bar and Bill did a couple of runs to get things warmed up and try and get the tyres grippy enough to stop wheelspin on the dyno...
With 1.3bar I was getting around the 328bhp mark... this was repeatable which is a good thing as previous attempts have been erractic at best so I turned up the MBC... added three whole turns which turned out to be a tad much as the gauge went off scale at over 2bar!! didn't produce much power from that either considering with timing pull in the 9's and the engine getting all hot and bothered... so turned it back down and was getting 1.8bar...
Here is a pic of the results of a few of the second batch of runs...

Not sure of the boost I was running in them exactly as I was turning it down between each run to see where power would settle.... the first one I think was when I was running around 1.4bar... Run 4 was a non repeatable one done after allowing the car to cool down a bit and spraying the FMIC with water etc... not sure of the boost on that one but timing pull was bonkers so the boost was backed off again... run 6 was at 1.5/1.6 where its now set....
One thing that did make quite a difference was resetting the ECU adaptions (fuel trims)... here is a before and after comparison... before in red and after in orange..
As you can see I gain power and torque above 5k rpm but it still flattens out soon after... this suggests the fuelling needs a bit of tweaking in the map and I suspect if it was in its current configuration then I should get a bit more power out of it but not going to worry about until I have the large port head fitted as the map will need sorting anyway...
So, bit more work to do it would appear but at least I have something to work with... with the map tweaked to suit I would imagine I could find another 15 or so more horsepower, I reckon we could get around 350bhp or more with a bit of map tweaking but tbh its not worth it atm as I am only a month away from starting the next round of mods
I have pretty much reached the limit of the std components now I think with airflow getting bottle necked by the FMIC, throttle body and std small port head... roll on the next round")
****** good day and many thanks to Bill for letting me have some dyno time...
Couple of vids too...
Warming up the tyres..
[video]http://s84.photobucket.com/albums/k30/tufftybloke/Random/Car/S3/Build/?action=view¤t=S3_Dyno_Run.mp4[/video]
...and a dyno run...
[video]http://s84.photobucket.com/albums/k30/tufftybloke/Random/Car/S3/Build/?action=view¤t=S3_Dyno_WarmUp.mp4[/video]
<tuffty/>
I learned quite a bit today, less is more and previous dyno runs have been on happy dyno's....
I first wound the MBC to its lowest setting with the stronger spring which turned out to be 1.3bar and Bill did a couple of runs to get things warmed up and try and get the tyres grippy enough to stop wheelspin on the dyno...
With 1.3bar I was getting around the 328bhp mark... this was repeatable which is a good thing as previous attempts have been erractic at best so I turned up the MBC... added three whole turns which turned out to be a tad much as the gauge went off scale at over 2bar!! didn't produce much power from that either considering with timing pull in the 9's and the engine getting all hot and bothered... so turned it back down and was getting 1.8bar...
Here is a pic of the results of a few of the second batch of runs...
Not sure of the boost I was running in them exactly as I was turning it down between each run to see where power would settle.... the first one I think was when I was running around 1.4bar... Run 4 was a non repeatable one done after allowing the car to cool down a bit and spraying the FMIC with water etc... not sure of the boost on that one but timing pull was bonkers so the boost was backed off again... run 6 was at 1.5/1.6 where its now set....
One thing that did make quite a difference was resetting the ECU adaptions (fuel trims)... here is a before and after comparison... before in red and after in orange..
As you can see I gain power and torque above 5k rpm but it still flattens out soon after... this suggests the fuelling needs a bit of tweaking in the map and I suspect if it was in its current configuration then I should get a bit more power out of it but not going to worry about until I have the large port head fitted as the map will need sorting anyway...
So, bit more work to do it would appear but at least I have something to work with... with the map tweaked to suit I would imagine I could find another 15 or so more horsepower, I reckon we could get around 350bhp or more with a bit of map tweaking but tbh its not worth it atm as I am only a month away from starting the next round of mods
I have pretty much reached the limit of the std components now I think with airflow getting bottle necked by the FMIC, throttle body and std small port head... roll on the next round
****** good day and many thanks to Bill for letting me have some dyno time...
Couple of vids too...
Warming up the tyres..
[video]http://s84.photobucket.com/albums/k30/tufftybloke/Random/Car/S3/Build/?action=view¤t=S3_Dyno_Run.mp4[/video]
...and a dyno run...
[video]http://s84.photobucket.com/albums/k30/tufftybloke/Random/Car/S3/Build/?action=view¤t=S3_Dyno_WarmUp.mp4[/video]
<tuffty/>
Last edited:
- Joined
- May 28, 2004
- Messages
- 10,217
- Reaction score
- 2,385
- Points
- 113
- Location
- nr Glos
- Website
- www.badger5.co.uk
was a pleasure mate
consistent this time now we are getting the knack of strapping methods req'd
still effing tricky tho, as when it climbs up on boost its rapid when it does so.. wooooosh tastic
consistent this time now we are getting the knack of strapping methods req'd
still effing tricky tho, as when it climbs up on boost its rapid when it does so.. wooooosh tastic
Chlippo
Registered User
- Joined
- May 28, 2004
- Messages
- 10,217
- Reaction score
- 2,385
- Points
- 113
- Location
- nr Glos
- Website
- www.badger5.co.uk
So a cooler of paul's size is fine then bill? Will changing to 60 internal diameter pipe help solve the bottle neck?
Just want to know as dont want to do my IC twice, want to do it once and then move onto turbo etc.
Just want to know as dont want to do my IC twice, want to do it once and then move onto turbo etc.

- Joined
- Sep 14, 2008
- Messages
- 24,836
- Reaction score
- 6,078
- Points
- 113
- Location
- Wibbleton
- Website
- www.tuffty.co.uk
If you don't mind loosing fogs and having pipes on show then fit an ebay cooler like Welly has... no apparent flow restriction and repeatable results on the dyno... if you want to retain the fogs then essentially do a ***** load of work like S3 Paul did to get an ebay one in, fit and AH/Forge with 51mm outlets or wait and see 'if' I can get 60mm outlets onto the AH in which case you could have a chat with Alex about producing something similar...
Alex says the core is good for 400+bhp which will be where I am aiming for but thats not to say it wouldn't benefit being larger or deeper...
As I have said in the FMIC thread I started its really down to how much work you are prepared to put in to get something like this fitted and how much compromise you are willing to make as to what has to go...
For a K04 (std or hybrid) then I don't see it being a major problem as tbh they run on the edge when you try to get the most power from them... all the S3's dyno'd so far are very sensative to heat and they produce a lot of it when maxed... there isn't much a larger FMIC will do to help there, WMI is what you want for that...
My engine produces the same power on 1.5bar as it was at nearly 2bar but the difference is it runs cooler... this suggests that despite the turbo being able to produce the the airflow for more power, the components of the engine will not flow it... this backs up and produces more heat which pulls timing yadda yadda yadda....
To answer your question, going 60mm will remove the current bottle neck 'I' am experiencing with the FMIC, on a K04 you would not really notice it... but I will need to do the same (improve overall flow) on the rest of the engine components before I can turn up the boost a bit more and realise the potential left in my GT30... larger throttle body, large port head and eventually a large port SEM inlet mani will give the the full flow potential of the turbo and whack my power up a bit to boot...
<tuffty/>
Ok thanks paul.
That's the thing, the ko4 will be going, im doing the suspension, brakes and clutch follows by the body work (when insurance pays out) after that lot the turbo and engine will be getting done.
Tbh i dont mind having to chop the bumper etc, i would rather do it all now and fit 60mm pipework and know it's out of the way rather than later on.
If it wasnt for my mot coming up and having todo the suspension now i would have bought the cooler im looking at with 63mm outlets and used 60mm pipe to see how it went.
- Joined
- Sep 14, 2008
- Messages
- 24,836
- Reaction score
- 6,078
- Points
- 113
- Location
- Wibbleton
- Website
- www.tuffty.co.uk
Chlippo
Registered User
You might be interested in this
http://forums.fourtitude.com/showthread.php?4690902-TECH-TEST-1-OF-3-Throttle-Body-Sizing
http://forums.fourtitude.com/showthread.php?4690902-TECH-TEST-1-OF-3-Throttle-Body-Sizing
- Joined
- May 28, 2004
- Messages
- 10,217
- Reaction score
- 2,385
- Points
- 113
- Location
- nr Glos
- Website
- www.badger5.co.uk


- Joined
- Jun 19, 2009
- Messages
- 3,883
- Reaction score
- 619
- Points
- 113
- Location
- Leeds
- Website
- www.aldevelopments.com
Did you manage to get the T/B fitted as i've just won a brand new R32 T/B on ebay for £99.99 and plan to do the same and add it to the S3 inlet for the time been
- Joined
- Sep 14, 2008
- Messages
- 24,836
- Reaction score
- 6,078
- Points
- 113
- Location
- Wibbleton
- Website
- www.tuffty.co.uk
Did you manage to get the T/B fitted as i've just won a brand new R32 T/B on ebay for £99.99 and plan to do the same and add it to the S3 inlet for the time been
Not yet... booked 2 weeks off work from the 6th September when I will be doing the next lot of work... clutch, large port head, throttle body and charge pipe work plus anything else that needs sorting)
Of course I will be updating this thread as I progress...
Plan is to have it all done and dusted so I can take her to Audi International at Castle Combe...
<tuffty/>
- Joined
- Sep 14, 2008
- Messages
- 24,836
- Reaction score
- 6,078
- Points
- 113
- Location
- Wibbleton
- Website
- www.tuffty.co.uk
As I have been totally ****** off in recent weeks due to the incompetence of the body shop re-doing the crappy paint job they have done on my car and I still have a week or so before I have time off to do the clutch and fit the large port head I decided I needed to do something to the old girl to make us both feel a bit better...
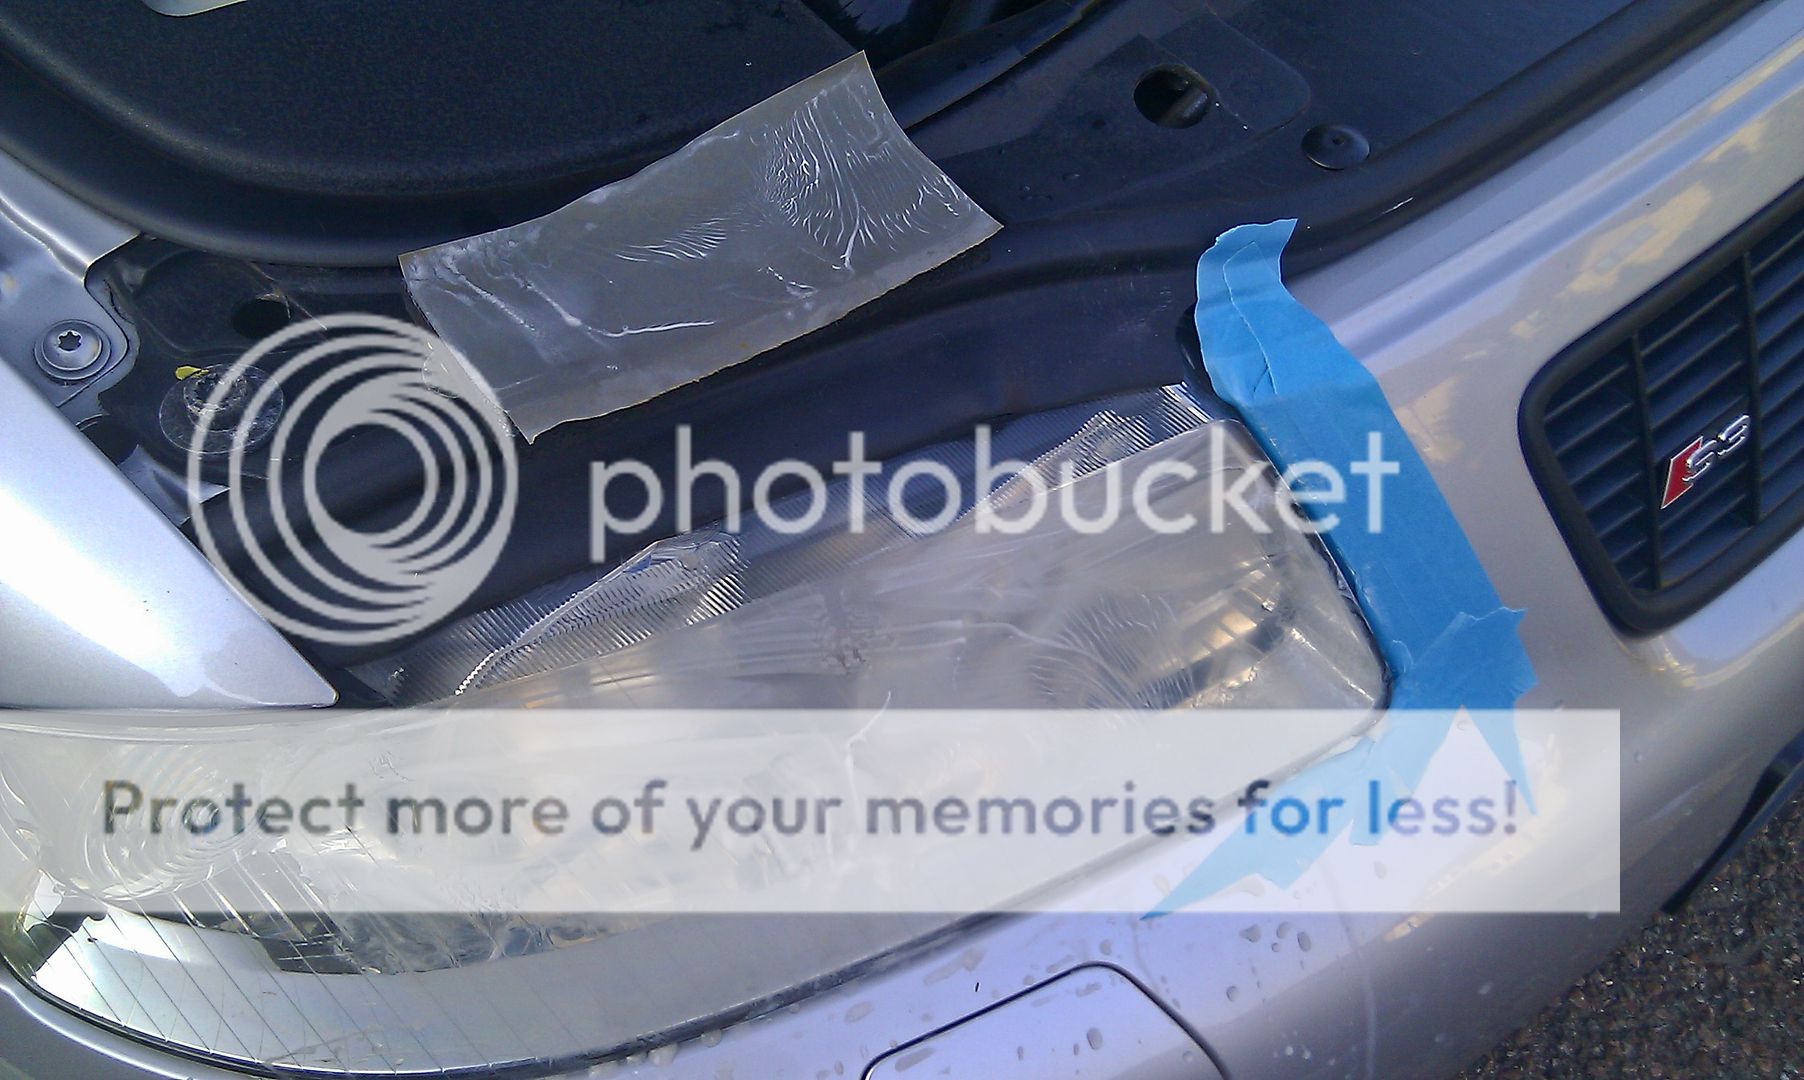
I have been thinking or sorting my headlights out for some time as they are looking a little worse for wear... I have read several tutorials and write ups on refurbishing plastic headlights most of which involve using wet and dry sandpaper first followed by a machine polish... sounded easy enough but sanding the headlight with wet and dry scares the life out of me but tonight I decided to give it a go...
Here's the kit I used...
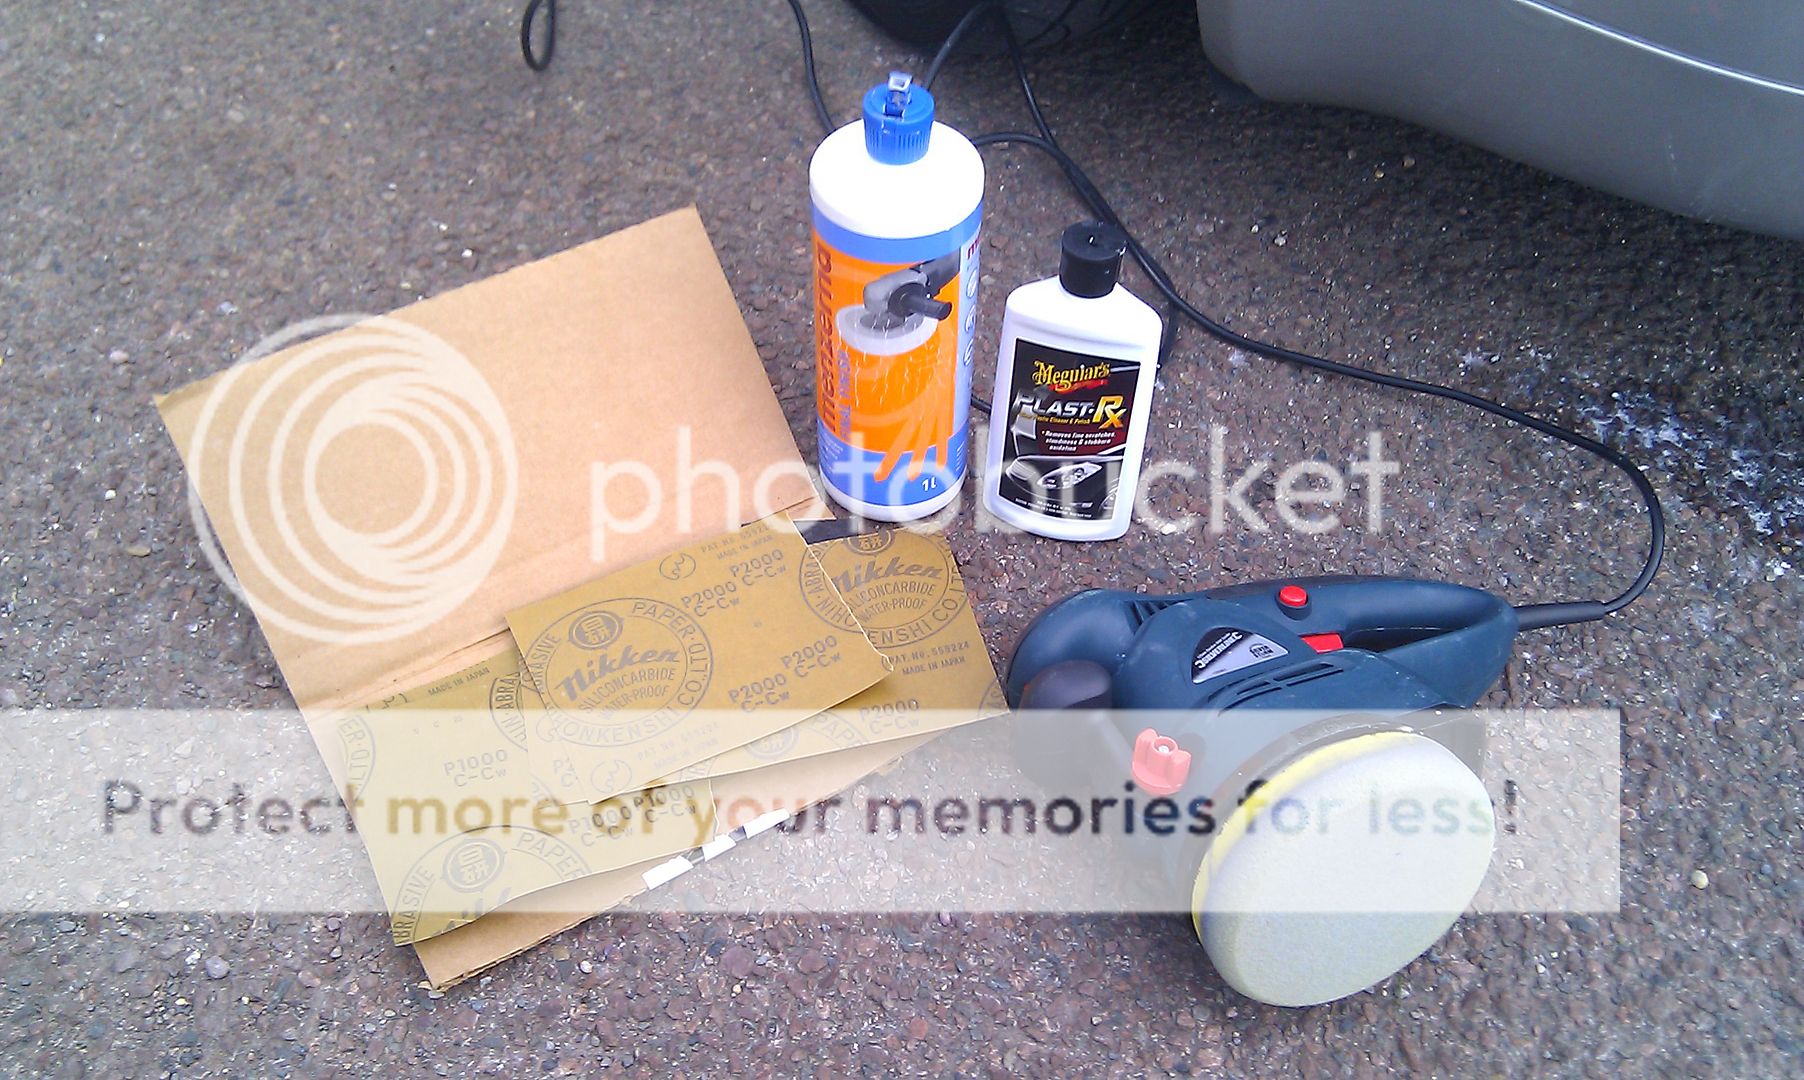
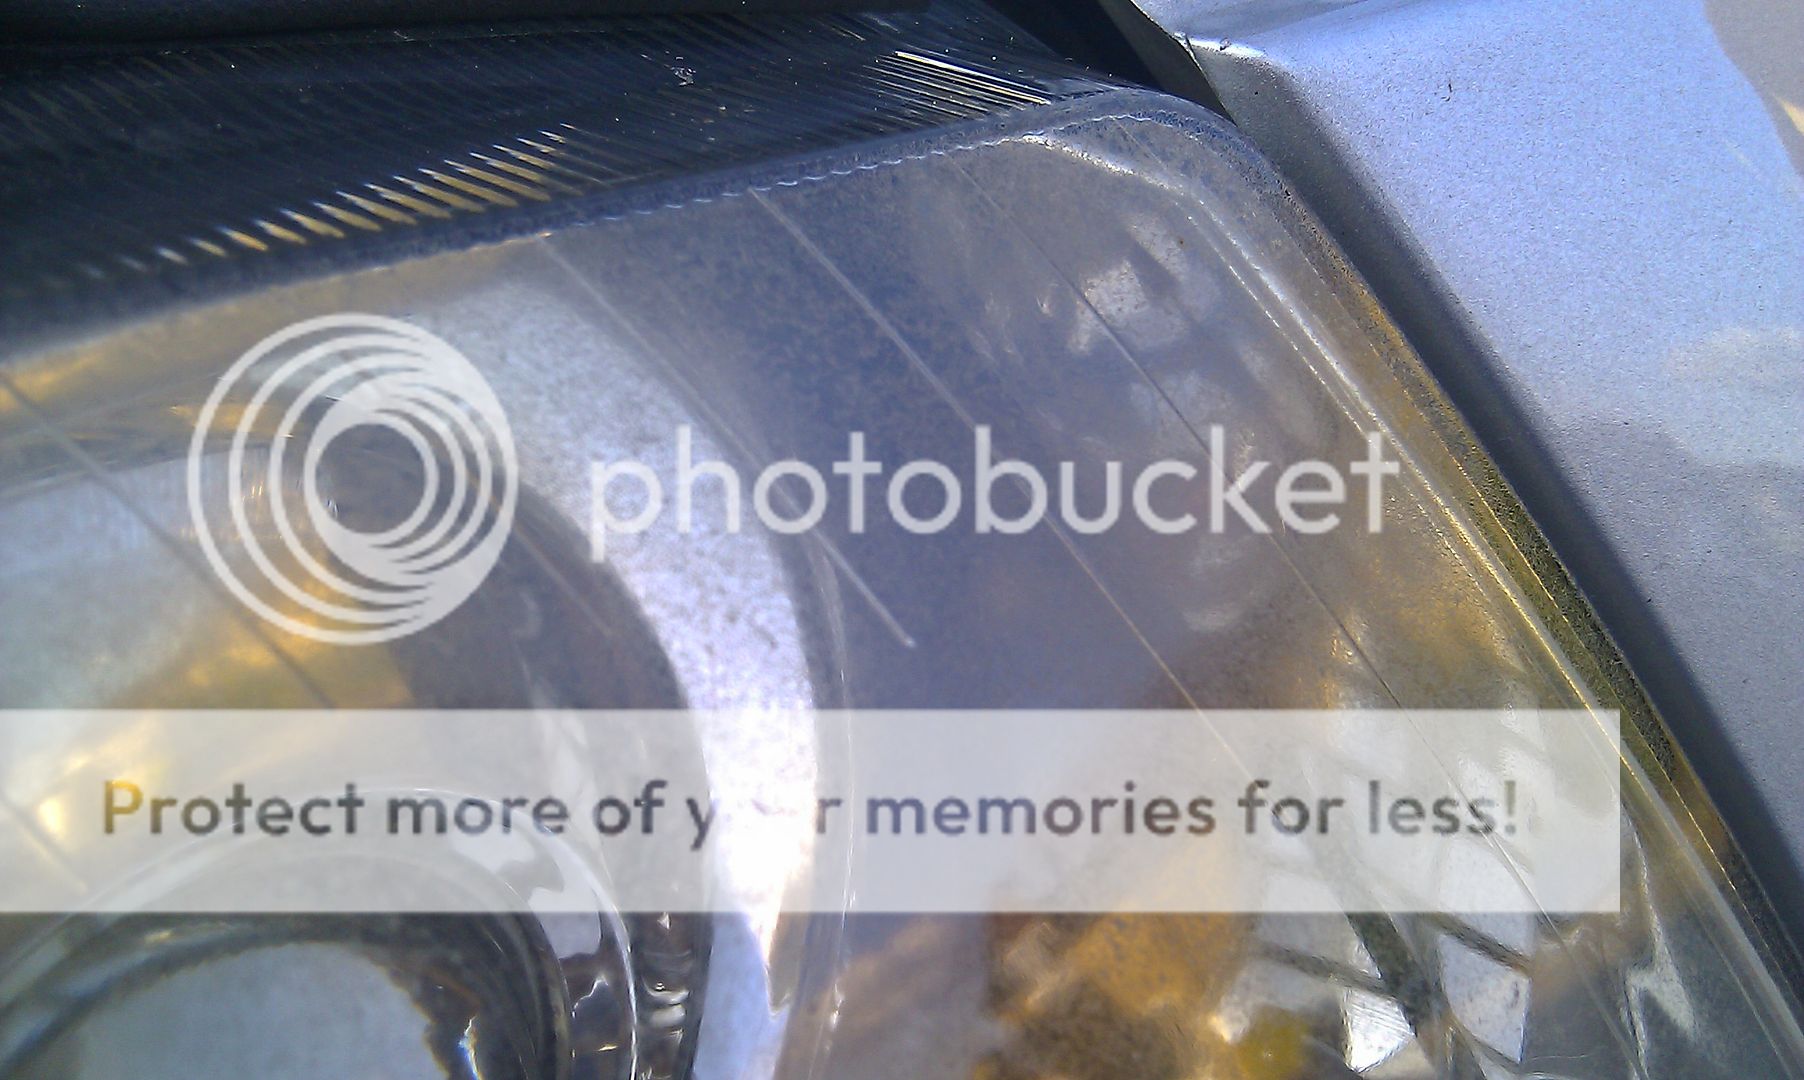
As you can see from this pic the headlight is fairly rough...
...still a bit worried about sanding the whole light so tried it on a small patch in the corner... used 2000 w&d with water of course then went over twice with Menz final finish which resulted in...
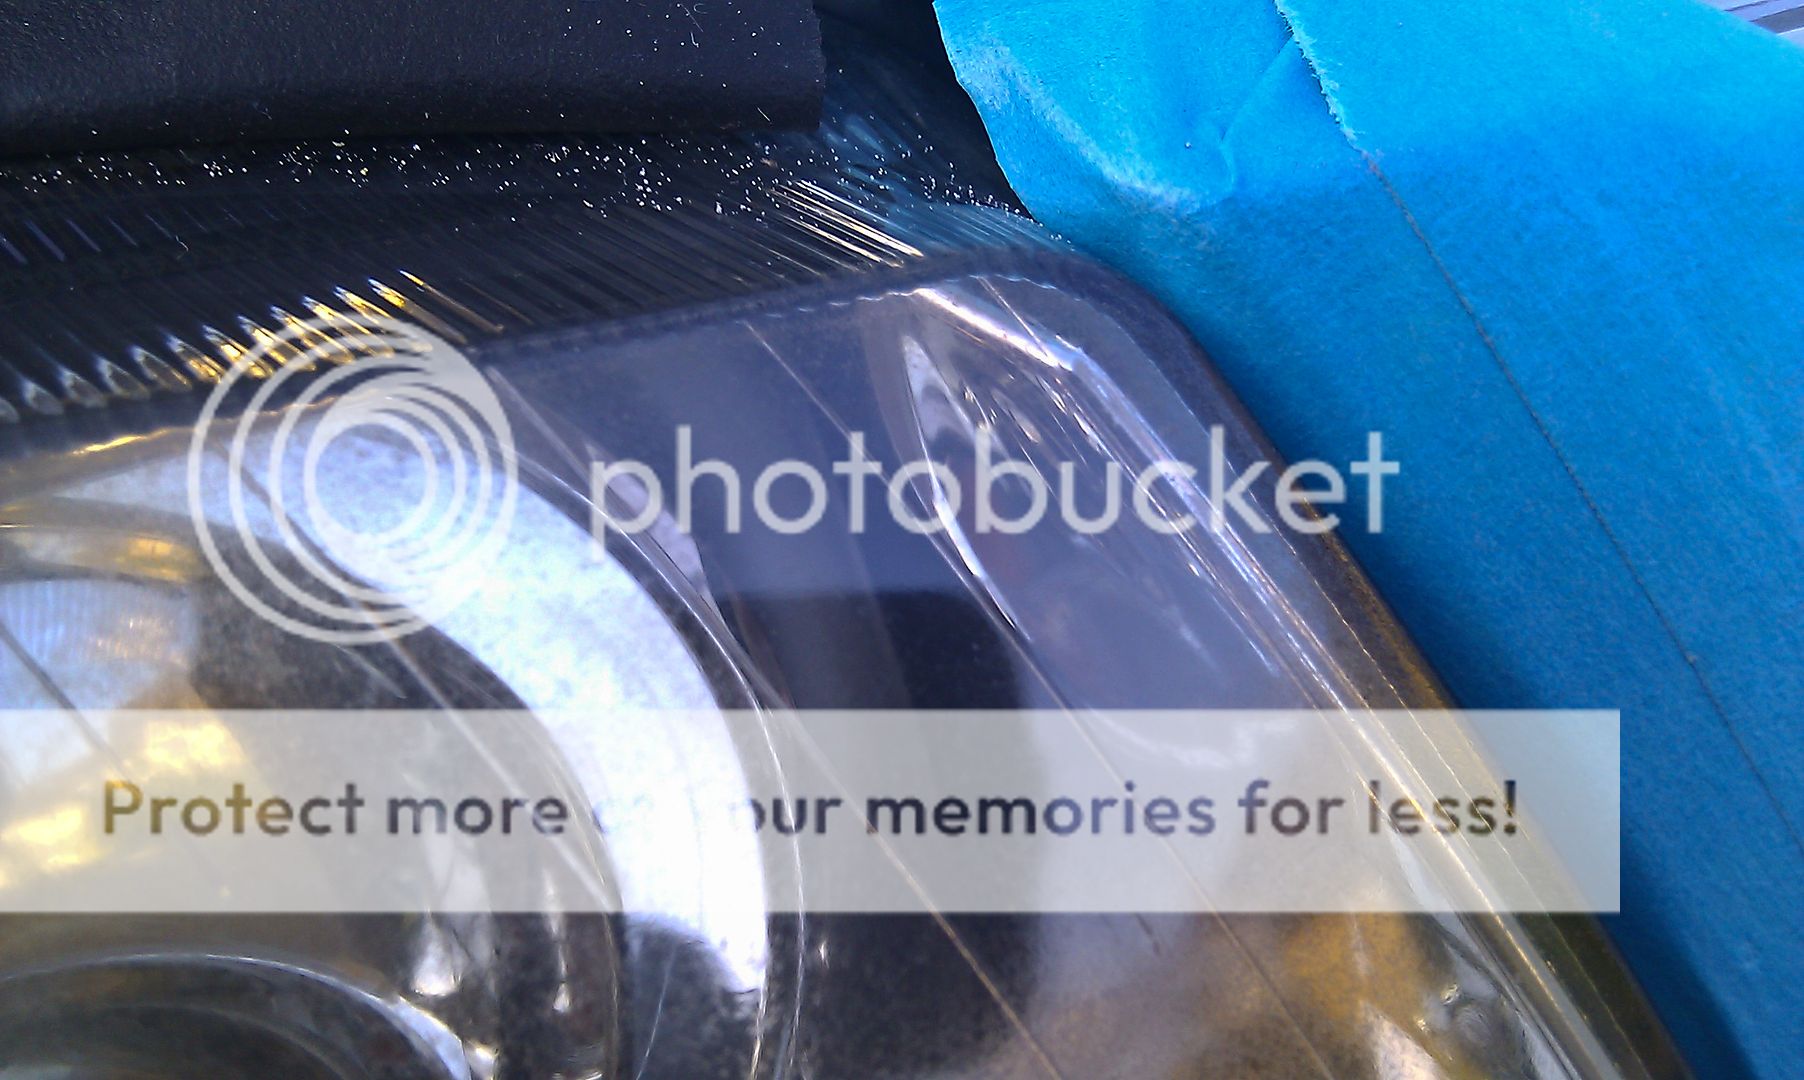
...happy with that I proceeded to mask up around the light and sanded the whole light face with 2000 w&d...
...ended up looking like this...

...dried off the water and finished up doing 3 passes with a soft pad an Menz final finish..
...the result of the first pass...

...and the final result...
...compared to the passenger side that I haven't done yet...

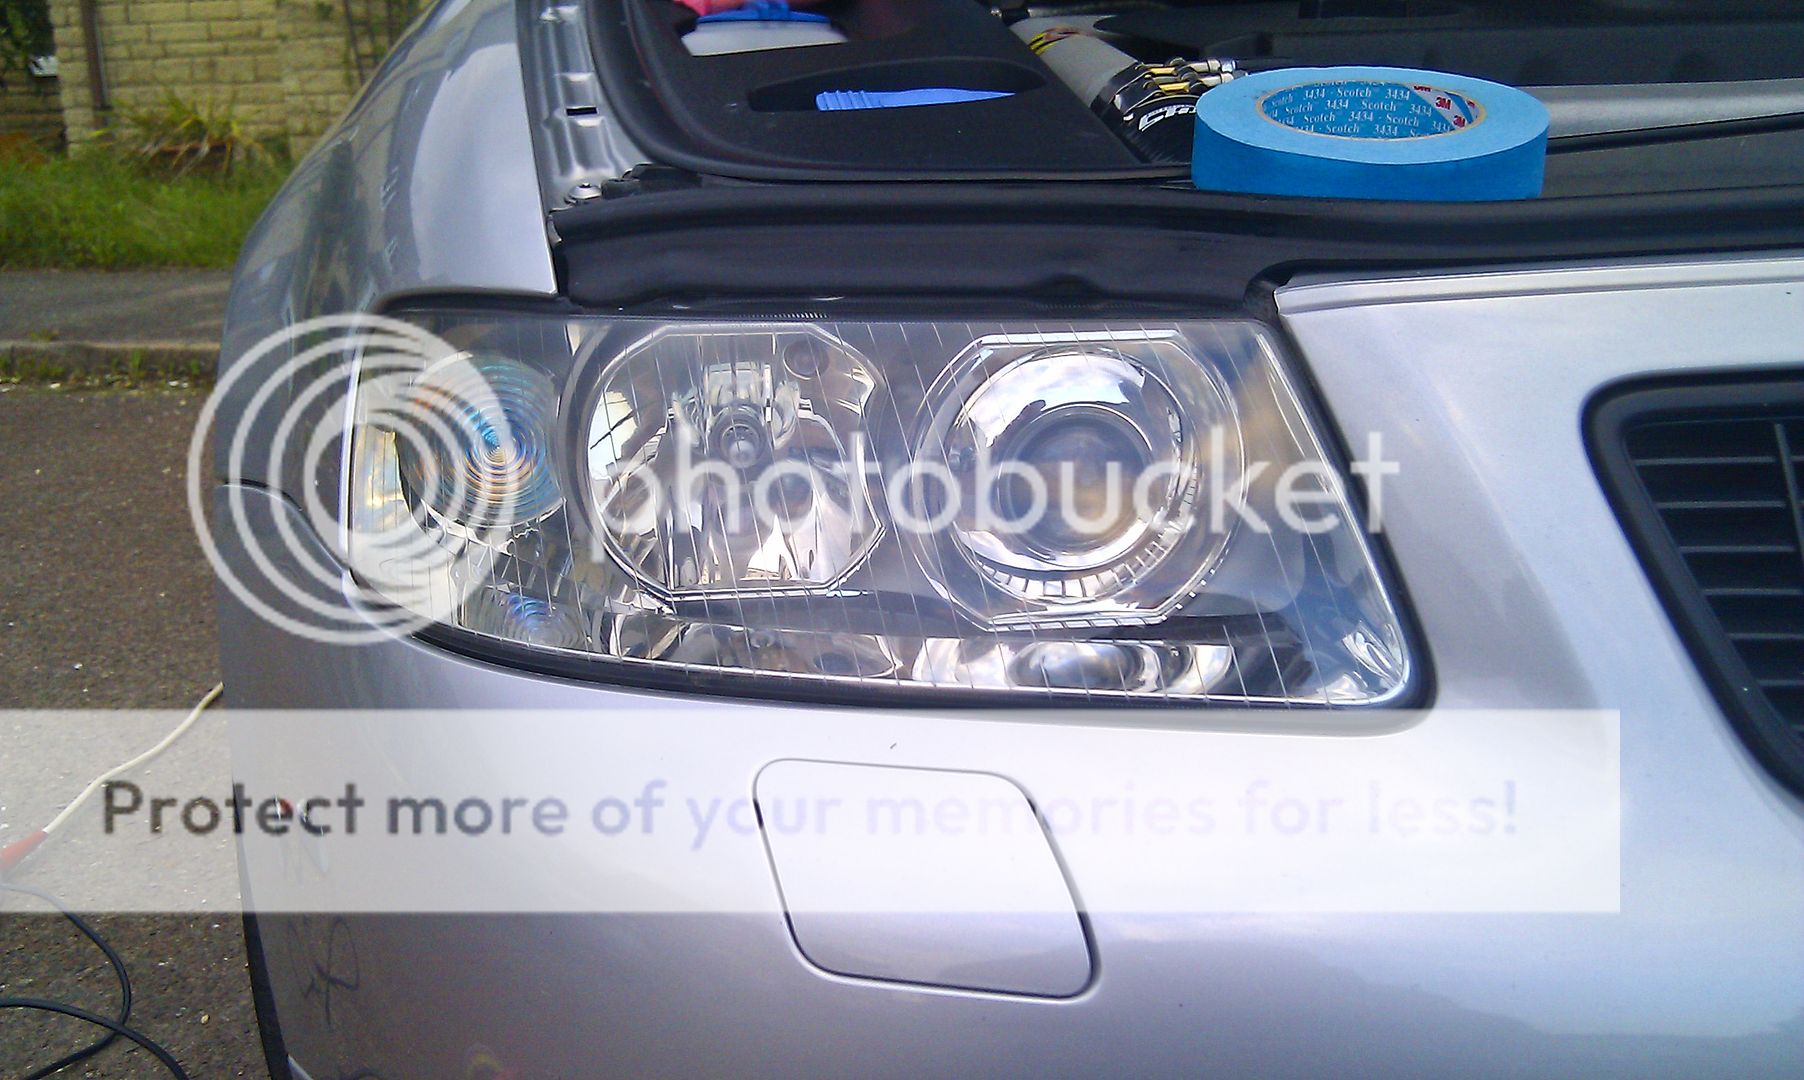
...and finally a comparison with the headlights on...
Before....

After...

Happy with the results of that but it does need a bit more finishing for me to be happy so I will do them both with them removed from the car and do a proper write up in the detailing section when done...
<tuffty/>
I have been thinking or sorting my headlights out for some time as they are looking a little worse for wear... I have read several tutorials and write ups on refurbishing plastic headlights most of which involve using wet and dry sandpaper first followed by a machine polish... sounded easy enough but sanding the headlight with wet and dry scares the life out of me but tonight I decided to give it a go...
Here's the kit I used...
As you can see from this pic the headlight is fairly rough...
...still a bit worried about sanding the whole light so tried it on a small patch in the corner... used 2000 w&d with water of course then went over twice with Menz final finish which resulted in...
...happy with that I proceeded to mask up around the light and sanded the whole light face with 2000 w&d...
...ended up looking like this...
...dried off the water and finished up doing 3 passes with a soft pad an Menz final finish..
...the result of the first pass...
...and the final result...
...compared to the passenger side that I haven't done yet...
...and finally a comparison with the headlights on...
Before....
After...
Happy with the results of that but it does need a bit more finishing for me to be happy so I will do them both with them removed from the car and do a proper write up in the detailing section when done...
<tuffty/>
- Joined
- Oct 27, 2006
- Messages
- 2,851
- Reaction score
- 110
- Points
- 63
Is the body work warrenty or something you have payed for yourself?
Im planning to book my car in for a little work in the next couple of weeks.
Im always scared of letting others loose with the car ...
Will they treat it like i do?
Probably not.
Such a shame realy
Im planning to book my car in for a little work in the next couple of weeks.
Im always scared of letting others loose with the car ...
Will they treat it like i do?
Probably not.
Such a shame realy
- Joined
- Sep 14, 2008
- Messages
- 24,836
- Reaction score
- 6,078
- Points
- 113
- Location
- Wibbleton
- Website
- www.tuffty.co.uk
Is the body work warrenty or something you have payed for yourself?
Im planning to book my car in for a little work in the next couple of weeks.
Im always scared of letting others loose with the car ...
Will they treat it like i do?
Probably not.
Such a shame realy
The work I have had done was covered by the 12 years anti perforation warranty...
I didn't have much choice of where to take my car as it was down to Audi and in fairness they did do a decent job the last time and again in fairness, the paint isn't that bad now either but its the stupid mistakes they have made and while they did get it all done they did it in a very bizarre fashion... I await a call from Bristol Audi as they have a body shop apparently but its driving me insane atm as all I want to do is machine polish the whole car to get rid of the overspray.... doing my head in...
Not that I will be able to let them do much as I take the car off the road after next week to do the clutch and change the head so that will be done before they get the car to do anything with
<tuffty/>
- Joined
- Sep 14, 2008
- Messages
- 24,836
- Reaction score
- 6,078
- Points
- 113
- Location
- Wibbleton
- Website
- www.tuffty.co.uk
Impressed with the head light sanding mate, looks a billion times better, I can see why you'd be nervous about using wet n dry on plastic...lol
Good job !!
It seems more difficult with a DA tbh, all the write ups I read used a rotary and the polished light while much much better than the one I haven't done still has a slight haze so I will have to go over it again just to get it right... Thats not to say it can't be done with a DA, just takes longer and is safer than using a rotary
<tuffty/>
Speedy Steve
Registered User
Let me know how you get on with the clutch paul as mine is very close to needing to be replaced
That's a coincidence as I sprayed the inside of my headlights gloss black in the week and have been reading threads on how to bring back to life the covers.
I have similar products to what you have so will give it soon.
Nathan
I have similar products to what you have so will give it soon.
Nathan
- Joined
- Sep 14, 2008
- Messages
- 24,836
- Reaction score
- 6,078
- Points
- 113
- Location
- Wibbleton
- Website
- www.tuffty.co.uk
As the sun decided to come out this afternoon I had a chance to to a few more passes over the drivers side headlight as I wasn't completely happy with the final finish...
The result of 3 more passes over with Menz final finish and a spot pad on a Kestral DA...
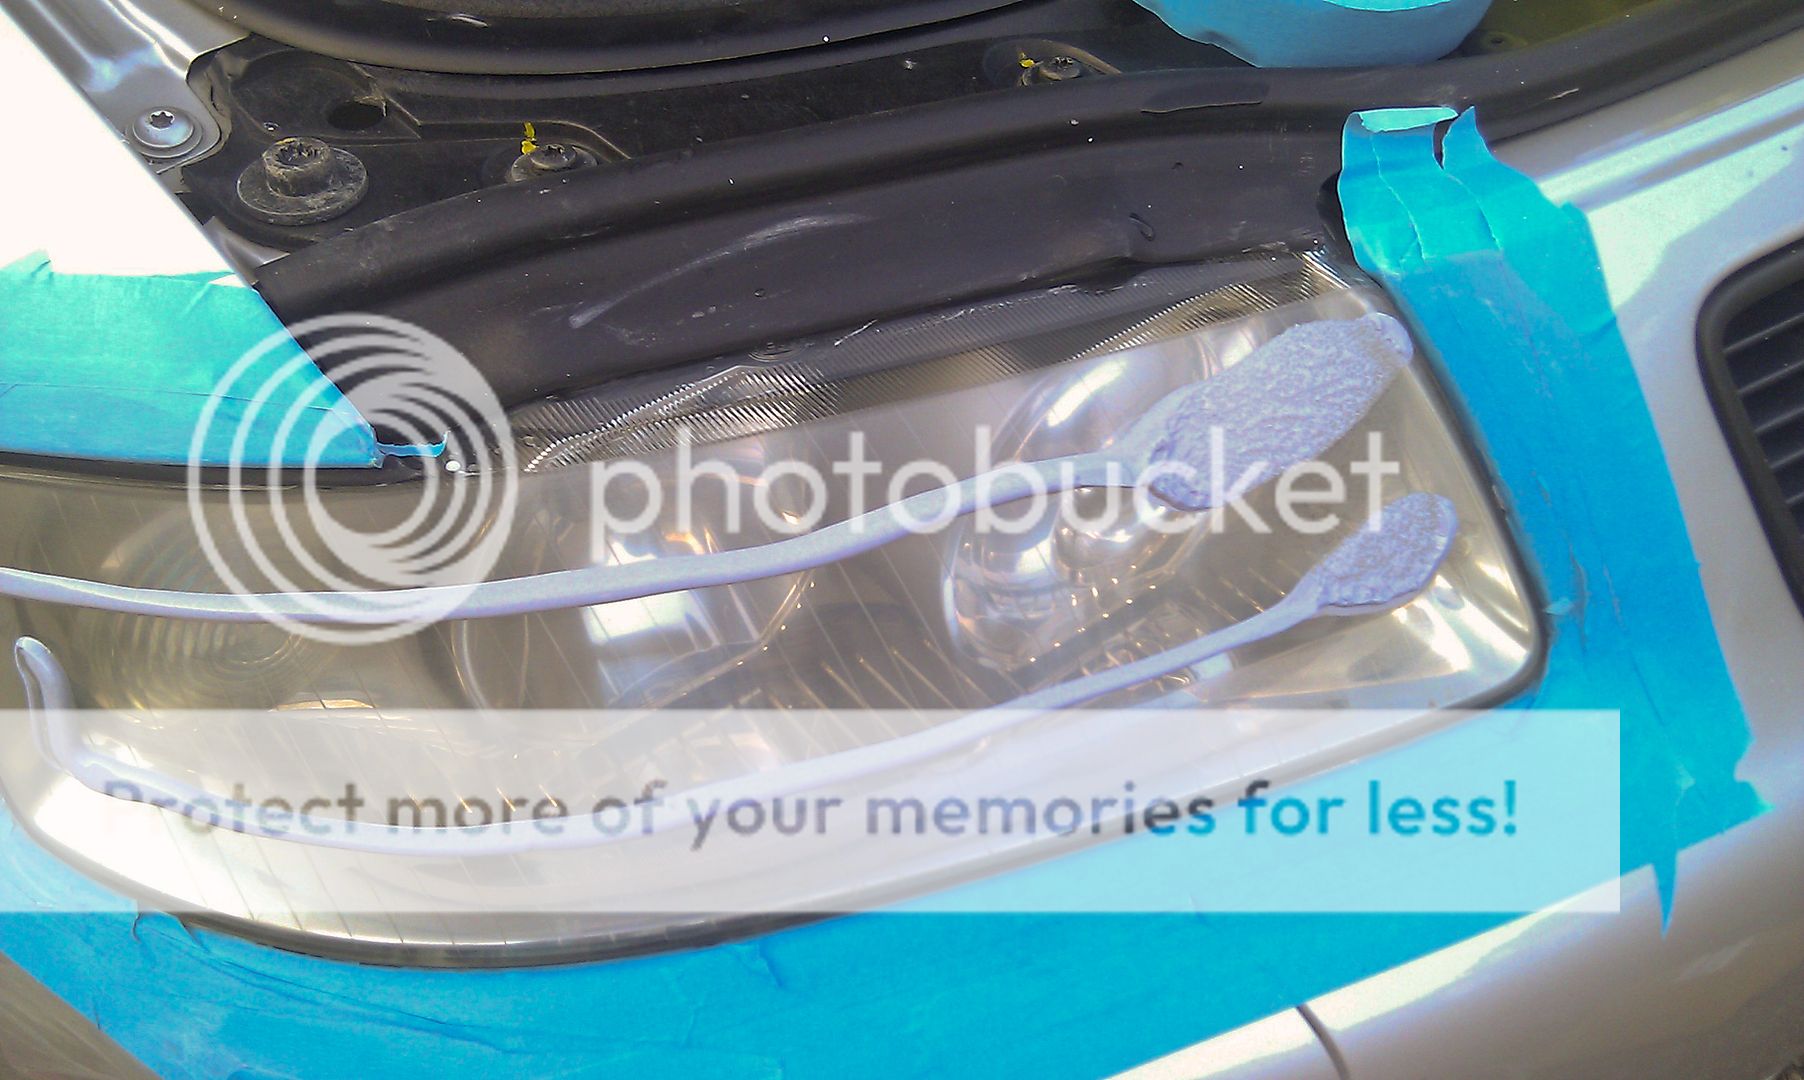
Looking at this one compared to the passenger side one I decided I couldn't wait and cracked on with sorting that one out too... feeling more confident of my abilities now I went straight in with 1000 grit wet and dry which took a bit of work to get an even finish then worked the light over with 2000 grit wet and dry as before....
This is the point where you would justifiably feel sick as a pig looking at the very opaque headlight.... Just to reassure you I taped up half the light and did a single pass with the DA...

...as you can see its pretty easy to get the finish back but use a hardish pad as my medium pad had got saturated and ended up using a soft pad which took god knows how many passes until I was happy...
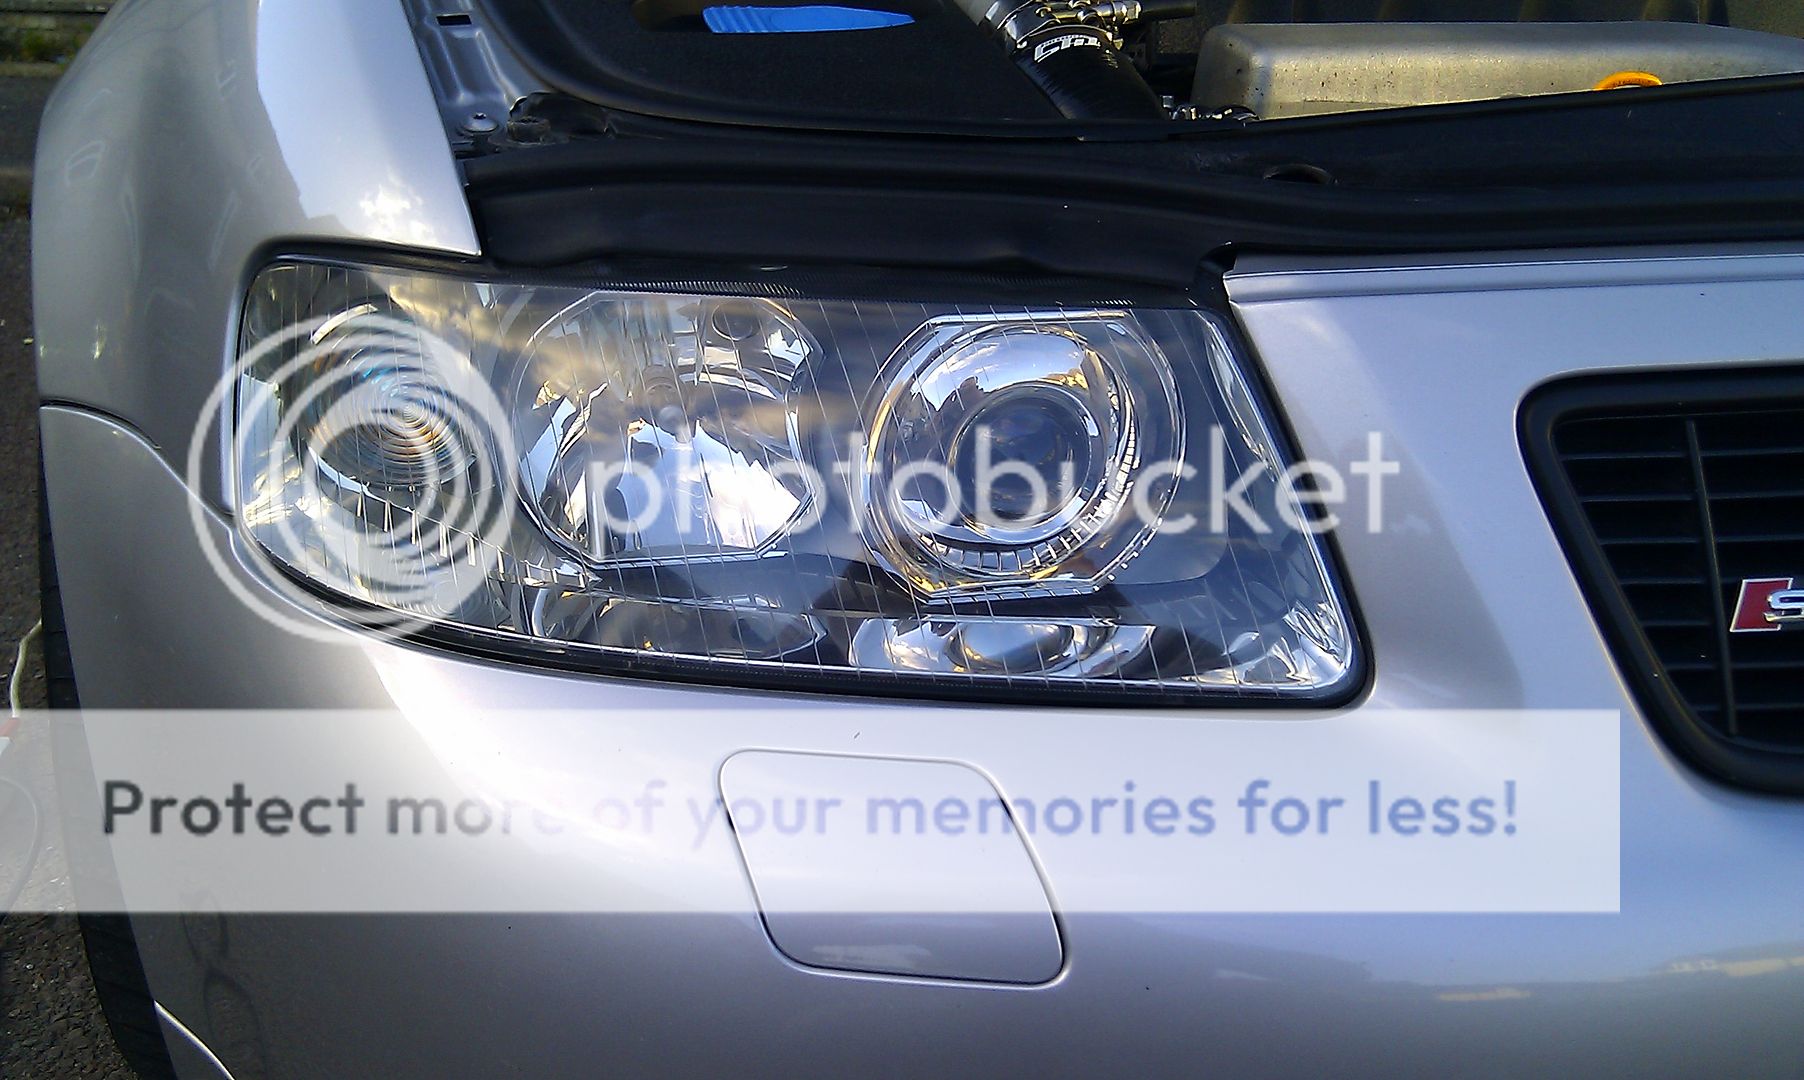
Reminder of the light before..
..and after...
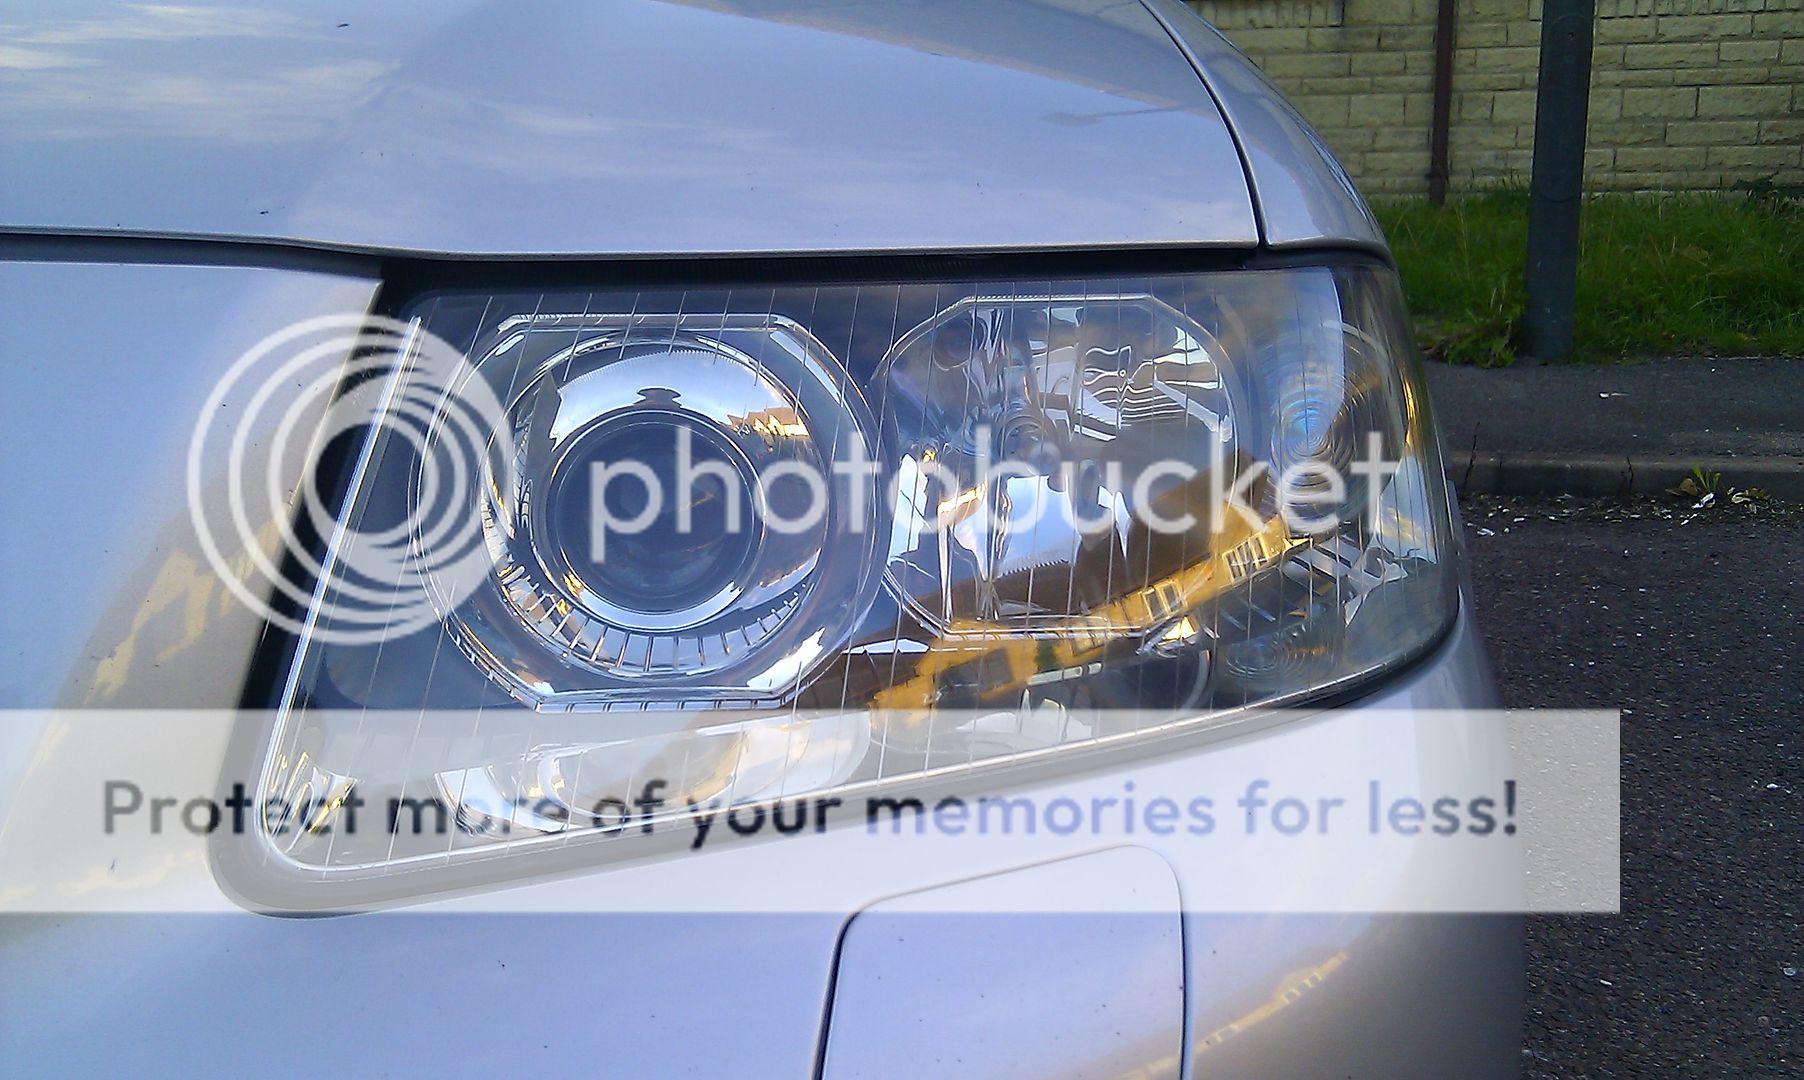
Next thing to do is to get some the Lamin-x film to protect the headlights now the UV layer has been removed and to help protect against stone chips...
A worth while job to do considering these headlamps are something close to £500 each from a dealer to replace..
<tuffty/>
The result of 3 more passes over with Menz final finish and a spot pad on a Kestral DA...
Looking at this one compared to the passenger side one I decided I couldn't wait and cracked on with sorting that one out too... feeling more confident of my abilities now I went straight in with 1000 grit wet and dry which took a bit of work to get an even finish then worked the light over with 2000 grit wet and dry as before....
This is the point where you would justifiably feel sick as a pig looking at the very opaque headlight.... Just to reassure you I taped up half the light and did a single pass with the DA...
...as you can see its pretty easy to get the finish back but use a hardish pad as my medium pad had got saturated and ended up using a soft pad which took god knows how many passes until I was happy...
Reminder of the light before..
..and after...
Next thing to do is to get some the Lamin-x film to protect the headlights now the UV layer has been removed and to help protect against stone chips...
A worth while job to do considering these headlamps are something close to £500 each from a dealer to replace..
<tuffty/>
- Joined
- May 28, 2004
- Messages
- 10,217
- Reaction score
- 2,385
- Points
- 113
- Location
- nr Glos
- Website
- www.badger5.co.uk

ive been meaning to do this for ages....... what pads did you use Paul as i have access to a DA or rotary but need to buy my own materials? i know you said a spot pad
looks absolutely brilliant what you've done, seeing the stages certainly gives me more confidence in what you can do with the DA....top stuff mate
looks absolutely brilliant what you've done, seeing the stages certainly gives me more confidence in what you can do with the DA....top stuff mate
- Joined
- Sep 14, 2008
- Messages
- 24,836
- Reaction score
- 6,078
- Points
- 113
- Location
- Wibbleton
- Website
- www.tuffty.co.uk
ive been meaning to do this for ages....... what pads did you use Paul as i have access to a DA or rotary but need to buy my own materials? i know you said a spot pad
looks absolutely brilliant what you've done, seeing the stages certainly gives me more confidence in what you can do with the DA....top stuff mate
I use menz pads from polished bliss Menzerna 80 mm Spot Pads | Menzerna Car Care & Detailing Products
I used the orange ones but you need a couple if doing both lights on the same day as they get saturated with polish and loose effectiveness...
stupid question time-
what is a DA...?
DA stands for dual action.... looky here... Kestrel DAS-6 Dual Action Machine Polisher | Kestrel Car Care & Detailing Products
<tuffty/>
- Joined
- Sep 14, 2008
- Messages
- 24,836
- Reaction score
- 6,078
- Points
- 113
- Location
- Wibbleton
- Website
- www.tuffty.co.uk
Thanks for that Tuffty-
am I right in saying you were using the Menzerna Final Finish 85RE compund...?
Yes mate.... not an aggressive polish which does make it harder work though...
sorry- and also- did you NOT use the Meguiars compund in the end...?
No, didn't make any visible difference and not aggressive enough as a primary polish....
<tuffty/>
Last edited by a moderator:
A
AHFabs
Guest
If you don't mind loosing fogs and having pipes on show then fit an ebay cooler like Welly has... no apparent flow restriction and repeatable results on the dyno... if you want to retain the fogs then essentially do a ***** load of work like S3 Paul did to get an ebay one in, fit and AH/Forge with 51mm outlets or wait and see 'if' I can get 60mm outlets onto the AH in which case you could have a chat with Alex about producing something similar...
Alex says the core is good for 400+bhp which will be where I am aiming for but thats not to say it wouldn't benefit being larger or deeper...
As I have said in the FMIC thread I started its really down to how much work you are prepared to put in to get something like this fitted and how much compromise you are willing to make as to what has to go...
For a K04 (std or hybrid) then I don't see it being a major problem as tbh they run on the edge when you try to get the most power from them... all the S3's dyno'd so far are very sensative to heat and they produce a lot of it when maxed... there isn't much a larger FMIC will do to help there, WMI is what you want for that...
My engine produces the same power on 1.5bar as it was at nearly 2bar but the difference is it runs cooler... this suggests that despite the turbo being able to produce the the airflow for more power, the components of the engine will not flow it... this backs up and produces more heat which pulls timing yadda yadda yadda....
To answer your question, going 60mm will remove the current bottle neck 'I' am experiencing with the FMIC, on a K04 you would not really notice it... but I will need to do the same (improve overall flow) on the rest of the engine components before I can turn up the boost a bit more and realise the potential left in my GT30... larger throttle body, large port head and eventually a large port SEM inlet mani will give the the full flow potential of the turbo and whack my power up a bit to boot...
<tuffty/>
Give me a shout if you want me to change the tubes to 60 mm. I will shape the tubes to fit the original intercooler. There will be no point going over 60 mm as it would be
OK to flow enough air for over 600 BHP.
Cheerz,
Alex.
- Joined
- Sep 14, 2008
- Messages
- 24,836
- Reaction score
- 6,078
- Points
- 113
- Location
- Wibbleton
- Website
- www.tuffty.co.uk
Give me a shout if you want me to change the tubes to 60 mm. I will shape the tubes to fit the original intercooler. There will be no point going over 60 mm as it would be
OK to flow enough air for over 600 BHP.
Cheerz,
Alex.
Sure thing Alex... I'll give you a call mate :thumbsup:
<tuffty/>