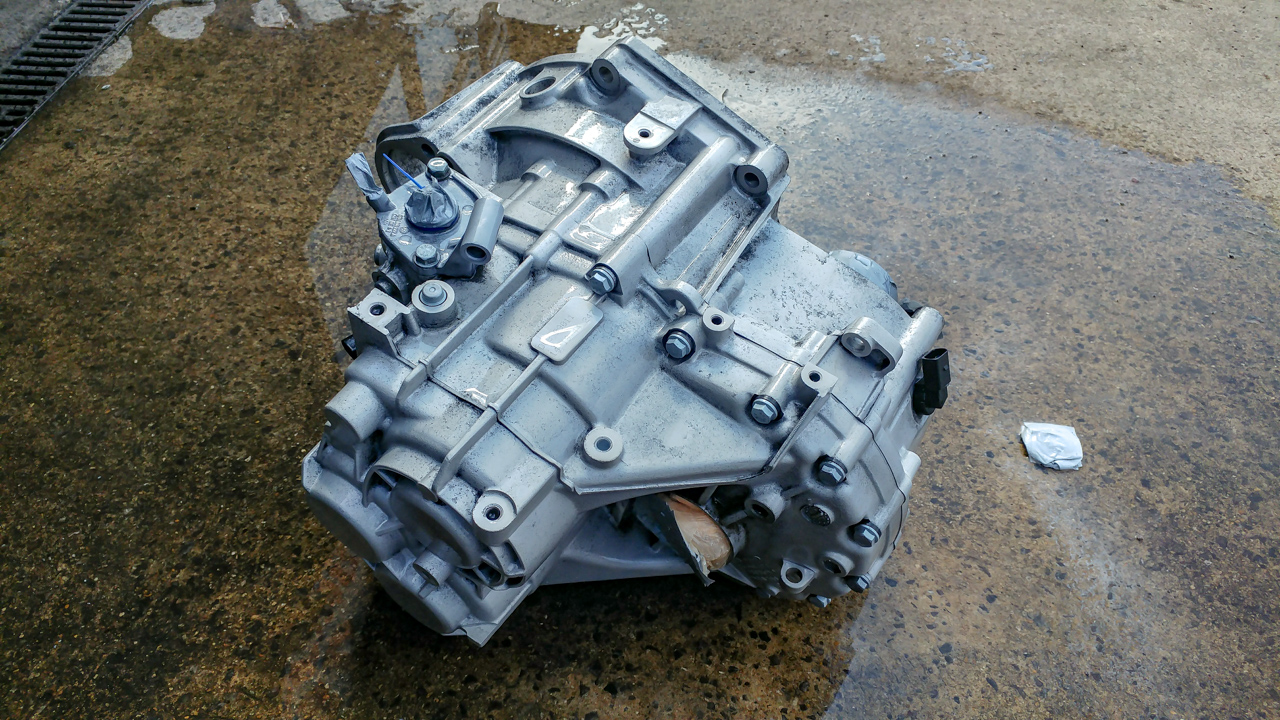
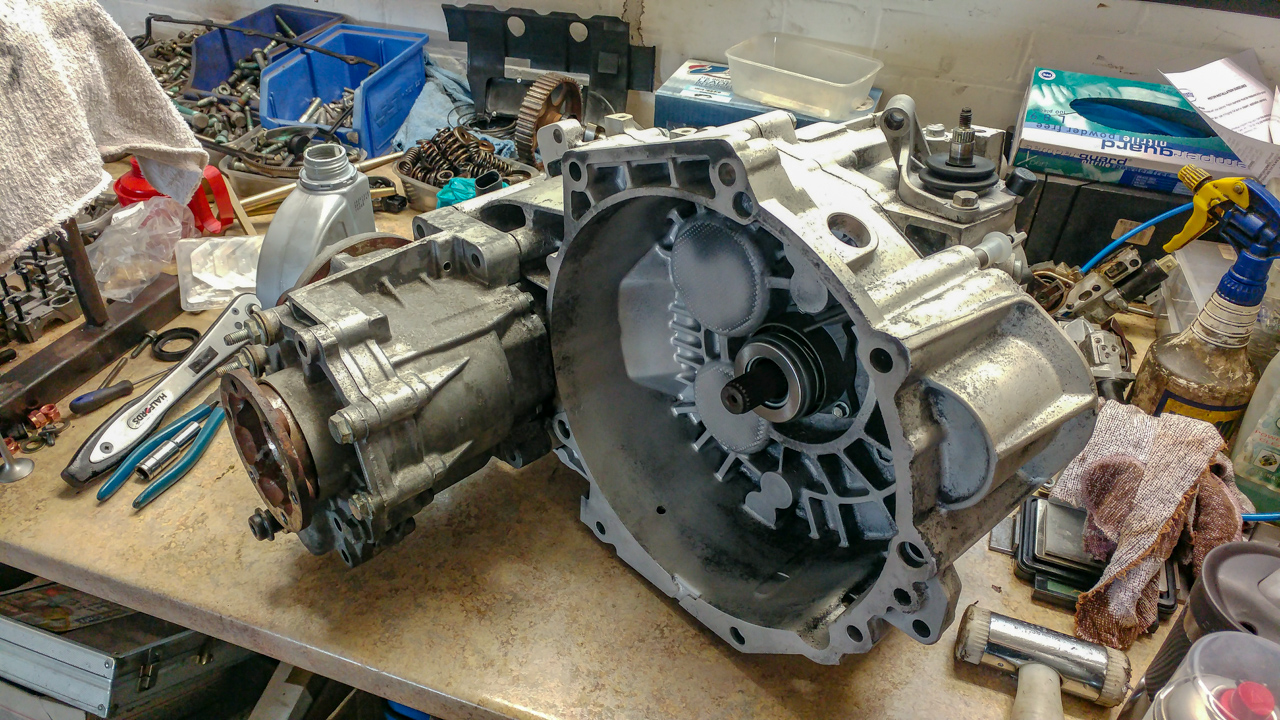
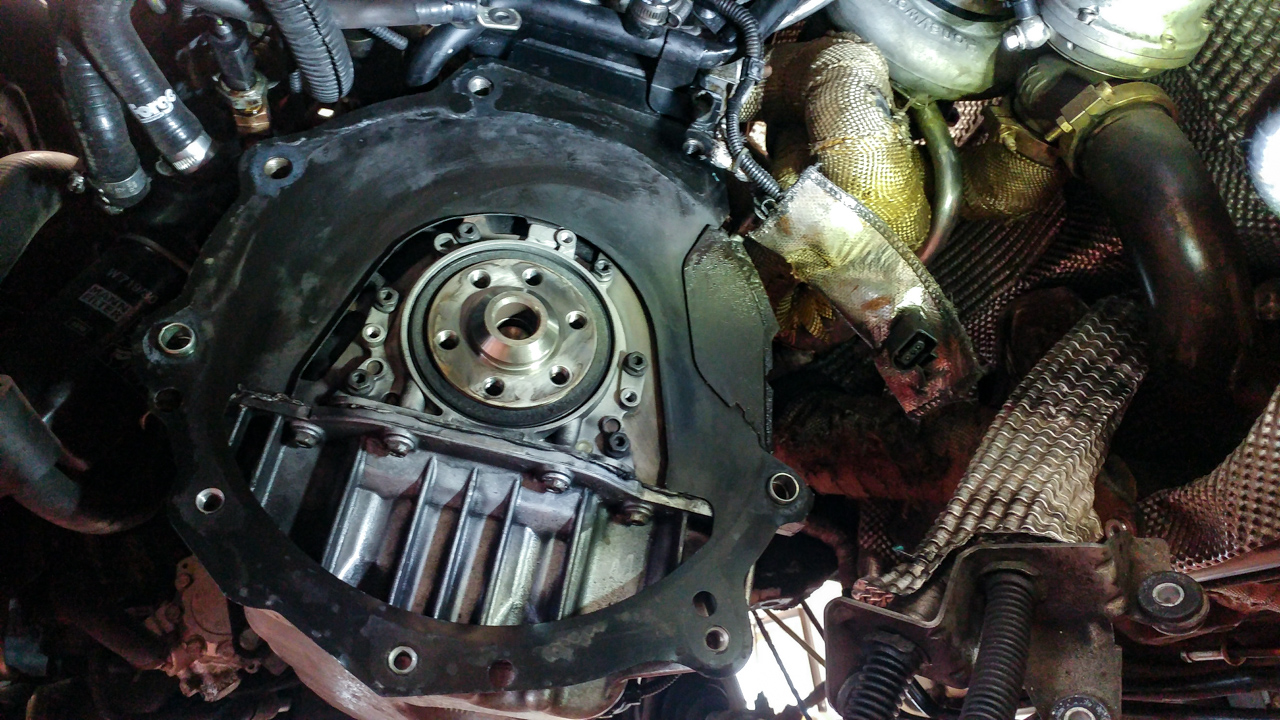
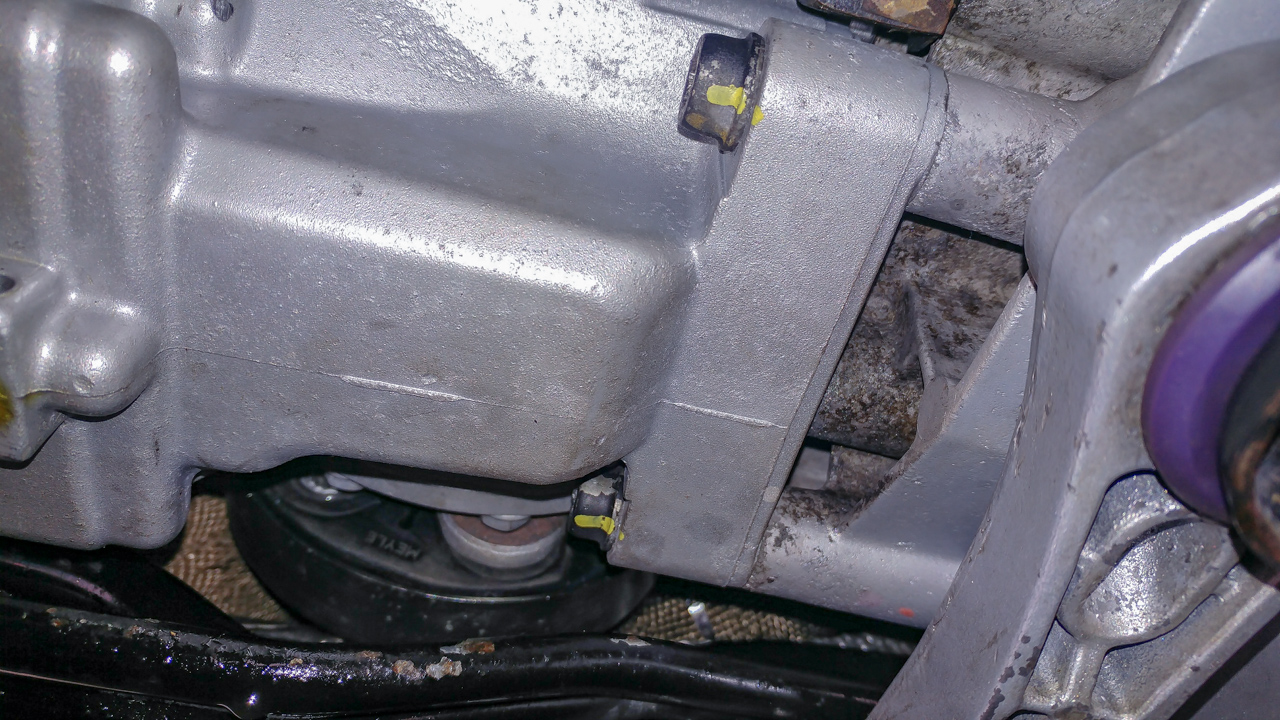
Made a start on the box...

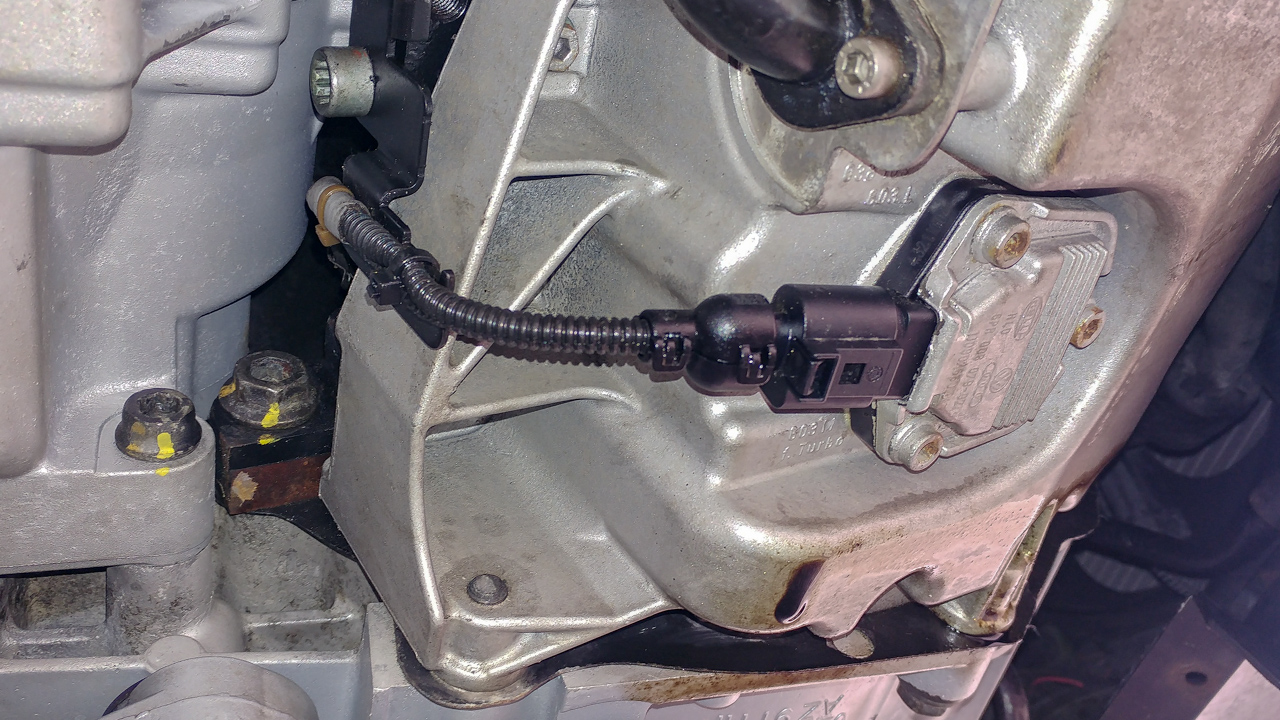
First job was the give it a clean off as its a little dirty...
20180407-96dpi-20180407_123701.jpg


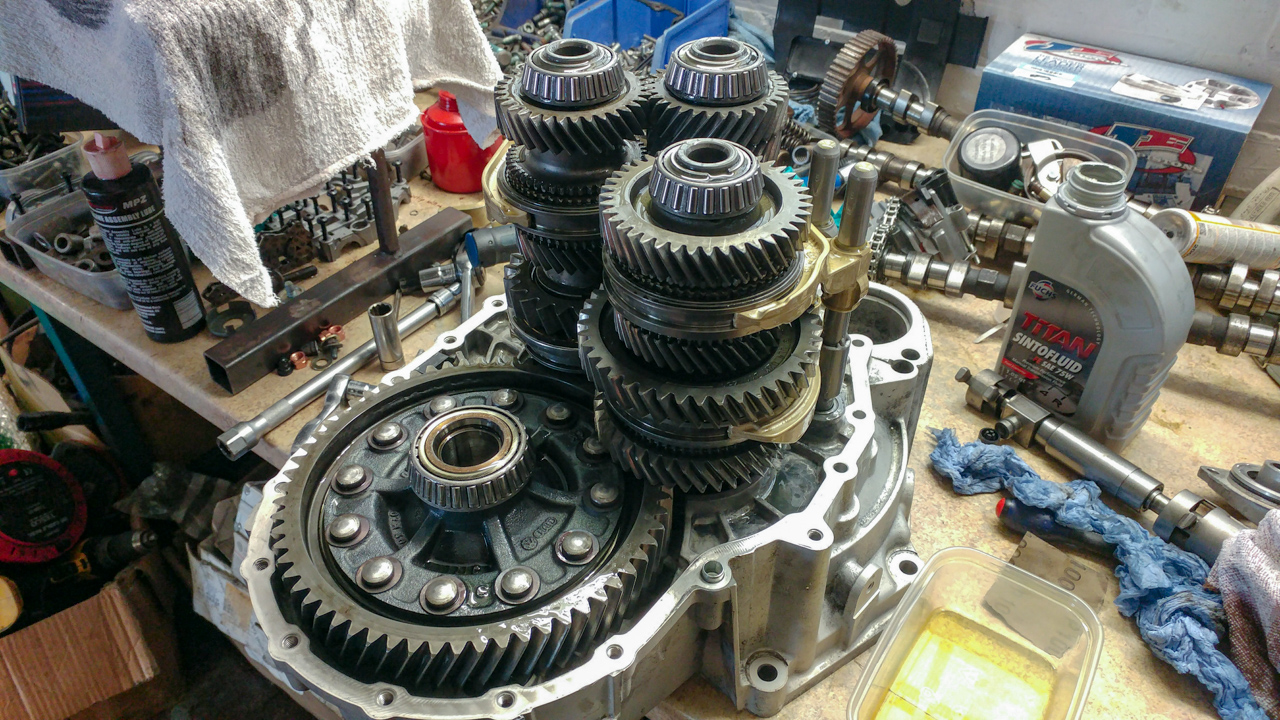
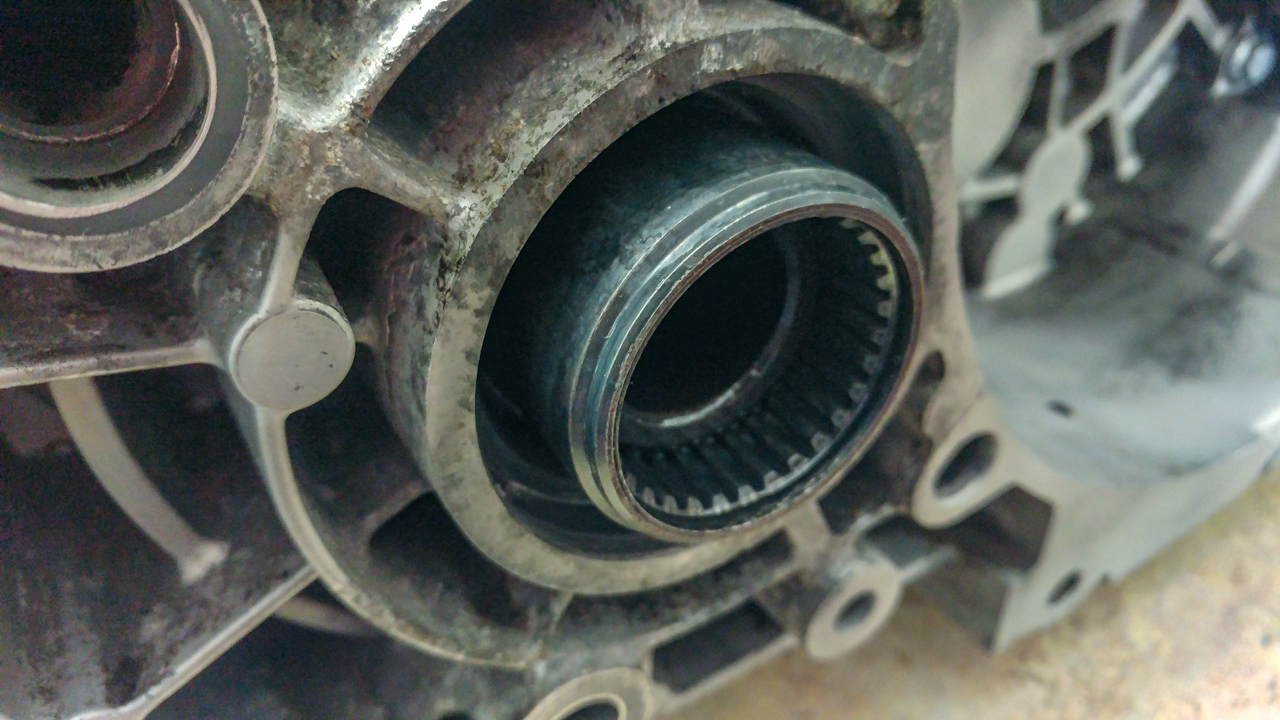
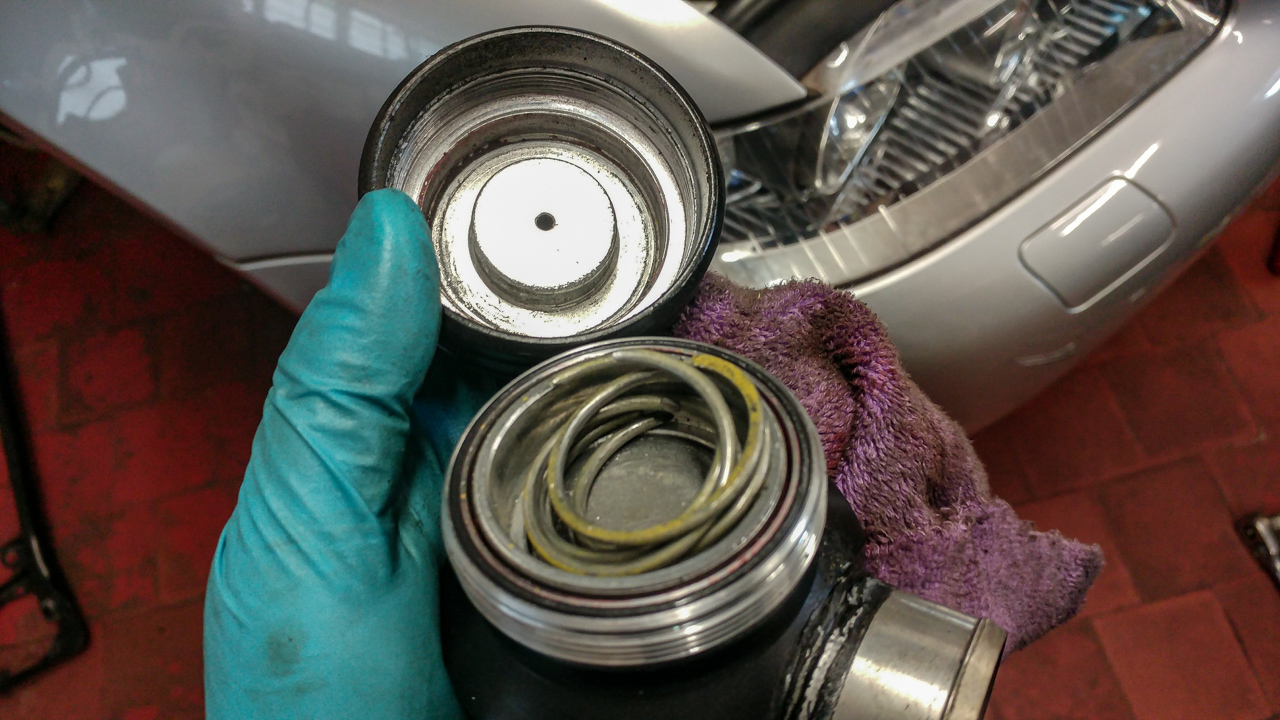
Once 'clean' I split it open... had a bit of a fight with the select tower but...
20180407-96dpi-20180407_144236.jpg


20180407-96dpi-20180407_144239.jpg


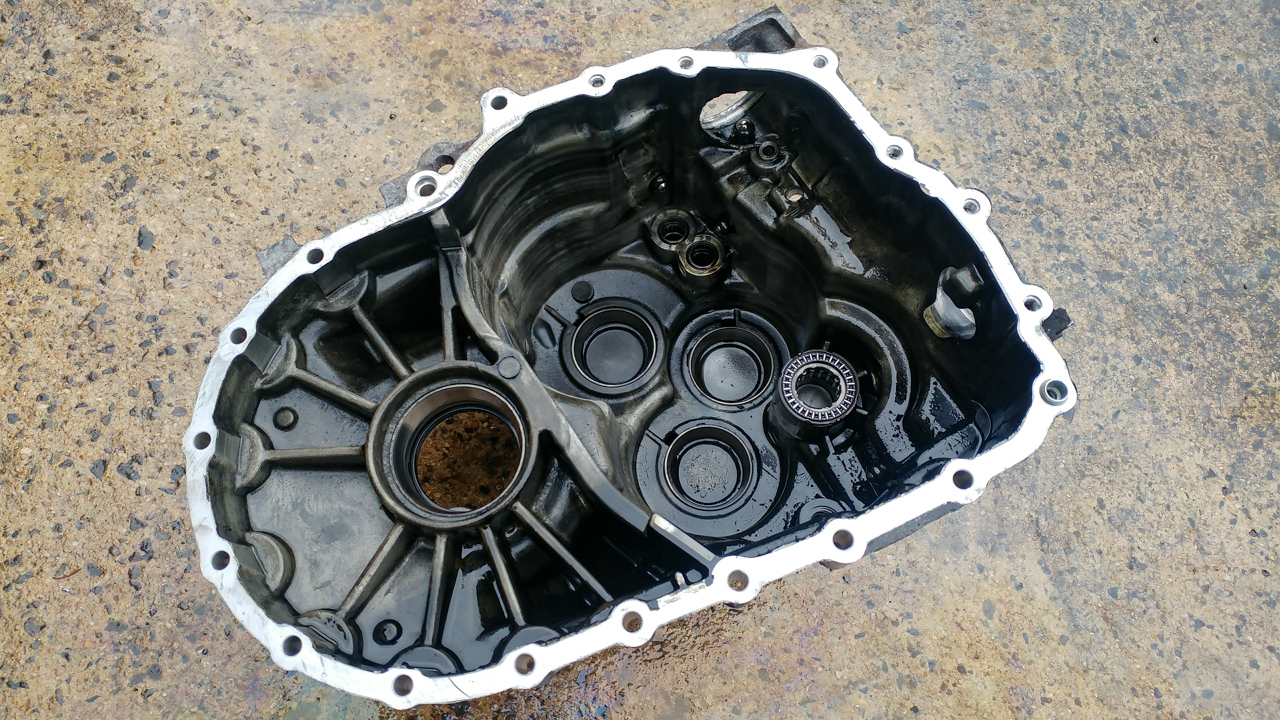
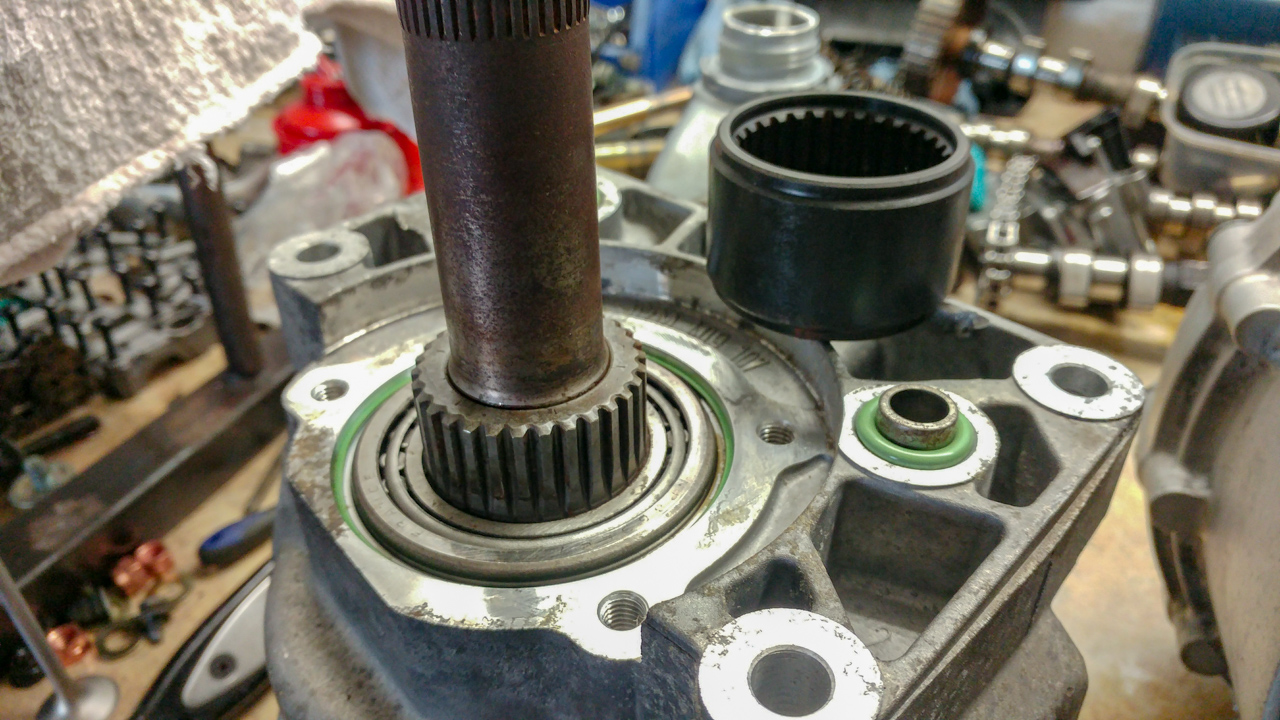
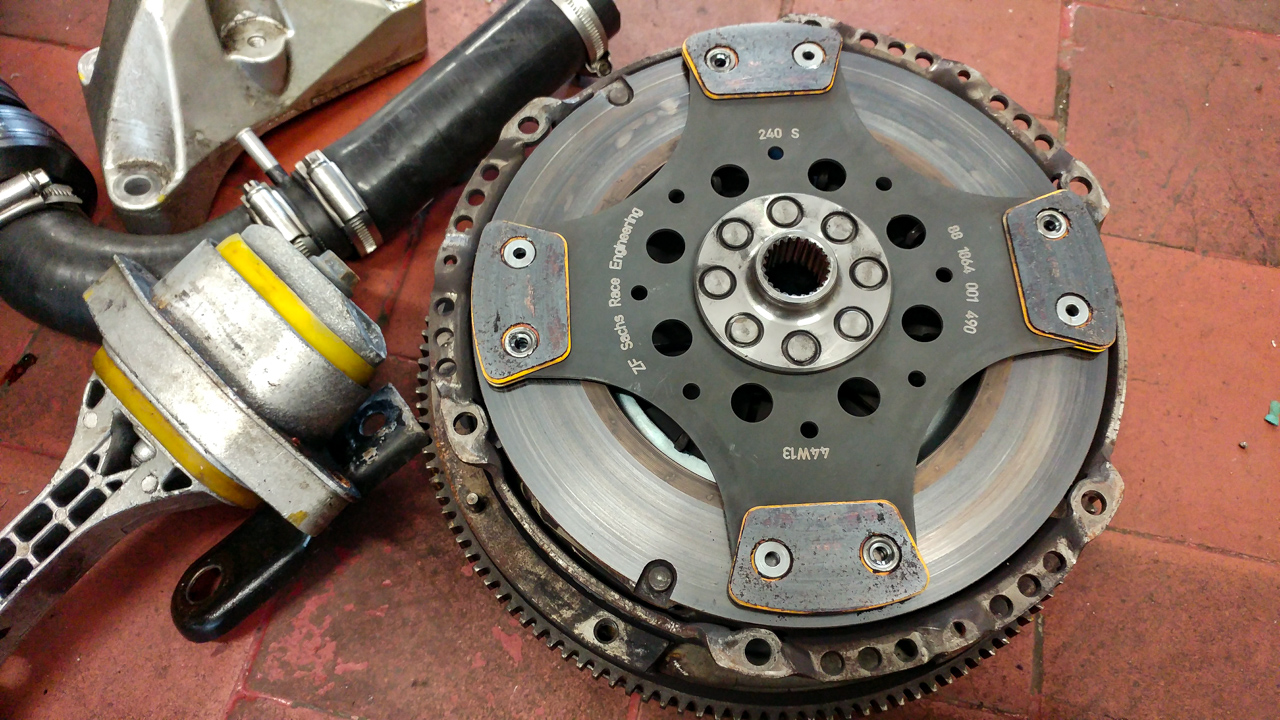
All looked pretty goos so far... no obvious teeth missing or other damage... so wrestled the shafts out for cleaning...
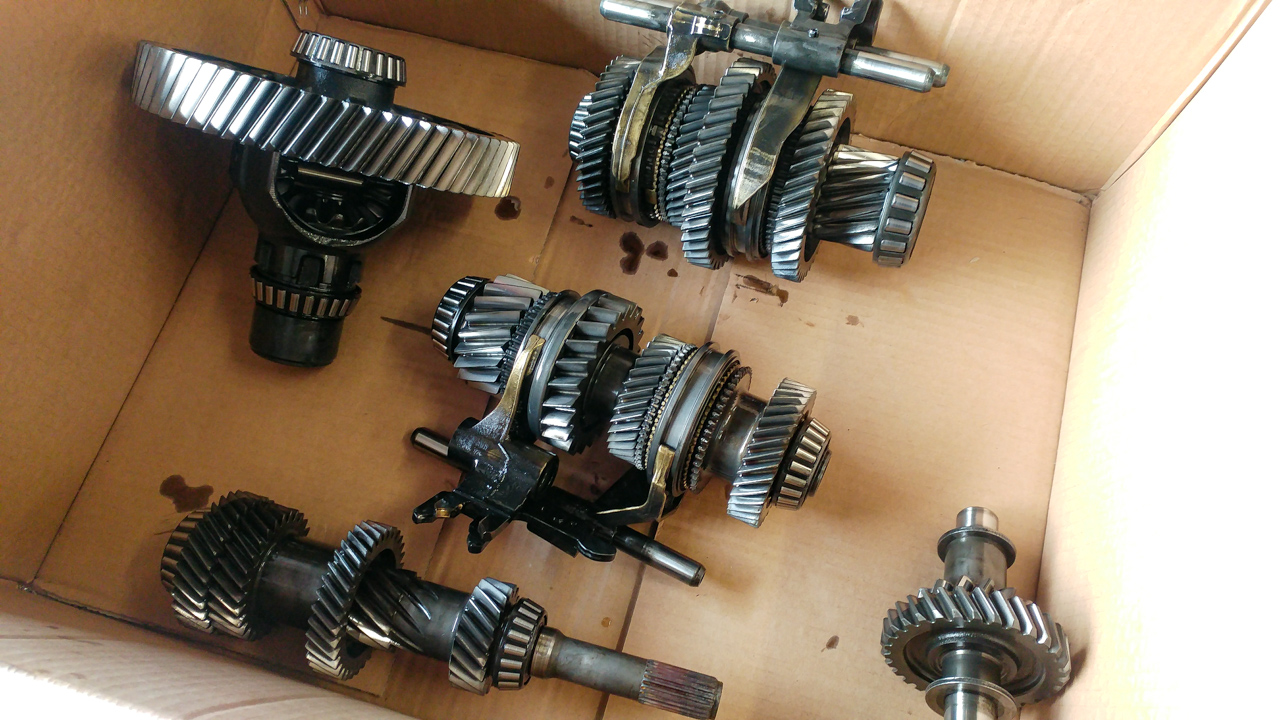
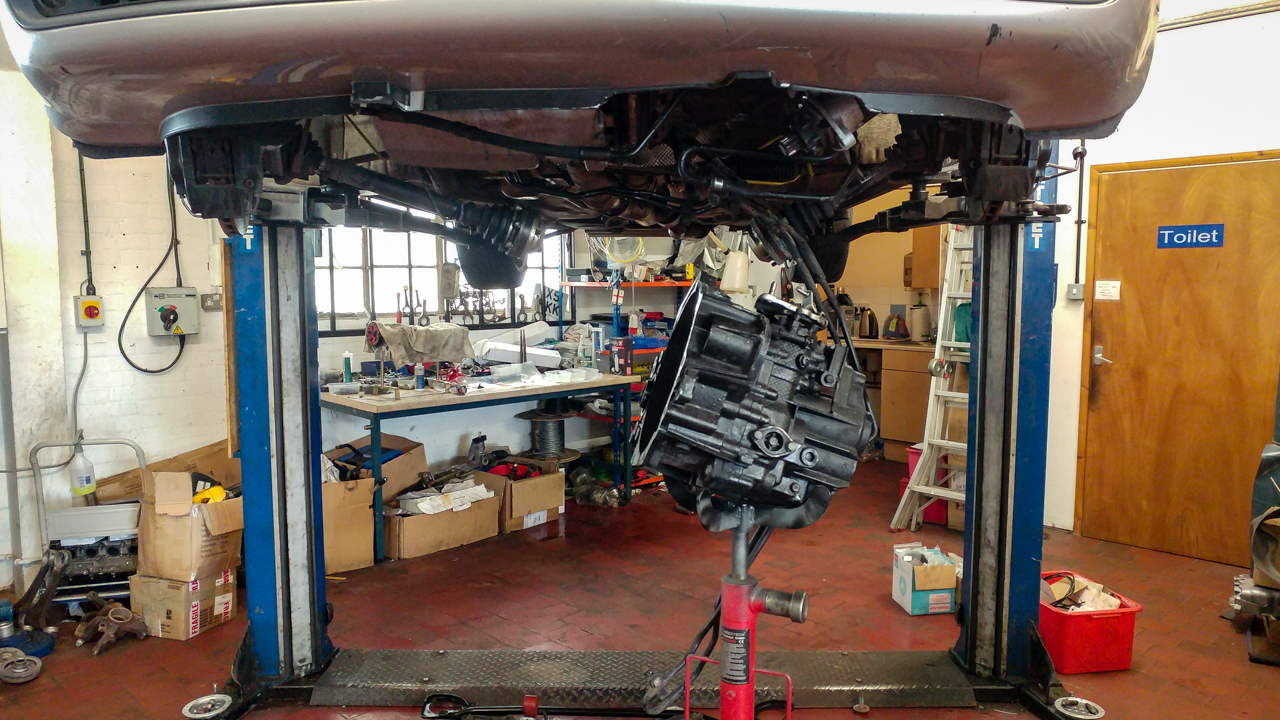
20180407-96dpi-20180407_153625.jpg


...can see why these boxes are heavy... :)

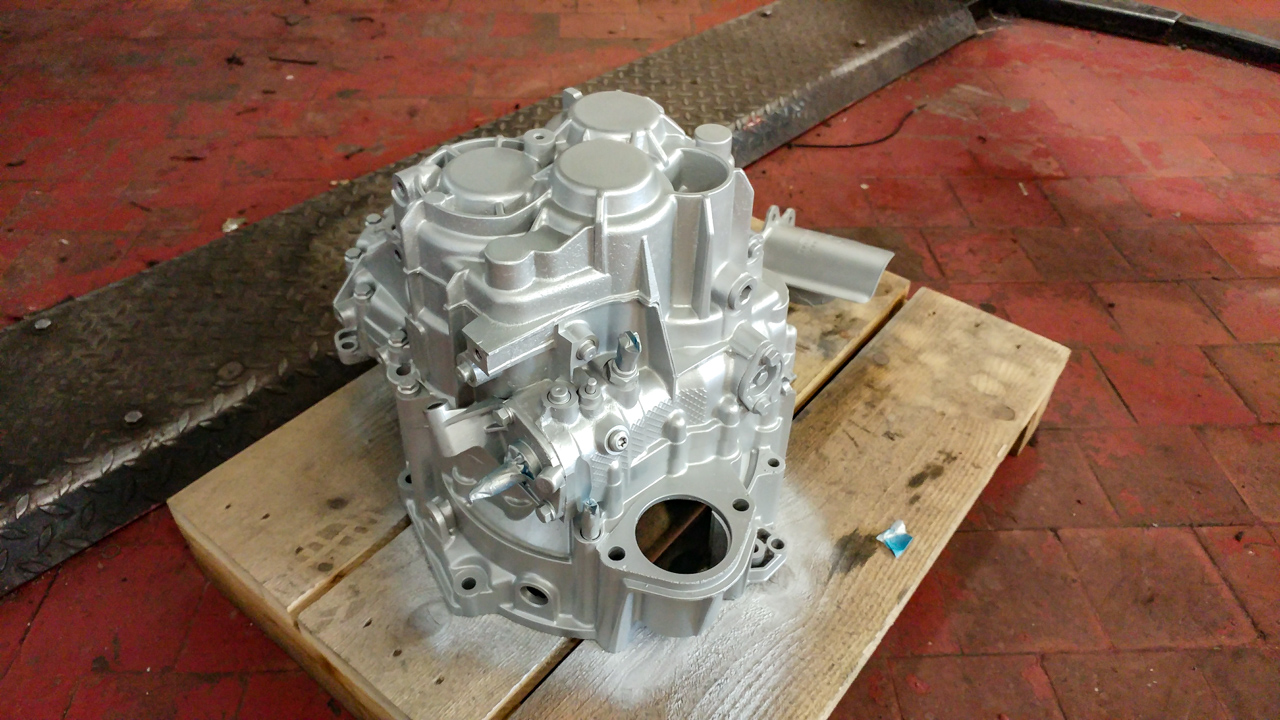
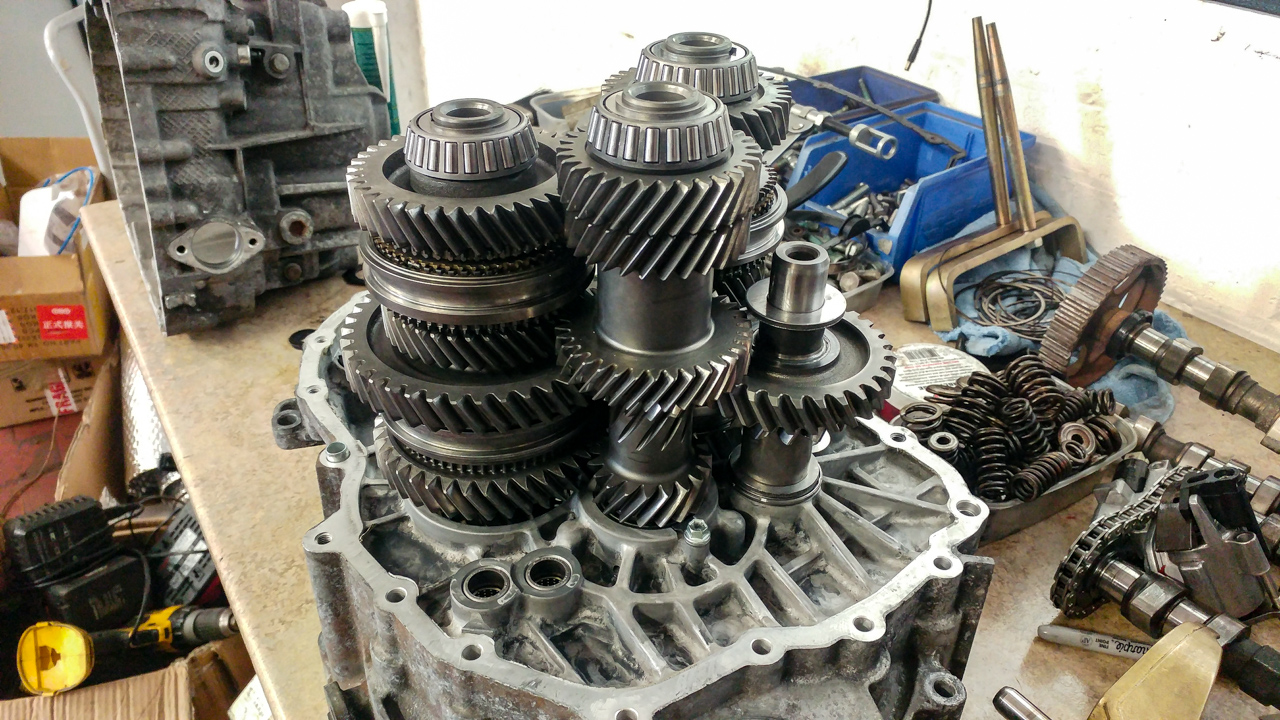
Fresh from the hotwash...
20180407-96dpi-20180407_162950.jpg


20180407-96dpi-20180407_163011.jpg


20180407-96dpi-20180407_162819.jpg


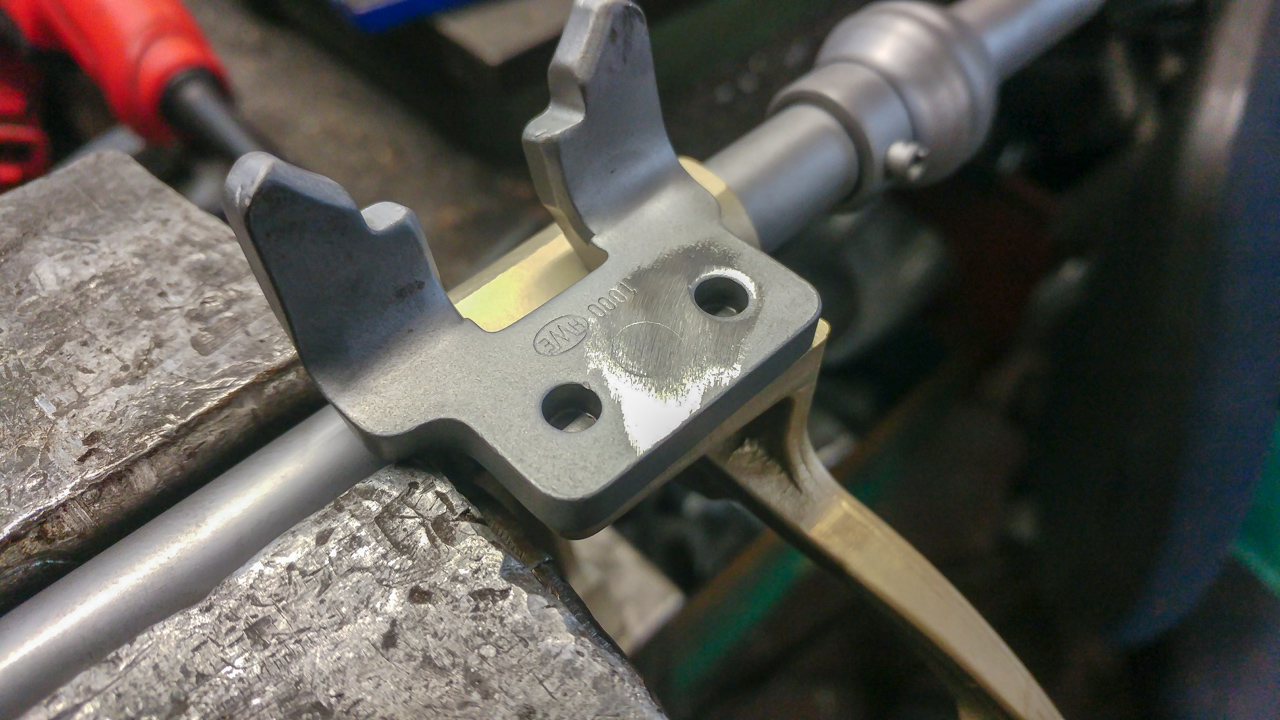
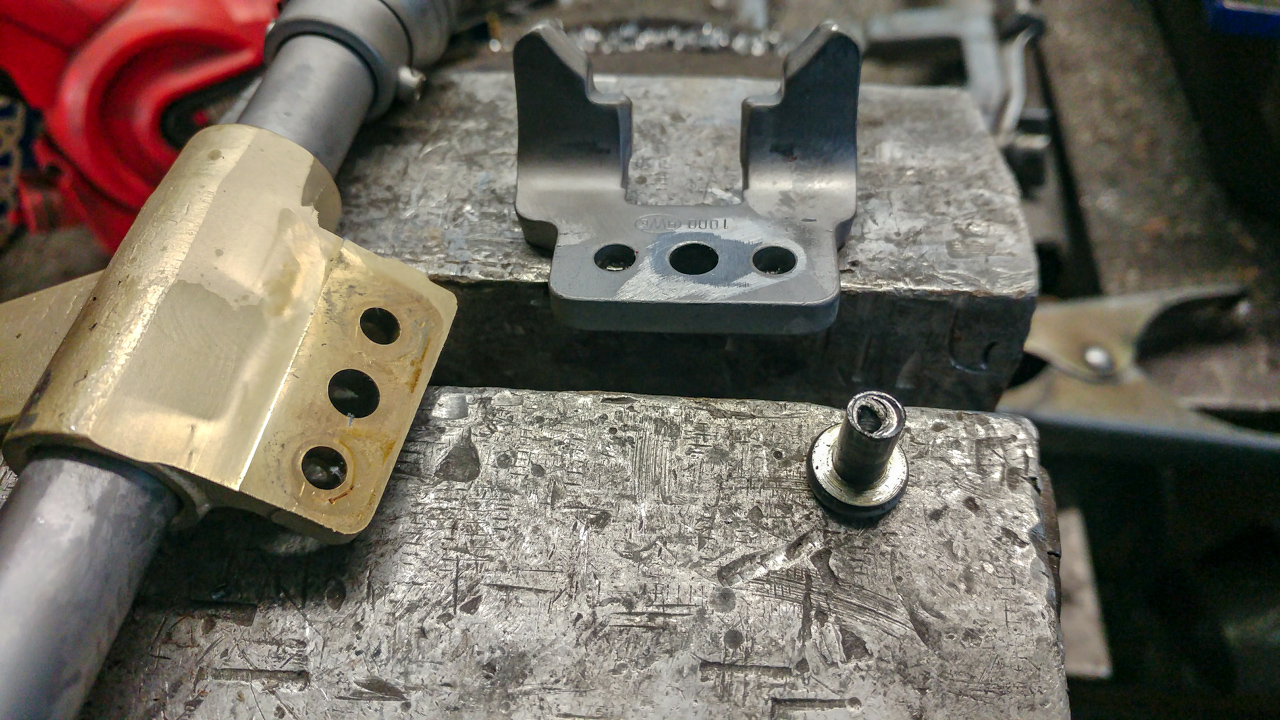
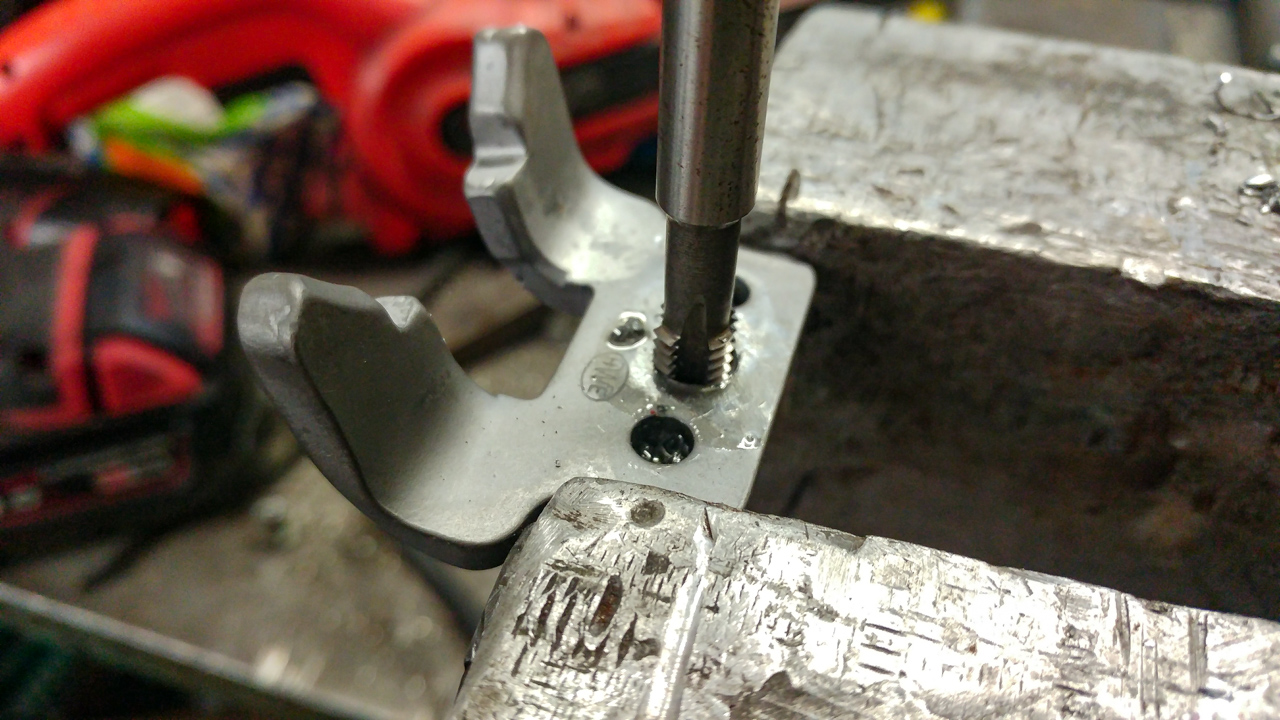
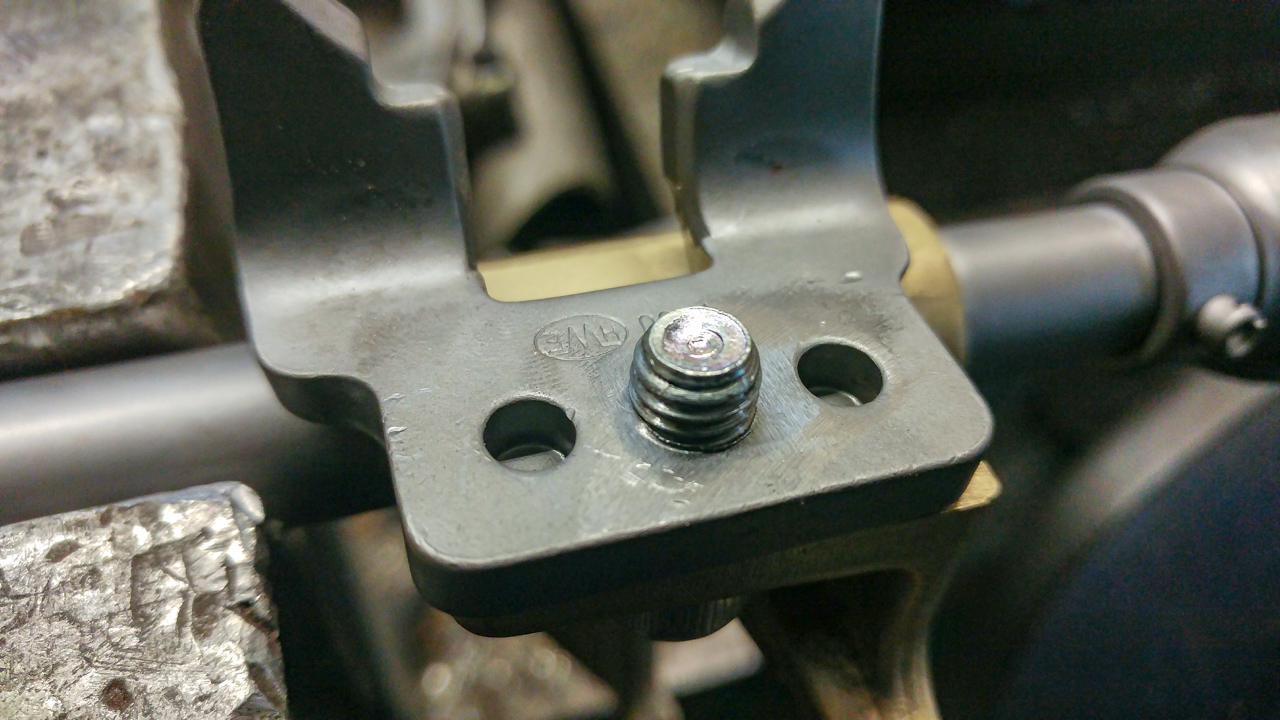
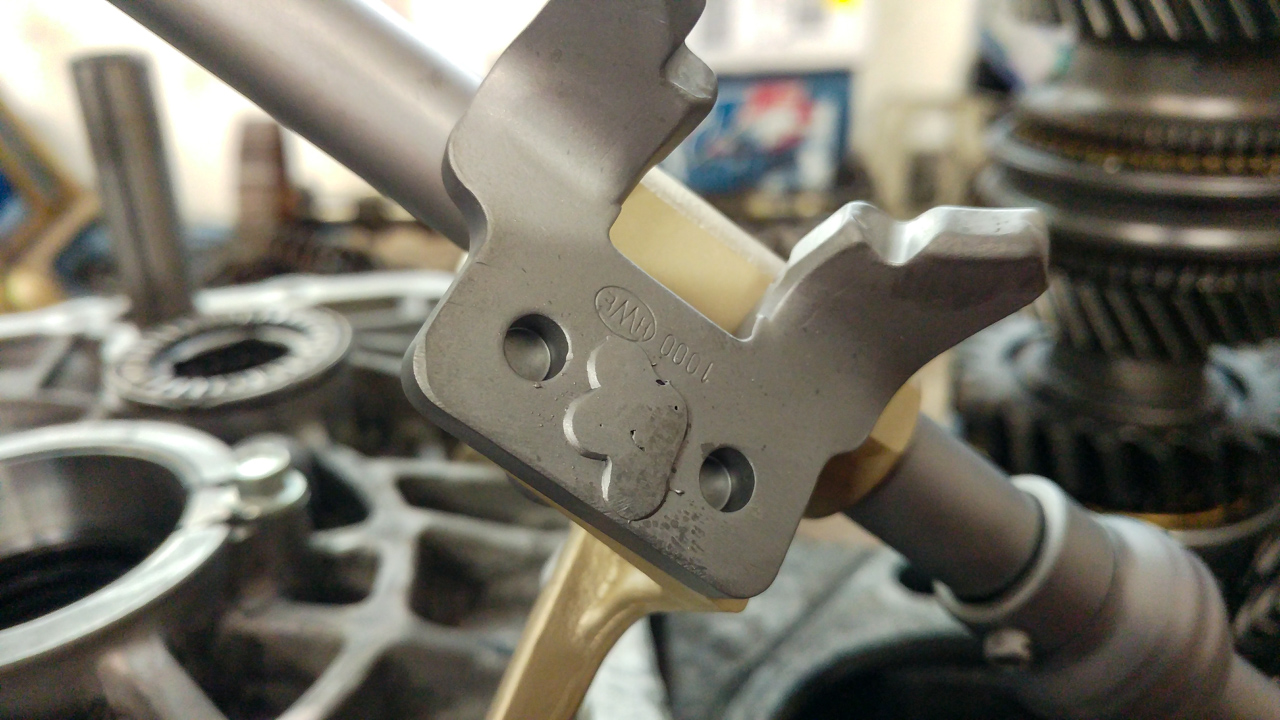
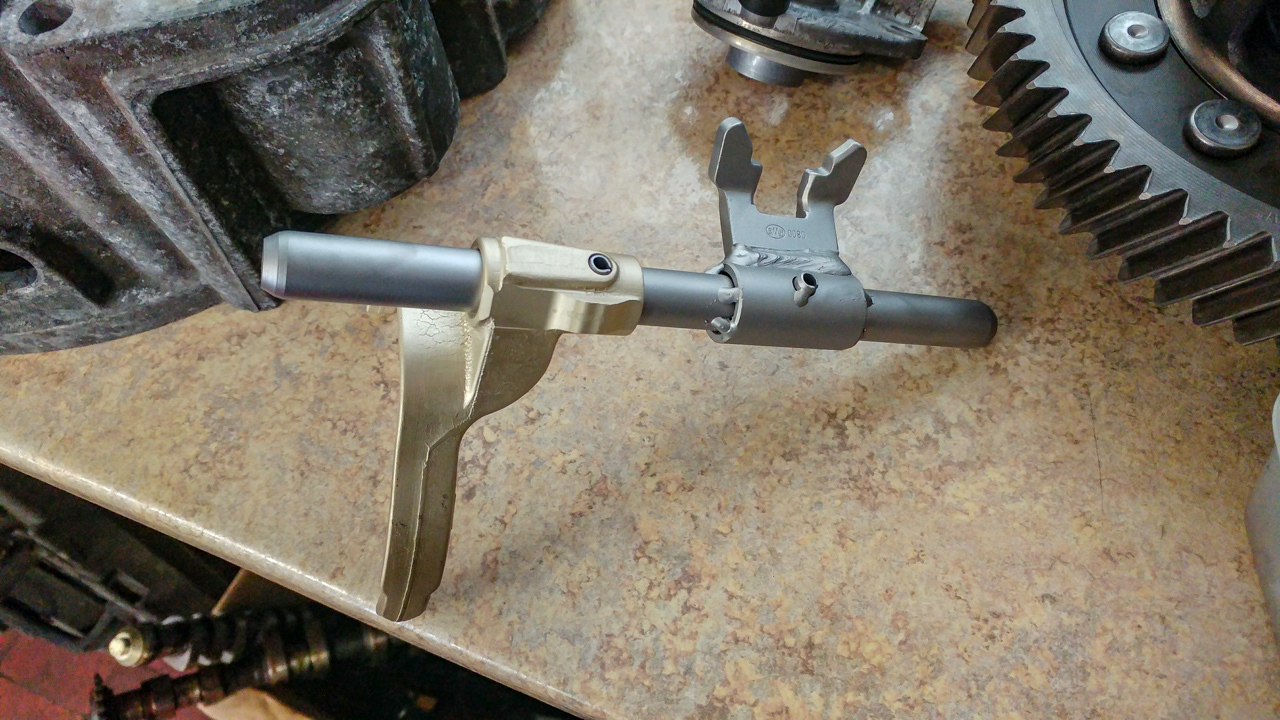
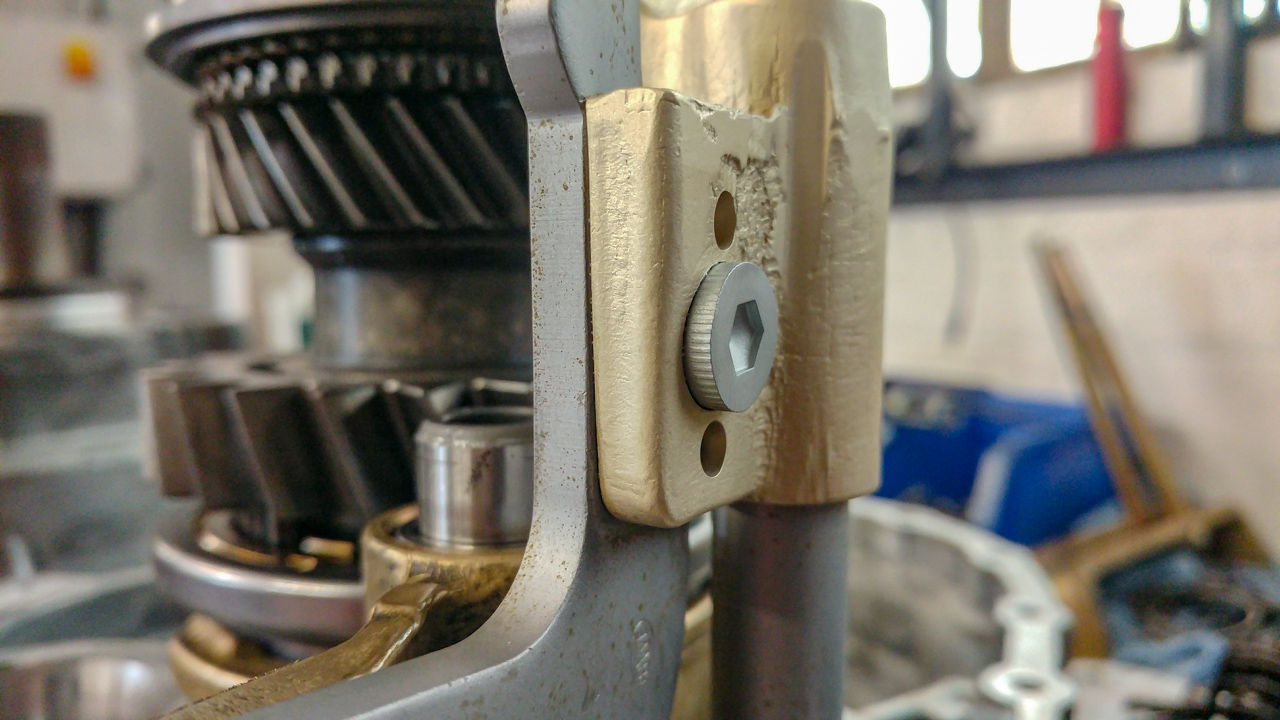
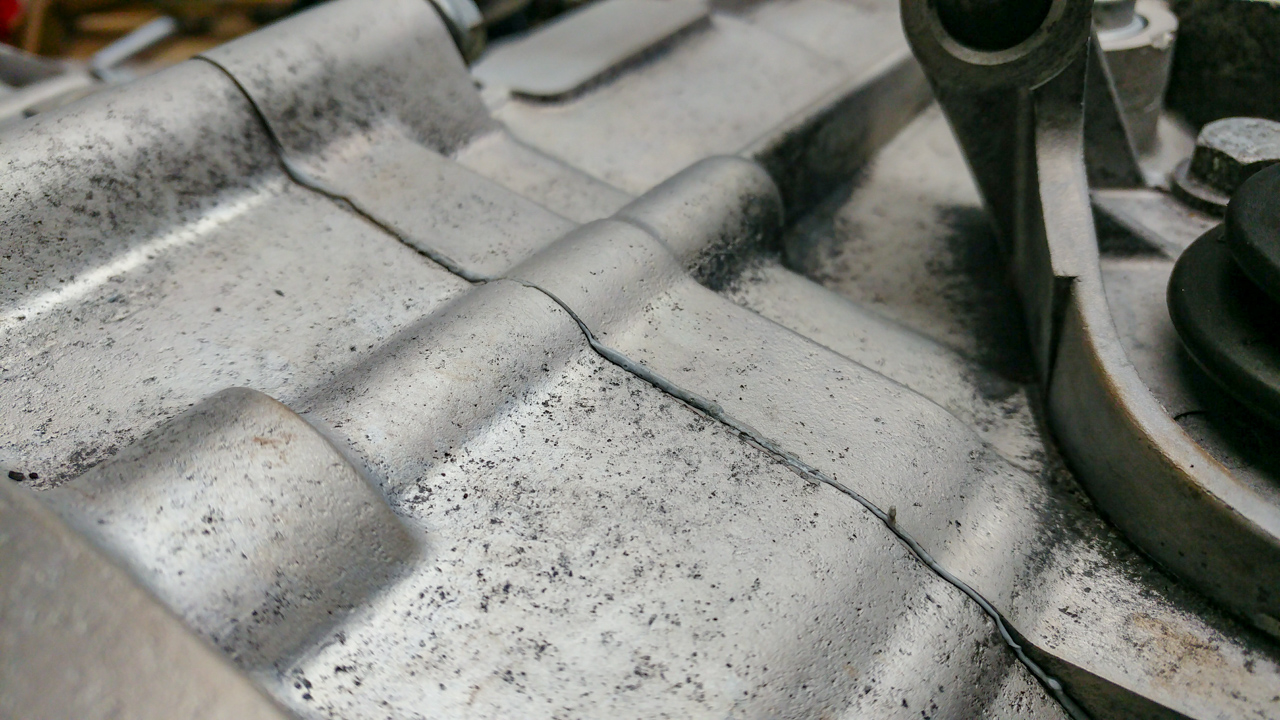
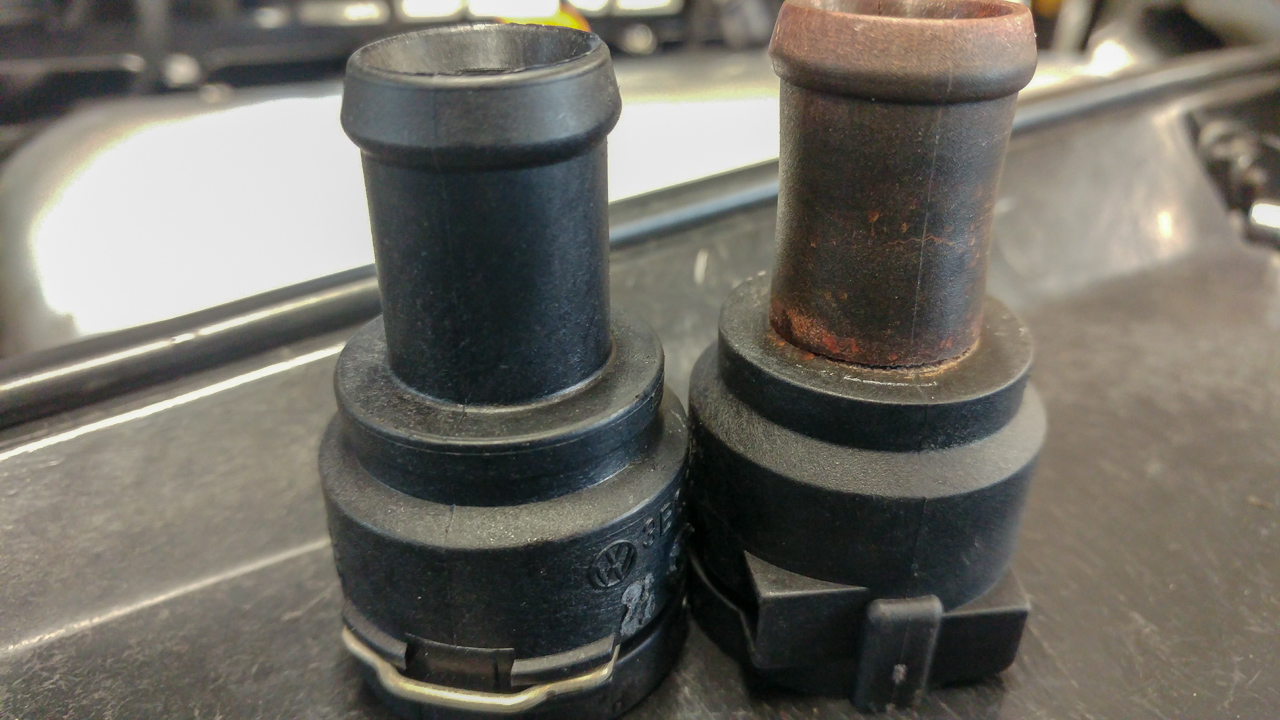
Next up is to mod the forks... the offending items...
20180407-96dpi-20180407_162825.jpg


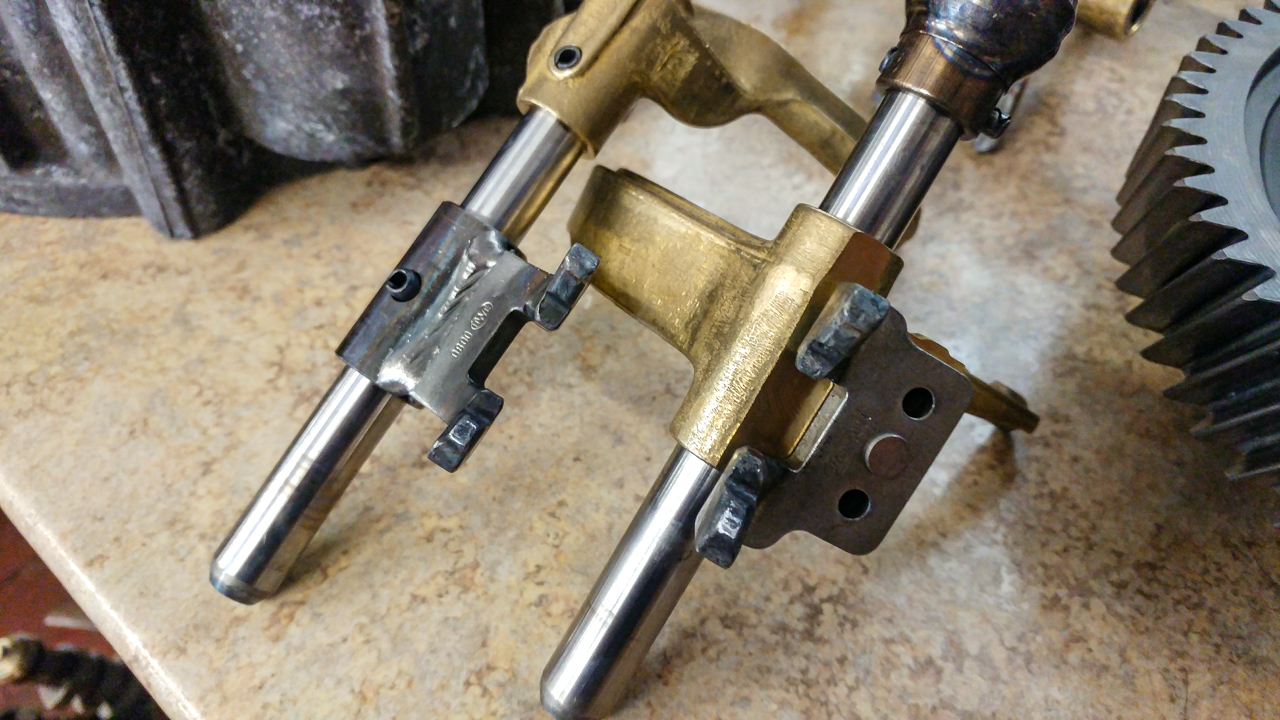
The rivet on the one on the right has a tendency to sheer leaving you unable to select gears...

A little info here...
http://weldingweb.com/showthread.php?176331-Beefing-up-VW-shift-forks
...and here (as long as you have the chrome photobucket extension)
http://forums.tdiclub.com/showthread.php?t=310279

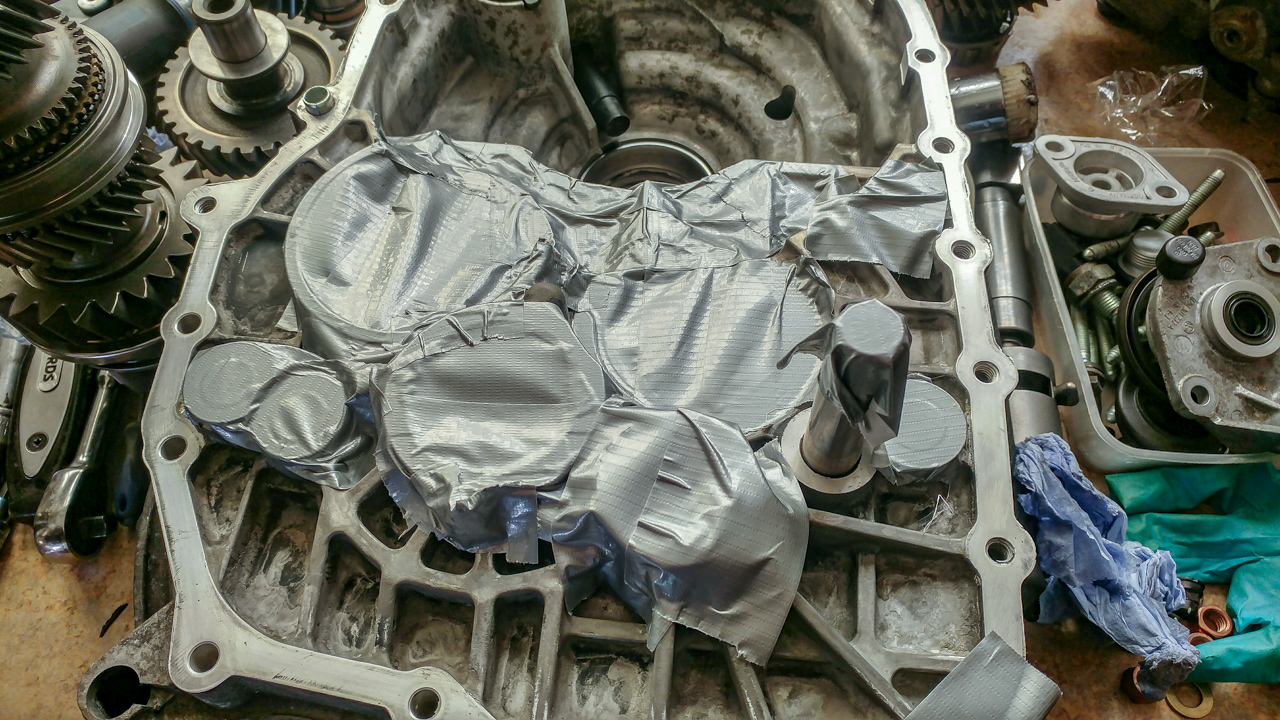
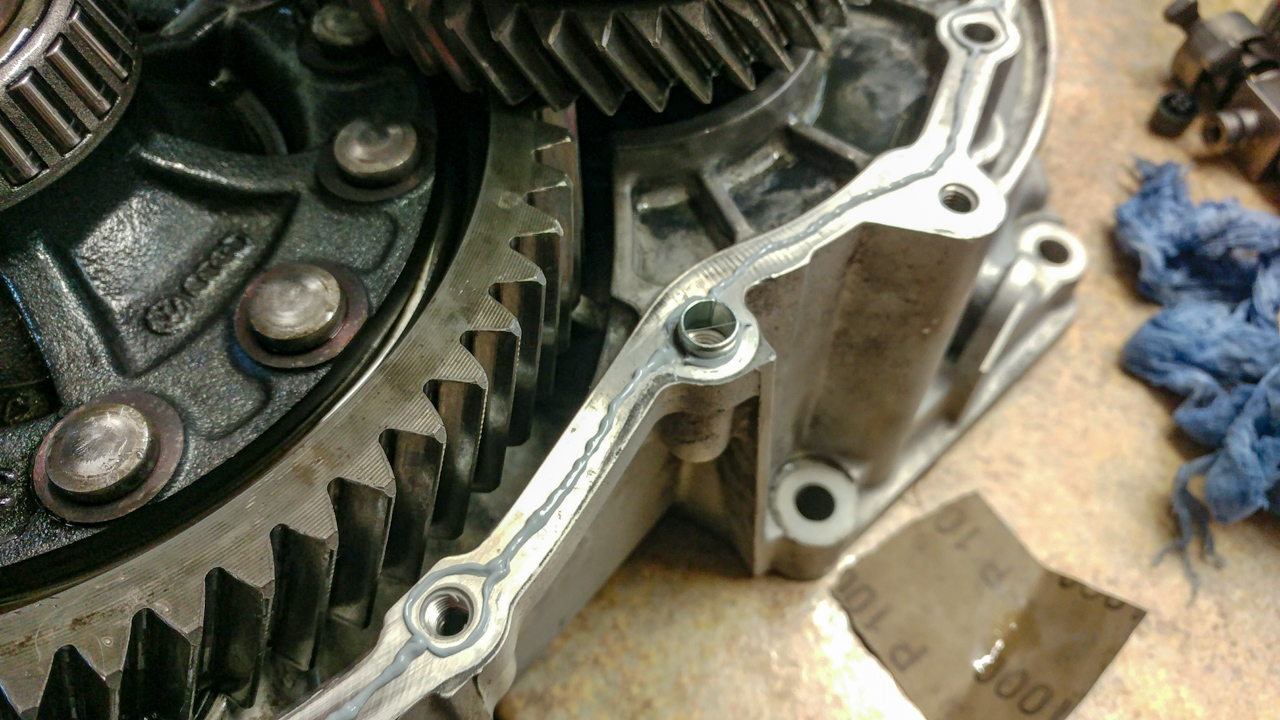
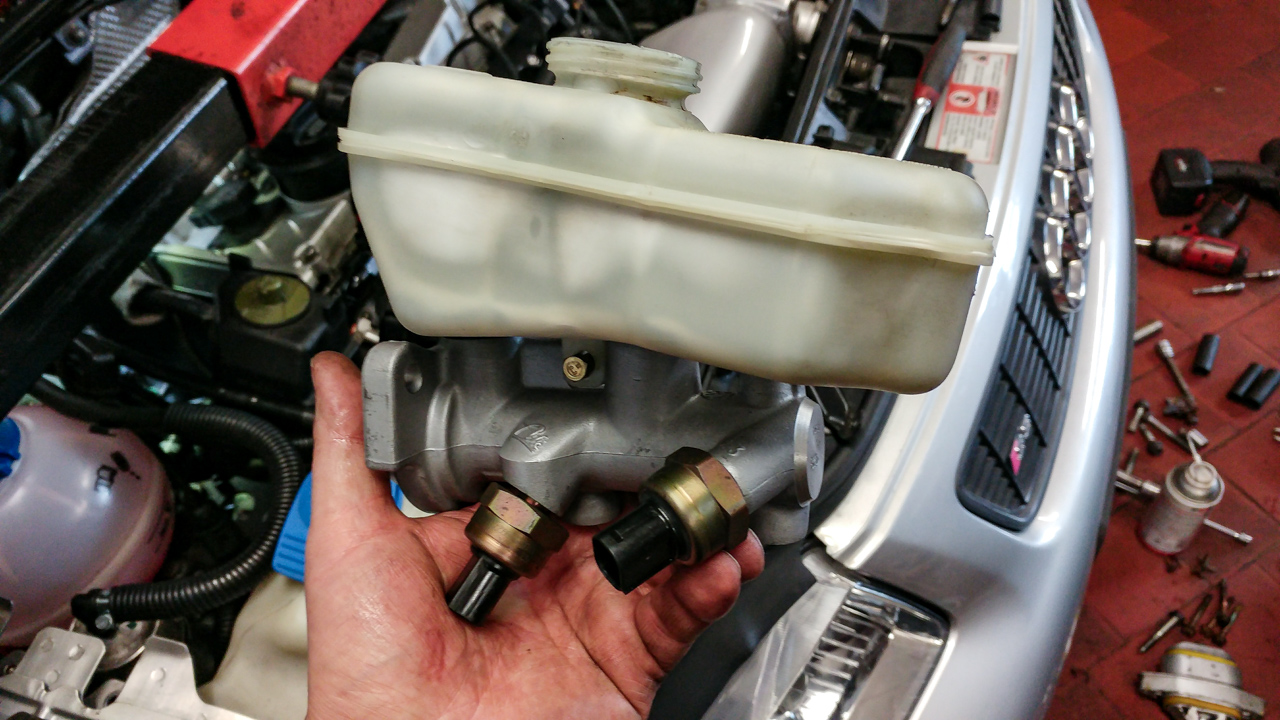
I also have this to fit...
20180407-96dpi-20180407_165226_HDR.jpg


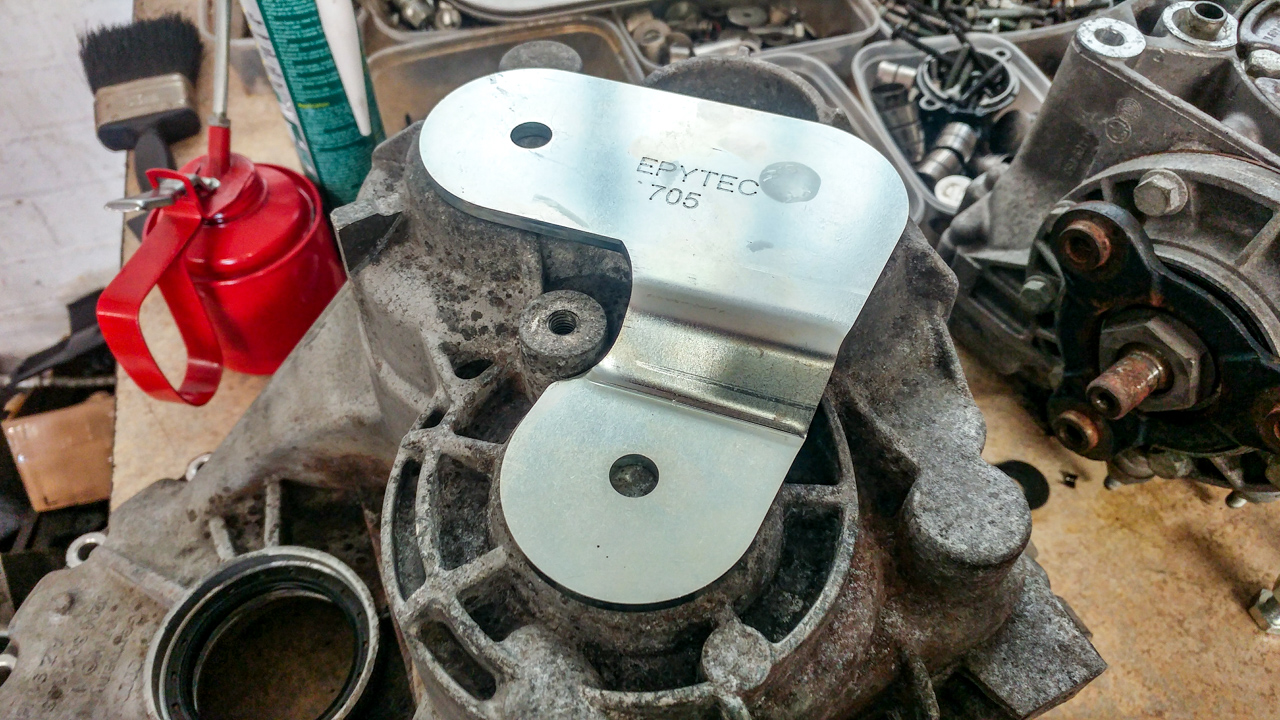
...not entirely convinced this will actually do anything and trying to convince myself it won't leak through the bolt holes...

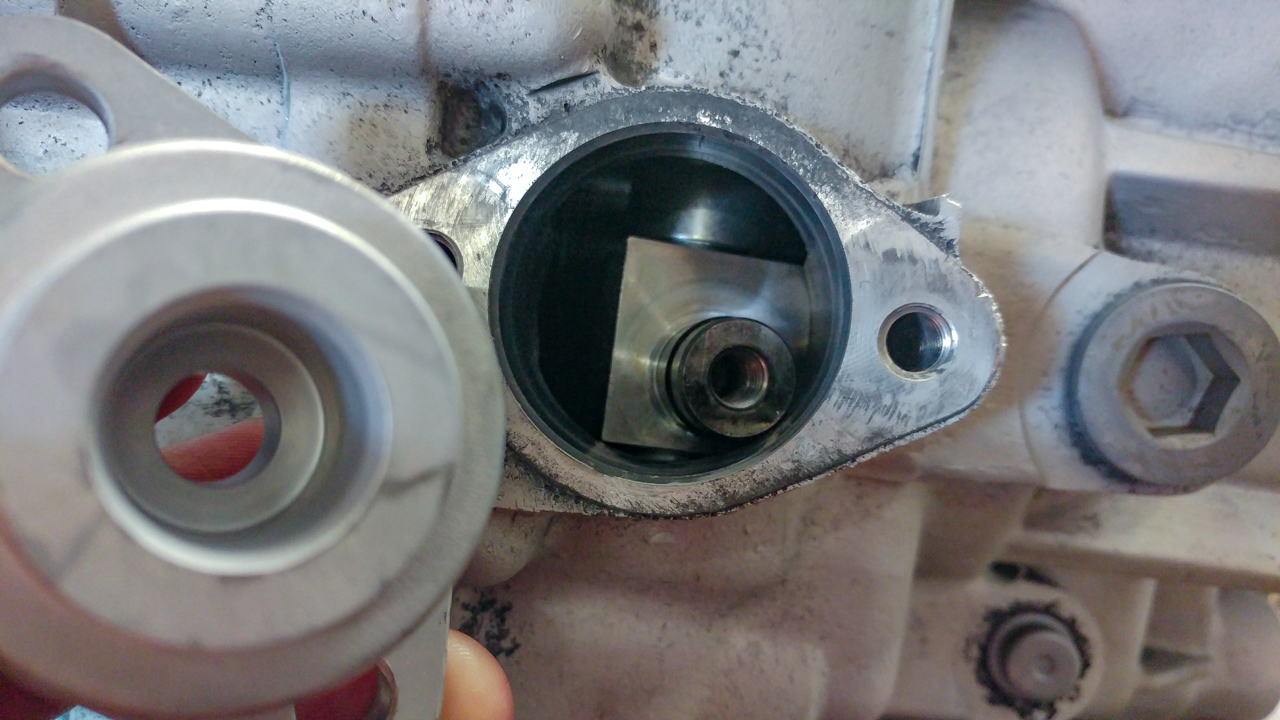
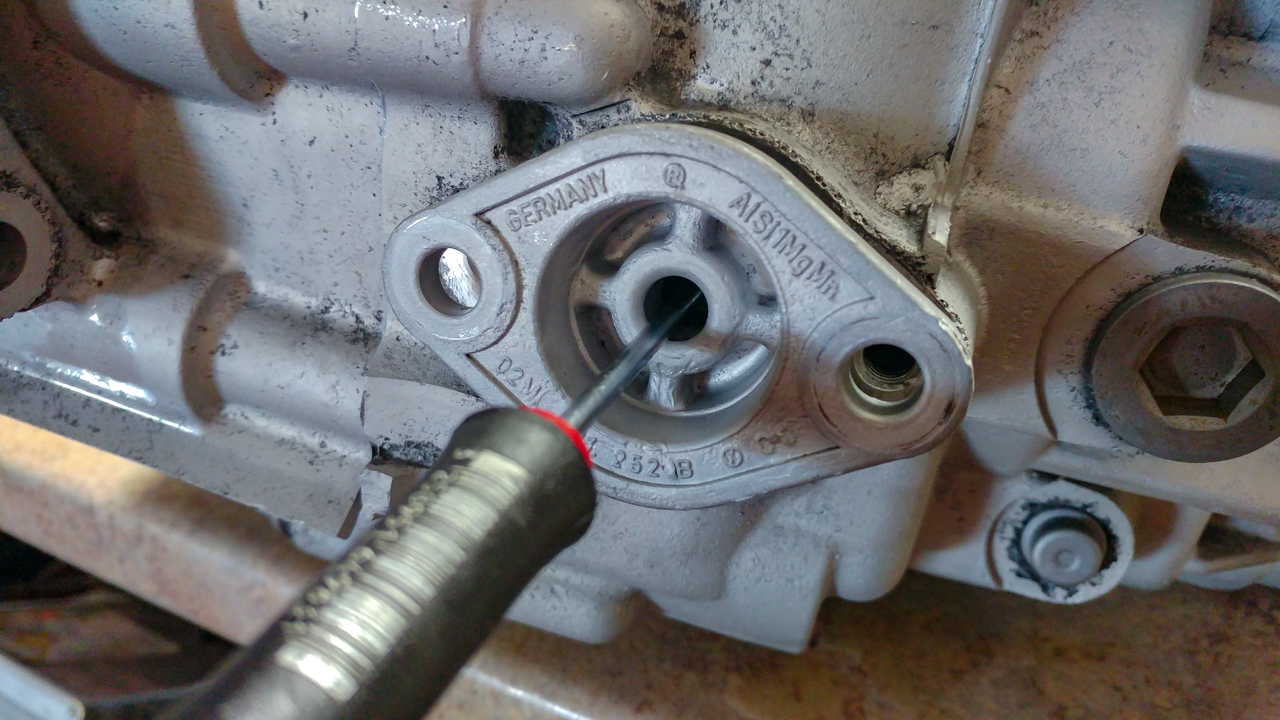
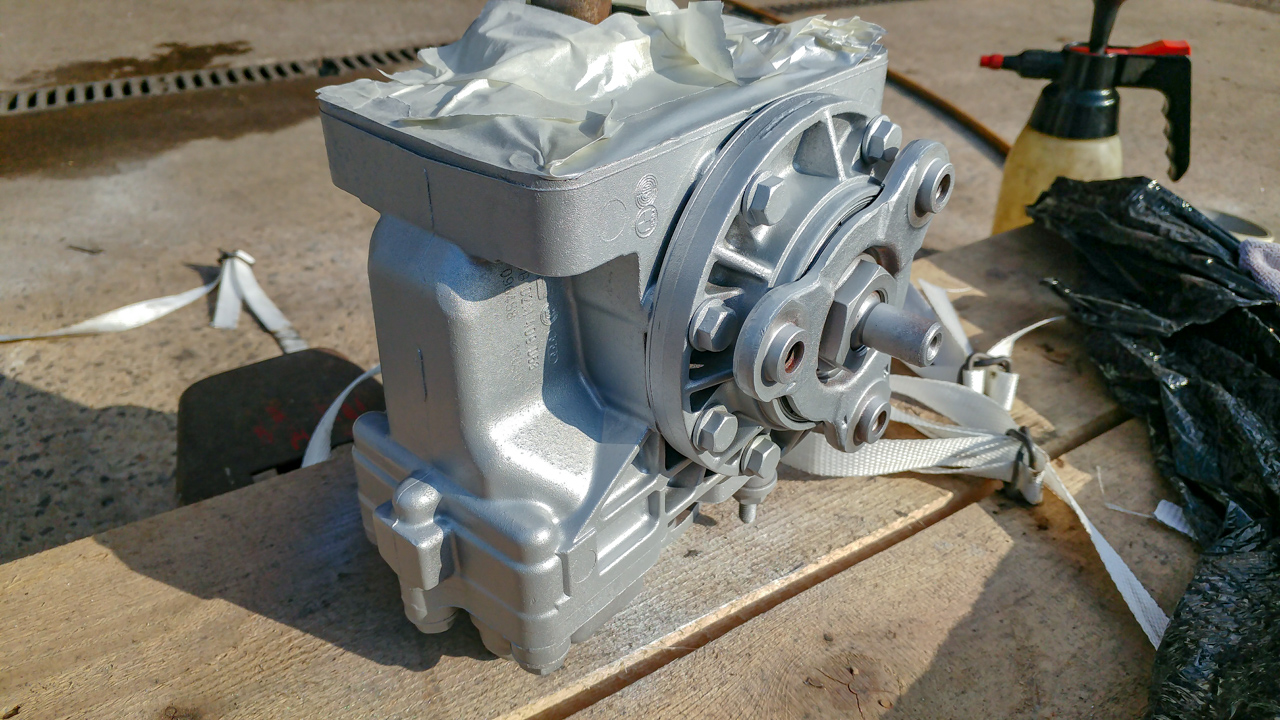
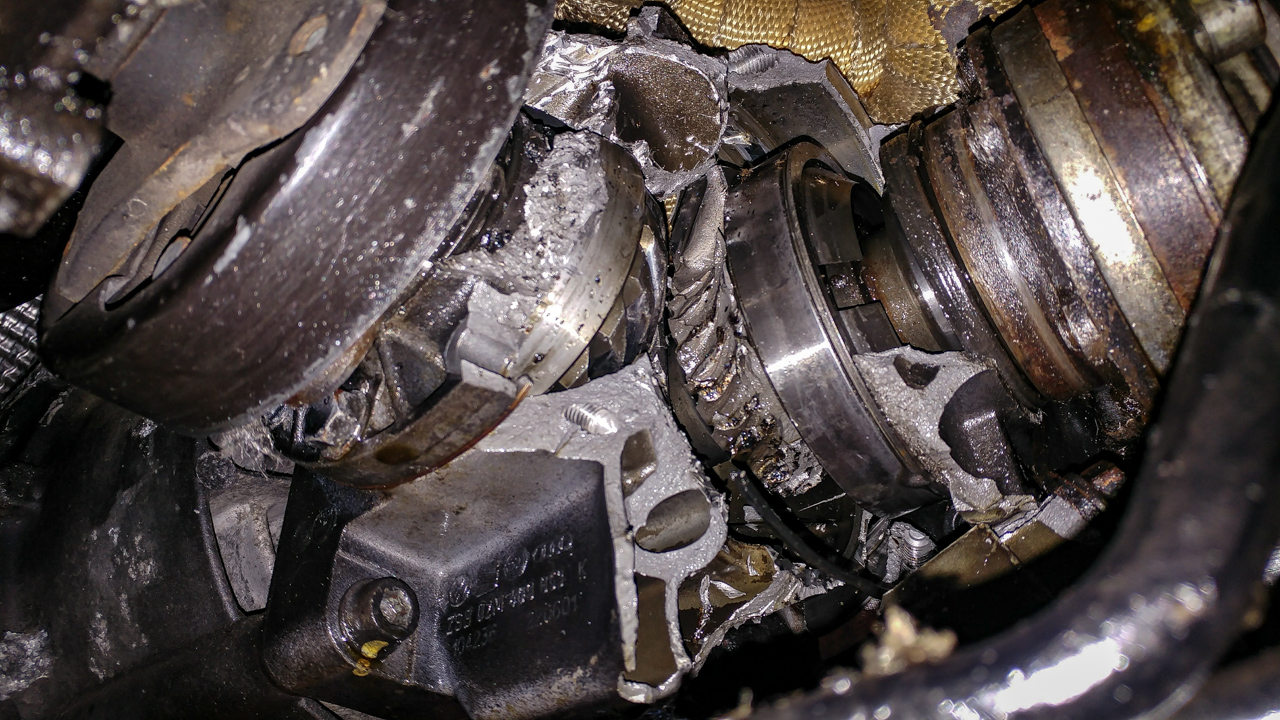
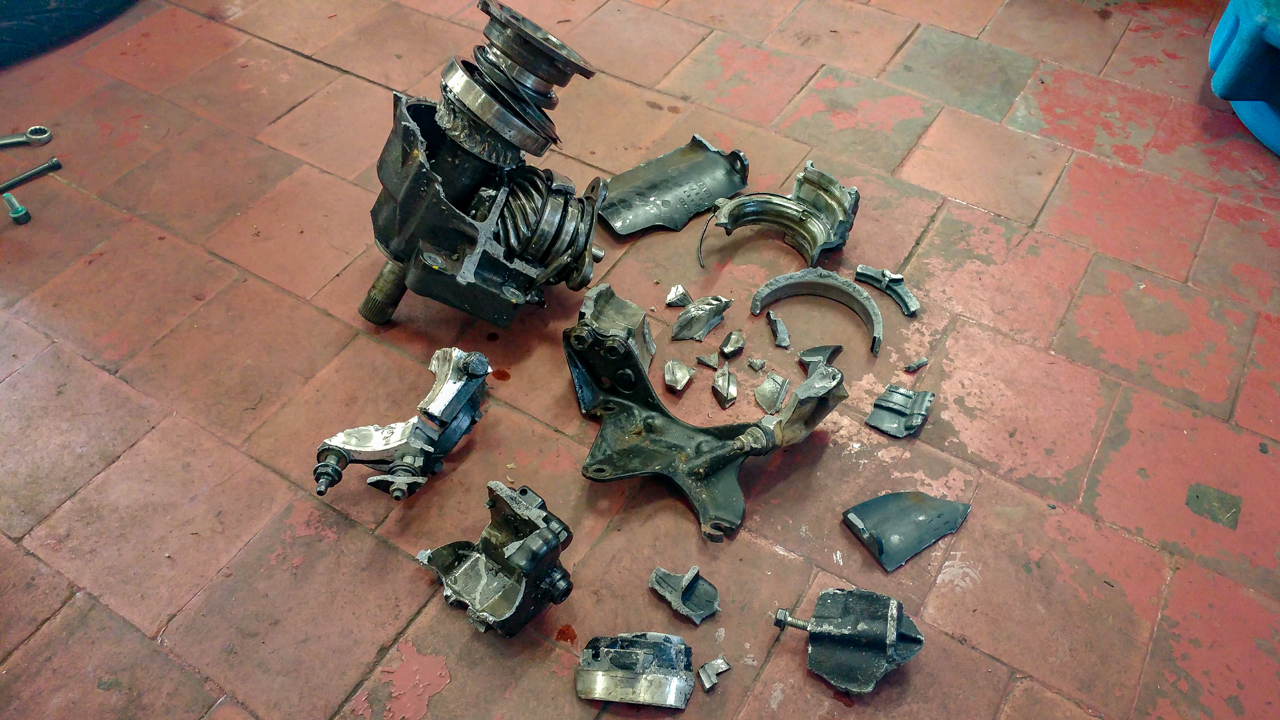
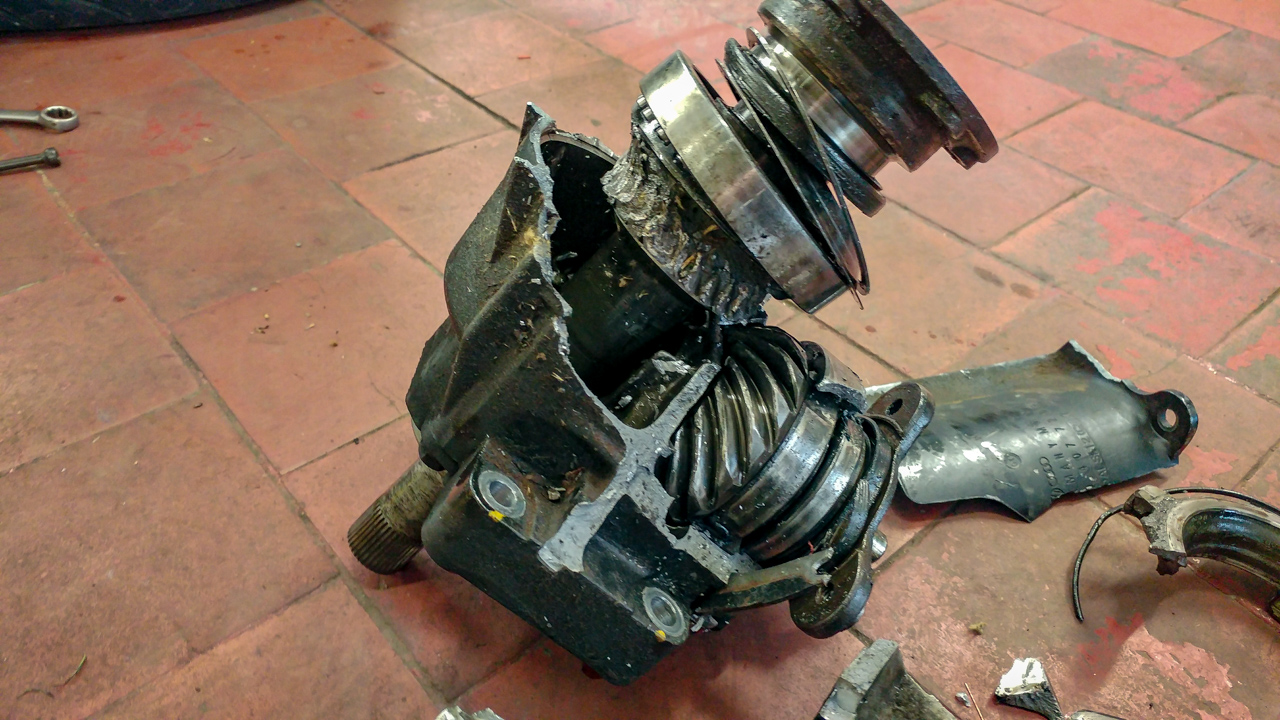
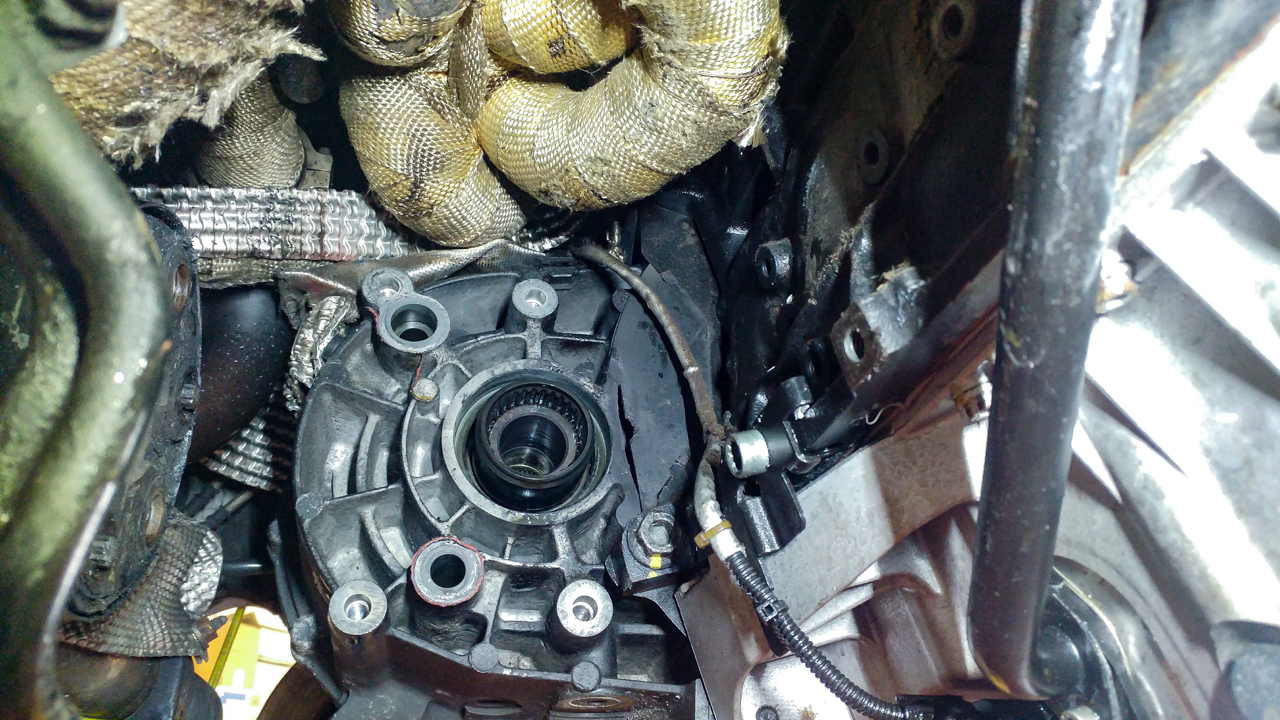
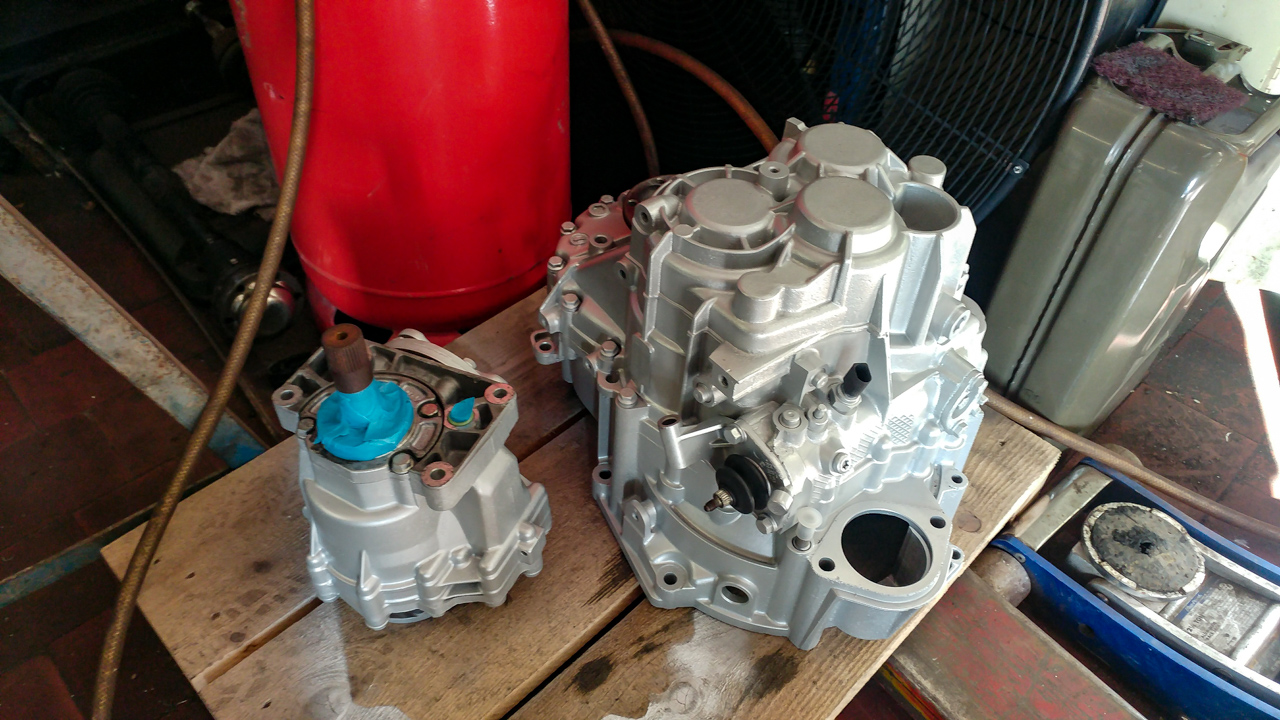
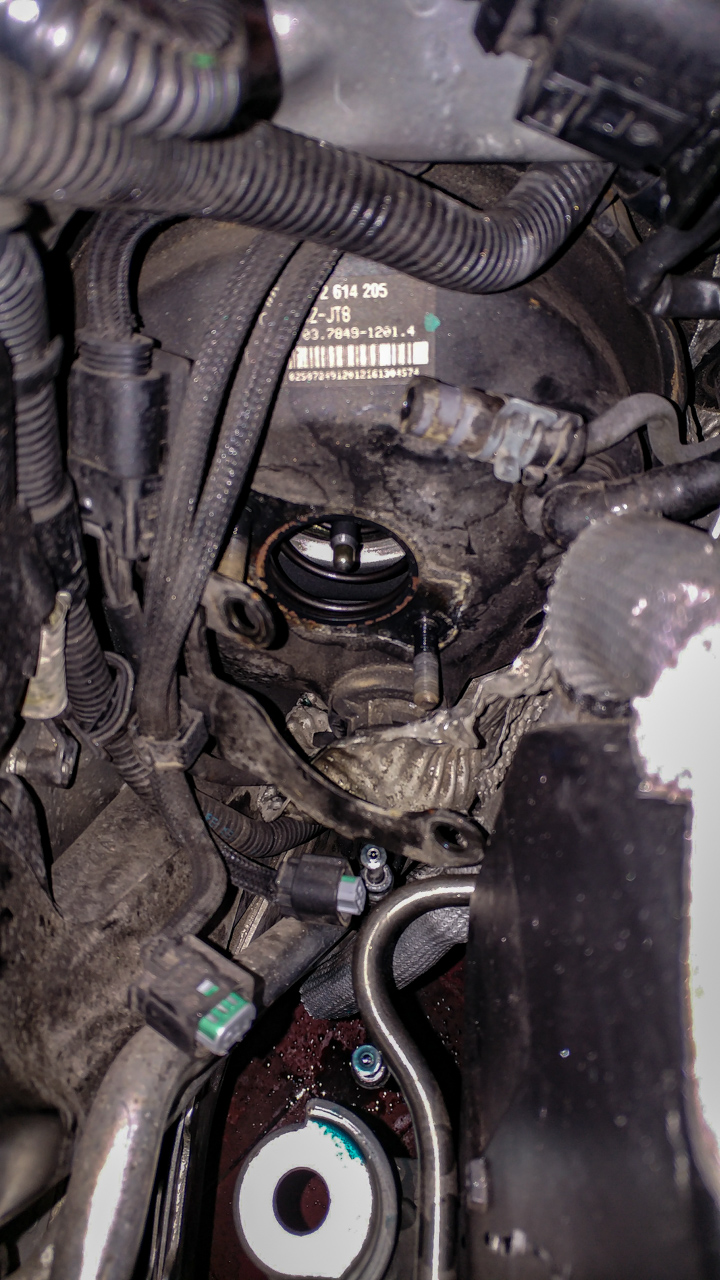
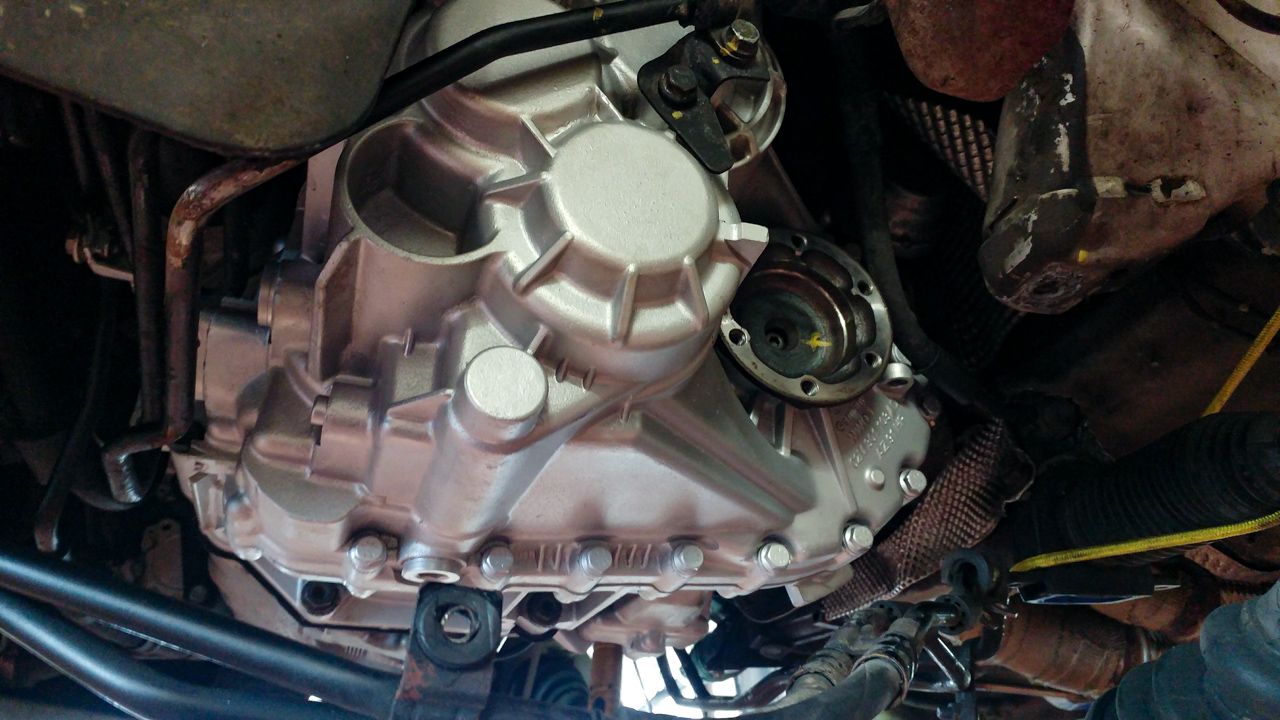
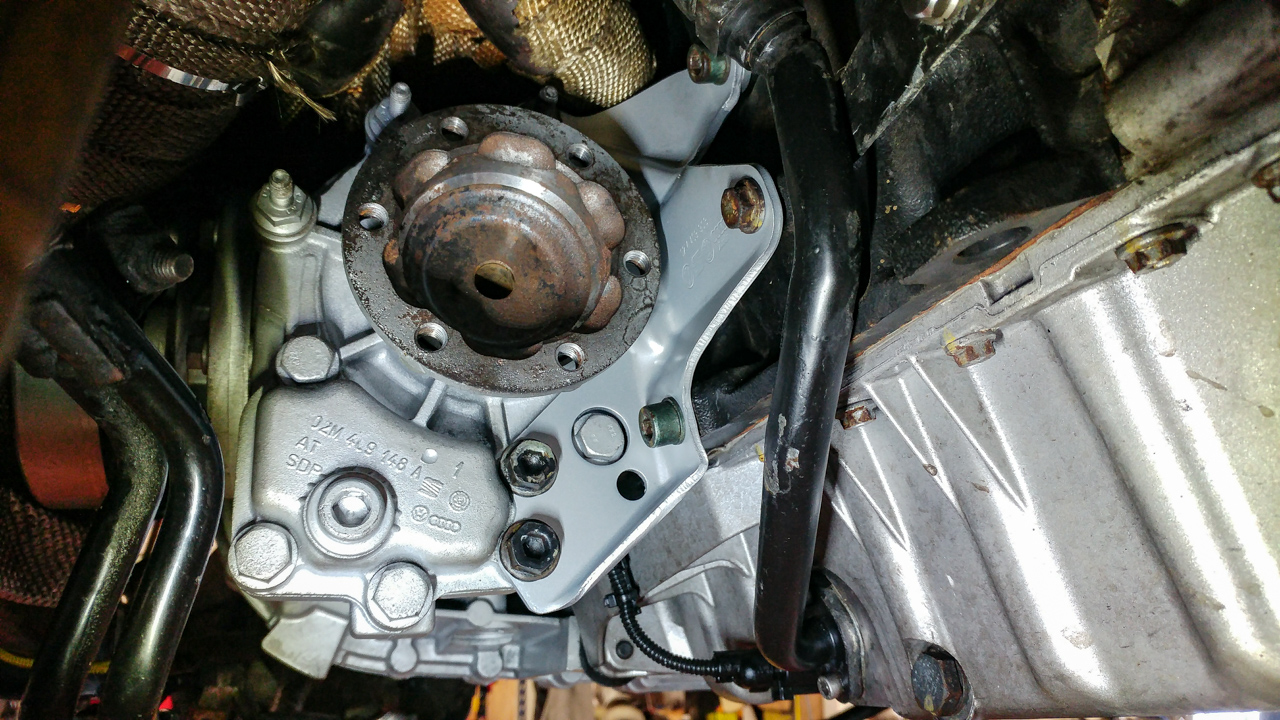
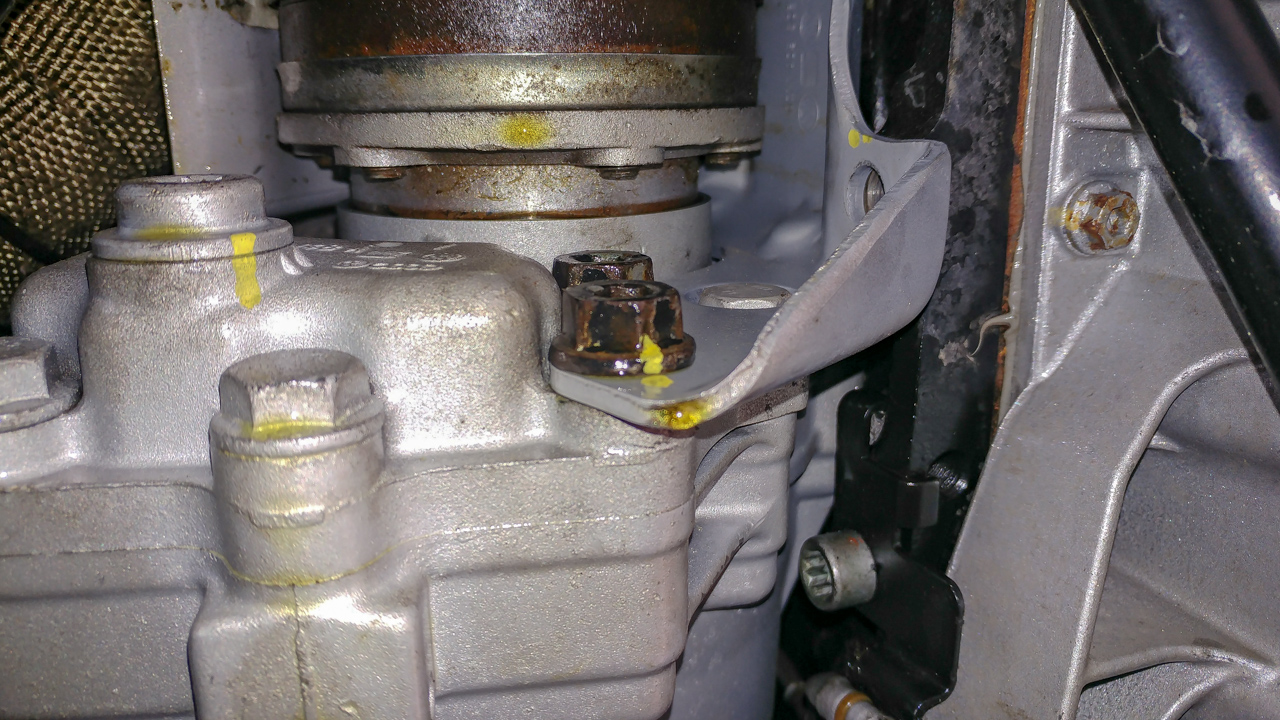
...and of course I cleaned up the reason I am doing all this in the first place... the transfer box... (I now have two of these... you never know :) )
20180407-96dpi-20180407_121441.jpg


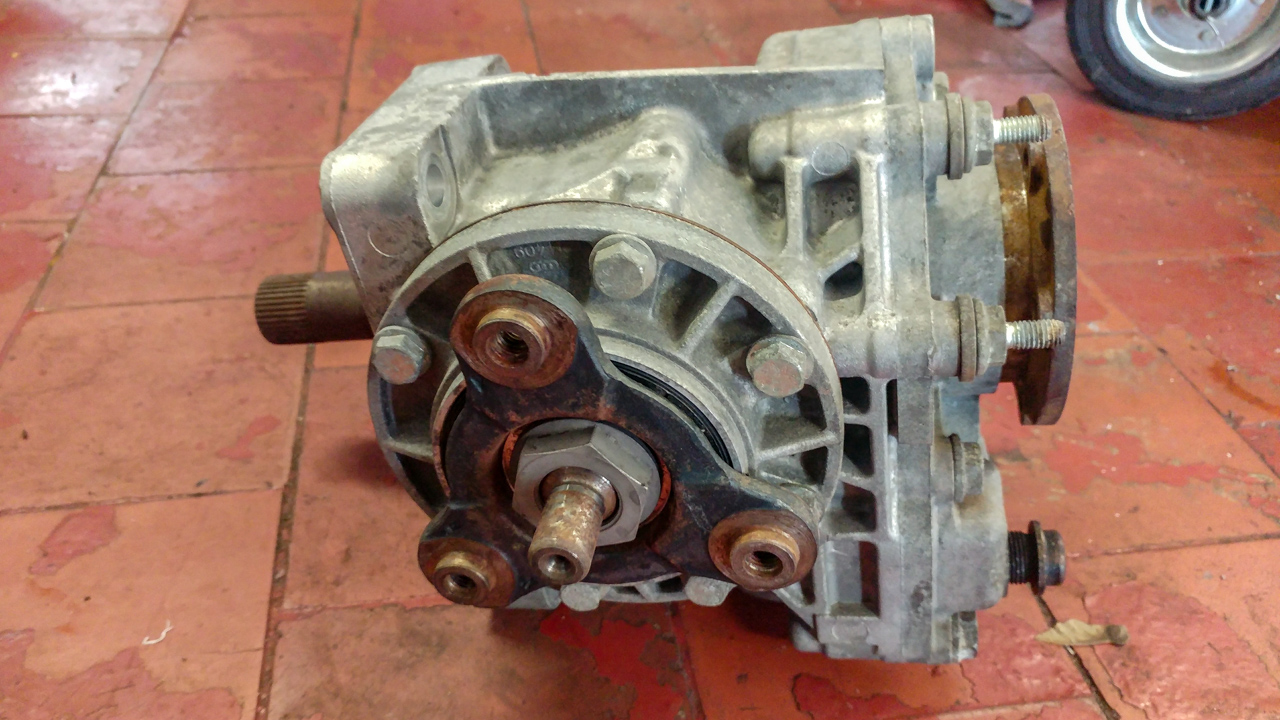
I was considering cleaning the case in the wet blast but... this would mean I would have to replace all the bearings as there is no way to be sure that the media is all clear in the crevices of the bearings... will just paint it black and be done :)

<tuffty/>
 
  • Like
Reactions: IPG, ToughlilT, S3JACKSON and 1 other person
Bit more done today...

The 02M forks have a habit of breaking the rivets that hold the selector tangs to the ... this leaves you stuck in gear or unable to select certain gears depending what you were doing at the time and which one decided to fail.

One solution is to use the steel forks from the later 02Q boxes... only issue with them for me at least is... they cost around £70 each, ideally require aftermarket bronze fork tips as OE as plastic and realistically were more an evolution to reduce the cost of the box (along with some other 'features' in the 02Q) rather than a solution to a fault...

Either way I couldn't quite justify the expense at this time so decided to modify the existing forks instead (if its good enough for Edd China then its good enough for me ;) )

Grind the head off the rivet...
20180408-96dpi-20180408_122646.jpg


...then punch it through...
20180408-96dpi-20180408_124055.jpg


Drill the brass fork for M8 clearance and tap the selector tang to M8..
20180408-96dpi-20180408_125839.jpg


I used a 12.9 grade M8 cap bolt... a little different to the rivet that was removed...
20180408-96dpi-20180408_134215.jpg


20180408-96dpi-20180408_132132.jpg


20180408-96dpi-20180408_132227.jpg


Cut off the excess and welded it...
20180408-96dpi-20180408_133226.jpg


The other selector fork in this group has two roll pins... these are generally not a problem but have seen people tap these for M8 too... I decided to leave the roll pins and just tack the selector tang to the shaft instead... I also tacked the roll pin...
20180408-96dpi-20180408_120954.jpg


Sorted...
20180408-96dpi-20180408_133404.jpg


Repeated this on the other riveted selector fork...
20180408-96dpi-20180408_144038.jpg


...but had to grind the cap screw down to allow it to clear the casing...
20180408-96dpi-20180408_142855.jpg


Finished up cleaning off the old sealant...
20180408-96dpi-20180408_145800.jpg


Now I just need to order a few new seals and I can begin final assembly...

Some of the other bits I intend to replace have arrived too...
20180408-96dpi-20180408_145518.jpg


I have also ordered a new concentric slave... for the cost of it it seems a little silly to not change it... I also intend to remove the clutch and flywheel to use the IE ekagrip shim to help prevent the flywheel from moving... I am hoping the DMF and clutch are going to be ok... can't really justify replacing that 'because its off' and its not done loads of miles so should all be good... but nothing surprises me about cars these days so will see how it is when its off and make a judgement call then...

<tuffty/>
 
  • Like
Reactions: Solberg, S3 Hilife, IPG and 3 others
LOL your heat shield is also cracked like mine.

Remember the input shaft seal too :)

Question. - what is the ball on one of the selector forks? 02Q doesn’t have them...
 
LOL your heat shield is also cracked like mine.
Not exactly... mine exploded as a result of the transfer box transferring its internals outwards... the one in the pic above is a replacement...

Remember the input shaft seal too :)
Already on the list...

Question. - what is the ball on one of the selector forks? 02Q doesn’t have them...
I suspect its used to locate the selector forks 'in gear' using the various sprung loaded ball jobbers in the case...

<tuffty/>
 
  • Like
Reactions: IPG
do you always end up with a selection of springs, nuts, bolts and bits of wood like me every time I do more than one thing at a time?
 
well lets just see if you end up with 6 reverse gears :D
 
  • Like
Reactions: S3JACKSON
Masked up the inside of the box with duct tape and plastic sheet so I could stick the case into the wet blast....
20180414-96dpi-20180414_113916_HDR.jpg


Came out quite well but there was a little ingress... not anything that wasn't easy to clean up and no where near the bearings so happy days :)
20180414-96dpi-20180414_132131.jpg


Fitted a new main shaft seal...
20180414-96dpi-20180414_141445.jpg


Using the oil I would eventually fill the box with I assembled the internals...
20180414-96dpi-20180414_150332.jpg


.....a thin bead of sealant...
20180414-96dpi-20180414_151816.jpg


Job done....
20180414-96dpi-20180414_164730.jpg


The selector needs a bit of faffing to remove and refit... the bit poking through the hole needs to go into the hole in the back to the cap...
20180414-96dpi-20180414_154958.jpg


...so used a screwdriver to help locate it...
20180414-96dpi-20180414_155112.jpg


...and tightened up the bolt in the centre to pull it in...

The transfer box I am using needed the locking collar removing as the gearbox already had one from its previous transfer box...
20180414-96dpi-20180414_164609.jpg


20180414-96dpi-20180414_161530.jpg


Never noticed it before as I normally remove the boxes own transfer box and didn't even realise the this collar was 'separate'...

Fitted the new concentric slave and test fitted the transfer box...
20180414-96dpi-20180414_165214.jpg


...then painted the transfer box :)
20180414-96dpi-20180414_170841.jpg


A good afternoons work... although as is always the way it found a way to bite me... lol...
20180414-96dpi-20180414_180342.jpg


Paint the box next and look to see when Bill will have a ramp free and be able to help recover the car to the workshop...

<tuffty/>
 
  • Like
Reactions: ToughlilT
A good afternoons work... although as is always the way it found a way to bite me... lol...

A nice hot bath will help you relive the memories of construction,top job mate :hi:
 
  • Like
Reactions: <tuffty/>
Just the confidence and knowledge to do that job from start to finish in the detail you did impresses me.
I just wish you lived near me lol.
 
  • Like
Reactions: <tuffty/>
Today I mostly.....

Painted stuff...
20180415-96dpi-20180415_130015.jpg


20180415-96dpi-20180415_151940.jpg


...and was traction control...
20180415-96dpi-20180415_131754.jpg


...for an mx150 mx5 turbo :)
20180415-96dpi-20180415_134733.jpg


With the box sorted I am hoping to get it fitted at the end of the month... along with sorting the brakes and fitting a DW65 pump...

Gotta love cars :)

<tuffty/>
 
  • Like
Reactions: tomjol, scotty_24 and SamHendry
I have to say the best part of the selfie on the back of the mx5-turbo is the fact that Bill has lost the letters on his laptop keys from brake fluid or inlet cleaner on his fingers.
 
I have to say the best part of the selfie on the back of the mx5-turbo is the fact that Bill has lost the letters on his laptop keys from brake fluid or inlet cleaner on his fingers.
How far did you have to zoom in to see that?!

Sent from my H3213 using Tapatalk
 
After being recovered by the Badger5 Recovery Service for prissy modified cars and talentless drivers (you know who you are!) I made a start...

Subframe off...
20180426-96dpi-20180426_163800.jpg


Carnage is surprisingly localised...
20180426-96dpi-20180426_164106.jpg


Considering how few bits I picked up off the road I was quite surprised to find it on this many pieces when I removed the transfer box...
20180426-96dpi-20180426_172718.jpg


Certainly looks like the case failed causing the gears to strip...
20180426-96dpi-20180426_172726.jpg


Block and gearbox look untouched which was a pleasant surprise...
20180426-96dpi-20180426_172846.jpg


In theory all I need to do is change the transfer box but obviously I had driven the car about a mile with next to no gearbox oil in it so not sure given the mileage it would have lasted...

Lets hope the box I took apart and put back together again holds up lol

Box out tomorrow... hoping to see if it will help get better access to the brake master cylinder as I need to change it...

<tuffty/>
 
  • Like
Reactions: Warsuperior, hydro s3 and superkarl
Sorry, youre right.. AST was not meant for you but for Nick(Prawn)..
Pretty carnage, but hopefully the gearbox itself is still in 100% working condition!
 
Pretty carnage, but hopefully the gearbox itself is still in 100% working condition!

Box was on its last legs... has a crack in the casing by the oil fill plug and was leaking plus making a few noises so was due a replacement... which of course I have :)
20180426-96dpi-20180426_173229.jpg


<tuffty/>
 
  • Like
Reactions: Warsuperior
Arguably but I'm not bothered myself... Not got much room with the exhaust mani either so would not entertain fitting without taking the engine out..

As I said before this kinda thing would be more delaying the inevitable than a cure and just makes it a time consuming and expensive process every time...

Last box lasted OK considering... If I don't launch then this one stands a chance. .

<tuffty/>
 
Got in early to get started...

20180427-96dpi-20180427_075843.jpg


While removing stuff to gain access to the gearbox I stumbled across another first for me...
20180427-96dpi-20180427_092242.jpg


Not sure how long its been like that... would have made the turbo noticeably laggy and no doubt have got me stumped for a little while as to why...still...

Gearbox out :)
20180427-96dpi-20180427_124008.jpg


Took the clutch and flywheel off...
20180427-96dpi-20180427_131300.jpg


All looked in good nick... and still a bit of meat left on the plate too
20180427-96dpi-20180427_131315.jpg


Next job was the master cylinder... what a c*ck of a job!!
20180427-96dpi-20180427_162037.jpg


Cleaned up the reservoir and fitted it and the new MC along with the pressure sensors...
20180427-96dpi-20180427_164639.jpg


Ironically refitting was a lot easier than removing it :)

Finished off a few other little jobs... fitted the replacement doughnut, re-wrapped the wastegate pipe and cleaned off some of the gearbox oil that had covered just about everything...

Replacement box in tomorrow and then sort the rear brakes... hopefully drive the old girl home Sunday :)

<tuffty/>
 
  • Like
Reactions: scotty_24, ToughlilT, hydro s3 and 3 others
Got in early to get started...

20180427-96dpi-20180427_075843.jpg


While removing stuff to gain access to the gearbox I stumbled across another first for me...
20180427-96dpi-20180427_092242.jpg


Not sure how long its been like that... would have made the turbo noticeably laggy and no doubt have got me stumped for a little while as to why...still...

Gearbox out :)
20180427-96dpi-20180427_124008.jpg


Took the clutch and flywheel off...
20180427-96dpi-20180427_131300.jpg


All looked in good nick... and still a bit of meat left on the plate too
20180427-96dpi-20180427_131315.jpg


Next job was the master cylinder... what a c*ck of a job!!
20180427-96dpi-20180427_162037.jpg


Cleaned up the reservoir and fitted it and the new MC along with the pressure sensors...
20180427-96dpi-20180427_164639.jpg


Ironically refitting was a lot easier than removing it :)

Finished off a few other little jobs... fitted the replacement doughnut, re-wrapped the wastegate pipe and cleaned off some of the gearbox oil that had covered just about everything...

Replacement box in tomorrow and then sort the rear brakes... hopefully drive the old girl home Sunday :)

<tuffty/>

Nice to see it getting fixed and back on the road for the weekend .... rear brakes you say...nice time for you and bill to make that kit
 
Nice to see it getting fixed and back on the road for the weekend .... rear brakes you say...nice time for you and bill to make that kit
Its being sorted I believe... I need to replace a caliper and just gonna clean up the disks and fit new pads for now... hopefully the kit will be sorted soon... :)

<tuffty/>
 
  • Like
Reactions: Goubo1
Nice job with the gearbox, always nice to read trough yours post, love pictures :)


Is it "normal" that 02m end up like that? Not had any problems with mine yet no idea what they are capable of really.
 
how much "rocking" play your DMF has?
Up and down i mean? and where did you buy that friction shim ekagrip? I was thinking of putting one in, since my clutch is out
 
Was that a forge supersize DV with the disintegrated spring?
Plan to use a higher rates spring next time?
 
Nice job with the gearbox, always nice to read trough yours post, love pictures :)
Is it "normal" that 02m end up like that? Not had any problems with mine yet no idea what they are capable of really.
02M is a strong box... but is only officially rated to 270ftlbs... 02M's have a couple of weak points at any level of power tbh... when modifying cars like this you are always pushing the design limits of components... in motorsport obviously stuff is reengineered for better reliability but still doen't make them bullet proof...

All things considered the gearbox components have done well...

how much "rocking" play your DMF has?
Up and down i mean? and where did you buy that friction shim ekagrip? I was thinking of putting one in, since my clutch is out

DMF has about 2 teeth rotation and minimal rocking... certainly nothing to be concerned about... so its gone back in

ekagrip was from Integrated Engineering...

Was that a forge supersize DV with the disintegrated spring?
Plan to use a higher rates spring next time?
Yes... had a yellow spring in which was perfectly fine (until it broke of course)... its now got some 'other' spring... possibly blue... its what ever was on the shelf.. :)

<tuffty/>
 
A bit late on the update but here it is...

Gearbox went in...
20180428-96dpi-20180428_150823.jpg


Transfer box went on...
20180428-96dpi-20180428_150805.jpg


On to the rear brakes... I fitted new pads and discs when I first bought the car... seems that I have had the use from them...
20180428-96dpi-20180428_183919.jpg


The offside rear was worse due to a seized piston...
20180428-96dpi-20180428_185628.jpg


the sliders were fine but the piston wasn't winding in... I mounted it back on the carrier without the disc which made it easier to exert more force to wind in... was a little still to start with but the last half of the travel was easy... needless to say I will be investing in new calipers in the near future...

I cleaned them up as best I could and refitted for now... didn't expect them to be that bad but have ordered some replacements as they only cost me £32 for the pair... not really worth arguing about at that price... I will replace them when they arrive...
20180428-96dpi-20180428_204102.jpg


Next little job was a coolant leak from the hose to the heater matrix... this has come and gone for a few years now... at first I thought the inside of the hose was compromised leading the the leak but just in case I bought some replacement fittings having been bitten by the coolant fittings before when I originally fitted the Forge hose kit... needless to say my intuition was spot on...
20180429-96dpi-20180429_100850.jpg


Hose looked ok so refitted with the new fittings and job done..

Next on the list of 'little jobs' was oil change, plug change to 8's rather than 7's and to bleed the brakes and clutch...
20180429-96dpi-20180429_153245.jpg


Once that was done I let the car down onto her wheels and fitted the rest of the stuff in the engine bay...
20180429-96dpi-20180429_185030.jpg


...looking a little 'undressed' there so on with the plastics...
20180429-96dpi-20180429_185909.jpg


Much better :)

Drove her out the workshop... no leaks, forward gears made the car go forward, reverse made the car go backwards (sorry @Stuart B :)) so ran her to temp and checked the levels...

Took a careful drive back to give the gearbox oil a change to slop around enough plus didn't really want to force a breakage just yet... parked up at home and as some as I got out that smell hit me like a train... gearbox oil :(

Sure enough there was a small 'puddle' forming under the car... ***!!... locked her up and walked away...

Monday I decided to have a look and see where it was coming from... my first thought was the input shaft seal... that would mean box off :(

Once jacked and supported I could see that the puddle was more at the back of the engine so first thought was the seals between the transfer box and gearbox... these were new so shouldn't leak but...
20180430-96dpi-20180430_154136.jpg


...that area was bone dry... disappointing as that would have been the easiest to fix...

I then noticed oil around the bell housing but that turned out to be engine oil... most likely from removing the oil filter as it collects on the lip of the block...
20180430-96dpi-20180430_153752.jpg


Doesn't look to be any gearbox oil coming from the bell housing which would be a sign that the seal was leaking or possibly through the bolts if I hadn't done the case sealant right... which seems to be the case here :/
20180430-96dpi-20180430_154123-Edit.jpg


Should be an easy fix that one though....

Moved to the side of the car to get a better angle on where the oil looked to be leaking from and....
20180430-96dpi-20180430_153749.jpg


Bingo!.... seems the drive flange seal on the end of the transfer box is shot .... have ordered up a replacement... even with the best discount in the world it came to £43!! for one seal!!...

With a bit of sealant around the case bolt, a bit of brake cleaner to get rid of the mess and this seal hopefully it should all be happy days...

Other than that the car drove lovely... gearbox is noticeably quieter than my old one which is good news and kinda suggests my old box wasn't long for this world before any of this (which I was aware of to be fair)

At the end of my stint I am feeling a little disappointed and most definitely broken... for an unfit old fart that sits in front of a computer all day long lifting 02M gearboxes in and out of a car while contorting to various un-before attempted angles left me rather stiff (fnarr)...

I did however spend the rest of my time eliminating cult members in Far Cry 5 and playing with the drip rig...
20180425 96dpi IMG 4396 Edit


20180425 96dpi IMG 4668 Edit


20180425 96dpi IMG 4689 Edit


20180430 96dpi IMG 4761 Edit


20180430 96dpi IMG 4814 Edit


Will sort the car out in the next couple of weeks... hopefully then I can get on the dyno and finish the tuning using the IECU :)

<tuffty/>
 
  • Like
Reactions: desertstorm
Nice stuff PT!

Is that a New old stock rear disc you refitted? Or is that the rusty one after a trip to the cabinet of magic and joy?

Definitely past it's best!

Shame about the minor set back, but this wouldn't be the minor modding thread without minor occurences!

Boosting soon my friend!
 
  • Like
Reactions: <tuffty/>

Similar threads

Replies
5
Views
1K
Replies
1
Views
1K
D
Replies
0
Views
702
Deleted member 65282
D