

As promised in my post about DIY retro fitting footwell lights (http://www.audi-sport.net/vb/showthread.php?t=58215) here is my guide to fitting puddle lights and warning lights.
I fitted these this morning, took about 6 hrs in total for both doors.
You'll need VAG-COM to switch on the puddle and warning lights, i would advise you to do this first.
You'll need to go to 42 and 52 for the door electrics.

Then in the coding option you'll need to add '64' to the number you already have in the top box, mine was 0000560 so the final number needed was 0000624.
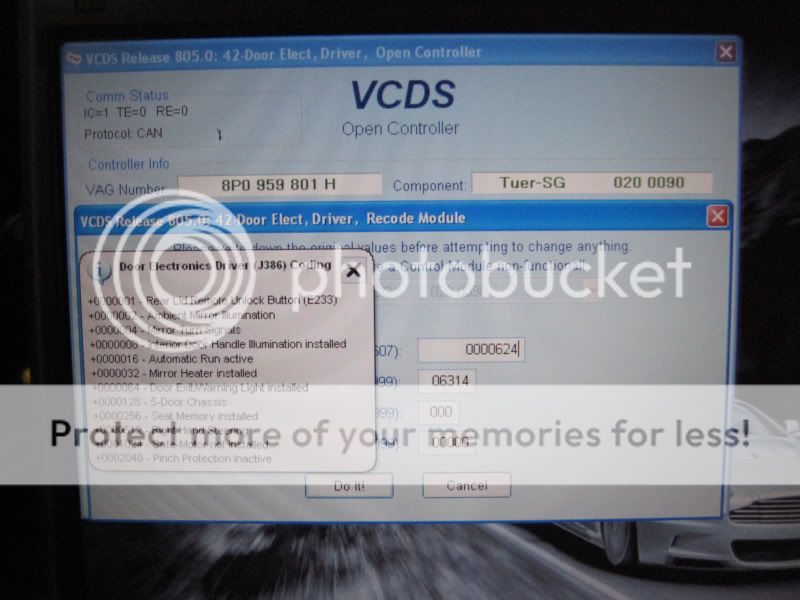
Do this on both 42 and 52.
This the vag com side sorted out.
Now for the hard work.
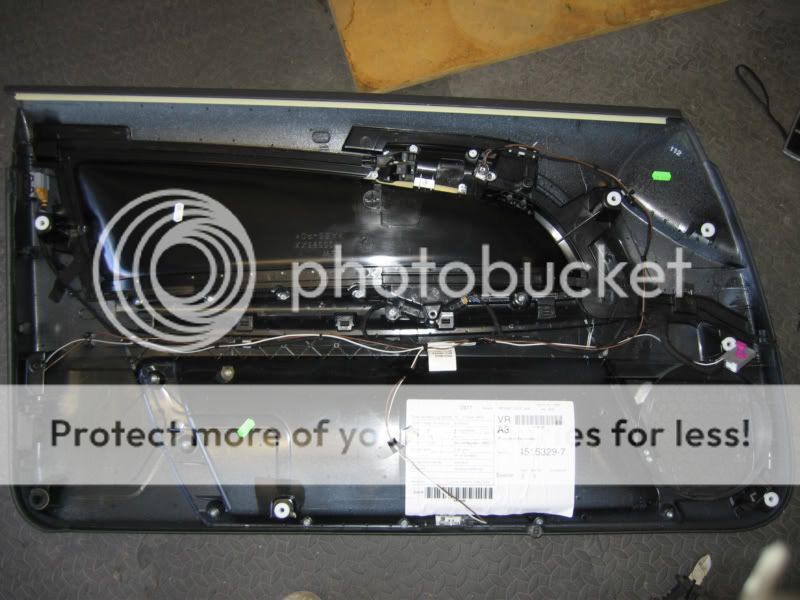
First of all the doorcards will need to be removed.
Remove the trim.
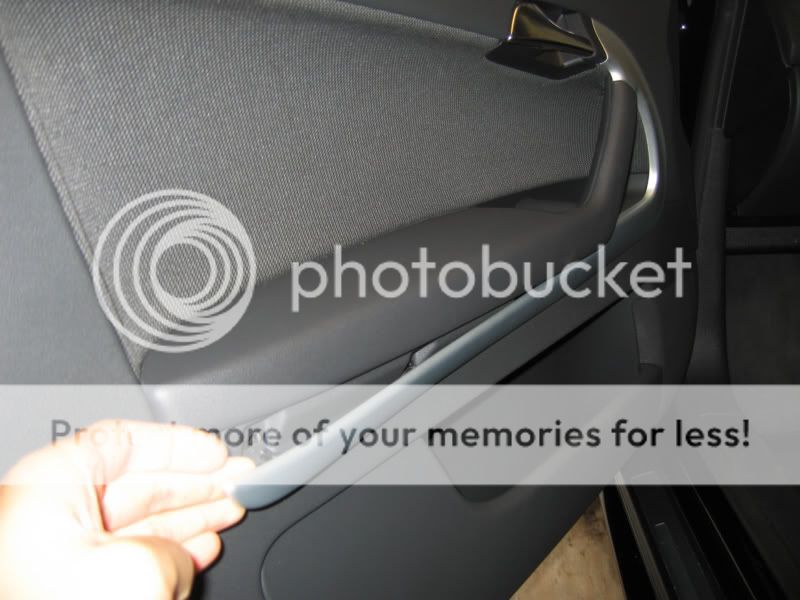


Undo the 3 screws holding on the door card.
Pull the door card off.
Undo the door handle cable and the electrical cable going to the door controller.
Remove the white foam stuff.
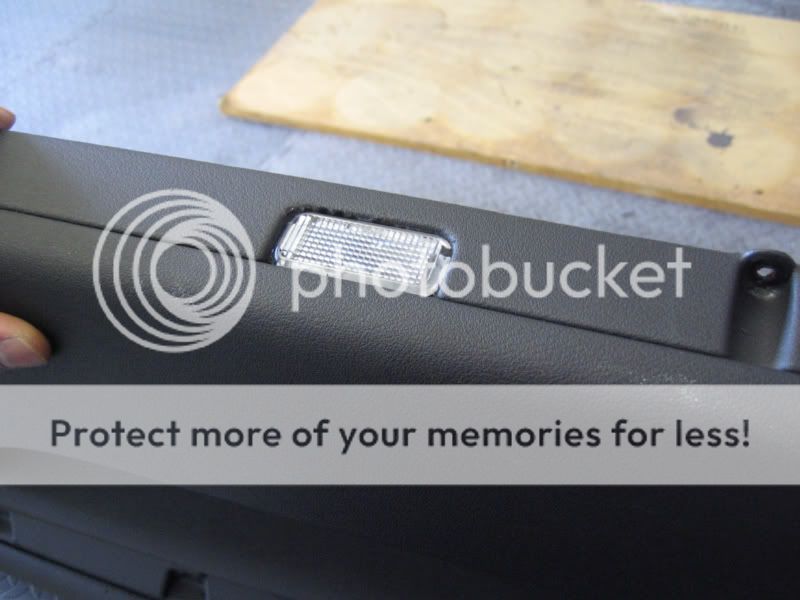
Now you'll need to remove some of the bottom of the door card for the light to sit in place.
I used a drill and used a small drill bit to drill around the rectangle.

Now the light can be palced into the hole, i used a tiny bit of superglue to keep the light in place.
Now for the wiring - DRIVERS SIDE
You can wire the set up in different ways but this is the way i have done it.
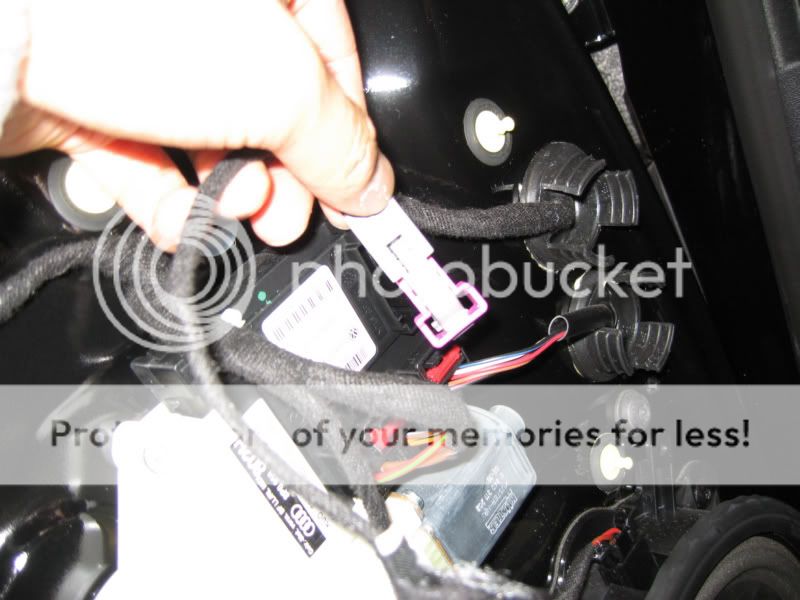
Remove the housing from the main connector (GREY).
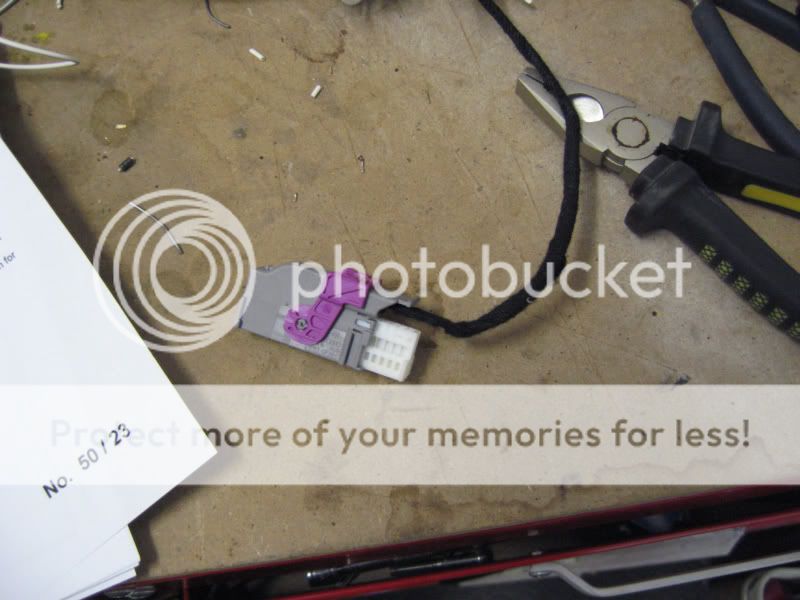
Now pin 1 is the supply and pin 2 is the earth.
You'll need to get the supply wire to both the puddle light and the warning light.
I used one wire which then split off into 2.
As for the earth this is the way i did it:
Unplug the connector going to the door lock switch.
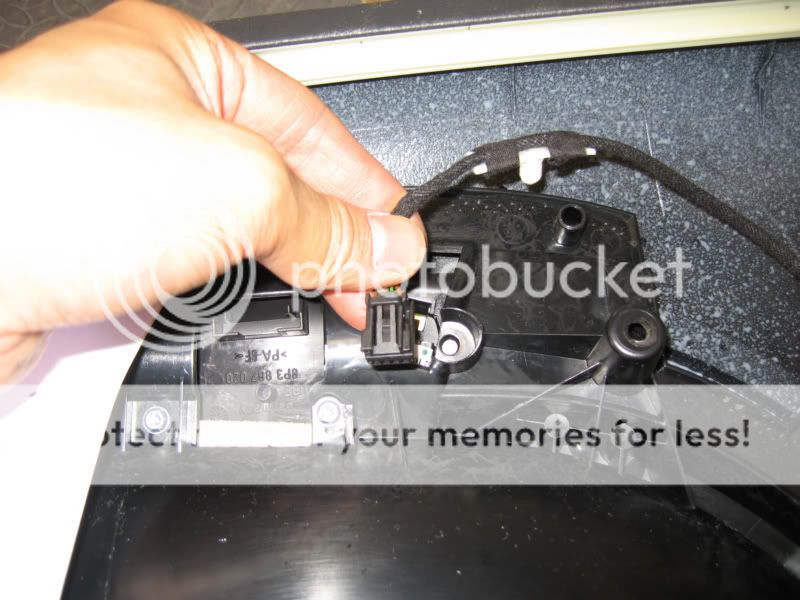
Undo the clip from the connector by sliding it away.
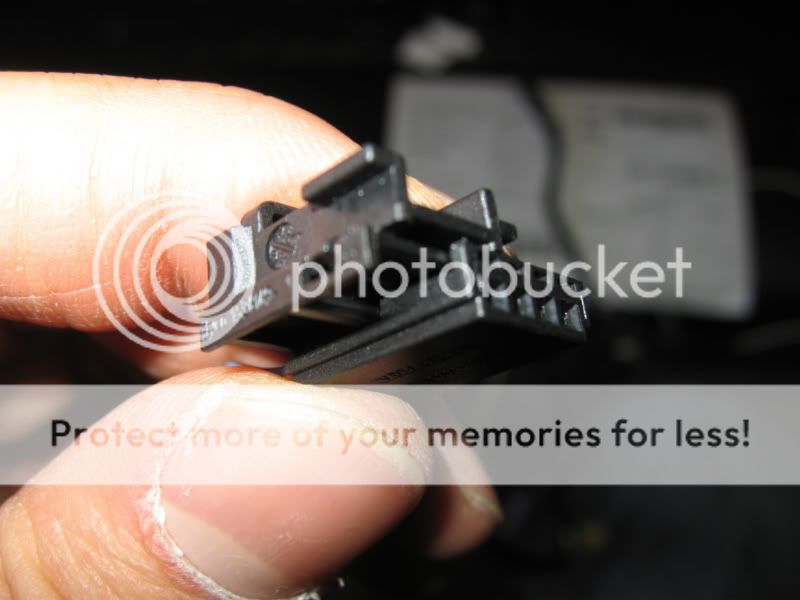
Remove pin 1.

Replace this wire with another earth wire going from pin one to the earth on the warning light.
The wire which was removed from pin one must now be soldered onto the wire you just put in.

Now you must solder an earth cable going from the puddle light to the earth wire you have just put in.
Put the connector back and plug it back into the locking switch.
Now put the main grey connector back together.
This is what mine looked like when completed.
Put the door card back along with the door handle cable and electrical connector.
The lights should go on when the connector is plugged back in.
Now for the PASSENGER side
The same goes for the passenger side but there is no locking switch to mess with.
As with the drivers door grey plug needs to be taken apart, pin one is the feed and pin 2 is the earth.
Supply the lights with an earth and a supply just like the drivers side.

Remember to tie the wiring down so it doesn't rattle when the doorcard is back on.
Put the door card back on and thats it really.
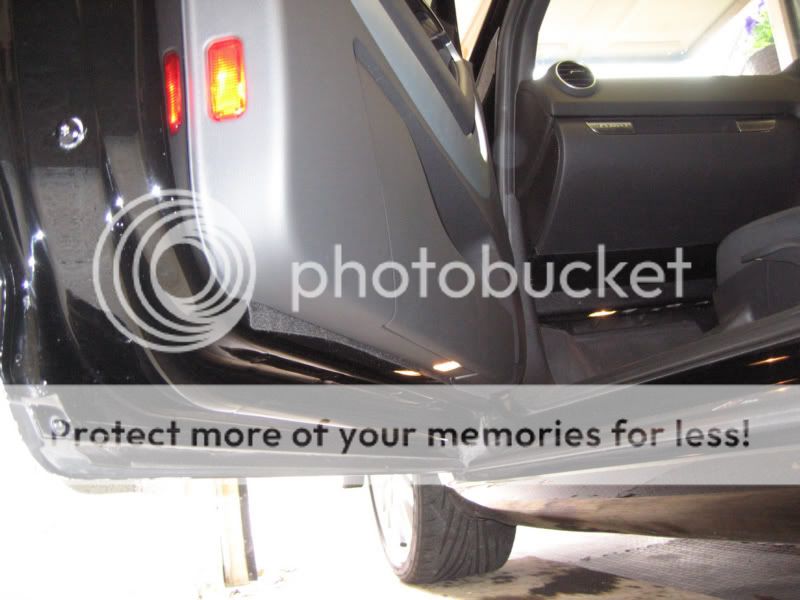
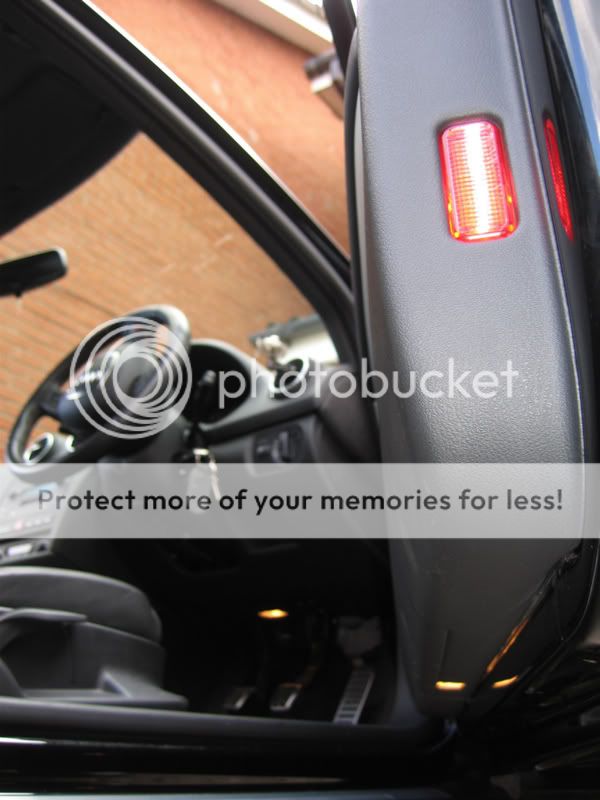
Here is the end result
If anyone needs any of the correct electrical connectors for the plugs etc then let me know as i have a supply of them.
Hope you find this post useful.
I fitted these this morning, took about 6 hrs in total for both doors.
You'll need VAG-COM to switch on the puddle and warning lights, i would advise you to do this first.
You'll need to go to 42 and 52 for the door electrics.
Then in the coding option you'll need to add '64' to the number you already have in the top box, mine was 0000560 so the final number needed was 0000624.
Do this on both 42 and 52.
This the vag com side sorted out.
Now for the hard work.
First of all the doorcards will need to be removed.
Remove the trim.
Undo the 3 screws holding on the door card.
Pull the door card off.
Undo the door handle cable and the electrical cable going to the door controller.
Remove the white foam stuff.
Now you'll need to remove some of the bottom of the door card for the light to sit in place.
I used a drill and used a small drill bit to drill around the rectangle.
Now the light can be palced into the hole, i used a tiny bit of superglue to keep the light in place.
Now for the wiring - DRIVERS SIDE
You can wire the set up in different ways but this is the way i have done it.
Remove the housing from the main connector (GREY).
Now pin 1 is the supply and pin 2 is the earth.
You'll need to get the supply wire to both the puddle light and the warning light.
I used one wire which then split off into 2.
As for the earth this is the way i did it:
Unplug the connector going to the door lock switch.
Undo the clip from the connector by sliding it away.
Remove pin 1.
Replace this wire with another earth wire going from pin one to the earth on the warning light.
The wire which was removed from pin one must now be soldered onto the wire you just put in.
Now you must solder an earth cable going from the puddle light to the earth wire you have just put in.
Put the connector back and plug it back into the locking switch.
Now put the main grey connector back together.
This is what mine looked like when completed.
Put the door card back along with the door handle cable and electrical connector.
The lights should go on when the connector is plugged back in.
Now for the PASSENGER side
The same goes for the passenger side but there is no locking switch to mess with.
As with the drivers door grey plug needs to be taken apart, pin one is the feed and pin 2 is the earth.
Supply the lights with an earth and a supply just like the drivers side.
Remember to tie the wiring down so it doesn't rattle when the doorcard is back on.
Put the door card back on and thats it really.
Here is the end result
If anyone needs any of the correct electrical connectors for the plugs etc then let me know as i have a supply of them.
Hope you find this post useful.


