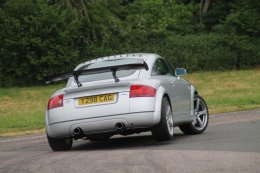
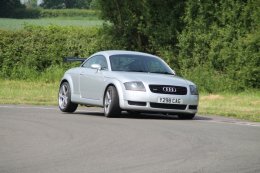
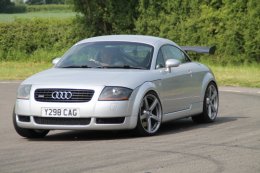
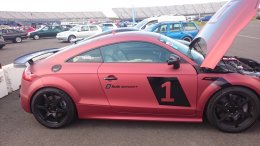
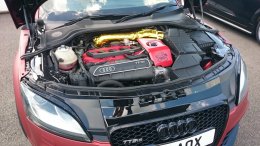
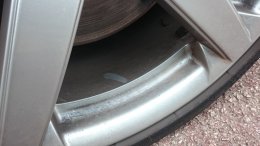
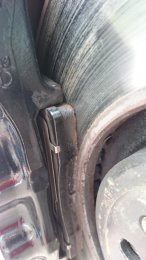
Mk1 TT 225 track day car, Officially a ten second car 10.8 seconds at 127 mph.

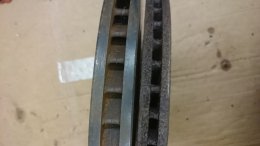
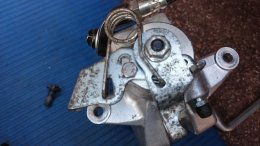
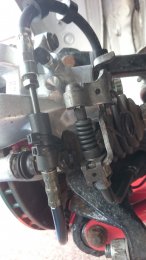
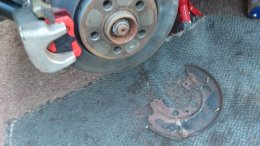
Changed the rear pads today to some red stuff items, I was going to upgrade the rear brakes to some larger items but with the reduction in weight at the rear end combined with the reduction in overall mass i feel that the rear brakes are probably going to be fine. To give them just a bit of help I have changed the pads to red stuff and removed the rear brake dust shields.
The dust shields were pretty rotten anyway and that gets rid of another 0.5Kg and it's unsprung weight too.
DSC 3285


I have been trying to decide on a tyre selection for the track for a while now. Initially was going to be 255/35/18 NS2R , They would fit on the 8.5 x18's fine but I am pretty sure I would have to do do something to fit the outside edge of the tyre inside the arch. They would also be very close to the strut as the Gaz Gold strut is a lot thicker than the OE one which has a flat on it.
Going to a 245 would give up a small amount of grip but make fitment easier, slightly lighter smaller tyres but they don't do an NS2R in that size damm.
They do a Federal RSR 595 which I have used before and they are OK but would I want to run around on a wet track with those on, I was trying to avoid having 2 sets of tyres.
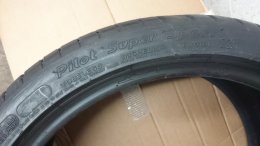
Looking at tyres on high performance cars the Michelin Pilot Supersport looked good. The 245/35/18 is fitted as standard to a lot of M cars and other high performance cars. The TT is a lot lighter now than these and doesn't run as much power as an M240i which uses these on the rear.
Looking at reviews people seemed to get good on track performance with them.
Came across an auction on Ebay from the BMW store for brand new 2 X 245/35/18 92Y MPSS for £147 delivered, less than £75 a tyre. Bargain I thought. Ordered 2 lots , so 4 tyres in total for just under £300 . Later decided that I would buy another pair as at this price I could sell them on if I didn't use them and still make some money.
They arrived on Monday , All 3 of them :evil: :evil:

DSC 3264

After looking on Fleabay the original ad had been changed to 1 x 245/35/18 .
After several E-mail exchanges with the BMW store they are going to honor the original ad, seems it was human error , which is what it usually is 95% of the time when this sort of thing happens. So another 3 tyres should be winging there way to me.
These tyres are close to the best road tyre you can get and in tests I have seen aren't that far off the ultimate pace of an NS2R. I can't believe how hard the sidewalls/ bead are on these , I bet the tyre fitters are going to be cursing me.
As new they only come with just over 6mm of tread in the outer groves and 7mm on the inner grooves so another nod to performance and handling. And at 10.1Kg they are light for this size of tyre, a 245/35/18 RSR weighs in at 11.8Kg when new.

DSC 3286

DSC 3287


Hopefully get them fitted next week , 1 more thing ticked off the list.
 
  • Like
Reactions: 45bvtc
Had a look through the Nefmoto forum to see if it's possible to log the N249 valve output to see when it's open and how long it's open for. You can't do it with VCDS but you can do it with ME7.5 logger.
The variable you log is B_ldsua, this shows as 0 when the valve is closed and 1 when it's open.
I was interested in seeing if the valve opened at part throttle as I have read a few descriptions of it's activity whereby the valve opens under cruise conditions to let air into the engine bypassing the turbo when the pressure in the manifold is less than atmospheric.
At the same time I found a very interesting document that describes the operation of the N249 using extracts from the functional diagrams.


I did a lot of driving around at slow part throttle speeds and found the N249 never opens, Indeed it states in the previous PDF that this functionality is available but will never work as the MAP sensor never sees a vacuum and the functionality is effectively disabled.
So onto what happens when your accelerating and you lift to change gear.
Here is some mapping I did of a 3rd gear into 4th gear run, I logged the variables at 20 times a second so there's lots of data.Done on a private road.
Air temp was around 4 degrees so I think the intercooler is showing that it's working well. This was also a run to get some data before I change the fuel pump over, also interested to see if the change on the intercooler piping has made any difference.
Change up at around 40.65 seconds into 4th and keep going. You can see the N249 actuates as soon as you lift and the MAF readings quickly fall to 0 as all the pressurised air fills the TIP, There is reverse flow through the MAF which is the woosh you hear. At 40.9 seconds the MAF is showing zero and fuelling is cut back as still off the throttle.
Back on the gas at 41 seconds and the valve immediately closes but it takes another 0.4 seconds for boost and fuelling to pick back up.
Then the real funny thing happens, I have felt this occasionally before and was never quite sure what it was but now know.
At 44.45 seconds I lifted fractionally and the pedal reading dropped to 95%, the dump valve opened immediately and stopped open regardless of the fact that I still had my foot planted.
You can see the boost drops off , the fuelling goes rich and the MAF readings drop as well.
It felt like I was suddenly driving up a steep hill the lack of acceleration was very noticeable.
Looking at the description of how the N249 works in the other PDF it's doing what it's supposed to do.


"If delta boost error * PIDLDSUA + current boost error is greater than ( > ) output of KFSDLDSUA then condition = true
(current[actual boost - requested boost] - previous[actual boost - request boost]) * 3 + current[actual boost - requested boost] > 200hPa
Even if you keep actual boost constant, a decreasing request boost (letting o gas) with cause this condition to be true."

At high revs, this was over 6000 rpm the requested boost is falling and boost levels continue to drop as RPM increases.
So am going to try disconnecting the N249 and do some logging, I would like to see what kind of pressures occur in the system and if gear changes are possibly quicker with faster recovery.
 

Attachments

  • DV FUNCTION- N249.pdf
    716.9 KB · Views: 672
  • 22-02-18 drive around accel runs to log n249 activity edit.pdf
    575 KB · Views: 327
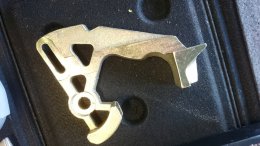
In other news after seeing a post the other day on short shifters I decided to buy one as it's something that should really help on the car.Just search on Fleabay for Audi 6 speed short shifter, around £30 and give upto 40% reduction in shift length.

https://www.ebay.co.uk/itm/Audi-TT-...t-Shifter-Quick-Shift-Kit-WG238/322845417583?

Compared to the other offering the casting is not the best quality.

DSC 3291

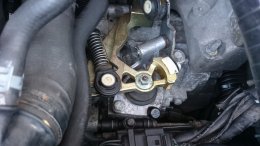
But it's not going to brake and it fitted well. My car has the older type socket and ball linkage ends so to get the cable end off the arm required the use of a thin 17mm open end spanner under the head of the end of the linkage to prise it off the ball.
Had to use a small puller to get the old one off the shaft but it wasn't too stuck.

Set the pin on the new short shifter to give a 33% reduction in throw. Found this video which is the actual part I bought off Fleabay.


DSC 3292

DSC 3293

It works well and definitely feels like it achieves the desired result.
 
Last edited:
  • Like
Reactions: AlexA4Avant
Now replace the selector cable bushings with brass ones and you'll have the real deal :)
 
looking at doing the same to mine

Sent from my SM-G930F using Tapatalk
 
Now replace the selector cable bushings with brass ones and you'll have the real deal :)
Had a quick look into this, Unfortunately my car must have been one of the last to have the ball and cup end fittings on the selector cables. But looking at on line videos there is a lot less movement in these than the replacement that came after. This is the reason the fitting of bushes improves the change and makes it more direct.
There is very little movement in the Ball and cup solution.
 
The rest of the tyres arrived today from Ebay. Good job the wife doesn't read through this. She may object to piles of tyres in the kitchen, but they are new.
£442 delivered for 6 new Michelin Pilot Supersport 245/35/18 XL tyres is a reasonable price.

DSC 3297

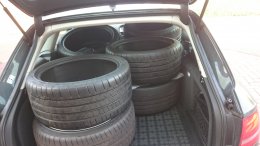
Loaded up the 18 inch wheels off the TT and 4 of the tyres in my car to get them fitted. I am always glad I drive around in an estate car when these kind of things come up. No chance of getting a spare set of wheels in the back of the TT now with the scaffolding in there. It's even less practical than it was before.

DSC 3298

If I took out the passenger seat I could possibly get a wheel or two between the seats and the roll cage. But you can only get two wheels in the boot.

DSC 3295
 
  • Like
Reactions: Jakes2514
Fixed the alarm siren on the car today.
Whilst I had all the interior apart and the wiring in pieces I had the siren disconnected for quite a while. I decided to connect it back up, as without the metal bracket it only weighs just under 200g, Think I can spare that.
It didn't work .
Took it apart and found the internal batteries were well past there best. And the one battery connection was pretty corroded.
DSC 3279

This seems very common and the fix is quite well documented. So got on the Bay and ordered some batteries to replace the existing ones.

DSC 3288

After soldering them together and wrapping with some tape and wiring to the connections.

DSC 3290

Put it back in the car and tried it. It didn't work but I could hear a very very quiet noise coming from it when it should be working. It sounded like the siren sound but you could barely hear it.
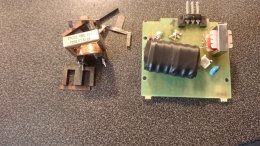
After some investigation I discovered the output transformer for the piezeo siren was open circuit on the secondary windings. Removing the Transformer and looking closely with a high power magnifying glass you could see the wire had rotted due to the corrosive stuff put out by the batteries leaking.
Not to be beaten back on the bay and found a transformer for a reasonable price that would do the job. Whilst googling the transformer part number EPCOS PRC MN F005 V1 0109 I found a thread on here where somebody had a similar issue and was looking for a transformer. These high power piezo sounders typically need 150-200v to work correctly.
I used an Eagle LT700
https://www.ebay.co.uk/itm/Eagle-LT...sformer-Pri-1k2-Sec-2x-3r2-EW20/142309705836?

Not being sure of the winding ratio on the original transformer I just tried initially using half of the secondary winding on the LT700 as it's a centre tapped secondary. If it wasn't loud enough then I would use the full voltage available on the secondary. Anyway it worked very well, If anything it's louder than it was before. Result.
A total cost of £12 to fix it.

DSC 3301
 
top result deserts will have to look at my alarm siren on my vrs

Sent from my SM-G930F using Tapatalk
 
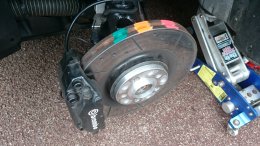
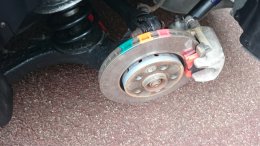
Unbelieveable change in the weather today, really nice so decided to paint the brakes and fit the track wheels to see how they look and if the tyres fit OK.
I bought this temperature sensitive paint a few years ago, not used it before so be good to see what it does. I don't expect the rears to get too hot but the fronts will. The paint blobs turn white or yellow after 10 minutes at specific temperatures,
450 , 550 and 630 degrees C.

DSC 3308

DSC 3309


Fitted the 18 inch wheels, dropped them on the scale to see what they come in at. 21.2 Kg isn't bad, Could probably save 1-2Kg a wheel with some really light weight wheels however these would cost a lot more than I paid for these. Also be a shame to ruin expensive wheels as I have read the brake dust from the DS1.11 pads is pretty evil stuff.

DSC 3318

Changing the wheels is a lot easier now as with the cage in the car and a lighter rear end the front and rear wheels come off the ground together when the car is jacked up. The cage definitely makes the car a lot stiffer.

DSC 3316


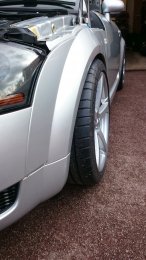
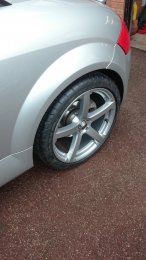
The fronts stick out a little bit, but looking into the legality of wheels and tyres sticking out from the bodywork it seems a bit vague. The construction and use rules seem to state that the wheel and tyre need to be covered by a wing to catch any water / debris thrown up by the tyre. Well the do cover 98% of the tyre so hopefully they will be OK. I know I have seen a lot worse on 4x4'S and even some cars.

DSC 3320


DSC 3322

I have just enough clearance I think between the strut and the inside of the tyre a good 5mm. The part thats really close is the rim protector bead, so this isn't going to move far.

DSC 3315


And the shorter 6 inch front springs mean the lower spring platform clears the top of the tyre.

DSC 3314
 
  • Like
Reactions: Jakes2514
I would say your good there storm

Sent from my SM-G930F using Tapatalk
 
Cheers Alex, Having driven around in it can't hear any rubbing. These Michelin tyres are more noisy than the other tyres I have had on the car, probably as they are wider.
Changed the fuel pump today for a DW65V. I was going to take some pictures but having fuel all over my marigolds I thought better of it.
The wife wasn't happy I pinched her washing up gloves but I bought her a new pair, I changed a fuel pump once before and used some latex gloves and they just disintegrated in the petrol.
Having no interior makes life slightly easier, just removed the front drivers seat, Takes about 2 minutes to undo the 4 bolts.
The top of the pump. Cleaned the dust off the top so none ended up in the tank. Tapped the lock ring around with a hammer and large screwdriver. Came off with no issues.

DSC 3325

Original pump removed after disconnecting the pipes and connector that run to the other side of the tank. Really surprised how much fuel was in the tank despite it saying the range was 0 and the fuel tank was empty.
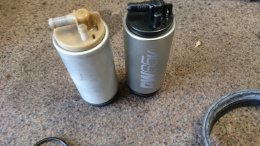
The old and new pump together.Not really a lot in it.You would almost think they just too original pumps and added a sticker.

DSC 3326


The hardest thing about replacing the pump was getting the old pipe off the pump outlet. They are hard plastic and are pretty firm. After making sure all the petrol was removed I used an electric heat gun to warm the pipe a little and it came off easily then.

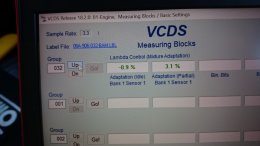
Did a check of the fuel trims and then cleared the faults on the ECU to reset them, hopefully get the partial one a bit closer to 0. I have a permanent fault on the ECU with the crash sensor wire being disconnected from the airbag.

DSC 3327
 
  • Like
Reactions: Jakes2514
I was wondering what conclusion you had drawn from the N75 bypass or are you still testing? Glad to see you have your hands on a 1.8t engine even if it is the wrong way round. Keep up the good work Karl.
 
Cheers Calum, I presume you mean the N249 not N75. I haven't by passed it as such.
Some people completely remove it, I have just connected the pipe that used to connect to the N249 valve to the vacuum feed from the manifold.
Thus the N249 valve piston is seeing what ever is in the intake manifold.
Did some testing to see what pressure differential you need across the N249 to make it open. With no pressure applied to the piston on the dump valve, ie atmosphere on a standard 710N valve you need 11 psi of pressure to get the valve open when running in the normal direction and 15psi if you reverse the flow through the valve.
Secondly I applied a vacuum to the piston and measured how much vacuum you needed to open the valve just so you could blow through it.
I was quite happy to see that the 710N OE valve is very similar to the green spring 008 which it's meant to be. The uprated springs in the 008 mean you need more of a pressure differential and more of a vacuum to open the valve.
So I am running ATM with the yellow spring in the 008 and it seems pretty much the same to me TBH. It's just I won't ever run into the issue I saw when I was testing where a small lift at high RPM opens the N249 and then because of the way it works it stops open.
Now as soon as you lift off the throttle valve will start closing reducing the pressure in the intake manifold to a point where the N249 will open and start dumping boost. will need to do some logging which I may do this weekend . Will also check the fuelling as the new pump seems to have cured the high RPM fuel pressure drop.Checked the Fuel trims and the high RPM trim was at 3.1% now 0.8% after just 20 miles.

mm reading is mm of mercury

710N OE valve
Vacuum applied at piston to open valve to allow air through.
opens 210mm -4.1 psi
closes 200mm -3.9 psi

Pump pressure applied to valve intake or outlet with atmosphere on intake to open valve
Normal inlet 11 PSI
Reversed outlet 15 PSI

Forge 008


Green spring
Vacuum applied at piston to open valve to allow air through.
opens 225mm -4.3 psi
closes 175mm -3.3 psi

Pump pressure applied to valve intake or outlet with atmosphere on intake to open valve
Normal inlet 10 PSI
Reversed outlet 17 PSI


Yellow spring
Vacuum applied at piston to open valve to allow air through.
opens 325mm -6.3 psi
closes 275mm -5.3 psi

Pump pressure applied to valve intake or outlet with atmosphere on intake to open valve
Normal inlet 12 PSI
Reversed outlet 20 PSI


Blue spring
Vacuum applied at piston to open valve to allow air through.
opens 375mm -6.3 psi
closes 325mm -5.3 psi

Pump pressure applied to valve intake or outlet with atmosphere on intake to open valve
Normal inlet 15 PSI
Reversed outlet 22 PSI
 
Yes, I meant the N249, I don't know how I got that wrong? I would say throttle response is much improved with the n249 taken out of the equation. The DV is responding directly to the throttle without electronic interference. This was how the B5 was set up and they seemed to manage without any problems, it's possibly down to refining the driving experience.
When I bypassed the N249, I put the vacuum line from the DV straight to the inlet and the N249 was looped round to where the DV vacuum line was but that sounds different to the way you have done it?
 
Yes I have just put the dump valve straight to the intake manifold. All the rest of the N249 valve and gubbins will be removed.

Fitting an oil catch can as this seems to be a bit of a requirement for the 1.8T engine when it's run hard on a track, they seem to breathe a bit heavily. Better to keep the oil out of the intercooler.
Looked around for a suitable can, didn't want something too big I can empty it regularly plus it's bound to weigh more. Needed to be 19mm connections to keep with 19mm hose.
Found what I wanted on Fleabay, where else.
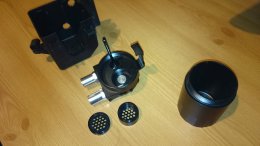
Has 19mm connectors , very well made from machined alloy and anodised black. Comes with a dip stick so you can quickly check the oil level. Has Two baffles that should result in the oil ending up in the bottom of the container and the vapour passing through to the engine.
It comes with a filter if you wanted to vent to atmosphere, But I am happy it will catch nearly all the oil so little will get through to the intake.

DSC 3334

As I am no longer using the N249 valve or associated parts,the Forge 008 is connected to one of the vacuum points on the intake manifold. The original box that held the ECU relay, then the N249 relay has been repurposed again to hold the oil catch can.

DSC 3338

Takes a few seconds to dip the can and if it needs emptying I can quickly unclip it from the bulkhead and empty it. That's the plan anyway.

DSC 3339

19mm rubber pipe, 90 degree bend and some clips on the way so can finish this off quickly some time in the week.

All in for the catch can, pipe, 90 degree bend and some clips £40 . A substantial reduction on the cost of something like the Forge catch can £250????? .

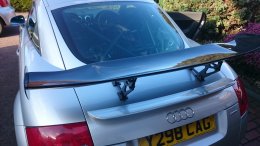
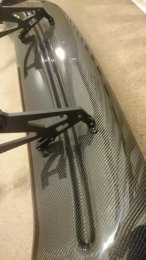
Also ordered a shelf for the back of the car, I can use it in the garage to store stuff. Been looking for a while and several cars on the Facebook TT Track page seems to use these or very similar items. Some cars have much bigger wings or wings mounted higher up which I am aware is better. I think this will generate a good bit more downforce than something like the V6 spoiler as this is a wing and is a lot bigger than a V6 spoiler. It's adjustable to, only having 275bhp don't want to put a monster whale tail on the back of the car, It's not a time attack machine :) .


https://www.ebay.co.uk/itm/291981606079 £170 delivered.

S l1600
 
Well the new garage shelf (wing) arrived today, pretty quick as I only ordered it Saturday and it's Come today. They come from Germany with UPS.
https://www.ebay.co.uk/itm/291981606079
Didn't look too good when the parcel arrived it had a few holes in the box but fortunately the wing is very well wrapped and protected so not a mark on it.
Quality looks very good and considering it was only £170 delivered I think it's quite reasonable value for what it is.
Going to get some stainless screws and nuts though tomorrow as the hardware supplied looks OK, I think long term stainless stuff will be better.
Just propped it on the car to get an idea for the size and proportions. It is pretty stiff and quite light.

DSC 3365

DSC 3356


DSC 3357

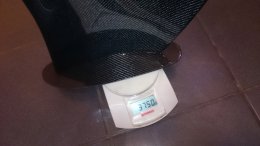
Weight comes in at 3.75Kg for the wing complete with all the brackets and fixings.

DSC 3360

I have ordered some carbon fiber vortex generators so will have a play with them before I put the wing on.
 
  • Like
Reactions: Jakes2514
Fitted the rear wing this afternoon. Quite easy to fit just 4 holes but took some measuring to try and get them just in the right place . You don't want to drill a hole and then find it's in the wrong place.
I was going to replace all the bolts with stainless items but the place I get all my hardware from carries very little in the way of stainless so just got some better quality bolts . They only had 12.9 so the spoiler shouldn't be going anywhere.
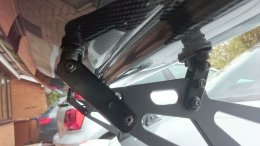
The weak point of the fixing for this I think is the brackets that secure to the wing.
They supply pozi drive screws which I replaced with cap head bolts and also fitted some 3m tape to provide a better fixing.
There appears to be a metal plate bonded into the wing and this looks to have been drilled and tapped . It's stainless for some reason as it is non magnetic.
original fitting
DSC 3388

3M tape added with 12.9 bolts which can be tightened more positively.

DSC 3391

Marked the centre line on the boot and the centres for the holes. Offered up the wing with the bolts fitted just to make sure the bolts lined up with the holes to be drilled.Much easier to do this rather than try and fill a hole if you drill wrongly.

DSC 3392

The bolts came through in just the right place. Just where the skin is doubled so it's nice and strong.

DSC 3393

I think it looks OK. Adjusted it too 7 degrees just to try it out and make sure it's still attached to the car. It's actually very sturdy.

DSC 3400


DSC 3401


DSC 3398
 
  • Like
Reactions: AlexA4Avant, Jakes2514, Blu-iTT and 1 other person
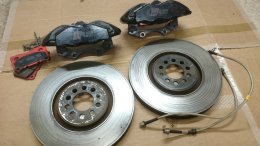
I must stop looking at the classified ads. Spotted one a few weeks ago on here, @superkarl selling some RS3 /TTRS calipers with nearly new Red stuff pads and 334mm R32 discs.They use an Epytec adaptor .

DSC 3368

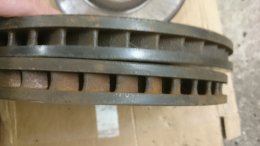
The brake pads on these calipers are about 40% bigger than a standard 312mm caliper on the left or a Brembo Cupra R DS1.11 pad on the right.

Standard 312mm red stuff TTRS  CUPRA R DS111

This pad profile is also the same as used by EVO's and Subarus so the pad choice is immense and the prices are not too bad.
Hopefully I won't need such a hardy pad with the very much bigger pad area and improved disc size.

Weighed a few bits and pieces just to see how much weight this would add compared to a standard 312mm system.
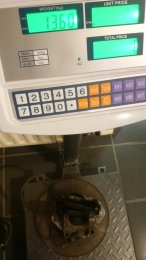
Weighed a 312mm caliper, carrier , nearly new pads and a well used disc . 13.6Kg

DSC 3380

The 334mm discs have no wear on them, there is no lip unlike the 312mm items. The complete caliper . carriers , pads and hose come in at 16.4Kg

DSC 3381

The RS3 caliper weighs 5.1Kg complete with pads , carrier and hose, where as the standard 312mm caliper comes in at 5.7Kg for the same. so the difference in weight is with the discs, which is what you would expect when comparing them.

DSC 3382

The 334mm discs are handed as well so the vents are directional.

DSC 3384

The 334mm disc is 11.3Kg and the quite worn 312mm disc 7.9Kg, I would assume a newer 312mm disc would come in a bit heavier but there is 3.4Kg difference between them. Which is quite a lot, but as the weight is located close to the centre of the hub rather than a lot further out as it is with heavier wheels and tyres the effect isn't as great.

The Red stuff pads will be going on my A4 as they are the same Pad and the existing red stuff ones are due for replacement shortly. Now need to decide what pads to fit, been looking at possibly CL RC5+ , Mintex M1155 ??.
 
Well got around to fitting the new brakes and doing a few other jobs with this nice weather we have been having.
After pondering on brake pad choice and looking at what was available, being such a popular pad size there is much choice.
I didn't want a full race pad as I drive the car on the road as well, I found that the Aston Martin DB9 vantage uses the same size pad on it's front brakes, Indeed the TTRS caliper is pretty much the same as the Aston Martin item, they are Interchangeable .
Bearing in mind the Aston weighs about 500Kg more than my TT and has 500bhp out of it's V12 running to 190mph I had a look at it's OE pads.
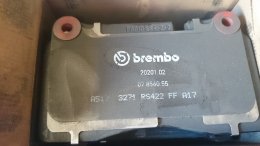
The pads from the factory are Pagid RS4-2-2 compund, quite similar to RS4-2 racing pads but designed to run on the road. They give up some of the high temperature capability to be less noisy and work from cold. Reading some of the Aston forums owners had tracked their cars with these pads although for serious work the pads in these cars needed to be upgraded. But as I have nearly 500Kg less weight and 200Bhp less I suspect they will work well.
OE pads make a lot of dust and I can believe that looking at them in the box.There is loads of black dust all over the pads and in the box and these are new.

DSC 3492


The Aston Martin Part number

DSC 3493


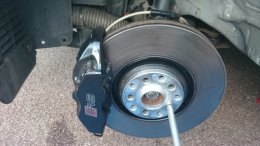
The caliper and disc fitted on the car.

DSC 3499

DSC 3501

Took the car out this afternoon to bed the brakes in. Wow, very impressed with them. Very solid pedal and very strong brakes.
Whilst the car was in the air fitting the brakes I decided to remove the front ARB. Not had it connected for several weeks now and car handles no differently without it. The very much uprated springs seem to control roll just fine.
As you need to drop the subframe to remove the ARB I decided to remove it using my angle grinder. Fifteen minutes and no messing around to reset the suspension settings. Cut off each end and the rest just pulled straight out with some wiggling.
4.2Kg less weight on the car.

DSC 3506

Also connected up the oil catch can, decided to keep the puck so essentially vents the same as OE but through the catch can.

DSC 3503
 
  • Like
Reactions: D0C, nightroamer, 45bvtc and 1 other person
Car started to play up the last few days intermittently cutting out as you were driving along. Fortunately I have a fuel pressure gauge so spotted that fuel pressure was dropping very low when the car was cutting out.The rest of the time it was perfect.
As it's recently had a DW65V pump suspicions were that may be duff or I had installed it incorrectly.
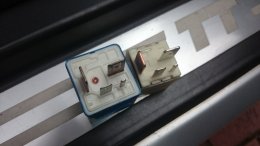
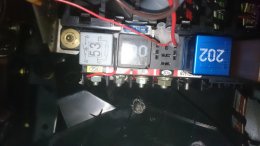
Rather than pulling the pump thought I would check the relay and fuse first. The fuse looked fine, The fuel pump relay confused me as the fuel pump wiring shown on ElsaWIN for a BAM seems to indicate that an 8 pin 409 relay is used. However on my car it's a 167 4 pin relay.
Had a quick look at the relay and it looked slightly second hand, and as this relay supplies not only the fuel pump but several other sensors and actuators on the engine. I swapped it out for a souped up version I found in my squirrel store.
I found a 202 relay which is used for glow plugs on a 1.9 TDI and is rated at 70A, coil resistance is very similar 60 ohms on the 167, 50 on the 202 so that's not an issue.

DSC 3535

DSC 3536


Took the car for a spin and just when I thought it might be fixed it cut out again. So wasn't the relay causing the problem.
whipped the cover off the fuel pump hatch and opened up the cover, fortunately there is only about 20 miles worth of fuel in the tank. Straight away noticed the one electrical connection to the pump was very loose, couldn't believe that I wouldn't have noticed that when I put it in but that very much looked like it might be the issue. Crimped the connector to tighten it up and confidently put the cover back on.
Took it for a run and never even got a mile before it cut for a few seconds. Damm.
Back home again took the cover off the other side of the tank that doesn't have the pump in. Just to see if it was being scavenged to the main tank, It was virtually bone dry so that was working.
Decided that Google might be a good idea and quickly discovered that if the pump is not installed 100% correctly you can get issues with fuel pick up when the tank is low.
Out came the pump and it looked OK to me when I dismantled it. Using the original pump I soon found that it was sitting about 8-10mm lower in the pot than the DW65V.
Greasing the O rings and being careful not to break anything I eventually managed to seat the new pump correctly, It was very tight to get it in the correct position compared with the old pump.
Put it all back together and took it for a run, success it seems. Ran it up and down hills flat out and never cut out once.
So if you fit a DW65V make sure it's fully seated in the pot.
 
  • Like
Reactions: DrStrange
Modified the brackets on the rear wing as I had noticed it was adjusting itself after any kind of high speed running.
The problem was due to the angle the front connecting link was at. It was virtually horizontal so any decent amount of load on the wing was tilting the front down giving a much higher angle.

DSC 3366

To solve this I made some longer rear links and modified the front ones so that they are fixed permanently and at a much better angle. I can now set the wing anywhere between 0 and 17 degrees and it will stay there. It has also lifted the wing about 15mm higher so it's hopefully in a slightly better position.
DSC 3512
 
Weight saving was the order of the day last weekend. Looking at the passenger seat base I figured it wasn't to hard to remove the OMP seat base and modify the seat mountings to bolt directly to the car floor.
Took about 2 hours measuring , cutting and drilling and I now have a spare OMP seat base and am happy with the seat mounting. The Drivers side I have an adjustable slide so it's a bit more fiddly to do that side .
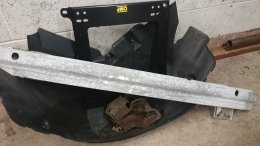
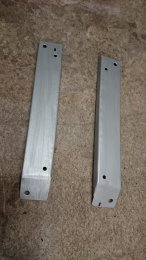
Took off the rear tow point box section. Some of the bolts put up a fight but some plus gas sorted them out. Whilst I had the rear bumper off I took off the rear crash bar. Really only useful in a low speed bump, anything more than 5mph it would probably be flattened.
Also as I had the rear wheels off and already undone some of the rear wheel arch liner bolts decided to undo the rest and see what the car looked like without these fitted.
Decided to keep the rear most section of the wheel arch liner which connects the rear bumper to the body but also helps to stop air from finding it's way to the rear bumper. So trimmed this off the rear liners.
Ended up with this pile of bits that weighs 10.1Kg

DSC 3539
 
First track event booked. One I have done the last few years with the Club GTI guys at Curbrough.Always been the fastest diesel :) .
A short sprint track it's just down the road from where I live. Currently 2 other TT's running an MTM tuned TTRS and a very rapid 450 + BHP TTS. I will just be happy to get around quicker than my A4 diesel estate that I have run the last few years.

https://clubgti.com/forums/index.ph...st-fun-day-bank-holiday-may-28th-2018.286795/

https://clubgti.com/forums/index.php?threads/new-race-car-mk3-audi-tts.287513/
 
  • Like
Reactions: 45bvtc
Doing a few more jobs on the car. Pruned some weight out of the car by removing the OMP seat bases I bought from the TT Forum . These are 2.5Kg each so a total of 5kg. A lot easier and quicker to put seats in using these bases but I could see that they could be removed with some modifications.
On the passenger side I have no sliders on the seat, so by reversing the one seat mount and drilling the mounts I have bolted the seat directly to the floor using the OE mounting points.
On the drivers side I use a slider so it's a bit more tricky.
Made up some bases out of some steel plate I had that was almost already preformed to the size and shape I needed . very handy. These came in at 1Kg so saves 1.5Kg off the drivers side,4Kg in total.

DSC 3598

After removing the rear tow eye point and saving roughly 2.5Kg I was wondering how to add a rear tow point and keep it light.
Looking in the boot of my B8 A4 daily I found the towing eye and it's substantially longer than the TT item and fits the same.
So gave me an idea.

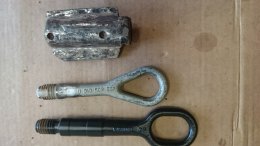
I cut the tube from the bottom of the towing point with an angle grinder and trimmed it right down. Here's the A4 B8 towing eye, the TT one which I tweaked with an angle grinder so it fitted better in the front and the tube cut from the bottom of the existing rear tow point.

DSC 3543

The tube part weighs 350g and the difference between a TT tow hook and the B8 is around 150g.
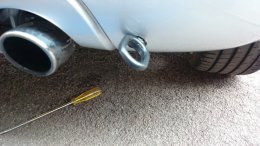
Welded the tube to the remaining box section where the original rear tow hook box bolted and cut a small hole in the rear bumper. Now have a solid rear tow point and saved 2Kg of weight overall.

DSC 3583

DSC 3578

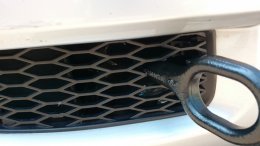
The front tow point looks better with the black tow hook.

DSC 3573

Getting the rest of the exhaust sorted next Saturday. Going for a longlife fastflow exhaust system 3 inch back with a resonator to a rear box that splits to two 2.5 inch pipes and I asked them to recycle the OE tails. There's absolutely nothing wrong with the OE tailpipes and will save some money. Should save a shed load of weight over the OE system and maybe add a few bhp to the engine.
The rear box is the same one they used on a Nissan GTR that they were doing when I was there . The Nissan made 540bhp after it had been mapped so the exhaust box seems to flow OK. The standard of welding looks to be amazing. Nitrogen back purged TIG welding. No sign of a MIG in this garage.

https://www.facebook.com/TRPtuning/
 
Bought some new rear calipers to upgrade the rear brakes.Trying to restore some of the balance between front and rear brake force.When braking hard the car tends to stand on it's nose a lot.

DSC 3614
 
Finished the rear brake upgrade. After fitting the very much larger brakes on the front found that the F-R bias wasn't right, the car nose dived quite a bit when braking heavily. The car stood on it's nose a bit with the LCR caplipers on but not like it does now.
So not wanting to add extra weight to the rear brakes by fitting 300mm discs as most people do fitted some calipers with larger pistons.
The standard caliper on the TT has a 38mm piston, increasing the piston size results in more force being applied to the pad for any given amount of pressure also results in a small increase in pedal travel.
A 43mm caliper creates ((43x43) / (38x38)) = 1.28 times as much force so 28% increase. To get that much extra rear brake force you would need to fit a 256 x 1.28 = 328mm disc.
The rear brakes have never got that hot at all even when I was doing some serious braking to test out the front pads.
The rear caliper I used is off the Audi A6 c5 4.2 V8 cars, also used on a few other cars I believe. On these cars it was used with a 269mm x 22 vented disc.
Part numbers are 4B0615423 and 4B0615424
https://www.onlinecarparts.co.uk/oenumber/4b0615423.html
https://www.onlinecarparts.co.uk/ridex-8099711.html

The Flexi hoses I got from ECP or you can get them from Carpartsforless https://www.carparts4less.co.uk/search/135440508
https://www.ebay.co.uk/itm/Pagid-70...-Line-Hose-Audi-V8-44-4C-A6-100/232639488320?
They are rear brake hoses off an Audi A6 c4 or some models of the Audi V8 and Audi 100.

DSC 3611

I removed the original handbrake brackets from the new caliper and fitted the original items. The handbrake mechanism on the new caliper uses a slightly different handbrake cable and the levers are a little longer, probably to give a better handbrake on a much bigger heavier car. I drilled a new hole in the original handbrake backplate to move the handbrake mechanism around a little. This meant I had to replace the OE torx screw with a 6mm set pin and file the lever a little .

I found some use for my 100cc Kart sprocket tool I used to use on my Senior Britain kart many years ago. Works great for removing the arm off the caliper.

DSC 3615

DSC 3621


I secured the original brake pipe to the caliper body using some tie wraps and some rubber fuel hose.

DSC 3626

Very impressed with the brakes now. Doesn't dive any where near as much when braking hard and the pedal travel is still reasonable.
 
Out in the car the other day and accelerating reasonably briskly to pass another car when the engine hesitated quite noticeably, like a big misfire. Seemed to carry on with no issue after that but just as I got home the engine management light came on.
Connected VCDS and got a P0102 fault code. Low readings off the MAF sensor.
Looking at the measuring blocks and the highest reading I could get for the MAF was 0.5 when revving the engine on the drive.
So the MAF is duff. Tried a reseat on the plug no difference. Took it out and had a look, couldn't see anything wrong. Seems like it's just failed completely so ordered a service exchange item from ECP, £69 with the current discount after the surcharge for the old one is deducted.

DSC 3629 smaller

Checked on VCDS and MAF now reading as expected. Fault codes cleared and took it out to do a little logging. All seems to have returned to normal.
It was the original MAF so 16 years and 90K miles isn't so bad.
 
  • Like
Reactions: Misikee
So you are still using the rubber flexi style brake hoses , are you intending to replace them at some point ?, only reason I say this as I had an unpleasant moment going into Paddock Hill at Brands when a rubber flexi failed .
 
Brake hoses on the front are HEL braided items. On the rear they are OE spec items as you can see. I am replacing all the brake pipes and hoses though with new items. working my way around the car. There are only 2 flexi hoses I haven't replaced and those are the 2 short ones that connect from the chassis to the trailing arm at the rear. I was going to replace them when I did the rear calipers but I forgot to order them so I have just ordered some.
 
Bought myself a new lid finally. I decided that a full face helmet wasn't what I wanted ,looked around for an open face helmet.
As I have no intention of ever racing the car I don't need a helmet to any particular spec but I always buy decent helmets as you only need to use it once and I would rather it worked the one time as with helmets you don't get a second chance.
Have had a few AGV and Shoei helmets over the years for karting.
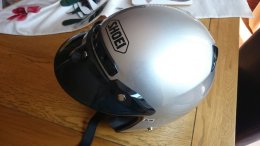
Found a Shoei dealer fairly close to me who could get the helmet I wanted in stock for me to try. Great prices as well, Speak to Paul who owns the shop he may be able to discount the price. I went for a Shoei RJ Platinum R in light silver. Just happens to be the same color as the car.

https://www.bikerstoreuk.com/

DSC 3639

Also got around to doing a few things with the car. Spent a few hours playing with the castor, camber and toe on the front in an attempt to improve the handling. It was pretty good before but I think the camber was just a little excessive and not balanced side to side.
With a lot of camber you get camber thrust and on a road that's not perfectly smooth the car is always moving around and feels very nervous.I have reduced the camber down to around 3 degrees either side and balanced it as best as I can and it's a lot better. Still turns in well and you have to really push on to get some understeer but the car is pretty balanced now.
Found reducing the front tyre pressures helps a lot. Just a few PSI made a big difference.
Had a play with the Vortex generators I bought from Fleabay. Used on EVO's Subarus and Type R's they seem to offer a cheap and easy way to get a small improvement in the way air is handled at the rear of the car. I have seen a few videos of people using wool tufts on the back of the car to see whats going on so raided the mother in laws Wool collection.
The sound quality is very poor on this as the camera is in a plastic box and it seems to be rattling around in the box which is what most of the noise is.
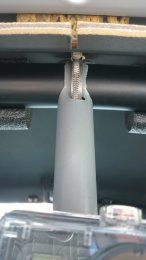
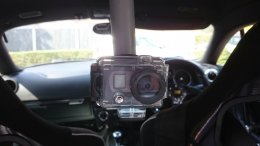
I had to make a mount for the camera off the roll cage. Used some plastic pipe and a jubilee clip.

DSC 3635

DSC 3636


No Vortex generators


With Vortex generators


With the vortex generators there is a definite straightening of the wool tufts and especially in the centre of the screen and also to the bottom the tufts are not lifting as much and are floating around less. The two runs were done to the same speed accelerating through the gears.

DSC 3641

https://www.ebay.co.uk/itm/Universa...oiler-Wing-Kit-Vortex-Generator/112786371347?
 
Last edited:
Had a problem changing the rear flexi on the drivers side. The brake pipe nut on the pipe running to the front of the car was seized and the brake pipe kinked. Unfortunately this is the longest brake pipe on the car and runs over the fuel tank. After looking for ideas to resolve this quickly settled on replacement of a small section of brake pipe.
After identifying the parts I needed popped over to Bromsgrove to pick up a kit from an Ebay seller.

stores.ebay.co.uk/Vintage-Warehouse-65?

https://www.ebay.co.uk/itm/BMW-Z3-3...Y-Brake-Pipe-Flaring-Repair-Kit/362194400509?

The proprietor Mark was very helpful and the kit did exactly what I needed.
Will be able to repair brake lines and make my own up now. It really is very simple to use.

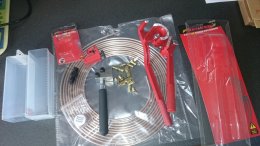
Here is the contents of the kit, there is a video on line that shows how easy it is to use, comes with full instructions. There are 2 of these tools available, the other does SAE flares which is a different type to what the TT requires which is a DIN bubble flare.

DSC 3644

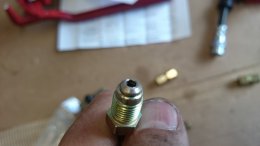
Had a quick practice on a piece of pipe in the garage, really easy to do and seems to do a great job.

DSC 3645

There wasn't loads of pipe left showing to work with but as this is so small it makes life really easy.You have to strip back the plastic coating off the existing pipe so the tool can grip the pipe. Will wipe some grease over the exposed section.

DSC 3646

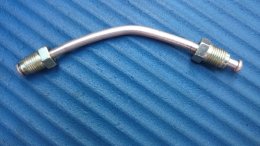
This is the short length of pipe I made up to replace the rotten section.
DSC 3654


And all fitted in place with the new flexi. Pipe run is pretty much the same as OE but with the joiner in place. I went for Kunifer pipe just a little more expensive than copper but a lot better.

DSC 3657

The old flexi with the rusted up joint that caused the issues in the first place. They really did need changing.No longer very flexible at all.

DSC 3658
 
Took the car to get the exhaust sorted on Friday at TRP Performance in Walsall Wood.
https://www.facebook.com/TRPtuning/
They are a Longlife exhaust franchise and looking at the web site I had been impressed with the work as well as when I went over to discuss what I wanted.
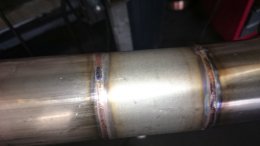
Not many places use TIG welders let alone welding up the completed system using nitrogen back purgeing.
This results in some very nice looking welds.

DSC 3679

I had originally asked for a small resonator where the stock resonator box was located. However after much effort it was concluded that with a 3 inch pipe the size of the box that could be fitted in the available space wasn't worth it, also it would have made the pipe run hang too low.
Thus the exhaust became a continuation of the 3 inch decat pipe to the back box which was a 3 inch in item with 2.5 inch outlets. The box is straight through from the inlet to the outlets.
This is the 3 inch inlet.

DSC 3672

A shot of the rear box after it had been welded up .
DSC 3682


And the complete system before it was fitted to the car and the stainless mounting points were welded on.

DSC 3683


How it runs under the car,

DSC 3690

It should have cost me £480 but the rear box that was ordered was incorrect. But fortunately had a correct box that had been removed from a Nissan GTR that had only done 200 miles. Still looked like new but got some discount.
On the GTR with this exhaust the car made 540bhp and 620Lb/ft of torque so I know the exhaust will be good for anything I want to do. The GTR owner had the box removed because his car wasn't loud enough, so it silences reasonably well.
On my car at idle it's not much louder than the standard car. On the move it is of course a lot more noticeable but it's not excessive and will easily pass any noise tests at a track. It's substantially lighter than the OE exhaust as well. Probably a good 10Kg at least.
 
  • Like
Reactions: Gazwould
First track day event completed last weekend at Curbrough with the Club GTI forum. It's only a small sprint track located just down the road from me so easy to get too and I have been round this track several times in my A4 road car.
I set myself a time of 28.5 seconds to beat as that was around 0.5s faster than I had managed in the A4 which I thought was doable and explains the silly laugh when Harrys lap timer told me I had done a 28.5s lap.

some pictures

IMG 3459
IMG 4077
IMG 4078


Seeing the amount of air I was getting in some of these pictures and the fact that the handling isn't quite where I want it I have ordered a slightly larger rear ARB. Gone for the 16mm 4-motion item. I have seen the mod that's sometimes possible on ARB's to stiffen them up but on my ARB the flat mounting point area on the ARB is not that long at all so you couldn't get it much stiffer.

Here are some videos, they are of the same run , one is Harrys lap timer on my phone, the other on a cheap action camera I bought, only £38 and it's every bit as good as the more expensive ones, indeed I think better because you can change the battery easily.
The guy at the end of the video got a bit of a shock when I rev the engine and the car is stationary it goes into launch control and will start popping and banging, very loudly with the new exhaust on.


  • Like
Reactions: Golfyste, 45bvtc and jojo
Well I was very pleased with how the TT went on Sunday afternoon. I spent quite a bit of time watching the cars in the morning sessions trying to spot the quick ones and time them to see what kind of lap times they were running. Not that I am competitive at all :) . The fastest cars I could see out there were a Clubsport S Golf and a Bronze coloured TTRS.
They seemed to be running 1:27-1:28 laps.
My first session at 2pm so ready for the drivers briefing at 13:40. In the briefing we were told that they had some issues in the morning session and had put some cones on the track on turn 3 just after the chicane, because a few cars had gone in the gravel ,and somebody had managed to roll an R32 in the gravel that then had a small fire.

34121283_10157926494097925_1113325909047246848_o.jpg


This didn't fill me with confidence but these things happen. As it was my first session on the track I decided to go somewhere near the back of the queue for the two sighting laps.
In future I will remember to get somewhere nearer the front. I had a few issues with people not moving over when I was very clearly quicker than them. Not wanting to incur the wrath of the organisers or more importantly have an accident I was waiting for people to move to the right and indicate before I passed.
I had a guy in a red GTI in front of me for a while who was braking so early I nearly ran into him. At the beginning of this video I decided to flash my lights at him to let him know I was there and moved well to the left of him and just outbraked him. Then immediately got stuck behind someone in a Polo who was dawdling in the middle of the track.
Got past him after he moved over and most people after that were very good.
I soon discovered that the TT was very good at cornering and braking, And gives a bit away to some of the other cars on the straights. I was very impressed with the sheer amount of grip the car had.
Heres a video for the first half of the first session.


Must have been doing something right as I never got overtaken by a faster car in the three sessions I did and I overtook lots of other people. The second half of the first session. I did get slightly distracted passing another car around 3:30 and took a small trip across the grass having carried too much speed into the corner.


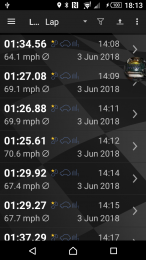
I have Harrys Lap timer but forgot to enable the video in the first and second sessions [smiley=bigcry.gif] but it was giving me lap times which were very encouraging.

Screenshot 2018 06 05 18 13 34


In the second session at 3PM ,There were hardly any cars on the track at all, meant I could concentrate on trying to work out how to go a bit faster. I did get to see how my TT compared to the nice TTRS I had seen out in the morning. Managed to catch up with him and pass him.

DSC 3725

DSC 3728


Third session I noticed that no videos had been recorded on Harrys and enabled the camera and also recorded my fastest lap of the day. Which was just after the out lap, It was around 25 degrees c and the tyres were struggling a bit after the first few laps, also engine temps were a little on the hot side.
Heres my fastest lap of the day.

 
Last edited:
  • Like
Reactions: jojo, Blu-iTT, 45bvtc and 1 other person
The car ran really well, brakes stopped strong on all three sessions with no sign of fade or a soft pedal so am well happy with them.
Looking at the pads and the discs when I got back home they have been hot around 550 degrees C, going by the heat sensitive paint on the fronts but there was remarkably little brake dust on the wheels considering what I had been doing.

DSC 3737

DSC 3738

DSC 3739

DSC 3740


Rear brakes looked slightly blue so had been working but the heat sensitive paint was unchanged.

Coolant temps hit a max of around 102 degrees on the diagnostic 49 on the climate control and the highest oil temp I saw was 109 degrees, which I am happy with bearing in mind the 24-25 degree temperature. And how hard I was working the engine. Looking at possible cooling upgrades to bring the temps down a few degrees on both of these readings I have found that the V6 radiator is a good deal thicker than the normal one fitted. 34mm against 24mm so I have ordered a Nissens V6 radiator to fit to the car. Will add a small amount of weight but will hopefully keep temps in check.

https://www.ebay.co.uk/itm/Nissens-Radiator-65011-OE-1J0-121-253-S/382303633337?

I found this rad through this site offering it as an upgrade.
https://www.urotuning.com/Radiator-Mk4-1-8T-2-0L-VR6-12v-Performance-p/1j0121253s.htm
Nissens make OE rads so they are good quality and not your cheap Chinese stuff.

The car looked to be fine when leaving the track I checked it over. But somewhere along the 85 mile drive home the passenger side front CV joint boot developed a split. It looks like an original so with 90K miles on it I suppose it's done reasonably. There feels like some play in the CV joint anyway so have ordered a new CV joint and boot kit. Might as well replace the whole thing whilst I have it apart. If it wasn't going to be tracked I suspect most people would have just replaced the boot.

DSC 3735

DSC 3736
 
Last edited:
  • Like
Reactions: Golfyste