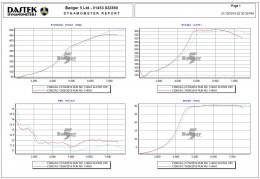
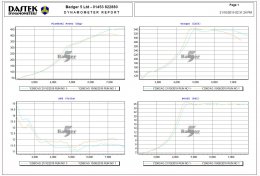
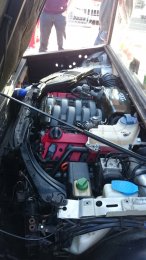
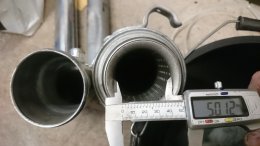
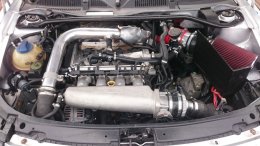
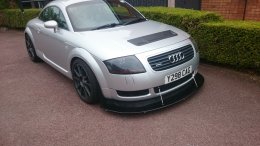
Mk1 TT 225 track day car, Officially a ten second car 10.8 seconds at 127 mph.

Yes @badger5 in the collector. Found the Lambda EGT enrichment map on Ignitron, Not normally used by the looks of it. I already have a WMI system fitted on my A4 road car that I very rarely use so think I may transfer it to the TT and try some water injection. I would like the EGT's to be sensible and under normal road use they are. On those dyno runs at yours the highest seen was around 915 degrees.
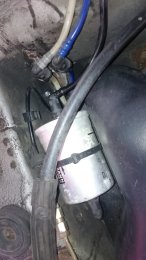
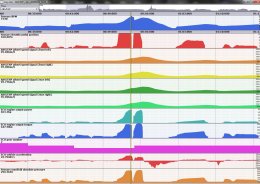
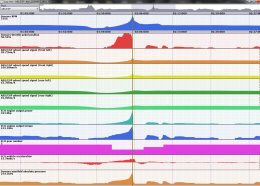
I was also babying the car a lot looking at the logs, I am not using the revs at all and changing up around 66-6700 RPM which is what I used to do with the stage 2 K04. Revving out the engine will only make the EGT situation worse though I would have thought. EGT sensor is located where the red cross is.
EGT sensor location
 
I noticed that you're not revving it out much at all Karl, it's really obvious from the sound more than anything. it'll be interesting to see how you find the cams open up the rev range.

I watched yours compared to mine last night and it's certainly making more power than I was on the GT30!

On my lap I cross the start line at 102mph, and only reach 129 up the rise. That's button pressed too so 2 bar the whole way up!

You cross the line at 88mph and still manage to reach 132mph, so whatever it's making it's more than I was on the GT30!

Looks fun. Will be good to see how you get on with a few ECU tweaks
 
The inlet cam I have should hopefully just help the top end breathing a bit. Opening point is the same as the turbo Cams so shouldn’t affect the bottom end and with more lift and 12 degrees more duration will just hopefully stop the torque falling off so quick at the top end. Been playing with virtual Dyno which I have found quite useful to see improvements in power and torque.
 
Went shopping on Flea bay looking for a new throttle body, didn't want another R32 item as although cheap enough they are 15 years old and more likely to fail. Found a 75mm throttle body as used on the RS4,RS5,RS3 and TTRS and looking at the connector it seemed the same as the original and the R32 item so went for that.
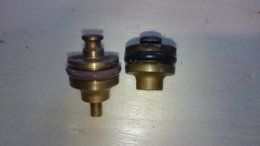
I dismantled the original throttle body to see what the problem was and the spring that shuts the valve had broken, right in the middle of the spring though not at the end which is where I would of thought it would break.
DSC 5135

Small problem with the new throttle body, although it has a 75mm throttle butterfly the spacing of the mounting holes is smaller on the RS3 item , only 70mm on the RS3 as opposed to 75mm on the R32. So looks like I had to find some way to make it fit. Either drilling some offset holes in the adaptor plate or remaking the plate. I decided on the easy option and slotted the mounting holes in the new throttle body. So after making sure the TB worked OK with the Ignitron ECU ( which it does) I slotted the holes out 2.5mm on each corner to get the 75mm hole centres.

DSC 5121
 
Interesting stuff Karl.

How did you manage to slot out the holes? They're usually cast the full depth like 30mm or more and quite thin!

Good to hear it's plug and play on the wiring side too, Much like the VR6 upgrade for the AGU setup
 
I slotted the holes using a course round file, It's only cast ally so not that difficult. If it was steel that would be a different story. There was enough material to let me do this fortunately. This item is about 350 grams lighter than the R32 one so a very slight bonus there as well. I thought as the item was used on turbo cars such as the RS3 and TTRS retention of the hose wouldn't be an issue. Unfortunately on the RS3 and TTRS I have since found out they use a throttle valve adaptor which bolts onto the throttle body and the hose connection to the intercooler is on this.
https://audi.7zap.com/en/rdw/audi+rs3+sportback/rs3/2011-720/1/145-145080/ item 26.

Thus I am having issues getting the boost hose to stop on the throttle body. If the Silverkrin hair spray doesn't work then will need to get some ally welding done like I did on the R32 item.
 
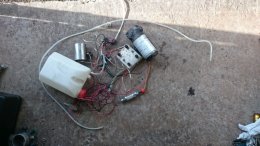
Small update, fitted the Water injection system. Took the WMI system off my A4 that has had very little use.

DSC 5123

I am going to use this to inject water only as I am really just after reducing EGT and hopefully some knock that occurs around 5500-6500 RPM at high boost. On the A4 I used a pressure switch that turned the pump on at anything over 20PSI . Fortunately on the TT I have the Ignitron and there are better ways of enabling progressive injection. You can buy a fancy progressive controller from Devils own or several other manufacturers or use some of the Ignitrons functionality to implement a fully adjustable progressive controller for the cost of a Solid State Relay.
Using the Fuel Rail Pressure controller option on Ignitron, which isn't used normally, I can control the SSR to switch it's output from 0-100% . The output from the controller can be routed to any unused output on the Ignitron ECU. So I used the Evap solenoid output. Extended the wires from the EVAP solenoid to the input connections of the SSR.

DSC 5151

The output of these SSR's is a Mosfet and the particular one I chose will switch 20A. I initially bought a 40A cheap Chinese clone SSR40DD off Fleabay and it did work but the heatsink on the back wasn't isolated and was connected to the 12V input. Not very good so bought a used Crydom D1D20 off fleabay.
https://www.ebay.co.uk/itm/Sensata-Crydom-20-A-Solid-State-Relay-SSR-D1D20/333168323379?
This works fine and should be more reliable than the cheap Clone. The heatsink is also isolated as it should be.

After some measurements of flow at various percentage outputs I came up with this map to try first.

Fuel Rail pressure map min

This will start injecting water when RPM is above 4500Rpm and more than 1.2 bar of boost . I discovered when testing that even with only a 5% output you would get 75% of the output that you get at 100%.
The jet used was a Devils Own number 5 . The atomisation was still good at 5%
5 % 260 mL / minute
8% 290
10% 300
40% 320
60% 330
100% 350

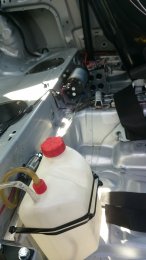
Mounted the pump and tank in the car low and in the centre.

DSC 5150

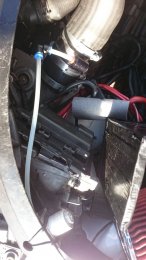
The water injector jet is pre TB

DSC 5153

Initial tests seem to show this works well to reduce EGT , took about 80 degrees EGT off a back to back 2 bar 3rd gear acceleration run. And also got rid of the 2 degree timing pull that was showing on cylinders 2 and 3. Intake air temps reduced by 4-5 degrees as well . Currently I am using deionised water as had 5L of it in the garage and it's fairly cheap compared to methanol anyway.
Unfortunately when looking at the logs I also noticed that the fuel pressure when running at high revs was not where it should be 3.3 bar instead of 5 bar and 99% injector duty cycle.
Ignitron was doing it's best to hold the Lambda to the specified level but looks like it was close to going into the limp mode
I have configured.
So looks like the DW65v is not happy so it's out to go back to Part-box and the original pump is back in. I have ordered a Bosch 044 and this will be fitted shortly. Hopefully this will mean I can get back to using the car on track again.
 
  • Like
Reactions: Misikee and baliszoft
the more I see about ignitron the more ridiculously impressed I am by it's capabilities. So much so that I simply cannot imagine a future that doesn't involve my car running on it!

I'd agree that a single DW65 is unlikely to keep up with a G25 660 at 2 bar, I've seen other have similar issues. I think an 064 inline is your friend there, but I'm not sure going back to the original intank is a wise move, as the 044 still needs a decent flow to keep it happy.
 
Ignitron is a great piece of kit, With all the features and the fantastic logging facilities makes tuning and tweaking the car a lot easier.
I have fitted a Bosch 044 to the car using Bills custom made tails and put the OE pump back in the tank for the moment. Not to difficult to fit really using the tails. I ran a 30A fused supply to the fuel tank and used the power feed to the in tank pump to switch the relay that then feeds the 044. Added a GND point for the pumps as well. Bill suggested a Cupra R filter that I have fitted under the bonnet. They are very much smaller than the OE TT item. Went to a local VAG breakers place by me and they were breaking a mk4 1.6 Golf so managed to get the 90 degree quick fit fuel fittings off that to use on the fuel filter. Filter part number 503440627 £5.41 delivered from CP4L . The Pump was from Fleabay £145 . You have to watch out there are loads of dodgy pumps on there, this is from an authorised seller and I have checked the hologram part number against the Bosch protect web site.
http://www.ebaystores.co.uk/driven2automotive

https://badger5.co.uk/fuelling/1-8t...fittings-for-oe-filter-location-pump-installs


DSC 5155

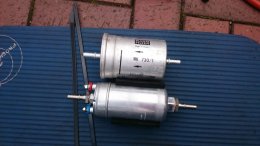
The OE filter on the TT is well big.

DSC 5166

Comparing the OE filter with the Cupra item. The Cupra filter fits nicely.

DSC 5165

You can see the pressure sensor in the line just before the filter. Previously the sensor was measuring pressure after the filter . Pressure seen at idle is about 0.2 bar higher than before. There will be a small amount of pressure drop across the filter but the main difference is the 044 is doing the business and shifting fuel.
DSC 5157


Didn't take a picture of the pump installed just the before piccie with the filter. You can see there's lots of room with.
DSC 5162

Pushed a fish wire down from the pump relay to the pump and pulled the pump wiring through.

DSC 5168

The pump is a good deal louder than the OE pump. Quite noticeable at idle but once driving you don't really notice it. I have a few ideas on sorting this.
These kind of pumps when used on cars typically have pulsation dampers or accumulators to try and smooth the fuel pressure pulses.
when I fitted the Original TT pump I did some testing and the TT pump managed 4.3 L flow to an open pipe in 90 seconds. The duff DW65 managed 5.1L on the same test. The DW65 flow is well below what it should be doing and has gone back to be exchanged under warranty.
The Bosch flows about 7 litres of fuel in 90 seconds at 3 bar looking at the stats, a lot more than the OE pump can flow to an open pipe.
I took the car out for a drive with the old TT pump on and did a 3rd gear accel run. It went into limp mode around 7K RPM when Ignitron detected the Lambda being higher than I had set. Maximum Lambda is set at 0.86 and it made it to 0.9 just before 7K. I pretty much expected that, the reason I had the DW65 was because the OE pump couldn't cope with a stage 2 275bhp tune.

Limp mode old pump


Looking at the logs the original pump managed about 4.1 bar max and fell to 3.4 bar when it should have been around 5 bar. Injector duration had hit 100% trying to maintain Lambda at target.

Old fuel pump


This is the log from the run on the dyno at Bills with the DW65 in better health. Peaks about 4.7 bar and then falls away to 4 bar.

DW65V on Bills dyno


And this is the Bosch with the original 17 year old pump in the tank. Pretty much holds 5.2 bar all the way through .The OE pump just has to supply enough low pressure fuel to the 044. I will probably drop the DW65 back in the tank just as it will be more reliable than the original pump . There is a possibility it may make the 044 a little quieter as I suspect some of the noise is due to cavitation due to restriction on the intake. Will be having a look at maybe controlling the voltage on the pump to reduce it's speed at idle and cruise.

Bosch 044 fuel pressure
 
  • Like
Reactions: Djordje1 and Blu-iTT
Good stuff Karl. I look forward to exposing a multitude of mechanical issues on mine once I have the full logging capability if ingitron :laugh:
 
  • Like
Reactions: desertstorm
Booked some track time for the car. Out at Curbrough on Bank Holiday Monday the 26th with the Chequered Flag group, Looks like a mix of cars, be interesting to see how the TT goes since the power upgrade.
https://www.the-chequered-flag.com/
Booked the 4th September at Donnington for the day with Javelin. Hopefully have the water injection fully dialled in for then so can get the full use out of the engine .
Looking to take it for a run out at Santa Pod for a laugh to see what it will do. Probably the GTI Action event in October after I have sorted the cam out and done a bit more tweaking.
 
Refitted the new DW65V pump that Part Box sent back to me in place of the original TT pump. This has sorted the noisy 044 pump issue.
Old TT pump


And the new DW65V, much quieter and almost inaudible in the car .


Do have a slight issue with the new DW65v and Bosch together they are putting so much fuel through the pressure at idle should be around 2.5 bar, it's more like 3.1 bar as the OE regulator looks like it can't handle that much fuel being thrown at it. The Ignitron works around this and has resulted in changes to the VE map. I may use one of the auxilliary outputs on the Ignitron and drive another SSR to regulate the Bosch pump at idle. Once the turbo is making positive pressure and the engine is using some fuel the fuel pump pressure regulation is pretty much spot on.
 
Did a sprint event at Curbrough on the Bank Holiday Monday. Had some fun and the car came back in one piece so that was a plus. Wasn't sure what tyres to run as done Curbrough before and they were only 30 second runs so didn't have enough time to get any heat in the tyres. Different format on this event with a much longer lap and it was well warm in the afternoon, should really have put the track tyres on.
Had a few issues with the Boost pipe popping of the throttle body so most of the time running 1.8 bar with the odd lap in the afternoon at 2 bar but it well hot then .Will be getting some ally beads welded on the TB. Temporarily fixed with tie wraps.
Water injection worked fine, EGT's never went over 910 degrees ,and intake temps were sometimes lower than ambient and they were starting off around 60 degrees in the afternoon as the car was sitting in queues, CSF rad is a great piece of kit coolant temps never went over 95 degrees despite all the time sitting in queues and the slow average speed around the track.
There were a good mix of cars there from a 3 wheel Morgan, Peugeot 206 GTI, M3 BMW, Nissan Skyline, Golf track cars etc.
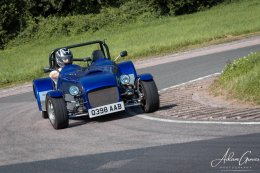
Fastest car of the day was a Kit car that looked like a small Caterham / Severn. Apparently 500Kg and a 200bhp FJ1200 bike engine in it, I was 0.4 seconds slower on my fastest lap and that was a 127.8.
Tim Wybrow Stuart Taylor FJ1200 200BHP 500kKg

DSC 5204

Image1


An in car video off my phone using the Harrys lap timer app.

 
Did a track day at Donnington last week. Despite the weather forecast saying just a 5-10% chance of rain it was raining all the way there and only stopped around 09:00. It was a Javelin track day and there was a very good mix of cars. They also have a resident photographer on these Javelin track days now so got a few decent photos.

48687377791 8b92cb0874 o


Didn't record anything in the first session as it was still a drying track car was going very well though overtook 2 of the Nissan GTR's that were out on track at that time.
Second session was a dry track, I let some air out of the tyres as I expected higher temps but should of let some more out though as the rear was getting skittish on the later laps.


Last lap on that session thinking about coming in and I had a bit of a trip through the gravel at Schwantz / Mcleans.


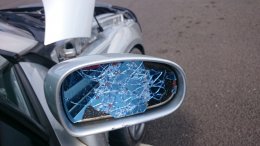
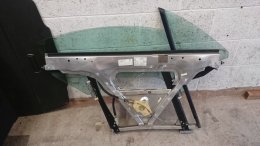
Unfortunately several pieces of gravel broke the passenger side window and the drivers side mirror along with a nice crack on the windscreen.

DSC 5234

Good job these are old cars, A replacement mirror cost me £17 delivered and picked up a complete window winder mech with glass for £30 from a VAG breakers just down the road. Really love how easy it is to change out things like the mirror, A 10 minute job to replace the complete item without having to remove door cards etc.

DSC 5236

The screen I will do through the insurance as it's MOT is due next month. The one on the car is the original and is going around the top edge anyway.
Captured the spin on Ignitron as I was logging the session.

Donnington spin log

You can see the two unloaded inside wheels partially lock up as I braked and kicked the ABS in. I look to have braked a little earlier than previous laps when still on the corner so Rookie mistake 1.
Good news is I can run full boost all the time when on track with the water injection. Brakes are great, Engine and coolant temps well under control, coolant temps never went over 90 degrees and oil temps hit 110 max. just need some more practice to improve the driver.
 
  • Like
Reactions: Terminator x, Retroman, Rom18T and 1 other person
Changed the intake cam several weeks ago now. Fairly easy job to do as you don't have to retime the engine. The cam belt connecting to the exhaust cam.
Just get a new gasket for the VVT tensioner and I reused the rocker cover gaskets as they are fairly recent.
I bought a complete cylinder head for £80 from a scrap yard off a 1.8 NA A3 with an APG engine.
This is the later engine with VVT . I only wanted an intake cam as I am not sure an exhaust cam change as well would make that much difference. And not changing the exhaust cam means an easier swap.
From Cat Cams site both fast road and ultra fast road have same exhaust cam 217 degree 9.95mm standard turbo exhaust 210 degree 9.3mm NA exhaust cam 210 degree 10.4mm . The CAT cam exhaust cam has only 7 degrees more duration and 0.7mm more lift than a BAM exhaust cam.
The AGP NA cam actually has more lift again than the CAT cam item with only 7 degrees less opening.

There are several threads around with the details of various cams and the timing of them .

inlet:

058109021 = ADR und AFY 8,78mm, 210°, 4° n.OT
058109021.B = APX, ANB, AEB,APU, AJL, AGU, AQA, ARZ, AJQ, APP, APY, AUL 7,67mm, 190°, 18° n.OT
058109021.K = ADR, APT, ARG, AVV 8,41mm, 202°, 16° n.OT
058109021.M = AWT, AUM, ARX, ARY, AUQ, AMK, BAM, AUL, APP 7,67mm, 190°, 18° n.OT
058109021.F = AGN, APG 8,41mm, 202°, 18° n. OT
058109021.E = AWB 8,6mm, 207°, 9° n.OT
058109021.D = ADR, AGN 8,41mm, 202°, 12° n. OT


esxaust:

058109022.B = AQA, ARZ, AJQ, APP, APY, AEB, APU, ANB, AJL, AWT, AGU, AUM, ARX, ARY, AUQ, AMK, BAM 9,3mm, 210°, 10° v.OT
058109022.C = ADR, AFY, APT, ARG, AVV 10,25mm, 210°, 8° v.OT
058109022.D = AGN, APG 10,4mm, 210°, 8° v.OT


v.OT = vor dem Oberen Totpunkt = before Top Dead Centre
n.OT = nach dem oberen Totpunkt = after Top Dead Centre

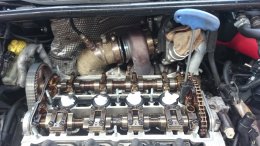
Had to undo the V bands on the turbo and swing the compressor back a little as the outlet was stopping the rocker cover coming off. Got to love these V-Band turbos so easy to work on.
DSC 5240


Set the cam timing marks to the correct place and marked the chain links with the 16 link spacing .
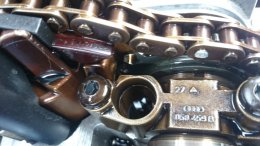
DSC 5241

Remove all the cam caps carefully noting location, they are all marked anyway, and remove original cam.
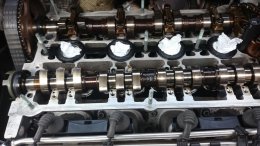
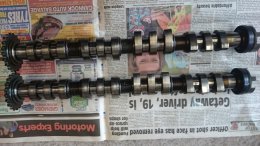
DSC 5242

DSC 5243
Looking at the cams you cannot see any difference. The original BAM cam marked with an L the new APG cam marked AC .
I did take some measurements with a vernier on the cam lobe maximum height and the base circle diameter.

Measured height of lobes on both cams.

BAM original cam marked with an L
Maximum height lobe width
43.62 36 outer lobes of each threesome
35.4 centre lobe

APG cam marked ac
Maximum height lobe width
44.35 36 outer lobes of each threesome
35.4 centre lobe
Calculated extra lift 44.35 - 43.62 = 0.73mm from specs above 8.41-7.67 = 0.74mm

So seems to me specs above seem correct as regards the extra lift.

Engine definitely pulls stronger at the top end and is keener to rev than it was before. Virtual dyno third gear pulls seem to show 30-40bhp more at the top end so hopefully this will show up on the dyno next time it runs.
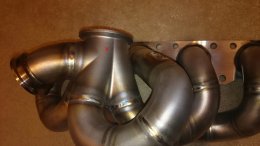
 
  • Like
Reactions: D0C and Blu-iTT
Well took the car to Badger 5 today for a run on the dyno to see what it was now making.
Seems I have lost some spool from a combination of the intake cam extra overlap and also a richer mixture I mapped in when it was spooling. My bum dyno and virtual dyno results seemed to indicate it was slighly better but will have a bit more of a play with this part of the map.Water injection didn't improve power but it did reduce EGT's which is why I put it on there. This plot is without water injection.
Really happy it made more than 500bhp as I had a target of 500Nm and 500BHP which it has hit.

30psi dyno plot


30psi dyno data

On track car will be running 1.8 bar most of the time which only makes 460 odd bhp. Just a press of the race mode button on the steering wheel takes you to the top boost map.

26psi dyno plot


26psi dyno data
 
  • Like
Reactions: badger5, Blu-iTT and nightroamer
Did a track day at Donnington last week. Despite the weather forecast saying just a 5-10% chance of rain it was raining all the way there and only stopped around 09:00. It was a Javelin track day and there was a very good mix of cars. They also have a resident photographer on these Javelin track days now so got a few decent photos.

View attachment 190348

Didn't record anything in the first session as it was still a drying track car was going very well though overtook 2 of the Nissan GTR's that were out on track at that time.
Second session was a dry track, I let some air out of the tyres as I expected higher temps but should of let some more out though as the rear was getting skittish on the later laps.


Last lap on that session thinking about coming in and I had a bit of a trip through the gravel at Schwantz / Mcleans.


Unfortunately several pieces of gravel broke the passenger side window and the drivers side mirror along with a nice crack on the windscreen.

View attachment 190350

Good job these are old cars, A replacement mirror cost me £17 delivered and picked up a complete window winder mech with glass for £30 from a VAG breakers just down the road. Really love how easy it is to change out things like the mirror, A 10 minute job to replace the complete item without having to remove door cards etc.

View attachment 190351

The screen I will do through the insurance as it's MOT is due next month. The one on the car is the original and is going around the top edge anyway.
Captured the spin on Ignitron as I was logging the session.

View attachment 190349

You can see the two unloaded inside wheels partially lock up as I braked and kicked the ABS in. I look to have braked a little earlier than previous laps when still on the corner so Rookie mistake 1.
Good news is I can run full boost all the time when on track with the water injection. Brakes are great, Engine and coolant temps well under control, coolant temps never went over 90 degrees and oil temps hit 110 max. just need some more practice to improve the driver.
Nice track Donnington, been there in the M5. The "s curves" are interesting given you are braking from a serious speed!

TX.

Sent from my BBB100-2 using Tapatalk
 
Took the car to Santa pod on Sunday. All the Saturday running for a big show the previous day had been cancelled due to rain. So it was absolutely rammed with people wanting to get on the track. So only got 3 runs in all day. It was cold, tyres were stone cold and the 3 degrees of camber on the front wheels don't help traction.
Was hoping for something around 11.5-11.8 as that should be doable with the spec of the car. Fastest run was my first with loads of wheelspin and no anti lag managed 12.15 at 122mph.
60ft times are pretty poor and should be more like 1.8-1.9s or better.
Second and third runs I used the race mode switch with launch and anti lag. The anti lag works great you can here the shifts are almost seemless in power delivery. I am nowhere near aggressive enough with the launch control settings as on the second and third run the car bogged quite a bit. So I think the car definitely has an 11.7-11.8 in it on a warmer day with some warm tyres and a decent launch setup. I plan to reduce the front camber a little as traction on the road is an issue quite often when accelerating quickly. On the second run I kept accelerating after the finish to see how quick it keeps going :) .

Removed the rear wing as it just creates drag at a 1/4 mile strip, also added a switch so I can turn on the fans to full speed at any time to cool the intercooler and engine down a bit.

DSC 5302


Timeslip

Santa pod 27 10 19001


1st run No launch control or anti lag just give it some welly with stone cold tyres, cold track = monster wheelspin.


2nd run using launch control and anti lag. I didn't really play with launch control much to set it up. It was nowhere near aggressive enough. Kept my foot in after the line to see how it kept pulling.


3rd run tweaked launch control a bit but still nowhere near aggressive enough. And the track was very cold now.


I plan to take some of the camber out of the fronts as wheelspin is an issue regularly when accelerating hard,may also go back to Santa Pod nect year when it's a good bit warmer and I have worked out some better settings for the launch control and boost by gear set up on Ignitron.

Some other stuff there, an RS V8 powered shed, I have seen this before it's based on a 2.8v6 Passat originally. Managed a 2.6S 60ft and 17.1 at 84mph.

DSC 5312

DSC 5313


and a nutter on a jet powered shopping trolley.
DSC 5315
 
  • Like
Reactions: Blu-iTT
Good terminal speed there Karl - congrats on breaking the 500hp mark
Keep up the good work.

Cheers
Bobby
 
  • Like
Reactions: desertstorm
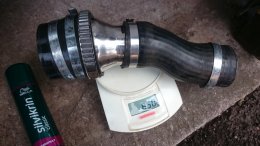
Few cheap mods to the car. Bought a replacement intake pipe to lose the silencer part of the standard intake. Not going to make a great deal of difference to ultimate power but probably worth a few bhp at the top end. It's nearly 1Kg lighter as well.

DSC 5339

DSC 5340


DSC 5342
DSC 5341


Just under £30 delivered (they have offers on just watch the item) , and a straight swap.

https://www.ebay.co.uk/itm/ALUMINIU...EON-1-8-20V-TURBO-CUPRA-R-03-05/352816388533?

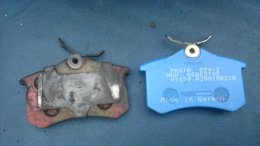
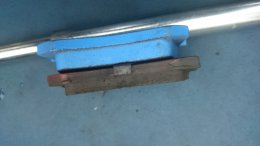
Changed out the rear pads to replace the EBC red stuff one I had been using. The rear brakes don't do that much normally but since changing the rear caliper to a larger piston size they definitely do more work when braking. The red stuff pads not really done that much mileage. The outer pads look to have got a bit warm.

DSC 5343


DSC 5344
 
  • Like
Reactions: jojo
Awesome thread, i've just bought a MK1 TT to play with so i'm glad i found it

Cheers Karl
 
Need any help just drop me a PM . Like your choice of the other car.
Ha ha I'm sure i will be, for now i'm just reading. Just stripped everything down as far as i can and replaced all gaskets and seals and cleaned the engine bay up.
 
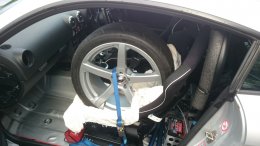
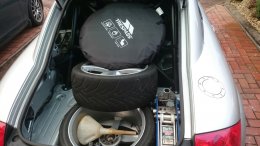
Took the car to Silverstone on Saturday for a track day with the Circuit Days people. Never been on the National circuit before so that would be a bit of a challenge. Weather this time of the year also a challenge and it looked like it was going to rain in the morning and be sunny in the afternoon. So kept the normal road tyres on and loaded the boot and car with stuff. The TT is not really a practical car, I am used to estates. With the roll cage it's even less practical so 2 tyres in the rear, take the passenger seat out and put 1 tyre behind the seats and 1 tyre in the passenger seat.

DSC 5380

DSC 5381

Put the 25L jerry can of fuel, Trolley jack, tools and various other stuff and ready to go. I booked a garage as I figured the weather would be dodgy. I just wished my garage was this big.Nice polished ceramic tiles which were fairly slippy when wet. There was mine and one other car in this garage.

DSC 5386

My Dad came down and had some passenger rides as well as one of my other mates @bhodgkiss . Also @jojo who has tracked an S3 for many years to get his opinion, It was very wet in the morning when the track opened. I left it for 15 minutes to let the rush die down and just as I was going to go out the track was red flagged. A pretty new 911 had aquaplaned on the pit straight and spun a few times before coming to rest in the wall at copse.
Ambulance was out with the recovery trucks etc.

@jojo at the wheel for some sighting laps, terribly cheesy smile from me in the passenger seat.

Jojo and me in the TT

The Circuit days people organise a photographer to take pictures that you can download for free. Essentially it's free advertising for them as they will get posted all over social media. The car was pretty epic straight off, the suspension and geo tweaks I have done recently really paid off. Car is more neutral handling, less roll and more straightline grip for breaking and traction.

XSP 1762


XSP 1784

Took a few laps to get past this LP560 Gallardo , 560bhp 202mph supercar, Eventually he made a mistake a copse and I out dragged him to the next corner. My car doesn't have ESP on it's coded out as it gets in the way too much on track. Looking at the way his car was moving around I suspect that his ESP was doing it's best to keep him on the track.

XSP 6214


One of the boost hoses popped off on the drivers side by the tow hook point when I went to use the push to pass button for the first time, this puts it on the top map. Reasonably easy fix to get the hose back on and just left it on the lower 1.8 bar map for the rest of the day. This is what it runs 95% of the time on track about 460bhp .
Winter project is to replace all the odd sections and hoses with some one piece ally pipes.
I did have 2 spins myself, If your not spinning you aren't trying hard enough :) . The first was caught by the photographer, I was trying to outdrift the BMW's but it didn't work.The second I was chasing down a Lotus Exige and got a little carried away into copse corner and spun. Caught him up a bit later and passed him outdragging it down the wellington straight.

XSP 6323

Over took various M3, M4 BMW's GT3 , 911 porsches etc and only got passed by one other car which looked like a race spec GT3 with Michelin wet race tyres. And he wasn't that much quicker than me.

Some videos I uploaded to you tube.


This one is an amalgamation of several runs with the good bits at normal speed, spins, passes etc and passing everything else 5x speed .


When it dried in the afternoon I put the road legal semi slicks on and tried to do some fast laps. The track had a dry line around most of the circuit but off line was still a bit greasy and it was only about 3 degrees. Using Harrys lap timer did a 1.09 lap but just as I was getting into the groove had to come in for some fuel. And just as I went to go out the track was closed as the light was fading.

Packed up and because my normal road wheels and tyres are slightly smaller only 8 inch wheels as opposed to 8.5 got 3 wheels in the boot and one in the passenger seat. Result.

DSC 5398

Set off home happy that the car was in one piece and nothing broke and managed to get up the M1 as far as the junction with the M6 and the car started missing and losing power. Looking at the Ignitron display I could see fuel pressure was low and within 10 seconds the car had cut out. Coasted to the side of the motorway right where the exit lanes are for the M6.
I have a cut out switch for the fuel pump and went to check this and burnt my finger, so figured I had found the problem. The toggle just flopped around the switch was knackered.

DSC 5395

DSC 5396

Fortunately only took about 15-20 minutes or so to find the tools, torch and get the switch out so I could short the connections . When I went to start the car the battery had gone flat due to the lights and hazzards being on. So had to call AA out to jump start the car. The AA man was happy it was an easy job and after I had moved the car off the motorway we spent 15 minutes talking about track cars as the car idled to charge the battery, he has a 172 clio track car, LOL.
 
Last edited:
  • Like
Reactions: jojo, SteWatson, baliszoft and 2 others
Making a few upgrades to the car for this year. Started by buying a new coffee table for the living room.

Rear wing


The wife said she didn't like it so decided to fit it to the back of the car, Minus the Revo stickers as I mapped it myself.

DSC 5458


DSC 5459
 
  • Like
Reactions: Blu-iTT and jojo
Can't see why your missus didnt like the coffee table, looks fine to me

Sent from my CLT-L09 using Tapatalk
 
  • Like
Reactions: Bryant1998 and desertstorm
Few more aero upgrades added over the two weeks.
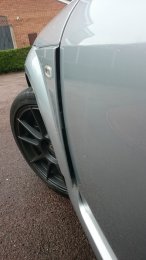
Modified the front wings so they vent at the rear. This allows the high pressure air in the rear of the wheelarch to be released . This excessive air pressure causes lift and also increases drag. Best thing about this mod is it's free.
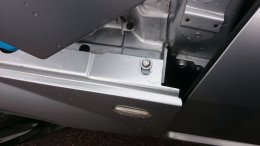
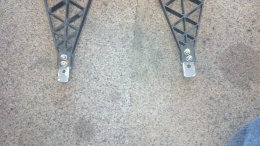
Remove the wing and trim the rear of the wing to remove the large return edge and the lower bracket. The wing is held in at the bottom to the sill by a bolt.

DSC 5478

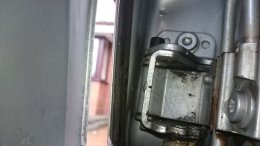
Modify the top mounting points by slotting the mounting holes , You can leave the front mounting bolts alone. You need to remove the thin plastic liner behind the main arch liner if you want any air flow through there.
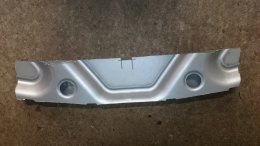
I modified the arch liner by cutting the top part out so air could flow through there. I tried removing the liner completely but all the rubbish off the roads just ends up filling up the door shut and making a mess. So put the liner back. Also cut a small piece out the top of the wing at the back and removed the black plastic moulding at the rear of the bonnet . This allows air to flow from under the bonnet out the slot to help vent the pressure under the bonnet.

DSC 5507

Hammerite smooth silver is a very close color to the car so use this for painting over cut edges.

DSC 5491 ]

DSC 5509

DSC 5510

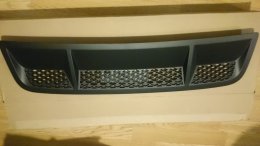
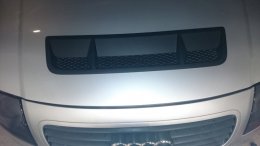
Onto the bonnet and fitted a FORD part to the car. A genuine bonnet vent off a 2010-2014 Ford Mustang Shelby GT500 .

Ordered off Fleabay from America. The actual part was only about £90, with postage and import duty came to around £130.
Which for what it is I think is still quite good.

DSC 5486

DSC 5484

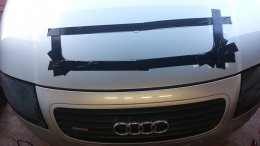
It could have been made for the TT as the curve across it is the same as the bonnet . Just a matter of making a template and deciding where to fit it. Then making a small incision in the bonnet.
Found this video on making a template to fit this.


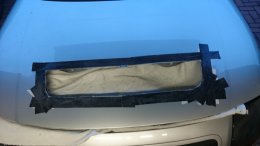
Mark out template onto bonnet and apply masking tape around it, I used 2 inch normal white painters masking tape then overlaid some gaffer tape which is a lot thicker and stronger. Don't try sticking gaffer tape direct to the bonnet it's difficult to get off.

DSC 5520

15 minutes with a 4.5 inch angle grinder with a nice thin metal cutting disc. fortunately the bonnet is aluminium so easy to cut and no sparks so put a towel over the engine bay under the bonnet.

DSC 5522

DSC 5534


DSC 5525


I cut the two plastic tabs off at the rear of the vent and made provision for a small hole for the single mounting stud on the rear. On the Mustang there are 3 location grooves on the front edge mounting with corresponding mouldings on the vent. I removed these small bits of moulding from the front mounting groove with a dremel.

Removed the thin rubber sealing strip from all around the edge as this would make the grille stand up off the bonnet a little more. The bonnet vent has fixing tape at the rear which I used along with some tiger seal around the sides and across the two clips I had removed and under the area where the bolt is. Trying to make the area watertight so rain running down the bonnet will run around the vent.

DSC 5526


DSC 5531
 
  • Like
Reactions: jojo, Blu-iTT, Misikee and 2 others
Nice one Karl!!
Hope it will dissapate some of the heat under there, which in affect reduces intake temps :)
 
Haven't updated this thread for a while. Have a few things coming up in the next few days. Got to do something to keep amused.
Radiator fan change out on the TT the other day. Decided to have a look for a possible upgrade / weight reduction. Looked at some aftermarket fans Spal , Revotec etc and they looked good but a decent one was over £100. And I would have to fabricate a mounting. Not a fan of the pins through the core to secure it. Looking at what was available OE and cheap ordered a second hand fan off a Skoda Fabia 1.4TDI. 6Q0121207L
Only £20 delivered. Having looked at drawings of the OE fan and this one It looked very close in fitting. This car has only one fan but is larger than the large fan on the 1.8T .

DSC 5614


Unfortunately the internal resistor on this fan was open circuit. I spent £3 on a 0.5 ohm 100W resistor and mounted the resistor externally cooled by the fan. Fairly easy to take the motor apart and bridge out the internal resistor. The Skoda fan shifts a lot more air than the large TT one, and the OE small fan on full speed is fairly anemic.
Did some current measurements using a 12v booster battery pack.
OE large fan 345mm 250/60 w 1j0959455F 5A low speed 10A high speed

OE small fan 290mm 100/60w 1J0959455K 3A low speed 5A high speed

Fabia fan 385mm 250 / 60w 6Q0959455N 7A low speed 14A high speed.
The Fabia fan is taking virtually as much current as both the others combined and does shift some air.The fan is as wide as the rad and the cowl is the same width as the OE fans. To fit it just had to make some flat alloy extensions as this fan is 10mm narrower than OE.

DSC 5617

The mounting point widths are spot on. There are two mounting points for the fan and had to rotate it to the second point to stop the top fan support arm interfering with the top rad hose.That meant making a small bracket. Didn't take long to do and looks a lot tidier . The OE plug for the big fan connects directly and the fan works really well.
And how much weight did this save. Well just about 1Kg which is just about what you lose if you remove the small fan off the OE setup. But this single fan probably moves as much if not more than both the OE fans.

DSC 5619
 
  • Like
Reactions: jojo and Blu-iTT
Been busy over the last few weeks tatting with the car and upgrading / modifying stuff.
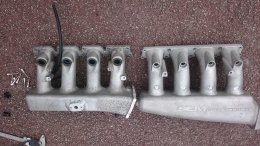
One of the things I wanted to do was change the intake manifold over from the standard BAM small port item with the RS3 throttle body to something more in line with the power output. I really wanted an SEM Motorsport item as they are just about the best manifold you can get for this engine. They haven't made them for the last few years and they are like rocking horse poo.
Spotted one several weeks ago on one of the FB forums and picked it up. In a previous life it had at some time had nitrous injectors in each runner which had been replaced with bolts that were siliconed in. Not really what I wanted so got the holes welded up and ordered an 034 large to small port transition spacer. Most of the SEM manifolds are large port.
Not just the plenum volume that makes the difference but more so the flow is very compromised in the OE manifolds where the injector boss protudes into the runner a lot causing a real restriction. Had to rearrange the vacuum pipes a little and some of the wiring as well as raise the pipe from the turbo to the intercooler as the intake / fuel rail and injectors sit up higher.
Took the opportunity to revisit the boost hose arrangement I had used which was a bit of a codge job with stuff I had available at the time.

Old and new manifold.

DSC 5655

New manifold fitted with original boost hose
DSC 5659


The original boost hose arrangement, used one of the original hoses a stainless exhaust adaptor and a straight piece of silicon pipe.

DSC 5712

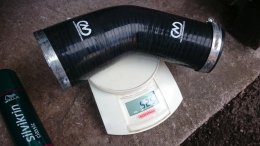
The new hose is a 63-83mm 45 degree hose which does the job much better and fits a lot better on the throttle body.As well as saving 50% of the extra weight the manifold added.

DSC 5713

And the net result after doing some limited testing in the car is about a 5% increase in fuel flow at higher rpm over 6K Rpm, with no change in boost there is more air flow . Should add around 20-30bhp at the top end so making around 535bhp with a good torque increase as well. The car does feel like it picks up better from 5.5K onwards.
 
Not running WMI on the car. Doesn't really need it, I have a water injection system just to reduce EGT's a little on track.
 
Another job done a few weeks ago fitted a second hand HPA haldex controller. Having had a powertrack insert in for most of the time I have had the car had to take the haldex controller off the car to put the original insert back in. Apart from having to remove and refit the haldex controller installing the HPA controller itself is very simple. Pretty much plug and play.
Original insert next to the powertrack.

DSC 5543

So many options on the HPA, Not had chance to fully try everything out, leave it in Competition mode most of the time which seems to work well for me. Should hopefully improve fuel economy a little on a run as it's not now almost permanent 4WD.

DSC 5559

For a bit of a laugh and to see how a TT copes with 500bhp with only FWD, I started the Ignitron logging and accelerated flat out in 2nd gear. It was completely dry around 20 degrees C .
First with haldex in competition mode

Acceleration with 4WD

Then shortly after turned the haldex off. Repeated the same run on the same piece of road. Well tried too, it was wheel spin city. trying to modulate the throttle to reduce wheel spin. Logs show fronts are both spinning quite nicely around 60mph whilst the car is only doing around 40mph. I have pretty decent road tyres 245/35/18 Michelin pilot supersports so no lack of traction there. 4WD FTW.

Acceleration with FWD
 
  • Like
Reactions: jojo and RyanJonS4
Made some other aero changes to the car recently to try and reduce drag and improve down force. At the rear of the car got busy with the angle grinder and removed a section of the rear apron and the diffuser. Removed the rest of the rear arch liners that I had left in that stopped air finding it's way into the bumper.

DSC 5663

With the rear bumper remounted I made an aluminium plate that runs across the top of the opening and stops air from running up behind the bumper. Not shown fitted in this photo.

DSC 5681

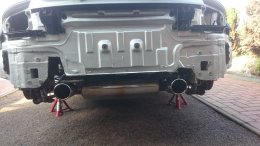
And the view from the rear now shows off the nice shiny exhaust system. Saved about 4Kg in weight, that rear apron is crazy heavy.

DSC 5679

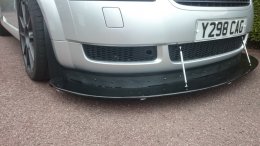
On the front decided I needed some more downforce to balance out the rear wing. The original splitter I made, version 1, had no air dam which really helps to make the splitter work. So Version 2 splitter I added the air dam.
Moving onto version 3 I have made it bigger and lower as well as making some other mods.
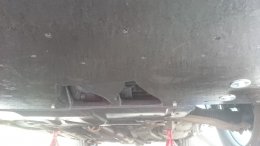
Original splitter was 3.5 inches deep this one is 5-5.5 inches deep and 25mm lower . I have also made it to work with the original undertray and provided cut outs for the NACA ducts that cool the gearbox.Previously didn't run any undertray under the engine and this adds drag. Also the original splitter blocks the gearbox cooling intakes.
Added some skid blocks as well just in case it rubs a little.

NACA cutouts for the gearbox cooling,

DSC 5724

Extended the end fence which is beneficial to reduce drag and consequent lift generated by the front tyre. Also put some small spoilers underneath in front of where the tyre is. These are fitted on the OE car to push air down in front of the tyre so it doesn't produce drag. Also creates a small amount of lift but worth it.Splitter is 12mm ply. And it will take my 85Kg standing on it so quite happy to have it on the car at 140+ mph.

DSC 5729


DSC 5728
 
  • Like
Reactions: jojo and Blu-iTT
After checking the state of the ignition wiring I was quite shocked to find it in a pretty poor state. Lots of cracked insulation on wires due to the heat from the engine/turbo. I have done my best to guard the wiring but it is nearly 20 years old.
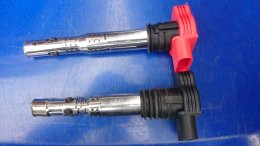
I replaced a few pieces of wiring and added insulation here and there to avoid any issues in the future. Also decided to upgrade the coils as the ones on the car are several years old and there are better ones available.
Bought a set of NGK U5014 R8/TFSI coils , quite reasonable at just over £26 each.
I did read several articles about how good they were in comparison to the OE items fitted. They do take a lot more current than standard coils and the standard dwell on the Ignitron map is a little high for these coils.
Going more than 2.5ms dwell does nothing to get anymore power from the coil, at this duration it is saturated and pulling over 13A.
I have set my dwell up so typical dwell is 2ms going upto 2.3ms at high boost.
Crispy coil wiring

DSC 5778


Old and new, the new ones are a little longer.

DSC 5782

DSC 5783

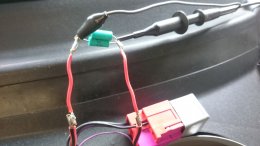
Did some testing myself of the current taken vs Dwell on the NGK u5014 coils. Dug out my old Tektronix scope, must be over 30 years old but still chugs on. Found some 0.1ohm 2.5% power resistors and put two in parallel to make a 0.05ohm burden resistor. Put this in the power feed to the Motronic relay so measuring current for just the coils.Altered the dwell map so it varies dwell from 1.5ms at idle upto 3ms at 4K. Set up some nice big gauges on the Ignitron tablet and made some measurements.
TBH found pretty much the same as seen on other threads on the net but nice to verify it myself.
1.5ms = 8A
1.7ms = 9A
2.0mS = 10.5A
2.5mS = 13A
2.75mS =14A
You can see on the video that after 2.5ms the "knee bend" occurs and increase in current changes and is no longer linear. Coil is saturated so any further increase in dwell just heats the coil up more.
It seems recommended dwell around 14V is 1.7-2.0ms which seems good to me. I think I will run them around 2.1-2.2ms when the engine is in boost. Running them at 2.5ms will probably get the most out of them but they are liable to not last as long.


This is the dwell table I run in Ignitron for the coils and works very well. No issues or problems on track or on the road.

1672504105926


DSC 5796
 
  • Like
Reactions: Blu-iTT
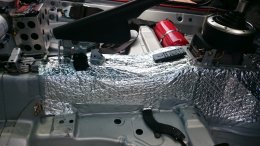
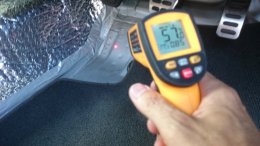
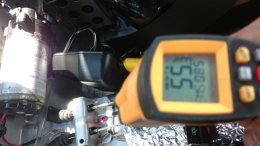
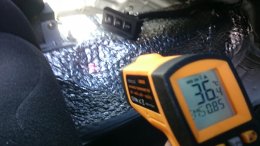
Quick job I did the other day as I have noticed when on track the prop / exhaust tunnel does get pretty toasty in the car. Just normal driving when it's hot will get temps to around 45- 50 degrees. On a track day probably closer to 65 degrees. I have all the aluminium heat shielding on the tunnel and most of the downpipe , manifold etc is heat wrapped.
Used some insulation I had left over from doing another job.
Does make a difference in the car and only added probably 100g tops to the weight. Also helps to quieten the interior a little. Any soft surfaces help to stop noise bouncing around in the car.

DSC 5832

DSC 5834

After 15 minutes driving and not particularly hard either.

DSC 5837

DSC 5838

Temperature used to be hottest on top by the gearstick. Now near enough 20 degrees cooler.

DSC 5840
 
  • Like
Reactions: jojo, Blu-iTT and Bryant1998