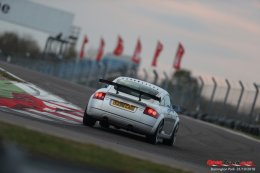
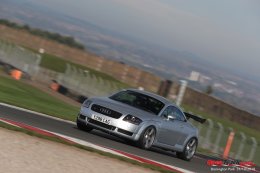
Mk1 TT 225 track day car, Officially a ten second car 10.8 seconds at 127 mph.

Shopping on Ebay again. Decided that the Michelin Pilot Supersports were great and really gave the car loads of grip but on a
hot day like Sunday and on a faster track they would probably get ripped up quite quickly. So decided to get some proper track day tyres and put the Michelins on another set of wheels for tracks where it's either wet or cold.
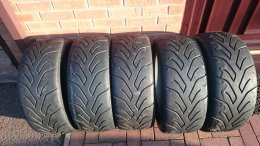
Found some barely worn Medium Hard Yokahama A048's in a 235/40/18 size that were from the last batch of road legal tyres they made. Despite being a 235 tyre they have virtually the same width of tread as the 245 Michelins.
They are directional but unlike most directional tyres you can turn them on the rim so if the outside edge wears a lot you basically get two tyres out of one.
They normally come with 4.7mm of tread as new, 4 out of the 5 tyres have between 4.5 and 4.7mm of tread and the 5th 4.3-4.6mm they have only done one track session apparently.
Reviews on these are pretty good and they feel suitably sticky with very stiff side walls on the tyres, almost like a run flat.

DSC 3747
 
  • Like
Reactions: jojo and Golfyste
Got busy over the weekend doing a few jobs on the car. Changed the Passenger side outer CV joint for a new SKF item with a new boot. The new boots seem to be made of what appears to be plastic and not rubber. The Drivers side already appears to have been changed at some point in the past.
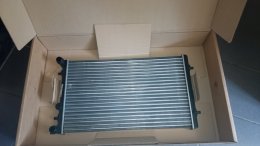
The Nissens 65011 radiator arrived, this is the one used in the V6 and is also specified as an upgrade for the 1.8 in hot climates or if the engine is modified. I got the new rad off Fleabay (where else) only £58 delivered. Ordered some new O ring seals and a seal for the coolant switch separately.
Came in a nice big box ,

DSC 3746

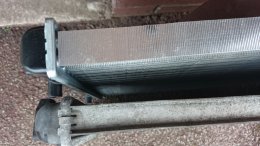
Removing the old one wasn't that difficult. once I had it off I was really surprised how thin the original item was, only 25mm against the new one at 34mm.

DSC 3750

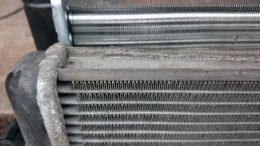
The original uses a thin channel to carry the coolant across the rad, where as the Nissen item uses two circular pipes on each layer.

DSC 3751

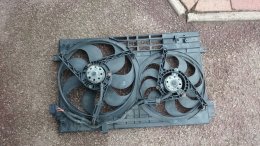
Whilst I had the rad pack out I added a few holes to encourage flow through the rad, before

DSC 3753

And after

DSC 3754

Initial tests seem to indicate cooler running with the new rad, which is what I would expect. Be interesting to see how mich difference it makes to coolant temps on the track. Got to 102 degrees at Rockingham, be good if this can keep it more like mid to high 90's.

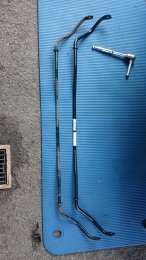
And lastly the upgraded rear ARB arrived. Gone for a 16mm rear ARB off the 4 motion Golf. Ordered some Super Pro 16mm bushes. Fortunately all the original bolts came undone on the brackets. Reasonably easy to change for me as I have removed the alloy heat shield from the rear exhaust. Otherwise I would have had to drop the exhaust then remove the heat shield to get at the brackets.

DSC 3755

Quite amazing the difference just 2mm on the rear ARB makes to the handling. Car now turns in much better, the rear is a little harder when going over potholes drains etc, and feels a little more nervous compared to before.
Will see how it goes, need to do some more miles before I am fully happy but this is definitely a step in the right direction.
 
  • Like
Reactions: 45bvtc
Great work mate, been reading this over the last few days whenever I had a minute. Wish I had the time and funds to do something like this.

Car sounds great, sounds that good one of your gti international vids jyst blew the speaker on my phone!
 
Next track day arranged at Donnington on the National circuit at the VAG tuner live event on the 8th July. Looking at some of the you tube videos there are some pretty quick cars on track so should be interesting. I suspect I will be lacking down some of the straights with only 275bhp but should be fun.
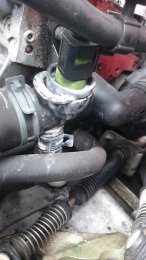
Sorted some small jobs the other day, Noticed I had a coolant leak from the engine temperature sensor, ordered some new seals and clips from Fleabay to replace the rubber O ring which I suspect has probably gone hard.

DSC 3756

Contemplated draining the system, but I changed one of these on my Passat many years ago and the amount of coolant lost was tiny when the sensor was removed, so decided to remove it and see how much was lost.
Fortunately it was the same again, released any pressure in the system by removing the coolant overflow bottle filler and then doing back up again. When the sensor was removed I would say less than 20-30ml of coolant came out. The original O ring was more like plastic than rubber and was pretty hard. A new O ring has resolved this issue.

https://www.ebay.co.uk/itm/X3-O-RIN...NG-FLANGE-BUNG-SENSOR-SWITCH-VW/172801999694?

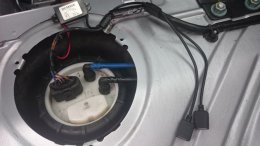
Added some USB charging points for the action camera in the car and the bluetooth GPS dongle I use with Harrys lap timer.

https://www.ebay.co.uk/itm/Car-Hard...-for-Dash-Cam-iPhone-GPS-DVR-UK/113010100967?

Looking for an ignition switched feed to connect it too in the rear decided to connect it to the fuel pump motor feed. Only gets powered when the car is running so hopefully won't get any flat batteries. Just have the 2 USB plugs showing inside the car so it looks fairly tidy.

DSC 3760
 
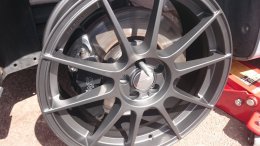
New Autec Wizard 8x18 ET35 alloys arrived today from Tyre Leader. Very well packaged.
Tried them on the car just to make sure they clear the caliper which was my only concern really.
And as they are a Motorsport type design there is a lot of clearance between the caliper and the spokes on the wheel.

DSC 3767

DSC 3768

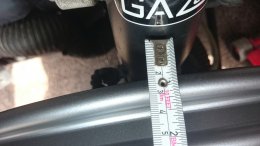
I have 15mm spacers on the car all around so ET20, The Gaz Gold shocks are thicker than the standard items .

DSC 3770

I have some Team Dynamics Pro Race 1.2 8 x18 ET35 alloys on my A4 and they weigh in at 9.5Kg each. The Autecs are 9.7Kg so pretty much the same as a Pro Race 1.2 would be.

DSC 3772

I would have gone for the Pro Race wheels if they were a more reasonable price, but the cheaper Black Gloss alloys are around £650 where as silver is more like £720 for a set.
I think these will look quite good on the car in the satin Gunmetal color.
 
  • Like
Reactions: Sandra
Took the car to Track Toys racing last week which is a local company by me that do all kinds of race car prep and track car builds and setup for people.
https://www.tracktoys.co.uk
Really wanted to see what kind of weight the car was running and how that was distributed so popped over to get that done and see what they could do to help with the car handling.
First thing was to weigh the car. I left the heavier Team dynamics wheels on with the Yokahama A048 tyres which are heavy as well compared to the Michelin Pilot Supersport. Nearly 12Kg total heavier than the Autecs.
18x8 Autec Wizard with 245/35/18 MPSS tyre 19.6Kg
18x8.5 Team dynamics Jade alloy with 235/40/18 A048 tyre 22.5kg
Car had 5/8 of a tank of fuel, Not sure what most people weigh there cars with but probably more like 1/4 tank with a roughly 60L tank and 0.75Kg a litre for fuel 3/8 of a tank weighs around 17Kg so with a quarter tank and the lighter wheels car would have been 28-29Kg lighter.
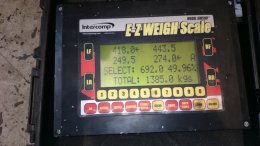
Came in at 1310Kg with a LF-RR split of 44.5% , when I sat in the car that stayed pretty much the same.

DSC 3808


They measured the ride heights with out me in the car and with me in it, those changed quite a lot especially the right rear.
They checked the camber without me in it and they were pretty much set at 3 degrees front ,1.5 degrees rear give or take 0.1 degrees.
I am taking it back there next week and they are going to set the corner weights and try and get those closer to 50% LF-RR.
I moved the fire extinguisher after to help a little from behind my seat to in front of the Passenger seat. It's in a better place there anyway as you can get it from the drivers seat if needed.
 
Had a good day out at VAG Tuner live at Donnington. Parked on the TT Forum stand when I wasn't on track . Went out in the morning session 11:00 til 12:30 and the afternoon late session 15:00-17:00. It really was pretty hot in the afternoon session the car temperature gauge was saying 29.5 degrees.
The car ran well oil temps never topped 110 degrees despite the temperatures although I did see 115 degree coolant temps in the afternoon sessions despite short shifting around 6300 to try and help the engine a bit. But with nearly 30 degree temps it's not surprising.
Looks like some cooling vents in the bonnet maybe the next mod just to cover this.
Brakes were great, really strong all day, no sign of fade at all and I seemed to be braking deeper and later than most cars, indeed this was how I was managing to keep up with some of the faster cars. Only one run off the track at McLeans I put the outside 2 wheels through the gravel trap. Trying to leave the braking later and later as it's braking up hill and I left it a little too late. Picked up some gravel rash on the sill and the passenger rear wheel. Good job it's not a show car
yabb_smiley.gif
.
A great track really liked running down the Craner curvers at 100mph+ and some of the corners a good challenge as they are blind or have more than 1 apex. Managed a 1 minute 26.88 fastest late in the afternoon session when it was it's hottest.
Hard to find a clear lap without having to overtake somebody, there were loads of red flags too which limited the amount of laps you could do.This lap was following one of the Darkside cars, Think I could have gone a little quicker as he brakes in the middle of the Craners, I could take that flat through the kink.
The sync between the data logged and the video is not quite correct, This seems to happen after you have done a few laps.
The video is a few seconds in front of the lap speeds.


A video from the action camera in the car, set the exposure incorrectly unfortunately, looked OK in the pits when I set it up in the morning.


Got overtaken near the end by one a tuners RS3. Very rapid on the straights but I was catching him under braking and in the corners, pity the session got red flagged.
 
  • Like
Reactions: Blu-iTT
Car made this months edition of Audi Driver, Neil Birkitt came along to the Curbrough sprint session and took some great photos of the cars and Eddie from Club GTI added the words.

Audi driver magazine011
 
  • Like
Reactions: 45bvtc, jojo and Blu-iTT
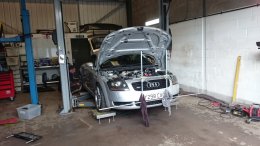
Haven't updated the thread for a while. So catching up a bit, took the car to Tracktoys https://www.tracktoys.co.uk and got it corner weighted and the Geo reset with the corrected ride heights and with the drivers weight in the car.
Really good job Matt did, measuring and remeasuring as things were changed.
I weighed in at 81Kg so 83Kg of brake discs found their way into the seat to simulate my weight. With half a tank of fuel the car weighed in at 1385Kg so the car is just on 1300Kg with half a tank of fuel.
After establishing the ride heights and rake I wanted on the car it was tweaked and adjusted till it is running a 50/50 split on the LF/RR weight split.

DSC 3834

Then onto the Geo set up. Went for 3.5 degrees of camber, max castor parallel front track. 1.5 degree rear camber .
No lasers here though, strings and lots of careful measurements with vernier calipers.

DSC 3835

Very happy with the resultant handling , the car does feel like it corners better and I am looking forward to the next trip out on the track at Curbrough on the Bank Holiday Monday coming. Hopefully I will see an improvement in lap time with all the tweaks I have made since the last time I was there.

https://clubgti.com/forums/index.ph...fun-day-bank-holiday-august-27th-2018.287991/
 
  • Like
Reactions: ruairi83
Also started collecting parts to give the engine a little more oomph on the straight bits. After spending time looking at what the options are against the costs I came to the conclusion that any meaningful improvement from the current performance level is going to be expensive, Rods, manifold, turbo, injectors, clutch, remap, exhaust valves etc etc.
So decided to push the boat out a bit and do this once hopefully. Rather than going to a hybrid and at some later time end up upgradeing parts why not just put a big turbo on it in the first place ?.
As BTN Performance the UK importer for Garrett are offering a 10% dIscount on Garrett ATM I have ordered a G25-660 turbo.

https://www.btnperformance.com/871389-5010s-turbo-assembly-kit-v-band-v-band-0-72-g25-660/

Won't quite get the spool of a K04 but looking at various build threads using these turbos they do pick up very well and provide large amounts of air with good efficiency.

On Back order ATM so may be a few weeks before it lands but I am in no great hurry. Still have lots more shopping to do :) .
 
  • Like
Reactions: RyanJonS4, ruairi83, jojo and 1 other person
Had some fun at Curbrough on bank holiday Monday. Nice to meet up with @jojo who had a run out in the car. And I showed him how not to do a quick lap by spinning when he was a passenger in the car . Managed 2 off track excursions in the morning as the A048 tyres were not getting any heat in them with the low ambient temp and the very short run on the track. Fortunately no damage and it kept the crowd happy.
Took the car back home during the half time break as I only live just down the road and put the Alutec wheels on with the Michelin Pilot Super Sports, This was a much more stable set up in the afternoon.
Getting noise checked in the morning.
Car shot exhaust noise check


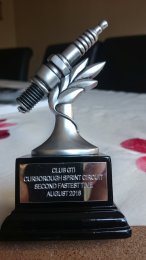
Managed the second fastest time of the day and picked up a small trophy.

DSC 3869

The quickest car of the day was an MTM tuned TTRS which was about 0.3s quicker than me on a 28.5s lap. The car was not quite as quick as it had been earlier in the year. I put that down to the cooler temps meaning traction and grip were compromised . But also the car was not as stable which I suspect may be down to the rear ARB I upgraded. So will be putting the original back on the car for the next time.
 
  • Like
Reactions: Mark Bridges, 45bvtc, Sandra and 4 others
Had some fun at Curbrough on bank holiday Monday. Nice to meet up with @jojo who had a run out in the car. And I showed him how not to do a quick lap by spinning when he was a passenger in the car . Managed 2 off track excursions in the morning as the A048 tyres were not getting any heat in them with the low ambient temp and the very short run on the track. Fortunately no damage and it kept the crowd happy.
Took the car back home during the half time break as I only live just down the road and put the Alutec wheels on with the Michelin Pilot Super Sports, This was a much more stable set up in the afternoon.
Getting noise checked in the morning.
View attachment 164200


Managed the second fastest time of the day and picked up a small trophy.

View attachment 164201

The quickest car of the day was an MTM tuned TTRS which was about 0.3s quicker than me on a 28.5s lap. The car was not quite as quick as it had been earlier in the year. I put that down to the cooler temps meaning traction and grip were compromised . But also the car was not as stable which I suspect may be down to the rear ARB I upgraded. So will be putting the original back on the car for the next time.

Thanks for letting me have a go in the TT mate, it almost felt strange to be back in a 1.8T again, I was definitely rusty! I agree the current setup had a bit of tail happy to it, especially under braking with the load up front. Your brake setup is very nice, but the pedal seems a tad longer than my black S3, of what I remember of it anyways. Still, I had fun, and it was nice to go ripping around the course, so cheers! :)
 
  • Like
Reactions: 45bvtc, voorhees and Sandra
Longer pedal travel than the standard system due to the 4 pot TTRS calipers on the front and the larger 43mm pistons on the rear compared to the standard 38mm items. Not a lot I can do about it but I am used to it so it doesn't bother me.
 
Last edited:
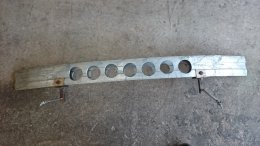
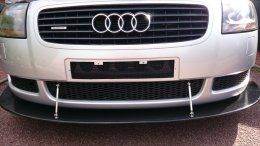
Making some mods to hopefully improve cooling on track with the planned power upgrade. Ventilated the Bumper bar and created a decent size hole behind the number plate. This should encourage a lot more air through the top of the intercooler and the middle of the radiator. Vents in the front of the bonnet to follow.
I wanted to keep the bumper bar as I hang the supports for the splitter off it and it really doesn't weigh that much.

DSC 3898

Cut some pieces of high density foam to fit into the bumper, stops air running along the bumper.

DSC 3899

Some black spray paint on the bumper bar and some alloy mesh fixed to the rear of the bumper with hot melt glue completes the mod. Takes a Minute to remove the number plate at the track.

DSC 3906
 
  • Like
Reactions: ruairi83 and jojo
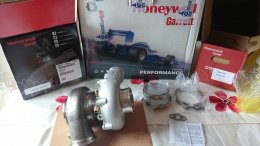
Well the UPS courier arrived this afternoon with a parcel from Germany.
Boost united UK Ltd appears to be STK Turbo Technik https://en.turbolader.net/ as this is where the turbo has come from.
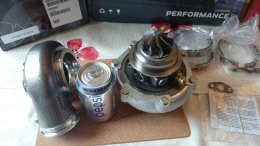
I some how had it in my head a turbo supposedly good for 660bhp would be a little bigger.
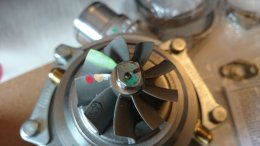
Can't get over the size of the turbine wheel, looks quite small and fragile all the better to spool I suppose.
Better get on and start ordering/ finding all the other bits I need to make this work. The plan is to get the engine / gearbox out over Christmas and then build it up.

DSC 3916

DSC 3917

Lots of paint on the turbine wheel.

DSC 3919
 
  • Like
Reactions: jojo and 45bvtc
Our 185bhp A1 has a supercharger and turbocharger, Karl; the supercharger sure gets the A1 up and going and then the turbocharger smoooooothly takes over. Maybe a similar installation for you would be of consideration.

You know where we are... :racer:
 
Hi John, thanks for the suggestion but thats all a bit complicated. Worked well for the Lancia Delta Integrale but turbo technology has come a long way since those days.
 
  • Like
Reactions: 45bvtc
Well the car passed the MOT. Just spent 15minutes changing the cat out and putting the cat delete pipe back in.
Only one advisory .
Passenger seat(s) missing at the time of the test Rear(All) .
Think I can live with that :)
 
  • Like
Reactions: 45bvtc
Subscribing for interest in the g25-660 progress and results. I am currently installing the same turbo on my 225 track toy az well. Good luck and post updates!!
 
I will Max. Ordered a Nortech manifold and downpipe from Bill along with an Ignitron ECU so collecting bits. You are well in front of me I don't plan to be taking the engine out till Christmas time really.
 
Out in the TT again on Wednesday at Donnington. Great weather for it ,dry all day but a little chilly around 10 degrees max. Dad came along and had a drive, we attracted a bit of a queue behind us at one point. Had a possie of Renaults trying to pass.He wasn't going quite as fast as I do but the TT is a good deal faster than the Austin 7 ulster which he usually races.
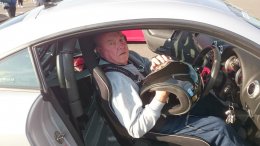
He did struggle to get in the car a bit :D
DSC 3969

44938354274 202d419b12 o

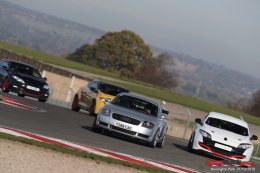
Some nice cars out on track not often you see a 150K Ferrari 458 but there was a black one out on track with us when I gave dad a passenger ride. Let him past as he was a little faster . But then caught him up in traffic and passed him back.
Saw this in the paddock and the carbon ceramic brakes on the front were massive. Probably a pair of discs would be more than my TT.


Some laps later on in the afternoon when there was less traffic on the track.Going dark and a little cooler. With all the engine mods planned power should be going from 275bhp to hopefully 450bhp so lots more straight line speed.


I can throughly recommend Opentrack (https://www.opentrack.co.uk/ ) They had 2 ARDS instructors who you could book with to get a 30 minutes session and this was free along with all the High quality photos available in a FLICKR album to download. https://www.flickr.com/photos/opentrack-track-days/albums/72157699802110342
I have about 35 pictures of my car. And had around 20 minutes with Martin Sismey due to a red flag and found that very interesting. If I can just put into practice what he was telling me I know it will help a lot.


43845665460 8ae6298f35 o

30722572667 cdb5a4f017 o
 
  • Like
Reactions: Blu-iTT and jojo
Another you tube video with some more in car footage.

The White car that overtakes me is a 12 plate M3 BMW , Just 420 bhp.
Learned a few things on the day.
1. I have a lot to learn about circuit driving and lines, need to turn in later and be smoother. Probably as much lap time gained as adding a good chunk of power. Get the line out of Coppice corner onto the back straight right and you gain 4-5mph at the end of it.
2. The TT does not like running with much less than 3/8 of a tank of fuel, After that long right hand corner at Coppice coming onto the straight the car would intermittently back fire and miss. Looking at the fuel pressure gauge I could see it was low. Certainly when it was down to a 1/4 of a tank it was quite bad. Fill the tank back to 3/4 and instantly fixed. Need to investigate a seperate swirl pot possibly.
3. Oil temps seem well under control never topped 100 degrees all day. Most of the time around 97 degrees. Coolant max seen was 105 which I still think is too high bearing in mind the 10 degree ambient, so looks like the bonnet will be getting some venting.
 
  • Like
Reactions: Blu-iTT
Had a go at fitting the Bi Xenon projectors I bought off Ali-express the other week.
https://www.aliexpress.com/item/For...For-BMW-E46-E39-E60-X3-Audi/32670291575.html?
For AL Headlight Replace Bi-xenon Projector Lens D2S For BMW E46
These are made by Sinolyn and I have used there stuff before, It seems good quality.
They were £46.50 delivered, you get £3 off if you register a new account.
Came quite quickly just over a week to deliver not bad for Aliexpress stuff.
Started off by parking the car in front of the garage door and marking the beam pattern with some masking tape. This way I can reset the headlights correctly to get the beam height correct and the left right position correct.
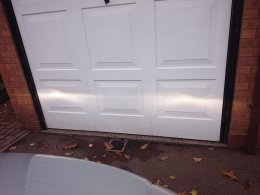
DSC 3993

Whipped the bumper off and removed the off side headlight first. There are several places where you can find out how to remove the bumper and headlights, It's not that tricky especially if you have a 10mm nut driver to undo the 10mm nuts that secure the bumper.

looking in the back of the headlight I could see that the existing projector could be removed by undoing the 3 screws which are 6 point security Torx.

DSC 3996

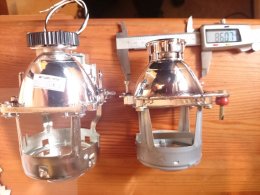
Putting the new and old one together to see how much of a challenge this will be :)

DSC 4007

DSC 4010

DSC 4012

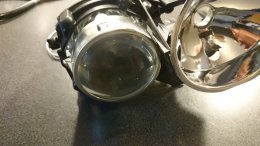
Well the new one is bigger in a few dimensions, the lens is 75mm across compared to 65mm on the original. They are much the same length and some of the screw fitting centres look not too far apart in dimension so looks promising.

Tried to fit the new projector in the light in the vain hope it might actually fit and I wouldn't have to split the headlight. Well it didn't so I put the oven on it's lowest setting about 120 degrees , removed the HID electronics which is held on by three phillips screws and put the headlight in to bake for 10 minutes. Put the Kettle on and made a cup of tea.
I have some plastic trim removal tools that I used to split the headlight, and use a pair of gloves as well as makes holding the light easier.

The headlight came apart reasonably easy, don't forget to remove the 4 clips before putting it in the oven.
I had bought some new butyl tape to reseal the headlight. It's good to use this as if you stick it together with something like silicon you won't get it apart again. The butyl goes quite soft in the oven . Some people just stick the unit back together using the original butyl but it's more likely to leak I would of thought.
https://www.ebay.co.uk/itm/BUTYL-SN...CREEN-METAL-PANELS-BODY-SUNROOF/282706251076?

I removed a lot of the original butyl sealer whilst it was still warm.

DSC 4013

You need to remove the indicator reflector at the bottom of the headlight, there are 2 small Torx screws securing it at either end.
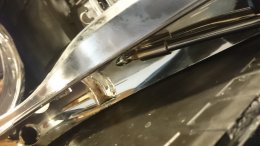
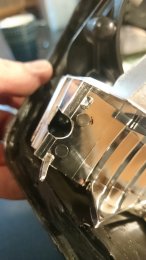
DSC 4016

DSC 4017

You then need to remove the main beam headlight and plastic surround that the projector screws too. This is a bit fiddly but by using the two white hex adjusters on the top of the headlight you wind the adjusters to move the main beam reflector out of the headlight casing. Don't forget to unclip the height adjustor from the bottom of the assembly.
You end up with this.
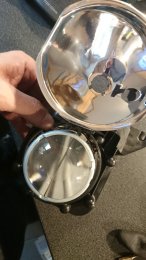
DSC 4019

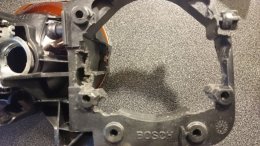
After making some measurements and looking at the location of the mountings on the new light I determined that I could use 1 of the original mounting points . I had to use a dremel and junior hacksaw to trim the plastic mounting plate as the 4 arms that support the lens have a larger diameter so fouled the mounting. Also the flap that opens for the Bi Xenon effect was catching on the sides.
Points 1 and 4 need trimming to stop the Bi xenon flap from catching. Points 2 and 3 are trimmed to allow the bottom arms that mount the lens to fit.
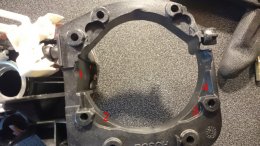
DSC 4020

And after

DSC 4021

DSC 4022

Time to mount the new projector, The screw in the top left of the projector goes into the original mounting hole.
The bottom two holes need drilling. If you use a 4mm drill you can re use the original mounting screws as they self tap into the plastic. If you look closely at the picture you can see a nut as well as the original red rubber mounting. This nut is needed as the one original mounting sits on a raised pad about 4mm deep. So to keep the projector square you need something 4mm thick . i used some thin nuts.
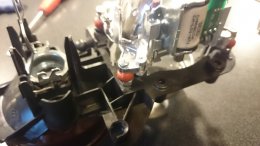
DSC 4023

Should Look something like this

DSC 4024

Before you put the headlight back together you need to trim a piece of plastic from just above the ballast for the bulb.
The wires from the bulb are held on a brass clip secured to a piece of plastic. This clip needs removing and the plastic tab cutting back. Otherwise this fouls with the solenoid on the new projector. be careful cutting the plastic tab as the black box under the tab is the ballast for the bulb. Marked "Here" in the following photo.

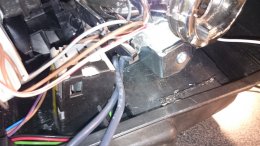
DSC 3996

DSC 4029

Next you need to connect the wires from the solenoid black and white to the main beam connections brown and red/white.
This will activate the solenoid and lower the shutter on the projector giving you main beam.
I connected black to brown and white to red/white. Don't think it makes any difference which way you do it as I don't think there is a diode snubber on the solenoid.
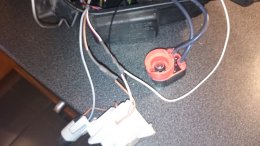
DSC 4030

Just need to put the front back on now. So check there is no dust , or bits of plastic around. Clean you finger prints off the projector lens (I didn't) and get the oven back on. I let it pre heat for 10 minutes or so. If you are just reusing the original butyl then mount the front part on the headlight and put it in the oven for 10 minutes to soften the butyl.
I removed most of the original and applied some new butyl. It's like a 7mm string thats soft and sticky. You can stretch it to make it a little thinner if you want, but starting in the middle on the bottom of the headlight put a continuous run all around the headlight back to the bottom.

When the headlight comes out the oven it's just a matter of reseating the front of the headlight and fitting the 4 clips.
Refit the ignitor unit with the three screws and put the bulbs back in and rear cover back on.

Now time to refit and admire your handywork.
You will notice that it's a tad darker than when I started and I have just done the one side. I recon it will take me an hour or so to do the other side now I don't have to take piccies and I know what to do.

The right side is the new lens the left the old one just in case you can't work it out.

On dipped. The cutoff is sharper than it looks on the photo as the camera has exposed for the dimmer parts of the picture. You can see there is a lot more light on the RHS.
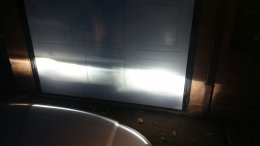
DSC 4034

Main beam is where you can really see the difference, a serious amount of light being thrown out. Not sure why they didn't fit these in the first place.
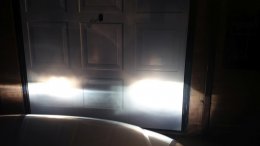
DSC 4035

And a small video,

 
  • Like
Reactions: Blu-iTT
Parcel arrived today from Badger 5. More bits for the engine rebuild.

DSC 4055

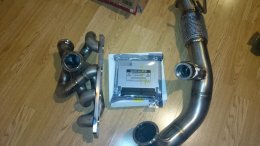
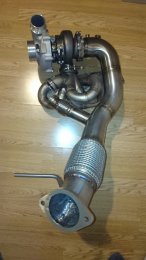
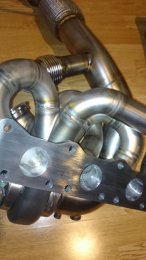
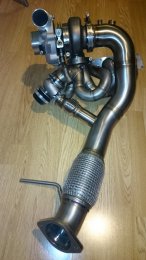
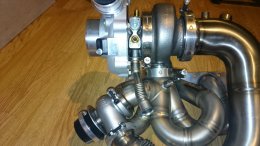
Put the manifold and downpipe on the turbo just to make sure it all fits together, and it does very nicely.
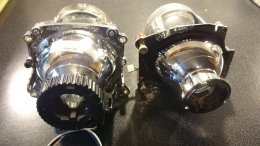
DSC 4049

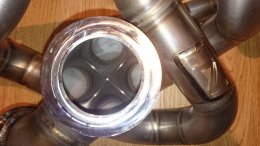
The quality of the welding and finish on the manifold and downpipe is excellent. No cheap Chinese stuff here. Unfortunately not cheap Chinese prices either, But I decided to try and do this right the first time. I went for the 45mm wastegate flanges.

DSC 4052

DSC 4051

Need to download the Ignitron software and start having a look at what it does.
 
  • Like
Reactions: Misikee and jojo
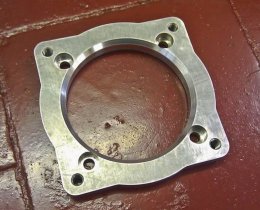
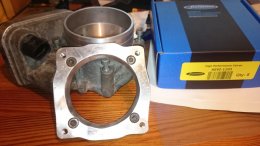
Been out in the garage this afternoon making an adaptor plate for the R32 throttle body. Badger 5 supply them I think and there is a picture on the net of one, so as I have some 10mm aluminium plate I thought I would make one. Think it came out quite good compared to the CNC machined item. Mine was made with a hand drill, hacksaw, carbide cutter, 63mm hole saw and a small bench pillar drill.
Supertech Inconel exhaust valves finally arrived this morning so pretty much got most of the big bits for the engine build.

Badger 5 throttle body adaptor

Throttle body adaptor plate

My attempt,

DSC 4072
 
  • Like
Reactions: Blu-iTT
Another small mod this weekend. Seeing an advert quoting horsepower gains from reduced parasitic losses on the alternator / power steering by fitting lightweight pulleys and underdrive pulleys thought I would look into this.
Didn't want to spend a lot of money and I remember reading that Prawn had changed his alternator for a 70 A item I thought I would look into this. Changing the engine crank pulley is a no no for me as people have had issues with these and that pulley performs a very important function.
An alternator typically runs upto around 15K RPM but most are designed to run to 18K RPM. Did a quick calculation on the pulley sizes 138mm and 57mm so the alternator runs at around 2.42 times engine speed. So 7500 RPM would be 18150 rpm.
So anything over 7500RPM is really over the design speed for the alternator.
As I have a much reduced electrical load with no heated seats, air con , surround sound stereo etc a smaller capacity alternator shouldn't be an issue. It should be lighter and I would expect the stator (rotating winding) to be smaller.
Surfed around on the net looking for suitable 70A alternators and came up with a few part part numbers.
028903028C
030903023H
06A903026B- I bought this one off a 1.6 2005 Beetle. £35 delivered off Fleabay.
The one I bought is a Bosch Item as opposed to some of the others being Valeo items. The advantage being that the voltage regulators on the 70/90/120/140A alternators in this range are all interchangeable. So if I bought one with a duff voltage reg I could swap it. It actually turned out the brushes on the one I bought were quite worn so I swapped my 120A voltage reg into the 70A alternator.
Here are some pictures.
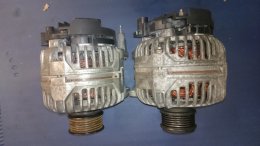
The 70A alternator on the right. These smaller alternators don't need a one way clutch as the rotating mass is smaller the alternator is more easily slowed when the engine speed changes.

DSC 4076

Put them on the scales the original 120A alternator weighs 6.8Kg and the 70 A alternator 5.5Kg . Only 1.3Kg hardly worth changing it out to save just over 1Kg.
They are quite similar in size but I could see the 70A alternator rotor was smaller and shorter than the 120A item. So took the alternators apart to have a look. They come apart quite easily and separated the two halves of each alternator to leave the pulley and rotor assembly with the front part of the case.
Measured the size of the Iron rotor mass in each alternator.
70A 93.5mm diameter by 53mm long.
120A 103mm diameter by 58mm long.
The front part of the case on each alternator was very similar in size and weight so the difference in weight between the two would be the reduction in weight of the rotating mass.
A picture of the two together.

DSC 4089

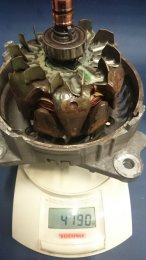
The 120A alternator rotor on the scales

DSC 4091

The 70A alternator rotor on the scales.

DSC 4092

There is 900g 0.9Kg difference in the rotating mass. Thats quite a bit considering the speed that this runs at and a lot more than is saved by changing an alternator pulley or PAS steering pulley. The amount of energy stored in a rotating mass is proportional to the rotational speed squared. So as the alternator spins at 2.42 times engine speed that's nearly 6 times the amount of energy required to spin up the mass on the alternator compared to having it on the crank pulley.
If you underdrive the alternator it may not charge the battery enough at idle speed. This should hopefully maintain a decent voltage at idle speed.
 
  • Like
Reactions: Alex C and jojo
Small update on the car, These big turbo upgrades are complex and expensive. So many parts and bits to find. The alternator seems to work fine on the car.
Been shopping around in the sales and got a few more bits and pieces cheaper than you would normally.

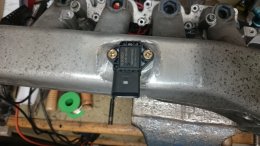
Got a MAP sensor boss welded onto the inlet manifold and the Adaptor plate finished and matched to the manifold so I can fit the R32 throttle body.

DSC 4113

Hopefully will have a go at connecting the Ignitron ECU and make sure that all works correctly. Try running the car MAF less using the new MAP sensor and see what it drives like. Plan is to get the engine/ gearbox out over Christmas and get it all rebuilt with the new turbo .
 
  • Like
Reactions: Misikee, RyanJonS4, jojo and 2 others
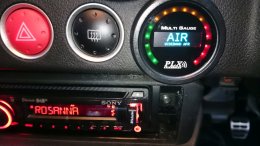
Getting ready for the new turbo. Fitted a Wideband AFR gauge , going to mount the Lambda sensor where the rear cat sensor is ATM. Just need to work out a way of getting the lambda sensor connector back to the gauge.

DSC 4159
DSC 4158
 
  • Like
Reactions: xpoweruk and AlexA4Avant
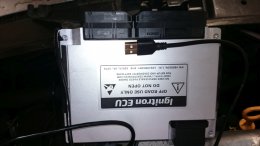
Todays job was to fit the Ignitron ECU and make sure it works OK. Hopefully some of this may help somebody using one of these. Also going to hopefully get used to playing with it a bit before I swap the engine over.Never got going on this till late this afternoon as had to do some Xmas shopping in Telford.
The Ignitron ECU is a PNP solution that replaces the existing ME7.5 ECU. http://www.ignitronecu.com/?page=home&lang=en
The Ignitron is available in the UK via Bill at Badger5.
The advantage of the Ignitron over other similar ECU's is this is a direct PNP item. There are no other harnesses to connect and the ECU pretty much replicates all the functionality of the standard item without it's limitations. Has 8Mb of built in memory so has great logging capability. Changes to maps can be entered within seconds and it has configureable inputs/ outputs so you can interface sensors for oil pressure / oil temp etc to it.
The ECU is very well constructed in a very solid aluminium case. It has a connection to the rear for the USB lead that is used to talk to the ECU.

DSC 4174

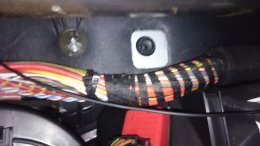
First job remove the old ECU, Not so difficult after pulling the wiper arms off and removing the scuttle panel. To feed the USB into the car I used the blanked hole at the back of the pollen filter. This is visible at the back of the glovebox when that is removed. This means there is a good length of cable in the car to put the laptop /tablet where you like. In my case I am using a windows 10 laptop ATM.

DSC 4176

I had to undo the locating nut on the ECU mounting frame to get the Ignitron in as it's a little deeper than the OE item. No big problem really.

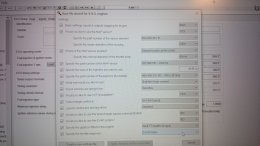
The Ignitron comes with a base file wizard that makes getting the engine running and useable hopefully quite simple. Dependent on what engine code you enter it configures the sensors, The MAF calibration is set dependent on the part number you select, the same with the MAP sensor. Options such as EVAP system, VVT etc are set and things such as the gear ratios allow gear dependent boost limiting , traction etc.
Instead of 386cc for the injector size I specified mine as 445cc as I have a 4 bar FPR on the car.
The wizard has 3 boost maps in it for a K03/K03S, K04 hybrid and a "big turbo" . These are purely to get you going as are reasonably easy to alter. The whole package is quite intuitive and well organised once you have played with it a bit.

DSC 4181

From the logging I did on the car before it was mapped I had a guesstimate at a standard 225 map. Just to get used to what the ECU does.

Standard boost

So following the extensive provided instructions. There is a very good on line translated manual. There isn't an English manual available yet but apparently that is OTW.

DSC 4182

Switched on the ignition, The CEL and ESP light came on and I heard the in tank pump start. Well that was a plus point.
Next connect the ECU to the laptop and see what's going on. The laptop pinged up and said it was installing the drivers and after a few seconds declared that the device was ready.
Opened up Ignitron and tried to connect to the ECU. Spent 10 minutes messing around turning the laptop off and on to get the ECU to connect. Did some more checking and the driver install had failed :roll: .
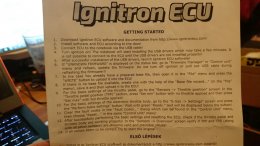
I was at step 4 on the list, I noticed that step 13 was start the engine, Good job I am not too superstitious.
Driver failed to install as they are unsigned. Windows 10 doesn't like unsigned drivers. You can however disable this by following this process . When the laptop reboots it will allow unsigned drivers to be loaded.

https://in.answers.acer.com/app/ans...windows-10:-disable-signed-driver-enforcement

I could now connect to the ECU, Connection was immediate and I could see that the the ECU had unknown firmware.
It appears that a copy of the latest firmware is packaged as part of the install so followed the process and loaded "Toxic Fumes which appears to be the name of the latest firmware level.
Took a minute or less to update the firmware and I could then upload my base map which only takes 10 seconds or so.
Next onto the throttle body adaption and clearing the fault codes.
Then start the engine.
the Engine turned over and busrt into life, unfortunately a little too much life. Revved upto around 3300 RPM and sat there. Switched it off after a few seconds and checked over what I had done.

Quickly realised that in my enthusiasm I had missed out step 9 set min and max settings for the throttle. :oops:

Checked the TPS all appeared to be working OK, showed 0 with no foot on the pedal and 100% flat to the floor.

Restarted engine and it started more like I would expect, idling at around 1200 RPM. It works.

Spent the next 30 minutes or so playing on the drive. Tweaked the warm up Lambda map which seems quite rich to me, think the idle speed is a little high too when the engine is cold but things like this are all easily tweakable.
I discovered that the reset option for the ECU is right next to the check fault codes.

DSC 4178

The engine stumbled quite a bit but it never stopped.
Think I have worked my round a lot of the menu options and hopefully I will get some driving in tomorrow and play with it a bit more after I have put the wiper blades back on the car. Unfortunately it is raining a lot lately.
 
  • Like
Reactions: jojo and xpoweruk
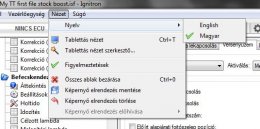
Anybody wanting to download the software and have a look. A useful tip is the default language is Hungarian, To change to English select the English option from the drop down.

English option selector
 
  • Like
Reactions: Misikee
Looks like you have made it :)!
Please check if you have the latest ignitron sw installed, as it seems to be an older one to me (thats why it did not recognize the current firmware and started in hungarian). You need the one with the highest version number from the site (which is I21 R7 at the the moment). After upgrading to the newest sw, you should flash the ECU back to the last firmware :) (it already came with it) and possibly start over creating a new basefile too (because it will create a better one for you). Remember, if you need any help just send me a message!
 
Last edited:
  • Like
Reactions: xpoweruk
Hi thanks for the hint. I already worked out this afternoon that Toxic fumes was an old level of firmware as I bought myself a 10 inch tablet to use in the car and downloaded the latest version of software on that. Then got a warning when I tried to open the base Map I had created.
Thus as you say I need to start again I think but it doesn't take very long. Very impressed with the functionality and the speed with which you are able to change things. Also it seems very well organised and logically set out. Very intuitive to use.
I will be contacting you at some point in the future I am sure, but I usually try to sort stuff myself, you learn more that way.
 
  • Like
Reactions: xpoweruk and baliszoft
Continued playing with the ECU this afternoon.
I hadn't picked the newest version as it looked like it might have been a Beta version, But it seems there have been major improvements with the new software.
Thus installed the latest software version and created a new map.
Using the base file wizard and altering the boost map took about 15 minutes to create a new map. When I connected it to the car it detected the Firmware on the car was out of date, A 2 minute job to upgrade to the latest version. Loaded my new map on the car and started it up.
Straight away I could tell this was an improvement over what the car was doing yesterday. I made changes to the warm up Lambda map yesterday as it looked pretty rich to me, Seems I was right as on the new software a lot of the maps have been tweaked.
The car to drive is pretty much like it was with the OE ECU. Very smooth and pretty much spot on straight away. I was mighty impressed.
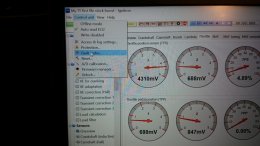
Some of the new features in this software include more integration with the existing modules. The ECU uses the CAN bus to talk to the ABS and other modules like the dash.
You can see the oil temp reading outside air temp fuel level etc and the trip computer now works as the ECU is supplying fuel use info to the dash. The ECU can even see the current ODO value
The fuel consumption accuracy can be tweaked with a correction factor.

DSC 4193

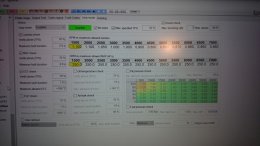
There is a lot more settings on the limp mode protection screen. You can add an oil pressure sensor and configure a map such that the car will go into limp mode if the oil pressure drops below a certain range. Indeed there are about 9 different things that can be monitored that will put the car into limp mode.
If you wait till an oil pressure light comes on then it's probably well knackered already.

DSC 4194

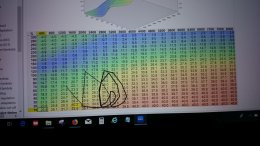
Another obvious addition is a tell tale trace that follows the current setting that's been used when looking at live values.
The trace draws a black line behind it which persists for a few seconds and then thins out and fades away.
This shot was on the ignition timing screen. I was just revving the engine and letting the revs drop. You can follow the path of the actual value being used .

DSC 4196

I also noticed that the ECU now does a calculation to work out power and torque. I have set up the boost and Fuelling based on a standard 225 map from logs I took before it was mapped. So it was interesting to see it recorded 243bhp peak output and 340Nm peak torque. When I ran it on Ricks dyno with the standard map and similar hardware to what it has now it made 234 bhp and 320Nm of torque. The car has a few extra tweaks such as a straight through 3 inch exhaust, and a few other bits so the readings I got seemed pretty reasonable.
The logging facilities are very good and you can export all the info as a CSV if you want to do more crunching on the numbers.
DSC 4203

I can really see why @badger5 and Paul really like this.

@baliszoft just wondering how accurate the calculated power and torque readings are likely to be?. They do seem pretty much where I would expect them to be .
 
  • Like
Reactions: Blu-iTT
The Turbosmart actuator and IE rods arrived this afternoon from Badger 5.
So checked the actuator fitted OK on the turbo/ manifold / down pipe set up. Also interested to see how much movement was available to move the downpipe.
Another reason for going V-band is it gives you some freedom to move stuff. And with everything being V-band mounted I have plenty of adjustment in the positioning of the downpipe.

DSC 4199

I have had an EGT boss welded on the manifold so can fit the OE EGT pre turbo. Also tried out a drain pipe for the turbo oil drain. This is fully adjustable to place it where you need it and will probably be the hardest thing to run in. Fortunately everything seems to fit really well, I suppose I should expect that but you never know.
Will be wrapping the manifold and downpipe in heat wrap to try and reduce under bonnet temps.

DSC 4200

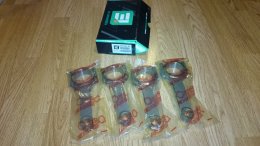
The IE rods also arrived with the actuator. Great service from Bill and Alex at Badger 5. This pretty much completes all the big parts spending.

DSC 4201
 
  • Like
Reactions: jojo and Blu-iTT
just wondering how accurate the calculated power and torque readings are likely to be?. They do seem pretty much where I would expect them to be .

The indicated torque and power depend on the calculated airflow ("Injection Airflow").
This will heavily depend on how precisely the ECU is mapped (and how healthy your fueling is).
- If you use a fairly OEM-ish setup with a MAF sensor (and your MAF is working and scaled perfectly), then the readings may be close.
- If you set up the ECU to use the MAP sensor to calculate load (speed density method), then your VE table will determine the calculated airflow (and therefore calculated power figures, too).

You can easily get lower and higher calculated power figures if your injector sizing is incorrect or if the fuel delivery is inadequate (f.eg low fuel pressure) and you up/down scale MAF or lower/raise the values in the VE map to compensate this.

You also can "scale/finetune" the calculated power values by adjusting the "Power constant" value in Basic settings->Fuel.
The calculated actual torque is distributed on the powertrain CAN network (just like with the OEM ECU), so f.eg the haldex uses it to determine minimum clutch tension, ...
 
Spent a few hours looking around on Fleabay for a suitable tablet to use in the car for programming the ECU and also using as a display. A few people are using a Linx 8 inch tablet, You can get these new for around £80 or even less. I widened the search and included second hand items.
I like Lenovo stuff and every one in the house has a Lenovo laptop, My work laptop is a Lenovo item and has been for many years. So they are pretty well built and reliable. I found the Lenovo Yoga 2.
This comes in an 8 and 10 inch size and found a second hand barely used 10 inch Yoga 2 for £100. Came with all the original packaging, the keyboard was unused and the tablet had only been used a dozen times or so according to the elderly seller.
The tablet had been upgraded to W10 by a family friend and they hadn't used it since. I got the idea they weren't that PC literate.

https://www.laptopmag.com/reviews/tablets/lenovo-yoga-tablet-2-10-inch-windows

These have a great battery life of 12 hours plus and a bright full HD screen 1920 x 1200 . 32Gb memory with a micro SD slot that will take upto 64Gb . The quad core processor is pretty much the same speed as the Linx tablets so it has no problem doing what I want. the big advantage is the fold out metal stand that I figured would make a great mounting point.

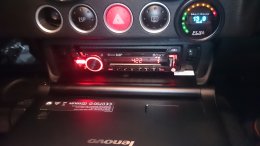
Tried it out for size tonight in the TT.

Smaller display


I Just wedged the stand under the bottom of the radio to take the picture and it sat there fine. Will make some brackets up
and use the screws at either side of the radio to attach the screen. This should mount it pretty solidly. The screen will just lie flat if I want to get at anything behind it.

Smaller tablet mount
 
Last edited:
  • Like
Reactions: CWD and Blu-iTT
Not done much over the holiday, connected the Fuel pressure sensor and Oil pressure sensor into the Ignitron and set up the calibration for the gauges. Can Now log FRP and Oil pressure and implement some protection if the oil pressure drops below defined limits. Hopefully never need it but I would rather get an indication when oil pressure is below 3 bar rather than 3 PSI when the oil pressure light comes on.

DSC 4262


Also changed the car over to speed/ density mapping to see how it runs there and make sure all that works before I start thinking about taking the engine out.
 
  • Like
Reactions: CWD
Really enjoyed catching up on this Karl. Seems like you're doing great!

I'm about to reconfigure my Emerald to run speed density also.

You've got a treat in store when you get the G25 on!
 
Yes reading through some of your posts and stuff that Bill has posted this turbo seems to do everything that was on my list. That seemed to be the case when looking at compressor maps and all the Garrett blurb before people started posting real world results.
Good power and torque at sensible boost levels with a nice wide powerband with decent spool, whats not to like .
A big step up from a stage 2 map on a standard turbo.
 
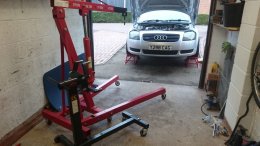
Decided I was happy with the ECU so started taking out the engine this afternoon. Fortunately my next door neighbour has an engine crane and engine stand which I can borrow for a few weeks, top man.
Got the front off , rad, intercooler headlights etc, drained the oil and coolant and disconnected all the electrics, fuel , gearchange , MAF, air filter , TIP and a few other bits.
Need to disconnect the prop shaft , clutch, drive shafts, exhaust and a few other bits then the engine mounts , dog bone etc and hopefully it will be out. Taking the engine and gearbox out together is the plan.
DSC 4266
 
  • Like
Reactions: Blu-iTT and Seanchadwick2k3