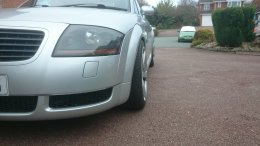
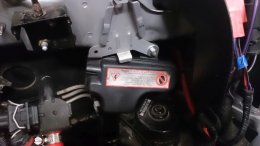
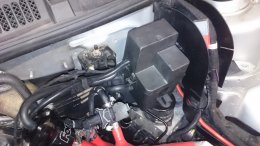
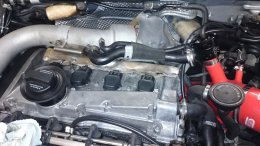
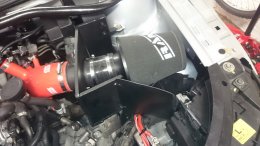
Mk1 TT 225 track day car, Officially a ten second car 10.8 seconds at 127 mph.

Just thought I’d mention that Karl kindly let me have a quick blast in the TT, it pulls very nicely and smoothly through the Rev range! I really do miss this performance of my 8L S3, and as such, I’ve just purchased a small upgrade for my current S3!

It’s all your fault Karl that I’m walking along a slippery slope! :laugh:
 
  • Like
Reactions: Zman6000, 45bvtc and desertstorm
Glad to be of assistance @jojo . I think Rick made a great job with the mapping. I haven't got anything to compare it to as never driven a mapped 1.8t before so nice to get some positive feedback :) .
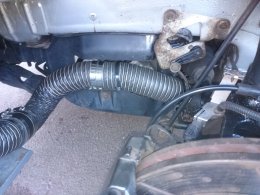
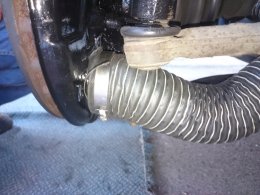
Finished off the brake cooling pipes over the weekend. All hooked up, will have to see how the pipes fair if they need a little rerouting. All seems to be OK at the moment. I may revisit the backing plates on the back of the discs as I used the original ones and added a piece of 2.5 inch intercooler pipe to connect the pipes to . Probably make a better job of it by making my own back plates.

DSC 2969


DSC 2970

Just ordered the roll cage. As it's liable to take a few weeks hopefully I can get it in the car with the seats etc over christmas.
Spoke to GAZ and the shorter rear springs should be here this week so I can finally get the suspension sorted and start stripping some weight from the car.
 
Last edited:
  • Like
Reactions: 45bvtc and jojo
Changed the diff oil this afternoon, last of the fluids in the car that haven't been changed. Decided to go for a decent spec gear oil as it's only 1L and the difference between run of the mill 75W/90 and the best you can get is about £5.
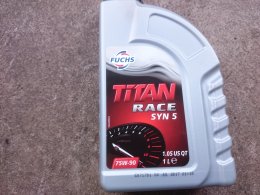
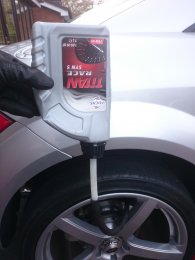
Went for the Titan Race SYN 5 75W/90, this is a very high spec oil and is used by Quaife in all there racing transmissions that use a 75w90 oil. http://quaife.co.uk/customer-service/technical-support/
Less than £15 off Fleabay.
https://www.ebay.co.uk/itm/Fuchs-Ti...ully-Synthetic-Gear-Oil-1-Litre/161133108382?

DSC 2971


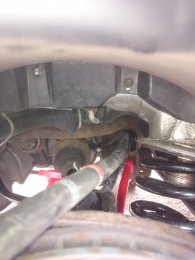
Easy job to do. Fortunately my drive slopes a little so when the car is on ramps it's actually level. You need to get the diff level to fill it to the correct amount. But it's just 1L that comes out and 1L to go back in so as long as you get the whole bottle in you are good. The drain and fill plugs are 17mm hex, I use a Laser 14/17 mm drain key with a 19mm ring spanner to undo the fill first and then the drain plugs.
http://www.ebay.co.uk/itm/LASER-TOOLS-1575-DRAIN-PLUG-KEY-14-17MM-HEX/391284845316?

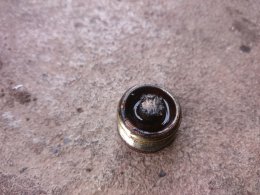
Only a small amount of swarf on the drain plug magnet

DSC 2972


Audi don't make it really easy to get the oil back in to the diff, Fortunately the bottle this oil comes in has quite a long filling pipe so managed to squeeze in about 600ml underneath. Then had to fit a pipe onto the bottle and squeeze the rest in. Having done this kind of thing before I drop the new oil container in some really hot water whilst I am jacking the car and getting the old stuff out. This thins it down and makes it a lot easier to squeeze through smallish pipes. Rested the filling pipe on the top arm of the rear suspension it means the pipe has a steady fall all the way to the filling hole.

DSC 2973


DSC 2974


The old oil was fairly smelly and black, also didn't feel anywhere near as "slippery" as the new stuff.

DSC 2977


Karl.
 
  • Like
Reactions: 45bvtc and jojo
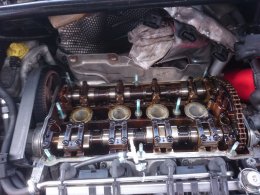
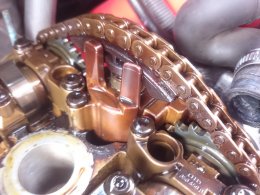
Tackled another little job this afternoon and changed the rocker cover gasket. Seems like another one of those common issues that you get on these engines . The gearbox end of the engine has always had a bit of a weep from the half round rubber block that is part of the rocker cover gasket. And when I changed the plugs I noticed a very small amount of oil in some of the spark plug tubes, so before it gets any worse decided to sort it.
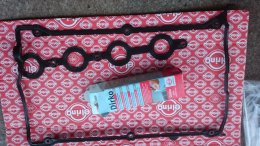
Bought a new Elring gasket from my favourite store and just needed a little of the Dirko sump sealer to stop any possible leaks in the corners of the gasket.
All looks OK with the cams and the wear on the timing adjuster seems OK.

DSC 2985

DSC 2981

DSC 2982


Took longer to clean up the rocker cover than it did to remove it and replace it. Used a rotary wire brush to remove some of the corrosion on the outside and make it a bit smarter. Removed some of the baked on gunk from the inside of the rocker cover.
 
  • Like
Reactions: 45bvtc and jojo
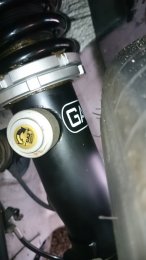
Changing over the front springs to the shorter 6 inch items supplied by GAZ.
Weight saving of 0.3Kg per side and it's unsprung weight. Don't think I am really going to notice it though. Main thing I will be able to do is get it down to the height I want also the spring base should not now get in the way of the tyre hopefully when I fit the track day tyres on the rims.This is what the 225 tyres on the wheels look like at the moment. The adjuster has moved up the coilover body by around 15-20mm so should now be out of the way of a wider tyre. If it needs to go up any more I can get rid of the helper springs.

DSC 2888

DSC 2990

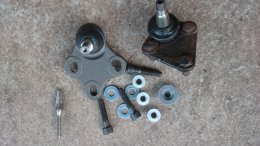
Started fitting the MK2 balljoints, was already for a titanic struggle to get the old ones out as they looked original and was very surprised that the one I have changed so far came out pretty easily. maybe the one that's left will be the nightmare one. The old ball joint I have removed on the one side wasn't that bad really.
Used a carbide burr to remove the material required to fit the new ball joint. Takes just a minute with one of these in a drill they are a very useful tool.
Will have to do some serious adjustment on the tracking as it looks like there will be a serious amount of toe out.The ball joints don't come with bolts so got some 8mm 12.9 cap head screws from my local nut and bolt supplier.
DSC 2988
 
  • Like
Reactions: 45bvtc
Just when you mentioned carbide burr, did you do the exhaust manifold Karl?


Sent from my iPhone using Tapatalk
 
Hi Callum, no not messed with the exhaust manifold on this but that is the reason I have the burr in the first place I have used it to port match the turbo and manifold on the A4. If I ever get to taking off the exhaust manifold off the TT it will probably be because a chinafold will be going on.
Been outside today finished off fitting the MK2 TT ball joints. Really surprised how easily the old ball joints came out . What really caught me out was how tight the locknuts were on the track rod ends . Luckily I have pretty hefty 24mm spanner.
After the ball joints are fitted the tracking is a mile out, probably be off the scale of many measuring devices. Fortunately my next door neighbour who is doing up an MGF bought a nice piece of kit that I have borrowed for a few weeks till I get all the suspension sorted. Set the tracking by eye and then wheeled out the laser. Managed to get it to 30 minutes total toe just by guesstimate before I tried to track it with the laser.

Went from about 25 degrees toe out to 10 minutes total toe .
DSC 2992
DSC 2993
 
  • Like
Reactions: jojo
What were you’re impressions of before and after port matching?
The A4, isn’t that double skinned.


Sent from my iPhone using Tapatalk
 
I just used it on the collector to match the turbo to the collector . You would be hard pressed to notice any difference doing things like this but it all adds up.
 
  • Like
Reactions: QuattroCalum
Those bottom ball joints look almost the same as Audi 80 ones, they seem to have a million miles of adjustment on them. I’ve never attempted doing the tracking, one of the jobs I haven’t tackled.
The China folds, I can’t help wondering if they would function better by putting a relief cut on them the same as the oem manifold has, warping does seem to be a problem.


Sent from my iPhone using Tapatalk
 
Shorter rear springs turned up today. Should be able to get the car down as low as I want it now. The spring is very small :) .
Rated at 850Lb/in and just 4 in high.

DSC 2997


Hopefully get these fitted on the back this weekend and have a go at setting up the suspension with a few bits of string a spirit level and the digital angle gauge I bought.
https://www.ebay.co.uk/itm/Digital-...r-Inclinometer-Magnetic-Base-UK/302480183659?

The roll cage is due to be delivered 15/12 so can start stripping some stuff out of the car to fit the seats harnesses and cage.

Upgraded the lighting in the garage as well to make it a little brighter in there. I can strongly recommend these LED Batten lights. They are IP65 rated so are wired in the ends to achieve that waterproof rating. Not a problem in the garage.

https://www.screwfix.com/p/lap-twin-led-batten-43w-4400lm-4ft/6481v
 
  • Like
Reactions: jojo and QuattroCalum
Well the TT spit it's dummy out tonight and decided to make a mess on the drive. Fortunately only popped out down the road but when I came back walked around the front of the car and noticed an oil trail on the drive. Quick look under the car and there was a good pool of oil under there. Popped the bonnet only to be greeted with oil everywhere, on the underside of the bonnet, all over the front of the engine , and a nice puddle on the undertray.
Pushed it over some newspaper to catch the dripping oil and spent 10 minutes cleaning the drive.
Checked the oil level and fortunately it was only half way down the dip stick.
Next job get the undertray off and locate the leak. Nothing obvious till the engine is started then a steady flow of oil from one of the oil cooler hoses. A small split in the one hose, looks to be about 5mm long about 3-4 inches from the connections on the engine end. I cannot work out what's caused it.
The hose was supplied with the oil cooler and is Aeroquip FC598 spec. The only thing I can think is that the engine is moving a lot more than I thought and has strained the hose, and it would have to move several inches to do that. I replaced the dog bone mount with a powerflex yellow item so it doesn't move very much.
Other than that it's some kind of manufacturing issue . Ordered 3m of new hose so will make the pipes several inches longer just in case that is the issue.
Any body else had any similar problems like this. Good job it happened now and not on a track.
 
Damn, that’s unfortunate but at least there’s no real harm done.
That rear spring is hilarious


Sent from my iPhone using Tapatalk
 
Bit of an update. Oil cooler hopefully sorted now Pipe run allows more movement of the engine if it wants, so hopefully won't see a repeat of the split pipe. I honestly don't think it was down to engine movement stretching the pipe before but you never know.
Rear springs are fitted and ride height looking reasonable now.
DSC 3000


Bit of camber on the front

DSC 3001
 
  • Like
Reactions: ashley cox, 45bvtc, jojo and 1 other person
Bit of an update. Did some logging on injector duration a few weeks ago and monitored the fuel pump pressure under load.
Did a video of the Boost gauge with the pressure sensor switched to the fuel rail. Third gear acceleration run.
3500 rpm
3500rpm

4000 rpm
4000

5000 rpm
5000rpm

6000 rpm
6000rpm

6500 rpm
6500rpm

The fuel pressure should track the boost and at 3500rpm seems to be keeping up about 0.15 bar low. As the rpm increases though and flow increases the pressure cannot keep up. At 4K it's about 0.2 bar low. 5K down to 0.4 bar low and at 6k still around 0.4 bar low. 6500rpm down by nearly 0.5 bar.
The injection duration is running around 95-97% from 5700 to 6500. Rick did say it was maxed out on the fuelling.

Fuel injector duration


Checking the fuel trims -0.6% at idle and 4% partial so it's correcting the pressure drop I believe as the pressure drops being seen work out about 4-5% less fuel.

So purchased what appears to be the best option for pumps a DW65V from part box in the black Friday sale they had. Just under £200 delivered, which for what it is I think it's expensive. An external pump would be cheaper but means two pumps to run and more weight. Just need to wait till the tanks run down and I can change it out.
Hopefully will get me away from running the injectors maxed out. May even be worth a little more power.
 
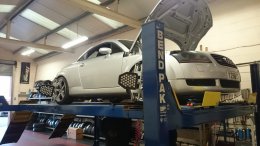
Took the car to get the suspension set up properly today. Took it to A line in Dudley used them a few years ago to set up my A4 after I changed the suspension .
http://www.alineyourcar.co.uk/
They have a Hunter set up and thats pretty much all they do so they are good with it.
They have loads of race and track cars there along with a lot of pretty expensive fast cars.
They asked me what I wanted it set upto so told them front parallel toe, 3.5 degree camber, rear 24 minutes total toe, around 1.5 degree camber .
I also got them to check and give me the print outs for the chassis dimensions wheelbase and track so if I do some checks in the future with the string and tapes I might be able to do it a bit more accurately.

Here's the car on the lift in the workshop.
DSC 3033

These are the dimensions recorded for the track and wheelbase. They were the same pre and post

A line suspension set up004

The actual offsets recorded by the machine, Quite surprised there is only 1mm difference front to rear after removing and replacing almost everything suspension related on the car.

Pre alignment
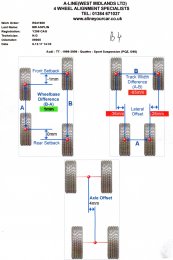
A line suspension set up006

Post alignment

A line suspension set up003

And the pre and post setup sheet that you usually see. He said I had done quite a good job to get it as close to what I wanted and it wasn't a million miles off except the rear NSR camber which it seems I set well wrong. Think I ended up setting it at 2.5 degrees camber and not 1.5. But that was what I went there for.
He loaded all the values I asked for into a specific set up which has been saved on the machine. So if I go back there again and tell him the set up name they could load it in a few seconds.
When I checked it with strings I came to the conclusion rear to was 23 minutes toe in on NSR and 6 minutes OSR. with a total of 29 minutes total to in.
It was actually 19 and 9 for a total of 28 minutes toe. The amounts of movement are really small . 4 minutes of toe is around 0.5mm across the width of an 18 inch rim so you are never going to get it bang on and I bet if I drove the car off the ramps and round the block to measure it again things would have changed by a few minutes.

A line suspension set up005


I actually got to give it a bit of a drive since disconnecting the front ARB and I am liking it. The car hardly rolls at all due to the spring stiffness. TBH I can hardly detect any more roll than when it was connected.
Despite the small changes on the setup it did seem to track noticeably straighter and by the time I got back home I had a big smile on my face. Compared to how it handled when I bought it the difference is more than night and day.
Just need to get some decent rubber on it, with the quite worn 225/40/18 infinity tyres the alloys came with I am sliding around on the seat hanging on around roundabouts so the bucket seats will come in handy when it's running 255/35 18 NS2R tyres.
Front caster is up on standard values with the use of the camber plates and the TT bottom ball joint along with the camber plates have front camber around 3.5 degrees each side.
 
  • Like
Reactions: Golfyste and 45bvtc
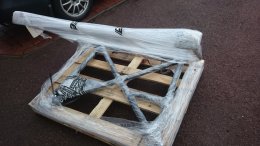
Well the cage came this morning, well wrapped on a pallet. I was a bit peeved when I bought it at the cost of postage for the cage from GSM but it seems It's standard as it is quite a bulky thing I suppose.

DSC 3049

The feet pack seem to fit reasonably well to the profiles of the sill.

DSC 3050

I have noticed all over the car that there are a lot of nuts and bolts marked with yellow pen. Is this normal.

DSC 3051

Seats and carpet removed, couldn't get over the weight of the carpet, I am not surprised why these cars are so lardy. The steel bracket for the foot rest by the clutch could support the weight of the car :) .

DSC 3052

Car has had some broken glass at some time, maybe had the side window put through as I found glass by the CD changer as well.

DSC 3053

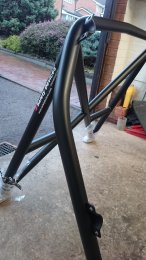
Quite impressed with the quality of the cage welding and finish.

DSC 3055

DSC 3057

Spent some time trying to work out how to mount the base and runners to the seats. Got there eventually. Only the driver gets an adjustable seat the passenger gets to sit as far back as possible.

DSC 3058

DSC 3059

And the cage in the car just sitting on the feet. Fits in fairly easily through the passenger door.

DSC 3060

The fire extinguisher I ordered came today as well. Will be on standby whilst I am welding just in case. Then fitted in the car, I know it's extra weight and if it was a diesel probably be OK , But I have seen a few under bonnet fires on the 1.8T engine.

DSC 3061

Karl.
 
  • Like
Reactions: SeoTFSI, jojo, Golfyste and 1 other person
Yellow or white paint on bolts is normal , usually indicates that they have been checked or torqued to relevant settings.
 
Should be out the garage sorting this cage out but I have come down with the flu so unfortunately playing with the car is on hold for a while. Typical as I finish work tomorrow and was looking to get this all in over the XMAS break.
some numbers as regards the weight of the cage if anybodys interested it comes in at around 23Kg with the feet pack.
The front seats are right hefty things around 24Kg each The replacement seats with the seat base and the slider on the drivers seat comes in at just under 17Kg.

Some more parts came yesterday, bought a baffled sump in the black Friday sale and I suppose as it's a hand made item they don't keep them on the shelf as it's taken several weeks to come.
DSC 3063
 
  • Like
Reactions: nightroamer
Echinacea for the cold or flu, Boots and Wilko’s stock it


Sent from my iPhone using Tapatalk
 
Thanks for the suggestion , TBH I wouldt ry anything ATM. I don't get sick at all normally which probably makes it worse when I do fortunately my employer is pretty good and I am working from home, and my manager has just pinged me and told me to log off so now sitting on the forums for an hour or so.
The postman must be getting a bit sick of me as another parcel arrived late this afternoon.
With the car having a BOSE system in and me not having the code for the radio and removing all the amps , wiring speakers etc I still wanted some music in the car.
Had a search around on my favorite performance parts website EBAY.CO.UK and found this.

file.php


https://www.ebay.co.uk/itm/Sony-MEX...iPhone-Android-DAB-Radio-AERIAL/401439455758?

Just £80 for a refurbished all singing all dancing Radio / CD / DAB /Bluetooth setup. Comes with a DAB aerial as well which is worth £15. So I can use it to make and receive calls in the car, play stuff from the phone etc.

https://www.sony.co.uk/electronics/support/mobile-cd-players-mex-series/mex-n6002bd

The button color and display color are customiseable to any color you like to match the car.
If the car ends up going to the ring maybe next year some time then will deffo need some tunes :) .
 
  • Like
Reactions: jojo and QuattroCalum
You are doing very interesting mods to your car, I'm following this thread a bit jealous I must say.
Cannot wait to see the result. Will probably copy some of this :) :)
 
  • Like
Reactions: ashley cox
Haven't posted anything for a while. Been busy welding the roll cage plates in and removing some of the weight.
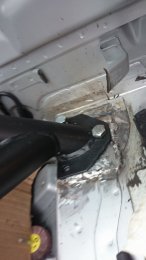
Considering most of the car is held together with a few spot welds I don't think the cage plates I welded in are going to go anywhere fast. The plate on the drivers side by the B pillar is very close to the fuel filter and fuel lines . The underseal under there caught fire, good job I was keeping an eye on it. With some paint over the welds they will look reasonable. I looked at a lot of cars at Autosport International and think my welding rates about average.

DSC 3103

DSC 3104

DSC 3081

Looking around at ideas for easier removal of the sound proofing I managed to get a pub size CO2 cylinder for £15 and it was less than 2 miles up the road . Bargain .
Made my own dry ice by fitting a pipe to the cylinder and then inverting it so I got liquid CO2 out into my old helmet bag.
Make sure you wear gloves if doing this and goggles just in case.Although this worked really well it was taking a long time to make the dry ice and then waiting for it to cool . Then chipping it off with a small chisel and Mallet.

DSC 3087

DSC 3089


I decided to see what it was like just using the chisel and mallet without the CO2 and was quite surprised how eay it came up. I suspect that the fact that it's only a few degrees certainly helps. I used white spirit to get rid of the remaining tar spots and that seems to work well.

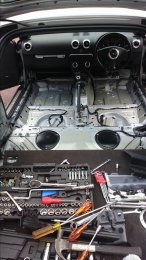
Currently removed all the sound damping from the floor in the front and under the seat. Sill have the gearbox tunnel to do, that seems tricky compared to the floor stuff as it's not as thick.

I have been using the angle grinder to remove all the surplus studs and bought some spot weld cutters so I can remove some of the excess brackets and stuff.

DSC 3110

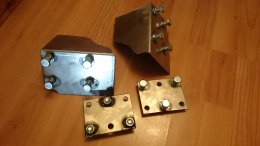
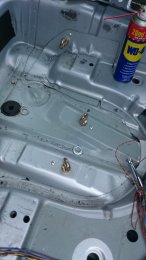
Fitted the seatbelt fixings this afternoon. I have 6 point belts so need 2 mounts under the seat and needed another for the lap belt by the tunnel. Bent the plates I bought to fit the tunnel shape and secured them with a rivet.

DSC 3105

DSC 3107

DSC 3109


Tacking the sound deadening in the boot next and will probably end up using a hot air paint stripper to do the tunnel and remove the black strips of sound deadening.Along with removing more brackets and stuff.
Then need to sort the wiring out. Decided to strip all the airbag wiring out and remove that, also have a few other ideas on possibly relocating the CCM. I would like to keep the locking functionality.
 
  • Like
Reactions: Misikee, ashley cox and nightroamer
In all honesty I wouldn't worry too much about how your welds look (that comes with time and practise) as long as they are good and strong that's what counts - ****** good work though.
 
The weight reduction continues. Removed all the sound deadening I can find on the panels including the stuff behind the rear lights. Haven't tackled the inside of the door panels yet, leaving that for another day.
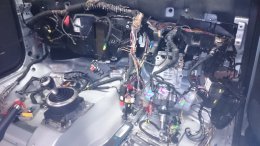
Started to strip out the spare wiring, Bose sound system , Airbag system,Heated seats, CCM is being relocated. Taking out the AC unit to remove the evaporator and whilst I have it all apart am taking the opportunity to trim off bits here and there that aren't needed.
I just hope I can remember how it all goes back together, :lol:

DSC 3111 DSC 3143
 
  • Like
Reactions: AlexA4Avant
More new year dieting.
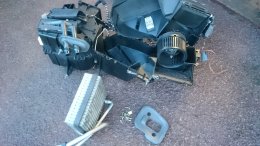
Took the AC unit out of the car to remove the evaporator.
DSC 3151

Not that difficult to get the AC out after I removed the bar which of course meant I had to take out the wiper mechanism.
Found the connector on the recirc flap on the AC was disconnected, seemed strange as they are a pain to pull out , only when I put it all back together and turned the ignition on I found why it was pulled out. Very loud clanking noise, so the actuator is duff. But it explains why the car tends to steam up as the recirc flap was shut all the time.
Got the flap open and just disconnected the actuator. So hopefully the car will be less likely to steam up now. Result.
Whilst the bar was out i removed the air bag brackets and trimmed a few of the others.
Whilst the bar was out it made sense to prune all the wiring out of the car that I didn't want at this time.
Looking at the Central locking module it didn't makes sense to me to mount it at the back. Nearly all the wires bar 4 or 5 run forward and contribute to the really thick harness on the passenger door side.
DSC 3153


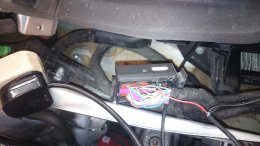
So I have moved the module to the front of the car it will be mounted under the glove box.
Along with the headlight height adjuster module. This has really reduced the amount of wiring in that bundle.
Rewrapped in some of the cloth tape used for harnesses.

DSC 3163

Removed the complete air bag wiring along with the module crash sensors etc etc. Only 1 wire left and that was the wire that goes to the dash module. If you put this to ground than the airbag light doesn't light at all.
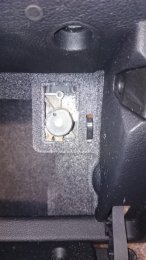
Also stripped all the BOSE wiring out except what I need to put my new radio in. Installed the DAB aerial and stripped out the old aerial from the rear window along with the amplifier etc.
Stripped out the heated seat harness as well.
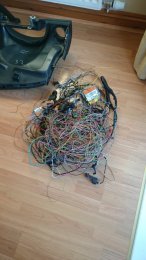
I now have 4Kg of spaghetti if I need any wire :) .

DSC 3162
 
Attacked the dash the other day to see what I could trim off that. As I have a boost gauge in the drivers side vent I figured that it didn't need any air and the passenger didn't need any either on the outside vent. So removed the cross pipe that feeds air to the outer vents and won't be putting the passenger side vent back in. Trimmed some of the excess plastic off around the passenger side airbag. My angle grinder has never seem so much action :) .

DSC 3155

DSC 3157


Removed the last of the Brackets under the rear seat, Lots of spot welds and a few longer welds. 1.5Kg with the bolts for the large bracket. With a few other small bits.

DSC 3166

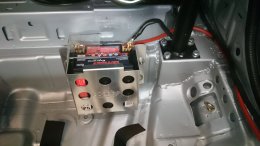
Battery arrived with the carrier. I was mulling over a PC680 or PC625. Either would do the job fine, many people use a PC680. Strangely the PC625 is only 6Kg and about 10% more capacity and rated output than the 7Kg PC680 .
The cage for a PC680 was slightly more expensive than a PC625 so that offset the price difference a little with the PC625 working out around £15 more than a PC680.

DSC 3173


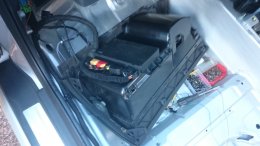
And where I intend to put the battery.

DSC 3168

When I was hacking brackets and stuff I converted the one bracket on the handbrake to mount the central locking switch.

DSC 3170


DSC 3171


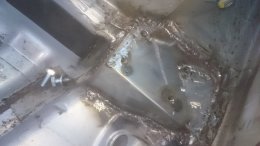
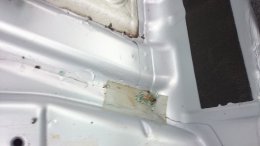
The only real amount of rust I have found on the chassis. Quite amazing for a 16 year old car.

DSC 3176


I knew that smooth silver hammerite would be a good match for the paint as I used to use it on my Passat which was pretty much the same color. So have painted all the areas where I have removed sound deadening and where the brackets/ screws etc have been removed.

DSC 3169

Need to start screwing it back together now. Will have to adjust the rear ride height as it's come up about 10mm, good job I have those silly short rear springs.
 
  • Like
Reactions: Sandra
More work the weekend. Fitted most of the stuff back in the car that's going in. Including the radio.
Relocated the CCM to the back of the glovebox, I have removed anything off the glovebox that didn't need to be there, that includes the useless shelf bit at the bottom of the glovebox.
DSC 3181


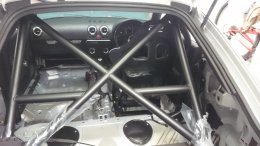
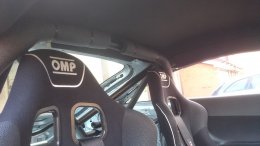
Fitted the roll cage back in the car, the seats and the harnesses. Added some padding around the roll cage where it could come into contact with the driver / passenger. Which is the head area and the bracket that would normally connect to the front section of the roll cage is fully covered with a very good thickness of padding.

DSC 3187


DSC 3188

DSC 3189

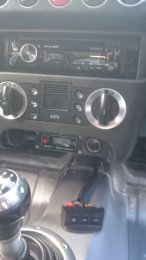
Installed the shift light controller where the ash tray used to be . Fits well and seems to work well. I connected the sense wire to the ECU on one of the trigger wires that goes to the coils on the engine.

DSC 3179

set the device up for a 4 cylinder engine and for some reason it was only recording the RPM at 1/4 of what the engine was doing. Fortunately the unit can be set from a 1 to 16 cylinder engine and works upto 40K RPM so covers pretty much any engine. Changing it to 1 cylinder it works perfect.
The only thing I can think is possibly having the sense wire so close to the other wires in the ECU it's picking up the pulses for the other coils, or all the coils are fired at the same time. That wouldn't make sense though.

DSC 3190

Haven't decided where to put the actual shift lights, waiting on the new steering wheel as it's smaller than the existing one.
 
looking forward to seeing this developed

Sent from my SM-G930F using Tapatalk
 
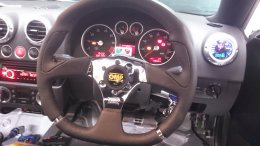
New steering wheel arrived today. I was undecided on Suede or leather, read so many posts from people saying suede was nice but unless you paid a lot for a decent wheel it doesn't last, especially if you don't wear gloves.
And it's one thing I don't do when driving is wear gloves, so decided to go leather.
Didn't want to buy some cheap make steering wheel and find it flexed a lot or the finish wasn't very good so having searched on my favourite site found this for £80 delivered.
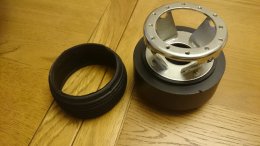
Brand new genuine OMP wheel, Possibly not everyones taste but I am quite impressed with the quality and feel of it. Bit easier to get into the car as well with the flat bottom as the sides of the seats are so much higher than the OE seats.

DSC 3194


The steering wheel with attached boss comes in at 1Kg lighter than the OE wheel with the airbag.
The actual wheel is pretty light, the boss kit I bought is pretty heavy, But that's not a bad thing when it comes to things like steering wheels.

DSC 3198

DSC 3199


Fitted in the car, I need to find a permanent place for the shift lights now. Where I was going to put them at the top of the cluster over that small grille is now directly behind the rim .

DSC 3207

Also had a play with the radio I bought. Very impressed with it,DAB + , Bluetooth streaming audio, Handsfree phone, voice dialling etc etc. You can set the display and buttons any color so being boring I just set them both as red.
Checked the standby current that the actual radio takes as I am moving to the smaller battery. A massive 1.5mA , I knew it wasn't going to be much.

DSC 3205
 
Had a reasonable day today and got a few jobs done.
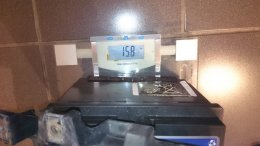
Started off by installing the battery, weighed the new one and the old one just to get an idea of what was being saved.
New battery, with the cage it was 6.5Kg.

DSC 3215

Old battery with the battery carrier screws and battery box.

DSC 3213

With the cable to run the new battery in it was around 7Kg so saving around 9Kg ,but the main thing that 9Kg is not stuck right at the front of the car high in the air. I used just under 3m of 25mm2 multi strand battery cable.
Fairly easy to get the cable into the car after the glove box was removed feeding the cable from the engine compartment into the car. The cable appears just at the back of the heater unit and drops into the footwell.

DSC 3209

There was a little too much movement of the battery in the cage so I cut down some of the grey foam that used to be in the car just by where the battery is now mounted. This stops the battery rattling around in the cage too much.

DSC 3216

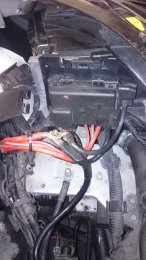
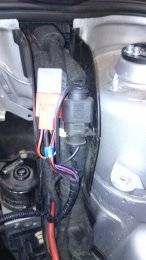
In the engine bay I cut down the top part of the battery that holds the fuses to make it a more manageable size and found it fitted quite well against the side of the headlight. So mounted it there, keeps the fuses out of anywhere that may be wet
and you can still easily get the flap open to check them.
Cut the battery terminal lug off the positive battery lead as no longer needed and connected the positive feed to the bolt on the battery lug which supplies the feed to the car.

DSC 3219

Debating whether to insulate this point or leave it open as it is. It's not really able to move anywhere and is a good distance from any bodywork. Comes in handy if I needed to jump start the car.
I recycled the old earth lead as it had a nice big flat tag on it and drilled that so that one of the bolts for the roll cage could be used as an earth point.
Also knocked up a bit of a plastic cover over the positive terminal just in case anything should find it's way onto the top of the battery.
DSC 3235


Did a few tests whilst I was connecting the battery to see what the standby current was for the car. I know the radio takes just 1.5mA but I was interested to see what the car took when locked with the alarm on.
Just over 20mA , I decided to disconnect the microwave sensor for the alarm to see if that made much difference. That was about 1-2 mA so not a lot, so connected it back up.
Anyway connected the battery up and fired the car up. Started just like it was on the original battery no problem. :D
 
  • Like
Reactions: Golfyste
As I had plenty of time left after fitting the battery decided to tackle a few other jobs.
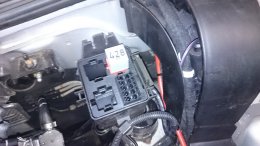
The relay box that houses the Motronic relay is wasted really. Takes up space when the relay could easily be moved into the trunking.

DSC 3220

I removed the strut bar to get better access to the box, just remove the top and pull the box off the bracket after flicking the catch at the top of the bracket.
Undo the 2 clips that hold the relay base into the plate that mounts in the box. Cut the large rubber seal off and the relay fits neatly next to the large connector in the trunking.

DSC 3221

I looked at the wiring diagram and that connector is a strange thing as it appears to be there only because of a change in the thickness of wire at that point. It would also be a good place to disable a car if you wanted to as if you pull the connector apart the ECU gets no power.
Anyway it looked a little to heavy and large to me and as I had the soldering iron out doing another job I cut it out and joined the cables. There goes another 35g :) .

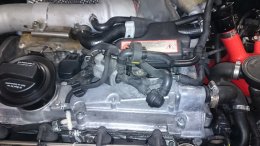
I was holding the box in my hand just about to consign it to the recycling when I remembered reading about somebody who had moved the dump valve solenoid off the top of the engine into that box.
So as it really gets in the way in the stock location and I want to keep it, decided to see if I could move it.
Started off with this,

DSC 3222

Found the vacuum reservoir fitted well attached to the bottom of the bracket , and the box could still be fitted.

DSC 3224

Jiggled the pipes and connections around a bit to get them pointing in the right direction and the complete solenoid and valves fitted in the box well.

DSC 3226

Extended the wiring for the solenoid and also added a piece of silicon vacuum line to take the vacuum to the solenoid and even managed to keep the OE pipes that connect to the vacuum reservoir and the dump valve.

DSC 3231

Now ended up with this, a lot tidier and probably better airflow to the turbo on the back as well as getting rid of that silly bracket on the top of the rocker cover.

DSC 3232

And because I still has a bit of time left I repurposed part of the battery surround I took off earlier and used it to make a shield where the battery used to be blocking hot air getting to the air intake.

DSC 3237
 
  • Like
Reactions: Misikee and AlexA4Avant
really starting to come together storm

Sent from my SM-G930F using Tapatalk
 
Thanks Alex.
After moving the battery the other weekend this has left a nice big hole where it used to be. So decided to fill it with boost pipe.
The standard intercooler pipe has to wind it's way past the battery and is not the best run of pipe with restrictions and 90 degrees bends. As the battery is no longer in place I can remove straight line the pipe. Also decided to add the facility for a cold side dump pipe.
Looked on Fleabay for a pipe I could use to mount the MAP sensor and a pipe to use for the cold side dump.would have cost around £35-£40 for the pair. As I had a section of steel boost pipe the right size, cut from the end of the intercooler front cross pipe I decided to make my own MAP sensor pipe.
Recycled one of the original boost hoses along with some 63mm straight boost pipe I already had and ordered some 25mm silicone pipe from Fleabay for the boost dump.
The source of the steel boost pipe, I don't throw things away.

DSC 2618

A closer look at the plastic pipe that house the MAP sensor and has to find it's way around the battery housing.

DSC 3248

DSC 3246

The original pipe run and my new pipe .

DSC 3253

New pipe installed, I haven't yet received the 25mm silicone for the boost dump so need to fit that. Just blocked off the 25mm pipe for the moment.

DSC 3256


Shouldn't be a problem with movement of the engine as the lengthy of pipe is quite long and there is potential for a lot of movement at both ends of the pipe run. Probably not make much difference but it all helps. Got rid of two 90 degree bends and the plastic MAP pipe that is all over the place.
 
Got my baffled sump on today. Fairly straightforward job and it fitted like a dream, slightly concerned as the Forge sump is an aftermarket item but all the holes were where they needed to be and it appears not to be leaking.
The sump plug that came with the forge sump is not being used. It only half as long as the OE item. Audi have done a good job of putting a lot of thread in the sump plug hole so you shouldn't ever have an issue , but using a sump plug only half the length is a waste.
I bought a new seal for the oil sender but I suspect It would have been OK to use the original one,Definitely needed a new seal for the oil return from the turbo.

DSC 3258


Also finished off my mod for the headlamp levelling sensors. When I fitted the rear suspension arms the plastic arm on the rear sensor broke at the end, seems like a common issue.
As a temporary measure I removed the link and applied silicon to the arm to hold it in approximately the correct place.
Whilst pondering what to do about this and considering that the front sensor gets in the way of my brake cooling pipes I decided a bit of radical modification was required.
So I have removed the rear sensor, stripped all the wiring out back to the headlight control module ( which is now located under the glovebox and removed the bracket on the rear subframe.
The sender is wired to the module and since doing that I discovered that the rear sender was actually faulty. Checking on VCDS in the measuring blocks you can see the signal returned from the sensor. It should vary from about 0.6v to 4.5v as you rotate the arm. My rear sender is stuck at 4.2v regardless of it's position.
So I removed the front sensor and most of the wiring and the mounting bracket and linkage.
I have wired the front sensor up to headlight range module, cut down the arm to just a circle and mounted it in the glovebox where the air bag switch used to be.

DSC 3239

DSC 3240


The headlight adjustment is performed when the ignition is turned on. The module checks the sensors and adjusts the levelling if it requires to be done. Thus I have found that by turning the sensor in the glovebox and cycling the ignition I can
alter the headlight level, not by a huge amount but it is adjustable. It's no worse than what is was before as the rear sender wasn't even working correctly.
I did find that when you disconnect a sensor and turn the ignition on the headlight will drive all the way to the bottom meaning you will have about 10Ft lit up in front of you.
 
  • Like
Reactions: nightroamer
New tyres I was going to put on the 18 inch wheels as my preferred track day tyre are on hold due to an Ebay **** up. They may or may not get sorted so I could be back searching again.
In the mean time put the TT comps I bought on the car, Think the gunmetal finish looks quite good against the silver. These wheels were going to be the wet set . These TT comps are 3Kg a wheel lighter than the standard 6 spoke 17's.

DSC 3261


The 25mm silicon hose and some clips arrived today along with a plug for the existing outlet for the dump valve.
I recycled the existing hose on the dump valve and used a 25mm alloy connector to get a better fit for the hose between the cold side and the Forge 007. Pretty much all the jubilee clips are now JCS HI grip clips which are the best jubilee clips I have come across.


DSC 3275

DSC 3274


Took the car for a drive, Didn't really expect to notice much difference, Not any louder when it dumps boost but it feels like the turbo is spooling quicker when I accelerate. I need to do some logging on this back to back . It only takes a matter of a minute to swap between the OE connection and the way it is now.
Will have to have a look at the logger and see what to log. The Forge 007 is a lot cooler, it would pretty much be one of the hottest things under the bonnet after the exhaust . If that's the only advantage I have only spent about £20 doing this mod so not an issue.

Lastly added some weight back in the car, Mounted the fire extinguisher behind the drivers seat. Hopefully it will never be used but it's always there just in case.

DSC 3276

DSC 3277
 
Last edited:
I love reading these update - Just brilliant !!, I notice you still have the MAF in play (?) are you going to get that mapped out at some point ?. With all the effort you've put in a fire extinguisher is very much a requirement (imo).
 
Thanks, where the car is ATM the MAF is the best solution. It only becomes a problem when you get rid of the OE turbo and get more serious with the tuning. And the plan is to get the car track ready, use it this year and see how it goes. If it goes well then I will upgrade to a bigger turbo / injectors/ clutch etc at the end of the year. I think somewhere in the 400-450 bhp range would be nice. At that point the MAF will probably be going, at least the standard one. But I would discuss that with Rick who would be doing the mapping.
 
looking good starting to be a very competitive track car if I were to be out on track with my vrs I would just move over lol

Sent from my SM-G930F using Tapatalk
 
Karl!

I honestly had no idea you'd been doing such a thoroughly decent job on this and posting so many updates over here in the forum I always forget exists!

****** good work mate, and it seems to be going really well! Very impressed indeed :)

Can't wait to hopefully see this at Curby later this year. I wonder how much quicker than the bus it'll be?

Keep it up mate! I'll try to check back here more regularly from now on! Sorry I missed the tags, I don't get notifications for them or PMs any more and I'm not sure why!

Have fun

:racer:
 
  • Like
Reactions: desertstorm