mark_S3 Progress Thread

Just booked Car in for Timing Belt and other stuff

Using P Allanson VAG Specialist in Wakefield. Next Thursday.
 
Thank You Sandra.....

Although my Bank Account Balance is quickly disappearing..... :-(

Just call it an early Christmas Treat to yourself. Lol. :) x
 
  • Like
Reactions: mark_S3
Just picked these up ('cough' 'cough') in works time :-o

DSC_1323.jpg
 
  • Like
Reactions: Sandra
​Lmao, you have been very good to yourself Mark. :) x
 
Lol..... ;-)

Just need to explain to my other half that Santa ain't coming this year...

Good luck with that Mark, its been nice knowing you, pmsl. :) x
 
  • Like
Reactions: mark_S3
Some goodies turned up... Althought at the present nothing has been done. Hopefully this week!

 
Sealed my Wheels in Carchem Wheel Armour.... This was after 2 weeks of constant driving, although i presume the BD Pads are helping!

 
Decided on sorting out my paperwork in to punched pockets: Every pocket has paperwork on both sides, plus i have the grey folder with the same. Well documented S3, must i say.......

 
  • Like
Reactions: The Doctor
Then yesterday, decided on fitting my Badger5 v2.2 TIP, Jetex Filter with Heatsheild. Although i did have to extend the N75 hose and breather pipe to make the TIP have a snug fit and no kinks.....


So my Badger5 is alive, and joined the club.....

Unfortnately I cannot experience the end result due to be below:


NSR Rear tie arm has decided to crack at the rose joint..... At the present trying to get it sorted although Im upgrading to s3dave's famour adjustable tie arms...

BTW Whilst i was fitting the B5 TIP, decided to give top of the gearbox housing a good clean. Used some stuff called Supersol we used at work. Worked in with a brush, hosed off then blasted off using my air compressor. Linkage then all re-greased. No before pictures but everything was black and caked in grease, oil, dust and dirt...

 
Last edited:
clean s3 there bud, its good when you get to work on your own car and can take the extra time cleaning them hard to reach places.
 
clean s3 there bud, its good when you get to work on your own car and can take the extra time cleaning them hard to reach places.

Cheers Fella....

Might aswell give everything a good clean when I have chance.

Once I had TIP out, there was no way I was leaving the housing in the state it was.

Its stuff like this that makes it worth while and cost nothing!

DSC_1437.jpg


Did side of block aswell the best I could. Problem was too many pipes, hoses and cables in the way to do it properly but a huge improvement.
 
all that looks really goo mate was the tip hard to fit the the big fat man in red brought me one also whats the stuff your used on your wheels mate?
 
No TIP wasn't hard to fit. Just tricky making sure everything was lined up correctly and a good fit.
Heard its abit trickier on K03/s. There is a guide on here for the K03 TIP.
Looks like you was a good boy this year then....
Sealant I used on alloys was CarChem Wheel Armour.
First I used CarChem Revolt (wheel cleaner) which I was amazed by how easy it cut through the dirt.
Both cost me £24. Highly impressed.
 
where did you get the cleaner from mate, im looking into giving them a good clean and then having them refurbed in the new year to anfersite grey (or how ever you spell it ha)
yeah looks like a was going to spening a good couple of days putting new stuff on in the new garage in the new year then going to start a little mod thread like your lol cant call min the silver bullet now though hahahaha
 
I got the CarChem stuff off a dealer I known for awhile.
You on facebook? as he does his trading on there.
 
BTW..... I finally managed to get hold of s3dave.
Ordered my Adjustable Tie Arms in Blue!
 
oooooooo I fancy some of those tue arms aswell for mine as the camber is out but money at the mo yeah im on facebook mate
 
Mine seems to love money at the moment then spits it back into my face... Lol

honestly i thought my rallye was a money pit, but my s3 just spends it faster then the girlfriend does
 
My Spare Tie Arm turned up today.....
My temporary measure until I can get s3dave Adjustable Tie Arms fitted. Plus I'll feel safer moving the car.
Anyway some parts turned up from TPS...
2 x New Metal Bonded Bushes (although I wish I ordered 4 now)
4 x New Bolts and Nuts
1 x New Half Moon Gasket Set for VVT

DSC_1451.jpg


Anyway does anyone know where to purchase the Tensioner Tool for the VVT so I can lift the unit and replace the gasket as TPS are sure they don't sell this item?
 
Just some pictures to show what I’ve been up to over the past 4-5 weeks....
First of all was to sort out my rear broken control arm. I sourced a standard arm, and 4 x metal bonded bushes for the rear hub with new bolts and nuts.
Old Arm

Replacement Arm with New Bush (Gave the area a good degrease and clean)


Home Made Contraption for Bush removal... Did the job and cost less than £7.00

My New daveS3 Adjustable Control Arms... Mmmmmm. Also brought the Arm bushes to use for the other standard arms.


Some Pictures after a good 2 bucket method wash and Sealed with Poorboys Shine & Gloss.


VVT Tensioner Tool for when I replace my Cam Cover & VVT Gasket.
 
PowerFlex Front and Rear ARB Bushes (Supplied by Awesome GTI)

New Wiper Blades from TPS (Spoiler Ones) Very Happy with these. Much better to look at than standard and really good at clearing the screen. £3.20 each.

Before

After

Then got around to replacing the front drop links with New Meyle Heavy Duty ones. Also fitted my new PowerFlex ARB Bushes to front with new mounts and bolts. Was surprised to find the plastic collars fully intact and look brand new.

Gave the underside of the arches a good degrease and clean.

And the ARB bush. Very happy with new ARB bushes and Drop links. Steering more positive and feels little bit more stable into corners.

And received this kit..... Can’t wait to use it, when the weather gets better. ;-)

That’s about it for the time being...

Still need to do the follow:
-Camcover Gasket and VVT Gasket
-Replace rear ARB Bushes for PowerFlex
-Fit daveS3 adjustable control arms
-Interim Service including new Spark plugs
-4 Wheel Alignment
-In process of ordering a Saikuo Michi S3-OCC, so ditching the PCV system
-Full Machine Polish as I’ve just purchased a Kestrel DAS6 kit
-And some other things that I can’t think of.
Anyway here are some pictures when I refurbished my Injectors last June. They was stripped down, and then cleaned using a Ultrasonic Bath including the FPR.
I was shocked at the amount of carbon and film that came out.
Then they were fitted with new seals from TPS (£4 a seal x 8). Yes I know you can get cheaper but at the time, getting from TPS was the quickest way.

DSC_1133.jpg


DSC_1134.jpg


DSC_1135.jpg


DSC_1136.jpg


DSC_1142.jpg


DSC_1144.jpg


DSC_1145.jpg


DSC_1146.jpg
 
Last edited:
Finally managed to puck up the courage to do the Cam Cover Gasket along with the VVT Unit Gasket.

Here are the bits and bobs:


Lets Commence:


Charge Pipe Off, N249 Unit off and a few other bits:


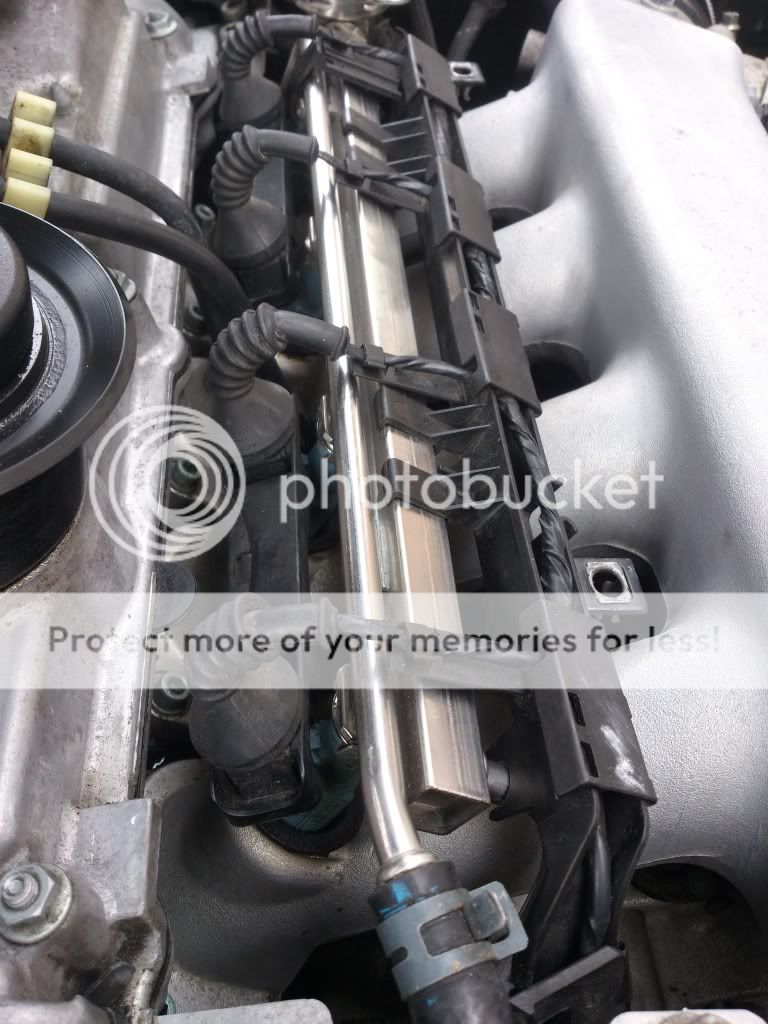
Then once coil packs where out and undid the cam cover bolts.... Here’s the upper insides:


And then I peeled off the gasket, very brittle in places but I suppose it’s done its job after 135,500miles.


Then I slacken off the tension on the chain, and undid the bolts on the VVT Unit. Pulled off the gasket and popped out the half Moon Gasket. New Gaskets in, and redid the VVT unit bolts down.


Then I tackled the cleaning process of the Cam Cover.


Then it was time to clean up the head contact area’s before the gasket kit went on. VAG Sump Sealant was used on the corners and head it went over the cams.


Time to get the cover back on and start to refit various parts. When cover was back on decided to fit my new NGK BKR7E plugs which where gapped before hand.


Then finally the end result.......


Then I jacked the car up, supported on axles stands and dropped the oil. Old Oil filter off in which case only did 4,000miles. New Sump Plugs then fitted and then fresh Shell Helix Ultra 5w-40 was put in.

Whilst I had all the N249 System off, it was a good time to do a delete. Unfortunately the stub on the N112 Valve decided to break. Had No option but to bypass this and leave the N112 Valve electronically connected just like the N249. Another job in the pipeline now, is to remove the SAI system and blank it off.

Overall... After 2 weeks of driving not one drip of oil has leaked from the Cam Cover. Fairly easy and self explanatory job.... which in my case took nearly 5 hours, which I did spend doing it properly and de-greasing and cleaning various items.

The S3 is happy and I’m happy ;-)
 
  • Like
Reactions: AVLO, s3dave and <tuffty/>
Well it’s been a busy 3-4months... Lost track on spends and time spent.

He’s the updates on the pictures I’ve currently got and from memory... Lol

First up, was some facelift headlights that I decided to refurbish with a little twist. So off came bumper....


Headlights in with 6000k HID’s fitted....


New Coolant Temperature Fitted


Full Detail inside and out on various weekends... He’s a few pictures


  • Like
Reactions: IPG
New Coolant Expansion Tank.... Much needed....


Still need to fit my new bottom coolant hose as original is showing signs of wear....
 
Purchased some LCR Brembo’s with 2 piece rotors, however the rotors need new discs so saving these for next years Ring trip soI’m opting for just standard disc’s with Ferrodo DS2500 pads for time being....


New Braided Lines from Badger5


Carriers all cleaned and sprayed black...


New Stainless Steel Bleed Nipples

 
  • Like
Reactions: ShaunS3
New bits....

ATE Superblue Racing Fluid
New pads for rear brakes
New Drop Links for rear


Similar threads

Replies
9
Views
2K
Replies
26
Views
2K
Replies
1
Views
878
Replies
65
Views
7K