

A bit rushed because it was ****** freezing outside, and the wind moved my tripod towards the end and f**ked up my red shots, Manfrotto Carbon with a bag hanging off it and it still moved.
Oh how I suffer to give you guys a quick demo
First take one car, one DSLR on a tripod and then park it somewhere dark, use time view (TV) setting and rotate the dial to give you 30" exposure. A good torch is critical, my weapon of choice is a Lenser P7 and a V2. but this time I was using a Gamma head torch. Very recommended as it uses three led's in white, green and red and also has a 88 lumen "oh my god that's effin bright " switch. (It also has a red light at the rear on the battery pack for if you are a cyclist).
Right, lets take some pics...
One with a white light

A couple of green ones...
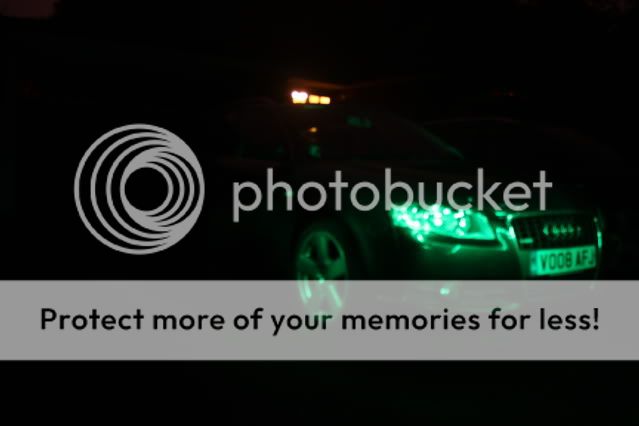

And a couple of red ones...


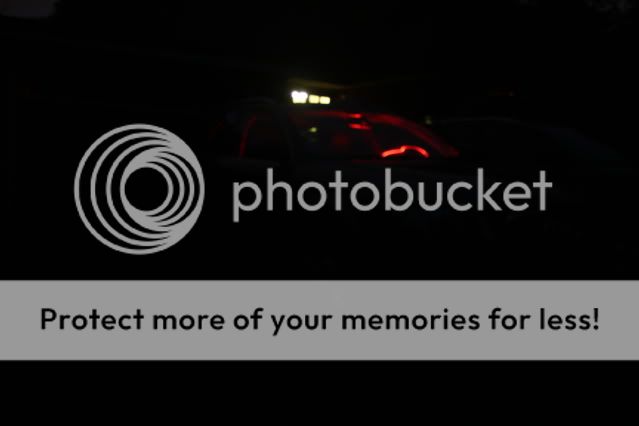
And a red one from inside just for the hell of it...
Add all the images to Photomatix, click process and out it comes. This is just the stacked image and has not been tone mapped.

Not fantastic but it gives an idea to anyone wanting to have a go at light painting and tone mapping.
To tone map it, just move the sliders about in Photomatix to get the desired effect.
The easiest way to teach yourself tone mapping is to take three shots of the same thing, use a tripod so you get nice lines, one under exposed, one over exposed and one normal exposure. Most modern DSLR's have a facility to do this for you, select P mode, go to menu and select Bracketing Mode, adjust the scale to 2 stops either way, make sure your camera is set to take multiple shots, pick a subject and pull the trigger. Stack the three shots and tone map.
Get out there and give it a go.
Linkies.
Lenser V2
LED LENSER - Classic Line - V² (v squared)
Lenser P7
LED LENSER - P7 - P Serie - High Performance Line
Gamma H/T
Gamma LED headtorch - Outdoor Gear Shop - Alpkit
Photomatix
HDR photography software & plugin for Lightroom, Aperture & Photoshop - Tone Mapping, Exposure Fusion & High Dynamic Range Imaging for photography
Oh how I suffer to give you guys a quick demo
First take one car, one DSLR on a tripod and then park it somewhere dark, use time view (TV) setting and rotate the dial to give you 30" exposure. A good torch is critical, my weapon of choice is a Lenser P7 and a V2. but this time I was using a Gamma head torch. Very recommended as it uses three led's in white, green and red and also has a 88 lumen "oh my god that's effin bright " switch. (It also has a red light at the rear on the battery pack for if you are a cyclist).
Right, lets take some pics...
One with a white light
A couple of green ones...
And a couple of red ones...
And a red one from inside just for the hell of it...
Add all the images to Photomatix, click process and out it comes. This is just the stacked image and has not been tone mapped.
Not fantastic but it gives an idea to anyone wanting to have a go at light painting and tone mapping.
To tone map it, just move the sliders about in Photomatix to get the desired effect.
The easiest way to teach yourself tone mapping is to take three shots of the same thing, use a tripod so you get nice lines, one under exposed, one over exposed and one normal exposure. Most modern DSLR's have a facility to do this for you, select P mode, go to menu and select Bracketing Mode, adjust the scale to 2 stops either way, make sure your camera is set to take multiple shots, pick a subject and pull the trigger. Stack the three shots and tone map.
Get out there and give it a go.
Linkies.
Lenser V2
LED LENSER - Classic Line - V² (v squared)
Lenser P7
LED LENSER - P7 - P Serie - High Performance Line
Gamma H/T
Gamma LED headtorch - Outdoor Gear Shop - Alpkit
Photomatix
HDR photography software & plugin for Lightroom, Aperture & Photoshop - Tone Mapping, Exposure Fusion & High Dynamic Range Imaging for photography
Last edited: