Hey guys!
After lurking here for a while and using the information with the helper of forum members for various project on my 2013 A3 8V, I decided to give back and write a guide. This time I'll be focusing on a rather easy retrofit which are the genuine LED cupholder lights.
This retrofit is suitable for both beginner and experienced retrofitters. The main challenge here is to divide the center console into two parts using a soldering iron because it's soldered from the factory.
So, let's get started! What we need is:
2. After inserting the tool as deep as you can, lift it up with force (but being gentle not to tear up anything) until you can hear the clips releasing (you'll hear a popping sound). Do this on both sides and you'll be able to free the top part of the console:
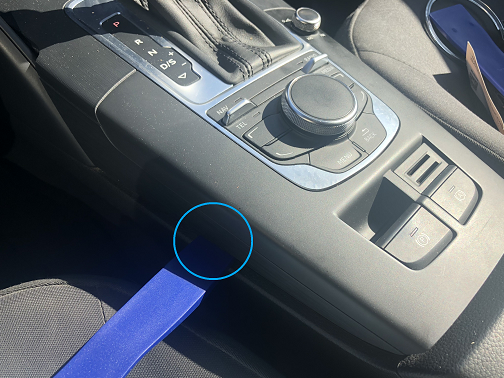
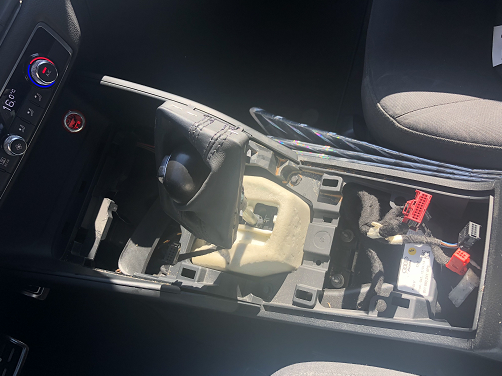
3. After popping up the top part, you need to remove the bottom clips. You can do this pulling the console towards the back of the car, as the clips are located under the cigarette lighter area.

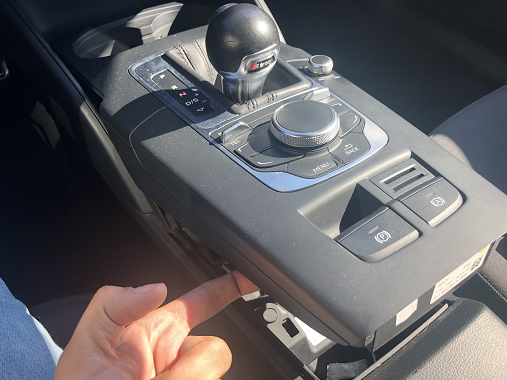
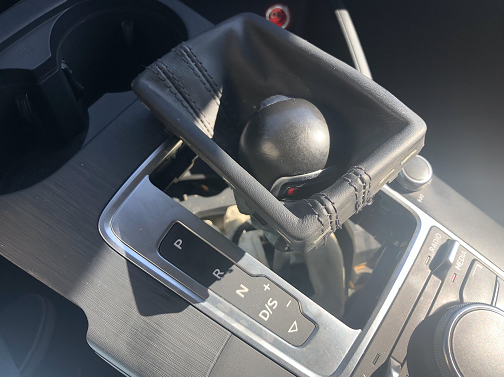
4. To fully free the console, you'll need to remove the leather gearknob cover. You can pop it up by pushing it from under and then "playing" with it until you can remove the console through it. Don't forget to remove any connections under the console. (Unfortunately I forgot to take a picture of that but they should unclip pretty easily). Please note that if you disconnect the e-brake harness while the car is on you will receive a message on the info cluster so you'll need VCDS or OBDEleven to clear it, so please turn off your car before removing anything!
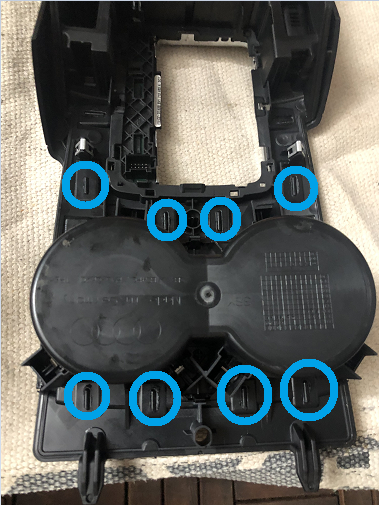
5. Now that the console is out can we start really working on the less fun part of this install. I placed the console upside down on a cloth so I won't damage the top part. What we need to do is to separate the top part from the bottom part. As you can see in the picture, they're soldered from the factory so there's no pretty way to remove them. I used a soldering iron to melt the tabs so I can barely slide a plastic tool to separate them enough to remove the ring and put the new one. I marked the tabs that you need to melt before separating the console.
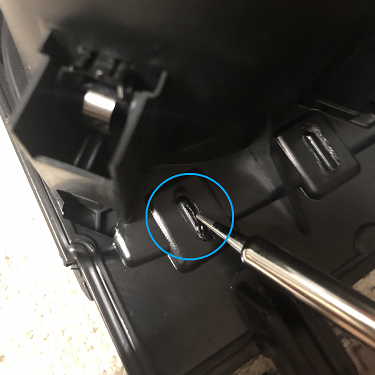
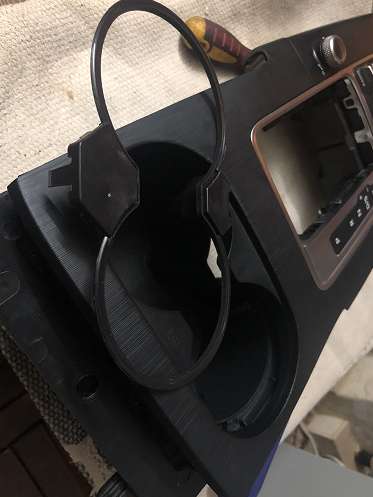
6. After you can barely separate the console, you'll be able to see the old ring and pull it out to install the new one. Put the new one in and put the two parts back together. I used a really high quality glue to put the console back apart and let it dry overnight before installing back into my car.
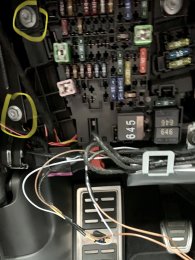
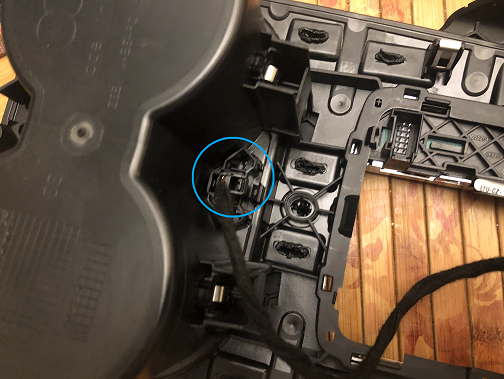
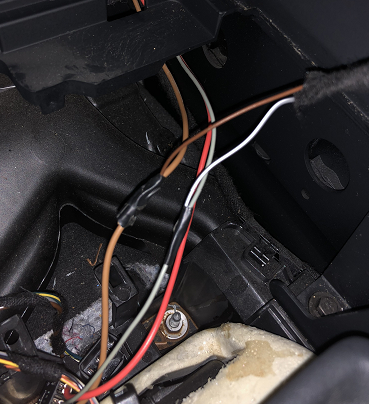
7. The fun part, the connection part! Now all we have to do is connect the lights. From the factory, the lights are connected into the BCM and can be controlled through the MMI. I couldn't bother to do that because my wires were too short and because it's basically the same functionality as using the knob on the headlight switch so I connected them to the cigarette lighter wires.
8. Install the console back in slowly, not forgetting to connect back any wires and there you have it!
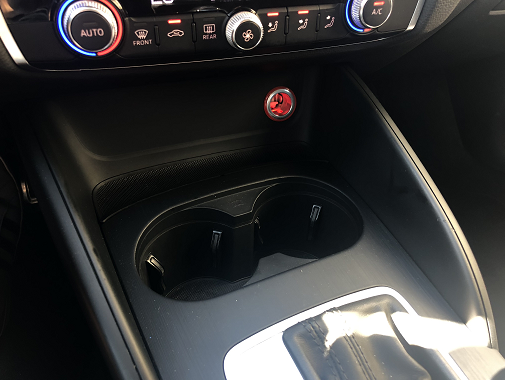
Before:
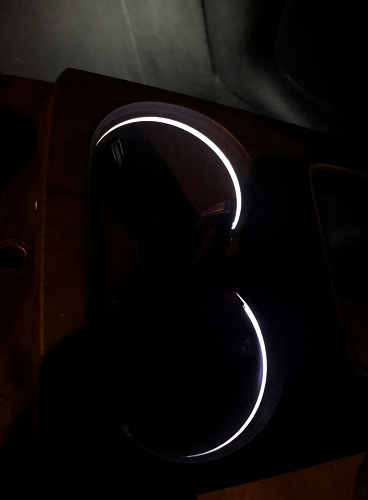
After:

Thank you for reading") .
.
After lurking here for a while and using the information with the helper of forum members for various project on my 2013 A3 8V, I decided to give back and write a guide. This time I'll be focusing on a rather easy retrofit which are the genuine LED cupholder lights.
This retrofit is suitable for both beginner and experienced retrofitters. The main challenge here is to divide the center console into two parts using a soldering iron because it's soldered from the factory.
So, let's get started! What we need is:
- Genuine LED Cupholder Light Ring (Part Number 8V0947157A): I used a kit from AliExpress that comes with the connector and two wires. This was a genuine part.
- High Quality Plastic Trim Removal Tool
- High Quality Glue
- Soldering Iron
2. After inserting the tool as deep as you can, lift it up with force (but being gentle not to tear up anything) until you can hear the clips releasing (you'll hear a popping sound). Do this on both sides and you'll be able to free the top part of the console:
3. After popping up the top part, you need to remove the bottom clips. You can do this pulling the console towards the back of the car, as the clips are located under the cigarette lighter area.
4. To fully free the console, you'll need to remove the leather gearknob cover. You can pop it up by pushing it from under and then "playing" with it until you can remove the console through it. Don't forget to remove any connections under the console. (Unfortunately I forgot to take a picture of that but they should unclip pretty easily). Please note that if you disconnect the e-brake harness while the car is on you will receive a message on the info cluster so you'll need VCDS or OBDEleven to clear it, so please turn off your car before removing anything!
5. Now that the console is out can we start really working on the less fun part of this install. I placed the console upside down on a cloth so I won't damage the top part. What we need to do is to separate the top part from the bottom part. As you can see in the picture, they're soldered from the factory so there's no pretty way to remove them. I used a soldering iron to melt the tabs so I can barely slide a plastic tool to separate them enough to remove the ring and put the new one. I marked the tabs that you need to melt before separating the console.
6. After you can barely separate the console, you'll be able to see the old ring and pull it out to install the new one. Put the new one in and put the two parts back together. I used a really high quality glue to put the console back apart and let it dry overnight before installing back into my car.
7. The fun part, the connection part! Now all we have to do is connect the lights. From the factory, the lights are connected into the BCM and can be controlled through the MMI. I couldn't bother to do that because my wires were too short and because it's basically the same functionality as using the knob on the headlight switch so I connected them to the cigarette lighter wires.
8. Install the console back in slowly, not forgetting to connect back any wires and there you have it!
Before:
After:
Thank you for reading
.