

Goodbye Vauxhall (sort of), well hello Audi S3
- Thread starter Harvey
- Start date
You are using an out of date browser. It may not display this or other websites correctly.
You should upgrade or use an alternative browser.
You should upgrade or use an alternative browser.

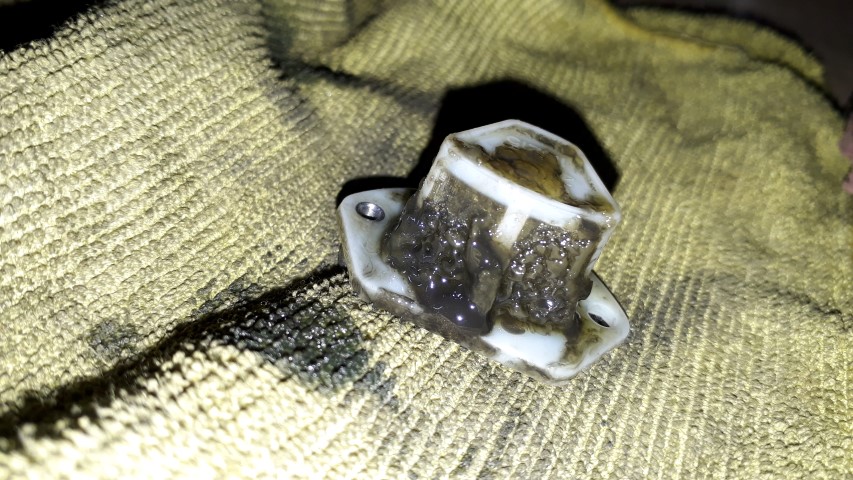
I noticed my S3 oil filler cap had oil vapour around it so my additional o-ring under the lip fix wasn’t working. During my research I’d seen an EA888 Gen3 oil cap seal kit on AliExpress so took a punt and exactly three weeks later these arrived.
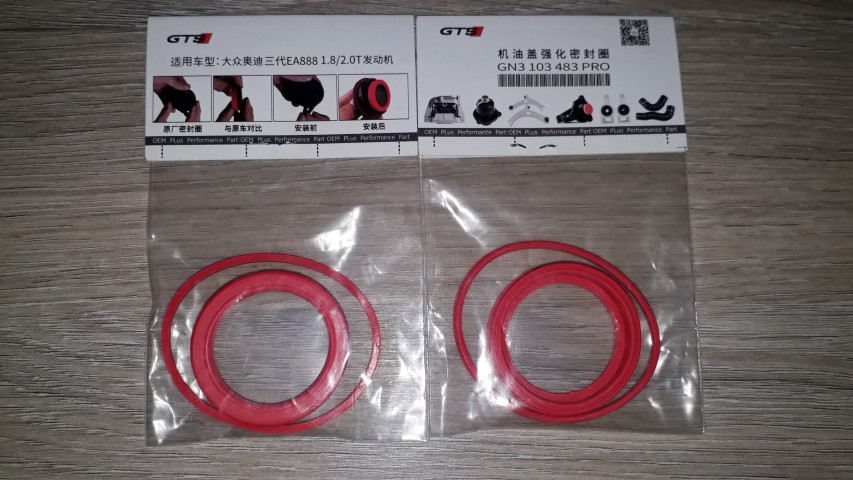
I'm really impressed with the quality and finish. They seem to be some sort of dense silicone like substance unlike the OE rubber which has gone hard.

The fit is perfect to the oil filler cap, they simply pressed on lovely using your hands.
The cap itself felt a little tighter than it was previously to fit so lets hope this stops any future oil vapour escaping and messing with my lovely clean engine bay.

For anyone interest the AliExpress seller I purchased from is here, the price has gone up since I bought but not by much. There is also another seller I’ve found since buying here which looks identical and cheaper. So take a deep breath and go buy direct from China and avoid those costly European post-Brexit delivery fees hahahahaha.
I'm really impressed with the quality and finish. They seem to be some sort of dense silicone like substance unlike the OE rubber which has gone hard.
The fit is perfect to the oil filler cap, they simply pressed on lovely using your hands.
The cap itself felt a little tighter than it was previously to fit so lets hope this stops any future oil vapour escaping and messing with my lovely clean engine bay.
For anyone interest the AliExpress seller I purchased from is here, the price has gone up since I bought but not by much. There is also another seller I’ve found since buying here which looks identical and cheaper. So take a deep breath and go buy direct from China and avoid those costly European post-Brexit delivery fees hahahahaha.
Not used the S3 much recently so it’s ticking over on its heart monitor and the Accumate is doing its thing keeping the battery healthy in this cold Winter spell we’re currently experiencing.

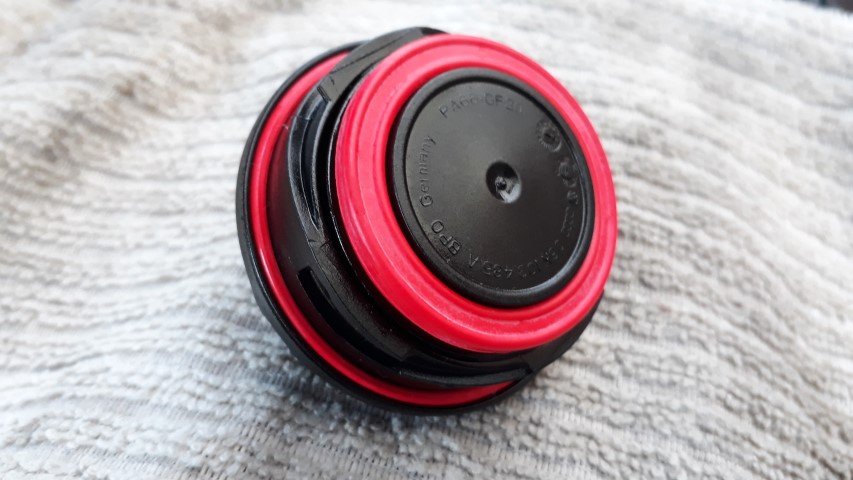
I decided to take a punt and swap over the button cover for the MMI screen as my retrofit last year used the later button bar with the screen on/off logo and not the early up/down version.
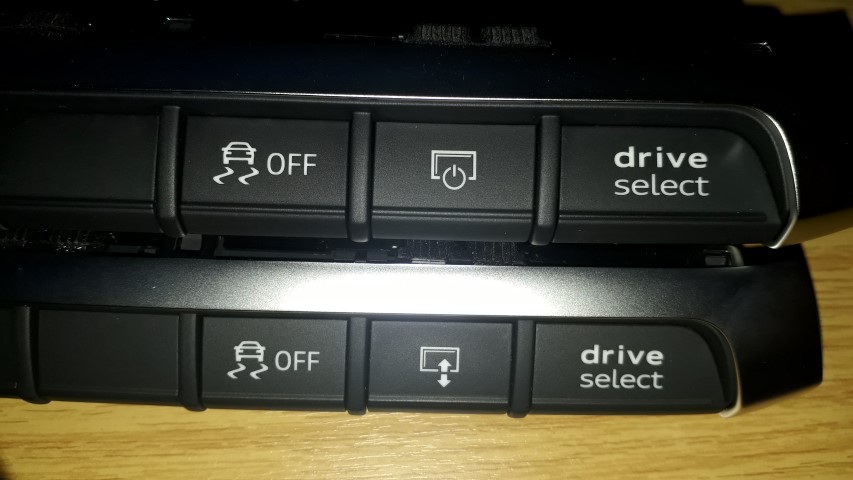
A careful, gentle and then more forceful level under the button using one of my plastic pry/trim tools soon had the job sorted. Looking much more period correct for my MY2017 S3 with roll up/down MMI screen.
I decided to take a punt and swap over the button cover for the MMI screen as my retrofit last year used the later button bar with the screen on/off logo and not the early up/down version.
A careful, gentle and then more forceful level under the button using one of my plastic pry/trim tools soon had the job sorted. Looking much more period correct for my MY2017 S3 with roll up/down MMI screen.
I always say its the little things that countNot used the S3 much recently so it’s ticking over on its heart monitor and the Accumate is doing its thing keeping the battery healthy in this cold Winter spell we’re currently experiencing.
I decided to take a punt and swap over the button cover for the MMI screen as my retrofit last year used the later button bar with the screen on/off logo and not the early up/down version.
A careful, gentle and then more forceful level under the button using one of my plastic pry/trim tools soon had the job sorted. Looking much more period correct for my MY2017 S3 with roll up/down MMI screen.

er: 139994"]
So to celebrate this momentous occasion I had a tweak in VCDS and activated the passenger mirror dip when reversing in bit 2 & 3 long coding for module 52. Works a treat and really does help to stop the nearside rims getting munched against gnarly stuff.
 [/QUOTE]
Do you need to have electric folding mirrors for this feature?
I enabled it using OBDeleven but cant get it to work.
So to celebrate this momentous occasion I had a tweak in VCDS and activated the passenger mirror dip when reversing in bit 2 & 3 long coding for module 52. Works a treat and really does help to stop the nearside rims getting munched against gnarly stuff.
Do you need to have electric folding mirrors for this feature?
I enabled it using OBDeleven but cant get it to work.

Do you need to have electric folding mirrors for this feature?
No you don't require elec folding mirrors as I activated & used this feature prior to the elec folding mirror retrofit & it worked perfectly. If your vehicle is a rhd make sure your mirror switch is in the lh mirror position when selecting reverse otherwise the mirror dip won't function. It'll remain in the dip position out of reverse unless the vehicle is moving at 10mph> or you move the mirror switch out of the required position for the feature to work.
I've posted this elsewhere on the forum in a rather interesting thread relating to your car ownership history here but thought I'd also stick it in my on-going vehicle tinkering diary for all your amusement 
My vehicle ownership list; I've been driving since 1995 and I tend to keep cars a good few years, some of which I've still got.
Alas, no pics of the Nova Diamond I'm afraid as well as the cars rusting away the pictures also have.
Astra L Max Power here we come!
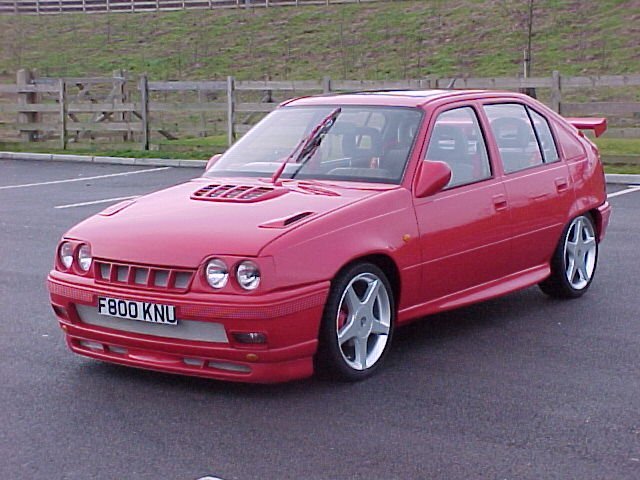
Astra Starmist, one of the two I've owned but don't know which this one is.

Astra GSi, 202K on the clock and still made above book figures on the rollers.
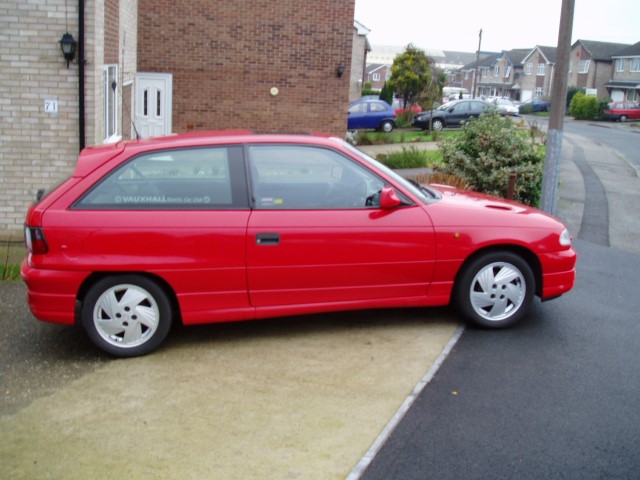
Astra SRi, low mileage but required a bit too much work under the skin so waved bye bye.

Omega GLS workhorse 1.

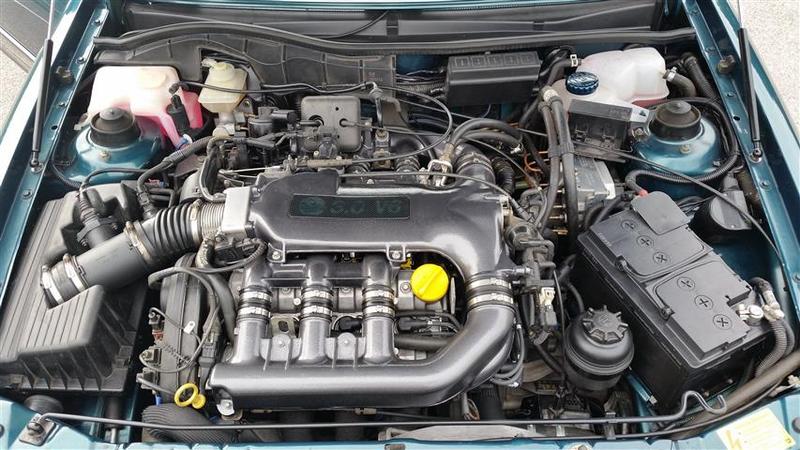
Calibra SE9 lovely motor but started going pink so moved it on.

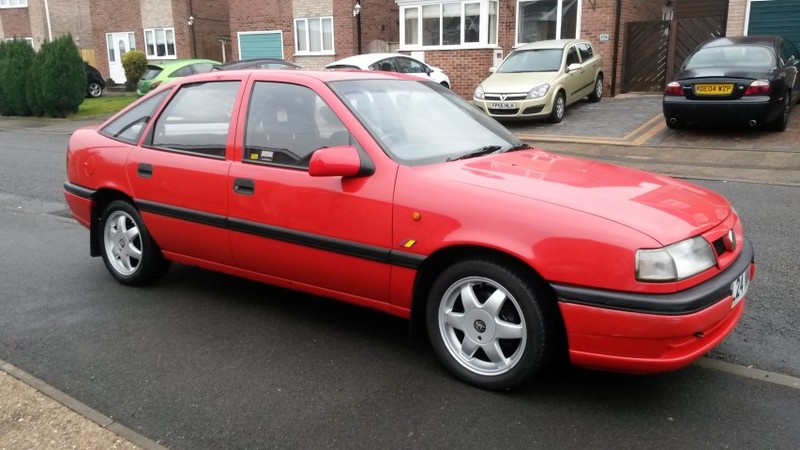
Cavalier Cesaro tidy and did what it says on the tin...rust.
Frontera workhorse 2.

GTE 16v complete with the legend himself John Cleland (BTCC with honours) who I met at a photoshoot back on 2009 at Knockhill circuit as I had a magazine feature with my car.


Vectra Super Touring 200 or ST200 for short, nuff said, still got it, going nowhere.


Astra Artic now with a lush V6 that I rebuilt and wedged under the bonnet. Wifey loves it so it's staying.

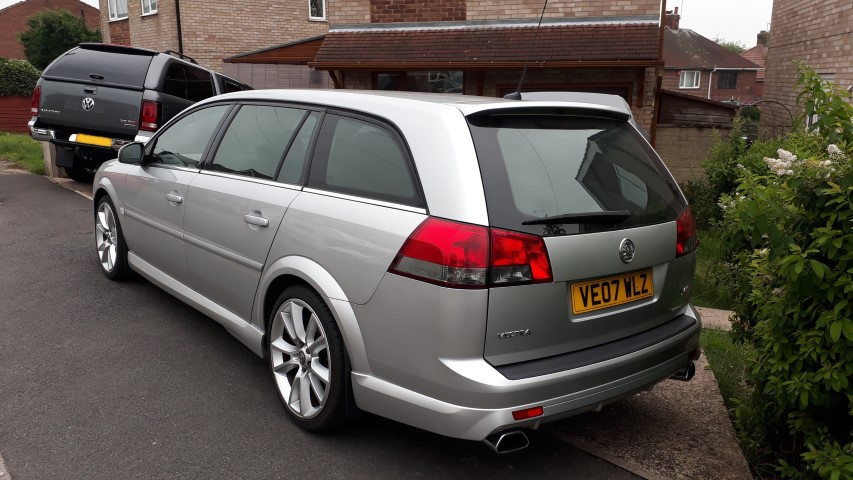
Vectra VXR Estate getting very very rare now with only 134 estate made.
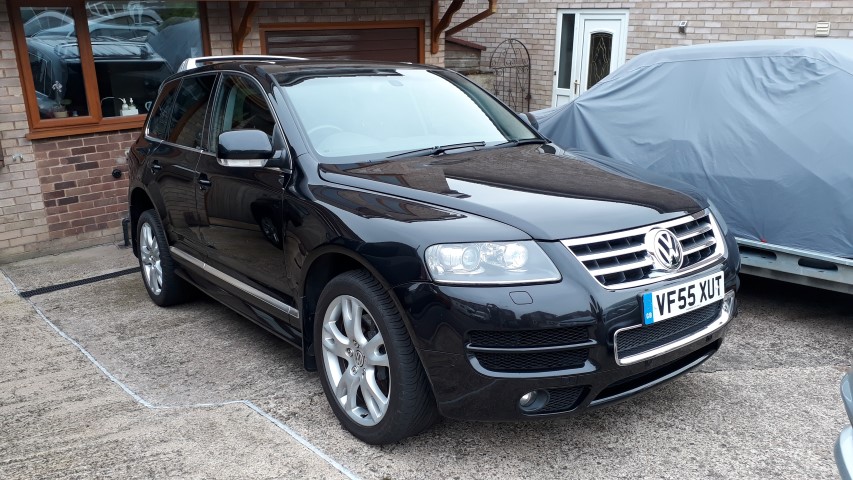
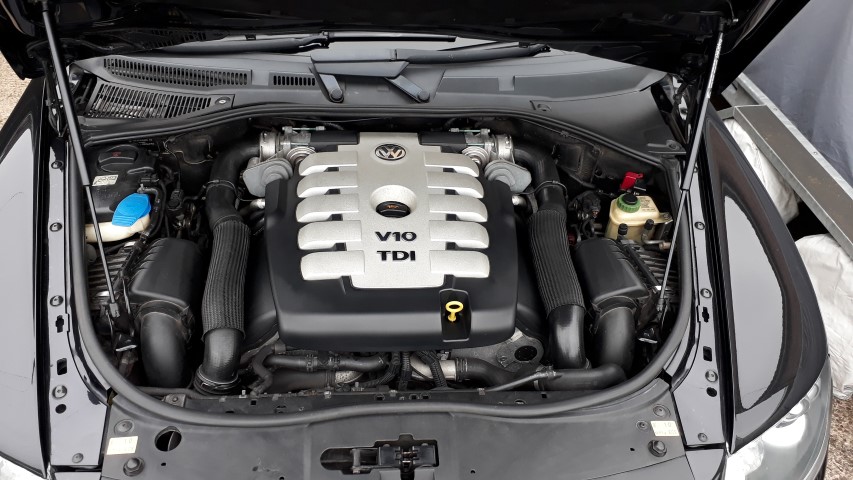
Touareg Altitude V10 workhorse 3 in style, beast and will never be forgotten.
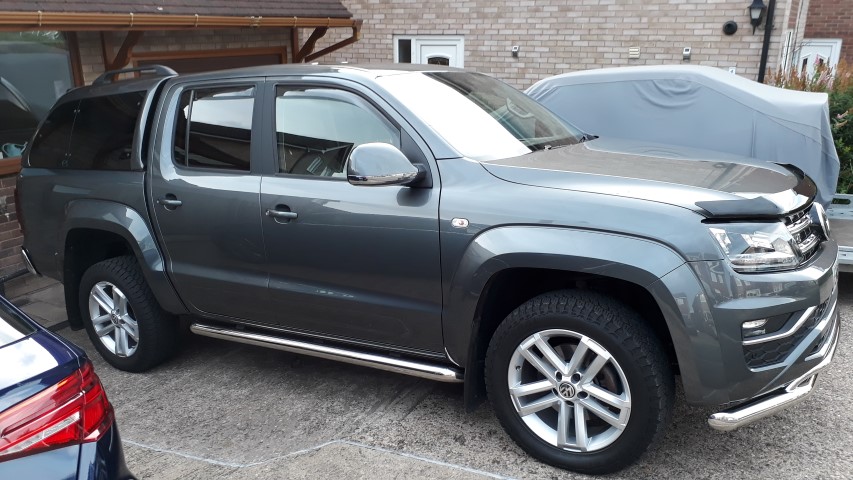
Amarok V6 workhorse 4 with all the AdBlue shenanigans and 550Nm of go.
Audi S3 which will be a long term keeper as the wife & I love it

My vehicle ownership list; I've been driving since 1995 and I tend to keep cars a good few years, some of which I've still got.
- Vauxhall Astra L mk2 1.3L 5 door
- Vauxhall Vectra Super Touring 200 #0005 of 38 produced, still owned since 2001
- Vauxhall Astra Starmist 1.4L
- Vauxhall Astra Starmist 1.4L, yes another one
- Vauxhall Astra GTE 16v mk2, still owned since 2004 was stock now a fully fledged road legal track car with gnarly bits
- Vauxhall Omega Estate GLS 2L
- Vauxhall Frontera 2.2L 5 door
- VW Touareg Altitude 5.0L V10, very sad day when this was sold but served it's time well
- VW Amarok 3.0L V6, current ownership
- Vauxhall Nova Diamond 1.2L
- Vauxhall Astra Arctic 1.6L but now with a 3.0L V6, still owned since 1999
- Vauxhall Astra GSi mk3
- Vauxhall Astra SRi 1.8L mk2
- Vauxhall Calibra SE9 2.5L V6
- Vauxhall Cavalier Cesaro 1.8L
- Vauxhall Vectra VXR Estate 2.8L V6 Turbo
- Audi S3 mk3 FL, current ownership
Alas, no pics of the Nova Diamond I'm afraid
as well as the cars rusting away the pictures also have.Astra L Max Power here we come!
Astra Starmist, one of the two I've owned but don't know which this one is.
Astra GSi, 202K on the clock and still made above book figures on the rollers.
Astra SRi, low mileage but required a bit too much work under the skin so waved bye bye.
Omega GLS workhorse 1.
Calibra SE9 lovely motor but started going pink so moved it on.
Cavalier Cesaro tidy and did what it says on the tin...rust.
Frontera workhorse 2.
GTE 16v complete with the legend himself John Cleland (BTCC with honours) who I met at a photoshoot back on 2009 at Knockhill circuit as I had a magazine feature with my car.
Vectra Super Touring 200 or ST200 for short, nuff said, still got it, going nowhere.
Astra Artic now with a lush V6 that I rebuilt and wedged under the bonnet. Wifey loves it so it's staying.
Vectra VXR Estate getting very very rare now with only 134 estate made.
Touareg Altitude V10 workhorse 3 in style, beast and will never be forgotten.
Amarok V6 workhorse 4 with all the AdBlue shenanigans and 550Nm of go.
Audi S3 which will be a long term keeper as the wife & I love it
More future service stock as I managed to source a DSG/S-Tronic genuine filter that VAG list as a filter for life but I say if you can change it then you should. My box is the DQ381 (0GC) which I thought took filter no. 0GC325183A but the supplier is an Audi dealer who I sent my VIN/reg and they confirmed filter part no.0GC325183 fits plus they included the o-ring seal.


More future service stock as I managed to source a DSG/S-Tronic genuine filter that VAG list as a filter for life but I say if you can change it then you should. My box is the DQ381 (0GC) which I thought took filter no. 0GC325183A but the supplier is an Audi dealer who I sent my VIN/reg and they confirmed filter part no.0GC325183 fits plus they included the o-ring seal.
Where did you see it listed for life? DSG fluid and filter should be changed ever 40,000 miles according to my service documents (for the S3 that is). Of course they do modify these quite a bit over the life of the car but it would be crazy to not change the DSG fluid and filter at regular intervals.
S-Tronic transmission -
Change fluid and filter element for clutch hydraulics
Every 40,000 miles A3 Sedan and Cabriolet Non-B-cycle 2.0T, S3, TT, TTS, S5, S6, S7 4.0T, and R8 (4S) only
Where did you see it listed for life? DSG fluid and filter should be changed ever 40,000 miles according to my service documents (for the S3 that is).
If you read the official VAG SSP 556 The 7-speed Dual Clutch Gearbox 0GC it’s clearly listed on page 30 highlighted below.
S-Tronic transmission -
Change fluid and filter element for clutch hydraulics
Every 40,000 miles A3 Sedan and Cabriolet Non-B-cycle 2.0T, S3, TT, TTS, S5, S6, S7 4.0T, and R8 (4S) only
I have a 2016 facelift S3 and the “MyAudi” app says dual clutch S-tronic gearbox fluid every 80k miles. My car is coming up to 38k miles so if my app is incorrect, I was planning on changing the fluid at 80k. There’s no time limit specified that I can see either


If you read the official VAG SSP 556 The 7-speed Dual Clutch Gearbox 0GC it’s clearly listed on page 30 highlighted below.
View attachment 216163
Interesting to see this for the 7 speed. I have a 2017 with 6 speed so filter changes still applies for my side. I would be curious to see your filter condition when the time comes (if you ever change it that is). I assume your 7 speed still has the filter housing on top of the transmission?
I have a 2016 facelift S3 and the “MyAudi” app says dual clutch S-tronic gearbox fluid every 80k miles. My car is coming up to 38k miles so if my app is incorrect, I was planning on changing the fluid at 80k. There’s no time limit specified that I can see either
My apologies that I forgot to clarify engine type. You may be 80,000 for the change if B-cycle model:
Yes the DQ381 filter sits on top of the box & shortly after the release of the servicing data for this S-Tronic/DSG the schedule was revised from 80k to 38k. There's a lot of misleading info floating around regarding this but me being me I'll be serving it, both oil+filter, way before the recommended scheduled 38k

Gave the wife’s Astra mk3 V6 a visual inspection the other month and noticed the l/h front Koni shocker was leaking from the top adjuster. Only a minor weep but required fixing nevertheless.

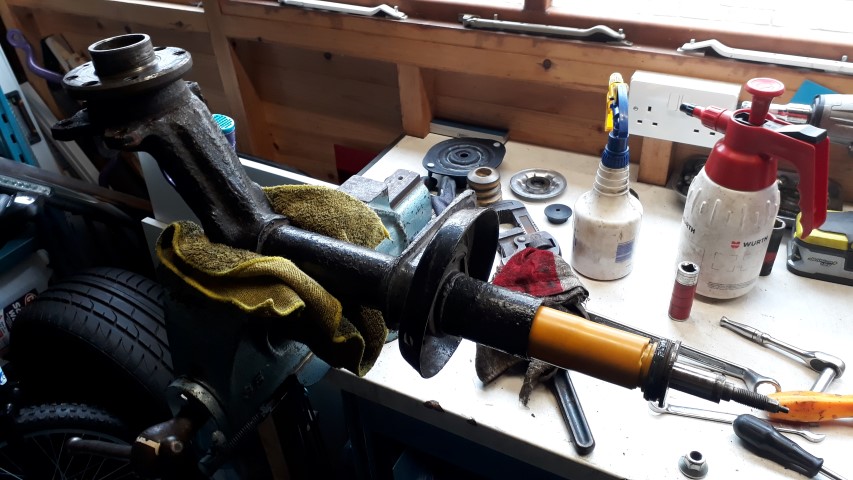
Removed both front struts, note the hub is part of the unit so not a quick job like on modern stuff.
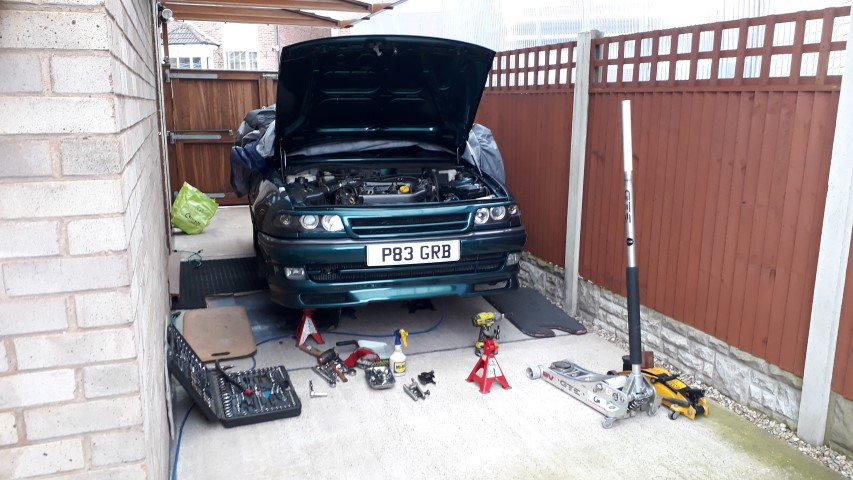

After enquiries a refurb for my existing shocks was going to be just shy of £200 (pair), brand new replacements were around £240 (pair) or a completely free fix using my old spare GTE track day suspension. I opted for option C, a free fix. After stripping the mk3 suspension I found I had used mk2 GTE 16v inserts and my GTE kit was actually mk3 GSi so perfect for what I required.
Fresh mk3 inserts going in and manly stilsons used to tighten the locking nut which should be 200Nm. I’ve had the locknut come loose previously so a blob of thread lock and good tug on the stilsons should put pay to that happening again.
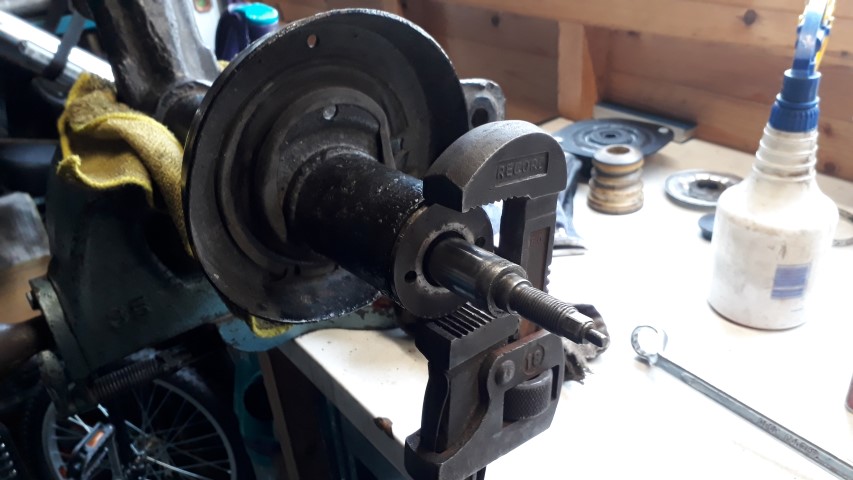
Boshed the Cav mk3 V6 Eibach spring on, top mount gubbins and repeated for the other side. Leak resolved for no expense, winning.

Once I’d got the struts refitted, I rerouted the ABS and brake pad wear sensor wiring more neatly as I was never happy how it looked previously. Much better this time with cost free shocker replacements being the best.

Removed both front struts, note the hub is part of the unit so not a quick job like on modern stuff.
After enquiries a refurb for my existing shocks was going to be just shy of £200 (pair), brand new replacements were around £240 (pair) or a completely free fix using my old spare GTE track day suspension. I opted for option C, a free fix. After stripping the mk3 suspension I found I had used mk2 GTE 16v inserts and my GTE kit was actually mk3 GSi so perfect for what I required.
Fresh mk3 inserts going in and manly stilsons used to tighten the locking nut which should be 200Nm. I’ve had the locknut come loose previously so a blob of thread lock and good tug on the stilsons should put pay to that happening again.
Boshed the Cav mk3 V6 Eibach spring on, top mount gubbins and repeated for the other side. Leak resolved for no expense, winning.
Once I’d got the struts refitted, I rerouted the ABS and brake pad wear sensor wiring more neatly as I was never happy how it looked previously. Much better this time with cost free shocker replacements being the best.
Managed to source the correct transmission oil part no.G055529A2 for my DSG box (DQ381) at a bargain price, sorry Audi S-Tronic is a mouthful. From what I’ve researched the box takes 6L for a complete dry fill and around 4.6L for an oil change (+filter) so I grabbed the full 6L knowing it gives me wiggle room.


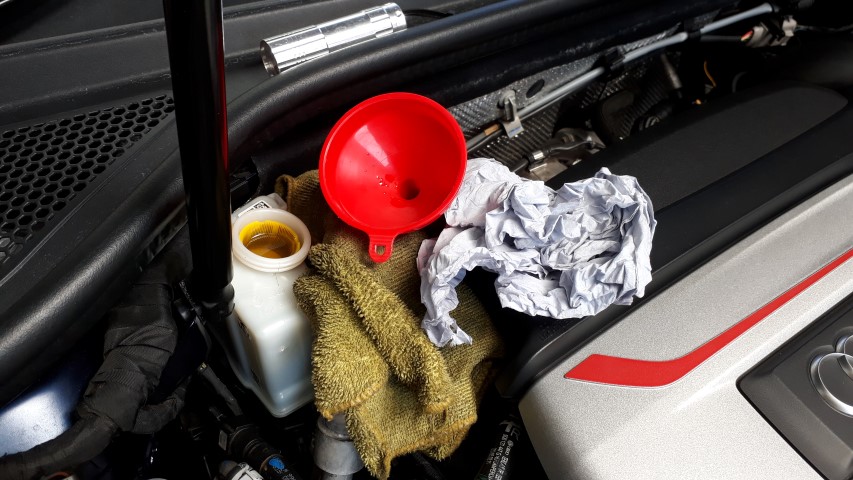
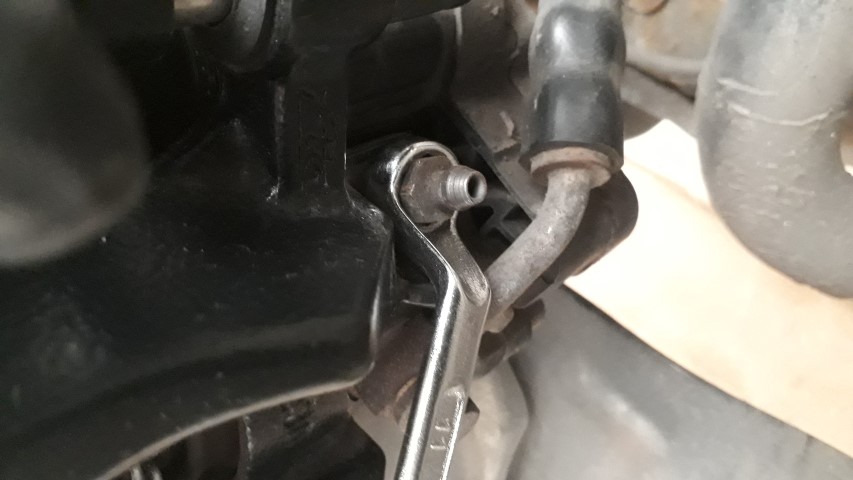
I can happily report after a few hundred miles of mixed driving the oil cap is no longer weeping & has no visible oil vapour around it as you can see below. The EA888 Gen3 aftermarket oil cap seal comes highly recommended, see my post here for further details and links to purchase.

I can happily report after a few hundred miles of mixed driving the oil cap is no longer weeping & has no visible oil vapour around it as you can see below. The EA888 Gen3 aftermarket oil cap seal comes highly recommended, see my post here for further details and links to purchase.
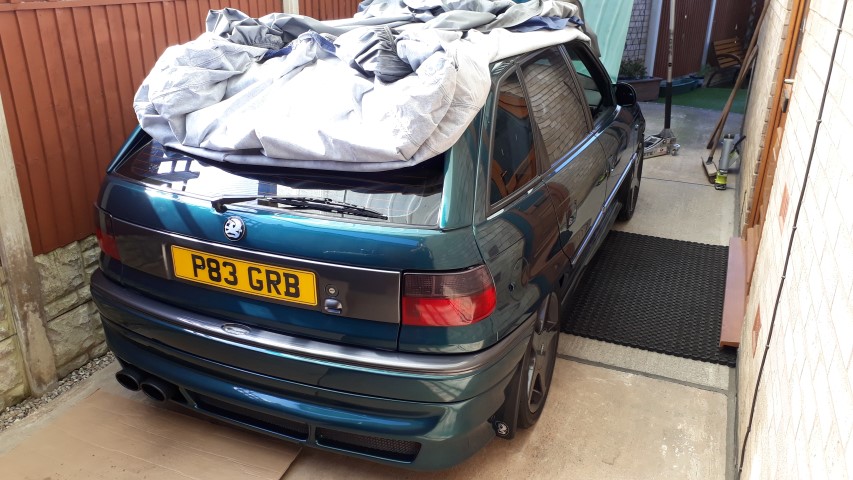
Back to my Vauxhall roots for the last few weeks as I’ve been safely storing a rare 2002 mk4 Astra SRi Turbo while a friend moves to a new house. It’s been a rolling project for him since 2014 and slowly being restored back to original.

I can’t help myself so while it’s been with me I’ve treated it to a wash including in the fuel filler cap area, inside the rims and under the bonnet. It beaded rather nicely after it’s final rinse.


This lot is going as the OE airbox, intake and intercooler will be refitted.

I removed the VXR etched branding from the tailpipe after checking my mate wanted it gone. I have no idea why Milltek did this in the first place. Attacked it with wet’n’dry 600/1000/1500/2500 grit before a final Autosol polish. The pictures don’t really do it justice as it looks so much better in the flesh.


Managed to sort the cooling fan continually running with the ignition on traced to a/c pressure switch loom plug corroded due to missing weather seal. Cleaned the crank sensor which had a scary amount of metal filings attached as well as removed and cleaning the spark plugs before a hot compression test with all cylinders +/- 5psi.


I’ve never been a fan of the mk4 hatch and prefer the coupe looks but it’s been nice playing with something different.
I can’t help myself so while it’s been with me I’ve treated it to a wash including in the fuel filler cap area, inside the rims and under the bonnet. It beaded rather nicely after it’s final rinse.
This lot is going as the OE airbox, intake and intercooler will be refitted.
I removed the VXR etched branding from the tailpipe after checking my mate wanted it gone. I have no idea why Milltek did this in the first place. Attacked it with wet’n’dry 600/1000/1500/2500 grit before a final Autosol polish. The pictures don’t really do it justice as it looks so much better in the flesh.
Managed to sort the cooling fan continually running with the ignition on traced to a/c pressure switch loom plug corroded due to missing weather seal. Cleaned the crank sensor which had a scary amount of metal filings attached as well as removed and cleaning the spark plugs before a hot compression test with all cylinders +/- 5psi.
I’ve never been a fan of the mk4 hatch and prefer the coupe looks but it’s been nice playing with something different.
The S3 got its weekly wash early yesterday and the paintwork is still looking fresh.

I grabbed a fresh tube of Autosol a few months back and it finally had some use.

The quad tips were just beginning to mark up and that’ll never do so they were subjected to a good hand buff and came up well. This is the r/h pair with the l/h looking identical and a lovely mirror finish. Oh, I do like a nice shiny tip making it even more exciting when you have four to look at!

It does upset me when you see a nice-looking vehicle which has never had any loving given to the chrome exhaust tips It doesn’t take much to keep them fresh so come on peeps give them some joy and get buffing.
I grabbed a fresh tube of Autosol a few months back and it finally had some use.
The quad tips were just beginning to mark up and that’ll never do so they were subjected to a good hand buff and came up well. This is the r/h pair with the l/h looking identical and a lovely mirror finish. Oh, I do like a nice shiny tip making it even more exciting when you have four to look at!
It does upset me when you see a nice-looking vehicle which has never had any loving given to the chrome exhaust tips
It doesn’t take much to keep them fresh so come on peeps give them some joy and get buffing.Had a poke around the S3 last night with my VCDS having realised I can check the number of times the S3 had been launched using the procedure aptly titled Launch control programme within the user manual.

I’m pleased to say my S3 has never ever, just as I thought, been launched. Goes to show it’s had a controlled and pleasurable up bringing. For anyone wanting to check their car and having access to VCDS it’s in Module 02. The German>English translation fir the description is “anzahl launch control anfahrt > number of launch control approach”. I was also checking where the transmission oil temp value was located for when I change the fluid and filter in the future.

I’d read but not realised the S3 comes with a fake exhaust noise which is Module A9 (sound actuator) so I’ve now turned it off completely having been at 100.0% when I checked prior to turning it off at 0.0%. The vehicle is loud enough for me, so I don’t need some reprobate synthetic emulated sound pumped into the car thank you very much. If I want a loud car interior experience, then I’ll jump in my GTE and take that for a drive as it really does hurt your eardrums.

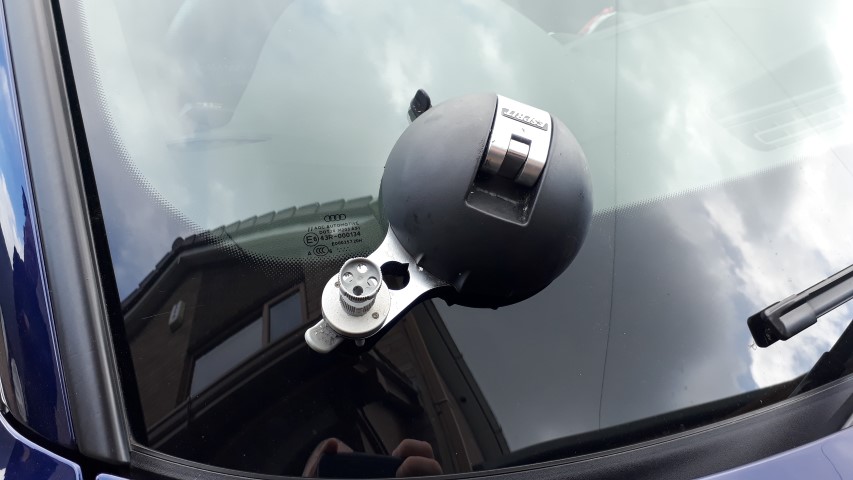
On a sad note a stone hit the screen the other day while driving along in traffic. It's at the bottom r/h of the screen in the black boarder area.

On the face of it doesn’t look bad until you look more closely and see the spider legs on the layer below. It’s the size of a 5p so I’ll keep an eye on it and if needed buy a new screen, so annoying.

I’m pleased to say my S3 has never ever, just as I thought, been launched. Goes to show it’s had a controlled and pleasurable up bringing. For anyone wanting to check their car and having access to VCDS it’s in Module 02. The German>English translation fir the description is “anzahl launch control anfahrt > number of launch control approach”. I was also checking where the transmission oil temp value was located for when I change the fluid and filter in the future.
I’d read but not realised the S3 comes with a fake exhaust noise which is Module A9 (sound actuator) so I’ve now turned it off completely having been at 100.0% when I checked prior to turning it off at 0.0%. The vehicle is loud enough for me, so I don’t need some reprobate synthetic emulated sound pumped into the car thank you very much. If I want a loud car interior experience, then I’ll jump in my GTE and take that for a drive as it really does hurt your eardrums.
On a sad note a stone hit the screen the other day while driving along in traffic. It's at the bottom r/h of the screen in the black boarder area.
On the face of it doesn’t look bad until you look more closely and see the spider legs on the layer below. It’s the size of a 5p so I’ll keep an eye on it and if needed buy a new screen, so annoying.

The use of 'launch control' was one of the first things I had checked on my car too, and thankfully mine has not been used either - I think it's just too complicated. If you have ever been in a car when it has been used, and if you have a shred of mechanical sympathy, you will never want it done to your car!!!!!!!!!!!!!
Checked the speaker thing and Mine is also turned off too - thankfully, I just don't understand it. - discuss!!
Bad luck about the stone chip, I would have it 'sealed' as the least invasive option if it's covered on your insurance.
Boy home tomorrow!!!!!
Checked the speaker thing and Mine is also turned off too - thankfully, I just don't understand it. - discuss!!
Bad luck about the stone chip, I would have it 'sealed' as the least invasive option if it's covered on your insurance.
Boy home tomorrow!!!!!
..snip...
On a sad note a stone hit the screen the other day while driving along in traffic. It's at the bottom r/h of the screen in the black boarder area.
On the face of it doesn’t look bad until you look more closely and see the spider legs on the layer below. It’s the size of a 5p so I’ll keep an eye on it and if needed buy a new screen, so annoying.
Get a piece of sellotape over that ASAP
Launched my car quite a few times, not to often but it is great fun. If you wasn't suppose to do it audi wouldn't have written up the sequence to launch the car.
Go on you know you want to
Sent from my SM-G981B using Tapatalk
Go on you know you want to

Sent from my SM-G981B using Tapatalk
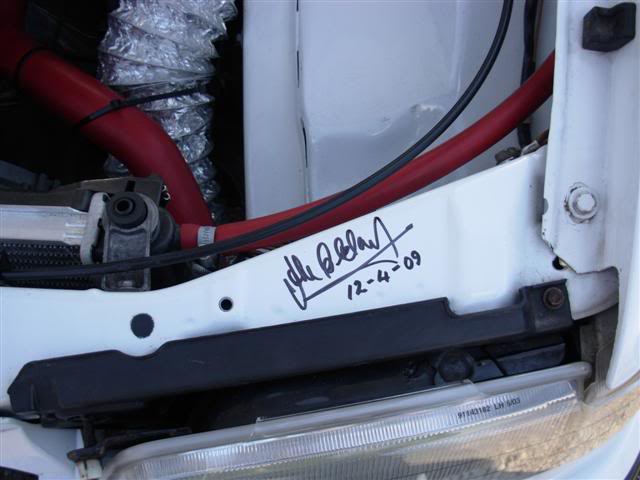
It's 12 years exactly to the day that I dragged my (at the time finished) track car all the way up to Knock Hill for a magazine photoshoot as featured in the June 2009 edition of Total Vauxhall. I can't forget it as I had the absolute pleasure to meet the 90s BTCC legend John Cleland who I got to sign my slam panel and passenger in my own car when he drove it round the circuit. It was worth all 13 hours of trailer towing and strangely for Knock Hill the sun came out! The car has evolved since then but from the outside looks identical. The other Astra GTE in the background is owned by Vauxhall and is part of the Vauxhall Heritage Centre collection.

Last edited:
I’ve had the tiny chip from the other week repaired by AB Screens who I’ve used in the past. Andy said as the chip was so small and where it’s located it was difficult to tell if the repair will last, at the very least it was worth a try so time will tell.
It was as cheap/cheaper to use my local screen company directly than it was to go through via insurance and use a national company who inflate prices which the insurance companies then pass on to the consumer with higher premiums, moan over. If you’re in the Nottingham/Derby/Mansfield area and require a screen sorting try contacting AB Screens directly, the number is on the funky work van or website link above.

It was as cheap/cheaper to use my local screen company directly than it was to go through via insurance and use a national company who inflate prices which the insurance companies then pass on to the consumer with higher premiums, moan over. If you’re in the Nottingham/Derby/Mansfield area and require a screen sorting try contacting AB Screens directly, the number is on the funky work van or website link above.
Are you pleased with the repair? my daughter had a chip done on her Lupo the other week before her MOT, by Halfrauds and it was CR __ P the fitter said he could not go inside the car because of Covid and left the repair resin sharp on the outside! needless to say I finished the repair at home it was snagging my wash leather!!!
Busy few days on the S3 with the first job, hover craft conversion levelled on axle stands.

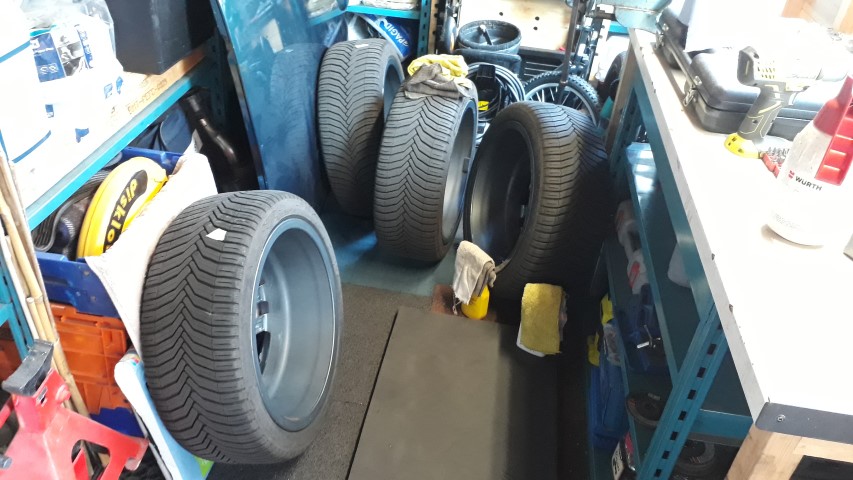
The wheels were removed as I had an action plan which consisted of; rim detailing, Haldex service & brake fluid change. Stuck the rims in my man cave ready for a polish ‘n’ wax.
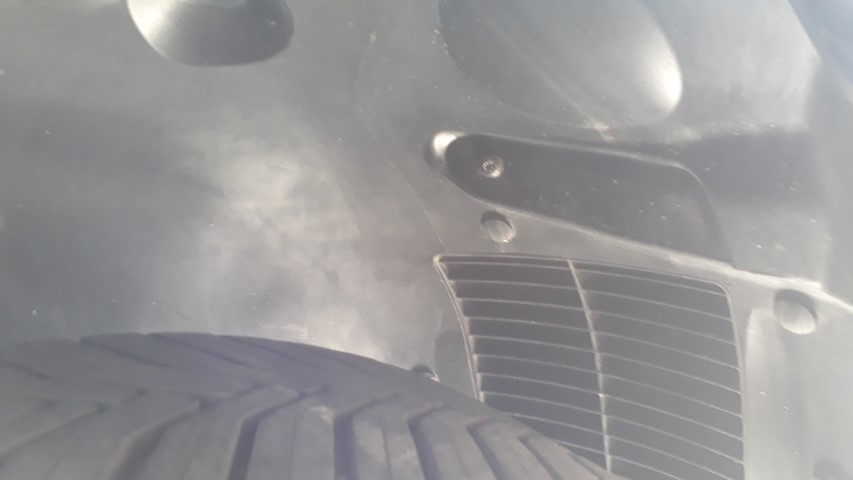
Flicked all the little stones out the tyre tread & found this lurking!
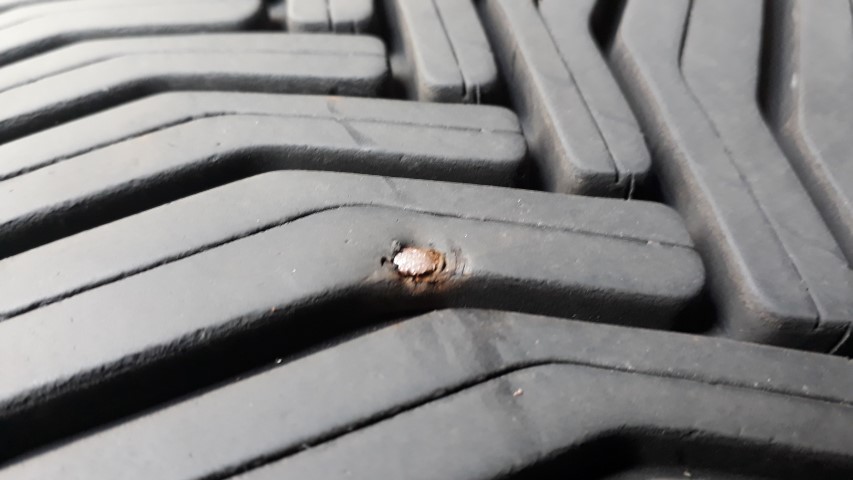
Got the pinchers out & it was the remains of a nail, unbelievably it didn’t puncture but I’ll be keeping an eye on pressures.

The haldex had an oil change with the dealers at 9.800 miles so I thought it best to change the oil & remove the pump for a gauze clean knowing the dealers wouldn’t have cleaned the gauze when they serviced it. My S3 is now on 16,450 miles.
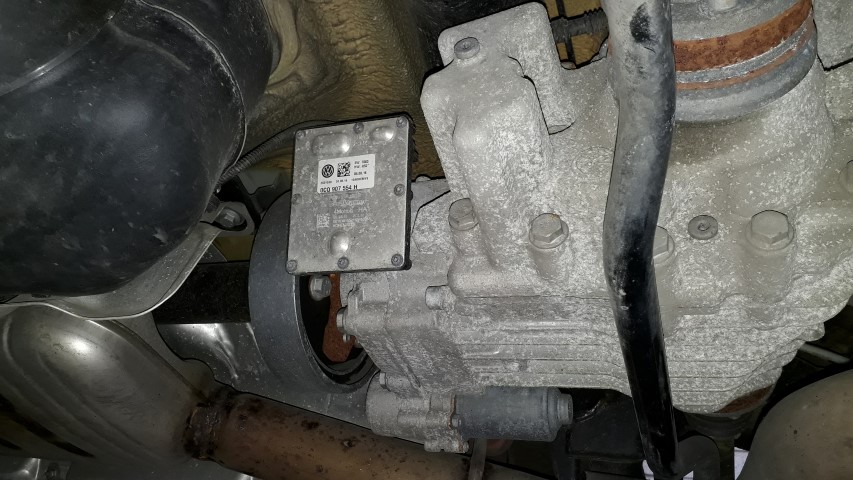
Haldex oil draining after removing the fill/level plug & drain plug. Left it draining then installed a new drain plug torqued to 35Nm.


Pump remove & as expected lumpy jelly so the gauze is doing its thing as intended. I then removed the gauze & gave it a good clean with my favourite automotive produce, brake cleaner.


Pump housing before & after a clean. Pump bolt torque 10Nm.
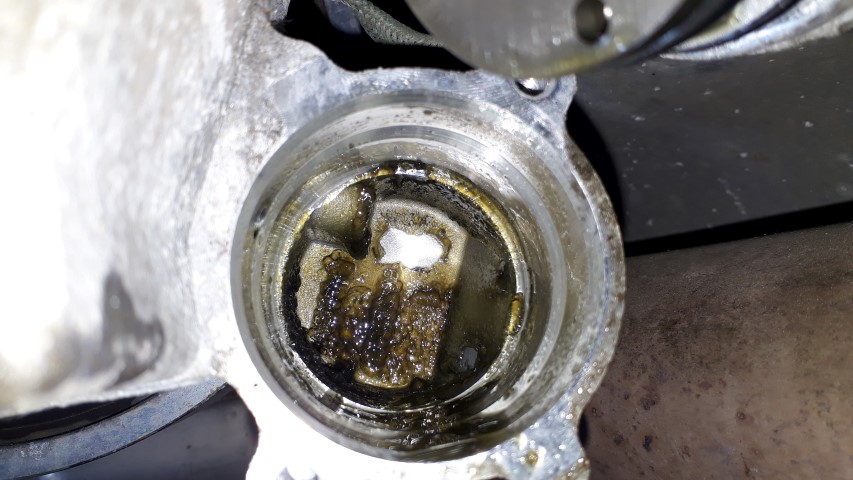

The old Haldex fluid wasn’t as dirty as I was expecting so you can tell it’s had a gently life in my ownership with little clutch wear. I managed to drain 750ml, more than expected, so either the dealer had over filled or not actually changed the oil being still factory filled. A few lumps in the drained oil I spotted when draining.


The wheels were removed as I had an action plan which consisted of; rim detailing, Haldex service & brake fluid change. Stuck the rims in my man cave ready for a polish ‘n’ wax.
Flicked all the little stones out the tyre tread & found this lurking!
Got the pinchers out & it was the remains of a nail, unbelievably it didn’t puncture but I’ll be keeping an eye on pressures.
The haldex had an oil change with the dealers at 9.800 miles so I thought it best to change the oil & remove the pump for a gauze clean knowing the dealers wouldn’t have cleaned the gauze when they serviced it. My S3 is now on 16,450 miles.
Haldex oil draining after removing the fill/level plug & drain plug. Left it draining then installed a new drain plug torqued to 35Nm.
Pump remove & as expected lumpy jelly so the gauze is doing its thing as intended. I then removed the gauze & gave it a good clean with my favourite automotive produce, brake cleaner.
Pump housing before & after a clean. Pump bolt torque 10Nm.
The old Haldex fluid wasn’t as dirty as I was expecting so you can tell it’s had a gently life in my ownership with little clutch wear. I managed to drain 750ml, more than expected, so either the dealer had over filled or not actually changed the oil being still factory filled. A few lumps in the drained oil I spotted when draining.
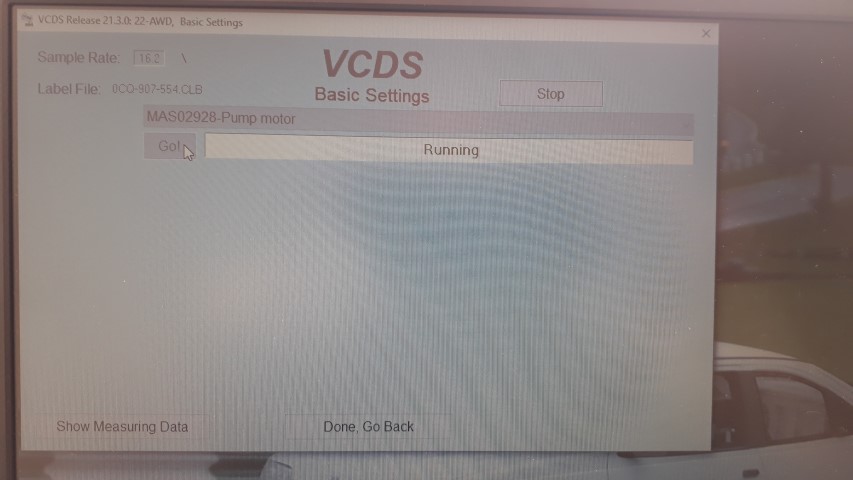
New fluid decanted & being pumped in via the fill/level hole. I got 550ml in before it reached level then refitted the ‘old’ oil fill/level plug & ran a VCDS basic setting for the pump to reset values & circulate the new oil. I then pumped in another 150ml (700ml total) before fitting a ‘new’ plug torque at 15Nm.


Brake fluid next & as the wife was available, I decided to bleed using the manual pedal method as it’s less messy then using my Eezibleed . Sucked all the old fluid out the brake reservoir & poured in fresh Dot4.
The rear calipers are a silly design with limited bleed nipple access so I had to dig out my set of swan neck spanners. All bleed nipples f+b at 11mm.

On, off, on, off, on, off…you get the idea until you’re happy the fluid is fresh coming from the nips. Not as darker colour as I’ve seen from other cars I’ve done so not much heat soak in the fluid.

With that lot done it would be rude not to clean the inner arch liners so the front got wiped & rears brushed as they are the fabric type sound deadening variant. Brake bells still looking fresh silver after a wipe clean with no Hammerite touch up required.


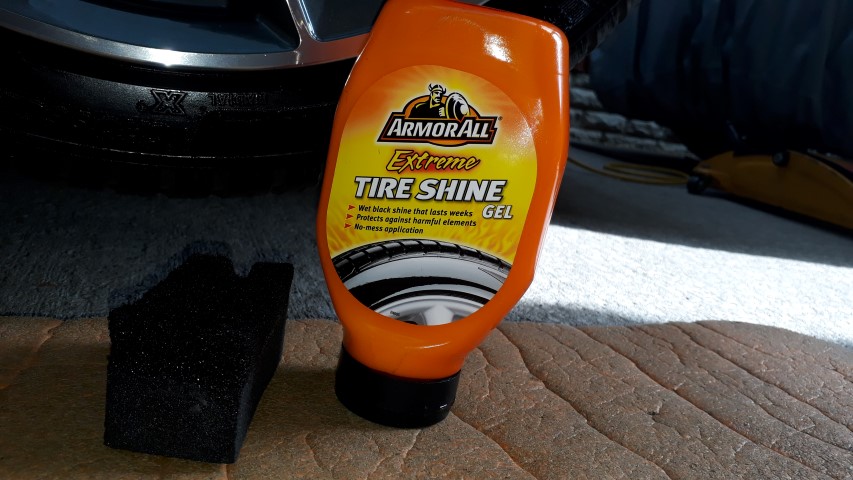
After the wheels were refitted while still on axle stands it was the prime time to treat the side walls to some funky gel.
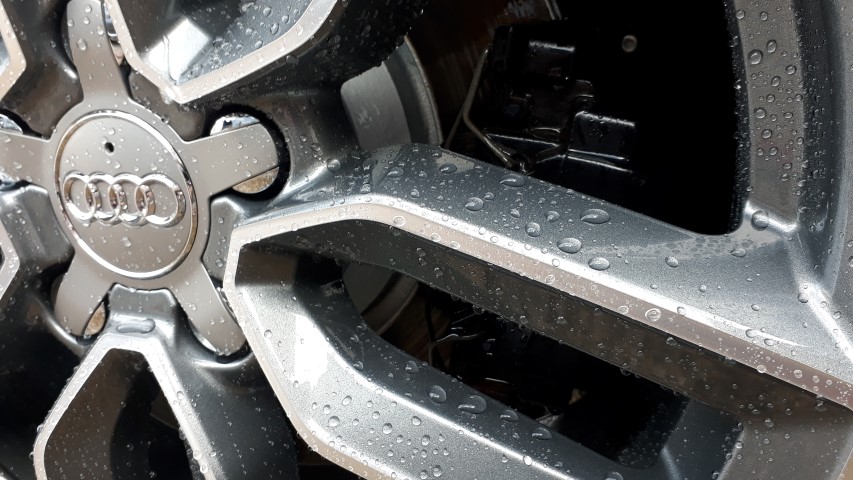
Wheels centres also got detailed. The finished wheels looking good.


With the car back on the ground it got washed as the bodywork was really dusty & no longer matched the clean wheels. I couldn’t resist this lovely beading shot.
Car washed, dried & being totalled biased the Navarra Blue looks stunning with so much depth in the daylight.

Brake fluid next & as the wife was available, I decided to bleed using the manual pedal method as it’s less messy then using my Eezibleed . Sucked all the old fluid out the brake reservoir & poured in fresh Dot4.
The rear calipers are a silly design with limited bleed nipple access so I had to dig out my set of swan neck spanners. All bleed nipples f+b at 11mm.
On, off, on, off, on, off…you get the idea until you’re happy the fluid is fresh coming from the nips. Not as darker colour as I’ve seen from other cars I’ve done so not much heat soak in the fluid.
With that lot done it would be rude not to clean the inner arch liners so the front got wiped & rears brushed as they are the fabric type sound deadening variant. Brake bells still looking fresh silver after a wipe clean with no Hammerite touch up required.
After the wheels were refitted while still on axle stands it was the prime time to treat the side walls to some funky gel.
Wheels centres also got detailed. The finished wheels looking good.
With the car back on the ground it got washed as the bodywork was really dusty & no longer matched the clean wheels. I couldn’t resist this lovely beading shot.
Car washed, dried & being totalled biased the Navarra Blue looks stunning with so much depth in the daylight.
I’ve got a track day at Blyton Park booked for June and thought I better get the GTE ready so need to do some road miles next month. Checked it over on Wednesday prior to the MOT.
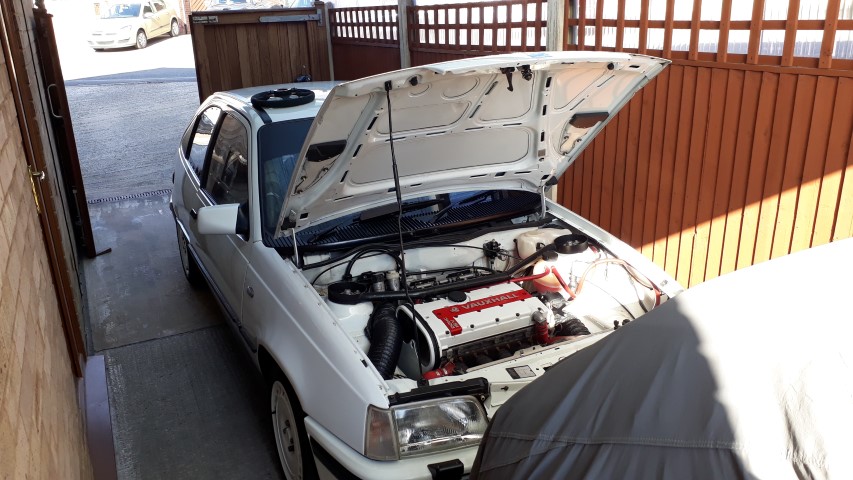
Then it was dee day yesterday so off I popped to my go to MOT centre Betta Fit, straight opposite Ikea Nottingham.

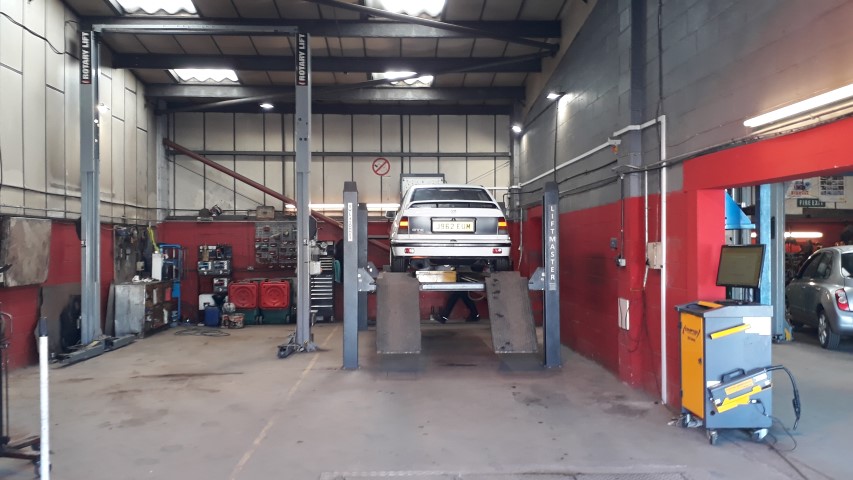
The scores on the doors, it’s a PASS

While there I got them to rotate my track day rubber of choice on the rims, lovely Dunlop DZ03. Well used but I’ll get another days abuse out of them before I get the Toyo R888R installed that I’ve got stashed in my loft.

Had a weird fuelling issue which I finally traced to the fuel pressure gauge so out with the old Fuel Performance on the left and in with the new Sytec on the right.

Gauge removed from the FPR.
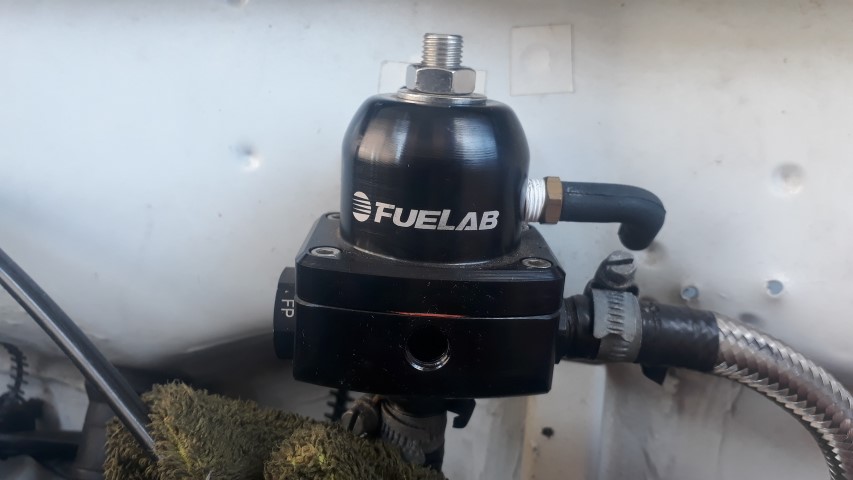
Fitted and set to 2.6bar (38psi), apologies for the angle as it’s hard to picture with stuff in the way.

I’m really looking forward to getting it back on circuit, it’s natural habitat. Driving it on the road feels like an assault on all the senses and you just want to get out after 20 mins.
Then it was dee day yesterday so off I popped to my go to MOT centre Betta Fit, straight opposite Ikea Nottingham.
The scores on the doors, it’s a PASS
While there I got them to rotate my track day rubber of choice on the rims, lovely Dunlop DZ03. Well used but I’ll get another days abuse out of them before I get the Toyo R888R installed that I’ve got stashed in my loft.
Had a weird fuelling issue which I finally traced to the fuel pressure gauge so out with the old Fuel Performance on the left and in with the new Sytec on the right.
Gauge removed from the FPR.
Fitted and set to 2.6bar (38psi), apologies for the angle as it’s hard to picture with stuff in the way.
I’m really looking forward to getting it back on circuit, it’s natural habitat. Driving it on the road feels like an assault on all the senses and you just want to get out after 20 mins.
The Astra mk3 also got prised from its hibernation today as I gave it the once over in readiness for going back on the road next month.


Can’t wait to actually drive it again as it’s been way too long, that is, if I can get the keys off the wife as it is her car after all.
Can’t wait to actually drive it again as it’s been way too long, that is, if I can get the keys off the wife as it is her car after all.
Superb thread - lovely cars and a great read. If only I didn't live on a hill in a terraced house, I'd love to be doing these maintenance jobs myself!
I had always thought the rear door shuts looked strange with the huge depth of the lower section then I spotted a post by the man above @The Cardinal regarding Audi cost cutting for the mk3 8V FL & the deletion of the rear door sill scuff protectors/trims on the Sportback & Saloon. After a spot of research regarding part numbers I decided to take the plunge & buy a pair from Audi Zentrum in Oldenburg via their eBay shop.
Rear sill trims with alloy inlays to match the fronts are the part numbers below. If you drop the A from the end these are the plain black trims with no inlay:
8V4 853 557 A – being the l/h, or nearside for UK vehicle
8V4 853 558 A – being the r/h, or offside for UK vehicle
Excitement ensued on arrival yesterday…


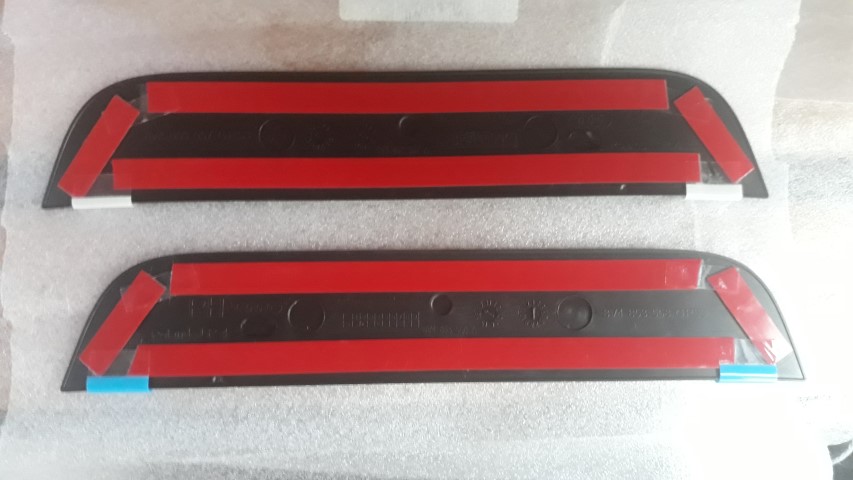
They are clearly embossed on the rear LH & RH with appropriate part numbers so be careful you fit them on the correct sides. It’s due to a slight dup in the sill & thus the trims are slightly curved to cater for this so you don’t want the alloy inlays bending incorrectly when fitting.

Trial fitting to sort where I wanted them located.

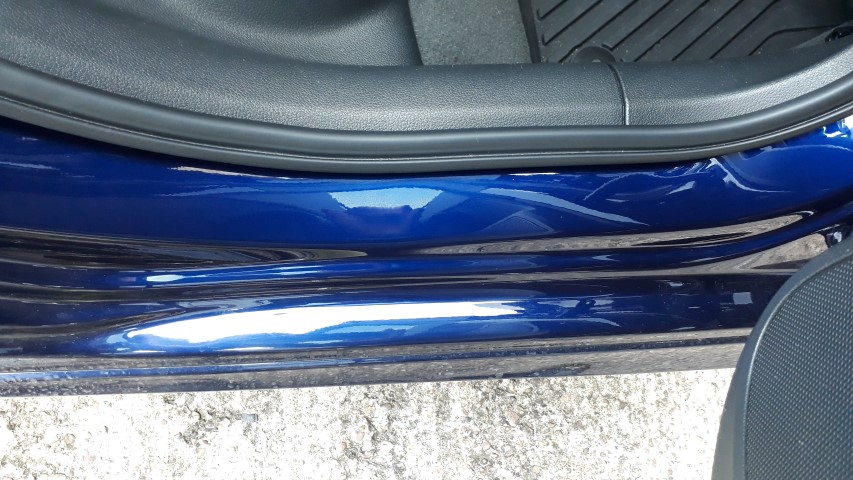
Then cleaned, polished & applied gentle heat using my heat gun to the sill & the rear of the sill cover to help with a super strong bond. Huge naked sill, it’ll look better shortly.
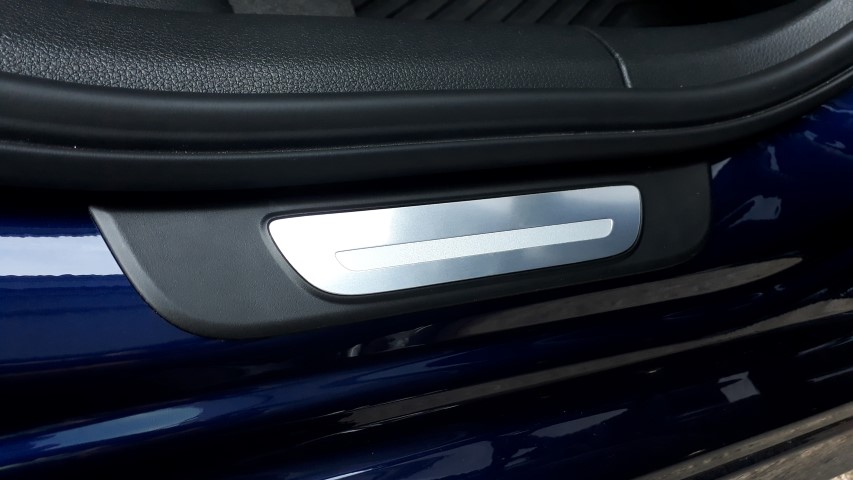
Right fitted.
Left installed.
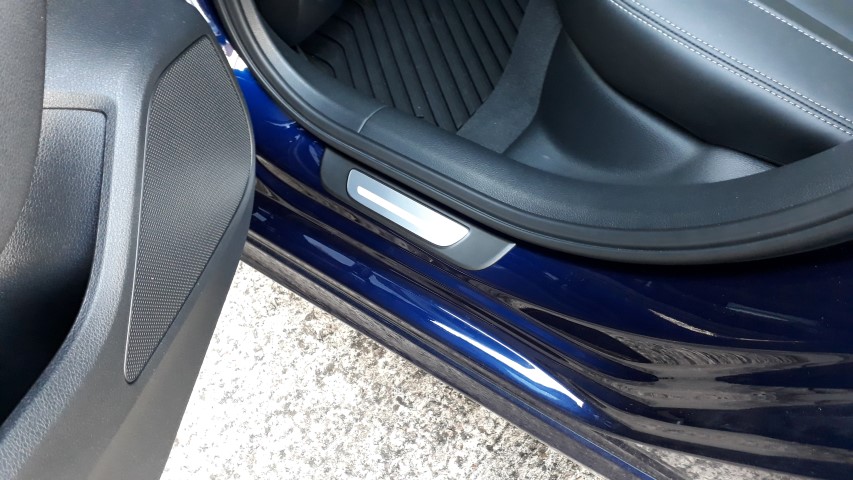
I aligned both along the horizontal marked line I used my thumbs as a guide compared to the front sill trims. The edge of the alloy inlay was aligned to the vertical line where the plastic trim joins. Picture shows r/h with l/h vertical alignment being the mirror opposite.
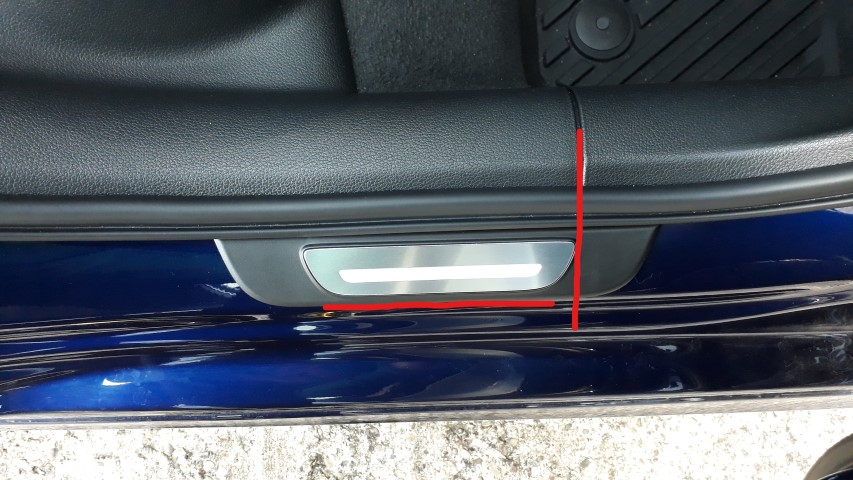
Easy job & it’s the little touches that make all the difference for me. Item fit/finish/quality is superb as you would expect from Audi but why oh why they cost cut to this extent is beyond me but every penny counts I suppose.
Rear sill trims with alloy inlays to match the fronts are the part numbers below. If you drop the A from the end these are the plain black trims with no inlay:
8V4 853 557 A – being the l/h, or nearside for UK vehicle
8V4 853 558 A – being the r/h, or offside for UK vehicle
Excitement ensued on arrival yesterday…
They are clearly embossed on the rear LH & RH with appropriate part numbers so be careful you fit them on the correct sides. It’s due to a slight dup in the sill & thus the trims are slightly curved to cater for this so you don’t want the alloy inlays bending incorrectly when fitting.
Trial fitting to sort where I wanted them located.
Then cleaned, polished & applied gentle heat using my heat gun to the sill & the rear of the sill cover to help with a super strong bond. Huge naked sill, it’ll look better shortly.
Right fitted.
Left installed.
I aligned both along the horizontal marked line I used my thumbs as a guide compared to the front sill trims. The edge of the alloy inlay was aligned to the vertical line where the plastic trim joins. Picture shows r/h with l/h vertical alignment being the mirror opposite.
Easy job & it’s the little touches that make all the difference for me. Item fit/finish/quality is superb as you would expect from Audi but why oh why they cost cut to this extent is beyond me but every penny counts I suppose.
Great work @Harvey I have just ordered a set from Tom@Crewaudi as I have always thought that my rear door sills look both vulnerable and a bit plain !!!!!
only dissapointment is no LEDs nor an 'S'
Now for the big question!!! is there a 'proper' protector for the bumper lip on a saloon which matches?
only dissapointment is no LEDs nor an 'S'
Now for the big question!!! is there a 'proper' protector for the bumper lip on a saloon which matches?
I'm usually a bit fussy about my cars, but must admit I just slapped my sill protectors on - while you did it properly!! They look great.
Something I noted on the S3, there’s no glove box lock due to yet more Audi cost cutting. I started researching and found the Sportback/Hatch/Saloon never came fitted with a locking glove box, I'm sure someone will prove me wrong. However, all Cabriolet did for obvious security reasons. The glove box handles are the same fitting for every A3/S3/RS3 mk3 PFL and FL 8V so I delved deeper into part numbers and came out with the following. For interest and a giggle I was quoted retail prices from Crewe Audi, thanks for the help Tom.
8V2857131C 3Q7 - £38, catch glove compartment lid aluminium finish cabriolet with lock barrel hole
N91085901 - £3, o-ring 12x1.9
107857113JC - £119, lock cylinder without key (VIN must be quoted to retain one key system)
Total cost new £160 for a glove box lock, ouch!!!
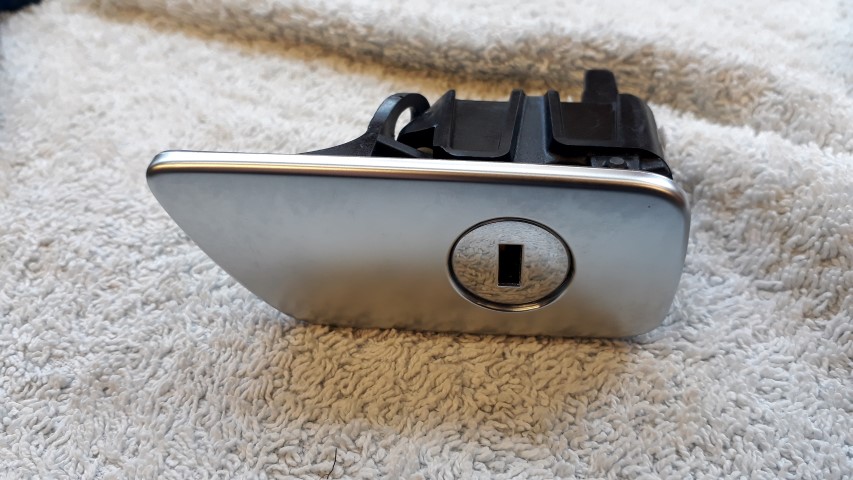
My head had already started formulating a plan at this point and with my vehicle being an S3 I wanted to retain the aluminium handle for the glove box plus a lock. After a brief search on eBay I found a breakers selling a complete glove box with the exact locking aluminium handle I required so took a punt for £32 all in with postage. A few days later this arrived.

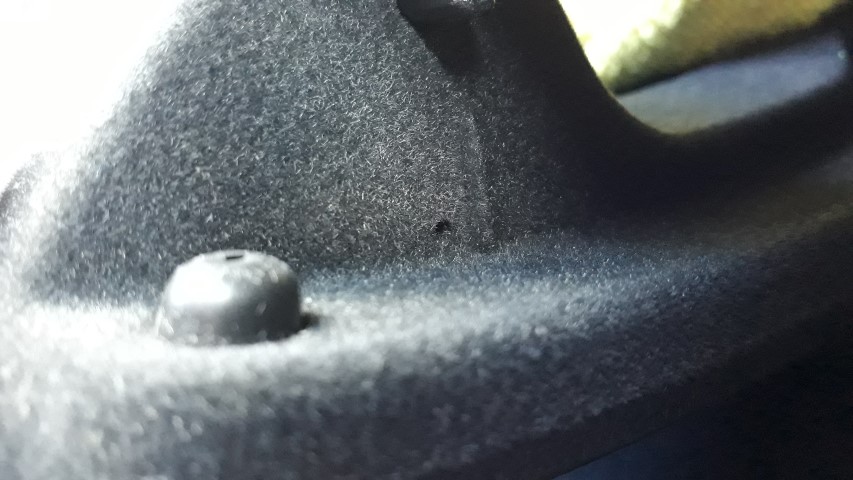
I checked in ElsaWin and noted the handle can be (easily ish) removed without stripping the glove box lid and without removing the glove box from the car. You need to first pull the handle as if opening the lid and you'll see a piece of grey plastic, get a flat blade screwdriver and push this firmly while gently pulling the handle and this will release the first clip. Now push a jewellers screw driver into the outer hole at the side of the lid while gently pulling the handle and it'll pop right off. Be gentle but firm pushing the securing clips, its surprising how much force is required.


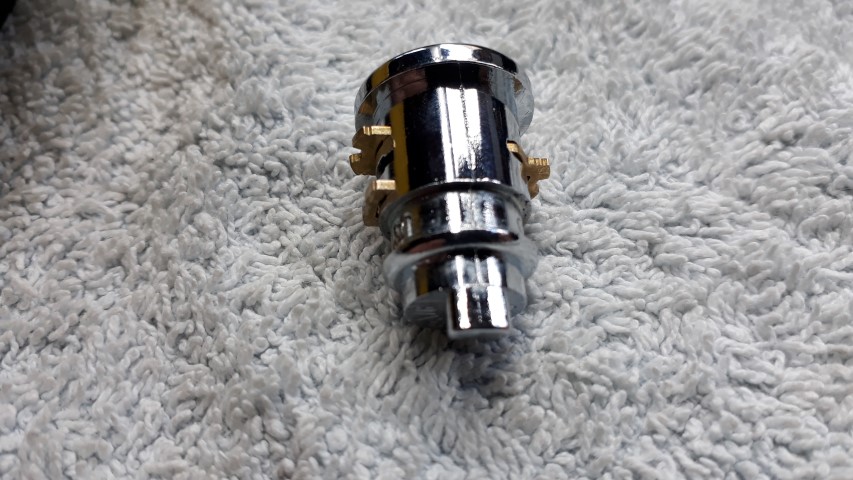
At this point I started stripping the handle as the lock was no use with my key and I needed to use welding wire from the rear to pick the lock and partially spin it so it could be removed. Careful removal is required as it's held in with plastic clips and the lock barrel sliders have tiny springs so if a key isn't installed when removing they can shoot out.


8V2857131C 3Q7 - £38, catch glove compartment lid aluminium finish cabriolet with lock barrel hole
N91085901 - £3, o-ring 12x1.9
107857113JC - £119, lock cylinder without key (VIN must be quoted to retain one key system)
Total cost new £160 for a glove box lock, ouch!!!
My head had already started formulating a plan at this point and with my vehicle being an S3 I wanted to retain the aluminium handle for the glove box plus a lock. After a brief search on eBay I found a breakers selling a complete glove box with the exact locking aluminium handle I required so took a punt for £32 all in with postage. A few days later this arrived.
I checked in ElsaWin and noted the handle can be (easily ish) removed without stripping the glove box lid and without removing the glove box from the car. You need to first pull the handle as if opening the lid and you'll see a piece of grey plastic, get a flat blade screwdriver and push this firmly while gently pulling the handle and this will release the first clip. Now push a jewellers screw driver into the outer hole at the side of the lid while gently pulling the handle and it'll pop right off. Be gentle but firm pushing the securing clips, its surprising how much force is required.
At this point I started stripping the handle as the lock was no use with my key and I needed to use welding wire from the rear to pick the lock and partially spin it so it could be removed. Careful removal is required as it's held in with plastic clips and the lock barrel sliders have tiny springs so if a key isn't installed when removing they can shoot out.
Next job was to set the lock barrel sliders in an order that would work with my key and require minimal sanding to work. I placed the tiny springs safely to the side and set to work. After a short time, I found I only needed to tweak one slider. They must have a proper name, anyone? Here you can see how much I had to remove (left) compared to an original (right).

With that done I popped the springs and sliders back in and test fitted my key to ensure the sliders all lined up. Then popped it into the handle without fully inserting to make sure I could turn it and all was good.

Next was easy, remove my old non locking handle.


Glove box locking handle installed and in the unlock position.

Insert key and turn anti clockwise into the locked position.
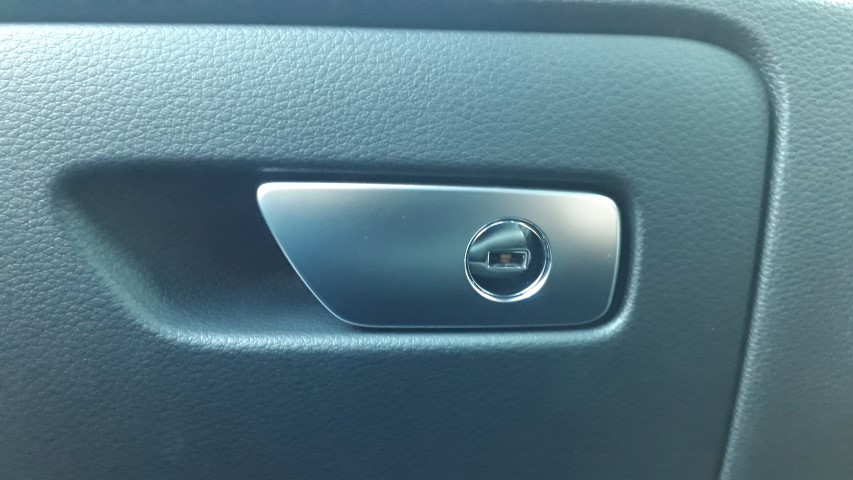
Conclusion, a cheap, easy, 2 hour mod so I can secure my sweets from thieves lol
With that done I popped the springs and sliders back in and test fitted my key to ensure the sliders all lined up. Then popped it into the handle without fully inserting to make sure I could turn it and all was good.
Next was easy, remove my old non locking handle.
Glove box locking handle installed and in the unlock position.
Insert key and turn anti clockwise into the locked position.
Conclusion, a cheap, easy, 2 hour mod so I can secure my sweets from thieves lol
A few months back I babysat my mates Astra mk4 SRi Turbo for a few weeks while he moved house. It was suffering from excessive oil usage which was traced to valve stem oil seals which is a common issue on the Z20LET engine. He sourced a replacement head with uprated stem seals and mild porting and polishing so we forged a plan of attach and set about the swap in his garage.
Front was stripped and rad pack removed for easier access.

Then a short while later after various other ancillaries, pipes, clips, hoses, clamps, nuts, bolts, tape, skin, belts, hair were removed it was time to whip the head off.


Shiny new refurbed head in the finial stages of prepping ready for fitting.

After the head was smashed on and third time lucky I got the timing bang on before the correct turbo fitting kit was used with new studs and nuts = BOOOOOOOST. The previous owner had a few mods executed poorly so it’s being slowly converted back to standard as a rolling project.

I’ve now left it with him to reinstall the rad pack, complete an oil change, pop fresh coolant in and turn the key for smile time.
Front was stripped and rad pack removed for easier access.
Then a short while later after various other ancillaries, pipes, clips, hoses, clamps, nuts, bolts, tape, skin, belts, hair were removed it was time to whip the head off.
Shiny new refurbed head in the finial stages of prepping ready for fitting.
After the head was smashed on and third time lucky I got the timing bang on before the correct turbo fitting kit was used with new studs and nuts = BOOOOOOOST. The previous owner had a few mods executed poorly so it’s being slowly converted back to standard as a rolling project.
I’ve now left it with him to reinstall the rad pack, complete an oil change, pop fresh coolant in and turn the key for smile time.
After a random search I found the OE mats for my S3 are part no.8V4863012FJTV & an Audi dealer on eBay selling a new set for £60 delivered. I snapped them up then found they retail at £118.44, ouch. My existing cloth mats are this version & only used for Summer but aren’t perfect, so I thought I’d have a backup plan for when they need replacing.


On the theme of mats & now the weather has improved it was time to swap over from the Winter rubber mats to the cloth Summer variant. A brief rummage ensued & they were dug out of hibernation with the rubber plus new mats popped back into the cryogenic genic chamber aka “the loft”.

Since having the ceramic coating I’ve always used CarPro Reset to wash the S3 but of late the roof & bonnet have gone flat like they have a coating of something on them. I decided to bite the bullet with a light Autoglym SRP & CarPro Reload…

…I was back in business with a wonderous beading action.

With the weather so nice this morning & feeling the S3 required even more loving I set about relieving the dust from all the nooks & crannies in the engine bay using my uber posh Valet Pro brush & Costco Microfibre.

On the theme of mats & now the weather has improved it was time to swap over from the Winter rubber mats to the cloth Summer variant. A brief rummage ensued & they were dug out of hibernation with the rubber plus new mats popped back into the cryogenic genic chamber aka “the loft”.
Since having the ceramic coating I’ve always used CarPro Reset to wash the S3 but of late the roof & bonnet have gone flat like they have a coating of something on them. I decided to bite the bullet with a light Autoglym SRP & CarPro Reload…
…I was back in business with a wonderous beading action.
With the weather so nice this morning & feeling the S3 required even more loving I set about relieving the dust from all the nooks & crannies in the engine bay using my uber posh Valet Pro brush & Costco Microfibre.