Center console compartment (replacement of ash tray)

FPSUsername

B.Eng. EE
Joined
Nov 12, 2020
Messages
208
Reaction score
44
Points
28
Location
Utrecht
Hello,

I want to replace the center console ash tray with the storage compartment, (also asked here) and through ETKA I found the part numbers and confusion.

The part number of the tray itself is 8P0863301A (number 20) and there's another trim piece (numbers 26-29). The part number of the upper trim piece is 8P0864138.
I checked some listings on eBay to see how the product looks like and I can't seem to figure out the LED light of the top trim. Some of the listings don't have a cutout, others have one with the light diffuser, but there's no connector and LED there as seen with the ash tray itself. ETKA doesn't really show what you need and the piece numbers 27-29 don't even have part numbers listed (or variants).

I found this video where the guy replaces the ashtray, but he didn't add the top trim nor did he mention anything about the light .
I hope that someone could help me out with the parts needed for the LED light for the top trim.
 
Led strip that sits under the climate unit & slots into the bottom of the dd cage uses a 2 pin connector same as the ashtray light, extend this & use as its the same circuit.

Not sure tye led strip is available anymore in etka, haven't checked for a while.
 
Got a part number of the led strip? I'm pretty sure that there's no light build in under the climate unit with the smoking kit from the factory.
It's more about the mounting of the light. I've seen that the ash tray uses a generic small LED with a resistor (easy to fabricate) and the ash tray has the mounting build in (so it's not a difficult job anyway), but I'm not sure about the light for the normal storage compartment.
 
The led unit slots into a purposely designed location in the bottom of all cages
 
Yes, my question was how the light is placed since ETKA didn't have any part numbers of the light part itself and I couldn't find it online. I sent a mail to Audi Zentrum Fensburg for a price quote (because the parts should be cheaper than what they go for on eBay)
 
Your converting so everything out as described above on the link. I didn’t remove the cc unit though. I removed the plastic bottom portion of the control unit. Slipped the light bar into the slot from front to aft direction and then installed the new plastic cc bottom with the opaque strip. Then as above peeps have said use the smokers pack wiring to plug into light strip. You just need to order parts and then do it. It’s 1/10 in terms of difficulty but it does take longer due to the steps involved


Sent from my iPhone using Tapatalk
 
I ordered the parts directly from Audi Zentrum Flensburg and they're a lot cheaper than 3rd party sellers or used parts on eBay.
Parts together 48.63 Euro incl. tax.

I've seen a 3rd party shop in my country sell each part for roughly 20 euro, so the total would be 60 (incl. tax).

I mean, I had to order the seat adjustment knob, because I broke the tabs from when I installed the heat elements. The adjustment knobs I found on eBay were 20-40 euro (and black, while I needed the beige color called "luxorbeige"). Price for the knob is between 9 and 12 euro depending on the color.
Why wouldn't I do this conversion at the same time and save on the shipping costs (15 euro).
 
Through some searching I found a guide as well here.

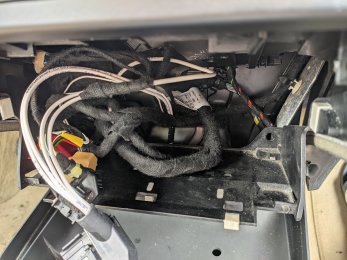
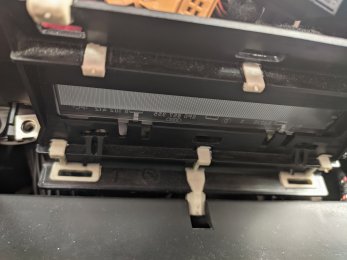
You have to fit the light bar from behind the climate control unit in between the plastic tray with the connector on the right side. (Not like this!)
PXL 20210929 140403254PXL 20210929 140314940

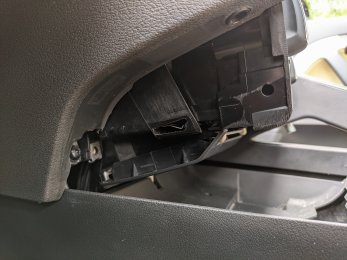
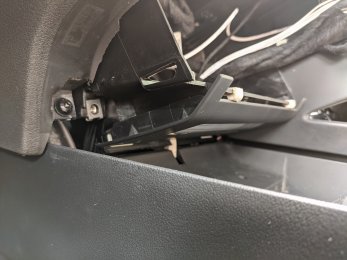
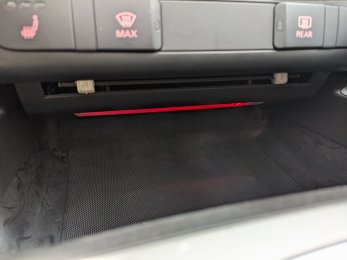
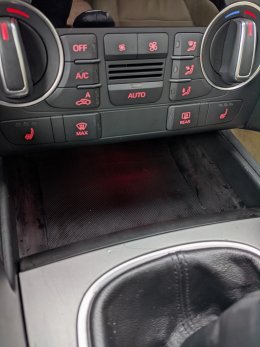
Here is how it looks like with the cover and the Q3/RSQ3 cliamte control unit (doesn't close nicely compared to the A3 one, but it's not visible anyways).
PXL 20210929 143220974PXL 20210929 143122481

I do have to say, the LED is pathetically weak and doesn't illuminate much. (The pictures were shot during heavily cloudy and rainy weather, don't let the pictures fool you)
PXL 20210929 150821855PXL 20210929 153658444

ps:
You have to install the tray first, then the triangles and lastly the top cover.
Installing the front bolts is a lot more difficult with the tray installed, so you might need a screwdriver that can bend.
 
Last edited: