Hi,
If you find that you pull the lever on your glovebox one day and nothing happens, this means the plastic arm has snapped-off the back of the lever. Whilst my car has covered 145k miles and the arm on mine has only just snapped, IMHO this is a poor piece of design by Audi (or whoever they commissioned to make the glove boxes). It is possible Audi have engineered this plastic arm as a point of weakness, but as that should be the job of the lock shroud, I personally think there's no reason it can't be made stronger.
This guide will help you permanently repair the arm without the need to break the lever facia in the process. It is a lot of effort considering you can buy replacement parts for £20 from Audi, however, this repair should fix the lever permanently whereas the replacement Audi part may break again in the future. This guide will also help you fit the replacement part from Audi if you'd prefer to go down that route.
PLEASE NOTE: This issue tackled in this guide is not related in any way to the broken hinge / damper issue (whereby the glovebox takes ages to fall open / the glovebox falls-open freely). There are plenty of other posts regarding this hinge / damper issue - please do not discuss this topic on this post, thanks.
DOWNLOAD THIS GUIDE AS A PDF:
Click
HERE to download this guide in PDF format (useful for printing out to refer to whilst working in your car).
DISCLAIMER: You follow this guide at your own risk! There is a chance you may snap, scratch or break things as a result of following this guide, I accept no responsibility!
WHAT YOU'LL NEED:
- A screwdriver with a star shaped bit (I'm unsure what size, sorry)
- An 8mm socket bit for removing the bolts that hold the glovebox in place
- A Philips screwdriver with a very small head
- A multi-tool (i.e. a Leatherman) or a small file
- A medium sized metal file
- Tin shears (metal cutters)
- A pair of pliers
- A small or medium sized hammer
- A fine point permanent marker (CD / DVD marker pen)
- A small (3mm) rivet
- A hand-operated rivet gun
- 3mm metal drill
- A drill (battery operated or mains, preferably with speed control for delicate work)
- A small strip of aluminium bar (about 2mm thick) - aviable from larger DIY stores (such as Homebase & B&Q)
- 2-part Epoxy resin glue (such as Araldite)
- Protective gloves if you are health & safety conscious!
- Kitchen roll / paper towels (to deal with the mess the glue makes!)
- You may also want to purchase the glovebox to aircon connection pipe and valve (they cost about £25 all-in and are worth doing whilst you have the glovebox out! I don't have part numbers, sorry).
POSSIBLE SHORTCUT
You have to remove the glovebox to gain easy access to the hex screw on the right-hand side of the glovebox (on UK models at least). You could try using a right-angle adapter or bendy screwdriver extender to remove the hex screw whilst the glovebox is in place (you can skip STEP 1 if you are able to do this!)
STEP 1: REMOVING THE GLOVEBOX
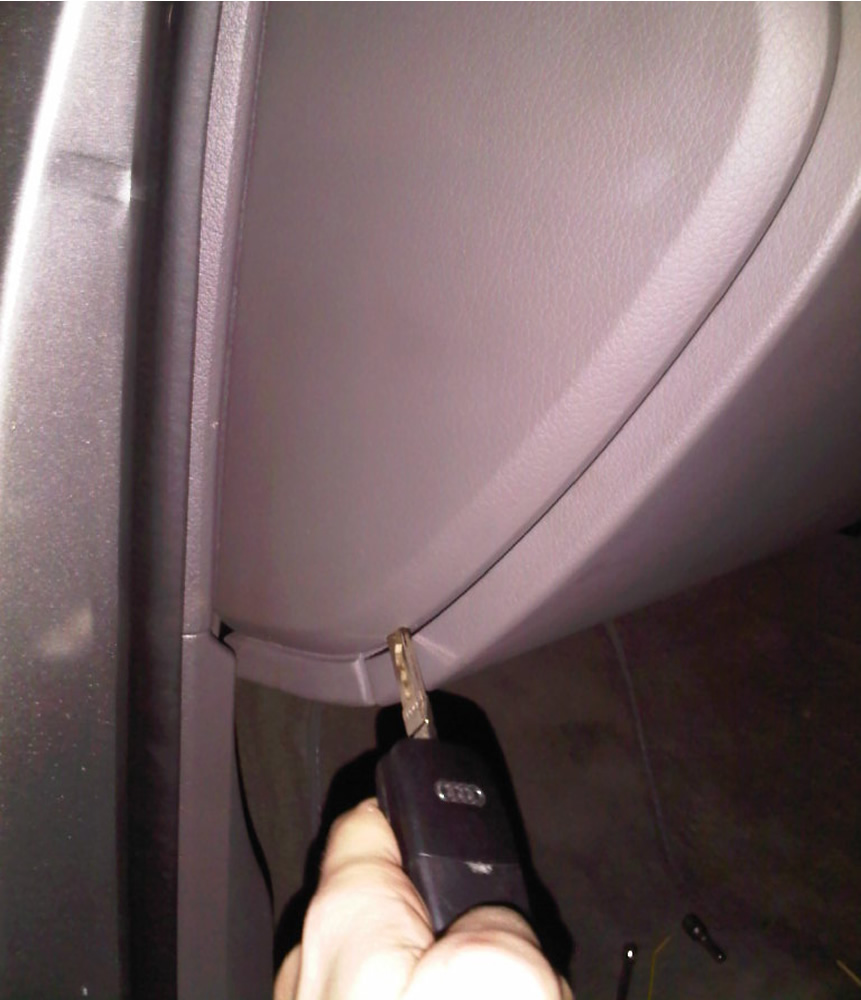
1. Go-round to the passenger side of the car, use your key to pop-off the end panel.
2. Using your key (or a screwdriver), press the end of the catch to open the glovebox (this moves the latches that the glove box lever is supposed to operate).
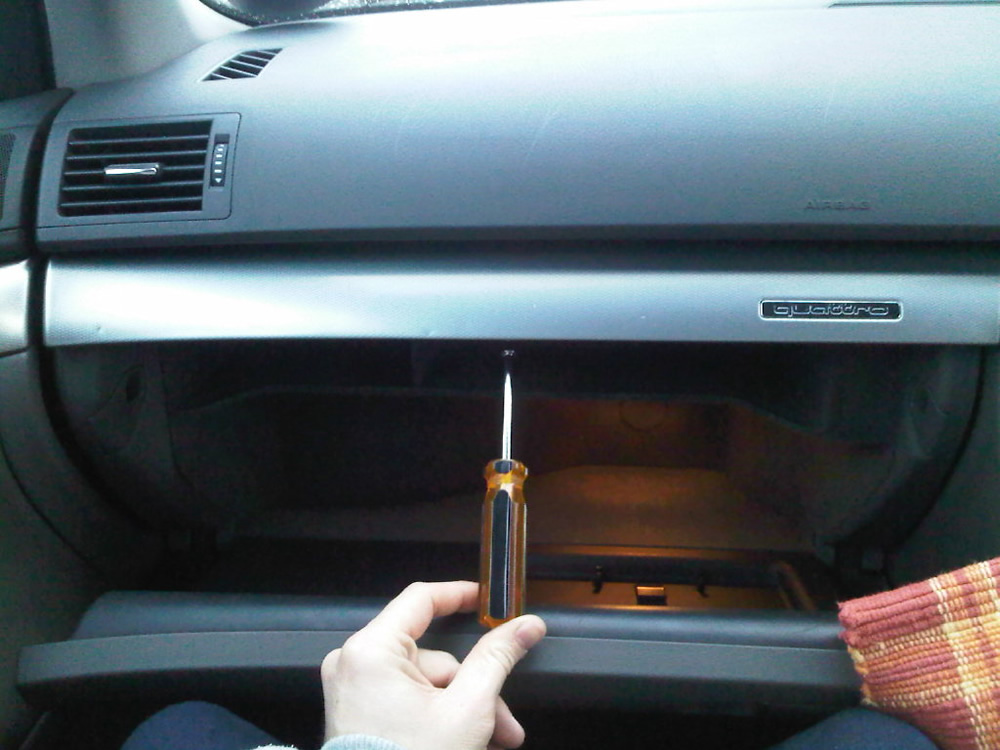
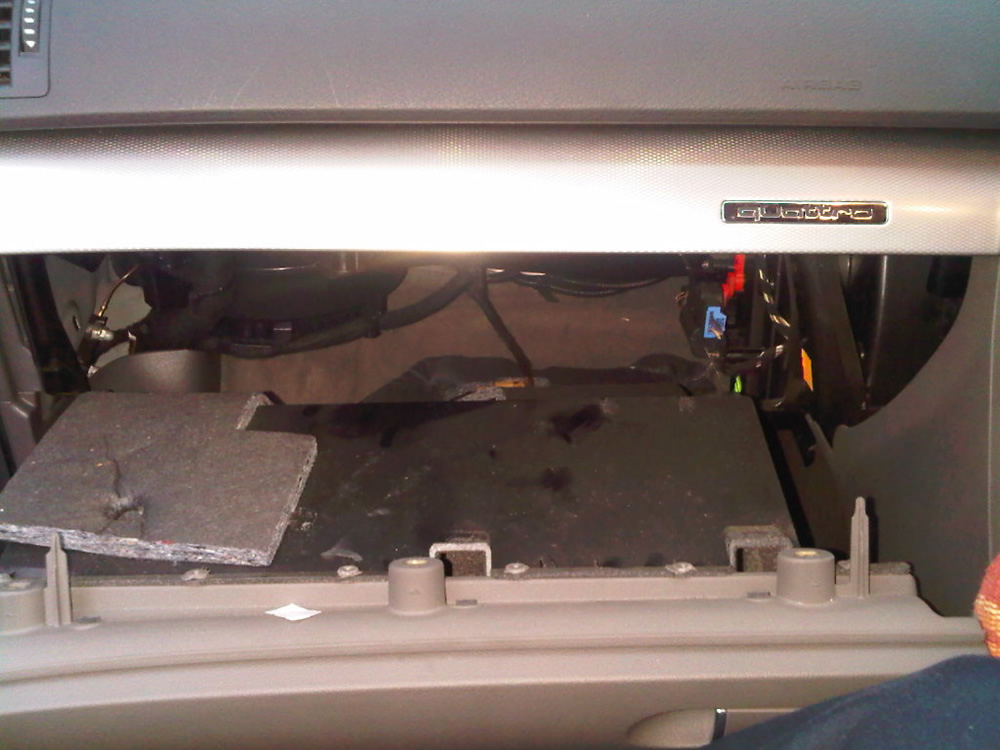
3. Open the glovebox and use the 8mm socket bit (or socket set) to undo all 5 bolts that hold the glovebox on (three on the top row as pictured and two on the left & right accessed from below the glovebox).
4. Lower the dashboard carefully (raise your legs to support it)
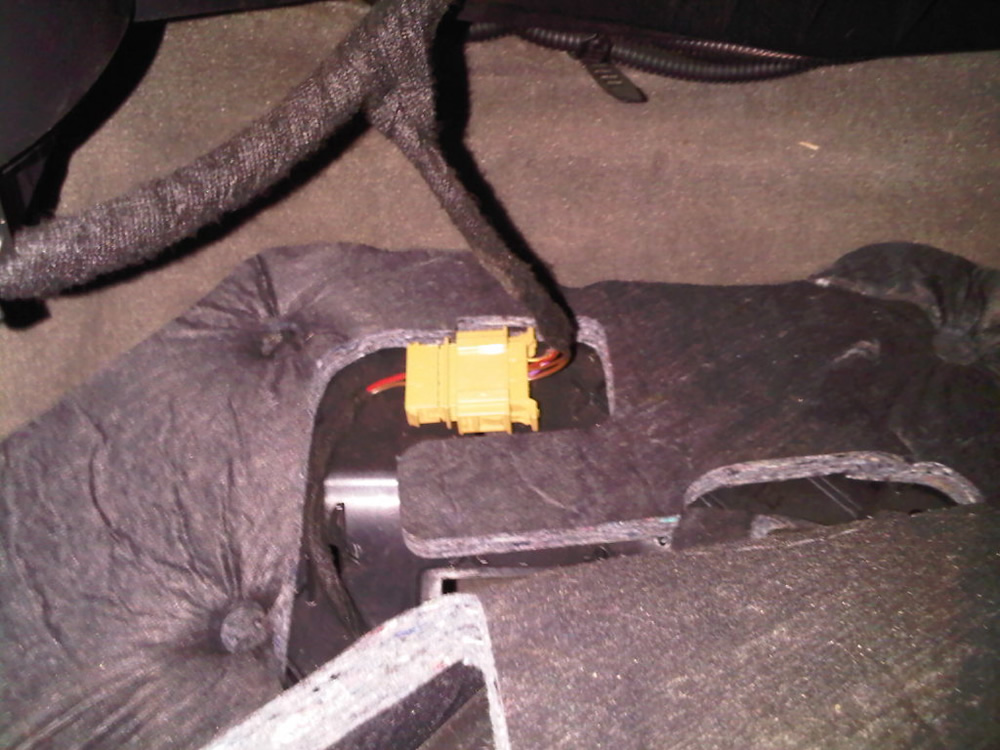
5. Whilst supporting the glove box, undo the camel-yellow coloured connector at the back of the glove box's built-in foot well cover
STEP 2: REMOVING THE BROKEN GLOVEBOX LEVER
Now you have removed the glovebox, take it inside and rest it on something soft (like a carpet / beanbag) so it doesn't get scratched.
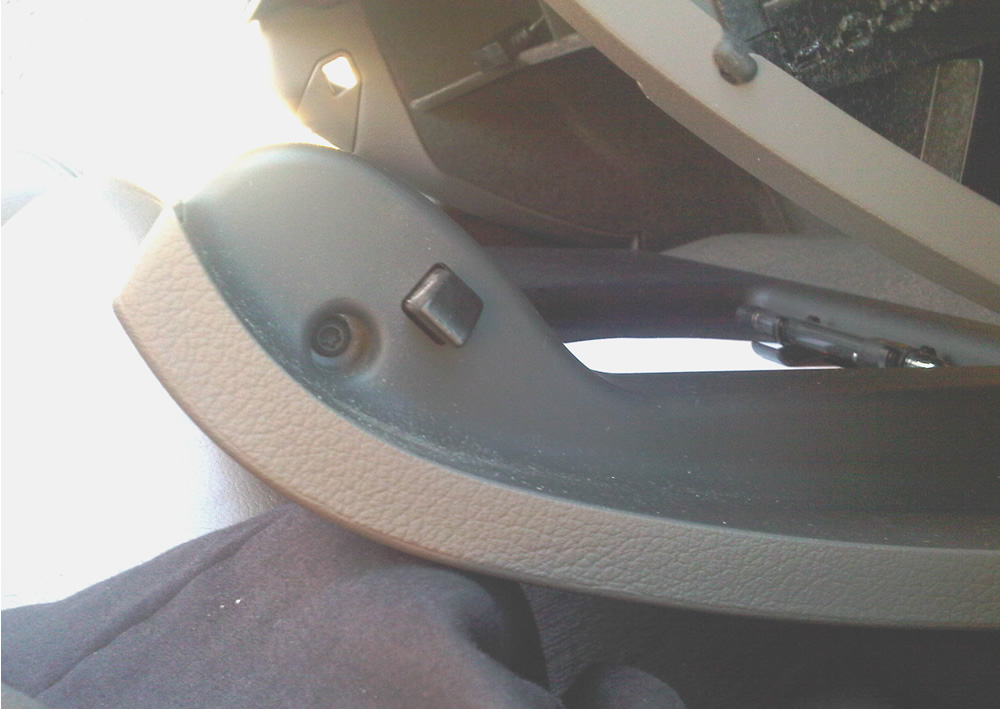
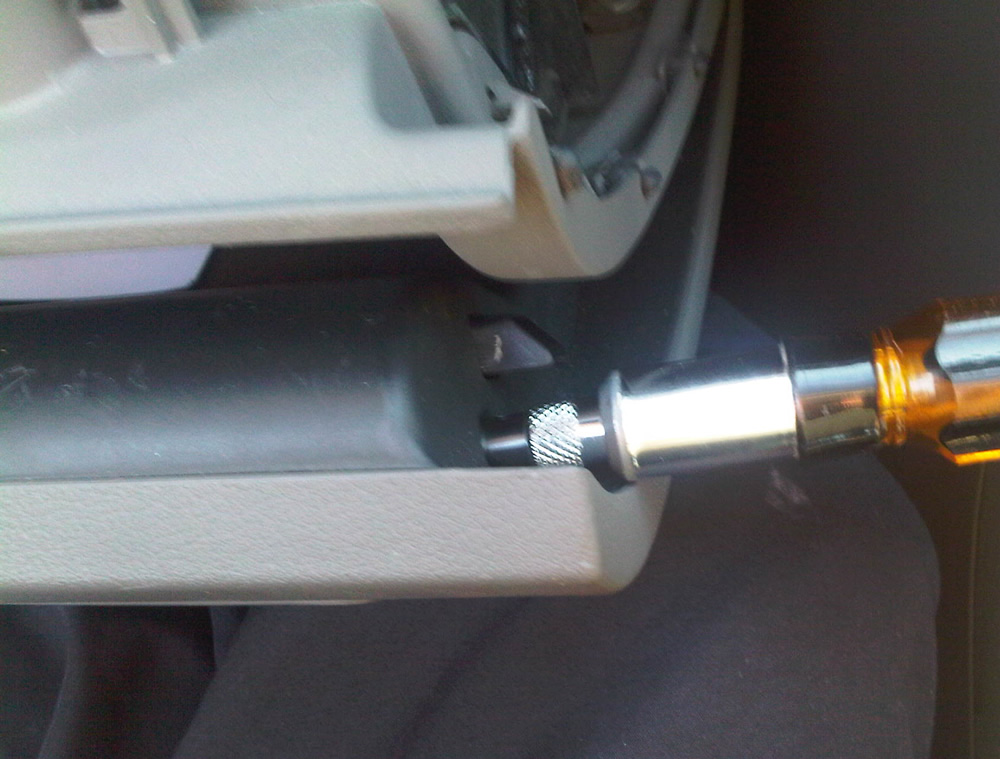
1. Turn the glovebox on it's side so the lever is at the top. With the glovebox open, look along the edge of the lid and you will see a recessed hex screw; undo this screw.
2. Now the hex screw has been removed, you can remove the lever. There should be no need to use screwdrivers to get the lever out. Use your finger to press-in the black plastic latch (on the end of the glovebox lid) to release the pressure on the lever. Now pull the lever open and rock it from side to side, whilst pulling it towards you. It's quite tough, so give it a good tug if it won't come loose. It should eventually come loose. Look-out for a small piece of plastic falling out as you remove the lever assembly (do not throw this away!)
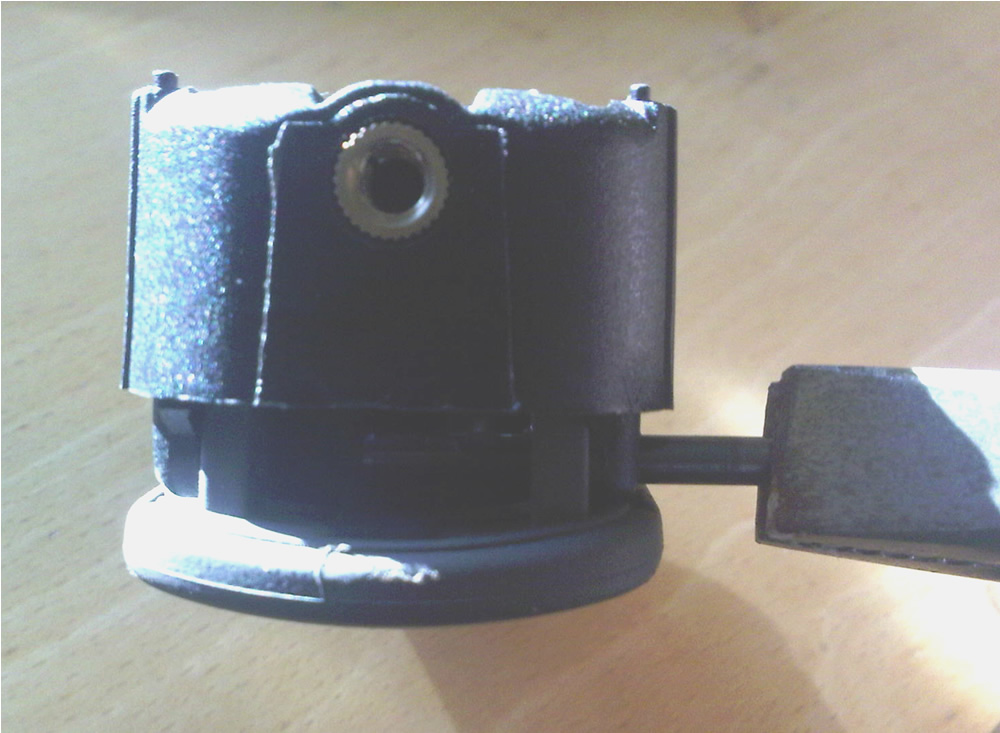
3. Looking at the back of the lever assembly, you can see where the plastic arm has snapped-off (I have enlarged the area in the photo below)
4. The front part of the lever assembly is held to the back by a pivot pin. You need to carefully punch this out using a screwdriver with a small head. Make sure you place something underneath that you don't mind getting marked (I used a mallet)
NB: One end of the pivot pin is larger than the other (and knurled - to stop it coming loose). Make sure you punch the pin on the smaller bevelled end, otherwise you will split the plastic!
5. Once you've punched the pin out a little way, use some pliers to pull the pin out all the way (don't worry, the spring won't fly off too far and it's easy to put back in place).
STEP 3: REPAIRING THE BROKEN GLOVEBOX LEVER
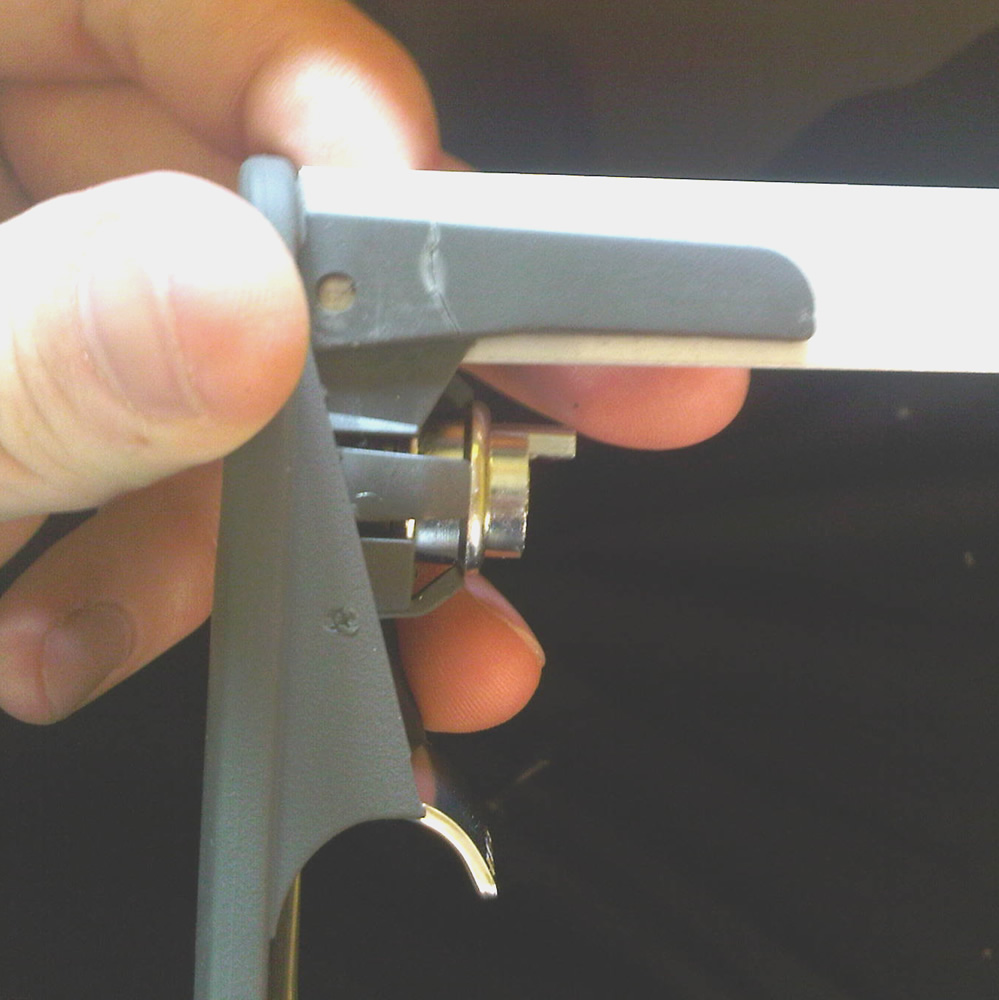
In the photo below, you can now clearly see where the plastic arm has broken off from. There isn't much material or space to work with, so a neat little fix is required using a strip of aluminium, epoxy glue and a rivet.
1. Hold the broken arm back in it's original place and offer-up a small strip of aluminium, pressing it right-up against the back of the lever (its very important that you get a tight fit). Hopefully your plastic arm will have split in the same place as mine - leaving enough material to work with.
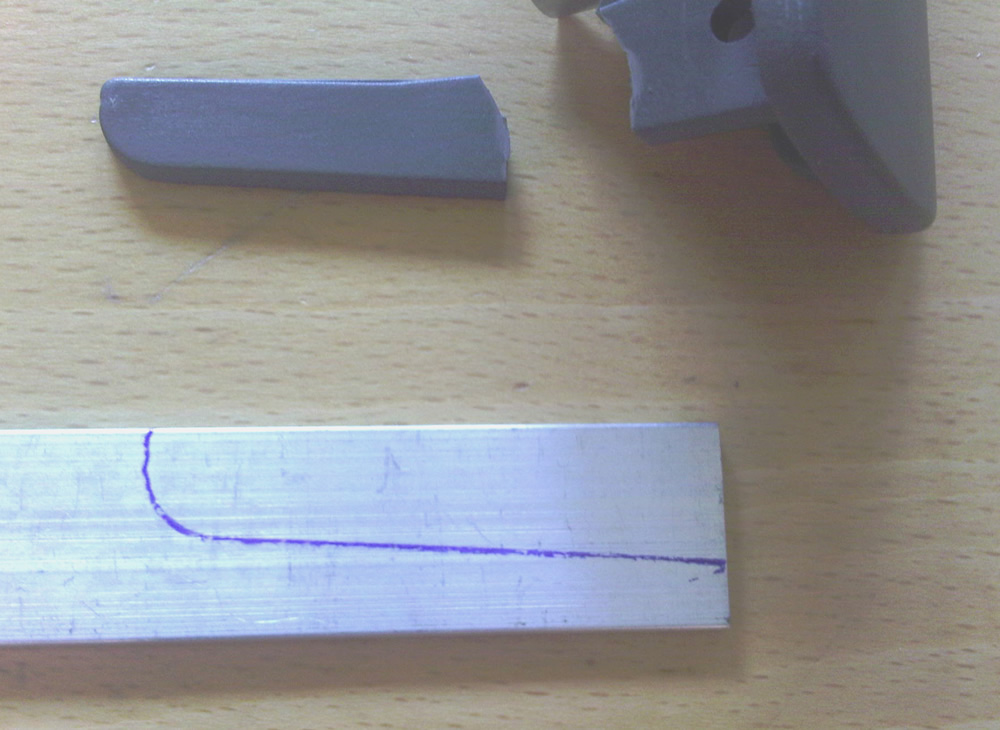
2. Draw round
whole arm (regardless of where it's snapped); we're going to make a copy of it in aluminium!
3. Using appropriate metal working tools, cut-out & shape the aluminium bar until its a perfect copy of the whole plastic arm.
4. Take the aluminium copy of the arm and drill a hole in it at least 5mm away from the point where it's snapped (but not too close to the tip, you don't want to split the plastic).
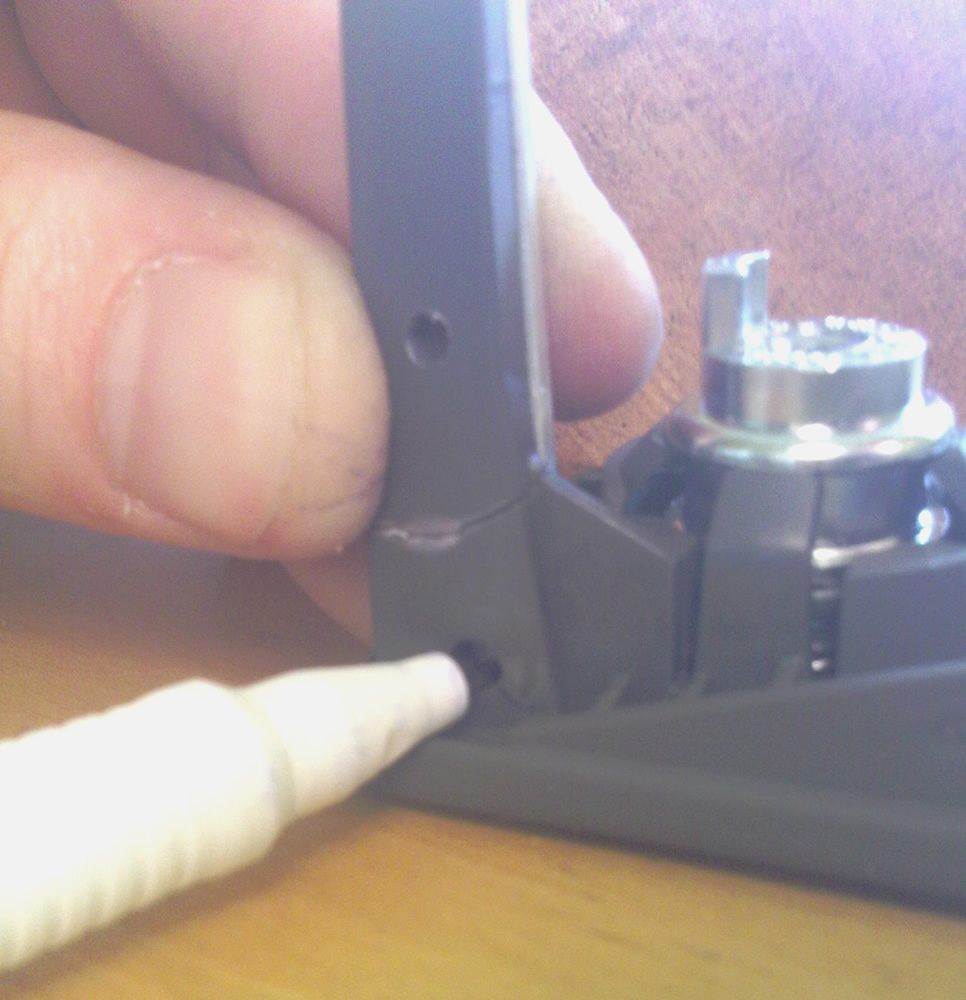
5. Having drilled the first hole, you now need to mark the hole where the pivot pin goes through.
6. As accurately as possible, drill a hole where you previously marked. Offer the drilled aluminium arm upto the lever and make sure the pivot pin slides in (it should be reasonably snug fit, not really tight).
Also make sure the other hole still lines-up to to the hole you drilled in the snapped-off piece of the plastic arm. Ensure the 3mm rivet can fit through both the aluminium and plastic arm when pressed together.
NB: Its essential you do the above before you attempt to glue things together! Carefully wiggle / oscillate the drill bit whilst drilling to widen the holes if necessary.
7. Using the edge of a medium metal file, deeply scratch the two surfaces of the aluminium & plastic arms (just the surfaces that are going to face each other). This is to give the epoxy resin glue something to bond to. Make sure you also scratch-up the lower part of the broken plastic arm (the part that's still attached to the lever).
NB: The aluminium arm needs to go on the
inside of the plastic arm; near where the spring is situated - refer to the photos further down.
NB: You have to be quick with the next few steps because some epoxy resins start to harden after 90 seconds! (even quicker if it's a very hot day!)
8. Mix-up some epoxy resin glue and smother some onto the rough side of the aluminium arm (be liberal - it won't be on show, so it doesn't matter if it gets a bit messy!)
9. Press the broken plastic arm onto the glue-coated aluminium arm & push the 3mm rivet through the hole that goes through the two arms (ensuring you feed it though the plastic arm first) and pop the rivet using a rivet gun.
NB: The flattest part of the rivet
must be on the plastic side of the arm as clearance in the lever assembly is tight (this will become apparent further on).
10. Push the glued & riveted arm assembly onto the rest of the plastic arm (the broken plastic bit on the lever).
11. Push the pivot pin through the holes on the lever and through the aluminium arm (this just ensures everything is lined-up properly, we'll be connecting it to rest of the lever assembly later).
Ensure that the aluminium arm is pressed-up against the broken plastic arm along it's whole length and that there is plenty of glue in the crack where the plastic arm snapped apart.
General photos for steps 9, 10 & 11:
NB: At this stage, you should leave the repaired arm for a couple of hours to set. Very gently turn the pivot pin after about 15 minutes to ensure it doesn't get glued in-place (pinch the aluminium & plastic arms together whilst doing this to prevent them separating). Sometimes epoxy resin can take quite a while to set, so ensure the arm is solidly set before proceeding to the next step.
STEP 4: REASSEMBLING THE LEVER ASSEMBLY
Making sure the the epoxy resin has been given enough time to set properly, you can now prepare the rest of the lever assembly to accept the repaired arm.
1. Remove the pivot pin that was temporarily installed (to hold the arm whilst the glue was setting).
2. Because the repaired arm is much thicker (and stronger) than the original plastic arm, the aperture on the black part of the lever assembly needs to be significantly widened to accommodate it.
I used my drill and the small file on my Leatherman multi-tool to achieve this. I also filed both sides of the rivet (on the repaired arm) a bit flatter to reduce it's profile. It will take a while to get it to fit, you just have to keep filing away!
3. Ensuring the little black spring is in the correct position, press the two halves of the lever assembly together and insert the pivot pin (smallest-end first of course!) You will have to use a hammer & small screwdriver to tap it fully into place.
Ensure that the lever assembly can be pivoted back & forth properly (it should be sprung-loaded) you will have to do some more filing if not! This is what the end result should look like:
STEP 5: RE-FITTING THE LEVER ASSEMBLY
Now you have repaired the lever assembly, it's time to re-fit it to the glove box.
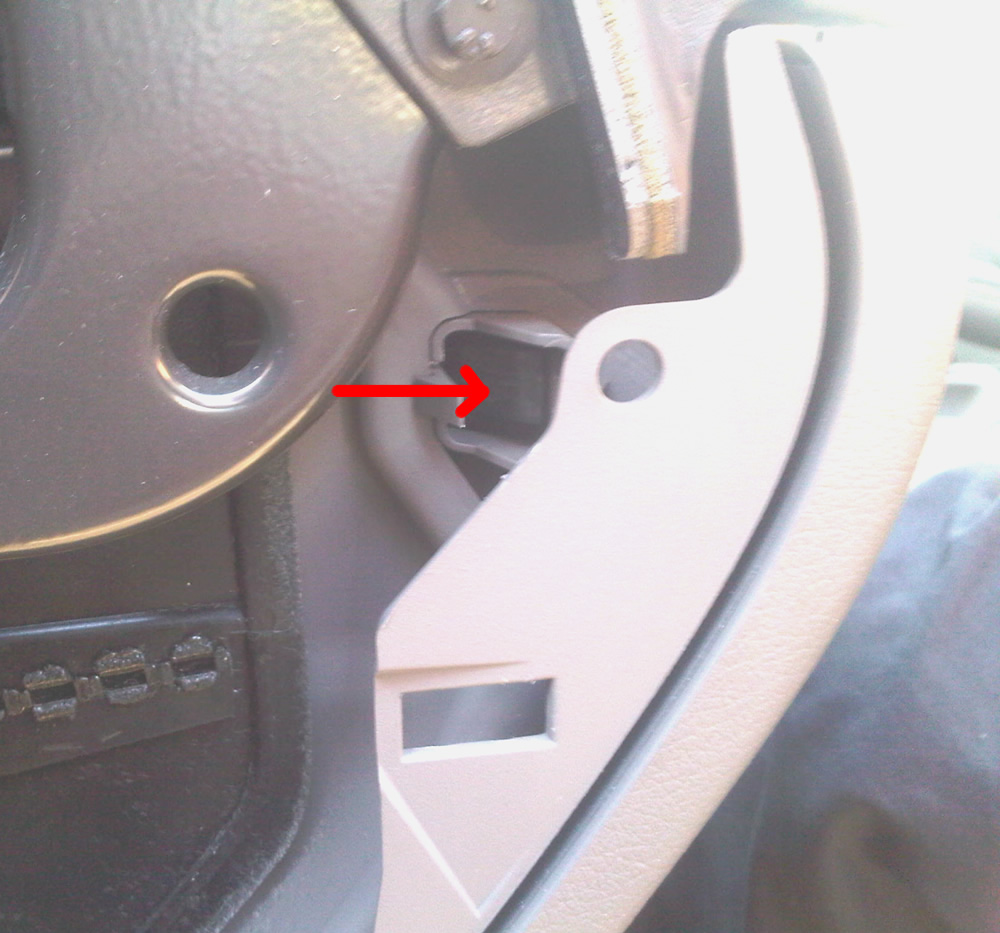
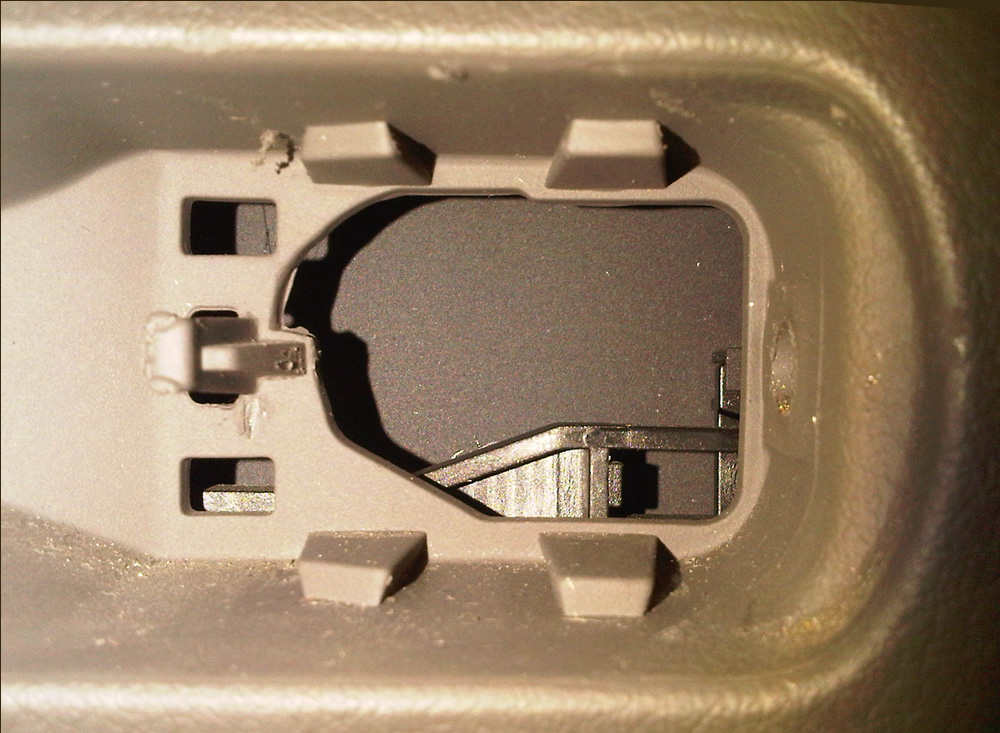
1. Because the repaired arm is wider than the original plastic arm, it will be a tight fit in the receptacle pictured below. This will result in a
sticky action when you release the lever (it will pull out OK, but won't spring back).
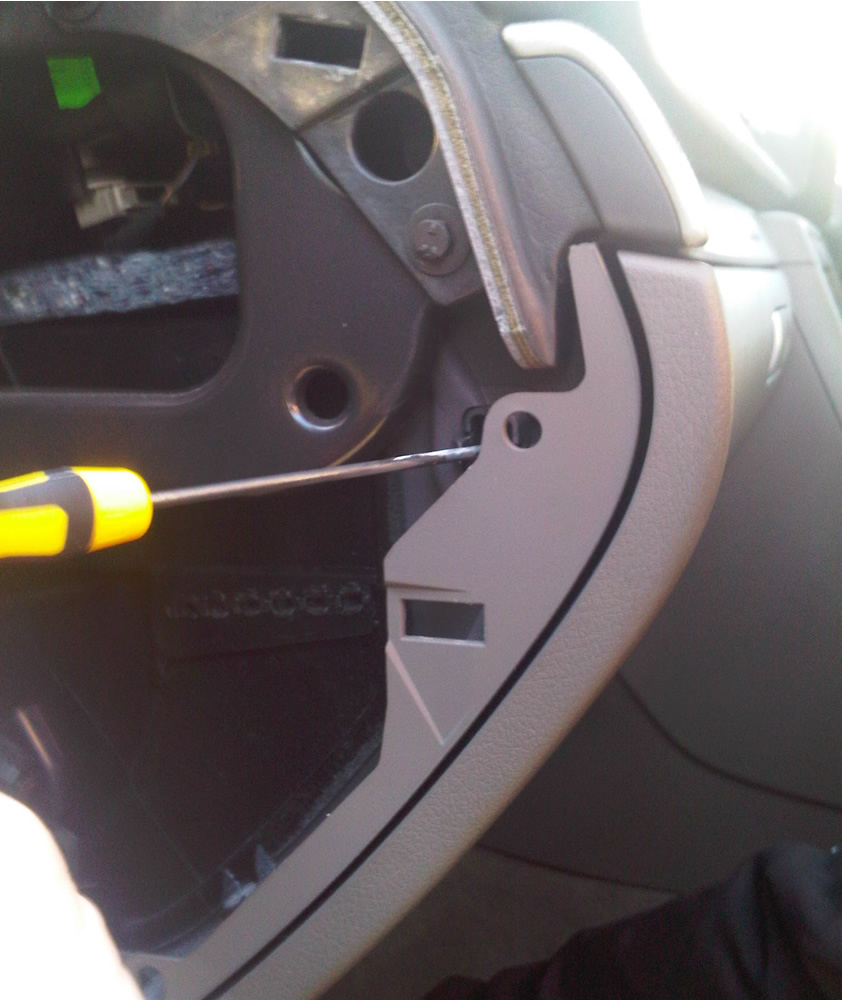
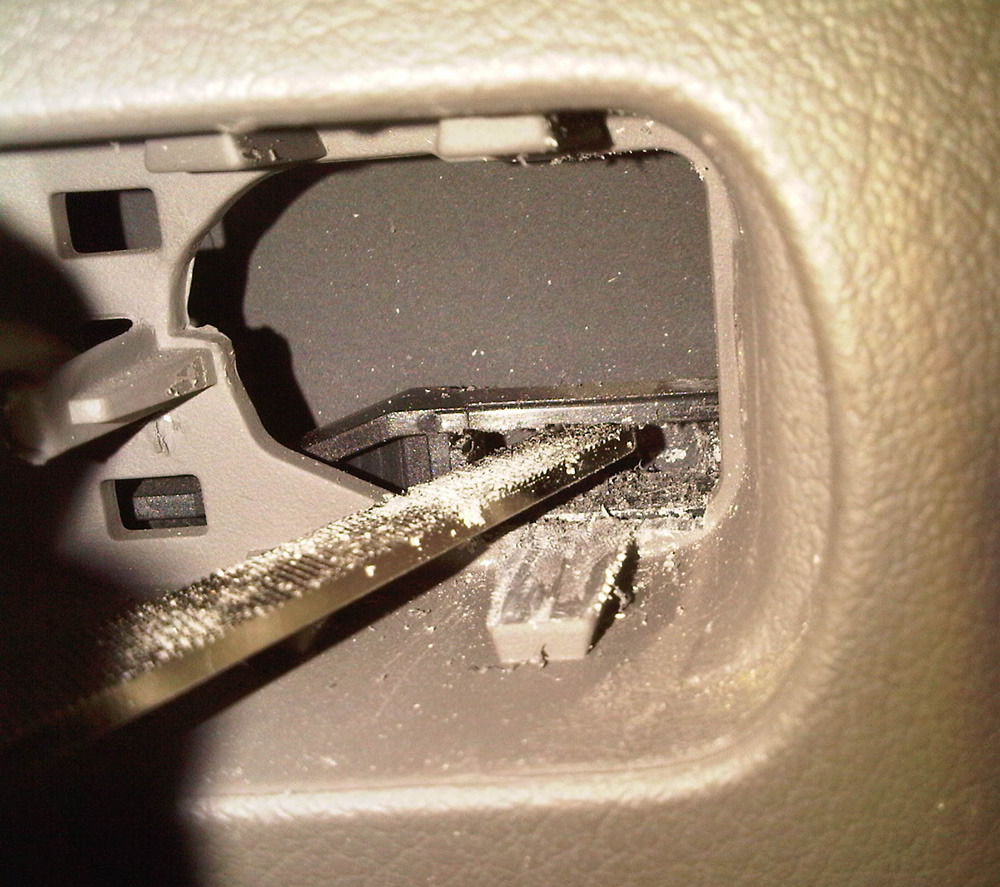
To resolve this, you need to file away the receptacle and surrounding plastics as pictured below; ensure you finish off with a smooth file to reduce friction.
NB: I used my metal file to reduce the thickness of the aluminium side of the repaired arm (by about .5mm) to ensure the arm fitted into the receptacle without sticking.
2. Test-fit the lever assembly by pushing it back into the glovebox lid (don't screw it back in place until you're sure the arm fits in the receptacle properly). Keep filing away until the lever opens and closes smoothly.
3. Once you're happy with the fit, you can replace the hex screw in the side of the glovebox lid to secure the lever mechanism.
STEP 6: RE-FITTING THE GLOVE BOX
Now you have repaired the lever assembly and you're happy with it's operation; it's time to re-fit it to the glove box.
1. Simply bolt the glovebox back into place and re-attach the side panel (basically, repeat step one in reverse!)
If you've found this guide useful, please don't forget to click on the REP / THANKS button (bottom left hand corner of this post) to show your appreciation!
Let me know if you've got any questions.
Al.