

- Joined
- Sep 14, 2008
- Messages
- 24,836
- Reaction score
- 6,078
- Points
- 113
- Location
- Wibbleton
- Website
- www.tuffty.co.uk
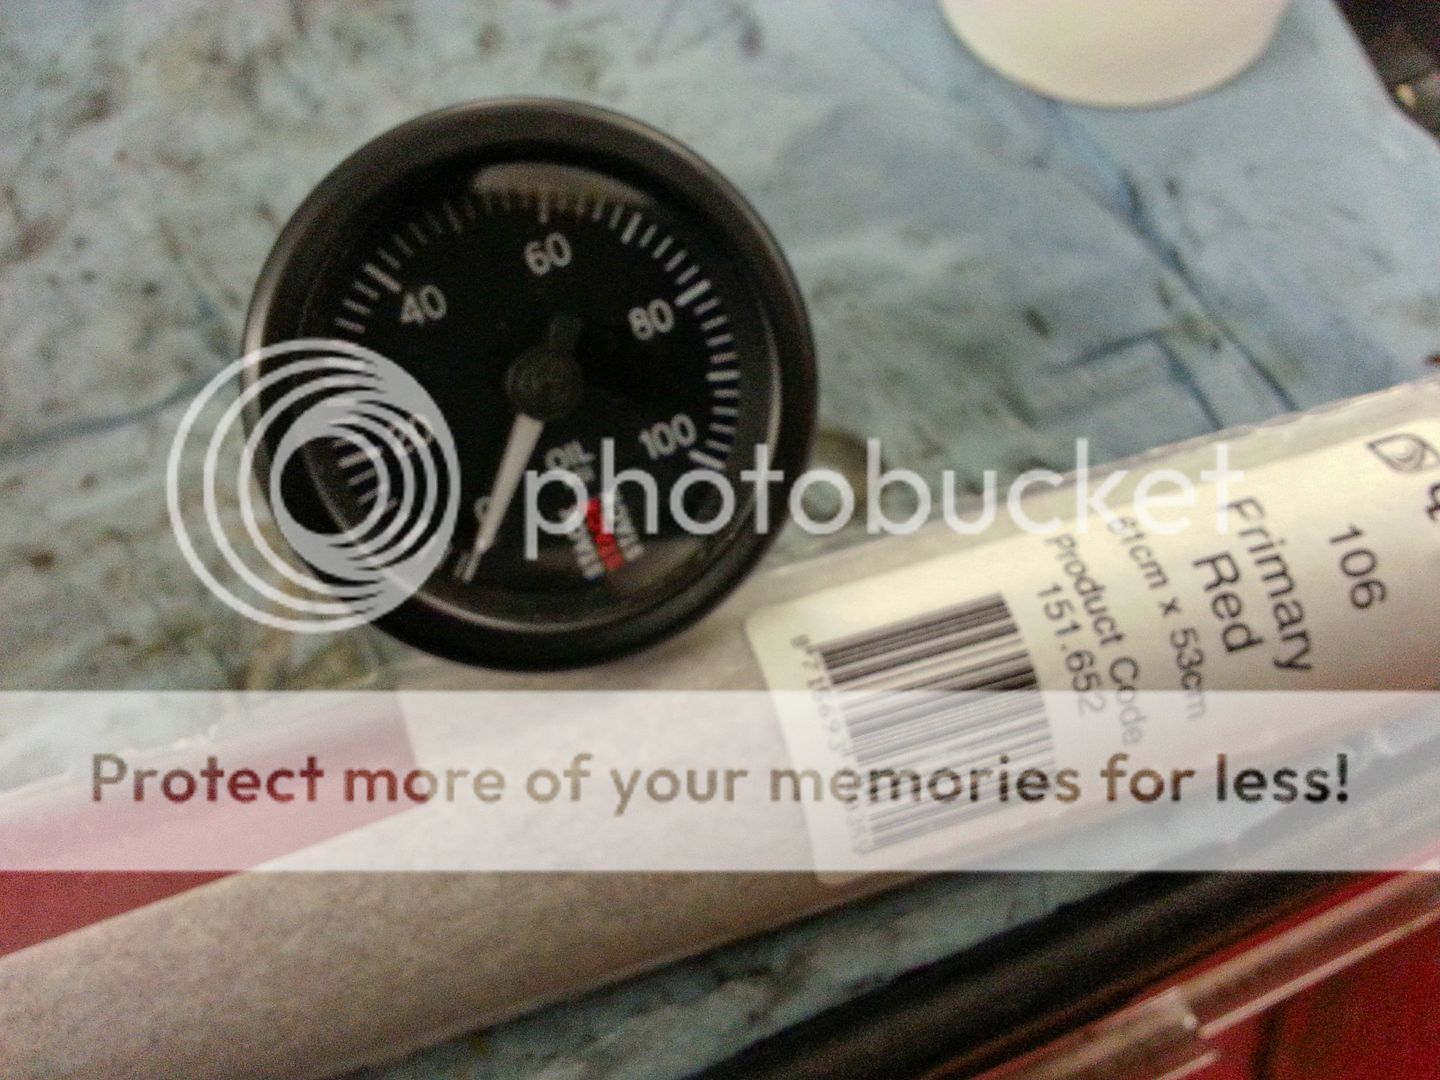
As I get a lot of PM's regarding how I changed the colour of the Stack boost gauge in my car I had an opportunity to take pics for how to as great mate Mark asked me to do this mod on his Stack oil pressure gauge... this is the same method I used on my boost gauge as Stack gauges are constructed the same...
Credit for the original idea for this goes to s3_kev who did this originally but with paint..
So... the gauge... and I used red lighting gel (the stuff used in disco lights etc...)
First you need to remove the bezel...

this is done by carefully lifting the 'crimped' bezel with a small flat bladed screwdriver... you only need to do this for a 1/4 to a 1/3 of the way round the bezel...

..this should allow you to then get the tease the bezel off... the case is plastic so will give a little...

Ta Da!!...

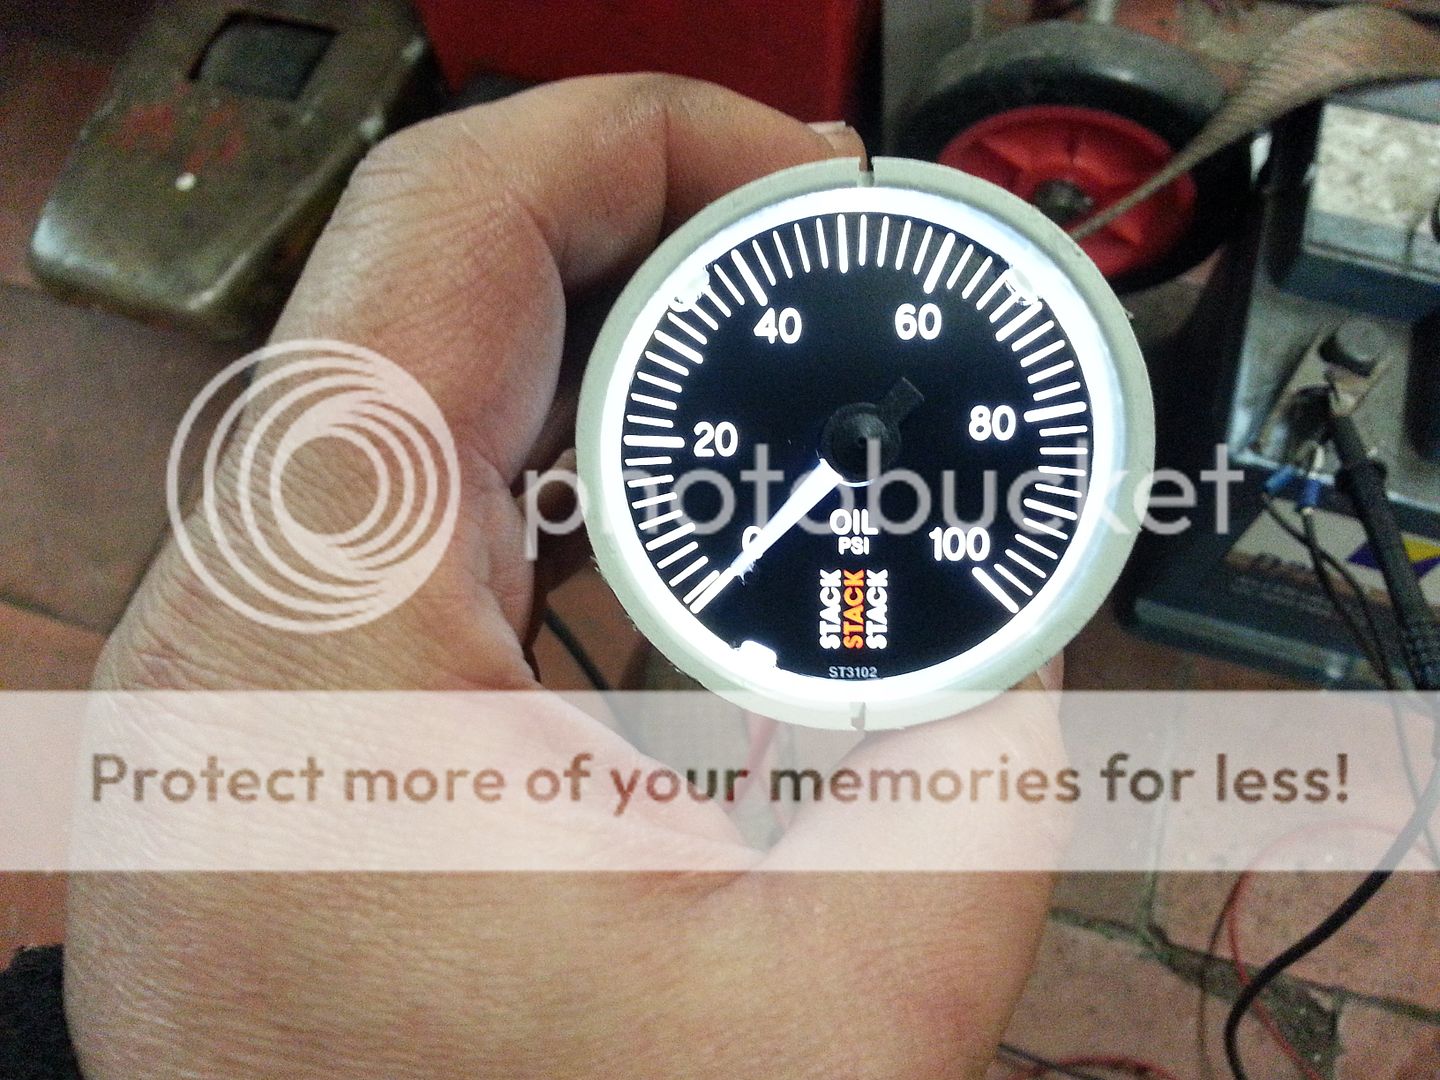
...as you can see the gauge is LED backlit in white...
...so next is to remove the main part of the gauge... in this case (I think the boost gauge was the same) you undo the nut on the boss for the hose connection.. in true Blue Peter style you should end up with something looking like this...

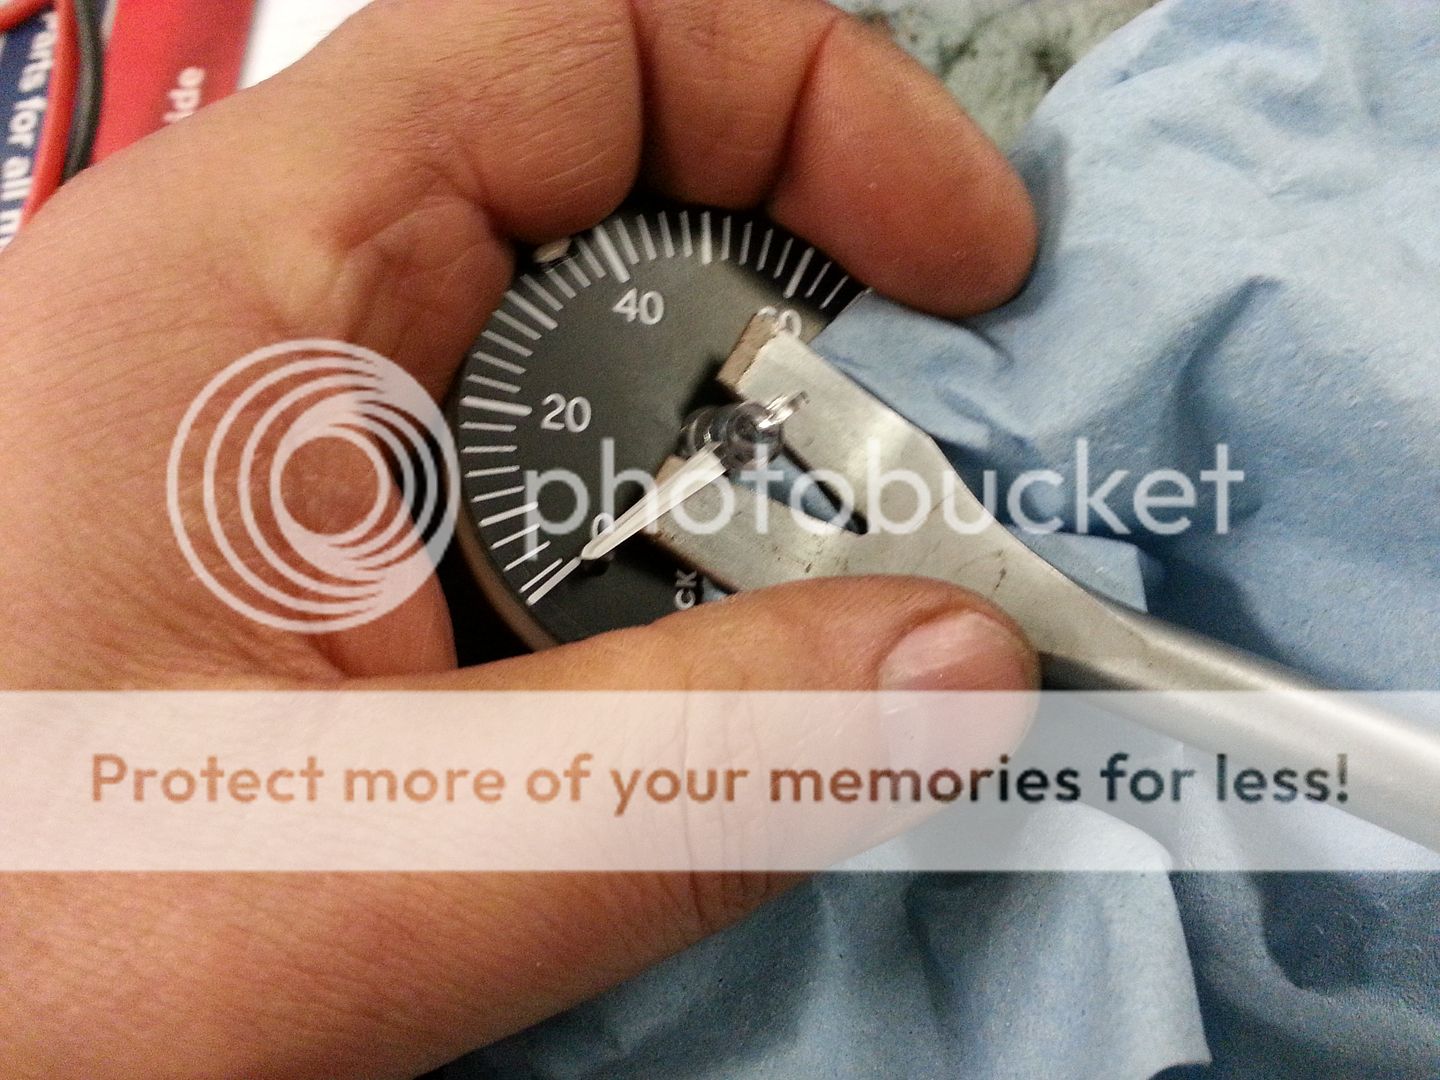
Carefully prise the needle off...
...and you will be left with the gauge face, the light diffuser and the gauge body...

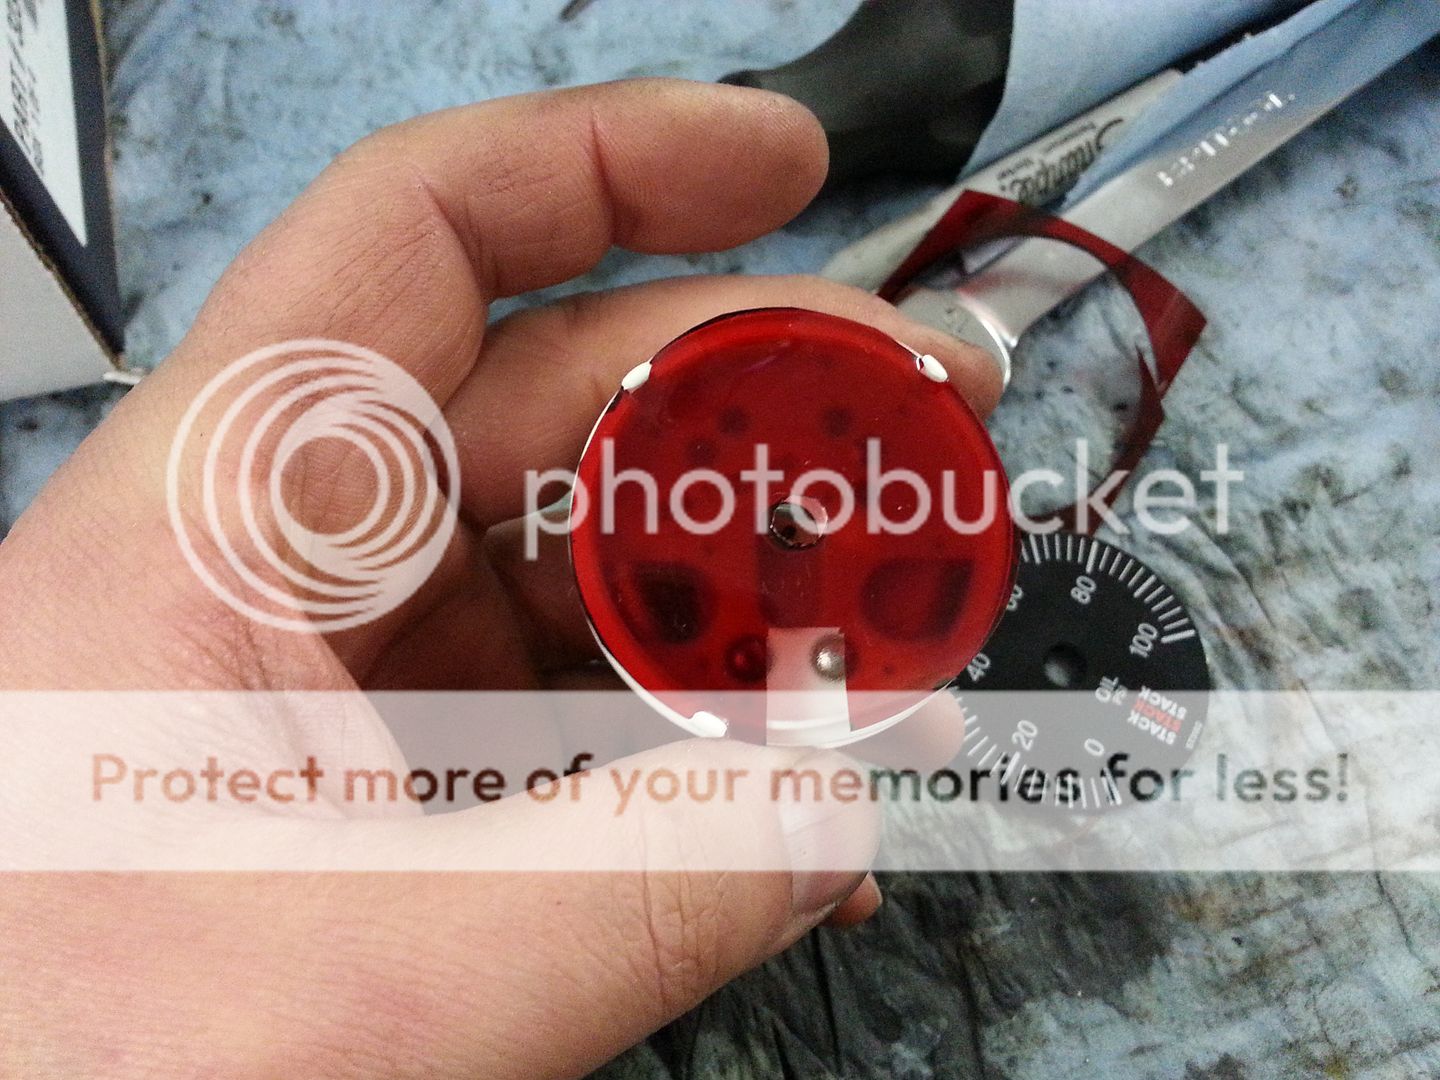
Next draw round the face on the lighting gel...

Cut it out and then cut a section out so that the 'Stack' logo is lit up correctly (will be all red else)

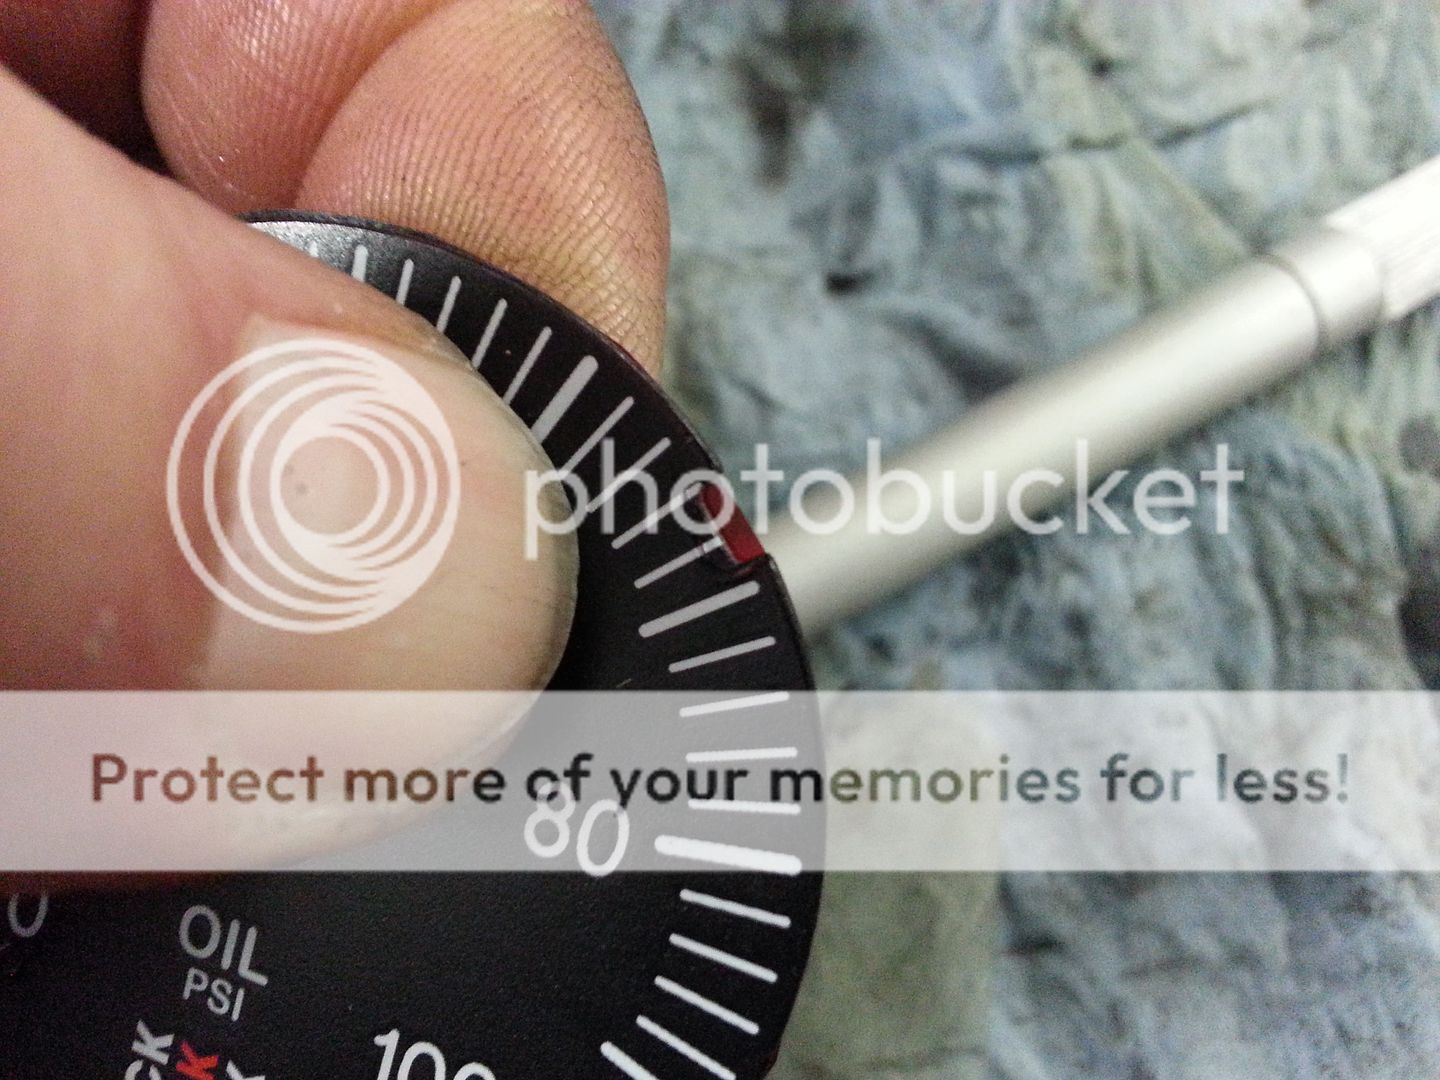
...you also need to cut the little slots out round the edge so the face will clip back onto the gauge..
...and assemble...
Be careful not to add any preload to the needle when you fit it back (the oil pressure gauge has a stop)... on the boost gauge you will need to obviously align it correctly on '0'...

Refit the bezel... I used the shaft of the the trim tool to bend the bezel edge back over...

...and done")

<tuffty/>
Credit for the original idea for this goes to s3_kev who did this originally but with paint..
So... the gauge... and I used red lighting gel (the stuff used in disco lights etc...)
First you need to remove the bezel...
this is done by carefully lifting the 'crimped' bezel with a small flat bladed screwdriver... you only need to do this for a 1/4 to a 1/3 of the way round the bezel...
..this should allow you to then get the tease the bezel off... the case is plastic so will give a little...
Ta Da!!...
...as you can see the gauge is LED backlit in white...
...so next is to remove the main part of the gauge... in this case (I think the boost gauge was the same) you undo the nut on the boss for the hose connection.. in true Blue Peter style you should end up with something looking like this...
Carefully prise the needle off...
...and you will be left with the gauge face, the light diffuser and the gauge body...
Next draw round the face on the lighting gel...
Cut it out and then cut a section out so that the 'Stack' logo is lit up correctly (will be all red else)
...you also need to cut the little slots out round the edge so the face will clip back onto the gauge..
...and assemble...
Be careful not to add any preload to the needle when you fit it back (the oil pressure gauge has a stop)... on the boost gauge you will need to obviously align it correctly on '0'...
Refit the bezel... I used the shaft of the the trim tool to bend the bezel edge back over...
...and done
<tuffty/>
