Not another Nogaro!!!
- Thread starter IPG
- Start date
You are using an out of date browser. It may not display this or other websites correctly.
You should upgrade or use an alternative browser.
You should upgrade or use an alternative browser.
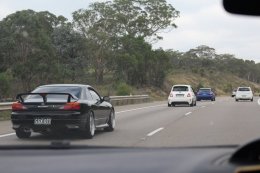
and some live action drive by's
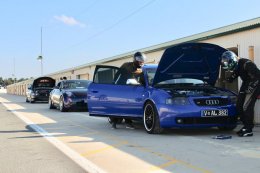
lucky someone was filming otherwise I would've cried a litle if i didn't get any pic/vids of Noggie on track.
TBH i'm just relieved she came out the other end still being able to drive + an 8 hr drive back home after the biggest caning ever!
lucky someone was filming otherwise I would've cried a litle if i didn't get any pic/vids of Noggie on track.
TBH i'm just relieved she came out the other end still being able to drive + an 8 hr drive back home after the biggest caning ever!
I guess i don't belong to these forums anymore...
This has been sitting around for a while now and as i've gone to move interstate, a change of plans have come along with Noggie.
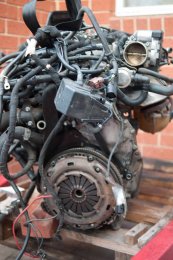
As you can see it looks like a palava! All of these unfamiliar things going on with wiring, plugs and many components i'm looking at thinking "what is this?" and "gawd what a mess"
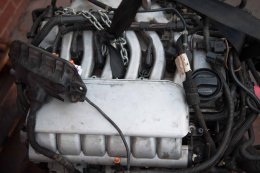

So out come some tools to start pulling this little beast apart
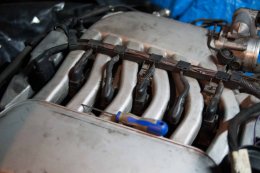
- managed to get these off without breaking anything
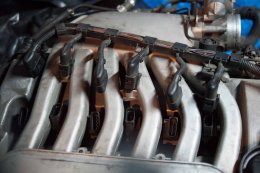
- labelling as i go
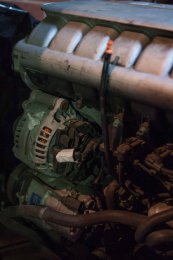
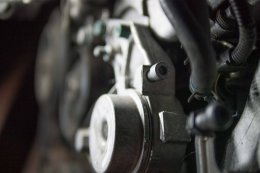
- releasing the serpentine belt. I used a rear CV to diff flange bolt - perfect length!
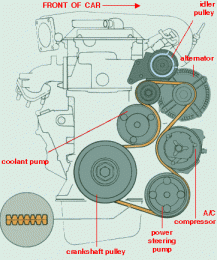
- off it comes. Had to make note of it's routing too.

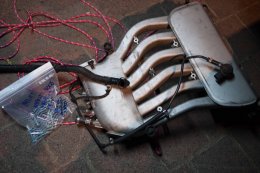
- after many bolts on the front of the head, side and back - the convoluted inlet manifold can come off.
- hidden underneath are the injectors, proper access to the coilpacks and fuel rail. Without the inlet manifold removed it's quite difficult to remove the coilpacks without a tool. Now i can just pull them out by hand.
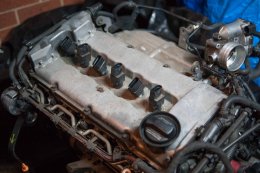
- the angle of these!

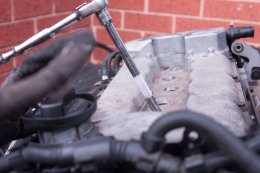

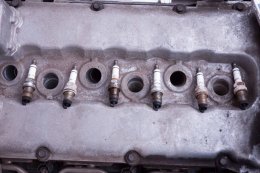
- these were looking a tad crusty
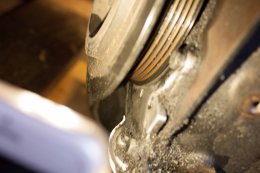
- Now that i'd removed the spark plugs it makes it much easier to turn the engine by hand. Finding the TDC marks and lining them up. 27mm socket to turn the dampener bolt! LOL
- reference shot of the back of the engine

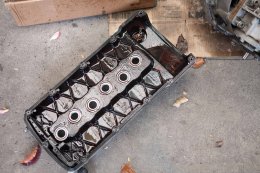
- cam cover off to be met with a slightly brown interior
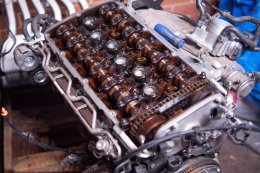
- you need to lock the cams in place before doing timing work. I didn't want to pay $150 for the official tool so i used some off cuts that i had from making my oil cooler bracket, stacked them up and they fit perfect!
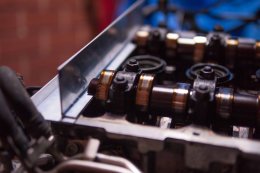
- more reference pics and marking with single or double lines to make sure plugs go back in the right spot

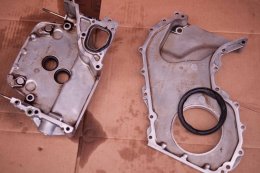
- top and bottom timing chain covers off. The crank and flywheel are mated together with 10 bolts!!! They're definitely not going to to anywhere.
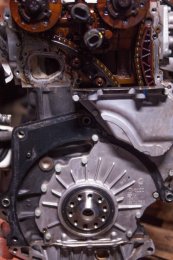

- these bits needed a bit of a scrub
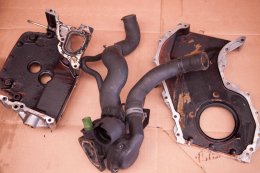

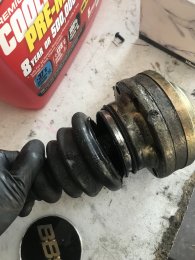
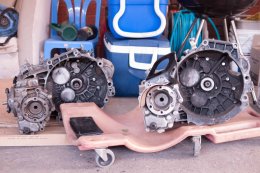
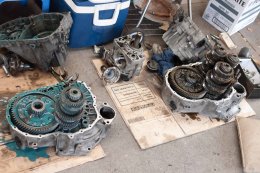
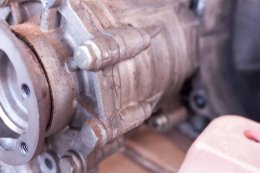
- turning my attention to the gearbox side of things. You can see why you need the VR clutch housing. The Gear housing is interchangeable. The bevel box is also slightly different. Notice the shaved edge on the VR part vs the 1.8t. The bracket is also different. CV heatshield is the same. I opened these up to swap in my 1 piece selector forks.




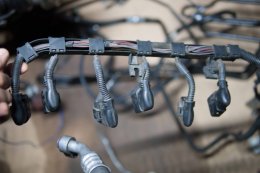
- turning towards the wiring loom now, count 'em! 6 coilpack plugs. wooo!
- This was the not so fun part. Where the 1.8t has TWO lambda plugs. the VR6 has 4. They need to fit into the tiniest gab in between the brake fluid reservoir and the chassis. FML.

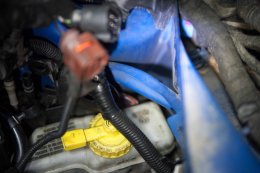
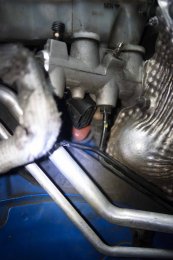
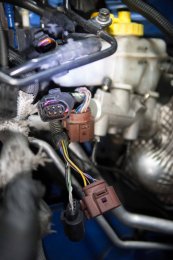
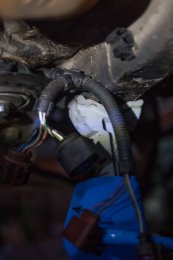
- it's doable, just takes a bit of fiddling around
- since it was out and very easily accessible i decided to refresh the timing gear: chains, guides and the two tensioners

- comparing the wear on the engine's original guides vs. new. You can see the tracks that have been worn but it doesn't look too bad.
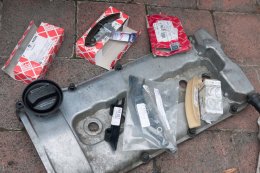
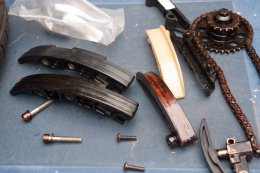
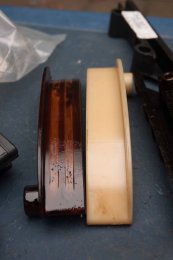
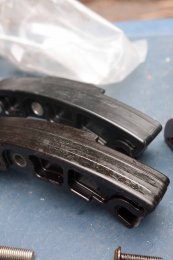

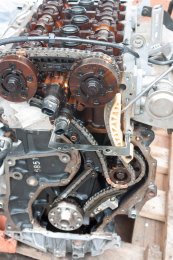
- all done and fitted! Surprisingly "easy" because of all the reference marks and colours chain links that you've got to work with.
- refreshing the seals on the upper timing chain cover. Just a simple case of push out and push in.
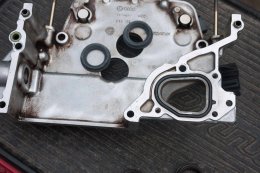
- i was impressed by how "idiot proof" gaskets are. They are all notched so you know exactly which way to put them. The cylinder cover bolts are also held in by the gasket as you remove it. No more losing these!
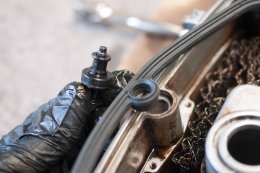
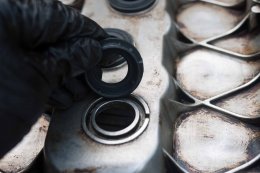
... and i've run out of photo upload allowance!
TBC
This has been sitting around for a while now and as i've gone to move interstate, a change of plans have come along with Noggie.

As you can see it looks like a palava! All of these unfamiliar things going on with wiring, plugs and many components i'm looking at thinking "what is this?" and "gawd what a mess"


So out come some tools to start pulling this little beast apart

- managed to get these off without breaking anything

- labelling as i go

- releasing the serpentine belt. I used a rear CV to diff flange bolt - perfect length!

- off it comes. Had to make note of it's routing too.


- after many bolts on the front of the head, side and back - the convoluted inlet manifold can come off.

- hidden underneath are the injectors, proper access to the coilpacks and fuel rail. Without the inlet manifold removed it's quite difficult to remove the coilpacks without a tool. Now i can just pull them out by hand.

- the angle of these!


- these were looking a tad crusty

- Now that i'd removed the spark plugs it makes it much easier to turn the engine by hand. Finding the TDC marks and lining them up. 27mm socket to turn the dampener bolt! LOL

- reference shot of the back of the engine

- cam cover off to be met with a slightly brown interior

- you need to lock the cams in place before doing timing work. I didn't want to pay $150 for the official tool so i used some off cuts that i had from making my oil cooler bracket, stacked them up and they fit perfect!

- more reference pics and marking with single or double lines to make sure plugs go back in the right spot

- top and bottom timing chain covers off. The crank and flywheel are mated together with 10 bolts!!! They're definitely not going to to anywhere.


- these bits needed a bit of a scrub


- turning my attention to the gearbox side of things. You can see why you need the VR clutch housing. The Gear housing is interchangeable. The bevel box is also slightly different. Notice the shaved edge on the VR part vs the 1.8t. The bracket is also different. CV heatshield is the same. I opened these up to swap in my 1 piece selector forks.


- turning towards the wiring loom now, count 'em! 6 coilpack plugs. wooo!

- This was the not so fun part. Where the 1.8t has TWO lambda plugs. the VR6 has 4. They need to fit into the tiniest gab in between the brake fluid reservoir and the chassis. FML.


- it's doable, just takes a bit of fiddling around
- since it was out and very easily accessible i decided to refresh the timing gear: chains, guides and the two tensioners

- comparing the wear on the engine's original guides vs. new. You can see the tracks that have been worn but it doesn't look too bad.


- all done and fitted! Surprisingly "easy" because of all the reference marks and colours chain links that you've got to work with.

- refreshing the seals on the upper timing chain cover. Just a simple case of push out and push in.

- i was impressed by how "idiot proof" gaskets are. They are all notched so you know exactly which way to put them. The cylinder cover bolts are also held in by the gasket as you remove it. No more losing these!


... and i've run out of photo upload allowance!
TBC
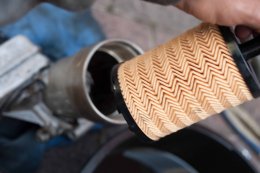
- refreshing general maintenance items. Thermostat, oil filter and spark plugs (which are damn expensive). Again you gotta use a big *** socket to access the oil filter.
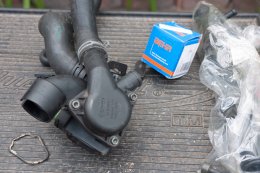

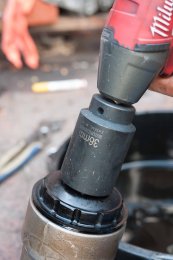

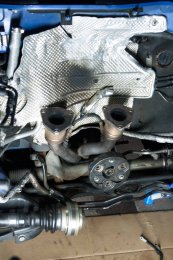
- to keep things simple i am using the VR6 oem downpipe and cats. Just letting them rest here for now. The 1.8t shifter cable bracket also needs changing to the VR6 bracket.
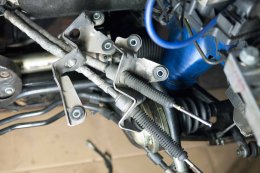
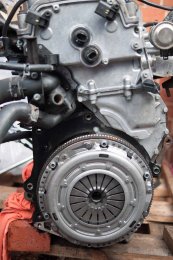
- clutch refresh. The clutch on the 120xxxkm motor actually didn't look too bad but better to be safe than sorry. Not too expensive either (gotta love AfterPay)
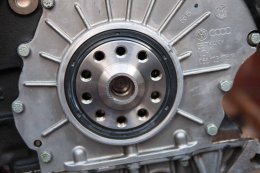


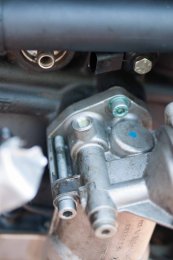
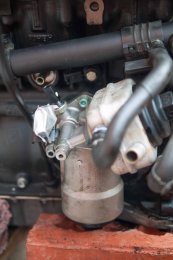
- putting the oil filter housing back on i noticed there's a spare bung on it. So i'm able to keep my oil pressure gauge functionality. *i actually didn't leave it like this as it stuck out too far and the plug for the oil pressure sensor didn't reach. The way have it installed is oil pressure warning sensor in OEM placement and the oil pressure gauge sender coming straight from the oil filter housing. Work's great!


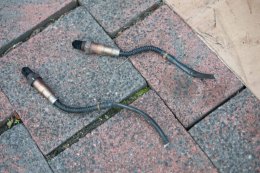
- stupid me cut the pre cat o2 sensors from their plugs... EEEEEEDIOT!
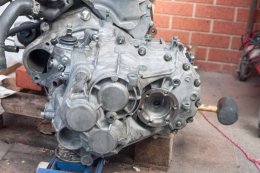
- Gearbox on. I've figured out a really nice way to do this one manned with the engine on a pallet and offering the gearbox up to it on the trolley jack. Works every time! The angle of the gearbox mounting means it needs to lean toward the front of the car. Once i used this hammer as leverage i was able to match up the main input shaft to the clutch giving me the brake fluid squirt on the chest. My main indication that i've got things lined up
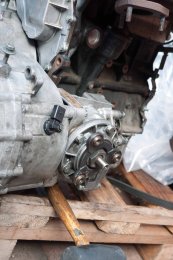
- these are my 3 reference points to swing the engine into the bay. Line these up along with engine/gearbox mount points and everything moves forward nicely. I did remove the ball joint on the gearbox side due to me rolling the engine in a little too far to that side. Removing the ball joint allowed me to manipulate the driveshaft so the gearbox could move back a little bit more than i could start all the driveshaft bolts by hand.
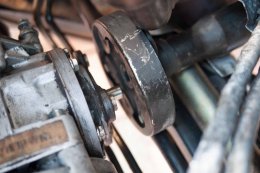
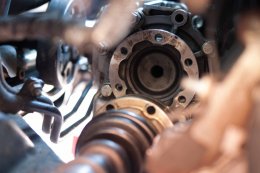
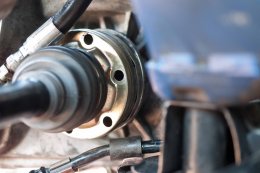
- the vacuum lines took a little bit of nutting out to get right. Basically need to use the VR's vacuum and coolant lines and then get creative with the brake booster piping.
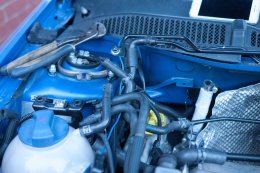
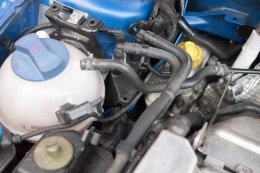
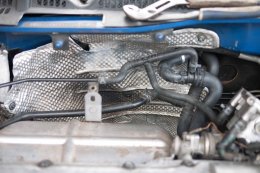
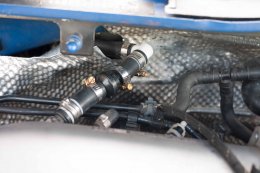
- now this is where things start getting tight. I noticed the A/C pulley was hitting the rail bracket where the intercooler cross piping would normally mount. Thought i had the engine in the wrong spot so i moved it as far over to the gearbox side as possible. Still not enough clearance. Out comes Mr. die grinder.
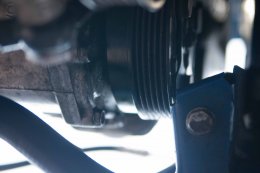
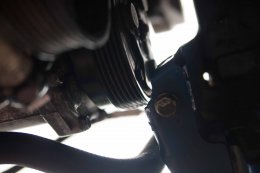

- snug as a bug in a rug! At this point i go around and torque everything up related to mating the engine to the drivetrain as well as joining the exhaust
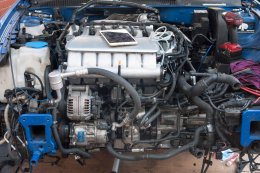
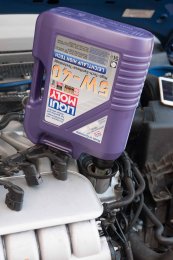
- time to fill up with some Leichtlauf 5w-40
- remember when i said things are getting tight? Well putting the front clip back on i was presented with these challenges. First one is self explanatory...
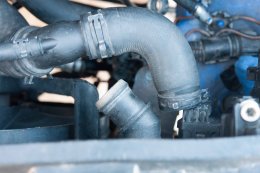
- here i needed to remove the bracket that the engine cover sits on so the A/C refill bung could fit. The bung needs to be released from it's holding bracket to be able to move off to the side of the inlet manifold. The two T30 torx MUST be replaced as they hold the variable intake in place (i think).

- the A/C pipe to compressor hit the fans. Needed to pull it away somehow... i'm sorry for the cheapie fix but it works.

- now this was one part that isn't too well documented but will be here in plain black and white. Does the oem 7.1.1. ECU fit (yes!) and does it work (yes.... with some work)
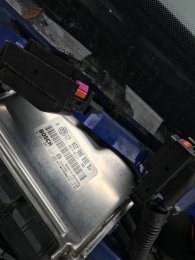
With the help of LM Tuning in Perth (a timezone away from the east coast of Australia) we decided to just give it a go.


- to keep things simple i am using the VR6 oem downpipe and cats. Just letting them rest here for now. The 1.8t shifter cable bracket also needs changing to the VR6 bracket.


- clutch refresh. The clutch on the 120xxxkm motor actually didn't look too bad but better to be safe than sorry. Not too expensive either (gotta love AfterPay)


- putting the oil filter housing back on i noticed there's a spare bung on it. So i'm able to keep my oil pressure gauge functionality. *i actually didn't leave it like this as it stuck out too far and the plug for the oil pressure sensor didn't reach. The way have it installed is oil pressure warning sensor in OEM placement and the oil pressure gauge sender coming straight from the oil filter housing. Work's great!


- stupid me cut the pre cat o2 sensors from their plugs... EEEEEEDIOT!

- Gearbox on. I've figured out a really nice way to do this one manned with the engine on a pallet and offering the gearbox up to it on the trolley jack. Works every time! The angle of the gearbox mounting means it needs to lean toward the front of the car. Once i used this hammer as leverage i was able to match up the main input shaft to the clutch giving me the brake fluid squirt on the chest. My main indication that i've got things lined up


- these are my 3 reference points to swing the engine into the bay. Line these up along with engine/gearbox mount points and everything moves forward nicely. I did remove the ball joint on the gearbox side due to me rolling the engine in a little too far to that side. Removing the ball joint allowed me to manipulate the driveshaft so the gearbox could move back a little bit more than i could start all the driveshaft bolts by hand.


- the vacuum lines took a little bit of nutting out to get right. Basically need to use the VR's vacuum and coolant lines and then get creative with the brake booster piping.


- now this is where things start getting tight. I noticed the A/C pulley was hitting the rail bracket where the intercooler cross piping would normally mount. Thought i had the engine in the wrong spot so i moved it as far over to the gearbox side as possible. Still not enough clearance. Out comes Mr. die grinder.


- snug as a bug in a rug! At this point i go around and torque everything up related to mating the engine to the drivetrain as well as joining the exhaust

- time to fill up with some Leichtlauf 5w-40

- remember when i said things are getting tight? Well putting the front clip back on i was presented with these challenges. First one is self explanatory...

- here i needed to remove the bracket that the engine cover sits on so the A/C refill bung could fit. The bung needs to be released from it's holding bracket to be able to move off to the side of the inlet manifold. The two T30 torx MUST be replaced as they hold the variable intake in place (i think).

- the A/C pipe to compressor hit the fans. Needed to pull it away somehow... i'm sorry for the cheapie fix but it works.


- now this was one part that isn't too well documented but will be here in plain black and white. Does the oem 7.1.1. ECU fit (yes!) and does it work (yes.... with some work)

With the help of LM Tuning in Perth (a timezone away from the east coast of Australia) we decided to just give it a go.
- Joined
- Oct 2, 2015
- Messages
- 3,565
- Reaction score
- 770
- Points
- 113
Jesus - IanPG ! is this in addition to your stroker? on your other S3? or are you already bored of your other engine? are you turbo charging this engine?
Why dont you try and fit a real hybrid turbo which uses an electric motor to spin up the turbo until the exhaust gases take over? or a twin turbo one small for 1500-3500 or a supercharger and big turbo?
Why dont you try and fit a real hybrid turbo which uses an electric motor to spin up the turbo until the exhaust gases take over? or a twin turbo one small for 1500-3500 or a supercharger and big turbo?
Jesus - IanPG ! is this in addition to your stroker? on your other S3? or are you already bored of your other engine? are you turbo charging this engine?
Why dont you try and fit a real hybrid turbo which uses an electric motor to spin up the turbo until the exhaust gases take over? or a twin turbo one small for 1500-3500 or a supercharger and big turbo?
This is in replacement - the move interstate = a change back to something more tame. Funds from old build to go into other things.
This engine will not be turbo'd - however... we will see what happens eh!
Wow! Your certainly turn this around quickly. Made it look so easy  well done Ian.
- Joined
- Oct 2, 2015
- Messages
- 3,565
- Reaction score
- 770
- Points
- 113
it's frightening isn't it. I can't even tidy up my bedroom floor quicker than Ian essentially makes a car.
have you mucked around with the map of this? it must lack power compared to your big turbo - and use more fuel? 15MPG?
have you mucked around with the map of this? it must lack power compared to your big turbo - and use more fuel? 15MPG?
Sounds mint Ian I’m still tempted to do this to mineit's frightening isn't it. I can't even tidy up my bedroom floor quicker than Ian essentially makes a car.
have you mucked around with the map of this? it must lack power compared to your big turbo - and use more fuel? 15MPG?
I average 17mpg in my r32 so 15 mpg wouldn’t surprise me
Sounds mint Ian I’m still tempted to do this to mine
I average 17mpg in my r32 so 15 mpg wouldn’t surprise me
That sound alone is worth 15mpg for sure
 if the time and funds aloud it... I’d do the same and turbo it!
 Sent from my iPhone using Tapatalk
Wow! Your certainly turn this around quickly. Made it look so easywell done Ian.
It’s actually relatively easy considering I’ve not worked on a VR6 engine before. It was just knowing the main parts that needed to be there for the engine to mount in properly then having to figure out a way to make the front end fit because of the tight squeeze. The mk4’s seems to have a little more room down the front.
I’ll make a list of everything I found that needed swapping over / changing / modding to make this happen (I’m looking at you @Tj 0785 )
LOL thanks. It was a quickie and a sneaky one but I needed it done by the time I moved interstate... it still wasn’t doneit's frightening isn't it. I can't even tidy up my bedroom floor quicker than Ian essentially makes a car.
have you mucked around with the map of this? it must lack power compared to your big turbo - and use more fuel? 15MPG?
There is a lack of torque busting through the sound barrier feeling but the down low torque, even with 200kg’s of my **** in the boot, in buttery smooth. It’s actually quite nice. It’ll be interesting to see how it is without all that extra weight.
MPG on freeway was actually pretty good. Was at 8-ish on flat ground and up to 15 when overtaking and up bigger hills. Only filled up once. It surprised me!
Is there much room for a turbo with the vr6It’s actually relatively easy considering I’ve not worked on a VR6 engine before. It was just knowing the main parts that needed to be there for the engine to mount in properly then having to figure out a way to make the front end fit because of the tight squeeze. The mk4’s seems to have a little more room down the front.
I’ll make a list of everything I found that needed swapping over / changing / modding to make this happen (I’m looking at you @Tj 0785 )
LOL thanks. It was a quickie and a sneaky one but I needed it done by the time I moved interstate... it still wasn’t done
There is a lack of torque busting through the sound barrier feeling but the down low torque, even with 200kg’s of my **** in the boot, in buttery smooth. It’s actually quite nice. It’ll be interesting to see how it is without all that extra weight.
MPG on freeway was actually pretty good. Was at 8-ish on flat ground and up to 15 when overtaking and up bigger hills. Only filled up once. It surprised me!
- Joined
- Mar 28, 2010
- Messages
- 10,073
- Reaction score
- 2,697
- Points
- 113
- Location
- Liverpool/Southport. N west
- Joined
- Sep 14, 2008
- Messages
- 24,836
- Reaction score
- 6,078
- Points
- 113
- Location
- Wibbleton
- Website
- www.tuffty.co.uk
Loads... VR tilts forward...Is there much room for a turbo with the vr6
If I didn't need the money for a respray (and could be ar5ed) I'd stick a turbo VR in mine... similar power but more torque and of course the noise!
<tuffty/>
- Joined
- Oct 2, 2015
- Messages
- 3,565
- Reaction score
- 770
- Points
- 113
Amen. Although Ian is bright enough to fit some alternative mechanism. Eg dual pulley supercharger, compressed air charge reseviour turbos etc. Dual inline turbos, electric spin up turbosBoost it or gay
Sent from my iPhone using Tapatalk
What do you do about the extra lambda sensors do you need the vr ecu aswell or can it be added to the s3 ecu?
- Joined
- Sep 14, 2008
- Messages
- 24,836
- Reaction score
- 6,078
- Points
- 113
- Location
- Wibbleton
- Website
- www.tuffty.co.uk
You need the VR ECU...What do you do about the extra lambda sensors do you need the vr ecu aswell or can it be added to the s3 ecu?
<tuffty/>
^
this one!
So moving on to he ECU side of things. Not much info online so i was throwing ideas around with Josh from LM Tuning to help me figure things out.
Pulling knowledge from coding in clusters i figured this
- i know what the SKC data looks like
- i know what VIN data looks like
- same with IMMO
- same with key data
Plan A - was to make a hybrid type file with all my 7.5's critical data intertwined with 7.1.1's
Plan B - was to transfer all of the 7.5's data in to replace all of the 7.1.1's data since they start and end in the same spots
Plan C - IMMO defeat
So i went and looked and compared cluster hex with my me7.5 ECU's EEPROM data. Going through the lines, looking for the patterns, finding the matching data.
Sure enough - the ECU also has the all the same data. Although it's in different lines compared to cluster data.
Our theory? Transfer the 4 sets of data across into the BDE ECU. Simple!
right?
emmmm.... no not so simple.
First of all the 7.1.1 didn't want to bootmode on the bench to be able to get a read. Josh had to use another tool to get the ECU's EEPROM data. After that he showed my the 7.1.1 data
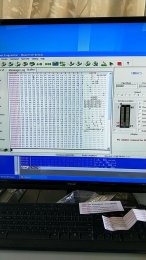
Sure enough i can see those 4 sets of values mentioned above in the 7.1.1 file... even better is that they're all at the same addresses!
Major thing that was pointed out is the size of the 5P08C3 ME7.1.1 file is bigger than the 95040 ME7.5 file. You can see all the "...FFFFFFFF..." down at the bottom of the read. The 5P08C3 chip used on me7.1.1 must just have more space on it.
Address lines changed are
30
40
B0
C0
D0
E0
F0
100
Only changing the values required and leaving surrounding coding as is.
Checksummed the file. Again this was a bit of a roundabout way because we had to use a checksummer that's only available for 95040. Had to save the file as a 95040 file size. Checksum it, then change it back to 5P08C3 size.
I made a checksummed file for plan A, B, and C.
Plugged in the BDE computer, battery on, clutch bleed, final electricals check. Key to IGN....
Plan A was the winner. Logic wins!!!
this one!
So moving on to he ECU side of things. Not much info online so i was throwing ideas around with Josh from LM Tuning to help me figure things out.
Pulling knowledge from coding in clusters i figured this
- i know what the SKC data looks like
- i know what VIN data looks like
- same with IMMO
- same with key data
Plan A - was to make a hybrid type file with all my 7.5's critical data intertwined with 7.1.1's
Plan B - was to transfer all of the 7.5's data in to replace all of the 7.1.1's data since they start and end in the same spots
Plan C - IMMO defeat
So i went and looked and compared cluster hex with my me7.5 ECU's EEPROM data. Going through the lines, looking for the patterns, finding the matching data.
Sure enough - the ECU also has the all the same data. Although it's in different lines compared to cluster data.
Our theory? Transfer the 4 sets of data across into the BDE ECU. Simple!
right?
emmmm.... no not so simple.
First of all the 7.1.1 didn't want to bootmode on the bench to be able to get a read. Josh had to use another tool to get the ECU's EEPROM data. After that he showed my the 7.1.1 data

Sure enough i can see those 4 sets of values mentioned above in the 7.1.1 file... even better is that they're all at the same addresses!
Major thing that was pointed out is the size of the 5P08C3 ME7.1.1 file is bigger than the 95040 ME7.5 file. You can see all the "...FFFFFFFF..." down at the bottom of the read. The 5P08C3 chip used on me7.1.1 must just have more space on it.
Address lines changed are
30
40
B0
C0
D0
E0
F0
100
Only changing the values required and leaving surrounding coding as is.
Checksummed the file. Again this was a bit of a roundabout way because we had to use a checksummer that's only available for 95040. Had to save the file as a 95040 file size. Checksum it, then change it back to 5P08C3 size.
I made a checksummed file for plan A, B, and C.
Plugged in the BDE computer, battery on, clutch bleed, final electricals check. Key to IGN....
Plan A was the winner. Logic wins!!!
I don’t know how you get your head round that I didn’t understand one word of it ha. But I have been looking into this you can pick the engine up for £300-450 and have seen a few gt30 kits for this. But they don’t include the engine internals.
Did you go for the bde code on purpose instead of the earlier ones for the vvt?
Did you go for the bde code on purpose instead of the earlier ones for the vvt?
I’m sure I’ve seen on here ( could be on r32oc)something about there being more metal between the bores as it’s the same block as the 3.2 means the block as the is stronger which is better for turbocharging plus the 2.8 is 1/3 of the price of a 3.2 engine
Last edited:
- Joined
- Sep 14, 2008
- Messages
- 24,836
- Reaction score
- 6,078
- Points
- 113
- Location
- Wibbleton
- Website
- www.tuffty.co.uk
HPA suggest that 400-500hp is doable on std internals... you use a spacer gasket to get the CR down... VR engines require less boost to achieve the HP/torque figures that us 20vt peeps have to use so cylinder pressures aren't as great...I don’t know how you get your head round that I didn’t understand one word of it ha. But I have been looking into this you can pick the engine up for £300-450 and have seen a few gt30 kits for this. But they don’t include the engine internals.
Did you go for the bde code on purpose instead of the earlier ones for the vvt?
Bill had a HPA R32 on the dyno a while back... GT3071 turbo... made 440hp/440ftlbs at 15 ish psi...
<tuffty/>
- Joined
- Sep 14, 2008
- Messages
- 24,836
- Reaction score
- 6,078
- Points
- 113
- Location
- Wibbleton
- Website
- www.tuffty.co.uk
The angle of the 'V' is greater on the earlier engines iirc...I’m sure I’ve seen on here ( could be on r32oc)something about there being more metal between the bores as it’s the same block means the block is stronger which is better for turbocharging plus the 2.8 is 1/3 of the price of a 3.2 engine
<tuffty/>
Really I episode thought it would be same as a 1.8t although the parts are different I thought it would be same grade metal so would take around the same limits. But that makes this change a whole lot more appealing. I’d probably still be tempted to do rods while engine outHPA suggest that 400-500hp is doable on std internals... you use a spacer gasket to get the CR down... VR engines require less boost to achieve the HP/torque figures that us 20vt peeps have to use so cylinder pressures aren't as great...
Bill had a HPA R32 on the dyno a while back... GT3071 turbo... made 440hp/440ftlbs at 15 ish psi...
<tuffty/>
Ian I bet the 204bhp is killing you after the last build
so im guessing the cylinder heads are probably not interchangeable if there's such a big difference in the blocks ?
A quick google suggest it can
So here’s an idea, buy a donor Audi TT 3.2. £2000 Take all the engine, loom, Ecu, engine mounts and stick it into the S3? Is it really as easy as that? With some obvious manipulation.
- Joined
- Sep 14, 2008
- Messages
- 24,836
- Reaction score
- 6,078
- Points
- 113
- Location
- Wibbleton
- Website
- www.tuffty.co.uk
Pretty much...So here’s an idea, buy a donor Audi TT 3.2. £2000 Take all the engine, loom, Ecu, engine mounts and stick it into the S3? Is it really as easy as that? With some obvious manipulation.
<tuffty/>
Pretty much could even take the dsg and fit that, but the 3.2 gives less power than my stage 1 s3 although it sounds better would need a turbo for me to do itSo here’s an idea, buy a donor Audi TT 3.2. £2000 Take all the engine, loom, Ecu, engine mounts and stick it into the S3? Is it really as easy as that? With some obvious manipulation.
Hmmmmmm  interesting..... well that just adds another option. 3.2 turbo/1.8 hybrid / 1.8 BT. What to do haha
- Joined
- Mar 28, 2010
- Messages
- 10,073
- Reaction score
- 2,697
- Points
- 113
- Location
- Liverpool/Southport. N west
so im guessing the cylinder heads are probably not interchangeable if there's such a big difference in the blocks ?
They are. Common for people to have 24v heads on 12v block.
Sent from my iPhone using Tapatalk
LOL read it again and look at the picture. It’ll make senseI don’t know how you get your head round that I didn’t understand one word of it ha...
Did you go for the bde code on purpose instead of the earlier ones for the vvt?
BDE is coil over plugs, VVT and double wideband. The loom is also BML ready.
Ian why didnt you go 3.2 ?
About that... 3.2... well you will see...
The BDE was already pretty much together. Just wanted to do the timing gear and seals.
So here’s an idea, buy a donor Audi TT 3.2. £2000 Take all the engine, loom, Ecu, engine mounts and stick it into the S3? Is it really as easy as that? With some obvious manipulation.
That’s pretty much it. The comprehensive list (which has all been pictured above) to do a VR6 conversion would be
- engine long block w/all ancillaries (this means you need the accessories bracket + new serpentine belt)
- VR6 engine block mount. This mount can be inserted into the S3 chassis mount.
- engine wiring loom + lambda wiring (both 4mo and R32 looms are interchangeable as long as you get the BDE loom)
- ME7.1.1 ecu + hardware/software to read/write/checksum/match the coding to the S3
- VR6 clutch housing + gear stick cable bracket
- VR6 gearbox to block bolts
- VR6 bevel box + it’s specific bracket + bolts
- VR6 flywheel + bolts
- VR6 coolant lines. Convert to VR6 from reservoir, from bulkhead, from top radiator hose
- VR6 power steering reservoir to pump hose
- VR6 exhaust headers, downpipe and cat (due to the two rear lambda’s). You can connect the s3 back section to catalytic converter. It mates up at the exact same spot. BONUS!
- VR6 n80 hoses/piping
- VR6 brake booster piping (if not just bodge like I did)
- VR6 intake pipe, inlet manifold
- SAI delete plate (you need to code this out to prevent the error showing on scans and CEL). Otherwise add SAI to the list.
Pretty sure that covers it
List copy and pasted I think the biggest drama for me will be the ecu side of it already pricing up gt30/35 turbo kits
I guess i don't belong to these forums anymore...
This has been sitting around for a while now and as i've gone to move interstate, a change of plans have come along with Noggie.
View attachment 155780
As you can see it looks like a palava! All of these unfamiliar things going on with wiring, plugs and many components i'm looking at thinking "what is this?" and "gawd what a mess"
View attachment 155781
View attachment 155782
So out come some tools to start pulling this little beast apart
View attachment 155783
- managed to get these off without breaking anything
View attachment 155784
- labelling as i go
View attachment 155785
- releasing the serpentine belt. I used a rear CV to diff flange bolt - perfect length!
View attachment 155786
- off it comes. Had to make note of it's routing too.
View attachment 155787
View attachment 155788
- after many bolts on the front of the head, side and back - the convoluted inlet manifold can come off.
View attachment 155789
- hidden underneath are the injectors, proper access to the coilpacks and fuel rail. Without the inlet manifold removed it's quite difficult to remove the coilpacks without a tool. Now i can just pull them out by hand.
View attachment 155790
- the angle of these!
View attachment 155791
View attachment 155793
View attachment 155794
- these were looking a tad crusty
View attachment 155795
- Now that i'd removed the spark plugs it makes it much easier to turn the engine by hand. Finding the TDC marks and lining them up. 27mm socket to turn the dampener bolt! LOL
View attachment 155796
- reference shot of the back of the engine
View attachment 155797
- cam cover off to be met with a slightly brown interior
View attachment 155798
- you need to lock the cams in place before doing timing work. I didn't want to pay $150 for the official tool so i used some off cuts that i had from making my oil cooler bracket, stacked them up and they fit perfect!
View attachment 155799
- more reference pics and marking with single or double lines to make sure plugs go back in the right spot
View attachment 155800
- top and bottom timing chain covers off. The crank and flywheel are mated together with 10 bolts!!! They're definitely not going to to anywhere.
View attachment 155801 View attachment 155802
- these bits needed a bit of a scrub
View attachment 155803 View attachment 155804
View attachment 155806 View attachment 155805
- turning my attention to the gearbox side of things. You can see why you need the VR clutch housing. The Gear housing is interchangeable. The bevel box is also slightly different. Notice the shaved edge on the VR part vs the 1.8t. The bracket is also different. CV heatshield is the same. I opened these up to swap in my 1 piece selector forks.
View attachment 155812 View attachment 155813
View attachment 155811 View attachment 155810
View attachment 155808 View attachment 155809
View attachment 155807
- turning towards the wiring loom now, count 'em! 6 coilpack plugs. wooo!
View attachment 155814
- This was the not so fun part. Where the 1.8t has TWO lambda plugs. the VR6 has 4. They need to fit into the tiniest gab in between the brake fluid reservoir and the chassis. FML.
View attachment 155815 View attachment 155816
View attachment 155817 View attachment 155818 View attachment 155819
- it's doable, just takes a bit of fiddling around
- since it was out and very easily accessible i decided to refresh the timing gear: chains, guides and the two tensioners
View attachment 155825
- comparing the wear on the engine's original guides vs. new. You can see the tracks that have been worn but it doesn't look too bad.
View attachment 155823 View attachment 155822
View attachment 155820 View attachment 155821
View attachment 155824
- all done and fitted! Surprisingly "easy" because of all the reference marks and colours chain links that you've got to work with.
View attachment 155826
- refreshing the seals on the upper timing chain cover. Just a simple case of push out and push in.
View attachment 155827
- i was impressed by how "idiot proof" gaskets are. They are all notched so you know exactly which way to put them. The cylinder cover bolts are also held in by the gasket as you remove it. No more losing these!
View attachment 155828 View attachment 155829
... and i've run out of photo upload allowance!
TBC
So did you use your gearbox with the vw clutch and bevel box or have I read that wrong ?


