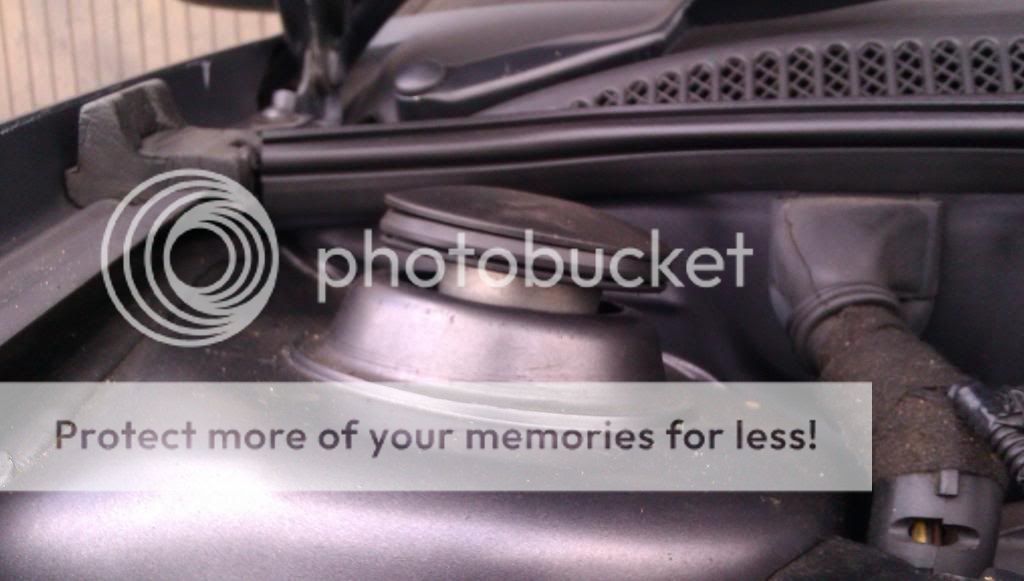
Top Mounts replaced with pics

.

Ahhhh haaaa, thanks for clearing that up! So in theory I could put axle stands under the jacking points then use my trolley jack to do the process you describe above??? I'm going to have to get spring clamps now. I got mine from tps hope they last longer than 6 months!! If they don't tps shall be having them back, receiving them by baseball throw across the trade counter! :)

Cheers, Sean

Yeah so basically loosen off strut top bolt/nut, jack the car up (wheel off etc obv) put axle stand in place at jacking point, put trolley jack under wishbone/bottom of strut and hub, undo strut completely at the top, slowly let the jack down so you've got enough room to get the old top mount out and bearing off the strut, then replace and jack the wishbone etc up until it's all in place and bolt the strut back up into the strut turret, let jack down and remove it, wheel back on etc and you're done! :)

Isn't too hard at all really fella! :)

Peace!

Dibdub1
 
Thanks a lot dib dub! I feel a lot more confident now! Think I'm going to try this 2moro now.... Will post how I get on


Thanks again for advice appreciate it!
 
I hate cars especially ones that have been messed with by numpty mechanincs with access to power tools!

Couldnt get the nuts off my brand new AP suspension ended up burring the bit you hold on to in the strut making it impossible to undo as now the sturt was spinning as i turned the nut!

Tried soaking it in WD and using shock and unlock to help but nothing would undo it so spent an age with a dremmel cutting the damn nut off so i could remove the bearing (which had fallen apart as soon as i lowered the strut) so it had to come off.

So now car is stuck in the garage with only half of one side complete as i now need to find another nut for the strut and someway to hold it still while i tighten it up.

will continue this charade 2moro when i am less annoyed and have a bit more patience.
 
Ok now vr bob has put me off lol!

Dont be put off if the nuts undo like they should the job is quite straightforward once you jack the wheel hub up and get the spring compressors on.

The only other thing i undid was the drop link as this allowed me to move the strut about a bit easier.

I still hate cars though as whenever i tackle one of these supposed "easy jobs" i alwaus end up in the sh1t lol

Just got to keep in mind that the car will be soo much cteer with new top mounts its worth the hassle :)
 

Yeah but I'd imagine these would seriously compromise the ride quality as the top mounts absorb some of the smaller bumps
 
Ive not heard good things about the poly ones, but that was a while ago so unsure if these will be better. Ive also here they squeak alot.
 
Well just managed to finish this job, Almost lost my right little finger in a small accident involving a strut moving into a hole in some body work and as i was lowereing using the jack it mjust of caught on something as it didnt move so i pulled the top of the strut with my hand and this of course relesed the strut which in turn shot thru the hole where my finger happened to be. Slo the whole weight of the strut was on my little finger and i could only just reach the jack to move it back up and free myself OUCH :(

Anyway have replaced both bushes now as these are pretty easy to do in real terms but the bearings were where i ran into issues, The drivers side bearing literally disintergrated when i took the bush off so i knew i had to replace it but i could not undo the not at the top of the strut so had to cut it off. The bearing on the other side was ok so as i couldnt undo that nut either i left it as it was. Had to find a replacement M14 nut for the one i cut off which luckily o found one hiddden in my dads garage so its all back together now and i have been for a quick spin and its all ok.

So now will relax and nurse my poor injured little finger......
 
I did this today too!

Mine were completely seized! Took over 3 hours to do first one then 30 mins to do second one. Also the only Allen key I was missing was 7mm one , the one you need. A quick trip to the fathers and he has a complete snap on style tall tool chest he's bought and never used had 5 sets of Allen keys in!

All in all a good job I'm glad I did, happy with outcome. Top mounts look miles better and aren't seized now. Bought my spring clamps from machine mart got a 3 pce set by Clarke were on sale £25 and were brilliant, though I had to grind them to half length were too long to fit in the arch let alone on springs. 5 mins angle grinding job done. These are a proper good quality set.

Thanks for advice guys ......... Only thing I would add is make sure you clamp the springs up closed enough from the start so you don't have to mess around whilst suspension in bits. This is what made the first side take so long for me and the fact it was seized.

Cheers, Sean
 
Nice one guys! anyone fancy typing a quick run down of what you did and how? :superman:

I've had a sodding chest infection / cough so havent even looked at the car all week
 
Looking good can see how squished the old one is, i will be doing mine soon along with, trackrods, and bottom balljoints feels so much better when you do them all in one go :racer:
 
Need jack, stands, 19mm socket for arb, 20mm for spring clamps, monkey wrench, 2 adjustables, 7mm Allen, spark plug socket, hammer, torque wrench.

Undid / loosened top mount fixings- 7mm Allen key through eye of spark plug socket ( held both with adjustables and loosened)
Jack car up , put stand under jacking point
Wheel off
Undo arb links
Spring clamps, compress as much as possible
Completely undo top mount fixing 1 on top of bush holder
Then smashed bush off as mine were seized
Then jack up leg enough to do 7mm Allen key process on tp fixing 2 holds bearing in place
Replace bearing
Replace fixing 2
Replace new bush
Jack up in place and put back together
Undo spring clamps
Arb links back together 19mm socket needed and monkey wrench
Wheel on replace cap job done
 
Well done lads! Glad to hear you both had a good go at it and managed to get them done! :)
 
i have resently changed my top mounts and bearings on my 1.8t agu one bearing was completely ceased up, once i had put everything back together i still have a big gap not a small gap like the after pic on the first post, have i done mine wrong?
 
I know this is a bit of a dusty (But useful) Thread, but i have a question.
I want to know how to tell if the top mounts need replacing? In first and second picture by op, it shows a clear gap between "cap" and "mount". Is this the indication for replacement? I have a very similar gap on my A3 and when i jack the car up the gap disappears and if i lift the wheel there is slight movement and a gap appears. I have to put some force in to lifting to get a gap but when sat it is rather noticeable. I have taken a couple of pictures to show the difference.

Many thanks,

Neil.


ON THE GROUND

IMAG0002-1.jpg


JACKED UP

IMAG0001-1.jpg
 
Brilliant thanks for that nice job for the weekend :icon_thumright:
 
guys i'm planning to attempt this, i understnad all except how the 7mm allen key and the spark plug socket bolt works, does it have to be a spark plug socket ? is this similar to a locking nut ?
 
I've had a nightmare replacing my top mounts this weekend. Passenger side was done in 1 hour, but the drivers side wasn't playing nice. I couldn't get the shock to aim at the hole, it kept going off at an angle (mostly towards the rear of the car) and it was too strong to manouver by hand. When i did finally get the shock at the right angle, the shock wouldn't go up into the bush hole - it was jacked up as far as it would go and was still an inch too short! Confused.com. The car started coming off the axle stands i was jacking it up that much. Maybe i need to remove the axle stand from the other side of the car so it's only on one? Any advice would be appreciated! Cheers
 
your piston has dropped inside the shock housing, you need to lever it out to get enough exposed thread to bolt it all back together again. Just screw the nut on 7 use a c spanner to lever it out.
 
the weight of the wishbone & lower shock should allow the piston the be extracted, its not difficult its just knowing how it all works.
 
Wish i'd have thought about that yesterday, literally was tearing my hair out as to why it wouldn't reach into the engine bay, whereas the other side went in easily! Spent 8 hours trying to get it back in. I think you've probably solved my problem. Unfortunately the car is 20 miles away sat on axle stands in his front garden otherwise i'd have popped out and given it a try!
 
mattboy I owe you one mate, it was the piston that had sunk into my right front shock. If only I'd asked you Sunday morning i wouldn't have wasted a whole day 8am - 7pm trying to get it to fit! It's fitted now, used mole grip between the spring to hold it up while i jacked her up into place. Leg-end. Cheers pal.
 
oh, crap, i thougjht they were supposed to stick out like that,

ah well, top mounts and bearings on order, tools located

i geuss i'll just add it to the list of things to do during teh holiday
 
ok, done this now, as it stopped raining long enough for me to do it.

great info in the thread above, only thing i did different was to take of both top mounts at the start, then support the wishbone with a floor jack.
this allowed me to control the suspension drop easily, without removing the ARB bolts

seems much quieter now

m
 
Hey there I have a question about the bush and bearing replacement as I don't the job and it looks a bit odd, the strut seems higher compared to the unchanged one. Does the bearing go on top the bush or between the coil and the bush?

Appreciate your help.
 
Spring (1) ,spring cap (19), bearing (14), bush (18), shaped nut (21), poke through strut top then cup (16), top nut (17), plastic cap (20) in the order...

Note... part (28) is supposed to be a 'distance piece' for heavy duty suspension... never seen this on any I have done myself so if you don't have it don't worry about it

Link to parts...
http://www.oemepc.com/audi/part_sin.../411/subcategory/411005/part_id/272767/lang/e

Diagram from above....
Capture


<tuffty/>
 
Hey there tuffty thank you very much, it turns out I put the bush with bearing upside down that's why it seems higher. I will be changing it today again.
 
I've got front shocks to fit on my S3 and noticed I've got a gap, so going to change the top mounts. Can anyone tell me if the lcr mounts last longer than the standard mounts and if they're worth the extra money?
 
I've got front shocks to fit on my S3 and noticed I've got a gap, so going to change the top mounts. Can anyone tell me if the lcr mounts last longer than the standard mounts and if they're worth the extra money?
They are harder than std mounts and are less compliant so you get an improvement in handling... read into that what you will..

<tuffty/>
 
Cool thanks tufty, from your experience is there any difference in how long they will last?Read a few threads where it seems people are replacing std ones within 6 to 8 months use. My S3 is my daily and gets a pretty easy life so would prefer to fit something that will last the longest.
 
They last longer than the ****** camber plates I had on for a while.. lol

I fitted them back in May 2011... no idea on mileage I have done on them but would imagine it to be 20k or so... I had the camber plates on for a while but refitted the LCR's before christmas after the roads took out the bearings for a second time and they sit nicely with no discernible gap.

I would imagine its a little subjective but they are supposed to be 85 durometer vs 55 durometer of std tops so should arguably 'keep it up' for a longer

<tuffty/>
 
  • Like
Reactions: flying oyster
Perfect, I probably average under 10k a year which includes a couple of btcc weekends..... around 800 mile motorway trips. So should last for a good bit. Will get them ordered
 
Hi did you have a part number for these please as I'm just in process of having top mounts changed
 

Similar threads

Replies
2
Views
840
Replies
5
Views
999
Replies
10
Views
5K
Replies
3
Views
828