andicole0
Registered User
My car doesn't have auto lights, but will the wiring and sensor be in place so that I can just replace the switch?
Andi.
Andi.


My car doesn't have auto lights, but will the wiring and sensor be in place so that I can just replace the switch?
Andi.


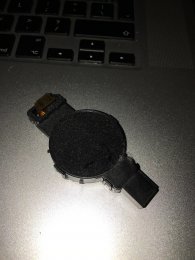
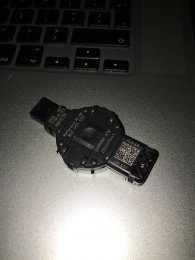
Just checked and the part number of the switch is L not J.
View attachment 76585 View attachment 76586
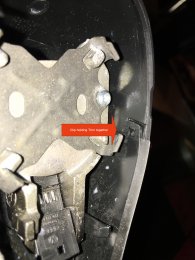
How is the switch removed, I've seen 8P videos where you push the switch in but this doesn't seem to work on mine?
Far too wet here today to look at the mirror
Andi.
@NHN How much do your charge to have auto lights and wipers fitted?We can supply/fit these systems, but chances are wiring wont be fitted, but we can do all this, pm if of interest.