Prawn and BigAls A3 Track Car

that should almost do it, my guess on the weights

Stereo 2kg double if std double din
Cd changer 4kg
Subwoofer 5kg
Remote central locking system 2kg
Bluetooth phone kit not a lot
Passenger airbag 5kg
Sound deadening behind dash 2kg
Door cards + speakers 6kg
Excess wiring 5kg
Final bitumen on floorpan 1kg
Rear screen and rear side glass for poly 6kg
Tailgate double skin cut back a little
Remove crash bars front and rear for track use. 6kg
Lighten doors and window mechs as much as possible ali door bars 2kg each so 4kg total


48kg by my guesses
 
Pretty sensible guesses there I'd say Jason. I think you're about right.

Just new to find where else I can realistically lose weight without compromising the car.
 
i break them all day and send parcels out so have a pretty good estimate of the weights, pass airbag might a Kg under though normally send them out as a set.

I assume you have removed the headlining all interior lights, seat belts, carpets,

other ideas, assuming not already done

lightweight mirrors
brackets for the passenger airbag on the dash bar
heater/ac unit replace with lightweight heater - should save 8/10kg

Had even looking at lightweight mirrors but doesn't seem to be a great deal out there compared to corsa's etc

Is there a way of lightening the front windows but still being able to wind up and down rather than the usual bonded/riveted lexan? Assuming you can't just replace the glass witn an identical plastic panel?

Due to the way our windows fix to the window reg I can't see why you couldn't replace the glass with plastic mate
 
  • Like
Reactions: StaceyS3
Dash supporting bar out. Its easily 20kg.
Heater out - its heavy as well, plus the extra coolant you need for it.
Then get a heated screen
 
dash bar is not anywhere near 20kg - its 10.3kg and that includes the lower part of the steering column that you kind of need, and if you are running a dash then you sort of need it for that too, let alone it must provide some chassis stiffness as its effectively a massive strut brace, so unless you have a multipoint cage to mount the lower steering column from you are in for a whole load of work really to remove it
 
Am i the only one getting delays?
Jasons reply wasnt there whenbi did mine!!
 
We have done:

Stereo
Cd changer
Subwoofer
Remote central locking system
Bluetooth phone kit
Passenger airbag
Sound deadening behind dash
Door cards + speakers
Excess wiring

we plan on doing:

Bitumen
Rear screen and rear side glass for poly
bonnet
Tailgate
we also have window mechanism and some of that wiring to remove still.

:) we removed about 5kg of wires, but still more we could take out.
 
dash bar is not anywhere near 20kg - its 10.3kg and that includes the lower part of the steering column that you kind of need, and if you are running a dash then you sort of need it for that too, let alone it must provide some chassis stiffness as its effectively a massive strut brace, so unless you have a multipoint cage to mount the lower steering column from you are in for a whole load of work really to remove it


I have a multipoint cage to mount the steering column and dash to :moa:
 
I have a multipoint cage to mount the steering column and dash to :moa:

******* :laugh:

Removing the dash to gut behind it is a long way off yet, and probably one of the very last things on the list.

If, and when it finally comes to that stage I'll look into it, but in reality I'll be doing everything else first that I can do and keep it 'rolling' for now.

Any major strip down work will be a winter thing once the garage is built and it's got a place to live!
 
Glad to hear you've got in touch with ACW about the windows. Tony really is one of the good guys.

Now you know you're not smashing your splitter off once a month, maybe a bit of time spent with a router thinning down the less vulnerable bits could be worth while? BTCC style.

Looking forward to seeing the result of the diet.
 
good man, now you need to work on your estimates for weights then (assuming you removed the dash bar) .......:whistle2:

I couldn;t care less what it weighs. All I know is, its a lot heavier than a length of T45, that was going to be there anyway. And I certainly have no interest in weighing everything I've removed. Would take me longer than removing it :blink:
 
i would suggest that you dont care what it weighs is not exactly the case or you wouldn't be that into building a track car as getting the weight down is clearly one of the priorities, but if thats the case up to you, I'm not bothered either, just thought id put the actual weight up as i had a complete dash bar to hand and a set of scales to weigh it.
 
Thanks Jason.

Good to know there's 10.3Kg there.

If it were 20kg, I'd probably make more of an effort to get it out, but if it's 10kg, and holds the dash and steering column in, by the time I'd removed it, then remade up some bracketry to hold the steering column and dash in place then you'd be adding back in 3-4kg I'm sure so not worth it.

It's a fairly large section I seem to recall? 50-60mm?

Perhaps a series of 20mm holes through it with a hole saw offset at 90 degrees could be a good half way measure.
 
yes its a big tube, not a very thick wall though or maybe it would be 20kg, theres a some brackets to remove for the pass airbag etc, but i agree too much like a ball ache to remove and sort everything thats attached unless you did have a multipoint cage fitted
 
Odd question slightly related.

The original s3 crossover pipe for the IC's weighs a ton. It ties the front of the chassis legs. Is it structural?
 
Glad to hear you've got in touch with ACW about the windows. Tony really is one of the good guys.

Now you know you're not smashing your splitter off once a month, maybe a bit of time spent with a router thinning down the less vulnerable bits could be worth while? BTCC style.

Looking forward to seeing the result of the diet.

Tony seemed very approachable yea, I'm waiting for him to get back to me now, which reminds me, I must drop him an e-mail this week.

Funny you should mention the splitter, I've been having the exact same thoughts!

I've been toying with the idea of remaking the splitter using 6mm ply instead of 12mm, and adding a single skin of fibreglass cloth top and bottom to add stiffness as well as along the leading edge.

Should end up about 8mm thick, fairly stiff, and considerably less in weight than the current 12mm.

Another reason for looking at encasing it in FG is for the durability of it, the existing ply will meet it's end not due to impact damage, but due to delamination where water has gotten in between the plys over winter. I've tried sealing it up with wood glues and paint type sealants, but I think a skin of FG over it all would do a much better job.

What are your thoughts on the FG idea Robin? Being an expert in it :)
 
Odd question slightly related.

The original s3 crossover pipe for the IC's weighs a ton. It ties the front of the chassis legs. Is it structural?

can't imagine it would be - its not on the R32 which is a heavier car with more power from the factory.
 
  • Like
Reactions: 16Klappe
Tony seemed very approachable yea, I'm waiting for him to get back to me now, which reminds me, I must drop him an e-mail this week.

Funny you should mention the splitter, I've been having the exact same thoughts!

I've been toying with the idea of remaking the splitter using 6mm ply instead of 12mm, and adding a single skin of fibreglass cloth top and bottom to add stiffness as well as along the leading edge.

Should end up about 8mm thick, fairly stiff, and considerably less in weight than the current 12mm.

Another reason for looking at encasing it in FG is for the durability of it, the existing ply will meet it's end not due to impact damage, but due to delamination where water has gotten in between the plys over winter. I've tried sealing it up with wood glues and paint type sealants, but I think a skin of FG over it all would do a much better job.

What are your thoughts on the FG idea Robin? Being an expert in it :)

It depends how much you're scraping it really. If you encase wood in grp, then you're essentially making a basic sandwich panel. The only trouble with this is that as soon as you grate through the bottom layer it becomes a single thin layer of fibreglass, with some quite thin wood stuck to the bottom of it. Add British weather to that and you've got a thin layer of fibreglass with a soggy bit of swollen wood not-really-stuck to the bottom of it.

If your skid protector thingy's are working well and you're not really scuffing up the underside then I say go for it, it's a nice idea. If you are still scraping the underside a bit, then I'd say water ingress will be a bit of a nightmare the first time you crack or grate through it. That said, if you're not expecting to wear through the fibreglass, then there's no real advantage to using wood rather than some much lighter foam if you're clever with it. If you do decide to do it with wood then don't use marine ply, you want something nice and porous that the resin can impregnate right into.

Personally, knowing how much use and abuse your current splitter's taken, I'd expect no better life-span from a fibreglass one (more complex composites is a different matter, but also a different budget). I'd be tempted to just re-make it how you did, with a little extra pocketing to shave some weight. You weren't expecting them to last anywhere near this long anyway.

(PS, the most trouble free splitters I've seen on 'sports & GT' cars have been foam cored composite with thin wooden skid-plates bolted to the underside of them.)
 
Excellent! thanks for the helpful reply dude :)

The ply is an odd one, it does have the off scrape on the underside, but very rarely but this isn't where the delamination has come from bizzarely. the wear bars are also doing a fantastic job.

the delamination, strangely, has from from stone chip impacts on the leading edge allowing a water path in I think, as the seperated plies are not at the top of bottom but in the very middle!

Pierre applied a layer of epoxy resin to his splitter, which seemed to do a good job of masking it's wooden construction. I was simply going to take this one step further with a thin layer of FG.

When it comes to remake time I'll definitely be making the rear half from 6mm ply instead of 12 this time. perhaps make the front half from 9mm ply, and borrow a router to take out the non load bearing middle section and a single FG skin too perhaps.

The main idea of the splitter re-work is to try and reduce weight, not increase durability really.

To be honest, I'm absolutely amazed that this one looks set to survive a full 12 months! I really did expect to be changing it every few trackdays.
 
Is water having a negative effect on your splitter?
Not really sure what you are saying.
If so you could try marine ply
or even vinyl wrapping it would help with splits and wster if its durable enough
Also how much would need routing that would be a pig of a job.
Maby get a 6mm sheet and laminate some 3mm to the areas you want 9mm
 
Bit more awake now and re read your post.
What type of ply did you buy
Structual will be poo for this
Wbp is likely what you used would still stand ok against water etc but not great, also wbp tends to be harder and doesnt delaminate like structual ply.
The fact it split in the middles no real surprise though it either had the weakest bond or material.
A stone probably smashed a little hole giving water a place to sit which will kill both the bond and ply layer
I use ply on a regular bases and the difference in boards is massive.
I was once told the red' er the wood the stronger it is. So if true and it has red outer layer it would help.
 
12mm thick WBP used here Daz, I found a few places selling ply, most of the sheets of 12mm were 5 ply, but I found this at Wickes and it's 7 ply WBP. It's lasted really well to be fair.I think I'll see the year out on this one then make another over winter.

A little update now, feels like ages since I've done anything on the car, even though it was only a week ago when I went to Ace to weigh it.

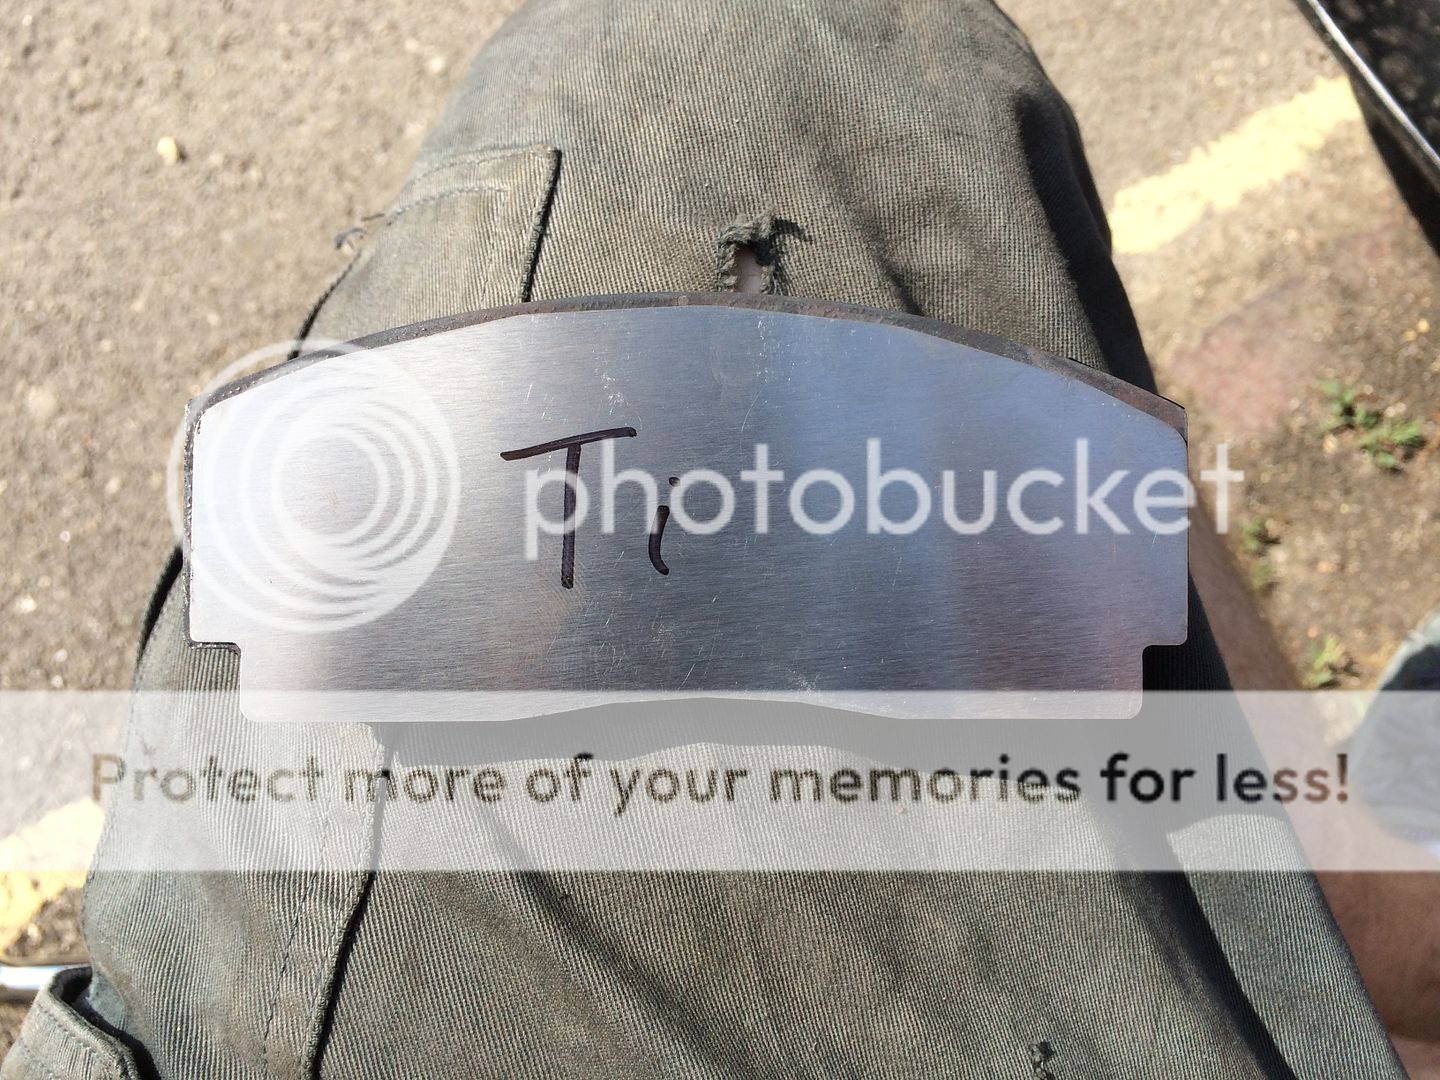
as we know, I bought a set of Hard-Brakes titanium pad shims, to act as a thermal barrier to stop heat transfer into the brake fluid.

Ti is around twice as good as stainless steel for this application, so my 0.5mm ti shims are around as effective as 1mm of stainless.

as I had the shims to hand, and some stainless strip, I decided to double up and make some stainless shims too :)


After a few minutes on the grinder:


And cleaned up with the flap wheel:


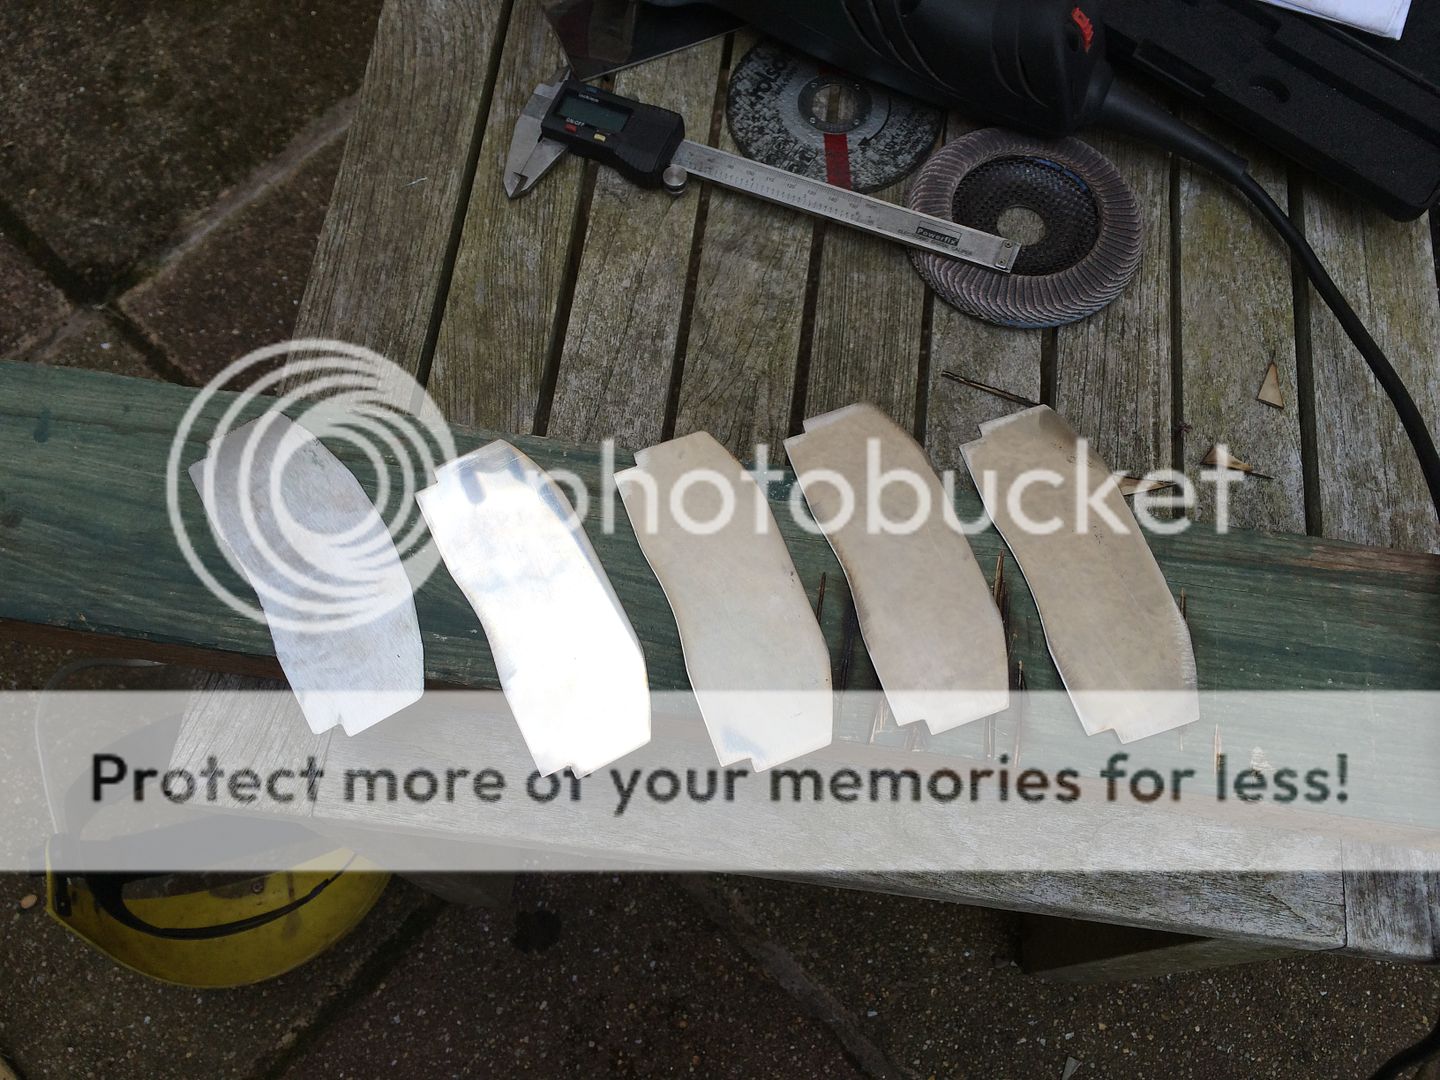
Purely for interest, I decided to measure and weigh the 2 types of shims:

First up, the Ti shims, 0.5mm thick:


And the stainless shims, 1mm thick:


A single Ti shim weighed just 16g, so being double the thickness, you'd expect the stainless to be around double the weight....

However, the beauty of Ti is pretty obvious here. A single stainless shim is 57g, so getting on for double the weight per unit volume!

Total weight added by the shims was 293g, hardly the end of the world if it solves my issues!


Next up was a delivery from Opie Oils:


And that completes what is hopefully the remedy to my long brake pedal issues:


I got all set up to go:


And the ****** Eezibleed broke!

One quick trip to halfords for a new one:


and we were off.

I fitted the shims up front first, seen here overlaid onto a pad;


And in the caliper:


I then hooked up the Eezibleed, and bled all 4 corners and the master cylinder until the blue was gone and replaced with golden Motul fluid.

With that done, I hooked up the laptop,and cycled the abs pump a few times:


Then bled all 4 corners again, Cycled the ABS pump AGAIN, and finally bled all 4 corners one last time, and the master cylinder again. Probably a bit over the top on the bleeding procedure, but I REALLY want this to work.

Last job was to clean up the calipers before putting the wheels back on;


And thus concludes todays jobs. fingers crossed all will be good when I get to test it at Goodwood in a few weeks time!
 
The grooves on those rotors are possibly the most purposeful I have seen to date. Nothing fancy just a proper deep groove that will catch all of the pad and do the job.
 
I read somewhere that anything more than 10 was too much.
Looking good guys!!
 
Me too mark!

I'm really looking forward to Goodwood, we've only been there once before, and it was right after the crash, with the car in a fairly bad way, so not really a decent crack at it.

Hopefully this time around it'll be good. There are some great cars in our group, so it should be much fun!
 
I thought it was open pit? Or you mean the whole group?
2 weeks this sat you guys are going?
 
It's Goodwood Daz, they don't do open pitlane at all on the whole due to noise limits.

They run a strict 10 cars per group, 4 groups per hour format, with forced breaks between sessions of the cumulative 'noise bucket' gets filled.

It's not as ideal as an open pitlane day, but a typical trackday at Goodwood costs ~£400, and this was half that, so about the cheapest way you'll get to drive the Goodwood circuit for a day. it's a great place Goodwood, cracking atmosphere there!
 
  • Like
Reactions: kwistof

Similar threads

Replies
26
Views
8K
Replies
6
Views
4K
Replies
10
Views
4K
Replies
166
Views
20K
Replies
40
Views
4K