- Joined
- Sep 14, 2008
- Messages
- 24,836
- Reaction score
- 6,078
- Points
- 113
- Location
- Wibbleton
- Website
- www.tuffty.co.uk
>>>>>>>>>>UPDATE!!!!<<<<<<<<<<<
Having gained a little more experience and exposure to various cars running all sorts of different intercoolers I am now of the conclusion that the AH Fabs V1 I helped develop with its 51mm inlets is not something I can recommend using anymore... the core itself is ok, Bill is using the core on his Lupo thats running best part of 370hp but with 63mm bends welded on instead of the supplied 51mm outlets... the 51mm outlets were a compromise to get the cooler to fit nicely behind the bumper retaining the fogs but I have since developed the AH Fabs V2 which is not much more expensive and a far superior intercooler and of course there are the 'wellycooler' variants one of which can be supplied with 63mm outlets rather than the traditional 76mm ones...
For this reason I have moved this first post around moving the AH Fabs V2 to the top as this is the one to go for out of the two....
After a lot of changes and further upgrades to my engine I discovered that on a bigger turbo setup the original AH Fabs V1 FMIC is a little out of its depth...
The plots below show the pressure drop and the initial spike as the turbo comes on boost and the airflow backs up while it finds a way through...
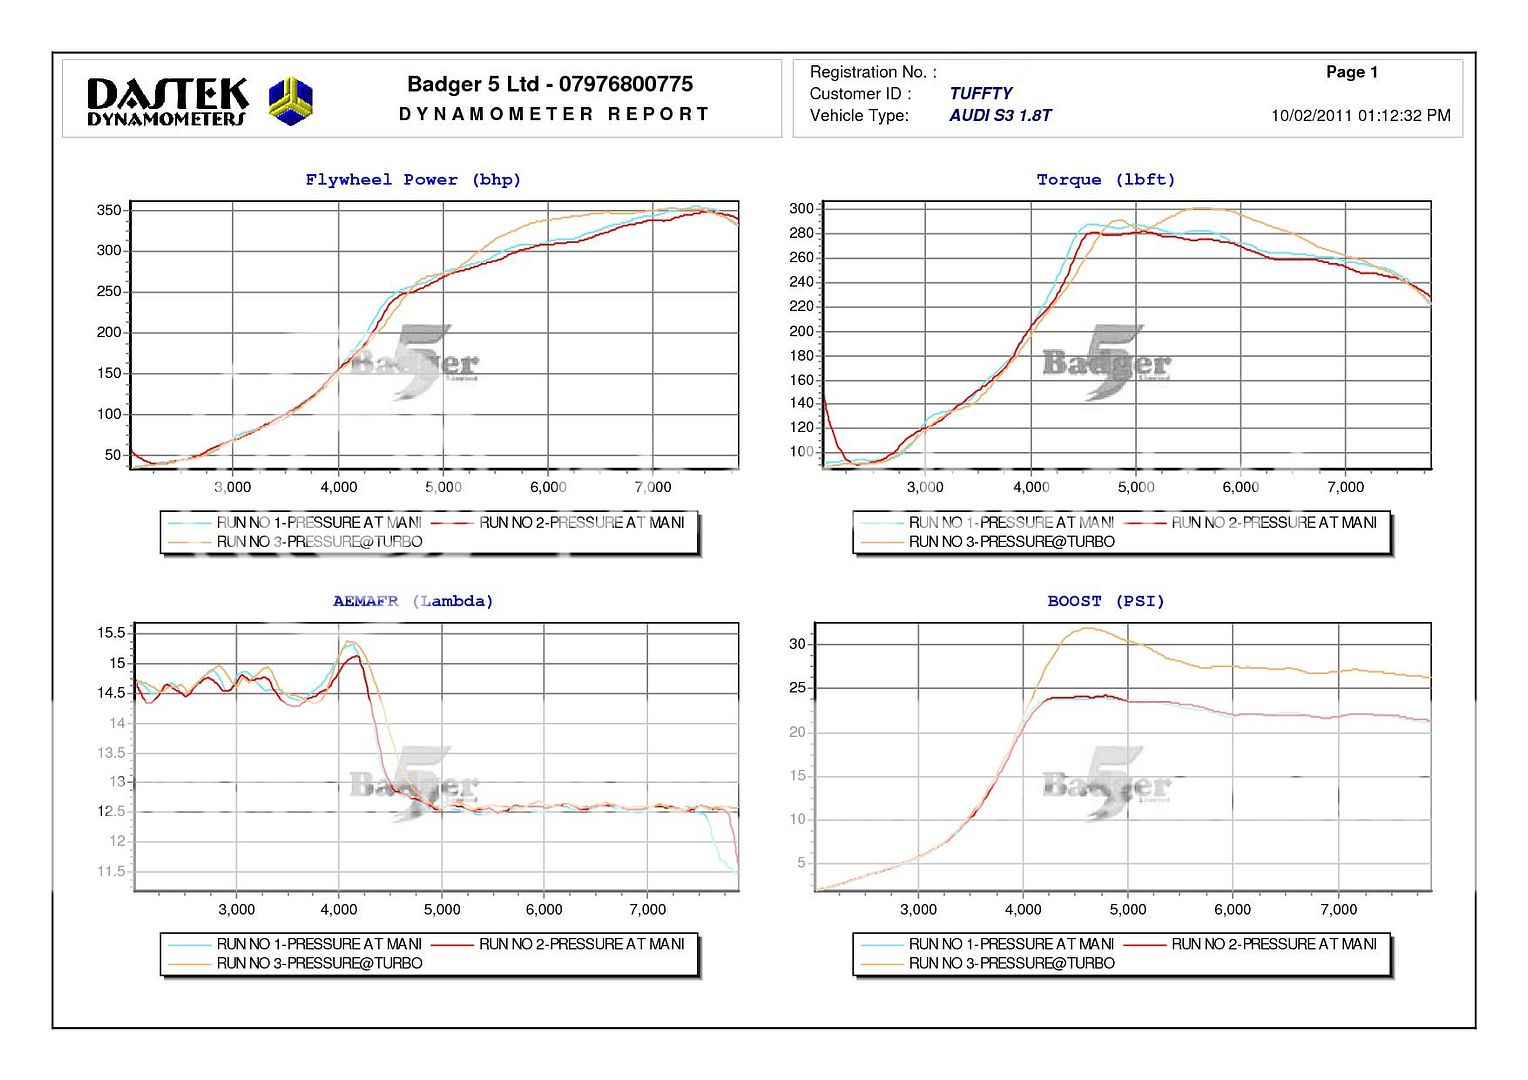
The orange line in the boost graph is pressure measured at the turbo and the rest are measured at the manifold... as you can see there is a huge spike thats not emulated at the manifold... the rest is the pressure difference between turbo and inlet manifold which equates to around 6 or 7 psi... this is quite a bit
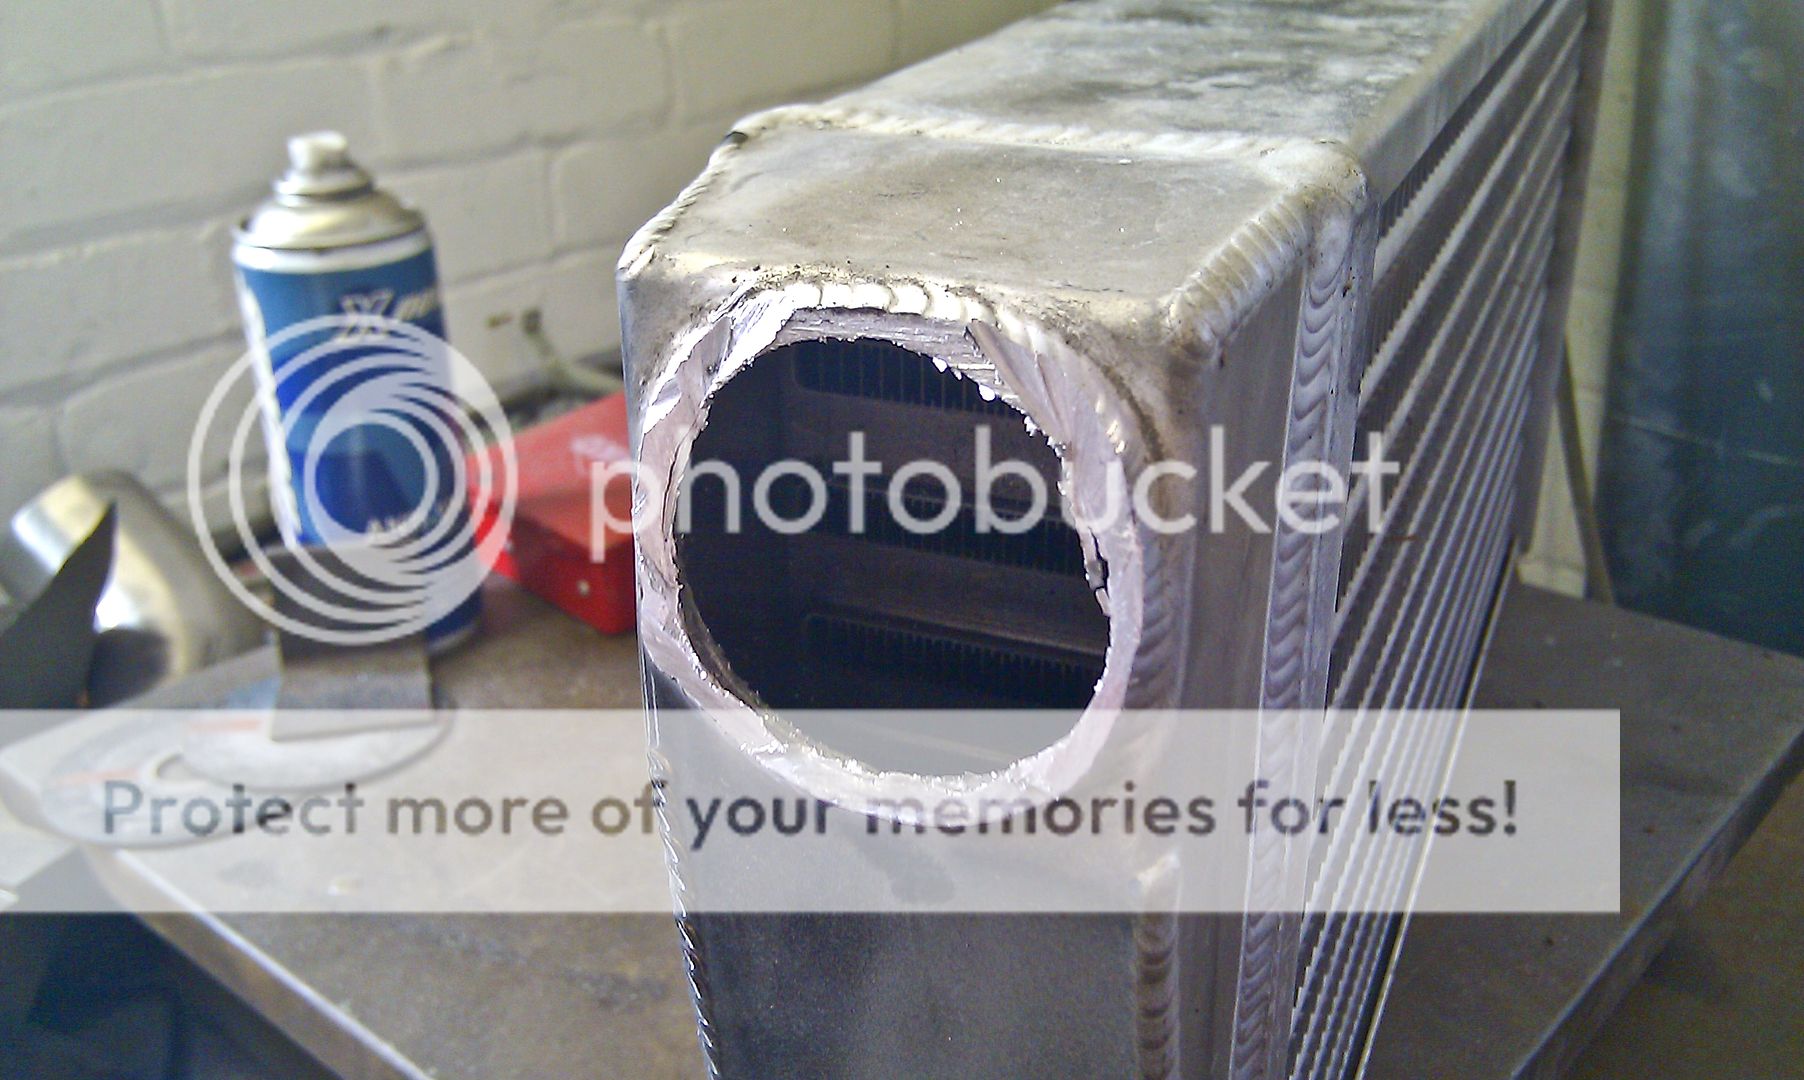
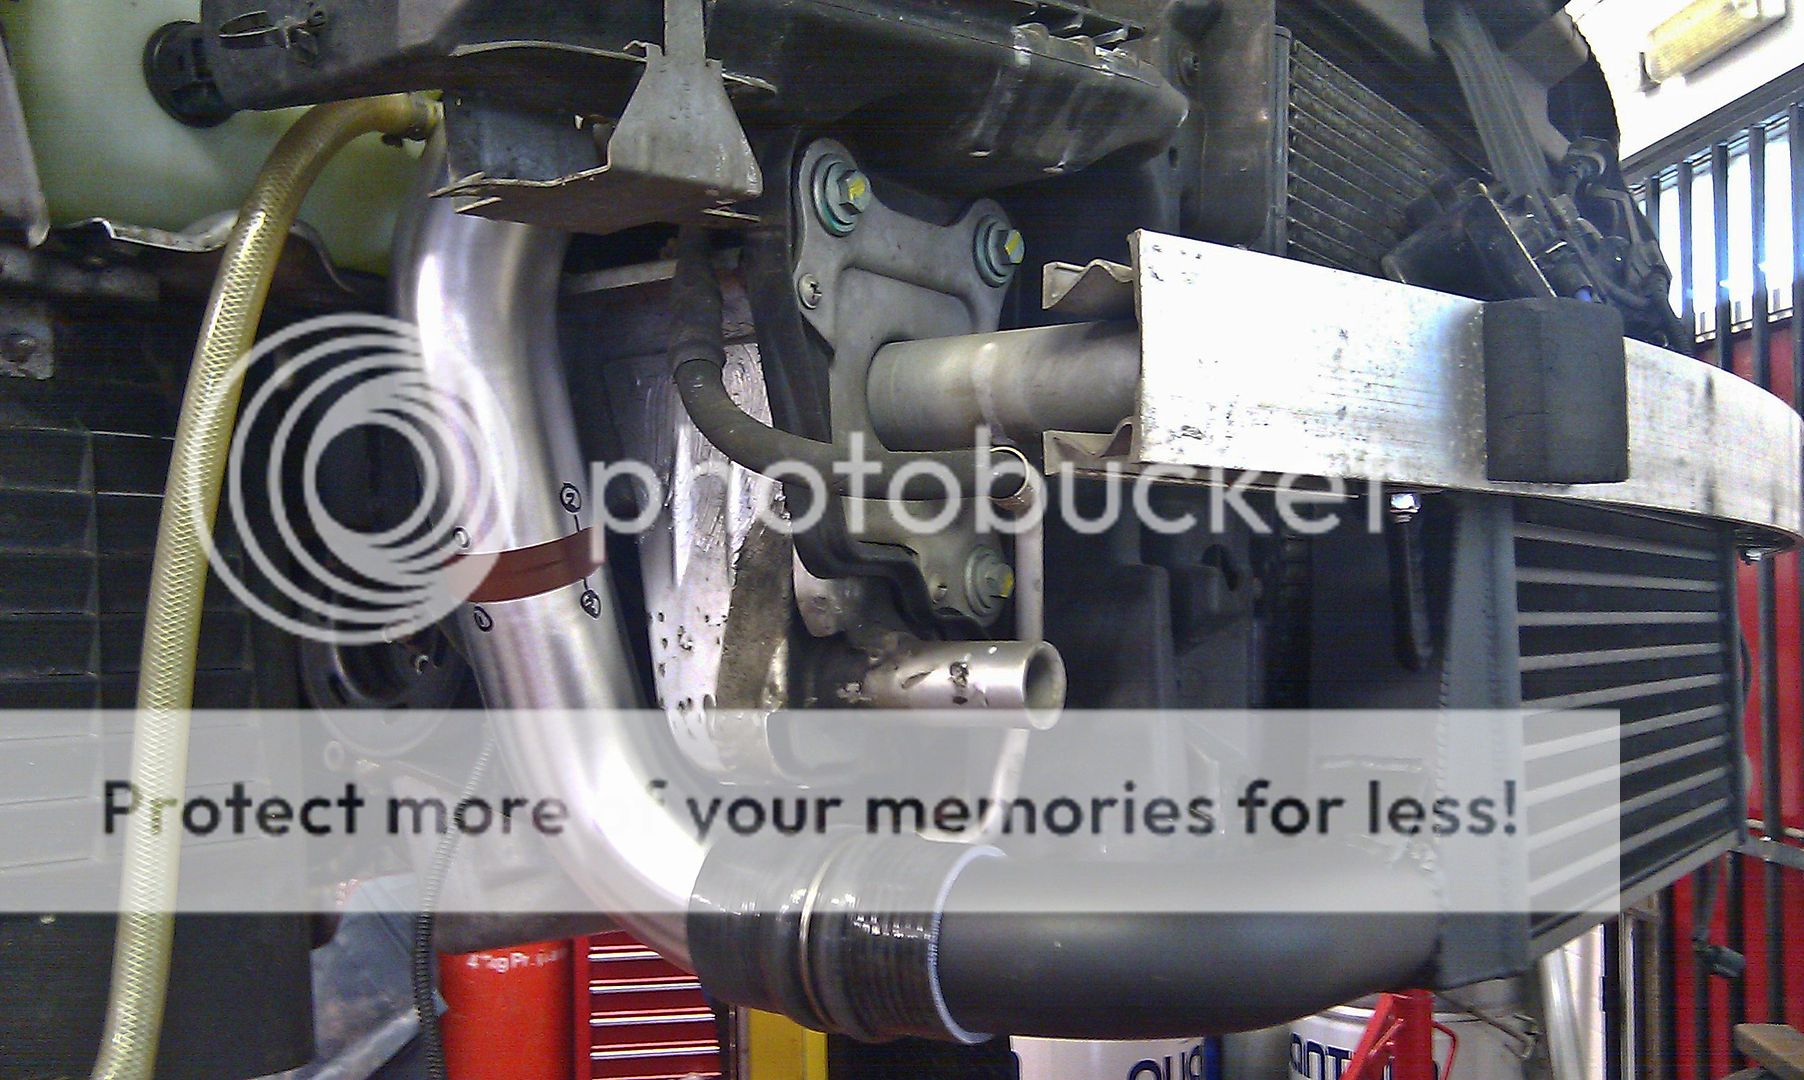
Bill and I made some changes to the FMIC to try and sort the problem and increase flow potential by cutting off the 51mm ends and welding on 60mm 90 degree bends... the bends were used rather than just 60mm stubs as a 60mm silicon joiner would not fit in the gap in the bumper...

Sadly while this improved things a little it was clear it wasn't up to what a GT30 will throw at it especially as I upgraded the turbo to a full size GT30 cartridge... so with all that in mind this prompted me to make a return trip to AH and talk to Alex about designing something a bit bigger but that would still fit with fogs intact and not stick out everywhere.
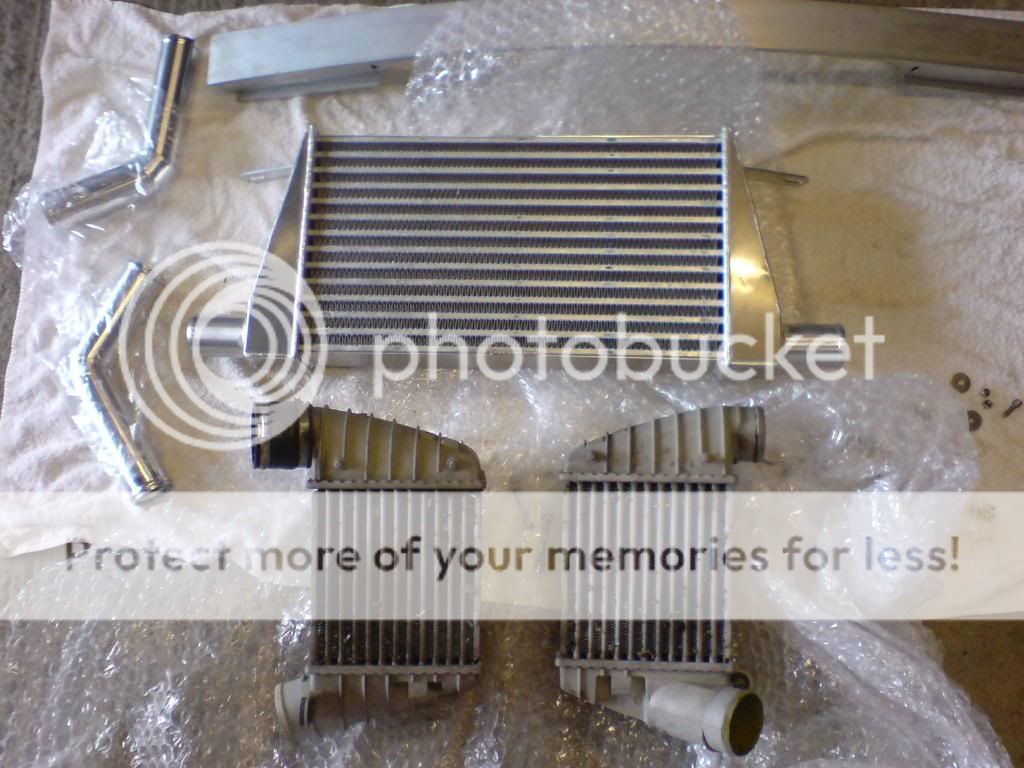
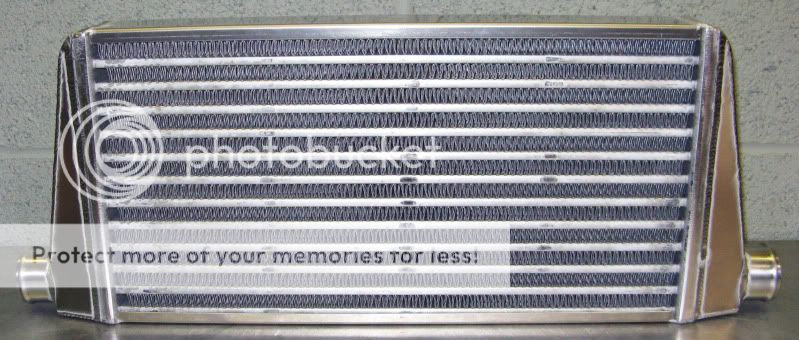
Alex sent me a core they use for the 500+ bhp Ford Cossie's so thats a good start...
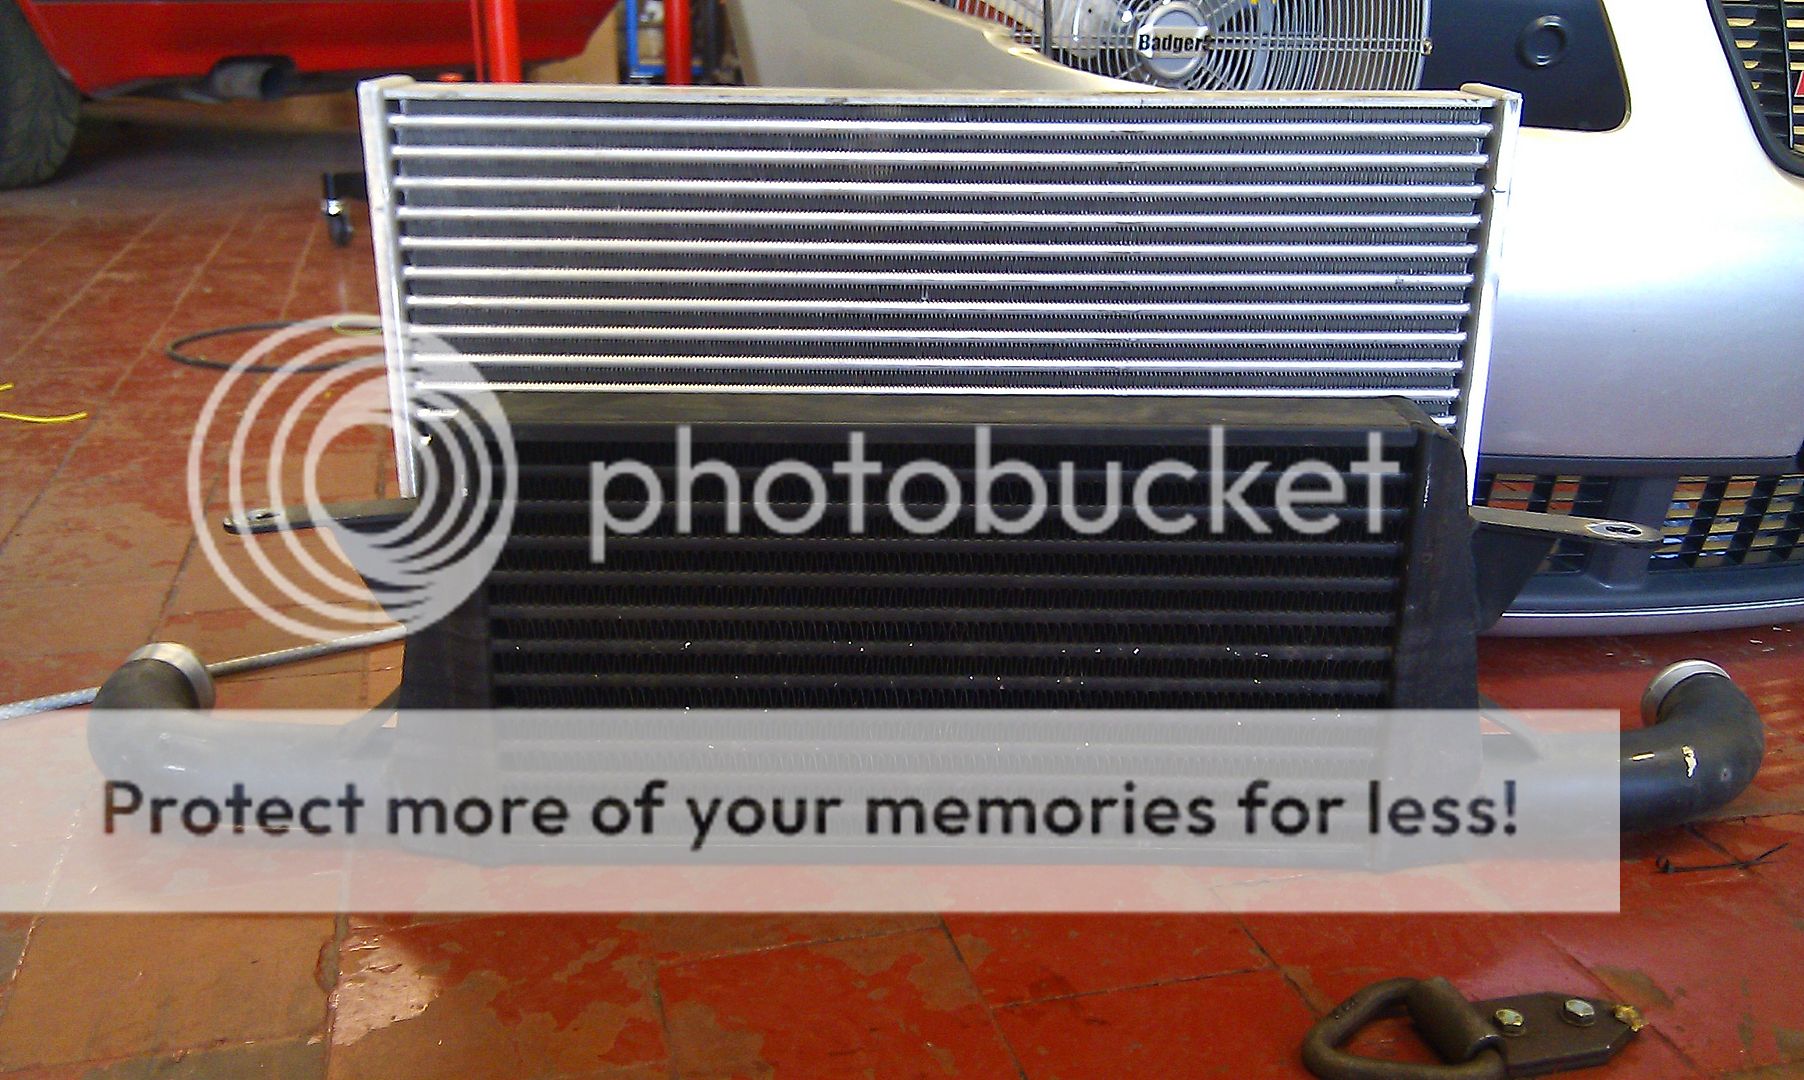
..as you can see its a little bigger
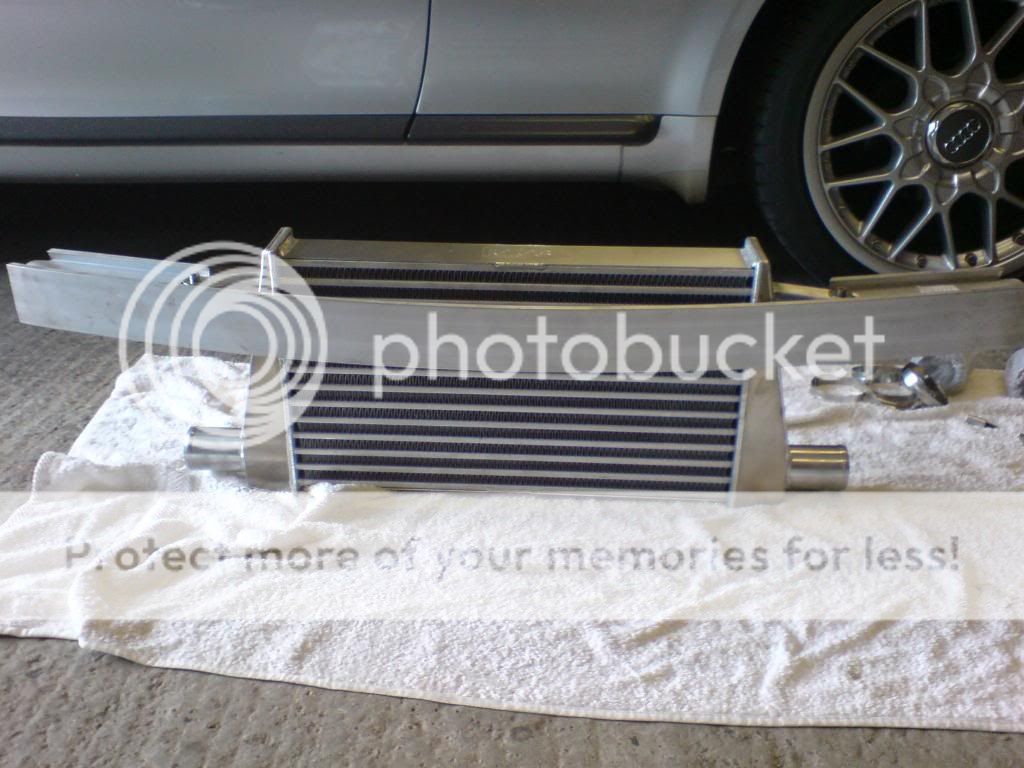
Took a bit of faffing to work out what I could get away with etc...


Had to cut off a couple of rows so it would fit ok but managed to get 63mm pipes in which is plenty big enough.
Took the results and the core back to Lars who works for Alex... the guy really knows his stuff and is a brilliant fabricator... especially seeing as he managed to understand everything I wanted to do... result lol...
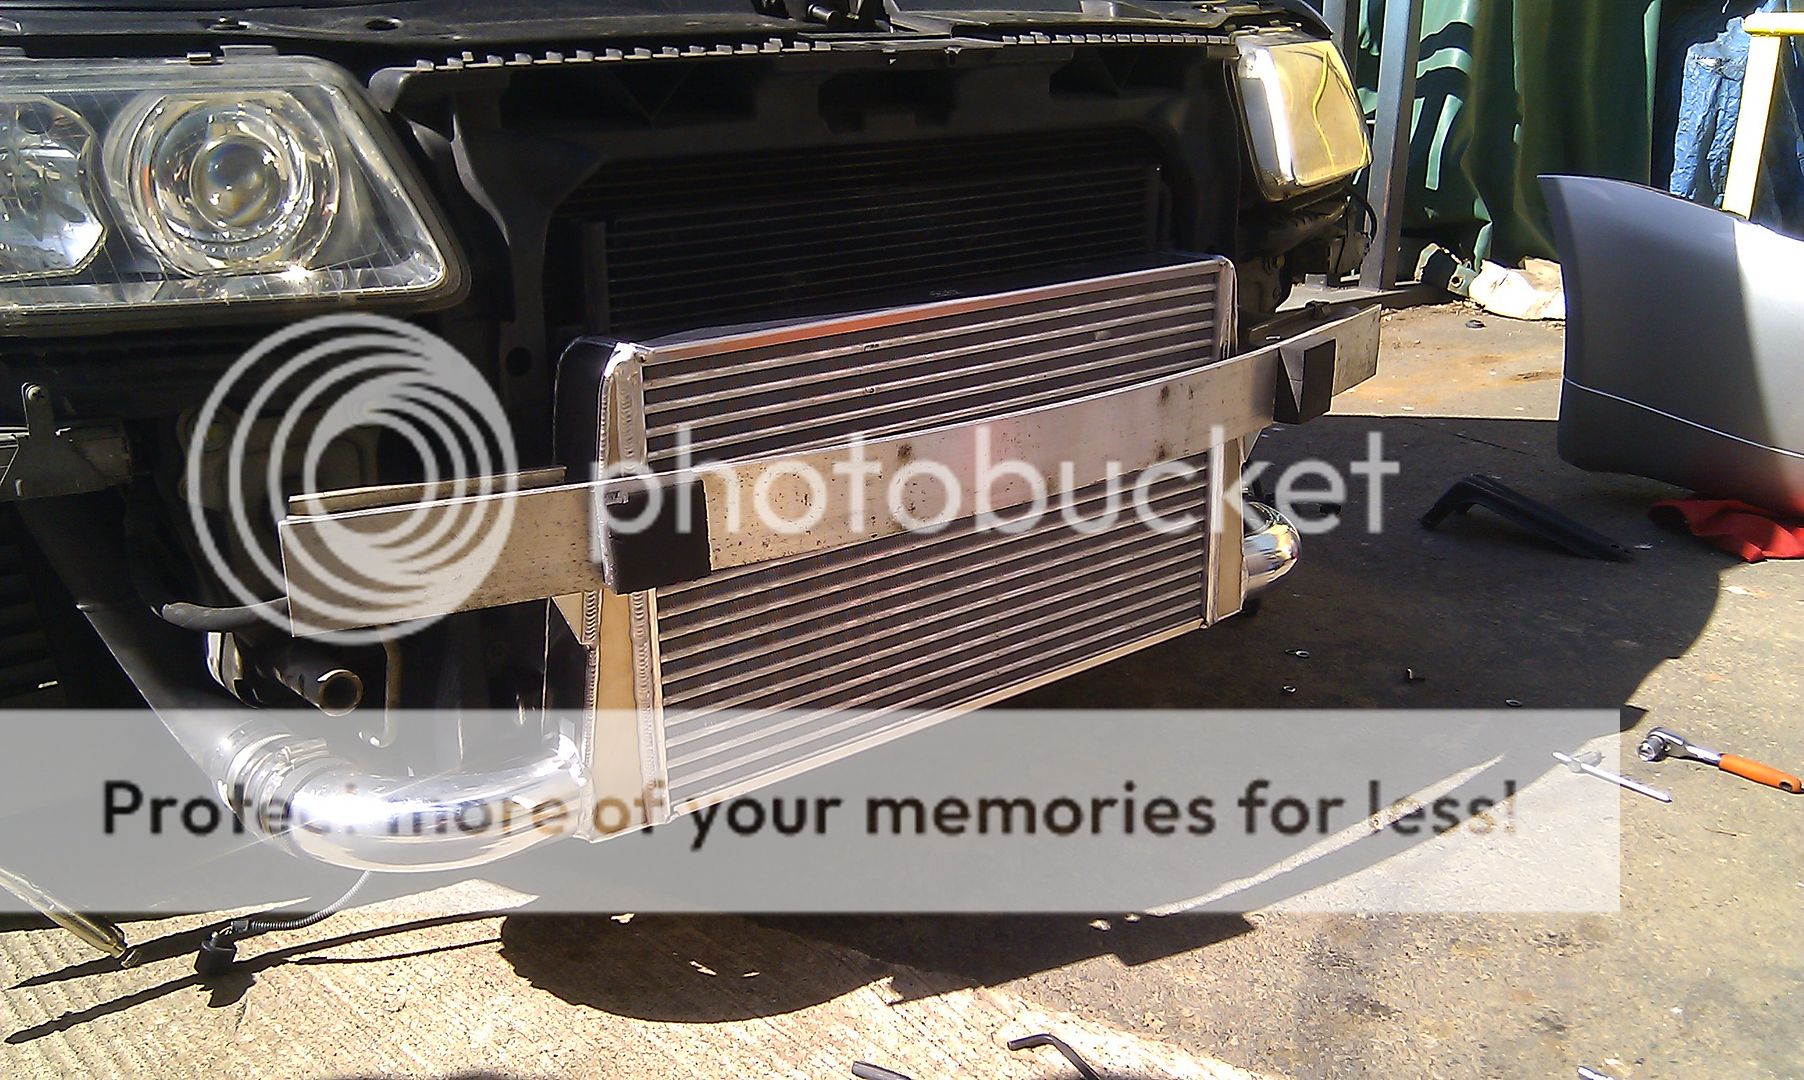
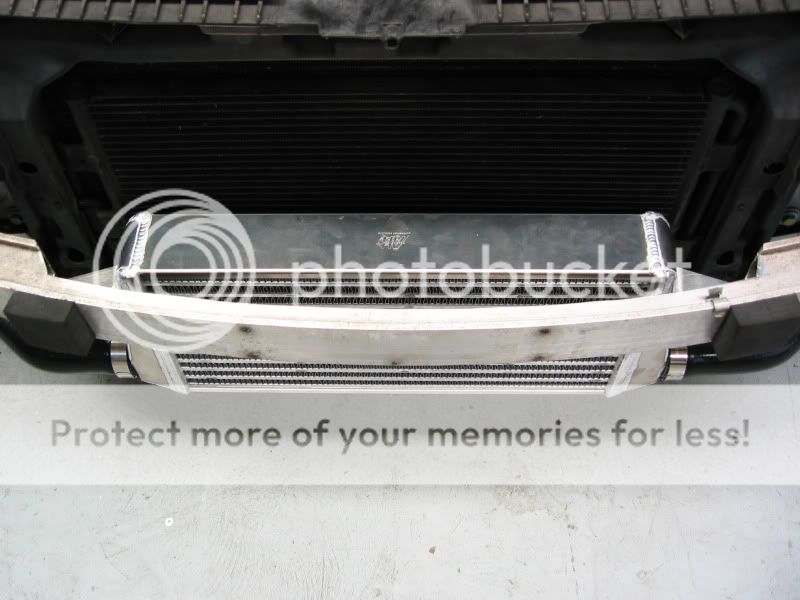
A week later I went over to AH Fabs workshop to fit the new FMIC.... was impressed to say the least... the crash bar needed a little extra trimming as the new FMIC is wider as well as taller... same depth as before though..
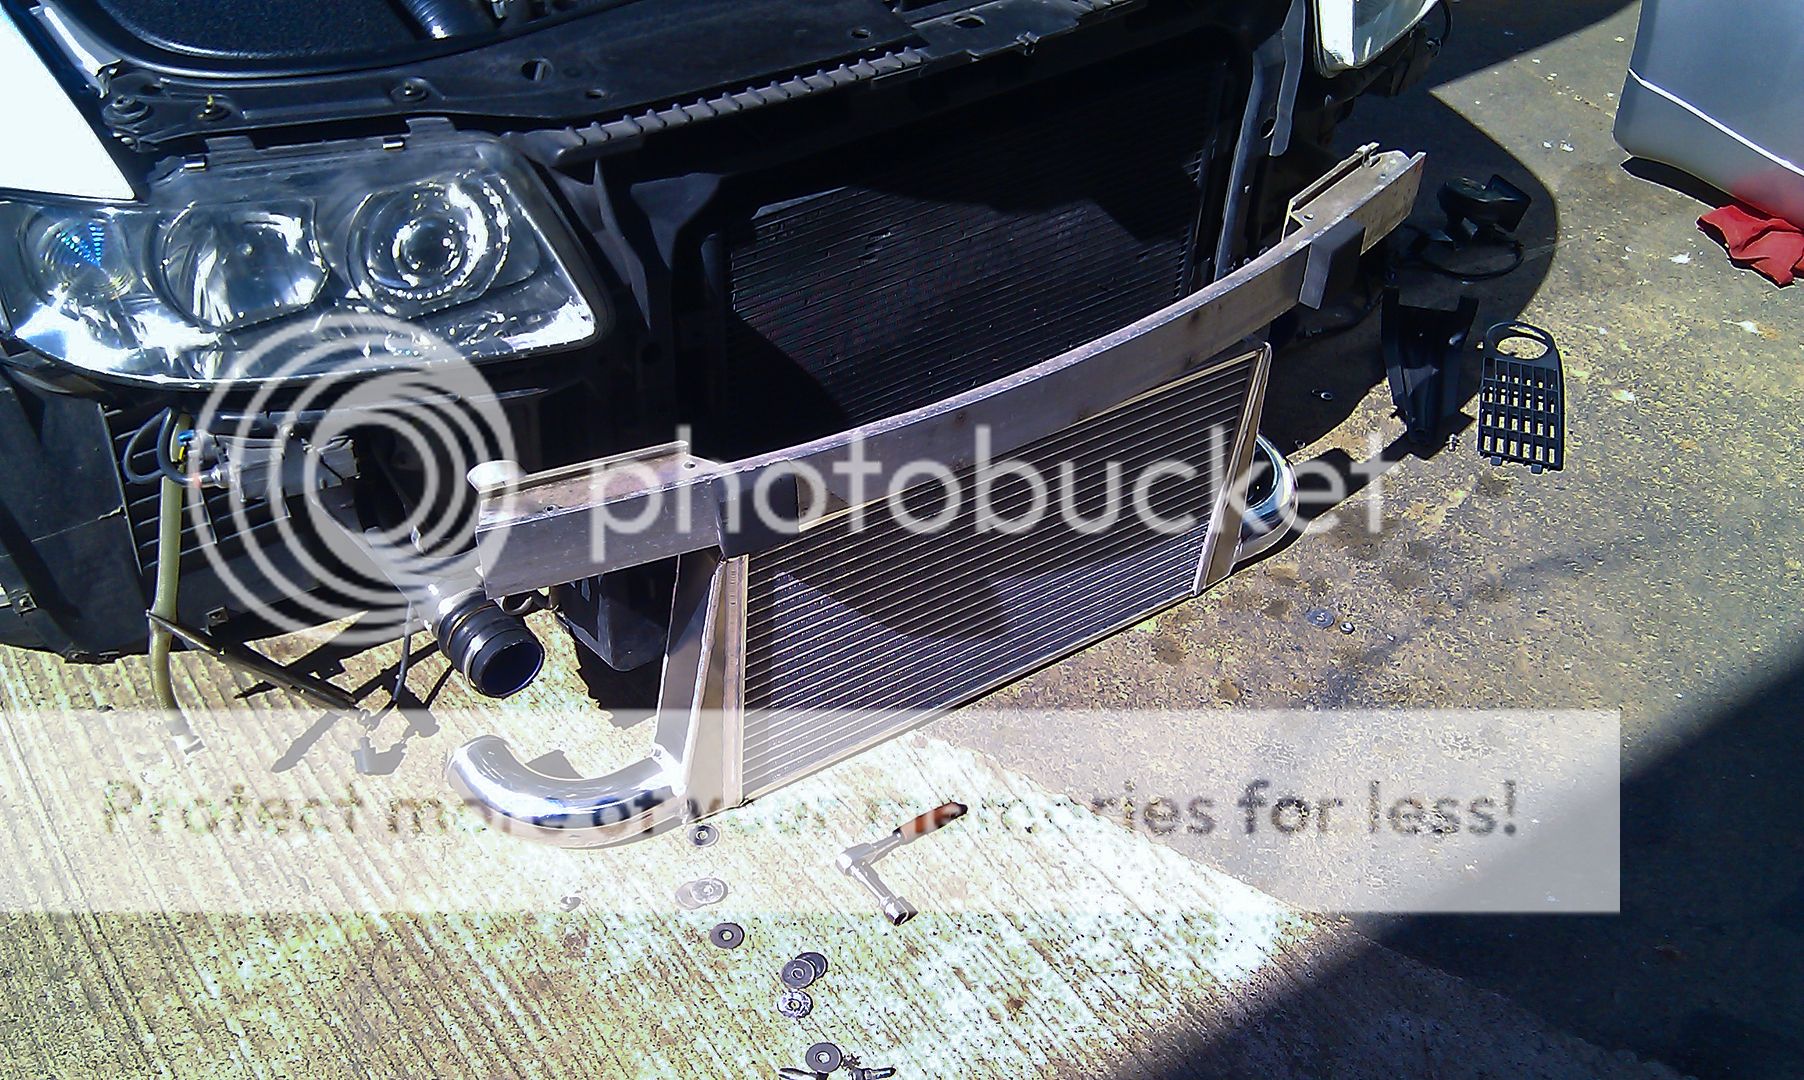
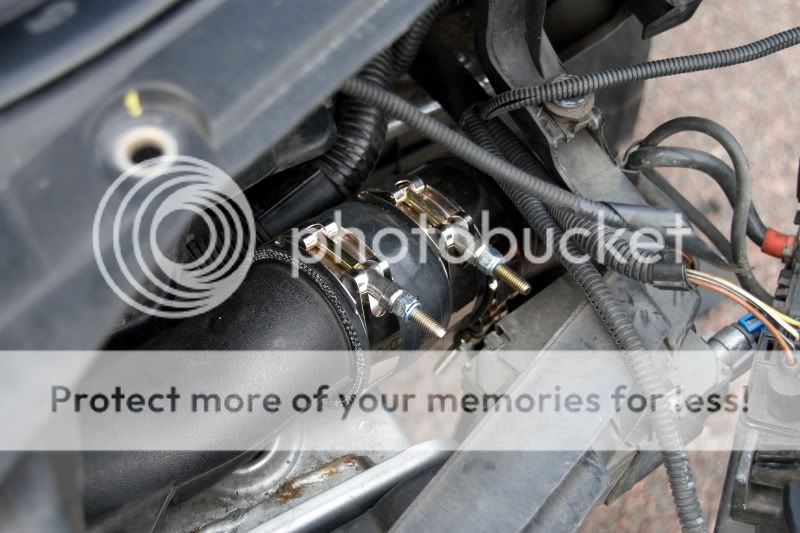
I had already changed the pipework on mine for better flow... I removed the original pipes a while back when we welded on the 60mm bends to the original... I now have alloy pipes joining the first silicon top hose to the FMIC (seen below with the original FMIC)
For anyone else I have sinced fitted the same FMIC to another S3 using a couple of 63mm alloy 90 deg bends and a couple of silicon 63mm 90 deg bends using the OEM MAP sensor tube so there is no need to go to the extent of fabricating the stuff I have...
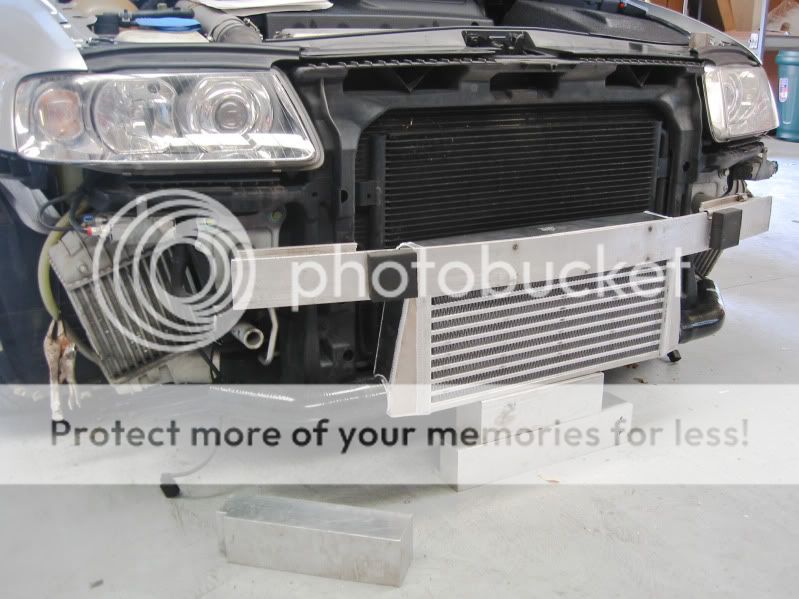
Here it is fitted...

We have since run the car on the dyno and the spike has gone with there now only being a couple of psi drop which is to be expected.... I don't have a graph handy but when I get the car on the dyno again I'll try and sort something out...
This updated V2 AH Fabs FMIC is available now... give AH a call and ask for Lars for current pricing...( AH Fabrications - Contact Us)... pipes to join it all together are now simpler (2 x 63mm 90 deg alloy bends and 2 x 63mm silicon 90 deg elbows plus clips)
For reference I have still included details of the original AH Fabs V1 below but would recommend the V2 over this all day long...
<tuffty/>
Having gained a little more experience and exposure to various cars running all sorts of different intercoolers I am now of the conclusion that the AH Fabs V1 I helped develop with its 51mm inlets is not something I can recommend using anymore... the core itself is ok, Bill is using the core on his Lupo thats running best part of 370hp but with 63mm bends welded on instead of the supplied 51mm outlets... the 51mm outlets were a compromise to get the cooler to fit nicely behind the bumper retaining the fogs but I have since developed the AH Fabs V2 which is not much more expensive and a far superior intercooler and of course there are the 'wellycooler' variants one of which can be supplied with 63mm outlets rather than the traditional 76mm ones...
For this reason I have moved this first post around moving the AH Fabs V2 to the top as this is the one to go for out of the two....
After a lot of changes and further upgrades to my engine I discovered that on a bigger turbo setup the original AH Fabs V1 FMIC is a little out of its depth...
The plots below show the pressure drop and the initial spike as the turbo comes on boost and the airflow backs up while it finds a way through...
The orange line in the boost graph is pressure measured at the turbo and the rest are measured at the manifold... as you can see there is a huge spike thats not emulated at the manifold... the rest is the pressure difference between turbo and inlet manifold which equates to around 6 or 7 psi... this is quite a bit
Bill and I made some changes to the FMIC to try and sort the problem and increase flow potential by cutting off the 51mm ends and welding on 60mm 90 degree bends... the bends were used rather than just 60mm stubs as a 60mm silicon joiner would not fit in the gap in the bumper...
Sadly while this improved things a little it was clear it wasn't up to what a GT30 will throw at it especially as I upgraded the turbo to a full size GT30 cartridge... so with all that in mind this prompted me to make a return trip to AH and talk to Alex about designing something a bit bigger but that would still fit with fogs intact and not stick out everywhere.
Alex sent me a core they use for the 500+ bhp Ford Cossie's so thats a good start...
..as you can see its a little bigger
Took a bit of faffing to work out what I could get away with etc...
Had to cut off a couple of rows so it would fit ok but managed to get 63mm pipes in which is plenty big enough.
Took the results and the core back to Lars who works for Alex... the guy really knows his stuff and is a brilliant fabricator... especially seeing as he managed to understand everything I wanted to do... result lol...
A week later I went over to AH Fabs workshop to fit the new FMIC.... was impressed to say the least... the crash bar needed a little extra trimming as the new FMIC is wider as well as taller... same depth as before though..
I had already changed the pipework on mine for better flow... I removed the original pipes a while back when we welded on the 60mm bends to the original... I now have alloy pipes joining the first silicon top hose to the FMIC (seen below with the original FMIC)
For anyone else I have sinced fitted the same FMIC to another S3 using a couple of 63mm alloy 90 deg bends and a couple of silicon 63mm 90 deg bends using the OEM MAP sensor tube so there is no need to go to the extent of fabricating the stuff I have...
Here it is fitted...
We have since run the car on the dyno and the spike has gone with there now only being a couple of psi drop which is to be expected.... I don't have a graph handy but when I get the car on the dyno again I'll try and sort something out...
This updated V2 AH Fabs FMIC is available now... give AH a call and ask for Lars for current pricing...( AH Fabrications - Contact Us)... pipes to join it all together are now simpler (2 x 63mm 90 deg alloy bends and 2 x 63mm silicon 90 deg elbows plus clips)
For reference I have still included details of the original AH Fabs V1 below but would recommend the V2 over this all day long...
Finally got around to sorting the pics so here we go...
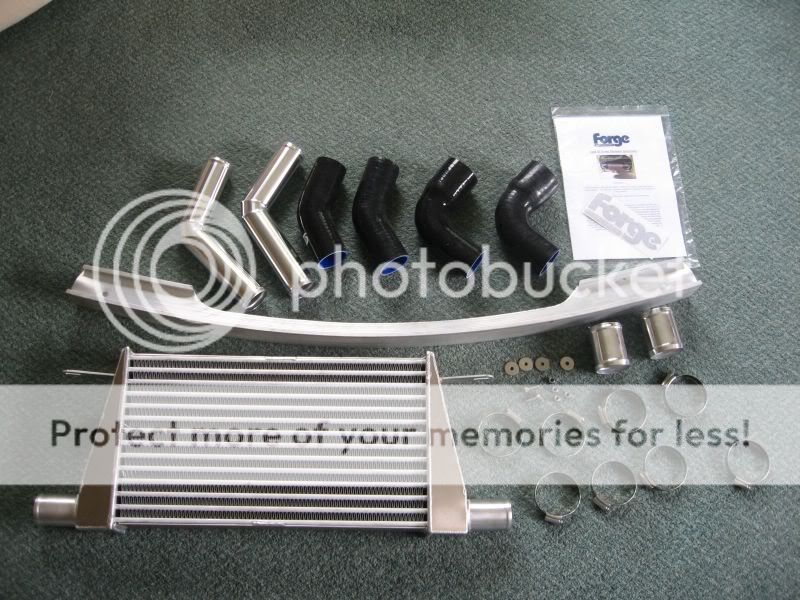
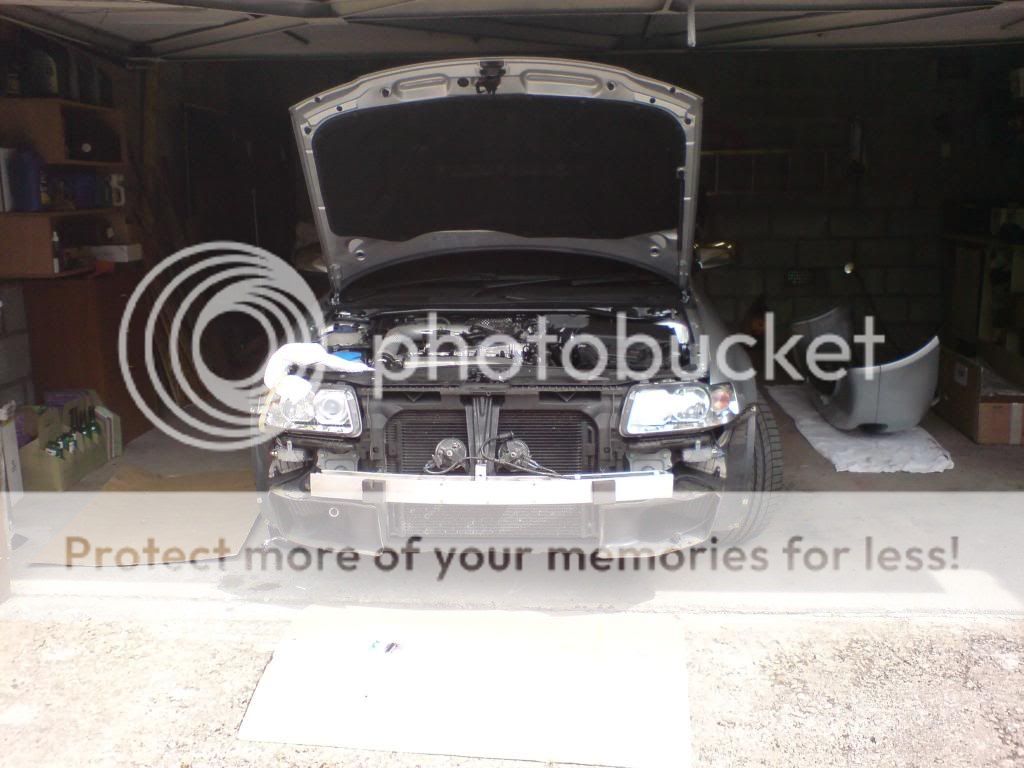
I wanted a FMIC for my car and initially bought a rather large ebay one. This wasn't going to fit quite how I would have liked as I wanted to keep the fog lights and not have to modify the car too much.
I couldn't justify the expense of the Forge kit (as nice as it is) so I looked for an alternative. A previous FMIC discussion on ASN prompted me to get in touch with Alex at AH Fabrications (- A H Fabrications). We chatted about the design and I sent him some links to other discussions on this forum and whatever else I could find and in a few days he produced this:
Alex only wanted to supply the intercooler so I sourced the rest of the hoses and pipes myself. For the S3 you will need:
2 x 51mm 45deg silicone elbows
2 x 60mm to 51mm 90deg silicone reducers
2 x 51mm 45deg aluminium pipes
2 x 60mm aluminium hose joiners
[FONT=&]1 x 60mm hose piece to replace short piece off MAP sensor tube[/FONT] (optional)
I sourced mine from ebay here: [FONT=&]eBay My World - mrsilicone
At the time these came to just under �100 posted.
You will also need to buy some clamps, I went for T-Clamp type although you could use Jubilee type clips. I sourced these from ebay too:
eBay My World - jap_partz
Sizes I got were:
[/FONT][FONT=&]6 x 54mm-62mm clamps
6 x 67mm-75mm clamps
I also bought an extra 67mm-75mm and a 73mm-81mm clamp as I am replacing the top hoses with silicone ones. This lot cost me shy of �30 posted.
<EDIT>I have since changed from using T-Bolt clamps as I have found them to be difficult to get the right amount of tension on them... they will either leak or crush the alloy tube... my preference these days is to use JCS Hi-Grip stainless steel clips available from Badger5, Forge or eBay... I have used these and only these for some time now and they give better feedback as to when they are tight (and avoiding the click of death) and do not crush pipes as it did on mine and a few others I have seen since... I use 50-70mm clips for 60/63mm silicon and 45-60mm clips for the 51mm bits... although these days I would suggest getting the AH Fabs V2 cooler over the V1</EDIT>

I used the Forge kit fitting guide to give me an idea of what I was up against. First thing you will need to do is cut a section out of the crash bar. I used an angle grinder fitted with a 1mm cutting wheel (again sourced from ebay). I marked the crash bar both sides more or less half way across the bar (centre). I made my measurements based on the ebay cooler which may be a little large for the AH one. I would advise offering the AH Cooler up to the crash bar first and mark up where its going to fit to be sure. Measure twice, cut once....

As Alex nor I had an idea of fitment for the brackets, we offered it up to the car to see what we could do.
[/FONT]
[FONT=&]
[/FONT]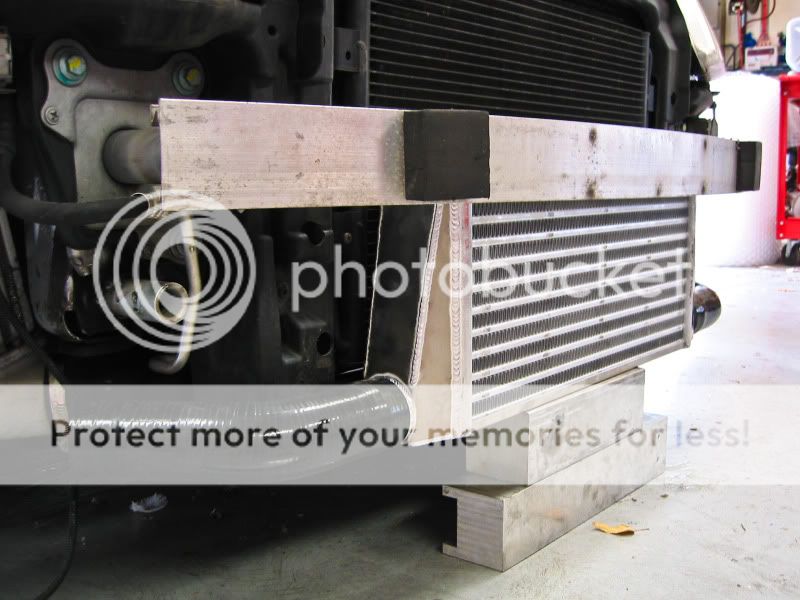
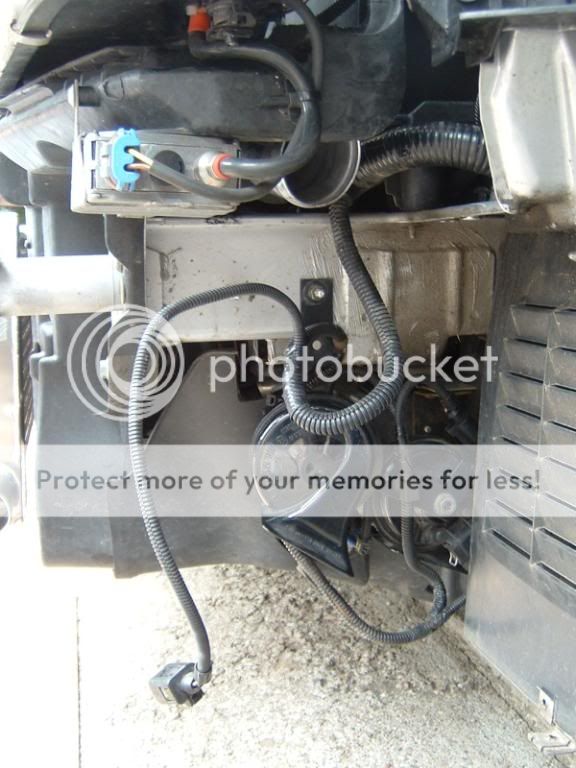
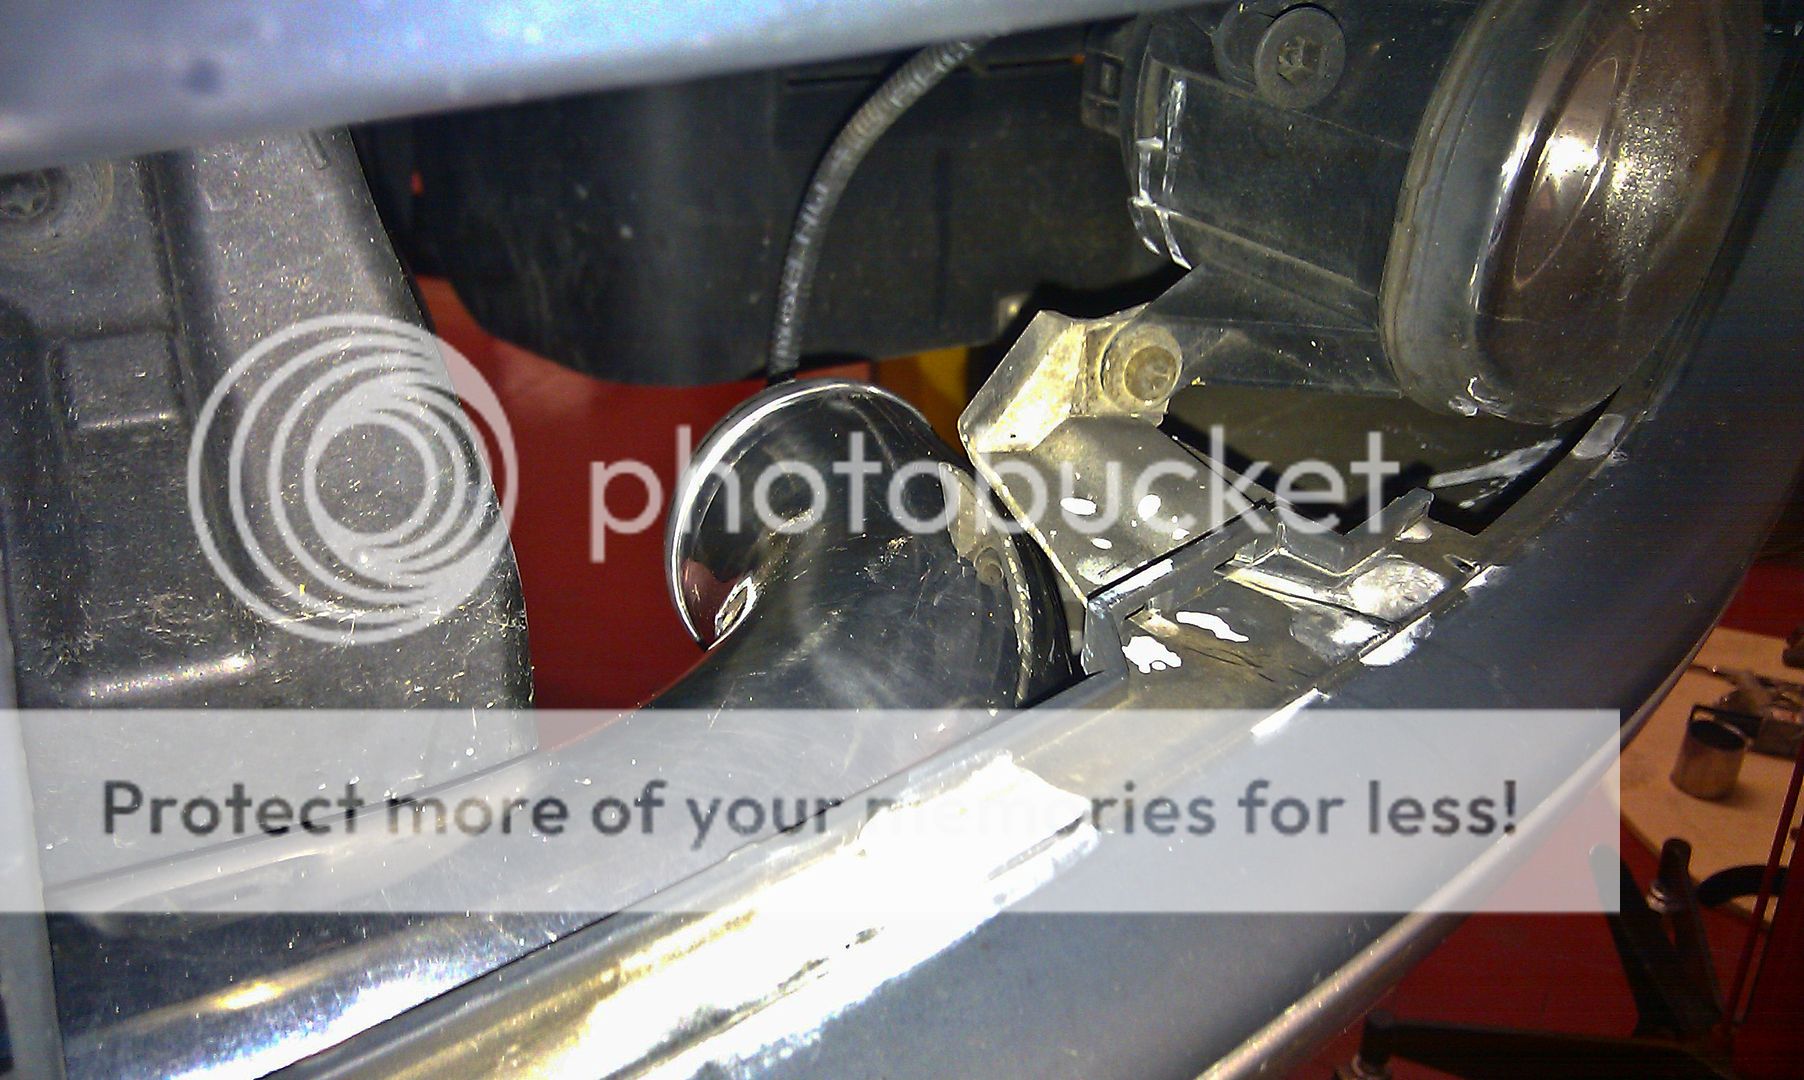
For those that have asked about retaining the drivers side SMIC, the picture above kinda shows its a lot of work to do so, you may be able to fabricate a pipe but TBH its really not worth it so remove the SMIC's.
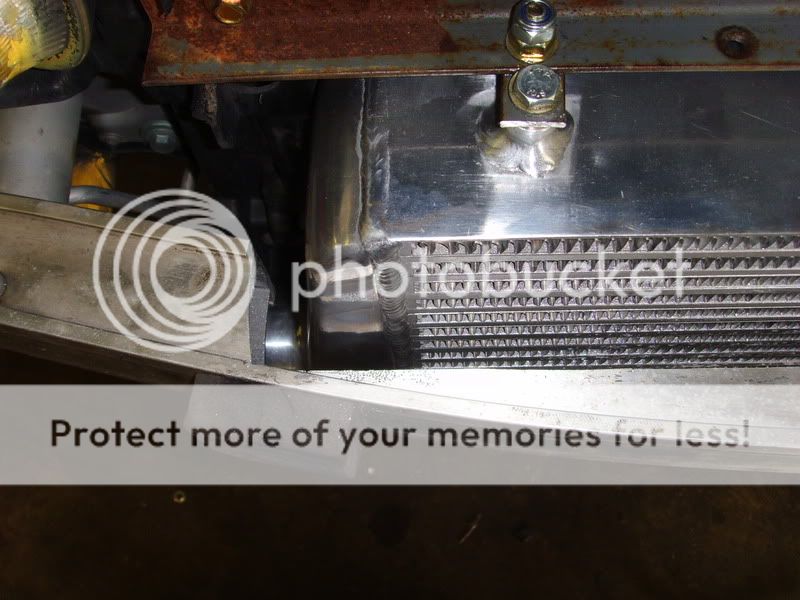
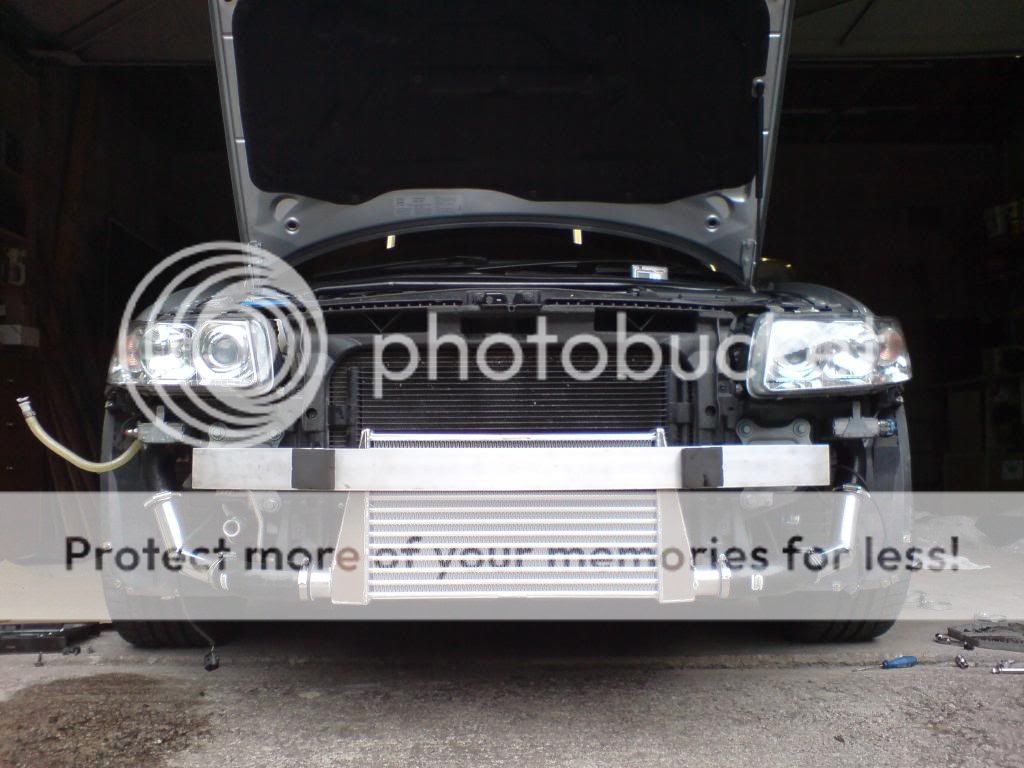
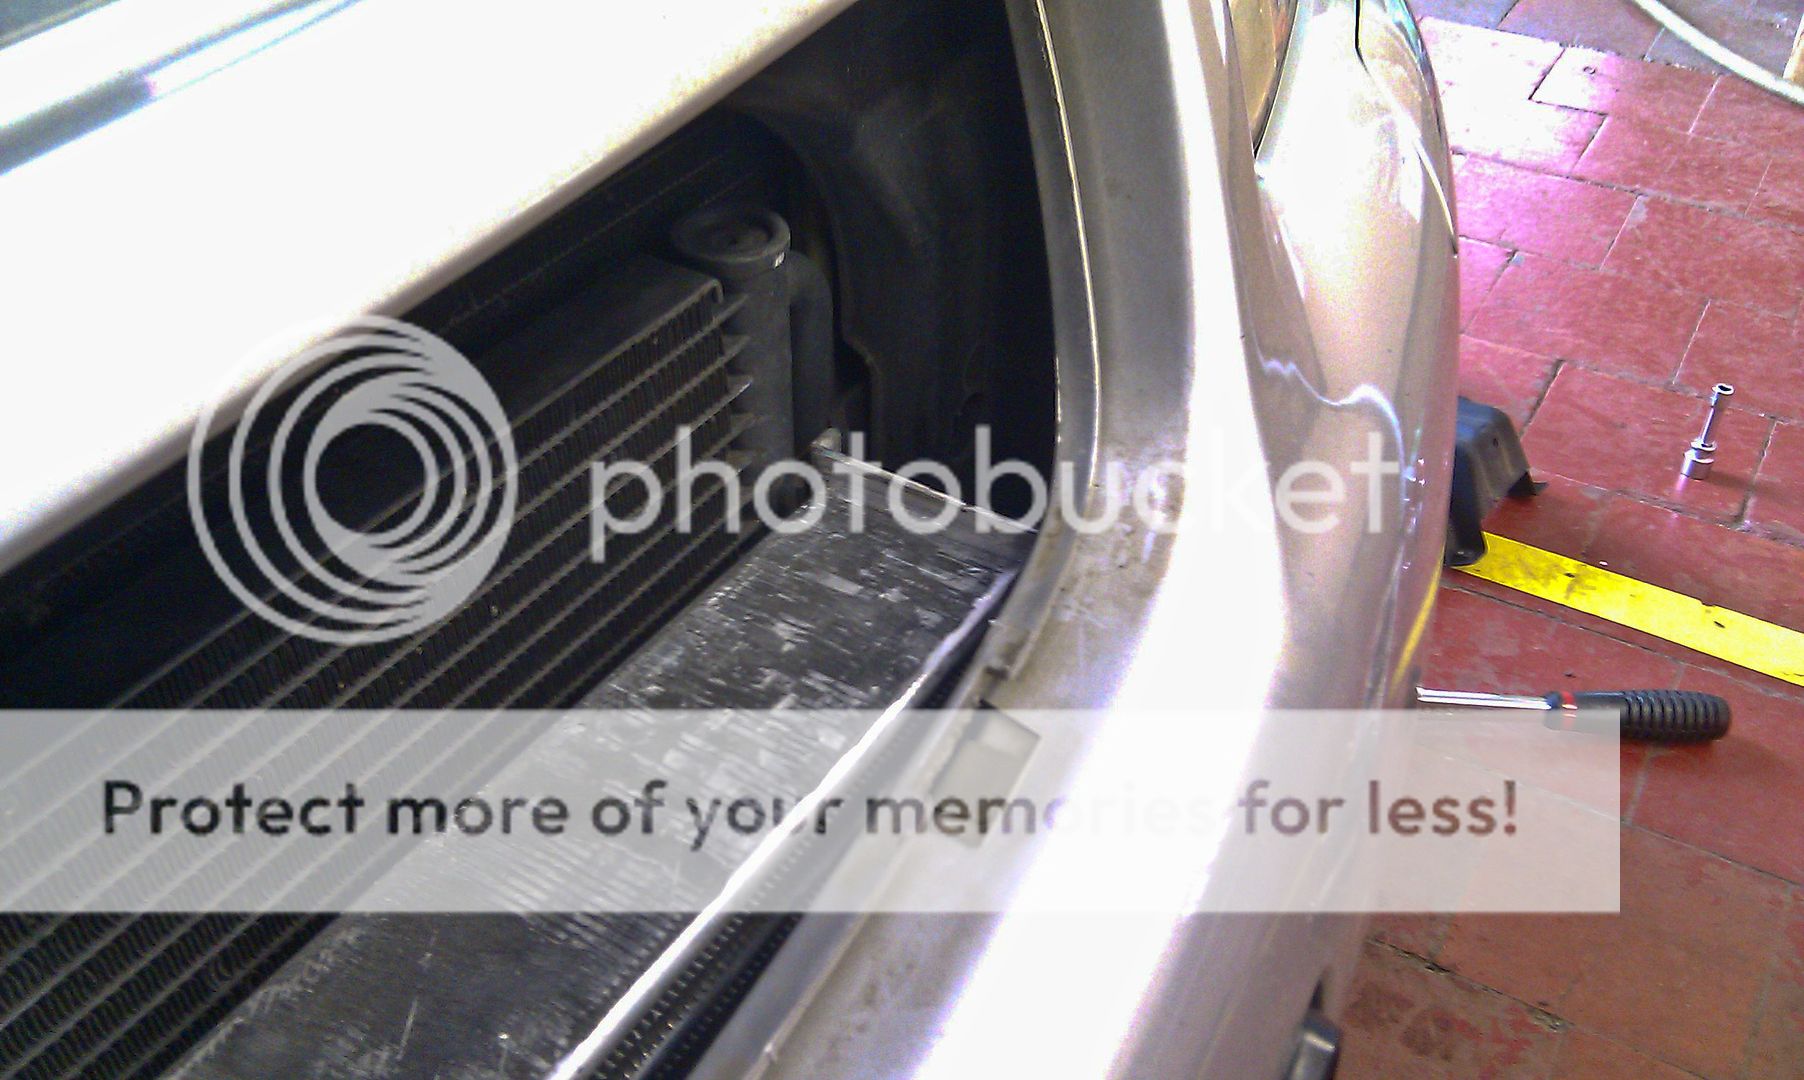
The cooler has 51mm pipes on the end tanks which is smaller than the 60mm piping the S3 normally has. The main reason for this is to allow it to fit while retaining the fog lights.
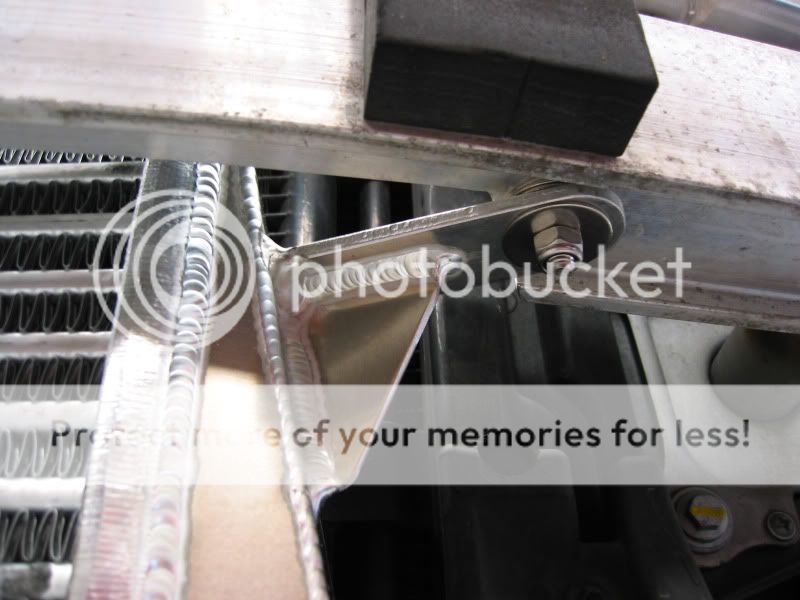
After a bit of test fitting with the bumper on and off a couple of times. We decided to mount the brackets so it would attach to the underside of the crash bar. This allowed us to adjust the final fitted height using washers.
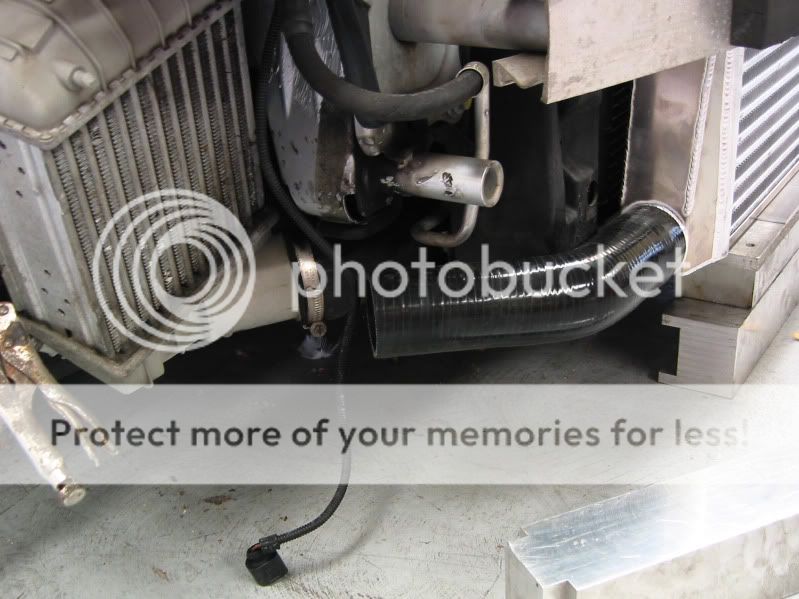
The hoses coming out of the cooler (51mm 45 degree silicone elbows) were trimmed a bit to fit better, the edge of the bend was made to line up with the corner of the slam panel were they fitted.
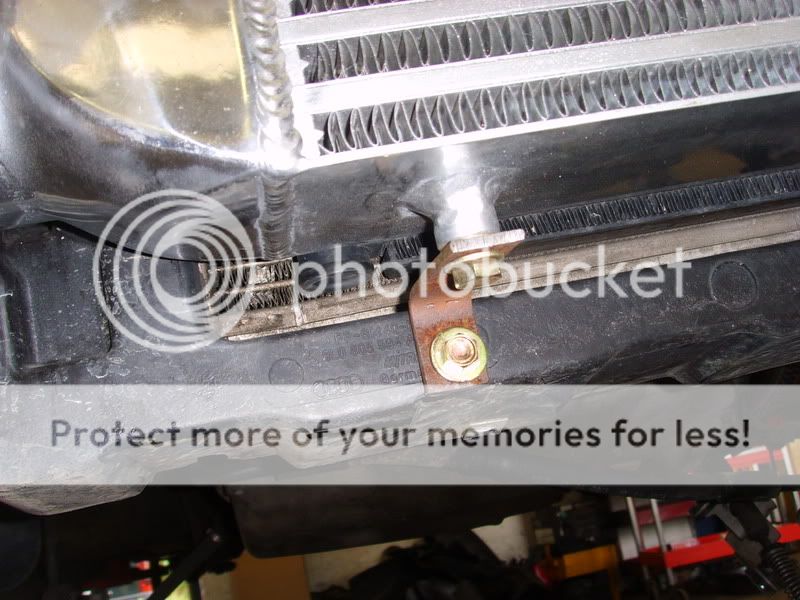
The horns were removed and fitted where the old passenger side SMIC bracket fitted. The Forge fitting guide shows you best how to do this but I also had to put a slight twist in the bracket at the top to angle the horns in a bit to clear the pipework. Forge fabricate thier own pipes so I guess they don't have that problem.
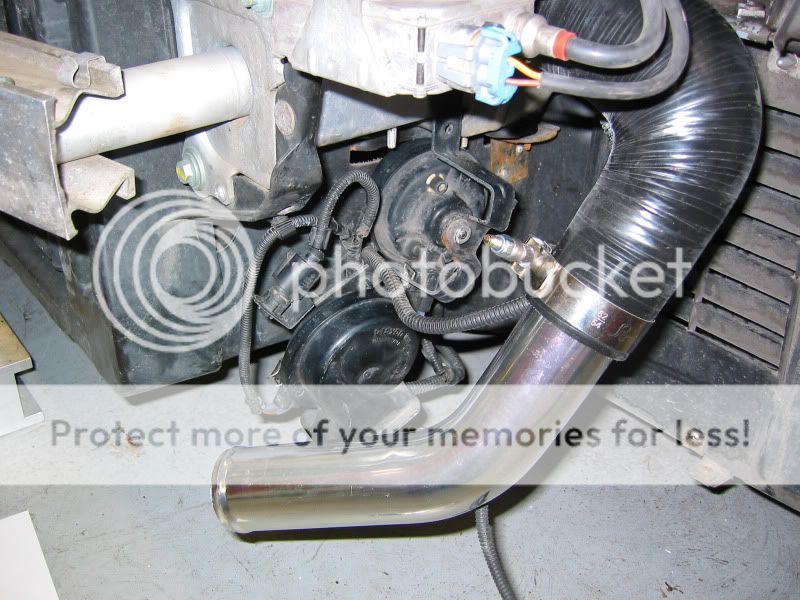
Hoses fitted up to the MAP sensor tube:
Hoses on the drivers side:

Watch out for the lights on the bolts if you get these clips.
Final fitment of all the hoses:

Top view showing the cooler against the cut of the crash bar
Top hoses, drivers side...

Passenger side was a complete **** to fit. I ended up removing the battery and battery tray to make sure it was all clamped up properly.
Alex then plugged in his rather groovy leak tester which was just a balck alloy cap on one side of the pipework and the other had a tyre valve in it. Pressurised to 10psi and leaked like a sieve so went round the clamps tightening them up and eventually with 30psi in the system, there were no leaks... YAY!!
Word of warning, T-Clamps feel totally different when tightening... you think they are tight enough and they simply aren't. You can also crush a pipe or cut through a silicone hose without much effort too but they are the best at keeping the hoses on once tight.
And finally...

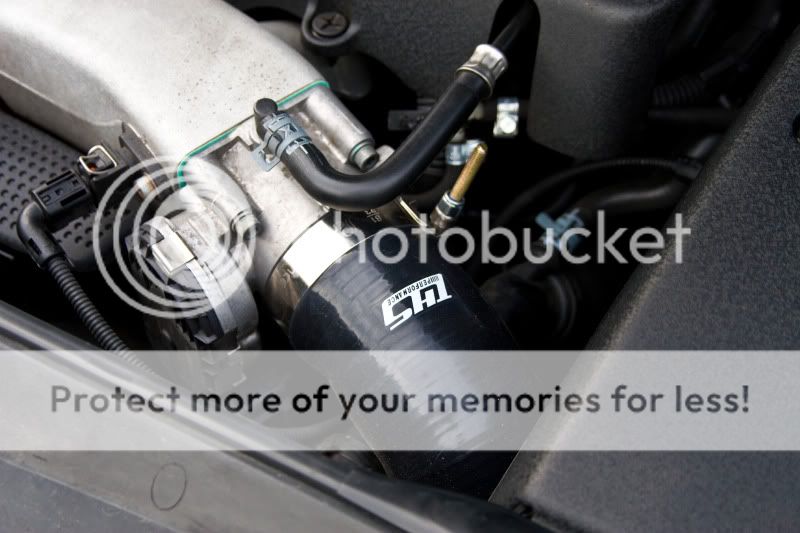
I have since sprayed the FMIC matt black and its real stealth
As for how well it works, I logged the air intake temperatures (AIT's) on the SMIC's with an outside temp of 16 degrees and was getting a steadily rising off bosst temp of between 50 and 58 degrees with an on boost max of 70 degrees. With the FMIC on, I logged with an outside temp of 18 degrees and got 35 degrees max under boost with an average of 27 degrees. I also logged in the recent heat wave, 28 degrees outside, average of 35 degrees and maxed at 45 degrees.
All in all a result, saved money, kept fog lights, low AIT's. As a result, the car feels better to drive all the time rather than spurious performance depending on the heat outside and how many bursts of the loud pedal I had given it.
Alex is now selling these from his website here...
A H Fabrications
Do yourselves a favour and get one
<tuffty/>
Last edited: