engine removal advice

danny_dj3

Registered User
Joined
Jan 8, 2020
Messages
273
Reaction score
145
Points
43
Location
Saddleworth
hiya all, as most have probably read, my car has started to smoke after being run a little, usually once its got up to temp but as of yesterday it seems to be smoking a little at lower temps too. initially i thought it would be valve stem seals, as the way its happend seems to point towards it, but after a compression test at the garage, i have been told its the rings.
compression sits at 50-50-60-70.
the car still runs pretty smooth, but i wont dare kick it as i dont want to damage the car more than it apparently is. its also used very little currently.

bought TJ's engine and the plan was to recondition the head and throw it onto my car as a 'test' to see if im able to do the bits that are needed to be done and fix it without totally blowing the car up lol. then at my leisure rebuilt the bottom end with new parts and at some point get around to doing a swap. this obviously is only if the head swap fixes the issue of smoking [but its something i have been itching to do anyway]
somewhere in TJ's thread, it says that the 2nd cylinder has dropped compression, i think he said to 0.9bar with the others all sitting around 1 bar. one of the thing he noted too was the dipstick would pop out and spray oil everywhere on higher rpm.

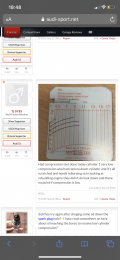
would a totally blocked puck cause this to happen? theres a pic of it in the original post i put up regarding 's3 boost issues' but would be interested to hear peaples thoughts. my way of thinking; blocked puck - nowhere for excess pressure to escape - path of least resistance - dipstick ?

I have had a scout about for a few days on the forums looking for a good thread about this but being a bit of a newb, im struggling to find the correct way ie; bonnet off lift out, subframe off drop out, slam panel off pull out you get where im coming from :p
things like the gearbox, keep it on or remove it, the transfer box removal [heard its a ****** lol ]

im in no rush at the mo, as i intend on doing the head first and seeing where it goes from there, plus im missing prob half the tools to actually get the engine in/out anyways. I'm just looking for any helpful advice that could help.
there is one other thing i noticed a day or so back, the forge divertor valve seemed to be ticking and that i have utterly no clue as to whats causing it.

ribe bit turns up today so i can get the head off the spare and check it out finally :D

cheers all

danny
 
Here the results from the test
In psi it’s 58,130,145,145
 

Attachments

  • 207D3CA6-C509-4629-85EA-39808D50E75F.png
    207D3CA6-C509-4629-85EA-39808D50E75F.png
    1.9 MB · Views: 262
  • Like
Reactions: danny_dj3
ta mate, i was going to peck your head about the pressures again ;) thats odd, i mean im defo no pro, but the cylinders dont appear to have any damage whatsoever, the honing is still visable and the bore is smooth to the touch.


So anyways, the ribe bit turned up and i set about stripping the head off.
cam cover off, checked the cams, appear to have slight damage to 2 or 3 of the lobes, are these now no good or can/should i run them?
Cam 1

Cam 2


cracked the head bolts off in the correct sequence, not as tight as i had assumed, and removed the head.
Head off


and the head itself
Head off 2


so on i went with inspecting and checking over what i could. found this :(

Mm difference


yes, its gnome mooning me while i work lol. quite a difference in piston height on cylinder 2. all the others match height at tdc.

thoughts appreciated here please.

so after that, thought sod it and cleaned it up a little.
Head1

Head 2


Please dont be knocking my makeshift engine stand as its about all i currently have to hold an engine, plus it was TJ's idea LOL. yes its a wheelbarrow but its done the job as up to now. waiting on a proper one to be delivered.
Been chatting whilst doing this with TJ for most the afternoon, and i think the route im gonna go is order some more stuff, head gasket set, valve stem tool, basically recondition the head myself and throw it on my engine in the car. i dont think it needs skimming, but im aware of that too, so i might have my mate double check it over for me and let me know whats the best route to go.
bearing im mind that im not going balls out power; i just want my baby running right so im not going upgrade route with this, its going to be using oem parts as i have no need really to go for more power.....yet. the bottom end thats in the garden i will prob get bored out and go forged further down the line at my own pace.

been a fun afternoon :)
 
well fml. if it aint broke, dont fix it; if it don't need cleaning, don't clean it.

jinxed myself with the cleanup no doubt.

so set about the bottom end today after meeting up with TJ for some advice and a natter [can't shut me up eh mate ;)] grabbed a spring compressor and some lapping paste. got home and got to getting the oil drained, sump off and pistons out.

here's the pics.

piston number one, the one that was low comp.
Ooohshit


the bore, as pointed out in TJ's trip to awesome gti.

Scratch


this is a tiny, tiny little defect thats barely noticable with a thumb nail. needs sorting tho.

Ring 1


ring number 2. a few bits fell out as i removed the piston, the rest i had to pick out as the entire ring was fractured and squashed it nice n tight. only picked it out for fun, i know the piston is trash.

Ring 2


top ring. as you can see, its warped/twatted out of shape, the shadow shows how much by.


Oil scraper ring


the oil scraper ring is tight and has damage. you can see the difference on the ring next to it.

CHEESE RODS


and piston number 2. named cheese rod after decimal tenths opinion of em.

so all in all, the pistons were never really going to be reused so no issues there. the block is at some point going to be rebored so again, no issue there. the head is going to get the seals and valves redone soon so thats all good too :)
im happy tho as the block looks in really good condition so its a project i dont really have an need to rush at.

i am amazed at the rods being sooooo bad tho, i have seen other pics of them bending, i know this isn't bad by a long way, but still amazing to drag it out and see the mess.

so after this, and the report back on how the engine was when it was checked, im a little worried about going deeper on my car as im sorta scared of what im going to find.
 
I still can’t believe it had I bent rod I never noticed anything other than the blow by
 
  • Like
Reactions: danny_dj3
I can't believe it was running at all?? . Looks like that engine has had a hard life. Cams don't look to good on the lobes.
 
i haven't checked my head yet, as the cars running and other than the smoke, appears to be ok but it will be one of the first thing i will be checking after the seals.
It was mentioned about going for n/a cams, and i have heard they help the engine breath a little better, any things i should be on the lookout for if i go this route?
 
The wear on the cams is fairly typical and looks like 99% of the cams I have ever seen on engines I have worked on...

<tuffty/>
 
  • Like
Reactions: MPH
Time for a VR6? MWAHAHAHAHAHAHA!!! ;)

<tuffty/>
 
  • Like
Reactions: danny_dj3 and Tj 0785
Are they useable still?
Arguably yes... you can look around and try and find a 'better' set but I doubt you will... even my cat cams had a little pitting on them... nature of the beast

Check the tops of the followers as that will give a good indication on if they are causing issues... if there are odd wear marks on them then could indicate a worn head or that the cam lobes are starting to wear excessively..

Check the cams in the old engine... you might find they are less or more worn...

<tuffty/>
 
well the cam tensioner tool turned up already, cheers superkarl, so im going to get some warmer clothes on and go outside to strip the cams off [weathers crap atm]
if all goes well, i will pull the valves and start cleaning.

funny you should mention the vr6 build, it was a topic of convo the other day lol

expect pics to follow ;)

i haven't checked the cams in my engine yet as its still being used, i will probably look into it over the next week or so.
 
done. cams out, valves out.

Marking


every one has pretty much exactly the same amount of wear. still good or a no-no?

Valves

intake valves are pretty much spotless bar a few little hard deposits that i have yet to soak and remove.

Exhaust

theses however look like they would need a grinder on them to smooth the faces off. pretty well coo ked. is it worth considering throwing a new set on the exhaust side or is it a full set job?

so, them keepers.....:) they look like they are going to be fun to get back on. tried a test and as long as the valve has oil on it, they seem to stick pretty well. i used a flat magnetic driver and gently placed one on the top and it dropped in and slid to the underside of the valve. lol, to much dismay from the wife, i stripped the valves out on the kitchen worktop with the head stood up on end.
couple of questions,

whats good to decarbon the ports, the exhaust side is foul and the intake just needs a good clean - brake cleaner?

is it good practice to replace the guides? these seem fine, the valves dont stick or feel loose when i checked them. is this all im looking for or are there other symptoms?

the cams seem to have little bits here and there the same as the pics above, no cracks and no obviously nasty bits. are they still usable or should i be looking to replace them.
 
You could get it in a parts washer or acid bath when you get the head skimmed , I used brake cleaner for. Cleaning the springs, and caps n things, , if planning on more power down the line than it’s worth changing them for super tech inconel exhaust valves, I didn’t change my guides as the guy who skimmed the head said they were fine
 
  • Like
Reactions: danny_dj3
another day in the garden. more bits cleaned and hopefully usable.
i didnt post up a pic of the exhaust ports yesterday, no2 which was the bent rod looked like this
Ugh

the rest were pretty clean with minimal carbon build up.

Exhaust


gave the exhaust valves a clean down with fine sandpaper for the rough stuff, followed by a rub down with a scotchpad [ in a drill ] then a polish up with compound. still got light deposits on the face of em, but 100 times better than before but pitted tho. would these be reusable?

Seats


the seats appear to be in pretty good condition and i think they dont need to be lapped, correct me if im wrong tho. in comparison to how they were, its miles different. i guess while its out, its easy to do so if its recommended then i shall be hitting ebay for a lapping kit.

i'm now pretty confident that i can referb this head up, and do a swap out to my car. i dont need to go silly with this one, but still doing the full head gasket set inc stem seals as its pointless doing a half ***** job.
 
Should always lap valves in in you get a chance too.... use a very fine paste

<tuffty/>
 
  • Like
Reactions: danny_dj3
ta mate, i will do them then.

got another question, and its prob going to come across as a bit of a daft one. the whole compression test has got me thinking how the hell have i lost so much compression across all the cylinders. to be told ' its ya rings pal' to me seems a stretch, i might be wrong /probably am, but is there anything else it could be, and all 4 at once??

the only things that have really raised an eyebrow with me is,

the amount of oil on the back of the head - cam gasket most likely

seen little puff's of smoke on occasion from the back of the engine - suggestive of possible head damage/head gasket? - prob oil on the manifold tbh.

last week i noticed a very slight tapping from the divertor valve, which i swapped back to the original oem one, this stopped the ticking pretty much straight away, however could that be a more sinister thing?

just picked the daughter up from work, maybe 2/3rds of a mile, but the time i had got there, the car was already smoking so i have now decided its off the road full stop.
am i wasting my time swapping the head and should i be looking at rings straight off?

sorry for being a pain, but i guess till the head comes off im not really going to know.
 
so, more progress. lapped all the valves by hand as i was informed that using a drill is a defo way to knacker them up, which does make a lot of sence.
pulled all the stem seals outta TJ's head, lol, and then cleaned up the guides. fitted new seals and replaced the cam springs this afternoon, all back in the exact order they came out. but got a little problem as one of the spring seat washers seems to have upped and left the building. just been on the net trying to source new and apparently its a discontinued part. would it be ok to use one out of my head as a replacement or not?, just a thought.

hopefully going to be taking the head off this weekend and should have a better idea whats caused the drop in compression, so taking bets on;

1]rings

2]head gasket

3]stuck/bent valves

4]all of the above :)

i'm gonna go for rings.

06A109629 is the part number for the washer, but all i'm finding is discontinued. any ideas anyone please?
 
you on about the thin washers under the exhaust springs? if so you can reuse one of yours if you wish

<tuffty/>
 
yeah, they appear to be for sale in the US, but thats gonna take a while to turn up. I will grab one from the other head when i remove it then, i wasn't too sure if i could use em.
cheers :)
 
found the little ******* hiding out in the garden, my fault for jetwashing the head no doubt.

1 torque wrench turned up, awaiting another, also awaiting some redline assemble lube for building the head back up. just ordered 2 mins ago new head bolts, cam tentioner gasket n half moon, gasket silicone stuff and some extra brake cleaner.

looks like im gonna be trying to sort this all on my own, head [on my car] should be off at some point tomorrow, and then hopefully the prob should be visable. if its not, then im gonna do a ring test [ apparently 50-50 fuel oil mix poured into a level head ] and see where that leads me. im really hoping its a valve/gasket issue but my luck has been pretty ***** lately so not expecting good news.

only thing bothering me atm is i dont have a jack to hold the engine whilst doing the timing belt so im semi tempted just to get whats bollxed fixed n get it down to the garage n let them deal with that. belt is clean, no real signs of wear and still fresh feeling so i aint sure if its wrong not to change it right now.

got a feeling this is gonna go sideways :/
 
Just use bricks or some wood under it while
You do it, don’t you have one in the s3 boot
 
  • Like
Reactions: danny_dj3
well, not much going on the rebuild till yesterday when the 2nd torque wrench turned up. finished the head off, redline lubed everything up, all lifters back in their correct holes, new stem seals fitted, valves lapped and polished up, cams inspected [ the most damaged were the ones i pic'ed above] and everything torqued down as it should be. plus a good clean out.

I'm gonna go out today and start stripping the car down, its been stood a week now and isn't getting used. My mech mate has suggested doing a test on the rings even if the head and valve look good, his way of doing it is to set all pistons at center and pour a 50/50 mix of petrol and oil into each cylinder and wait and seem how quickly it all drops. the quicker it drops, the more fubar'ed the rings and possibly the walls. this is only his idea before dropping the sump and doing the rings anyways.

Any thoughts on this guys as its not something i have really come across before, i get the logic behind it but i would rather the advice of peaple who know more about the cars.

only thing i can see me struggling with is the belt removal / engine mount. other than that, im pretty sure everything else has been thought about and checked over and over before i start.

I have had a good look through the forums for any pointers for doing this work, but if anyone has any advice in respect to this little job, it would be appreciated :)
 
  • Like
Reactions: Asim1
so todays messing about takes me here;

started to strip away all the stuff that needs to be moved, you know the usual bits, first thing i noticed was the amount of oil on the injector seats. im puzzled atm as to how its got there.

Oil filled injector seats


then a possible issue with the brakes i simply never spotted, right up in the corner this.
Split brake line


so next was to separate the manifold/hotsideturbo-wastegate or whatever its called. really happy to see this.
Bellend fixings


what u cant see due to my awesome photo skills is there is also a nylock nut [yes!!] along with the none standard fittings.

so the antifreeze/header tank has always appeared pretty clean, but the second i undid the fitting on the side of the head, i was greeted with some rusty looking stuff. to be fair tho, when soaked it into a paper towel it was pink n slippy ;)

Soup


Cam wear

well, im not sure about this but my gut says its not good. cams have these markings on them, which to me being a learner here, appear to be burned. am i right with this?
the lobes are in better condition than the other head, as not one of them has any sign of wear/pitting, but this marking makes me wonder.
i also noticed the lack of oil in the gutters, i mean everythings covered albeit lightly but advice/opinions here would be welcomed.

Odd


ok, im confused....all head bolts out nice n clean....this little ****** came out smelling the engine bay up and covered in gunk.

this a prob or am i now more paranoid than before?

Fun

yes, i forgot to drain coolant, my bad.

and ignore the timing belt. it needs replacing anyway.

also pay no attention to the loose bolts on the downpipe. or the one stud in the wastegate thing[ gonna look it up after i post this ;) ] or the ****** massive amount of rust on the block....

yeah my heart sank when this came off, but at least its something to work forward with.


shits n giggles
Seriously

i mean really, this just makes me realise that the guy i bought this off was utterly clueless. as if the rest of the little issues weren't bad, this to me takes the biscuit. hex bolts and a ****** nylock nut to hold the manifold i mean wtf.
to quote when i viewed,
'shes my baby, owned her for 6 years now, no expense spared. fast as ****, blows my mates vxr off like you wouldn't believe '

yeah, i dont think so.


erm. i think i need some pointers here with the route to go, bearing in mind im a sign maker and not that skilled in motors ;)

im gonna order rings anyway, as its at the point where it would be stupid not to do em. bearings too?
not done the liquid leakdown test yet as i couldn't get to the garage before the wife came home with the other motor so maybe tomorrow.
bores look ok, a couple of slightly glassy spots. honing probable?
i dont really want to go the full hogg n take the block out .... yet... but is the majority of the work acheivable by dropping the sump?
oil pickup off TJ's block is fautless so ok i would assume its all good to swap out.

last wonder, whats the best way to clean out the channels for the oil feed to the head; im pretty sure not enough is getting there.

once again, im sorry for being a pain in the ***, i am getting a little hesitant to commit to what are probable easy fixes, lack of knowlage i guess.
 
  • Like
Reactions: Asim1
bearing in mind im a sign maker and not that skilled in motors

Make a sign...'For Sale...Spares or repair'...?

Seriously though, stella job so far, way above my league.

Hopefully one of the intelligent ones will give some decent advice.
 
  • Like
Reactions: yoursixx, Asim1, Tj 0785 and 1 other person
ha!! yeah i prob should, but i aint a quitter and this isn't a project im gonna quit on. just had a good chat with a mate, n he reckons the head gasket is fecked, but as im this far in, why not crack on and do rings too.
i would be interested to hear other opinions too tho, as the more advice, the more i learn.
ta all :)
 
Looks like you have some work to do there. The oil around the injectors is due to the O rings on the injector body leaking. The pressurised air in the manifold leaks out carrying atomised fuel. The split on the vacuum pipe for the brake servo is common. If you follow the pipe all the way to the servo you may find more splits. The split in the boost hose is annoying. A new genuine part is pretty expensive as these are special heat resistant hoses. I am sure you will find more issues unfortunately this engine has many common issues.
 
  • Like
Reactions: danny_dj3
i had a feeling that little hard pipe was gonna be costly, the O-ring on the injectors i didnt know about, cheers :)

stupid thing is, this car feels more me than my RS turbo or the evo5, i love it. strange i know but i have to get this running right, heck, i want to get this right.
 
I’d get it honed your at the “mite aswell while it’s apart” point, plus it makes sense when fitting new rings
 
  • Like
Reactions: danny_dj3 and Asim1
Make a sign...'For Sale...Spares or repair'...?

Seriously though, stella job so far, way above my league.

Hopefully one of the intelligent ones will give some decent advice.
haha
 
mobile honing required....;)

got told if im careful with wet n dry, and i keep to a pattern that its ok. or buy a honing tool...
 
Honing tools are cheap enough I was told the one that looks like a toilet brush is the best type rather than the 3 prong one. I had a go ,and bottled it and got it done by someone but I had my block out the car yours still being fitted will limit your options
 
aye, im thinking if i drop the sump, pistons n rods, the squirters shouldnt be too hard to get out too. looks like imma need some more tools ha!
ring compressor for a start.
 
another daft question, can i reuse the rods; i aint sure if they are torque down or stretch nuts on em. not looked it up as of now, but asking anyways.

also, im struggling finding the standard rings and a honing tool.
 
Last edited:
I got my rings from badger 5. If you have it apart you would be best to spend a bit on some new rifle drilled forged rods. Not sure on what power goal ur looking for but at least you will have them in and 1 less thing to have to worry about leaving the block at some stage.
 
  • Like
Reactions: danny_dj3
atm im not going power with this engine. the head i have rebuilt is the one off TJ's engine and appears in good condition so the plans were to just get the car running as it should have been when i bought it.

but the spare bottom end is pretty much spotless and the now spare head i have already stripped down is also in good condition. looking at boreing it out, forge the internals and maybe bigger turbo, so this whole 'help me do my engine' thread is a sort of learning curve for me. i like to be sure i can get stuff done and so far the help and advice has been great and in all honesty, i haven't really struggled with anything other than waiting for tools to be delivered and the weather lol.

just can't find a straight forward guide to removing the engine mount on the cam side, as its going to be needed for the new belt n bits. whilst its off the ground will get the top mounts done too [just remembered about them :) ] edit; found a vid, dead simple.
 
Last edited:
anyone know which bearings i need to replace on the rods? just ordrering stuff up and noticed there appears to be 0.25, 0.5 and 1mm oversized. i was under the assumption they were just standard. yes, we all know what assumption is the mother of to.
ta :)
 

Similar threads

Replies
3
Views
1K
Replies
3
Views
2K
Replies
9
Views
7K
Replies
7
Views
2K