

What did you do to your audi today
- Thread starter Marky007
- Start date
You are using an out of date browser. It may not display this or other websites correctly.
You should upgrade or use an alternative browser.
You should upgrade or use an alternative browser.
Finally got around to fitting the "Supercharged" badges that I've had for 7 months.


mk4gtiturbo
Registered User
Saturday - Quick wash, then took it to the place I bought it from and sold it back to them. 
Anyone want a decent S4 Avant with good spec try Magari Automotive in Fareham
Anyone want a decent S4 Avant with good spec try Magari Automotive in Fareham
- Joined
- Dec 4, 2016
- Messages
- 190
- Reaction score
- 67
- Points
- 28
Awesome!
Can you tell us more?
What interface did you use?
I have had my front cam installed for like 2 years but never managed to get it to work...
Sent from my SM-G965F using Tapatalk
- Joined
- Dec 4, 2016
- Messages
- 190
- Reaction score
- 67
- Points
- 28
I checked the entire 200 posts thread but wasn't able to find anything related to the front camera...
Sent from my SM-G965F using Tapatalk
I checked the entire 200 posts thread but wasn't able to find anything related to the front camera...
Sent from my SM-G965F using Tapatalk
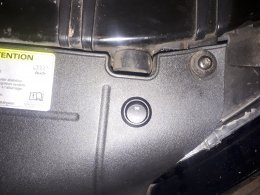
That unit is what allows the front and rear cameras to work with an MMI system. The cameras are just cheep units from China, less than £15 each.
At long last I've got my sons rally car out of my garage so I can get on and do some paint correction on the S4 after 7 months of ownership.
4.5hrs on the bonnet yesterday, had to do 2 stage mop due to cat claw scratches all over it

4.5hrs on the bonnet yesterday, had to do 2 stage mop due to cat claw scratches all over it

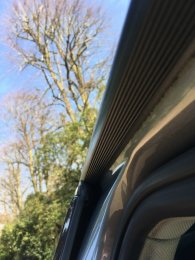
Not today but over the last few days i've changed the boot/glove box light bulbs to l.e.d bulbs. Rubber winter mats out & carpet mats back in. New wiper blades to the front & gave the Pano roof glass & wind deflector & the ''roof reces ''a good clean.
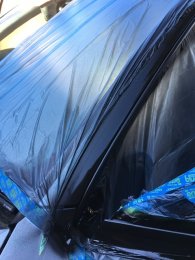
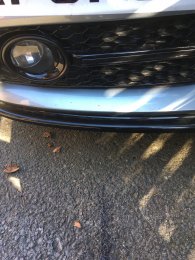
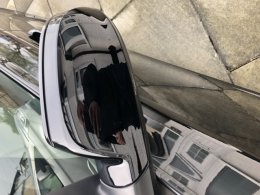
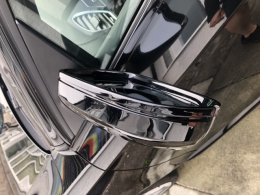
I ve done some cosmetics changes on my car consisting in plasti dip and rolls of masking material.I was a bit retained regarding the quality of the plasti dip and I knew won t be as easy as advertised (if you want to do a decent job)
Attachments
-
 CB49BED5-DC87-494E-845E-23E94353378F.jpeg98.7 KB · Views: 280
 -
 100C74A9-DCE4-4764-B396-A4C5C30102A2.jpeg121.7 KB · Views: 287
 -
 037F45BE-EE23-4200-91BD-C9A7CAFCFFDB.jpeg111 KB · Views: 282
 -
 CF4E8767-6C41-4C9F-A91F-F11177D93348.jpeg83.5 KB · Views: 276
 -
 5A32C0F5-F3F2-44C5-AD66-1301A3C3365A.jpeg136.9 KB · Views: 274
 -
 BE1E5967-9E29-4DDF-9350-3A5E6D0CAF11.jpeg102.6 KB · Views: 269
 -
 7980A4BF-709F-461D-BDEA-DF6E6168C4CD.jpeg122.7 KB · Views: 269
 -
 76AD7CD3-058E-4392-A743-83C869BE5361.jpeg1.2 MB · Views: 267
 -
 14D1824C-6326-4273-A04B-FEFD0491524A.jpeg77.7 KB · Views: 267
 -
 4AD7F2C7-80A2-46B1-9E94-3C5DF04D4790.jpeg110.6 KB · Views: 268
Looks great!
Any advice re the rear rings? I'm not keen on replacing with an eBay one but I hear plastidip may not last on the OEM badge surface.
Any advice re the rear rings? I'm not keen on replacing with an eBay one but I hear plastidip may not last on the OEM badge surface.
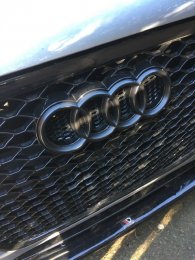
All badges are plasti dipped but must say the back one I did for at least 5 times and still not perfect. Must be done in the sun and let it try plus surrounds really clean. It s not easy as removing excess will do some removal of the chrome badge I used a very sharp knife going easy on the edge.Looks great!
Any advice re the rear rings? I'm not keen on replacing with an eBay one but I hear plastidip may not last on the OEM badge surface.
It does look as though it's a tough badge to do neatly. Sharp knife is a good idea but there's too large a risk of body work paint damage. I might just have to go with an eBay black badge.
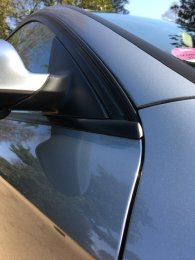
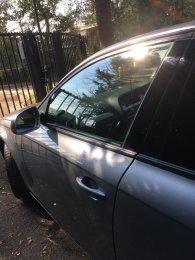
BTW, looks as though you did some good prep on the bodywork to cover the chrome window surrounds
BTW, looks as though you did some good prep on the bodywork to cover the chrome window surrounds
Thanks was long enough (time wise) for my wife to go a bit mad at meIt does look as though it's a tough badge to do neatly. Sharp knife is a good idea but there's too large a risk of body work paint damage. I might just have to go with an eBay black badge.
BTW, looks as though you did some good prep on the bodywork to cover the chrome window surrounds

Did the coolant pump mod with a switch today.
Attachments


Sorry for the long blah blah this time.
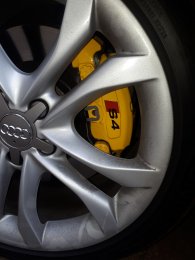
On going with the deep clean/detail of my car I got to the point of doing the wheels.
Someone in the past (not me) had possibly applied wheel acid cleaner and left it on for too long so it etched into the lacquer.
Before

After

I'm pleased how they have come out, however while the front ones were off I thought I'd check the size of the brake discs, they always looked under size to me with a large amount of the stone guard showing.
Sure enough when measured 320mm, standard on the B8-8.5 S4 is 345mm so 25mm too small.
Original top, new (correct size) bottom

The pads didn't fair to well

They were genuine Audi/VAG parts, I have been through the (full Audi) service history and there's no sign of the car ever having replacement discs and pads (mileage currently 23000 miles), could it maybe have left the factory with the wrong setup?
Fair play to Eurocarparts in the current circumstances as I ordered the new discs and pads Thursday afternoon late on for next day delivery (social distancing) and they were delivered by 08:30 yesterday morning.
All sorted

No caps on the nuts as I hadn't torques them up at the time.
Today I start on the inside, first off removing the Limo tint from the back screen and rear windows (can't see feck all at night when reversing!)
On going with the deep clean/detail of my car I got to the point of doing the wheels.
Someone in the past (not me) had possibly applied wheel acid cleaner and left it on for too long so it etched into the lacquer.
Before
After
I'm pleased how they have come out, however while the front ones were off I thought I'd check the size of the brake discs, they always looked under size to me with a large amount of the stone guard showing.
Sure enough when measured 320mm, standard on the B8-8.5 S4 is 345mm so 25mm too small.
Original top, new (correct size) bottom
The pads didn't fair to well
They were genuine Audi/VAG parts, I have been through the (full Audi) service history and there's no sign of the car ever having replacement discs and pads (mileage currently 23000 miles), could it maybe have left the factory with the wrong setup?
Fair play to Eurocarparts in the current circumstances as I ordered the new discs and pads Thursday afternoon late on for next day delivery (social distancing) and they were delivered by 08:30 yesterday morning.
All sorted
No caps on the nuts as I hadn't torques them up at the time.
Today I start on the inside, first off removing the Limo tint from the back screen and rear windows (can't see feck all at night when reversing!)
Great job with the wheels. Can I ask what you used to do this (apart from elbow grease!)?Sorry for the long blah blah this time.
On going with the deep clean/detail of my car I got to the point of doing the wheels.
Someone in the past (not me) had possibly applied wheel acid cleaner and left it on for too long so it etched into the lacquer.
Before
View attachment 200243
AfterView attachment 200244
I'm pleased how they have come out,
Yes lots of elbow grease as I didn't want to machine polish them in case I cut through.
Started with Farracla G3 compound followed by G10 finishing polish (same as I did with the bodywork), then two coats of Autobright Direct Very Berry wheel wax.
Having so much time on my hands at the moment thanks to Covid-19, I even painted the brake back plates and polished the brake calipers.
I did say it's a deep clean!
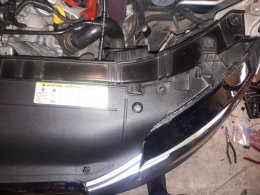
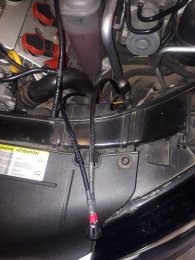
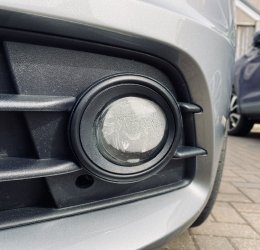
Messing around with an cold feed flexi pipe. No room what so ever behind fog light grill, so removed fog light and routed it through that way. Just a temporary mod, until my new fog light honeycomb grills turn up. Not worth losing the fog lights.
Attachments


Well that took a lot longer than I expected, but finished the deep clean inside and out at last.
Got to wait until this Covid-19 fecks off so I can go out somewhere in her.

While Furloughed from work I may change around the cars and get my wife's 14 plate Polo in for some TLC to keep boredom at bay.
Got to wait until this Covid-19 fecks off so I can go out somewhere in her.
While Furloughed from work I may change around the cars and get my wife's 14 plate Polo in for some TLC to keep boredom at bay.


Messing around with an cold feed flexi pipe. No room what so ever behind fog light grill, so removed fog light and routed it through that way. Just a temporary mod, until my new fog light honeycomb grills turn up. Not worth losing the fog lights.
Where did you pick up this tubing from and have you noticed any difference to performance and/or intake sound?
Not really noticed any gain in sound or performance. To be fair I haven't really taken it out for a good run yet. Obviously the quicker you go the more air is forced to the air filter, maybe help it to be a bit cooler in there. The tubing was from eBay for about £9, I was quite surprised at the quality for that sort of money.Where did you pick up this tubing from and have you noticed any difference to performance and/or intake sound?
Where did you pick up this tubing from and have you noticed any difference to performance and/or intake sound?
Where did you pick up this tubing from and have you noticed any difference to performance and/or intake sound?
Attachments

Decided to change filters and oil. Previous owner said he changed everything when I bought the car in January - oil so dark and thick that I could have paint a fence  and diesel fuel filter expired since August 2019


Sent from my iPhone using Tapatalk
 and diesel fuel filter expired since August 2019
Sent from my iPhone using Tapatalk
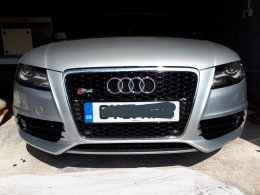
Removed my temporary air duct mod, spray painted black behind the fog grills, refitted fog lights and fitted my new honeycomb fog light grills.
Attachments


Full wash with the new Karcher K4 and snow foamer.
Needs a few more goes to get the full winter muck off, then i can give it's a double bucket wash.

Needs a few more goes to get the full winter muck off, then i can give it's a double bucket wash.

Thanks mate.
I was thinking of drilling through the honeycomb on the fog light covers for the B8.5 and having the pipe connect to the back. Need to check on the space.

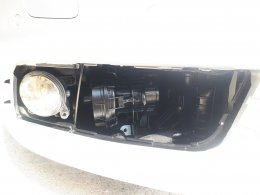
Removed the unit and took the bulb out, then blasted it with a hairdryer. Took a couple of heat cycles to get rid of all the moisture. Used two cotton buds taped together to clean the water spots off the inside of the lens, then refitted.
Cleaned and conditioned the leather trim, and cleared leaves and other debris from the air filter housing.
Yesterday I drained the coolant and flushed it then replaced with G13 and water wetter.
only fluid left is the brakes but want to see if I can get a pair of 4 pots before I need to do the brakes.
only fluid left is the brakes but want to see if I can get a pair of 4 pots before I need to do the brakes.
- Joined
- Dec 4, 2016
- Messages
- 190
- Reaction score
- 67
- Points
- 28
Dechroming in progress...

Sent from my SM-G965F using Tapatalk

Sent from my SM-G965F using Tapatalk