warren9022
Registered User
You will need to tag him if you want to get his attention, he won't follow the thread like we all do. I'm sure they're not far away.


 thanks trups
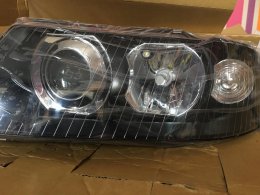
 I got mine and fitted today as I need them for a mot. These lights are soooo much better than standard.
They have both got a bit of condensation in already though on the indicator sides. Is that something I can combat?
Both grommets for the ballasts are seated properly so not sure why.
Other than that they're great

I can't get the indicator bulb holder to screw into my left headlight housing. The right hand side was fine but it feels like it can't locate properly for the left hand unit
Yeah the right hand side was tight to push down but it pushed down square. The left hand side isn't pushing in square and it feels like the locating tabs are fouling on something. It seems as if the hole in the interior chrome plastic doesn't appear to be concentric with the hole in the black housing so the locating tabs of the bulb holder can't locatei found them to be a bit tight. i gave mine a good push down to lock it in


Yeah the right hand side was tight to push down but it pushed down square. The left hand side isn't pushing in square and it feels like the locating tabs are fouling on something. It seems as if the hole in the interior chrome plastic doesn't appear to be concentric with the hole in the black housing so the locating tabs of the bulb holder can't locate

For those of you that have already fitted them, keep the pic's coming.
I wont be able to fit mine until next weekend.
Anticipation is killing me. Doesnt help that im currently working away as usual so I doubt I'll be able to fit mine for at least a month til im home. @t8ups you can leave mine till last if needs be.
If you want to install all mine and seal it all up I don't mind. I don't really want any fitting issues.When these lights come in the sealed box the indicator bulb holders are actually fitted in there, I have to remove them before they are split so the indicator reflector can come out and it will sit back in the same place. even I when I fit them they are really tight putting them in move them back and forth and they will sit in place.
I didn't fit the indicators and sidelights back in as sometimes its nice to do a little DIY and see what you have bought rather than me installing it all.

You should be able to easily adjust the beam height by turning one of the adjustment screws on top of the light. Are your motors ball joints connected properly into the platic runners, they are a pain to get in but if theyre not ‘locked in’ properly it will affect the beam height and cause the light to point too high and you won’t be able to adjust them manually to where they should be. When I fitted mine I didn’t need to recalibrate in VCDS because I hadn’t altered anything with the leveling system and thankfully it all worked as it shouldAnyone know the correct procedure for adjusting the headlights (up and down) car failed mot again as theyre pointing too high and they said the adjustments weren't working. If the electric motors aren't connected properly will this be an issue?
From what I've read you need to adjust both screws at the same time to get the desired up/down adjustment. Or do you have to use vcds to do it properly.
These are just a normal garage who did the mot not specialist in any way.
I'll take them off and have a look in a few days.
You should be able to easily adjust the beam height by turning one of the adjustment screws on top of the light. Are your motors ball joints connected properly into the platic runners, they are a pain to get in but if theyre not ‘locked in’ properly it will affect the beam height and cause the light to point too high and you won’t be able to adjust them manually to where they should be. When I fitted mine I didn’t need to recalibrate in VCDS because I hadn’t altered anything with the leveling system and thankfully it all worked as it should
Is that on the manual adjusters at the top? We had to seperate the lights to get the ball joint back in the socket on my friends set. It was a real PITAThe inside adjusters are not connected in the ball joint. Pain in the butt trying to pop the, back on

Is that on the manual adjusters at the top? We had to seperate the lights to get the ball joint back in the socket on my friends set. It was a real PITA