Audi S3 8P3 with the usual mods...

guile

Registered User
Joined
Nov 25, 2012
Messages
342
Reaction score
158
Points
43
Location
brisbane
the girlfriend finally admitted defeat to not being able to handle the clutch on the a3, therefore I was 'forced' in to buying this. she actually wanted an automatic but... well... tough luck...

DSC_0034_zps27358375.jpg


DSC_0035_zpsdb9854bc.jpg


DSC_0036_zps1b654188.jpg


DSC_0037_zps87a3e178.jpg


DSC_0038_zps59d5f76e.jpg


DSC_0039_zps40965599.jpg


DSC_0040_zpsd3d43133.jpg


DSC_0041_zps86813c16.jpg


DSC_0042_zps4e072152.jpg


DSC_0043_zps84db204e.jpg


DSC_0045_zpsc66e1d37.jpg


DSC_0046_zpse2929822.jpg


DSC_0047_zps49b8c232.jpg


DSC_0048_zps56e5f6ec.jpg


DSC_0049_zpsb592b758.jpg


DSC_0050_zpse4de8410.jpg
 
  • Like
Reactions: Raiden, Hookmonster and Jhcx
a few photos of the day it was collected from its previous owner...


s3 spec provided at time of sale is as follows...

Manufacture Date: 2010
Registered Date: 11/03/2010
Number of kilometres: 12800
Number previous Owners: 1 (purchased from the Sales Manager at Audi Albury with 1900 kms on the clock)
Factory Extras: Audi Exclusive Bucket Seats, Flat bottom Sports Leather Steering Wheel, Leather seats - Two tone, Metallic Paint, Audi Navigation System RNS-E,
Non - Factory Extras: Tinted Windows, Alpine iPod/TV integration module, H&R Sport Springs for 8P S3

now with the gf's new plates on...

null-3.jpg
 
had a full machine polish and wax to remove those annoying swirl marks that show up on black paint. i took a couple of shots while i was waiting to pick the mrs up from work...


i had it done at audi centre brisbane as it was still under warranty and if they stuffed it up they could fix it...

 
a photo of her in doors handy work one weekend, rear passenger side...


as the plan for me to take the car eventuated a bit sooner than first expected i decided i wanted the car in mint standard condition before the tweaking starts...


also got the front two wheels touched up (these were already done when i bought the car)...


you could hardley notice them but i knew they were there and it always bugged me...

 
continued on with a few bits and pieces to get the car in a good original condition. the alpine kuftec tv / ipod player did work when i viewed the car but in true good fashion decided not to work when i bought the car...


i wasn't a big fan anyway as it had a remote receiver stuck to the dash below the head unit which i thought stuck out like dogs balls. i removed the rns-e unit which also had a stuck dvd in it. i removed the dvd from the unit and all the extra equipment for the ipod and reinstalled...


i was having issues getting the aux facility to work so thought i'd check the model number...


turned out it previously had a symphony unit fitted and i'll need to swap a couple of pins around to get the aux working. while pishing around with the aux i found this....


google told me it was a connection for a phone so i promptly ordered the iphone connection kit. i have an iphone 5 but hoping with a converter cable i can go from the 30 pin to the lightning connector. i'll let you know when i arrives...
 
just because this thread appears to be full of photos i thought i'd add a few more. here are some shots i took for the carsales add...


another one...


more...


and more...


last one...

 
  • Like
Reactions: Hookmonster
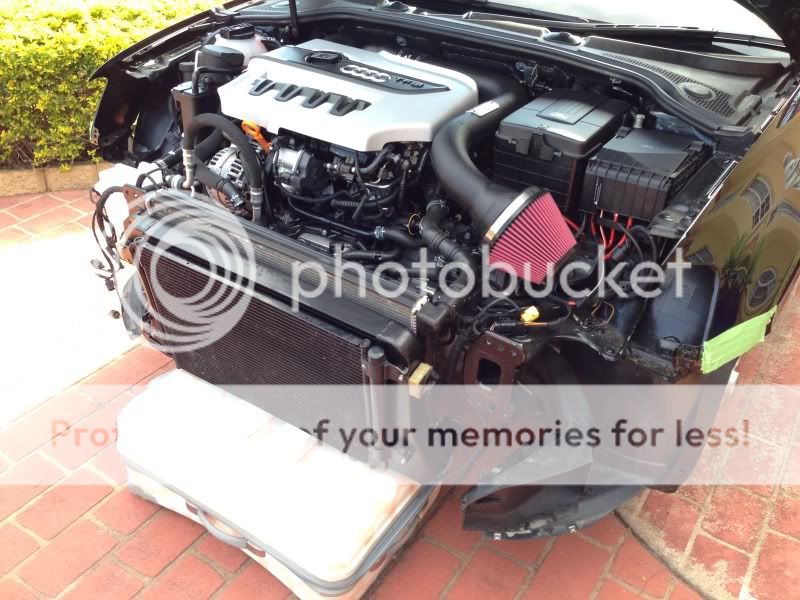
as i said in a previous post the s3 is now in my possession sooner than originally expected, therefore a few plans started to hatch in my head. i have read a couple of forum posts recently that reckon the s3 lacks the punch it should have left the factory with and doesn't really deserve to wear the s badge; i would be inclined to agree with this. the only solution, stage 2+. the current plan...

Phase 1

Tuning Essentials:
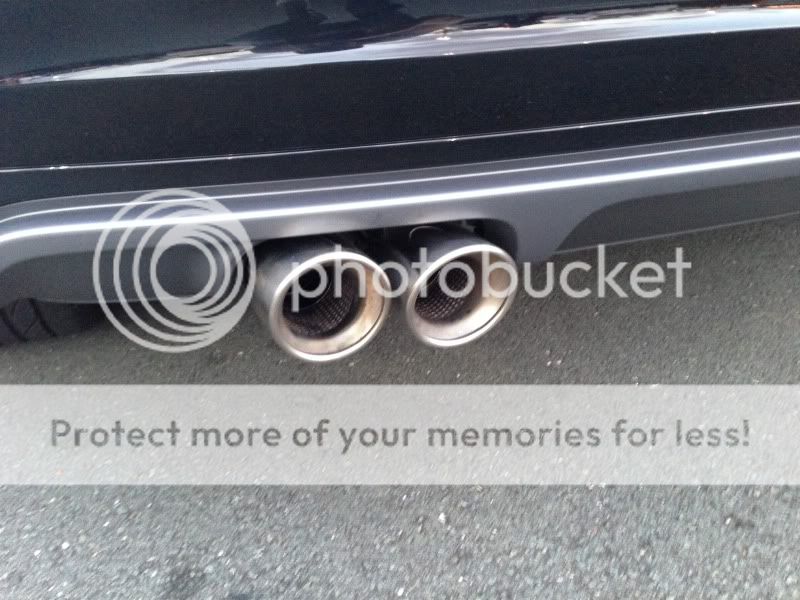
· Blue Flame Audi S3 Quattro 2.0 TFSi 2007 -> (Full 76mm System) 100 Cell Hi-Flow Cat
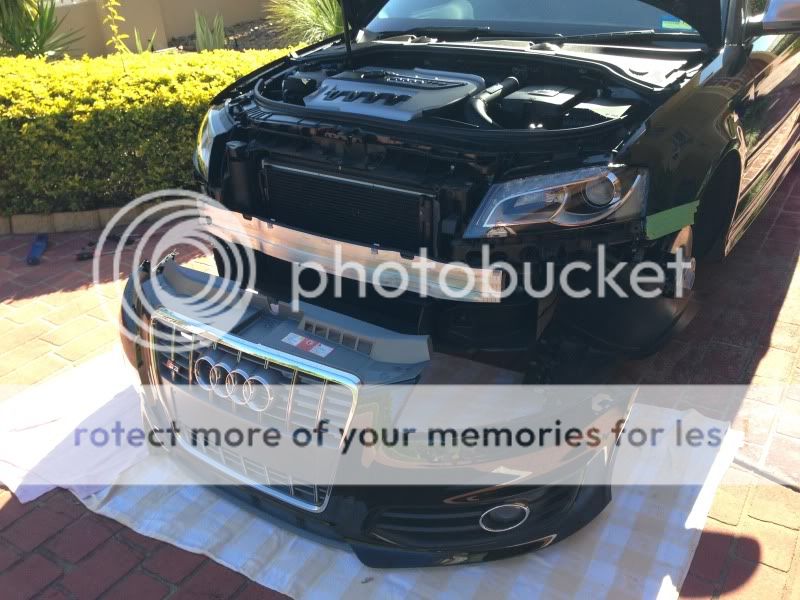
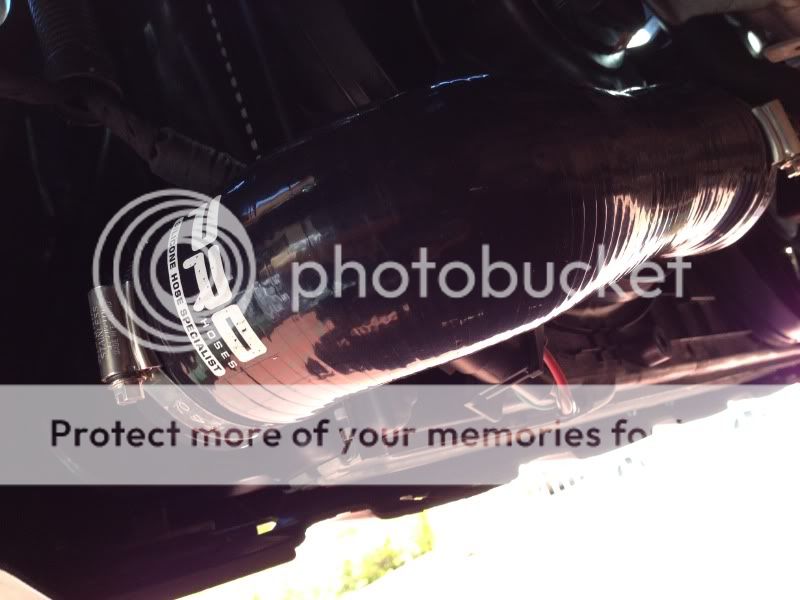
· Evolution Motorsport 2.0T FSI V-Flow Intake
· Autotech High Pressure Fuel Pump - 10-127-100K
· ECS Fuel Pump Cam Follower Replacement Kit - 06D109309CKT
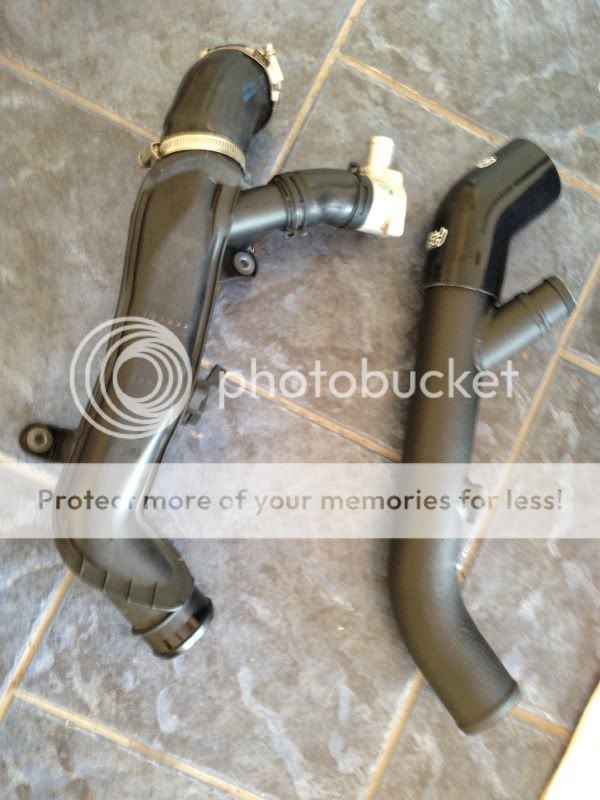
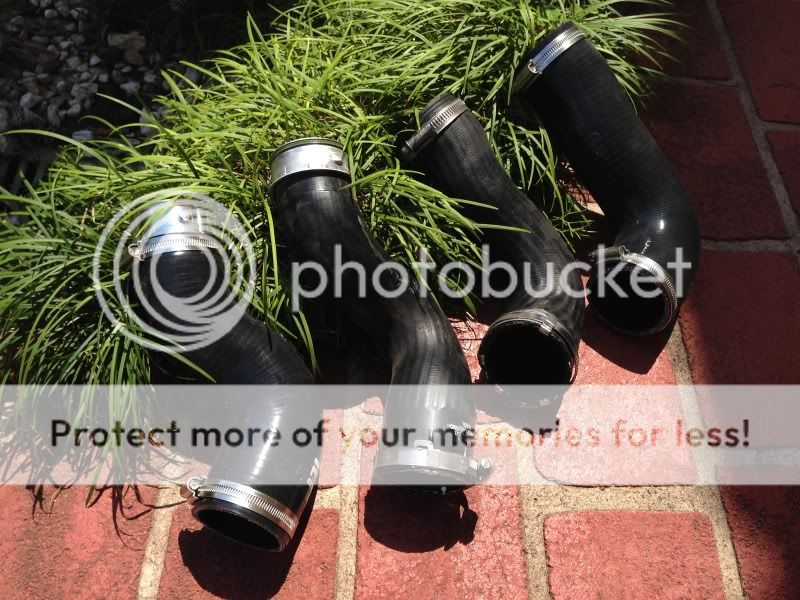
· Forge Motorsport Catch Can and PSV Delete with Boost Tap - FMMK5CTC
· BSH FSI Integrated Throttle Pipe - 30306054
· CustomCode Stage 2 - Pump Specific Software

Suspension and Wheels Spacing:
· 35mm H&R Lowering Springs - 29227-1
· 20mm H&R DRA Spacers Front and Rear (Track Use Only) - 40555712

Cosmetics and Incidentals:
· ECS Jack Adaptor Pad Kit - ECS10724KT
· Newsouth Performance Steering Cowl Single Gauge Pod - POD014
· Prosport Smoked Super White Turbo Boost Gauge - PSI (New Stepper Motor Version)
· Forge Expansion Bottle Cap and Oil Filler Cap - FMCAPS2-BLK
· ECS Interior LED Lighting Kit - PL3642BA9KT1
· ECS Exterior LED Rear Number Plate Lights – T10W37KT-2
· Genuine Audi Black Edition Front Grille – 8P0853651QVMZ
· Genuine Audi Black Edition Driving Light Grilles – 8P0807681PZDE / 8P0807682GZDE
· Genuine Audi TTRS Engine Cover – 06F103925J
· Genuine Audi Engine Cover Fitting Bolts – 2x WHT000731A & 1x 06E103164E
· Front and Rear Gloss Back Audi Ring Badges – Non OEM
· Front and Rear Gloss Back Audi S3 Badges – Non OEM
· Secure a Plate Holder 372mm x 100mm – Part No 1053

pictures or it didn't happen...


the box...

 
so i unpacked the forge catch can kit...


before i started...


its really not that challenging to fit so the photo sequence is quite boring...


removed the PCV valve...


all fitted...


fuel pump off and in the vice...


old and new cam, spot the difference...


boost gauge wired to spare fuse point 35...


innovate ot-2 fitted...


lights off...


lights on...

 
my black ed grille turned up at audi today, got a massive discount so happy with that. also tts-rs engine cover turned up and one driving light black ed grille, other one should arrive soon...

 
so another small part ordered, i think i have everything i want on order now for my original plans...


now thinking about getting front splitter and rear valance sprayed black. matte or gloss though?
 
decided to fit the badges before the grille goes on. was originally going to do matt black but now decided to go gloss to match the grille surround and s3 badge...


badge is not exactly original size on the front but it clipped in well at the back which was all i was concerned about...


a bit more performance gear showed up too...

 
  • Like
Reactions: HHS3
as all the parts have now arrived for phase 1 it's already got me thinking about phase 2. trying to put this off for 6 months or so though to keep me interested. i've also decided on my 360bhp target as i've read this is maximum you can get out of the standard k04 set up. not sure if this is true so if anyone knows otherwise feel free to comment...

Phase 2

Suspension:
Whiteline Rear Sway Bar (24mm) - BWR21XZ
Whiteline Control Arm - Lower Inner Rear Bushing (Anti-Lift/Caster Correction) - KCA316
SuperPro Roll Centre Adjusting Ball Joint - TRC0003
Haldex Performance Upgrade Gen 4 - 0BR Couplings Audi S3
Haldex Wireless Remote Control - Suits Gen 2 and Gen 4

Boost:
GFP DV+ Diverter Valve – T9351
Airtec Intercooler Upgrade for VAG 2.0 Petrol TFSI Including Hoses (black)
Neuspeed HI-FLO K04 Turbo Discharge – 48.02.69

Braking:
Front Brakes Hawk Performance Ceramic Brake Pad Set - HB543Z.760
Rear Brakes Hawk Performance Ceramic Brake Pad Set - HB544Z.628

Transmission:
Adjustable Quick Shifter for VAG 6 Speed Models - FMVWQS
VAG 6 Speed Side Quick Shift – FMVWSQS
SPULEN Dog Bone Engine Mount Insert Kit (Street) - SE-70117

Incidentals:
Forge Silicone Carbon Canister Hose Kit (black) - FMCCHMK5
Forge Silicone Coolant Hose Kit (black) - FMKC010
Forge DV to Intake return Hose (black) - FMRLH - 2L
 
fitted the evoms intake and genuine audi ttrs engine cover. more parts ticked off the "to do list" is also a bonus, lets just hope it produces the performance gains...

checking i have all the parts after my exhaust fiasco...


had a look how clean the turbo inlet is...


pretty pleased with the relatively oem looking outcome...

null_zpsb3a2e173.jpg
 
  • Like
Reactions: mechanic69
removing the old badge was a biatch and halfway through i was wondering why i had bothered. once all the goo was removed and the new badge was on i was quite happy. it should match the new front badge nicely and i'm a great believer that it's all in the detail...

null_zps959e3f79.jpg
 
i got the new boost gauge fitted this morning, the old podi one hit the back of the wheel. i do prefer the podi one but the prosport one also works quite well, just a shame about the red needle...

null_zps0da92b3d.jpg


cloth tape is worth it's weight in gold for tidy wiring installs. i still want to tidy it up more by getting rid of those zip ties on the obd cable and hardwire the gauge to remove the bullet connectors. it's a bit further down the to do list though...

null_zpsb459f0b5.jpg
,

i got the exhaust fitted at p&p yesterday too. they did a good job and it sounds nice...

null_zpscec2be25.jpg


finally took it for lunch and a pint at the rippers,

null_zpsf3643b65.jpg
 
  • Like
Reactions: voorhees
removed the rear wheels to fit the sway bar. gave them a good clean and took this photo as reference for when i'm trying to remember what offset they are...


whiteline 24mm rear sway fitted...


a better view of the exhaust too...


also took this photo so i can confirm which haldex controller i need...


fitted the h&r spacers while i was at it. difficult to tell but they are wide spacers...

 
managed to fix my aux in socket while i was back. i started with the genuine media connector block and repair wires from audi...


hooked it all up and tested it, worked spot on...


cloth tape to the rescue once again for an oem install. i now have an aux input, yay...

 
a few more bits to keep me out of trouble when i am home next, WALK...


and the neuspeed discharge pipe with hair net to keep the hair from eyes during installation...

 
another bit of tuning goodness turned up yesterday. i think thats all the bits i need for the latest plan.

in the words of rolf harris, can you guess what it is yet...

 
in other news my old lady sent my Xmas present early. would be rude not to install before the tune. don't tell her though, she thinks it's under the tree...

null_zps81d61682.jpg
 
got bored waiting for a lift to the pub so fitted the led interior lights...

null_zpsfe1ccc3b.jpg
 
Got a bit closer to installing the intercooler...

null_zps59f4f64e.jpg


Stuck some tape on to protect the wings...

null_zpsea4f7887.jpg


Then ripped the bumper off with one swift ninja swipe...

null_zpsd520e80a.jpg


Pretty amazing what you find, a bug, no biggy...

null_zps18b5bf87.jpg


Then wtf is that...

null_zps6ef23d8c.jpg


That's right, a bird with no head...

null_zpsccfc0c84.jpg


Anyway, got the new black ed bits on so happy about that...

null_zpsa1655c5f.jpg
 
  • Like
Reactions: Raiden, Zak0123 and S3_Jacko
Getting close...

null_zps30b70147.jpg


It's on...

null_zps7a38ee83.jpg
,

Kind of, nice suitcase...

null_zps915d1c3f.jpg


Also fitted charge pipe...

null_zpsaafc15c8.jpg


And discharge pipe...

null_zps7650ce46.jpg


Silicone vs original...

null_zpsba091559.jpg


Was a well packaged bit of kit, will be interesting to see how it performs...

null_zpsdd1d8211.jpg
 
plastic fantastic...

null_zpsb24878c4.jpg


cant beat a bit of silicone...

null_zpsc2fdf822.jpg


fitted the gfb valve upgrade, shhhh...

null_zpsbc646403.jpg


and it's now back on all 4...

null_zpsba1c58bf.jpg


picked up some sun burn while i was it at, ****** pommie skin...

null_zps5dd563cd.jpg
 
  • Like
Reactions: mechanic69
did a few little jobs at the weekend. tidied up the boost gauge wiring as i didn't like the look of the bullet connectors. hard wired with tape now...


not a big smoker so decided to remove the cig lighter fitting...


and replaced with the flap cover jobby...


means that i can leave the usb charger in when i find a shorter one, this just sticks up about 5mm too much...

 
cheated and got p&p to install the walk and slotted ball joints. would have needed to take it there for an alignment anyway so i thought why not get them to do the lot…

 
  • Like
Reactions: mechanic69
added a few more bits at the weekend. the dog bone mount upgrade is one of the easiest and cheapest mods i've done; would highly recommend to anyone. the bolt was ****** tight to back off though, like the length of my persuader...


once greased up it was easy to slip in...


installed and torqued to f king tight...


surprised at the state of the original bolt, might explain why it was so tight...


next on to the front brake pads, originals removed...


new ones fully lubed up...


and finally installed with a quick wipe down...


ran out of time to do the rear brakes before heading to the newmarket meet. a couple of photos...


and lastly...

 
  • Like
Reactions: Hookmonster, TorqueTerrorist, Compkiler and 1 other person
The final piece of the puzzle showed up today, just hope they are as good as everyone reckons...

 
got a few more bits fitted over the weekend…


i took this shot for reference before i started…


the destructions reckoned you can just pull the original linkage off the splines, yeah good luck. after a bit of vigorous tugging i nearly put my back out and gave myself a hernia at the same time. i then decided to make my own jack off screw, nothing rude, i just used a bolt to jack the linkage off the box…


i also got the haldex on too. i didn't really want to cut the grommet in the boot floor but it appeared to be the best option and dropped the plug right in the location of the controller…


all hooked up and the boot put back together. fits in pretty neat and looks fairly factory…


and just so i can remember what controls what…


also for future reference i decided i want to find out what all the option codes are...

 
so you lend your car to a mate while you are away and this happens, not cool...

 
  • Like
Reactions: MrWhItEwOlF, Ash187, RedDejavu and 2 others
small update from last time i was back in bris. unfortunately i didn't get much time as i was helping a mate get ready to sell their house. i used to park my car there too so means the a3 has to go…

i managed to get the speech dialogue system working (sds). i'm getting a bit more familiar with all this retro fitting business and enjoying the use of the full functionality. i took a couple of boring pics which can be seen below; i didn't take too many as i was concentrating getting the car back together before dark (most of the photos below are "borrowed")…

removed the headunit with the 4 removal keys...


removed 2 screws from underside of glovebox...


removed side cover with a plastic trim removal tool and the removed the screw...


removed the 4 screws from inside the glovebox...


removed the last 2 screws from the underside of the glovebox...


finally lowered the glovebox down and disconnected the interior light...


removed the glove box entirely...


i then unbolted the 4 bolts holding the seat in, disconnected the electric seat motor and airbag wires (i didn't disconnect the battery so ended up with and airbag warning light on the dash, thanks gav for fixing as usual). i then unclipped the bluetooth module box and fished the connector through the hole in the carpet...


i wired up some 4 core house alarm wire from jaycar. it was really thin and given the chance again i'd go slightly thicker. good thing is it doesn't bulge the carpet and the sds works well so not all bad. cloth tape (yet again) to the rescue for the oem look. the wiring diagram can be seen below to understand how i added the 4 wires...


the arrows show the route i used to get the wire up to the rns-e. i used a wire coat hanger with electrical tape on the end so it didn't scratch anything. the additional cable was linked to the rns-e so the microphone could get hooked up. lets hope it can understand my yorkshire accent tha nos…


it was a 2 stage process to fish the wire through. i removed a heating vent and got the wire to the vent opening first, then secondly took it from the opening to the back of the rns-e unit…


for anyone wanting to do the same and so i could get my head around the wiring without stuffing anything up i made the following basic diagram. i bought the repair wires from audi and they come with terminals on both ends so one wire is equal to 2 connections i.e. 3 repair wires needed total...


part numbers of repair wires for anyone wanting to do the same mod…


i also put the below info together from various different sources on the net. lots of info out there but in different formats and some contradict each other. i hope the pin outs below are correct and so far everything works well...

 
so i've been working on the next phase of the project. i promised myself i won't buy any of the following gear until i have fitted all the parts sat waiting to go on;

solid gear shifter mounting and linkage bushes, forge silicone water coolant and carbon canister hoses, oem non smoker ash tray removal kit and i've also got some wheels and tyres lined up…

once all the above is complete the credit card will be coming out again for this lot:

P3 Cars Integrated Vent Digital Gauge Audi 8P A3 – (p3-vent-gauge-a3-tt-er)
P3 Cars Integrated Vent Digital Gauge Analog boost sensor – (P3BST100)
CTS Drop In High Flow Fuel Pump Kit For FSI/TSI
CTS Turbo Throttle Body Spacer 2.0TFSI
Genuine RS4 Fuel Pressure Valve for 2.0T K04 Engines
Aluminium Dipstick - 2.0TFSI
ECS Magnetic Sump Plug With 10 Copper Washers

the existing boost gauge will get removed and eventually swapped out for a water meth flow control gauge. the old boost line will get hooked up to the analog sensor for the p3 gauge. while the intake manifold is off i will also remove the old engine cover fixings to tidy the bay up...
 
i'm looking to fix a radio signal fault that is being picked up due to the the retro fit of an rnse navigation system. it is the only fault when performing the scan and it's fcuking with my ocd so it's got to go.

from what i have read i need the following parts to fix it. they have been ordered from brisbane audi and i'll be picking them and hopefully installing them on my next r&r.

000 098 652 1m female to female Fakra cable
000 098 692 30 cm male to male Fakra adaptor
8P4 035 225B Upper antenna amp
8P4 035 225 Lower antenna amp
1C0 973 119B Three pin connector housing x2
000 979 009 Repair wires x3

what an enthralling diagram…


that is all, apologies for the boring update. i do have some more exciting news to come regarding wheels and rubber but i'll wait until i've picked them up...
 
  • Like
Reactions: S3_Jacko and T-800
You've certainly been busy,and I hope you enjoy the results.

For 360bhp,you shouldn't need a higher flow LPFP system,as the S3's pump is good for around 440bhp before it maxes out,and it may also be worth your while taking a look at some of the problems with RS pumps being fitted to S3s,over on VAGOC.

There is an uprated(basically RS3) PWM controller available,but as I say,for anything below a big turbo conversion,you don't really need to uprate the pump.

On the suspension side,you'll get far more out of the ALK kit you've bought,plus the ARB upgrade,and a decent set of coilovers,than you'll get from the Haldex controller.
Yes,it makes a difference,but it's not a big difference compared to the other things.
 
Great read through, cheers mate and the cars a beaut'!!! ;)
 
what does the 'stock' 'race' and 'eco' so to the haldex?

Race is tis the one where it does 50-50 after 50% throttle?
and eco just turns it off? but i thought it was off all the time unless wheels spinning up?
 

Similar threads