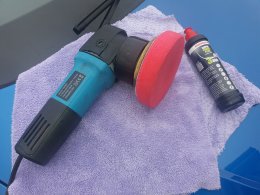
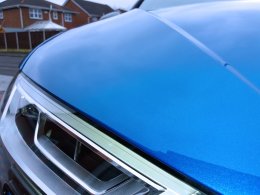
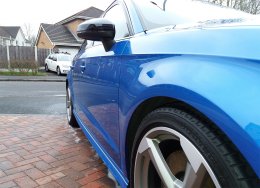
What have you done to your 8V today?

Further to the above... Warm engine, remove connectors and screws, remove coil packs, remove old plugs, install new plugs (30nm), replace coil packs (10nm), replace earth (9nm), replace engine cover, wash wounds and apply bandaids :)

View attachment 148752 View attachment 148753 View attachment 148754 View attachment 148755 View attachment 148756 View attachment 148757 View attachment 148758

What advantage do the RS7 plugs have over stock? I know they burn colder but is this advised for stage 1 / 1+ cars?
 
What advantage do the RS7 plugs have over stock? I know they burn colder but is this advised for stage 1 / 1+ cars?
I believe thats basically all its about. When you start ramping things up in the engine I was told its always a good idea to go a step colder on the plugs. People seem to love or hate the RS7 plugs. I just wanted something better than I had and the RS7 set is not only better but I managed to source them for a good price.
 
Had the resonator delete done down at BCS on St Helens! Much better sound from the car now, happy days. Great work done by @BCS Nige!

No pics as the car is filthy from the drive, 37mpg on the return though
 
  • Like
Reactions: Jassyo06 and oli356
Had the resonator delete done down at BCS on St Helens! Much better sound from the car now, happy days. Great work done by @BCS Nige!

No pics as the car is filthy from the drive, 37mpg on the return though
Always nice to hear more good things about BCS as having mine done on Wednesday, though a PFL car so will never sound as good but still ;)

And 37... nice :)
 
  • Like
Reactions: MattSedg
Always nice to hear more good things about BCS as having mine done on Wednesday, though a PFL car so will never sound as good but still ;)

And 37... nice :)
you should get the same bass/grumble to the normal exhaust note that I have, you'll get the sharper DSG fart too :rockwoot:
 
  • Like
Reactions: Jassyo06 and oli356
Just posted this on the Lighting thread but as its an S3 it belongs here as well :)

Fed up with the pitiful output, especially in the rain on tarmac when it was basically dangerous, of the standard HIDs on my 65 S3 8V, I have also taken the plunge and this week went up and bought a kit off Thrups at EM Tuning. Brilliant guy by the way, certainly knows his stuff.

Using Osram bulbs but rather than go for his standard 5000k Cool Blue I went for the same as standard 4300k bulbs but in uprated Nightbreaker form. I prefer the less white light. As it was the first he had used Thrups said that he checked the bulb in a fitting with a lumens meter and its output was at least the 70% over standard, and much more than the Cool Blue. So that was a positive sign for good things to come.

So back home me and my mate, now retired after a working life in bodyshops, set to work in the sunshine yesterday. We set aside a couple of hours to do the job. Although I am an amateur, I have spent much of the last 10 years stripping and reassembling cars, he is not and knows what he is doing but neither of us had tackled an S3 or A3 before but he has worked on other Audis. We also have a good collection of tools including battery wrench, screwdrivers etc.

Due to his past experience with shitshields we decided to leave them in place and just release back to the struts with the front wheels off. Probably a mistake. From inserting the jacks, due to the difficulty of easy access to the bumper bolts, it was 75 minutes until the bumper was free. Now we had a headlight to work on. It took us 15 mins to work out how to release the bulb and much the same to work out the best wiring route, the S3 needs a longer ballast to bulb wire than the EM standard, then similar to modify the housing, silicone seal the cable access hole under the ballast, then trial fit it and test OK, which it was. So that was another hour gone and we wern't halfway. Now we were up to speed the second light unit was a doddle, 20 mins or so. Fitting them took another 10 mins or so. Then it was onto bumper replacement. This was when we really regretted have the shields still in place. Even though we both have skinny arms it was a nightmare not getting a straight push onto some of the bolts. If we hadn't had a magnetic bit screwdriver for the T30 bit I shudder to think how long it would have taken, we really needed the long reach version which my mate had at home, of course. Jacks in to jacks out/bolts tight was the best part of 5 hours!

Talk about a steep learning curve. I would think we could do it again, with that screwdriver, in half that time. Faster with the shields off but I don't know how long it would take to refit them. Think I should have perhaps have asked if Thrups would fit them!

The good thing about it taking so long was that by then it was dark and I could test them. I had previously had the aiming checked to be spot on and marked the garage doors for simple beam alignment. The good news was that the new bulb combination was spot on. Initially the light output seemed to be much as the old was but once they had been on for 20 minutes or so output was rising fast. Now, after an hour or so they are just as I had hoped them to b, same spread but much more light in the centre. There is so much that I adjusted the offside down abit to reduce any possible ahgst from oncoming traffic.

Having recently had a 67 A4 courtesy car with LEDs, which were only marginally better than the S3, I am now a really happy bunny, £300 very well spent.

Clearly, based on my experience, these new light systems are not a patch on the old D1S ones but no doubt a lot cheaper for Audi.
 
Fitted the full revo carbon induction kit for my S3 pfl, easy enough to do!
 
  • Like
Reactions: EvOS3
washed it for the first time in 3 weeks, bottom half of the car on both sides seems to have picked up contamination, not as smooth to the touch as the rest of the car, any recommendations for fixing this without stripping the coating and making the need to correct paint?
just the door panels and behind the wheel arches :disappointed:

-could it be brake dust?
 
Last edited:
  • Like
Reactions: Jassyo06
washed it for the first time in 3 weeks, bottom half of the car on both sides seems to have picked up contamination, not as smooth to the touch as the rest of the car, any recommendations for fixing this without stripping the coating and making the need to correct paint?
just the door panels and behind the wheel arches :disappointed:

-could it be brake dust?

paint correction? a bit too essesive? You'll be taking off more of the clear coat as Matt Moreman would say. The least aggressive to get the door feeling better is to clay it first, you may strip some of the coating but what have you got on it already?
 
  • Like
Reactions: MattSedg
washed it for the first time in 3 weeks, bottom half of the car on both sides seems to have picked up contamination, not as smooth to the touch as the rest of the car, any recommendations for fixing this without stripping the coating and making the need to correct paint?
just the door panels and behind the wheel arches :disappointed:

-could it be brake dust?

Try iron remover first Matt, you can induce marring and swirls by claying it.

While I'm posting, haven't really done much to mine besides clean it yesterday and tackle the exhausts today, 30mins with some 0000 wire wool and Autosol and they are improved. Far from perfect though, they're pitted at the bottom! Thankfully they look ok until you get down close.
 
  • Like
Reactions: Jassyo06 and MattSedg
Try iron remover first Matt, you can induce marring and swirls by claying it.

While I'm posting, haven't really done much to mine besides clean it yesterday and tackle the exhausts today, 30mins with some 0000 wire wool and Autosol and they are improved. Far from perfect though, they're pitted at the bottom! Thankfully they look ok until you get down close.
yeah im hoping some remover will get it, dont want to have to do any polishing to it yet....

my pipes are looking sorry for themselves....always prided myself on them to in summer LOL, bought a small tub of mothers metal polish to try
 
  • Like
Reactions: Jassyo06 and Tom.H
While I'm posting, haven't really done much to mine besides clean it yesterday and tackle the exhausts today, 30mins with some 0000 wire wool and Autosol and they are improved. Far from perfect though, they're pitted at the bottom! Thankfully they look ok until you get down close.

I had this battle today...carbon on the inner tips was a nightmare to get off, ended up using some scotchbrite and lightly rubbing it. Car is only 5 months old, didn't think that much carbon would be on it!

Also, DA polished the outside, put water repellent on the side windows, gave it a quick hoover inside, activated G meter via VCDS, turned off the fake engine noise speaker, left the exhaust flaps open permanently and got Audi Connect working
 
Had enough of this.......

Should’ve sealed them with C5 when I got the car but was recovering from an op so couldn’t.

Shocking for a few months build up
7435084f115fc38e34671d373035992f.jpg


Used compound and wire wool to remove the crappy coating...
ignore disc face as car had just been washed so not driven to clean faces up yet.
c7f2d77f256ffbcc665a0a5a1ce4dccc.jpg


Shiny and sealed with C5.....

124622cba11596736af50d484c462df8.jpg
 
  • Like
Reactions: Dunedin, DJAlix, Audi Bairn and 5 others
Had enough of this.......

Should’ve sealed them with C5 when I got the car but was recovering from an op so couldn’t.

Shocking for a few months build up
7435084f115fc38e34671d373035992f.jpg


Used compound and wire wool to remove the crappy coating...
ignore disc face as car had just been washed so not driven to clean faces up yet.
c7f2d77f256ffbcc665a0a5a1ce4dccc.jpg


Shiny and sealed with C5.....

124622cba11596736af50d484c462df8.jpg
rs6 style wheels? also nice job on the hubs
 
  • Like
Reactions: T-800
Had enough of this.......

Should’ve sealed them with C5 when I got the car but was recovering from an op so couldn’t.

Shocking for a few months build up
7435084f115fc38e34671d373035992f.jpg


Used compound and wire wool to remove the crappy coating...
ignore disc face as car had just been washed so not driven to clean faces up yet.
c7f2d77f256ffbcc665a0a5a1ce4dccc.jpg


Shiny and sealed with C5.....

124622cba11596736af50d484c462df8.jpg


AWESOME WORK mate....hope your keeping well after the OP..............
 
  • Like
Reactions: Audi Bairn and T-800
paint correction? a bit too essesive? You'll be taking off more of the clear coat as Matt Moreman would say. The least aggressive to get the door feeling better is to clay it first, you may strip some of the coating but what have you got on it already?
oh no i dont want to paint correct, and by claying it will most likely cause marring which in turn...correction. Have Gtechniq CSL topped with c2v3 but I dont even think theres much of the CSL left.
 
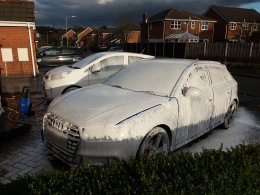
Yes winter wheels.

It’s nice to have a change from the RS rotors.
both beautiful wheels :yes: i was tempted to buy some of them rs6 style for the same reason!
 
  • Like
Reactions: Jassyo06
oh no i dont want to paint correct, and by claying it will most likely cause marring which in turn...correction. Have Gtechniq CSL topped with c2v3 but I dont even think theres much of the CSL left.
C2V3 is basically a Nano tech based quick detailer.. . . .
 
  • Like
Reactions: T-800
Wouldn't have made any difference to itsi longevity pal

The eater still runs off mine nicely and it's been about 10 months :sunglasses:

Think keeping on top of it plays a big part though.
 
  • Like
Reactions: Jassyo06
The eater still runs off mine nicely and it's been about 10 months :sunglasses:

Think keeping on top of it plays a big part though.
you've got the full on crystal serum right?
 
OK, so to cut a long story short.

I took my S3 for a tyre pressure check to a local garage, whilst it was in there the "owner" decided to prime a car door in the middle of the warehouse (He doesn't have a spray booth so does it in the open one of his employees said) causing overspray on some 4 cars, including mine. I immediately went mad and stated he was an absolute tool. He told me it won't cause overspray as its only "a bit of primer". The garage in question was Two Tone Motors in Leigh, I have no issue in naming and shaming a business where the owner has a total lack of respect for peoples property.

I washed my car as soon as I got home and sure enough, the complete car felt like sandpaper, the WHOLE car that is.
So if anybody else had their vehicle in this garage I would feel your paintwork and windows for overspray.

Anyway, onto what I have done.

I now needed to get my detailing arsenal out and correct this. Yes, I could get them to resolve the issue as they caused it, but, do I really want someone so stupid anywhere near my car? I also saw some of his "finished" paint jobs, and I would rather let my 5-year-old attempt to correct my paint.

I pre-washed the car using a citrus pre-wash to loosen any contaminants, once this had dwelled for 5 minutes I washed it off and then snow foamed the car or lubrication. Using the 2 bucket method I washed the car. Next step was to decontaminate using tar and glue remover and Iron fallout removers, once completed I moved onto clay barring the car to get off the overspray and any removing tar/contaminants.

Now the paint felt glass smooth I moved onto compounding the paint where necessary and completing the car in a finishing polish, this was all topped off with a wax finish. I know a lot of people these days like ceramic coatings etc, but I prefer to wax my car as I enjoy doing it.

Below are some images of the process and finished results. No filters on these, just RAW image files.
 

Attachments

  • 1.jpg
    1.jpg
    347.5 KB · Views: 328
  • 2.jpg
    2.jpg
    392.7 KB · Views: 358
  • 3.jpg
    3.jpg
    474.1 KB · Views: 312
  • 4.jpg
    4.jpg
    418.2 KB · Views: 319
  • 5.jpg
    5.jpg
    190.2 KB · Views: 329
  • 6.jpg
    6.jpg
    468.3 KB · Views: 323
  • 7.jpg
    7.jpg
    471.9 KB · Views: 333
  • 8.jpg
    8.jpg
    240.2 KB · Views: 331
  • 9.jpg
    9.jpg
    318.3 KB · Views: 324
  • 10.jpg
    10.jpg
    193.8 KB · Views: 328
  • 11.jpg
    11.jpg
    209.2 KB · Views: 325
  • 12.jpg
    12.jpg
    493 KB · Views: 320
  • 13.jpg
    13.jpg
    545 KB · Views: 337
  • Like
Reactions: Jassyo06, Audi Bairn, Lehn and 8 others
Had enough of this.......

Should’ve sealed them with C5 when I got the car but was recovering from an op so couldn’t.

Shocking for a few months build up
7435084f115fc38e34671d373035992f.jpg


Used compound and wire wool to remove the crappy coating...
ignore disc face as car had just been washed so not driven to clean faces up yet.
c7f2d77f256ffbcc665a0a5a1ce4dccc.jpg


Shiny and sealed with C5.....

124622cba11596736af50d484c462df8.jpg

What compound and grade wore wool did you use? They've come up nice.
 
Finally got a bunch done this weekend

Hybrid IS38 Turbo and ceramic coated hotside installed
Side Skirts installed
Mounted Dsg B&M cooler (still need to route hoses)
Flashed Eurodyne ECU and DSG
Purchased planted seat mounts for braum seats
30c5c0a37ff90bf936ad25baa95d1215.jpg
271223610e41586f0a9c216635bb603e.jpg
7f3ad3a7fc741e4b1aa66790a2ff46d3.jpg
b14faaa2001dc9cc22090b72929dc466.jpg
4575276b94478a1ef953fbe4c85d43a4.jpg


Sent from my Pixel 2 XL using Tapatalk
 
  • Like
Reactions: Weeb, Jassyo06, Audi Bairn and 2 others
What compound and grade wore wool did you use? They've come up nice.

Mernzerna P400 compound

d4884d502cccf7775809823f095b8c81.jpg

Used with a green foam scouring pad then the #000 extra fine wire wool and finished off with Autosmart tardis / Autosol

Sealed with C5.
 
  • Like
Reactions: Jassyo06, Dunedin and Tom.H
Bought hardwire kit so I can fit my amacam dashcam that I had in previous car


Sent from my iPhone using Tapatalk Pro
 
  • Like
Reactions: Audi Bairn
OK, so to cut a long story short.

I took my S3 for a tyre pressure check to a local garage, whilst it was in there the "owner" decided to prime a car door in the middle of the warehouse (He doesn't have a spray booth so does it in the open one of his employees said) causing overspray on some 4 cars, including mine. I immediately went mad and stated he was an absolute tool. He told me it won't cause overspray as its only "a bit of primer". The garage in question was Two Tone Motors in Leigh, I have no issue in naming and shaming a business where the owner has a total lack of respect for peoples property.

I washed my car as soon as I got home and sure enough, the complete car felt like sandpaper, the WHOLE car that is.
So if anybody else had their vehicle in this garage I would feel your paintwork and windows for overspray.

Anyway, onto what I have done.

I now needed to get my detailing arsenal out and correct this. Yes, I could get them to resolve the issue as they caused it, but, do I really want someone so stupid anywhere near my car? I also saw some of his "finished" paint jobs, and I would rather let my 5-year-old attempt to correct my paint.

I pre-washed the car using a citrus pre-wash to loosen any contaminants, once this had dwelled for 5 minutes I washed it off and then snow foamed the car or lubrication. Using the 2 bucket method I washed the car. Next step was to decontaminate using tar and glue remover and Iron fallout removers, once completed I moved onto clay barring the car to get off the overspray and any removing tar/contaminants.

Now the paint felt glass smooth I moved onto compounding the paint where necessary and completing the car in a finishing polish, this was all topped off with a wax finish. I know a lot of people these days like ceramic coatings etc, but I prefer to wax my car as I enjoy doing it.

Below are some images of the process and finished results. No filters on these, just RAW image files.
Great job! (and loving the shaving brush) :thumbs up:
 
Great job! (and loving the shaving brush) :thumbs up:

Haha thanks.
It's one of my most used detailing items as you can get in all the niggly bits around badges, wing mirrors, honeycomb grilles and dash vents etc lol.
 
  • Like
Reactions: Audi Bairn
Fitted S3 exhaust to my 1.8TFSI Quattro then wired in my new laser etched button designed by me ready to connect it up to the exhaust flaps. #slowprogress
8d38de31bb66e383713476a0a9833ebe.jpg
2b3d9f221d1ca4dc4dca0244f3b68674.jpg


Sent from my SM-G950F using Tapatalk
 
  • Like
Reactions: Reggieboy71, Jassyo06, Dunedin and 5 others
Fitted S3 exhaust to my 1.8TFSI Quattro then wired in my new laser etched button designed by me ready to connect it up to the exhaust flaps. #slowprogress

Sent from my SM-G950F using Tapatalk

Yours is not an s3? you retrofit all the stuff ? bumpers, exhaust and etc?
 
Yours is not an s3? you retrofit all the stuff ? bumpers, exhaust and etc?
Fitted the exhaust and modified my original s line bumper to have room for the extra 2 pipes. Retrofitted myself

Sent from my SM-G950F using Tapatalk
 
  • Like
Reactions: Jassyo06 and Schizophonic
Fitted S3 exhaust to my 1.8TFSI Quattro then wired in my new laser etched button designed by me ready to connect it up to the exhaust flaps. #slowprogress
8d38de31bb66e383713476a0a9833ebe.jpg
2b3d9f221d1ca4dc4dca0244f3b68674.jpg


Sent from my SM-G950F using Tapatalk
Good job, what differences have you noticed?
 
Noise and lots of it I did the resonator delete too. So with it being DSG you get the nice pop on the upchange

Sent from my SM-G950F using Tapatalk
Good stuff, looks a tidy job, the exhaust button should be a standard feature.