the half ***** wheel refurb

glad to entertain sir :)
Apparently she had noticed and had decided it was easiest to just let me go ahead, whatever the hell I was doing. What a woman!
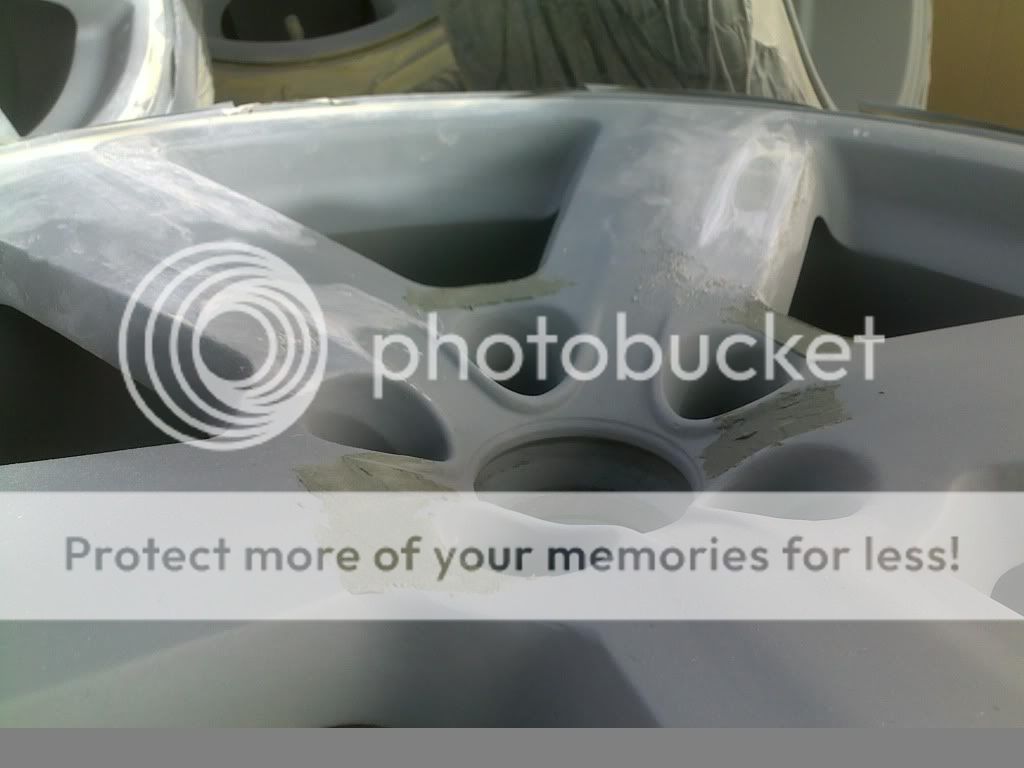
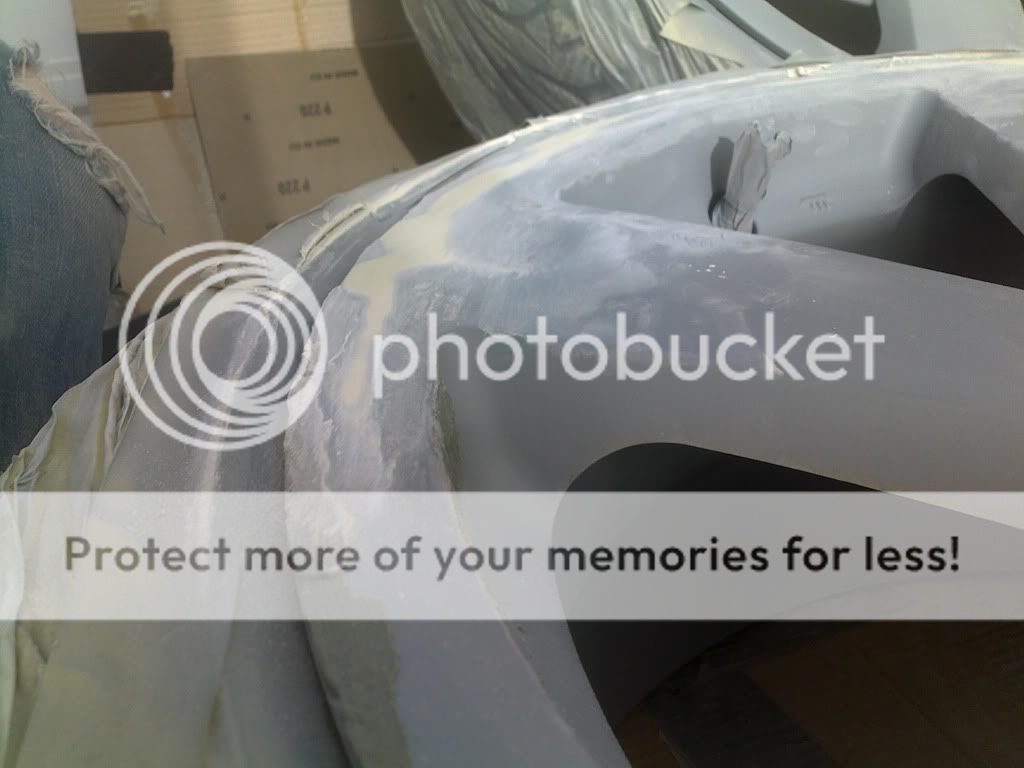
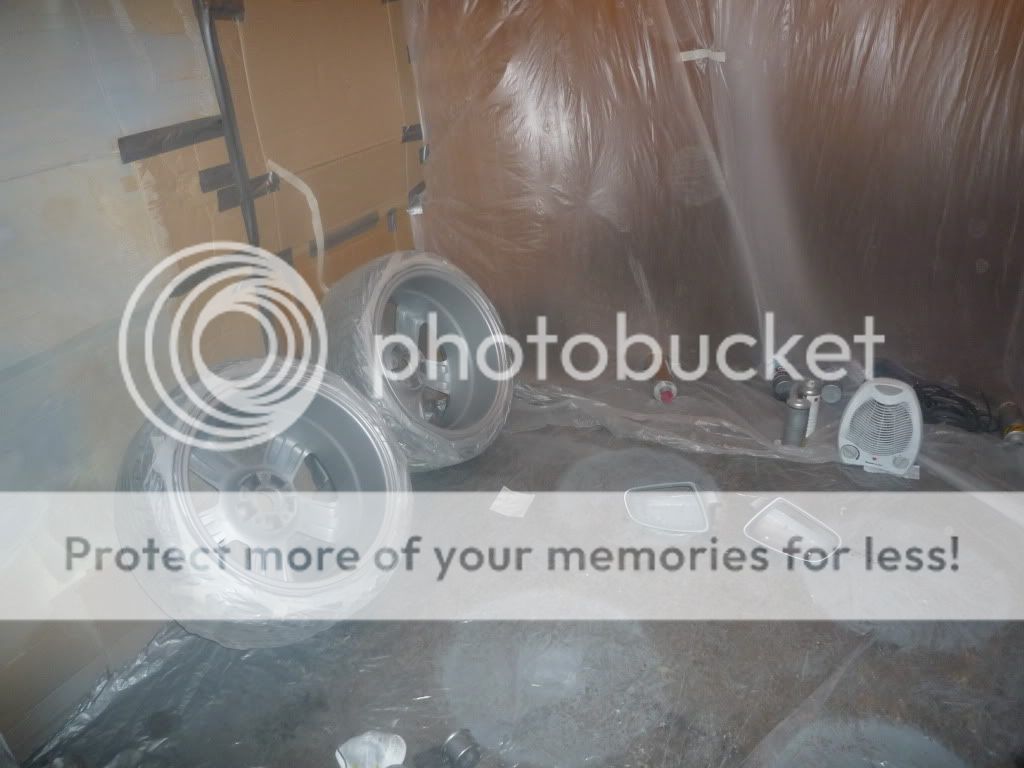
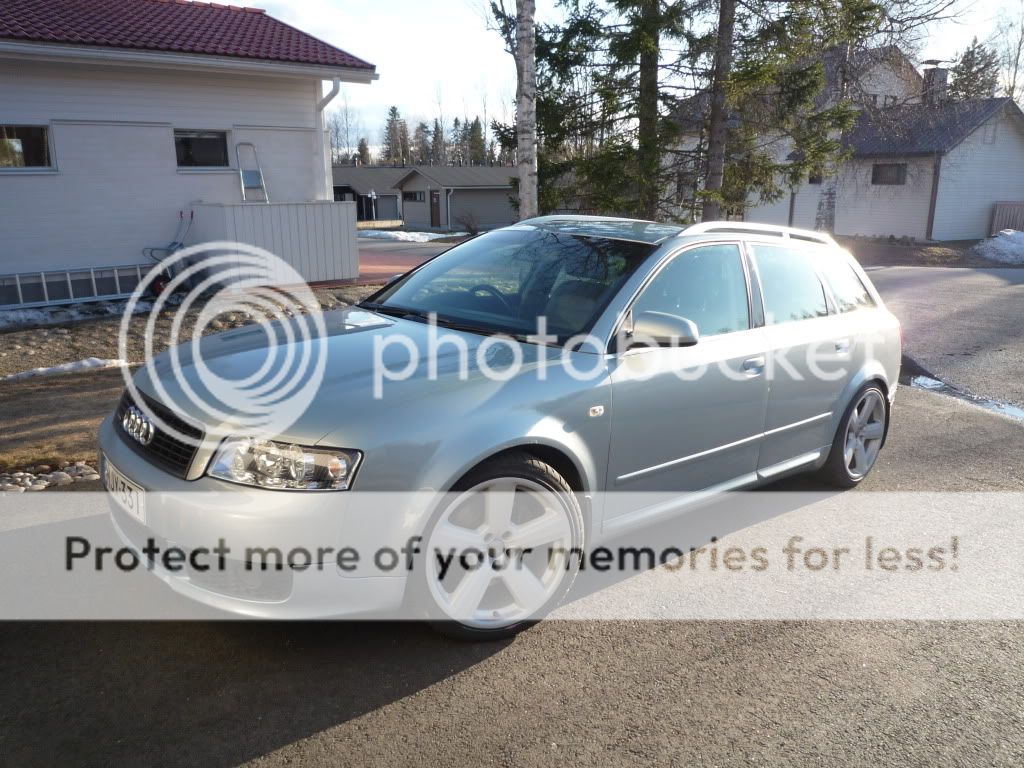
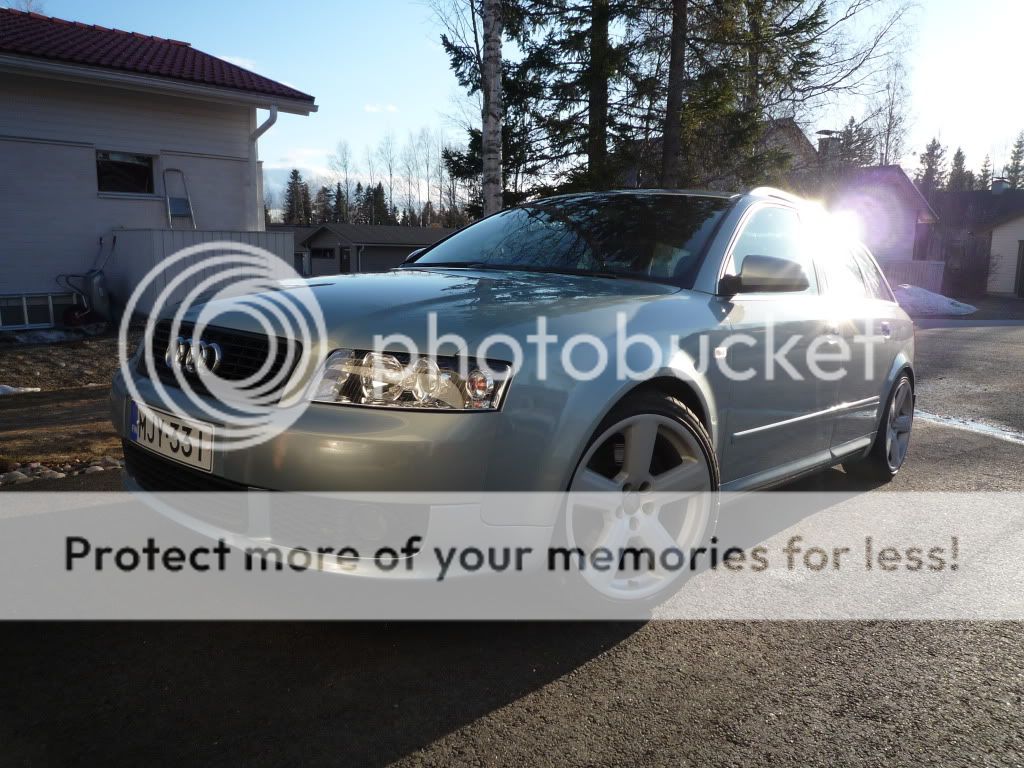
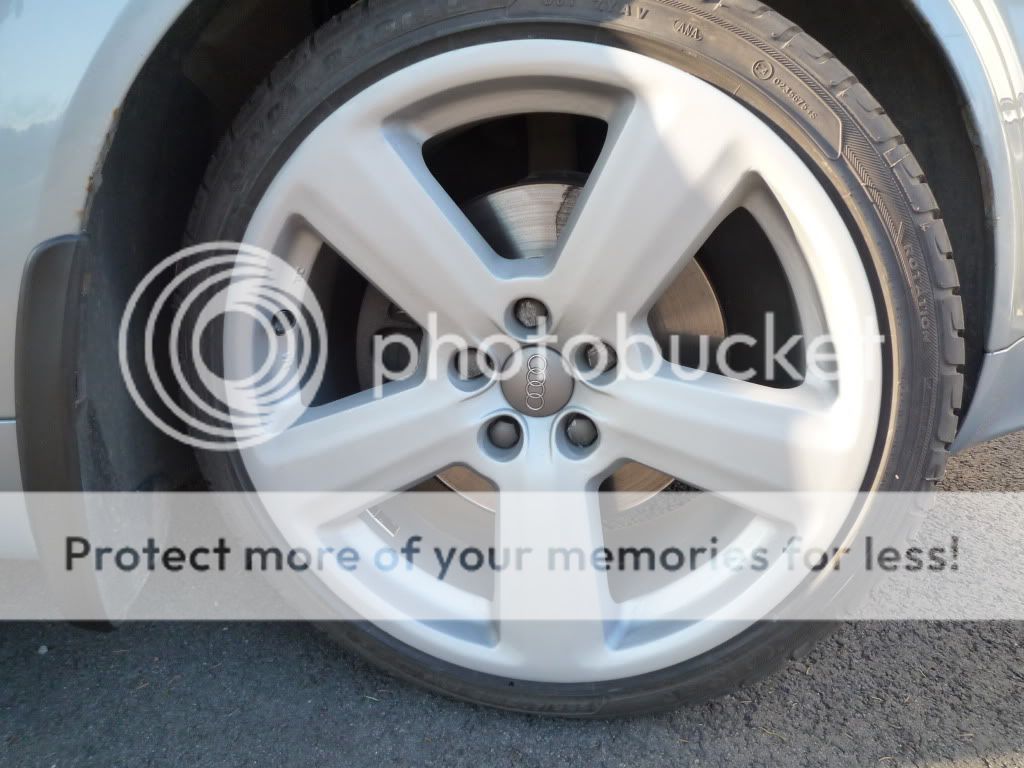
So I waited until she went to the supermarket and went out to do the first coat of filler primer. So when she came back in and smelled the waft of paint that had come in when I came back through just just raised an eyebrow and rolled her eyes. Second coat is now on too. I'll go back out in a bit and give it a third coat. at this rate the wheels will be an extra inch wider all in the name of smoothing out a few bumps.
 
It's no good. I can't claim it's half ***** any more. On Saturday I started considering whether it would be wise to just pay to get them powder coated so I got my missus to phone a local company. how much to powder coat each wheel? €140 !! per wheel! ha! so I've decided to stop ******* about and do it properly. Soo... back to the wheels and a bit of inspection of the dents and dings too big for filler primer (I guess I was kind of hoping for some kind of miracle with that stuff :) ) I found quite a few places to apply a drop of chemical metal and have now almost finished flattening them down to let me get back to stinking the place out with paint.
Sorry, photos are a bit **** on my e71
ref1.jpg


I actually found I got quite into this bit. It helped that the missus and kids were out and the sun was shining on me, with good music on.
ref3.jpg


Oh yes.. my landlady told us that whoever was renting her garage has stopped now so i'm expecting the key in teh next couple of days so I can actually continue in a garage instead of on the balcony. woohoo!
 
and in other news.. I bought a set of four 18" RS4 wheels for 40 quid! ha! Just because they were there. So my dad will be presently looking at them in his shed and wondering how his life became so difficult constantly couriering things to me :)
 
that filler primer is for prep marks more than any thing i hate the stuff i see no point in using it id rather just spend a few more mins on the job sanding it down to not need it but thats just me
 
So I shouldn't have built a frame and tried to pour it in like cement? :)
This is my 1st time using paints so I'm on a steep learning curve. Definitely seems wise to take time to do a lot of prep before ploughing ahead.
 
ha nope that would be the wrong way to do it lol id recomend spraying very light dustings of paint over it mate will take a bit longer but you will not get any runs in it this way the primer is ok as you can flaten it when dry with some 1200 grit or some thing to get it smoth but the silver do in short bursts say from the right to the lift then move down the wheel and do again dont try to cover it all in one go and give a min or two inbetwin coats as to get no runs same with the clear coat that will run very easy also put the cans in some hot water to warm them up paint comes out a lot nicer
 
cool, thanks. do you do the 1200 wet or dry when flattening the primer? and do you flatten again after a coat of silver before the next and again before lacquer? so what I'm asking is do I flatten between every layer?
 
its up to you mate i do use it wet but leave the primer over night if you can to dry if not its ok to do if dry. as for the silver no mate you dont touch that at all or you will see the marks in the paint when done so a big no no ;-) so just the primer mate and to be fair most of the time you dont need to flaten the primer ethere just if it needs it
 
Last edited:
Ive done a fair few sets before and followed this process.
1. Sand down the marks,
2. Sand again then use etch primer as quick as possible.
3. High build primer and sand back. Sometimes 2 coats.
4. Paint - min 2-3 coats.
5. Lacquer soon after - again 2-3 coats but not to thick as it goes milky white colour.

Leave for a couple of days in heated room to harden. If not done right they do tend to chip easily.
 
Last edited:
thanks gents. let's hope I don't make an utter ******** of it after all this.
 
As with most things, the key is in the preperation. If you're not sure whether to flat it back again then do so.

I like the filler primer myself, as long as you don't expect miracles of it then it's a useful tool.Just do as many coats of primer as you need to get a perfect finish, but if the filler primer has been done well then you'll only need two or three. I used 1200 grade paper at this stage to get the primer spot on. A few thin coats of Avus silver will of course be better than thicker ones. I left it 20 mins between coats before reapllying, but it depends on conditions. Do the insides first and you'll get into the swing of it. DON'T key back between top coats, they'll be no need if the preperation was done right.

The can in hot water trick is a good one, expecially with the lacquer which can be a bit blothcy if you're not careful. After I did mine I left them in the conservatory for an oven baked effect! Maybe you can do the same in a dry sauna?

Don't forget the Poorboys ;)
 
I ordered the poorboys before I even started the wheels so it's in the back of the car somewhere just now waiting for the day it can be used.

The sauna has always been the master plan but if I finish my wok off in the garage I'm about to get the keys for then I'll not be in a mood to bring wet wheels upstairs one at a time. I migt just have to leave the wee blow heater on in the garage to keep it at a nice temperature. hmm.. I was looking forward to posting pics of the wheels in the sauna too
 
use a hair dryer all you need to do is dry the out coat and then leave them over night and all will be find
 
cue angry wife just out of the shower and looking for absent hair drier.. or possibly finding semi silver har drier
 
I now have 4 coats of silver on and went for the 1st coat of lacquer. Was going OK until the can spat a few drops on one wheel and one mirror cap. aghhh. not much I can do about it though is there? Also I can now see where I haven't sanded uniformly before starting my painting. Would have been so good to get them shot blasted.. and powder coated to avoid me ballsing it all up.

I also moved down to a rented garage at the back of my flat since the landlady offered it to us cheap (was previously rented out by someone else).. I was dead chuffed until I opened it and found that the row of garages ism infact, one long garage separated by.. erm.. well the walls are like a wooden fance with gaps. and the ceiling space is empty air above the wooden rafters. So I had to cover both walls in cardboard and the ceiling areas with plastic so make sure the overspray didn't drift off and coat everyone's cars. I won't be ******* about with this kind of thing again until I've built my house (and matching double garage & storage rooms). at one point when moving the wheels from balcony to garage one fell over and took chunks out of the primered rim all round and I had to sand it all down again and re-primer.
More lacquer tomorrow and maybe on wed too...
 
get a pic up if you can of the splat mate some times you can get it out but need to see it first
 
What colour are the wheels Avant4me and where did you get them done?

Keep up the good work Noel :) Its no mean feat getting a good paint finish in your weather conditions I'm sure.

I don't imagine the people sharing that garage block will think its unusual that the guy with the Irish accent has covered everything in a weird dust....
 
it's more the stockpile of molotov cocktails glimpsed through the open garage door :)

Avant4me - like waving a burger at a starving man :) They're really nice. I won't pay €560 for powder coating here though. not this year anyway..

OK, so here's a pic of the mirror cap, although i'm not sure if you can see it well enough. I dunno if I can go really gently with some wet 1200 on these blobs or if it will mess up the paint underneath?
DSC_0155.jpg
 
its hard to see but dont look to bad lacquer is a funny thing to get right when i was traned to do boddy work i found out many tricks with the lacquer ie how to get read of blobs and runs the door miro dose not look like you have a lot of lacquer on it in the pic the so you can do one on of 2 things rub it all over with 1200/1500 dont need a lot of preshor as you are just keying it up and just work a bit harder on the blobs and just re lacquer or witch i dont think would be easyer as its such a small part you can just rub the blobs with 1500 and then ust a rubing compond to buff it back up id do the first one my self as its a small part
 
Last edited:
cheers Simon. And funnily enough that's exactly what I just did. the pic doesn't show it but there were a few blobs like i'd spat at the thing. same for one spoke of one wheel. when I rubbed them down though it left little dark circles so I had to put a couple of very light dustings of silver on and I'll go back in a while with the lacquer.
I'm going to soak the cans for a lot longer this time to try to bring the lacquer up to a reasonable heat. Next time I do this kind of thing (if ever again) i'll buy a second hand baby bottle warmer to set my cans in.
 
just put the kettle on feel a mesoring jug 4 to 5 ich with boiling warter live it in there for about 60secs just have a cloth to hold it with after to give it a good shake buy this time can would have gone cold enough to hold
 
is it possible I had it in the hot water too long last time? might have had it in there for 5 mins while I was doing other things.
 
maybe mate but a good shake should sort it
 
My ET oxygen tent stype spray booth
P1080057.jpg


given the very little amount of effort put into the back of the wheels they seem to have turned out ok
P1080058.jpg
 
what a bunch of w**kers around in this world to day the good news is looking at it get your self some fine rubing compond and it will go mate no pant needed
 
Yeah, I can't quite work out who or why, espcially given that it's been in my parking place for a week and well off the street. neighbour perhaps? maybe even accidentally? ah **** it. Like you say it should rub out. I have poorboys ant swirl remover so we'll see if that's hars enough. I also need the front arches sorted because they're bubbling. Obviously I'm not doing those myself.

I've also come to the conclusion that the lacquer I got is pretty ****, which is disappointing from a motor factors. not cheap either. no matter how much a shook and warmed (without going over the top) i'd suddenly just get spits. So I have a bit of polishing to do with a rubbing compound. The final effect is mediocre but better than they were with big chunks out of them. I'll post pics later.

So my lessons learned here would be... if you don't know what you're doing, take your time and make sure you're working in the right conditions with the right materials. and take your time with preparation. over enthusiam when sanding will leave an uneven surface that looks bad later when painted. And number one top tip - if it's not going to cost silly money... get a professional to it.
 
mate when i was lerning to do this stuff back in 1998 now my ferm was its you the prep that needs to get it right for the spryer he has the easy part and its true id prep the cars for them and when they where done 9 times out of 10 i / we had to rectify it after them small runs or bobbles or bits of crap that just whent it to the paint any way if you take your time and give the wheels say 5 days to harden then you can buff them right up and you will never no ;-)
 
Last edited:
Mate I think you're selling yourself short a bit! The temps. you're working in are pretty punishing for paintwork and I bet when you put the wheels on you'll be happy with them. Seeing them on the car is a lot more forgiving than kneeling down next to them closely examining them!

At least with the mirror caps it's relatively easy to pop them off again in the summer and redo them with silver and lacquer one day.
 
hmm. maybe :think:
If my tensioner actually turns up before next winter I'll get it fitted and take the wheels to be balanced (since I removed all the weights) and fitted. Then I'll get photos and see what the opinion is. I reckon they'll be 6 footers, as in they'll look ok from 6 feet away. I'll collect some dead flies and position them strategically on the lacquer spots on the mirrors too :idea:
 
What colour are the wheels Avant4me and where did you get them done?

Keep up the good work Noel :) Its no mean feat getting a good paint finish in your weather conditions I'm sure.

I don't imagine the people sharing that garage block will think its unusual that the guy with the Irish accent has covered everything in a weird dust....
James
They are Anthracite powder coat. Got them done in Bristol at a place called "Griffs reality motorworks" they started as a custom bike shop and there is a lot of powder coating goes on with bikes, he did my suspension bits about 4 years ago and they still gleam when i clean them. The finnish is immaculate and powder coat is a lot harder than paint.
 
Cheers, I don't suppose you know the paint code? There's a lot of anthracites out there!
 
yeah yeah yeah.. enough of your anthracite nonsense ;)

hmm.. just phone pics. need better ones with the big camera
19042011596.jpg


19042011595.jpg
 
Does anybody have a good source for replacement centre caps? One of mine is cracked and the spring/circlip things on the back have seen better days. Actually one may be enjoying better days and a whole new life somewhere since it's not attached to the cap.
19042011597.jpg
 
they look good mate and on the car they are going to look sweat
 
ah, mother fungler. just typed a big message and got some daft message, went back and it's gone

anyway.. et voila! Here's the car with wheels fitted and a good clean and polish.
P1080121.jpg


and another from a jaunty angle
P1080122.jpg


one of the wheels..
P1080127.jpg


The odd thing is they've come out as a matt finish. the guy who balanced them even told me to remember to put lacquer on them.. erm.. I did. 3 coats! very odd. so they're polished with a couple of coats of poorboy's wheel sealant too.
The final verdict is.. they're a bit ****. That's not me being overly self critical.. just a statement of fact. So I'll probably try again next winter if I have a better place to do the work.

Here's an odd thing.. the car seems to be pulling to the right a bit since the wheels were changed. it's possible there was a slight bit of pull with the 16s but is now exaggerated but I can't say for sure. any thoughts?

I also need to get the arches sorted out soon. After scrubbing the winter crap off them they don't look good at all
 
oh yes. I haven't fitted the silver mirror caps yet.. obviously. Hopefully get that done tomorrow.
 

Similar threads

Replies
12
Views
2K
Replies
25
Views
3K
Replies
3
Views
1K