superkarls overhaul

Fair play dude, its impressive work. I 'helped' or most probably got in the way doing my rod build and feel confident with most things but porting and making stuff is totally different lol :thumbsup:
 
The weak points on these 20v large port heads are the valve throats as the seat just doesn't flow well and needs smoothing out

you get an idea on how much time it takes to do a fully ported head now I bet, most people that do a DIY job end up getting bored and then send it to me, keep it up mate and take a bit more out of the exhaust port

Yeah... if I hadn't run out of money you would have my head when I put the stroker together :(

<tuffty/>
 
Ive got a downpipe ready made, its fugly, but it works, just needs a decat to go with it which i might v-band, and also v-band my miltek. We'l see.

Andrew, like you say, the time and delicate nature does put people off, but once id started on one cylinder and done what i was comfortable with i carried on with the other.

What i did was:
Gasket match inlet, so material removed from opening.
Smoothed cast marks out and as much of the ports as possible, that included the valve throats and 'bowls' as some people call them, this involved getting rid of casting marks, and tbh they were very prominent behind the seat.
I also blended in slightly the valve seat to the throat, the step ridge is massive, i didnt remove this tho, too delicate and too much material for a noob.

Exhaust side, port opening enlarged and smoothed a tiny amount
All casting marks removed, and smoothed the walls right down the throat to the seat.
The seats are completely blended in, less of a ridge to begin with unlike the inlets.
Also on the exhaust side there is a slight ridge either side behind the seats, these are completely gone, making the throat a fair bit larger.


Itl do for my first attempt. I have other heads to practice on and hope to be up to your standard one day andrew, because to be honest, i quite enjoy the time and delicacy needed, quite theraputic, apart from the noise lol.
 
And the tingly sensation you get in your hands after using the tool for a few hours :)
 
been doing quite a bit of head work, once the head is on the engine can go in.

First cleaned the valves, in a drill, wrapped in cloth tape to protect them, bit of steel wool and they're clean and seats are ready for lapping:


lapping in, takes forever, inlets only needed fine paste, exhaust seats needed a hit with some coarse then fine:


once those two jobs are done and the head is cleaned of grinding paste, you can start to install the valves, this is not a nice job, so fiddly and takes a lot of patience.
First new stem seals, real easy to remove old and fit the new with the right pliers and the drive:


Fitting the keepers, or valve collets as theyre known is as follows:

As you can see the keepers are in two halves and grip the valve:


which are then gripped by the retainer which keeps the whole assembly intact:


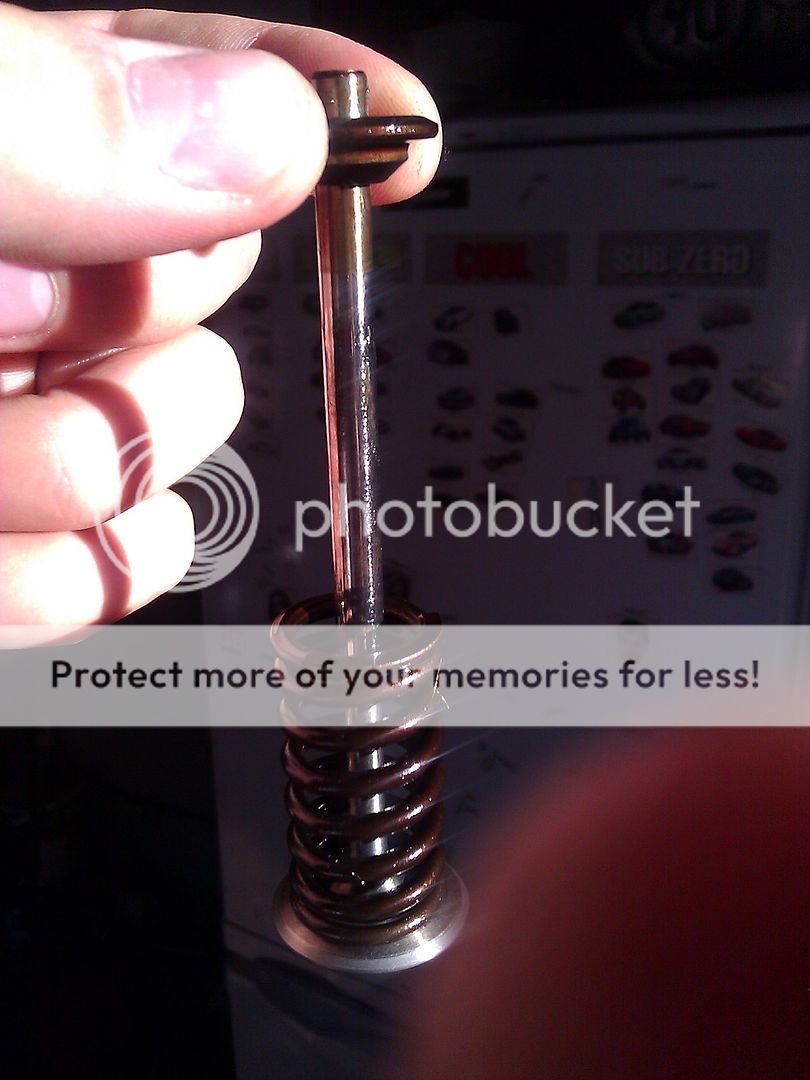
Lube your valve up, put it in the guide and up through the stem seal. Then place your spring in, you MUST make sure this is installed straight and the bottom of the spring is correctly seated or you will bend valves!


Now take your spring compressor and compress the spring, revealing the end of the valve stem, and the 3 grooves which your keepers will need to be installed. Yes, you need to put the keepers on through that gap!


1x tiny screw driver, 1 x tub of sticky grease:


Its like a giant game of operation, will take a few tries to get the angle of approach right etc, and use a torch! Was a little more difficult for me than most as im practically blind in my left eye, so depth perception isn't my greatest strength.
Once in you can rotate the keeper around the valve to make room for the second half:


Once the second half is on, gently remove your spring compressor and the retainer grabs the keepers and its done:


I then took a hammer and a wooden handle to then shock the top of the springs/valves to make sure they are settled and in the correct position.

Im now working on cam installation after putting the hydraulic lifters in, which have been in a bucket of oil for about 2 months.
Thing is, I totally forgot about the tensioner compressor tool, ****, off to VW I go.....
 
  • Like
Reactions: Gizmo20VT, JudderMan, S3Alex and 4 others
Oh and the manifold now has M10 studs fitted, tapped that a couple of weeks ago.

Its fitted to the head, secured with schnorr washers and copper flashed nuts. I need a special pikey modified spanner though to go over the top row of nuts as they aren't easy to get to and theyre not as tight as id like.
 
  • Like
Reactions: Alex C, ScottD3, Jason.s and 1 other person
Very nice results from a lot of hard work.
 
Thanks bill, is was that paper that made me extra cautious about the spring seating and fingers crossed they are all seated straight, i checked to the best of my ability.

Currently have the cam chain tensioner compressed with cable ties, and need to change out the cam seals before fitting the exhaust cam and timing that up with the crank and timing belt on, then proceeding to install the tensioner and inlet cam afterward. This seems the easiest as i see it.

Thanks for the kind words guys, certainly is one hell of a learning curve all this!
 
For the first time in my life ive timed an engine:


I hope ive done it right, as im aware people tend to do this a tooth out without realising.
I fitted it without the hydro tensioner as it was tight as a gnats chuff, so when fitting the tensioner in it sort of rotates the cam a little bit back, (is that where people get it wrong?), so I installed it a tooth ahead pretty much, and with everything fitted all the marks line up perfectly, turns over nicely.

(Don't worry I have a brand new crank bolt)


Fingers crossed anyway.
 
  • Like
Reactions: Alex C and s3dave
Good work Karlos!

Really looking forward to seeing this come together :)

How long is it you've been without the car now? must be driving you mad!

Is that Reesys old manifold and DP you're using?
 
  • Like
Reactions: superkarl
Got fed up with dong all those valves and converted it to an 8v instead? ;P

I really enjoy building engines... will be doing the bottom end of mine this weekend... can't actual wait :D

<tuffty/>
 
  • Like
Reactions: superkarl
Excellent work so far dude, well done on the headwork :D!
 
  • Like
Reactions: superkarl
I think i blew the motor in like january or feb, cant remember. Its painful having to share my mrs car, i feel guilty putting miles on it. Otherwise its not been too bad without, only recently has it started to annoy me.


I have enjoyed learning all the things i have, and its been enjoyable for some of it, but has also been stressful at times due to where i live, where the car is, where the engine is etc.

Speaking of blown engines, wait till i post a pic of my old piston later, its AMAZING, going to be an ornament in my living room i think lol


And yeh prawn reesys old mani and dp. Cheap and simple.
This build has been a budget build since the start, BUT i think ive paid for quality where it matters, and tried to save in other areas where its ok to do so, the mani is one of them, it will do the job, but isnt the best thing in the world, i can live with that.
The bottom end should be solid though, every bolt gasket and seal is brandnew on both head and bottom end. I pray that this can go on for another 150k, thats what i want, and i dont want it tuned on the ragged edge.
 
check this out:


Just think of the temperatures and pressures that must have been through to do that! its awesome!

The big ends weren't very healthy out of that old engine either:
 
Number 4, the one that died. I could only see the top though. I was wondering before what the whole piston would look like so I took it out and was like '**** into the eyes of zeus that's bad!'
 
  • Like
Reactions: crazy88
injectors were fine yeh.
It had a cambelt failure at some point in its life, valve marks in the pistons, so my best guess is the sharp mark caused a hotspot and began the detonation and that just kept going and manifested into what we see now.
 
Yep.....I'd say that piston's pretty well had it!

It will make a great trophy wherever it ends up.
 
Never got to check fuel pressure.
But i go by the theory that if it was fuel pressure related then all the cylinders would have suffered, not just one. The others are totally fine.

Got a da-31 going in, will log fuelling and if i have to replace/upgrade the intank then so be it.
 
Small update, sadly few pictures.

So I took the built and timed (after ordering the chain tensioner tool and it arriving while I was away, my dad put the inlet cam in for me with tensioner. 16 rollers, exactly as pictured in the instructions), across town to where the car is kept. Was fun putting that into the back of a Renault clio, it was heavy, and hard to get out.
Its now hanging on the engine crane waiting for a flywheel and clutch to be torqued on and a gearbox bolted up, Then the installation can begin.

Following day I loaded the old block with crank and Daves engine stand into the clio and met him half way, big thanks for the stand mate, and meeting me halfway for the handover.

Im currently back in Southport hoping to do the above things to start the install.
In the meantime I have a couple pics and also a question:


Turbo outlet extended to meet the oem stainless chargepipe which has also been modified, OEM+ looking install hopefully.
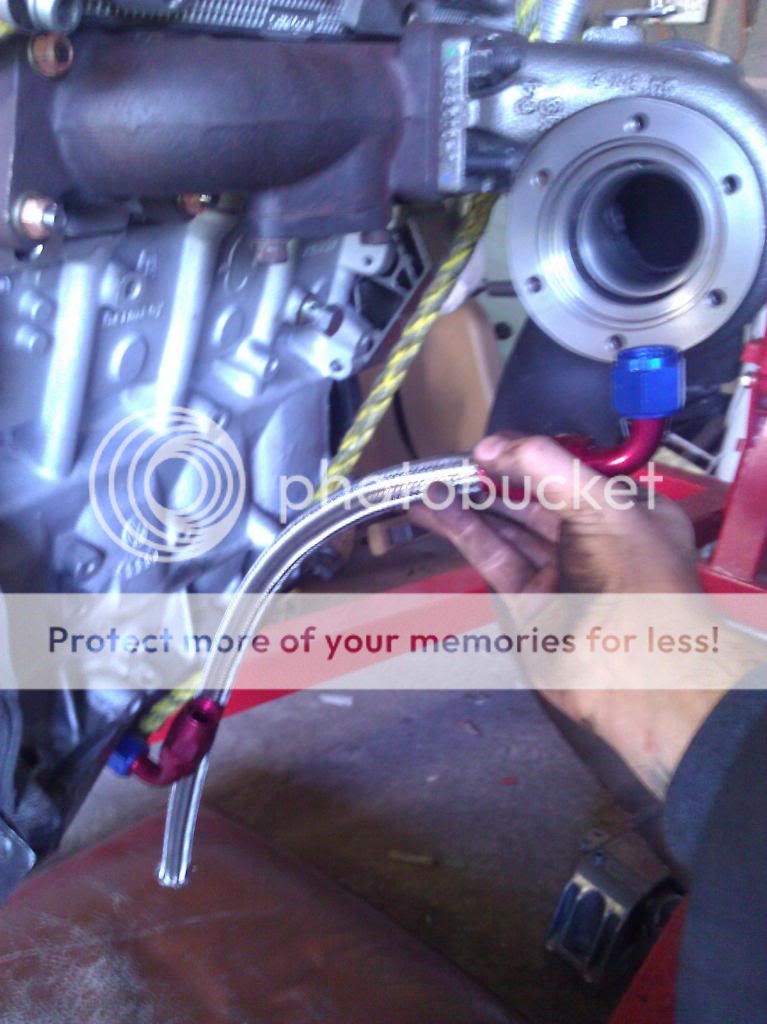
I also had an -10AN boss welded to the sump for the turbo oil return, no pics yet.


Recommended by Dan, Schnorr washers being used on the turbine housing bolts, and also on the mani-turbo studs which are high tensile bolts and I will cut the heads off, pictured with the slimline K-nuts. I wasn't happy with how far the studs went into the mani, so with these 50mm bolts I can go in as far as poss and cut to size.


Lastly, oil restrictor for the turbo feed. This is it wound in by hand, as far as it will go, I take it they don't go all the way and seat up against the hex section?
Im also not convinced its a 1mm hole, so will be checking that and drilling if need be.

That is all.
 
  • Like
Reactions: s3dave
Well done karlos. Nicely on track to finish in time for graduation.

I don't understand a lot of what you write, but it sounds impressive. :)
 
crazy, you need to be learning the lingo now that youre a boost junkie! You'l be rambling all sorts when your mrs asks 'wtf is that' and then shel look at you like you're a sad nerdy bellend.
And the rate this build has been going, i could probably do a phd by the time its complete, but seriously its been moving quicker lately, and i really need/want it done soon
 
  • Like
Reactions: Jason.s
I already baffle her enough with my regular jargon that I don't think car talk will help much. She still thinks I'm a bell end, ah well...i probably am.

But yeah, I need to get up to speed with this all. Keep going dude.
 
Had about 3 hours to do some work last week, which consited of failing to put the flywheel on and torque it down, due to the tool i was using being quite worn and rounded, i dont think it would like 60+lbft torque going through it, so waiting on a brand new bit so i have some confidence to fasten that up.

What i did do was, remove A/C rad:

which is nearly as thick as the main rad, and will no doubt free up some airflow and keep things cooler. I used to see in the height of summer and after a good hard raping, water temps get up to about 106-107 degrees when at stand still before fans working their tits off to get it down.

I also decided to put the gearbox on, despite no FW torqued or clutch fitted yet, for 2 reasons, turbo oil return, and downpipe fitment:

I need to swing that big lump of expensive metal into the bay and see how the downpipe sits and how much needs adding to meet the miltek.

And the oil return went as follows:


yet to cut it, but sits tightly between the transfer box and block, at as steep an angle i can get it

Next, with little time to spare and being on my jack jones, i started tinkering and thinking about the injectors.

Genesis II 630cc. They have very long nozzles, but cam supplied with spacers, for use with both the top and bottom of injector.
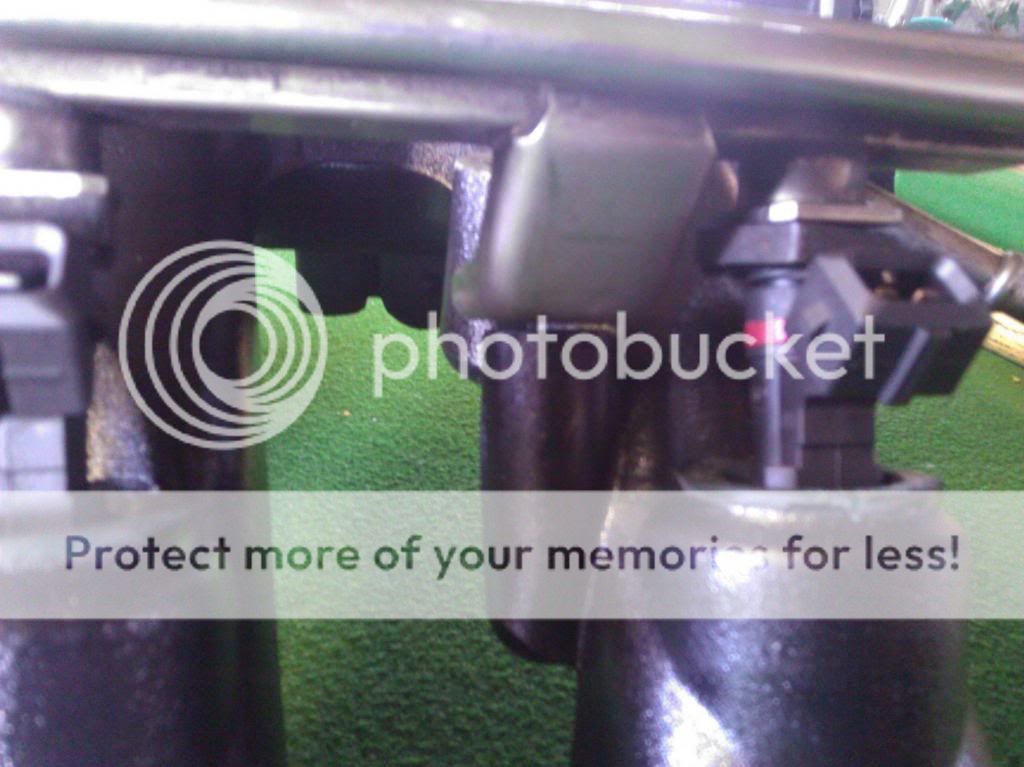
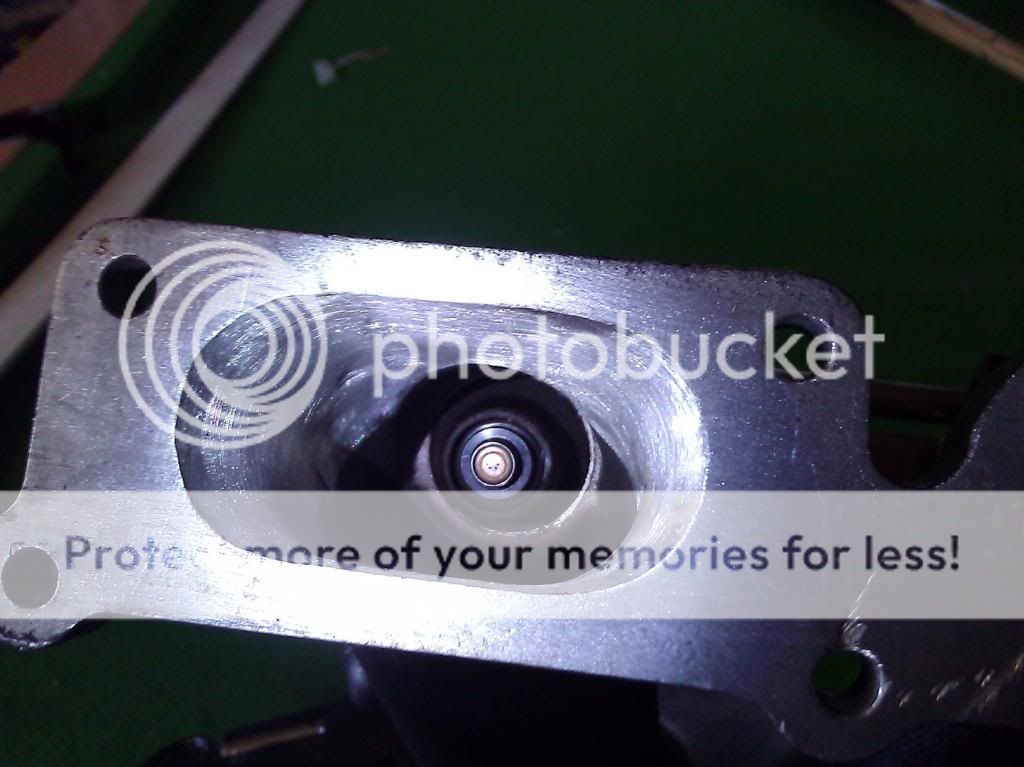
First i tried them spacer-less:


they sit nicely in the mani so that the fuel rail can be bolted down in its oem position, BUT, due to the long nozzle design, they protrude quite far into the ports AND seem angled and aimed toward the floor of the ports of both the mani and head.

So with spacers on:


They sit as oem injectors would in the manifold, but the gap from rail to mani would need some big *** spacers, which i dont mind doing.

My question is, which is the preferred fitment of these injectors, is the almost direct port setup ok, or too close to the wall of the ports??
Or should i stick with how oem injectors are fitted, and space the rail up as needed??

Tar
 
  • Like
Reactions: Goubo1
Looking good. Not long now?

Pretty sure Stacey had this issue with injectors? Check his thread on here or Vortex? I think Scott from USRT replied.
 
  • Like
Reactions: superkarl
Looking good. Not long now?

Pretty sure Stacey had this issue with injectors? Check his thread on here or Vortex? I think Scott from USRT replied.
I like to think not long, but V busy with uni, work and life in general.

cool il have a scan, i will PM scott if no one answers or i cannot find anything.
 
I would say the injectors need to have the spacers on, so they sit further away from the head. This should allow the fuel to mix with the air a bit better.
But thats just my 2 cents


Also I hope you going to heat shield that oil return line. Its going to get real hot down there :)
 
  • Like
Reactions: superkarl
Cheers dude, my thoughts too, will be making some spacers out of a bar of alloy.

Also the oil drain wont be near anything majotlr hot like on a top mount tubular, should be reet
 

Similar threads

Replies
24
Views
5K
Replies
10
Views
1K
Replies
7
Views
912
Replies
2
Views
674