

My new S.Blue S3!!
- Thread starter Boydie
- Start date
You are using an out of date browser. It may not display this or other websites correctly.
You should upgrade or use an alternative browser.
You should upgrade or use an alternative browser.
- Joined
- Jul 4, 2007
- Messages
- 17,105
- Reaction score
- 719
- Points
- 113
- Location
- Salford, Manchester
- Website
- www.facebook.com
Cheers N8! Do you have the contact details for this MJ fellow to do the triangles?
Michael Pinnock - MJ - Interiors : 01274 533370
- Joined
- Dec 24, 2006
- Messages
- 4,189
- Reaction score
- 1,168
- Points
- 113
- Location
- Co.Antrim
- Website
- www.reallymeansounds.com
Not an update but over here in Forres, northish Scotland with my gf.
Got the boat from Belfast to Stranraer this morning. I loved my trip down the west coast of Ireland but this is something else!
Absolutely fantastic scenery and the roads through the highlands and cairngorm are just breath taking!
Decided to have a look at the cairngorm ski resort to see what all the fuss was about and I am so glad I did.
Will be taking more photos over the weekend but a wee taster off the iPhone!

- Joined
- Dec 24, 2006
- Messages
- 4,189
- Reaction score
- 1,168
- Points
- 113
- Location
- Co.Antrim
- Website
- www.reallymeansounds.com
- Joined
- Dec 24, 2006
- Messages
- 4,189
- Reaction score
- 1,168
- Points
- 113
- Location
- Co.Antrim
- Website
- www.reallymeansounds.com
Cheers mate! Ended up missing the boat last night!
Realised at Ben Nevis that we were going to be pushing it lol the drive from there to Stranraer is just a blur! Awesome driving roads and really proud of the S3 (and my skills of course lol)
The S3 is definately a keeper for the for-see-able future!!
Realised at Ben Nevis that we were going to be pushing it lol the drive from there to Stranraer is just a blur! Awesome driving roads and really proud of the S3 (and my skills of course lol)
The S3 is definately a keeper for the for-see-able future!!
- Joined
- Dec 24, 2006
- Messages
- 4,189
- Reaction score
- 1,168
- Points
- 113
- Location
- Co.Antrim
- Website
- www.reallymeansounds.com
Some from the trip - unreal roads from Inverness to Fort William, through Glen Coe etc....
Loch Ness


Such a road at Ben Nevis!!


Loch Ness
Such a road at Ben Nevis!!
akash_sky1
Registered User

- Joined
- Dec 24, 2006
- Messages
- 4,189
- Reaction score
- 1,168
- Points
- 113
- Location
- Co.Antrim
- Website
- www.reallymeansounds.com
Cheers lads!!
Between my girlfriend holding on for dear life and having her eyes temporarily open, she did manage to mention that I was grining from ear to ear lol
Between my girlfriend holding on for dear life and having her eyes temporarily open, she did manage to mention that I was grining from ear to ear lol
- Joined
- Dec 24, 2006
- Messages
- 4,189
- Reaction score
- 1,168
- Points
- 113
- Location
- Co.Antrim
- Website
- www.reallymeansounds.com
Thanks!
Insurance

Cambelt and water pump change
Brakes all round
Trimming of interior plastics (as per Audi exclusive pack)
Modifiy old engine cover to suit intake once fitted!
Refurb BBS CH's
A few 2009+ facelift interior switches
Stage 2+ Revo which is a 3rd remap and high pressure fuel pump (360bhp)
Forge oil catch can
Not necessarily in that order but more or less!
After that, just drive it and enjoy it! I have a real bug now for driving holidays after doing North Wales, West Ireland and Scotland so I think next on the list would be the Ring!
Insurance
Cambelt and water pump change
Brakes all round
Trimming of interior plastics (as per Audi exclusive pack)
Modifiy old engine cover to suit intake once fitted!
Refurb BBS CH's
A few 2009+ facelift interior switches
Stage 2+ Revo which is a 3rd remap and high pressure fuel pump (360bhp)
Forge oil catch can
Not necessarily in that order but more or less!
After that, just drive it and enjoy it! I have a real bug now for driving holidays after doing North Wales, West Ireland and Scotland so I think next on the list would be the Ring!
- Joined
- Jul 4, 2007
- Messages
- 17,105
- Reaction score
- 719
- Points
- 113
- Location
- Salford, Manchester
- Website
- www.facebook.com
- Joined
- Dec 24, 2006
- Messages
- 4,189
- Reaction score
- 1,168
- Points
- 113
- Location
- Co.Antrim
- Website
- www.reallymeansounds.com
Alright guys!! I decided the other week that I want to return to Edition 38 in September. With that in mind, I have a number of small projects to finish on the S3 before the trip!
So, my bank has been hit and have a few things on order, just awaiting on delivery and installation!
So, first off, I saw a thread a week ago or so regarding retrofitting a TTS engine cover to the S3.
As a lot of you know, the 2.0TFSI intake in the golf/leon/s3 is all based around the engine cover. To fit a CAI, you have to remove the engine cover and reveal the ugly engine!
In the TTS, they revised this and used their own CAI of some sorts to do away with the airbox engine cover. Fortunately for us, this fits our cars")
So, spotted this on ebay and to the disgust of some members I won and it arrived this morning!

Good condition, no serious marks or chips in it that I have seen so far. Overall, very happy!
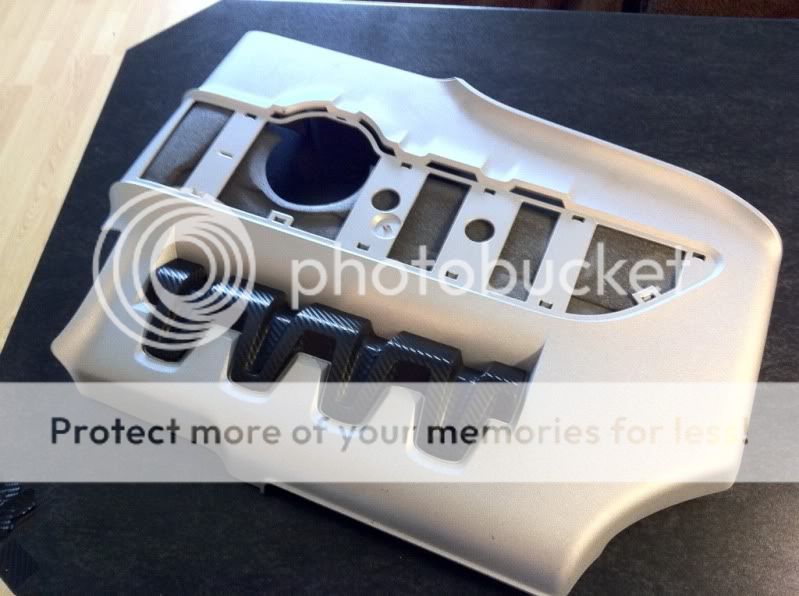
Started to strip it:
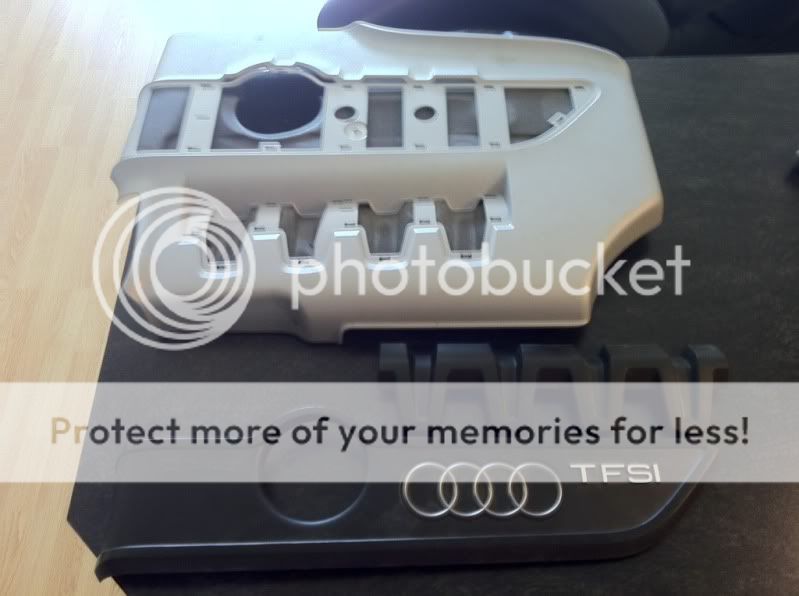
This looked difficult as the underside of the cover is covered in a foam/sponge layer but thankfully, the clips are not wedged in tight and came off with relative ease! Oh and I didn't break a single one lol
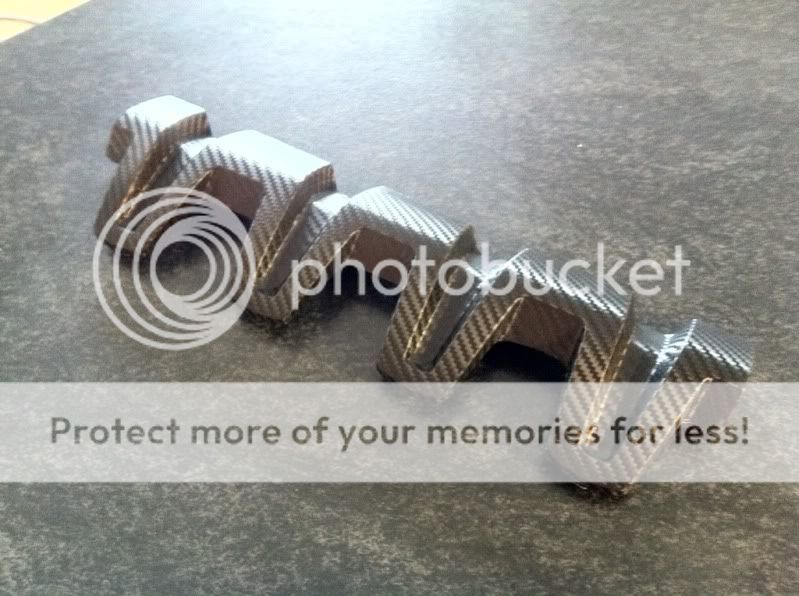
I plan to wrap these two black parts in carbon fibre vinyl or well attempt to anyway so, the Audi logo and TFSI have to come off to complete this.
Fortunately, the Audi logo is set in to the part but unfortunately, it is plastic welded in! Had to get the drill out and remove it that way! Luckily, the small pegs on the audi logo were not damaged so it will slot back in nicely with a bit of glue!
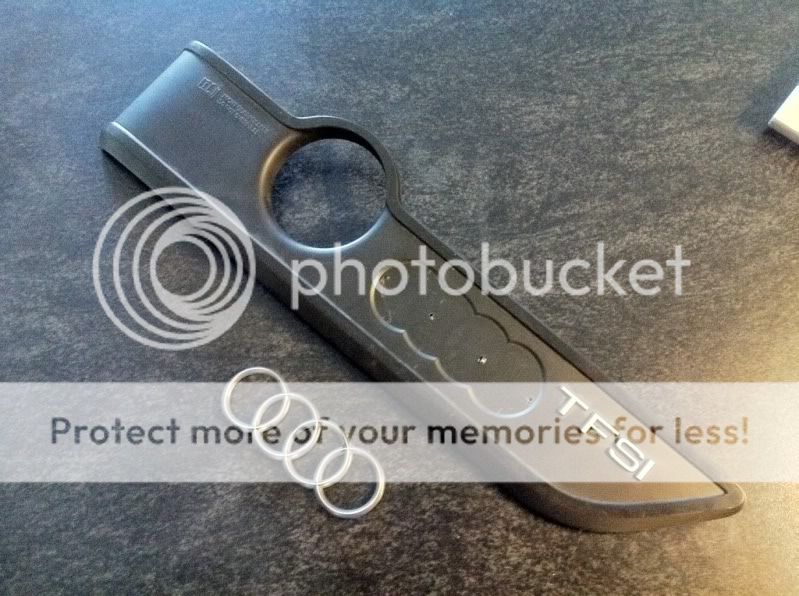
However, the TFSI is raised plastic so this will have to be cut, rubbed down and smoothed oh well, still going to be fun so off to B&Q I go this evening to buy some sand paper, P38 and pick up my vinyl!!
Hopefully update you with the completed cover later tonight or tomorrow
Early start today! Got the main panel sanded down so the TFSI is no longer as well as the "DO NOT OVERFILL" lettering.
Used a Stanley blade and P120 paper. Would be a lot quicker with a dremmel but I thought 45mins wasn't bad. Still have a tiny bit around the S to smooth but it's nearly ready for smoothing.

So, after sanding down, I taped up the area to be filled to provide some support:
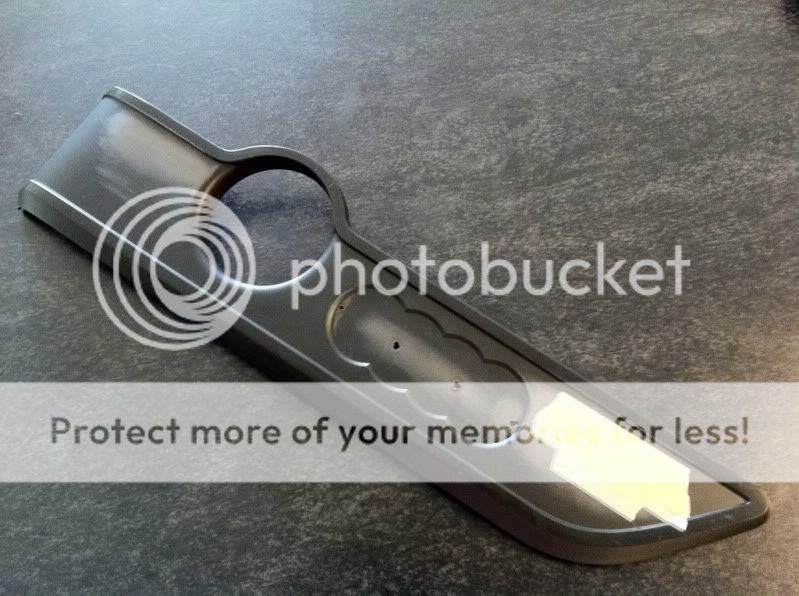
Then a bit of filling from behind!! Oh errr lol

So while that dried I got stuck into the other part, this was tricky but go there in the end:
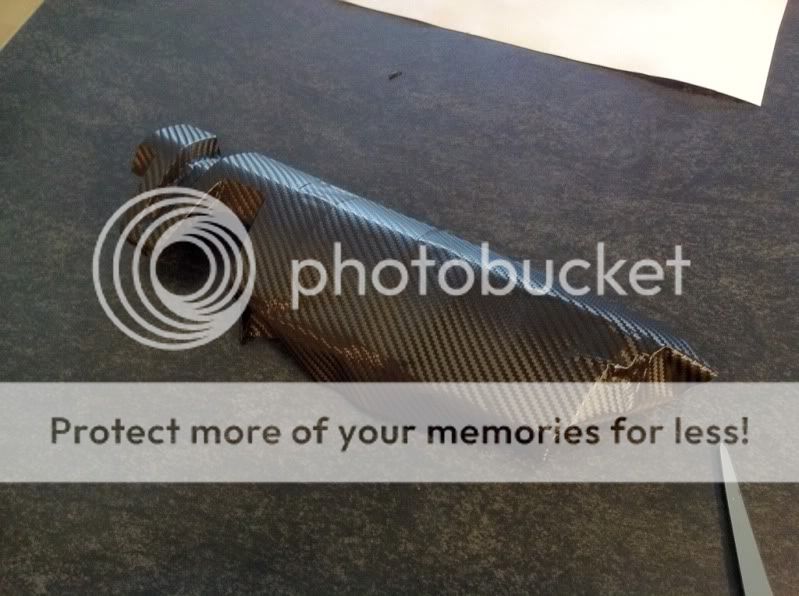
On the engine cover, perfect fit:
And then onto the other part once if was dry. A lot easier:
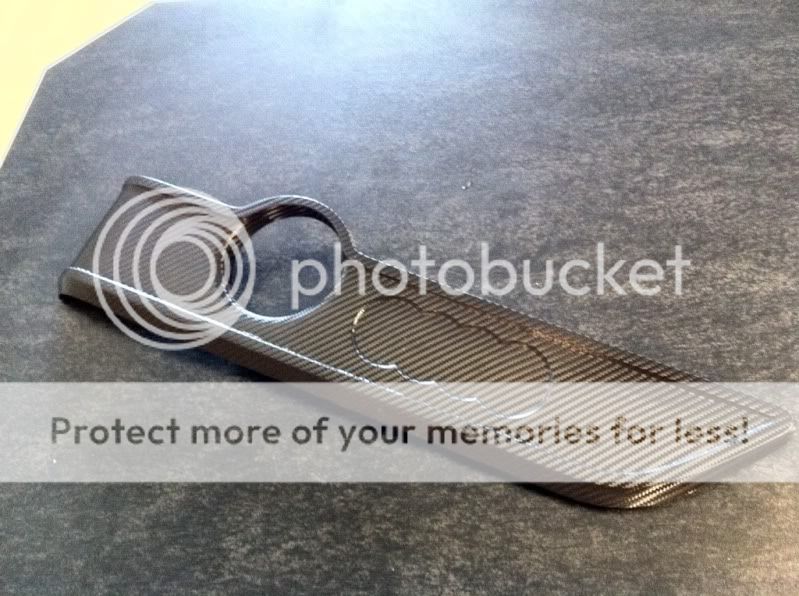
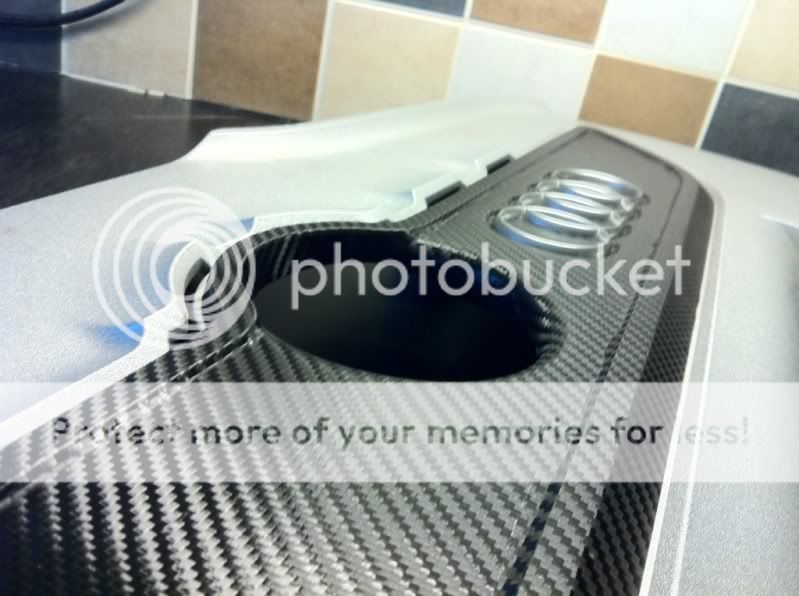
And then adding the rings. Had to cut the pegs off since the vinyl added extra depth so it was glued on:

And on the cover, no probs and clipped on perfectly:

All in all, very happy with the end result. Now to fit it to the car! The ball joints arrived in audi today so picked them up. I'm waiting on delivery of a forge catch can so no point fitting it until then. Hopefully though it will arrive tomorrow.
So, my bank has been hit and have a few things on order, just awaiting on delivery and installation!
So, first off, I saw a thread a week ago or so regarding retrofitting a TTS engine cover to the S3.
As a lot of you know, the 2.0TFSI intake in the golf/leon/s3 is all based around the engine cover. To fit a CAI, you have to remove the engine cover and reveal the ugly engine!
In the TTS, they revised this and used their own CAI of some sorts to do away with the airbox engine cover. Fortunately for us, this fits our cars
So, spotted this on ebay and to the disgust of some members
I won and it arrived this morning!
Good condition, no serious marks or chips in it that I have seen so far. Overall, very happy!
Started to strip it:
This looked difficult as the underside of the cover is covered in a foam/sponge layer but thankfully, the clips are not wedged in tight and came off with relative ease! Oh and I didn't break a single one lol
I plan to wrap these two black parts in carbon fibre vinyl or well attempt to anyway so, the Audi logo and TFSI have to come off to complete this.
Fortunately, the Audi logo is set in to the part but unfortunately, it is plastic welded in! Had to get the drill out and remove it that way! Luckily, the small pegs on the audi logo were not damaged so it will slot back in nicely with a bit of glue!
However, the TFSI is raised plastic so this will have to be cut, rubbed down and smoothed
oh well, still going to be fun so off to B&Q I go this evening to buy some sand paper, P38 and pick up my vinyl!! Hopefully update you with the completed cover later tonight or tomorrow
Early start today! Got the main panel sanded down so the TFSI is no longer as well as the "DO NOT OVERFILL" lettering.
Used a Stanley blade and P120 paper. Would be a lot quicker with a dremmel but I thought 45mins wasn't bad. Still have a tiny bit around the S to smooth but it's nearly ready for smoothing.
So, after sanding down, I taped up the area to be filled to provide some support:
Then a bit of filling from behind!! Oh errr lol
So while that dried I got stuck into the other part, this was tricky but go there in the end:
On the engine cover, perfect fit:
And then onto the other part once if was dry. A lot easier:
And then adding the rings. Had to cut the pegs off since the vinyl added extra depth so it was glued on:
And on the cover, no probs and clipped on perfectly:
All in all, very happy with the end result. Now to fit it to the car! The ball joints arrived in audi today so picked them up. I'm waiting on delivery of a forge catch can so no point fitting it until then. Hopefully though it will arrive tomorrow.
- Joined
- Jul 4, 2007
- Messages
- 17,105
- Reaction score
- 719
- Points
- 113
- Location
- Salford, Manchester
- Website
- www.facebook.com
Farhan
Registered User
- Joined
- Dec 24, 2006
- Messages
- 4,189
- Reaction score
- 1,168
- Points
- 113
- Location
- Co.Antrim
- Website
- www.reallymeansounds.com
Thanks guys! It will be fitted once my catch can arrives and have it fitted. May trial fit is later but it's raining
Picked up the ball joints so have to go work out where they are fitted and if the original joints have to come off. However, I am experiencing some mechanical difficulty with my bonnet lol think the lock needs replaced as you need to press the bonnet down while another person pulls the lever to open it
Picked up the ball joints so have to go work out where they are fitted and if the original joints have to come off. However, I am experiencing some mechanical difficulty with my bonnet lol think the lock needs replaced as you need to press the bonnet down while another person pulls the lever to open it
- Joined
- Jun 5, 2011
- Messages
- 659
- Reaction score
- 179
- Points
- 43
- Location
- Lancashire, England
- Website
- www.gnjmotorsport.com
Beautiful S3, Boydie, loving Sprint Blue more all the time! Can't wait to see your engine cover in place, VERY nice job. Well done! 
- Joined
- Jul 4, 2007
- Messages
- 17,105
- Reaction score
- 719
- Points
- 113
- Location
- Salford, Manchester
- Website
- www.facebook.com
- Joined
- Dec 24, 2006
- Messages
- 4,189
- Reaction score
- 1,168
- Points
- 113
- Location
- Co.Antrim
- Website
- www.reallymeansounds.com
Thanks guys!! Just now to get it properly fitted.
I have my original s3 engine cover for sale if anyone is interested.
I have my original s3 engine cover for sale if anyone is interested.
- Joined
- Jul 4, 2007
- Messages
- 17,105
- Reaction score
- 719
- Points
- 113
- Location
- Salford, Manchester
- Website
- www.facebook.com
- Joined
- Dec 24, 2006
- Messages
- 4,189
- Reaction score
- 1,168
- Points
- 113
- Location
- Co.Antrim
- Website
- www.reallymeansounds.com
Yeah I think warrencox asked the question and like a poacher I was straight on eBay looking lol
- Joined
- Jul 4, 2007
- Messages
- 17,105
- Reaction score
- 719
- Points
- 113
- Location
- Salford, Manchester
- Website
- www.facebook.com
- Joined
- Dec 24, 2006
- Messages
- 4,189
- Reaction score
- 1,168
- Points
- 113
- Location
- Co.Antrim
- Website
- www.reallymeansounds.com
Got back this morning from a fantastic weekend at Edition 38. Epic!!!
Some pictures of my car by JJM Photography


Love them!
Oh and.....

Some pictures of my car by JJM Photography
Love them!
Oh and.....
Pauljamescaton
Registered User
- Joined
- Feb 7, 2009
- Messages
- 228
- Reaction score
- 5
- Points
- 18

- Joined
- Jun 5, 2011
- Messages
- 659
- Reaction score
- 179
- Points
- 43
- Location
- Lancashire, England
- Website
- www.gnjmotorsport.com
Car is looking spot on mate. I want to get mine to this standard by next spring. Long way to go!
- Joined
- Dec 24, 2006
- Messages
- 4,189
- Reaction score
- 1,168
- Points
- 113
- Location
- Co.Antrim
- Website
- www.reallymeansounds.com
Thanks guys! Still a few good things to come that I didn't get time to do for Edition so watch this space!
S3RYE
Interior Next!!

- Joined
- Dec 24, 2006
- Messages
- 4,189
- Reaction score
- 1,168
- Points
- 113
- Location
- Co.Antrim
- Website
- www.reallymeansounds.com
- Joined
- Jul 4, 2007
- Messages
- 17,105
- Reaction score
- 719
- Points
- 113
- Location
- Salford, Manchester
- Website
- www.facebook.com
- Joined
- Jun 5, 2011
- Messages
- 659
- Reaction score
- 179
- Points
- 43
- Location
- Lancashire, England
- Website
- www.gnjmotorsport.com
Those wheels are perfect on a Sprint Blue S3! I actually am growing to like the OE 18's though. What affect did they have on the ride and handling? Is it sitting on H&R springs in those pics?
- Joined
- Dec 24, 2006
- Messages
- 4,189
- Reaction score
- 1,168
- Points
- 113
- Location
- Co.Antrim
- Website
- www.reallymeansounds.com
I honestly haven't really noticed a difference to be honest. My 18s came with ****ty tyres and there are Good Year Eagles on the 19s so they probably feel a lot better!
Yes, the car has H&R Springs and ARB's! Handles and grips brilliantly!
Yes, the car has H&R Springs and ARB's! Handles and grips brilliantly!
- Joined
- Dec 24, 2006
- Messages
- 4,189
- Reaction score
- 1,168
- Points
- 113
- Location
- Co.Antrim
- Website
- www.reallymeansounds.com
Small update today guys.
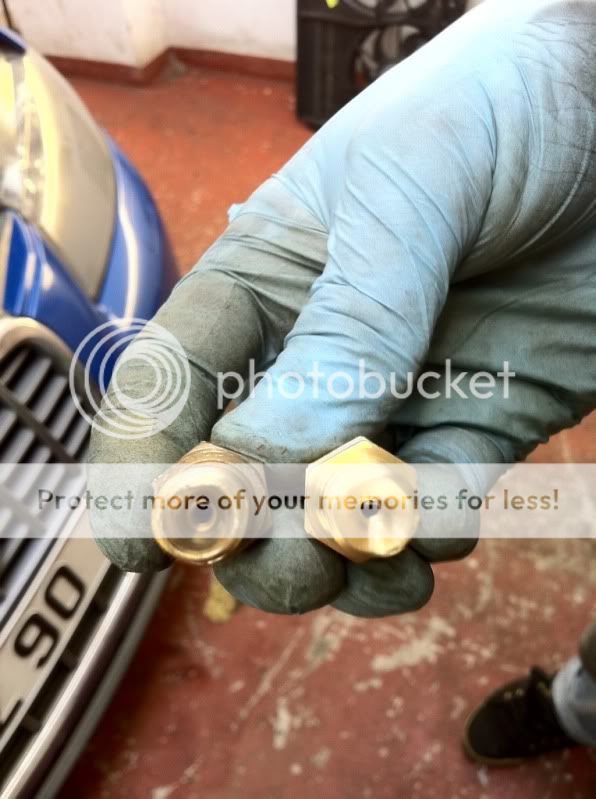
Well after having the HPFP fitted and Revo doing the software upgrade to 2+
at Edition, I needed to fit the RS4 Fuel Valve.
This went quite successfully without having to remove the intake manifold
See difference below of S3 (left) and RS4 (right)
I also bought some switches of Pauly for the windows and wing mirrors from a facelift A3/S3
I planned to do a write up but it started to rain so I only got some pictures:
Trim is easy to remove, just pull at the top near the door handle and it will pop off. Under the trim there are two T20 screws and a T20 screw at the very bottom of the door card just left of centre.

You do not need to remove the speaker grill.
You have to disconnect the main power lead (purple and grey) and the door cable.
At the top of the handle there are two T20 silver screws to be removed. Flip the door card over and you will see a number of T20 silver screws as well which require removing. You do not have to remove the screws surrounding the back of the door handle.
Once the screws are removed you can pop off the arm rest like so:

Flip it over to see the under side and the base of each switch. Use a small flat head to pry the switch out - this is quite tricky and they are a tight fit but do come out with some persuasion

It started to chuck down at this stage so repeat the last step 2 more times for the wing mirror switch and passenger window switch.
Once done it shall look like this, all connected and working as expected

Also fitted a forge throttle body hose when fitting the valve. I also dropped the radiator fan assembly on my mechanics nose which split him but he forgave me.
good day lol
Well after having the HPFP fitted and Revo doing the software upgrade to 2+
at Edition, I needed to fit the RS4 Fuel Valve.
This went quite successfully without having to remove the intake manifold
See difference below of S3 (left) and RS4 (right)
I also bought some switches of Pauly for the windows and wing mirrors from a facelift A3/S3
I planned to do a write up but it started to rain so I only got some pictures:
Trim is easy to remove, just pull at the top near the door handle and it will pop off. Under the trim there are two T20 screws and a T20 screw at the very bottom of the door card just left of centre.
You do not need to remove the speaker grill.
You have to disconnect the main power lead (purple and grey) and the door cable.
At the top of the handle there are two T20 silver screws to be removed. Flip the door card over and you will see a number of T20 silver screws as well which require removing. You do not have to remove the screws surrounding the back of the door handle.
Once the screws are removed you can pop off the arm rest like so:
Flip it over to see the under side and the base of each switch. Use a small flat head to pry the switch out - this is quite tricky and they are a tight fit but do come out with some persuasion
It started to chuck down at this stage so repeat the last step 2 more times for the wing mirror switch and passenger window switch.
Once done it shall look like this, all connected and working as expected
Also fitted a forge throttle body hose when fitting the valve. I also dropped the radiator fan assembly on my mechanics nose which split him but he forgave me.
good day lol
- Joined
- Jul 4, 2007
- Messages
- 17,105
- Reaction score
- 719
- Points
- 113
- Location
- Salford, Manchester
- Website
- www.facebook.com
- Joined
- Dec 24, 2006
- Messages
- 4,189
- Reaction score
- 1,168
- Points
- 113
- Location
- Co.Antrim
- Website
- www.reallymeansounds.com
- Joined
- Dec 24, 2006
- Messages
- 4,189
- Reaction score
- 1,168
- Points
- 113
- Location
- Co.Antrim
- Website
- www.reallymeansounds.com
- Joined
- Jul 4, 2007
- Messages
- 17,105
- Reaction score
- 719
- Points
- 113
- Location
- Salford, Manchester
- Website
- www.facebook.com